


Operating Instructions
<Full version>
Wireless Speaker System
Model No. SC-ALL2
Thank you for purchasing this product.
Please read these instructions carefully before using this product,
and save this manual for future use.
RQT0A27-1B

Table of contents
Accessories............................................................................................. 3
Unit care.................................................................................................. 4
About Bluetooth®..................................................................................... 5
Control reference guide........................................................................... 7
Network indicator illumination ................................................................. 8
Connections .......................................................................................... 10
Network settings.................................................................................... 12
Streaming music over the network........................................................ 21
Bluetooth® operations............................................................................ 30
AUX input .............................................................................................. 35
Rear surround ....................................................................................... 36
Firmware updates ................................................................................. 38
Others ................................................................................................... 39
Troubleshooting..................................................................................... 47
Specifications ........................................................................................ 52
How to use this manual
Click/Tap this icon to jump to “Table of contents”.
≥ Pages to be referred to are indicated as “l ±±”. You can jump to the
corresponding page by clicking/tapping this.
- 2 -

Accessories
1 AC mains lead
For the black model: (K2CT2YY00097)
For the white model: (K2CT2YY00110)
For the black model: (K2CQ2YY00119)
For the white model: (K2CQ2YY00136)
(K2CJ2YY00101)
≥ Do not use AC mains lead with other equipment.
≥ Product numbers provided in this operating instructions are correct as of May
2015. These may be subject to change.
- 3 -
Unit care
Clean this unit with a soft, dry cloth.
≥ Never use alcohol, paint thinner or benzine to clean this unit.
≥ Before using chemically treated cloth, carefully read the cloth’s instructions.
∫ To dispose or transfer this unit
The unit may keep the user settings information in the unit. If you discard
this unit either by disposal or transfer, then follow the procedure to return
all the settings to the factory defaults to delete the user settings.
(l 47, “To restore the settings to the factory defaults”)
≥ The operation history may be recorded in the memory of this unit.
Disposal of Old Equipment
Only for European Union and countries with recycling
systems
This symbol on the products, packaging, and/or
accompanying documents means that used electrical and
electronic products must not be mixed with general household
waste.
For proper treatment, recovery and recycling of old products,
please take them to applicable collection points in accordance
with your national legislation.
By disposing of them correctly, you will help to save valuable
resources and prevent any potential negative effects on
human health and the environment.
For more information about collection and recycling, please
contact your local municipality.
Penalties may be applicable for incorrect disposal of this
waste, in accordance with national legislation.
- 4 -

About Bluetooth
Panasonic bears no responsibility for data and/or information that is
compromised during a wireless transmission.
®
∫ Frequency band used
This system uses the 2.4 GHz frequency band.
∫ Certification of this device
≥ This system conforms to frequency restrictions and has received
certification based on frequency laws. Thus, a wireless permit is not
necessary.
≥ The actions below are punishable by law in some countries:
– Taking apart or modifying the unit.
– Removing specification indications.
∫ Restrictions of use
≥ Wireless transmission and/or usage with all Bluetooth® equipped
devices is not guaranteed.
≥ All devices must conform to standards set by Bluetooth SIG, Inc.
≥ Depending on the specifications and settings of a device, it can fail to
connect or some operations can be different.
≥ This system supports Bluetooth® security features. But depending on
the operating environment and/or settings, this security is possibly not
sufficient. Transmit data wirelessly to this system with caution.
≥ This system cannot transmit data to a Bluetooth® device.
∫ Range of use
Use this device at a maximum range of 10 m.
The range can decrease depending on the environment, obstacles or
interference.
∫ Interference from other devices
≥ This system may not function properly and troubles such as noise and
sound jumps may arise due to radio wave interference if this system is
located too close to other Bluetooth® devices or the devices that use the
2.4 GHz band.
- 5 -

≥ This system may not function properly if radio waves from a nearby
broadcasting station, etc. are too strong.
∫ Intended usage
≥ This system is for normal, general use only.
≥ Do not use this system near an equipment or in an environment that is
sensitive to radio frequency interference (example: airports, hospitals,
laboratories, etc.).
- 6 -

Control reference guide
Top view
※
3
12
1 Display
2 Network indicator (l 8, 9)
3 Internet radio preset channel
switches [1] to [6] (l 28)
(These switches are without
illumination.)
4
Display switch and indicator [DISP]
5 Alarm switch and indicator [ ]
6 AUX switch and indicator [AUX]
7 Bluetooth
[]
®
switch and indicator
8 Network switch and indicator
[NET]
Enter WPS pairing mode (l 17) /
firmware update mode (l 38)
※※※※※
45678
※※
910
9 Standby/on switch and
indicator [Í/I]
Touch to switch the unit from on to
standby mode or vice versa. In
standby mode, the unit is still
consuming a small amount of
power.
10 Volume control switch and
indicator [VOL –]/[VOL +]
Adjust the volume (0 (min) to
50 (max))
§ These switches work just by
touching the marks. Each time you
touch the switch, there will be a
beep sound. The beep sound can
be set to off. (l 45)
- 7 -
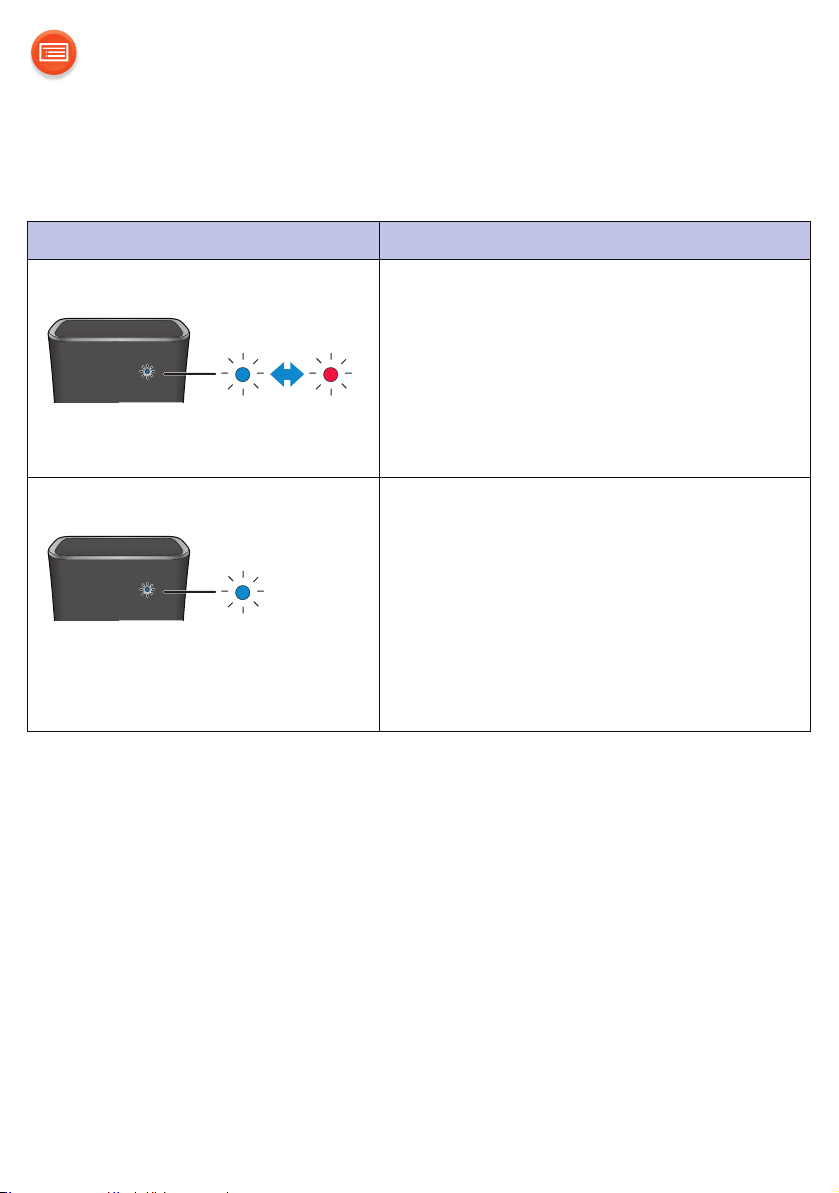
Network indicator illumination
The below illustrates the network indicator illumination patterns.
Network indicator Description
Illumination: blue/red Blinks alternately
≥ The unit is carrying out an internal
process.
– Wait for approximately 1 minute
before the blinking stops.
– Do not disconnect the AC mains lead.
Doing so may cause malfunction or
damage.
Illumination: blue Blinks slowly
≥ The unit is ready for network setup.
(l 12)
Blinks
≥ The unit is waiting for the WPS
PUSH connection. (l 17)
Blinks fast
≥ The unit is waiting for the WPS PIN
code connection. (l 17)
- 8 -

Network indicator Description
Illumination: blue Lights up
≥ The unit is connected to the
network.
Illumination: red Blinks
≥ The unit is connecting to the
network.
– When the network connection
cannot be established, the blinking
keeps going. Check the network
connection. (l 12)
- 9 -
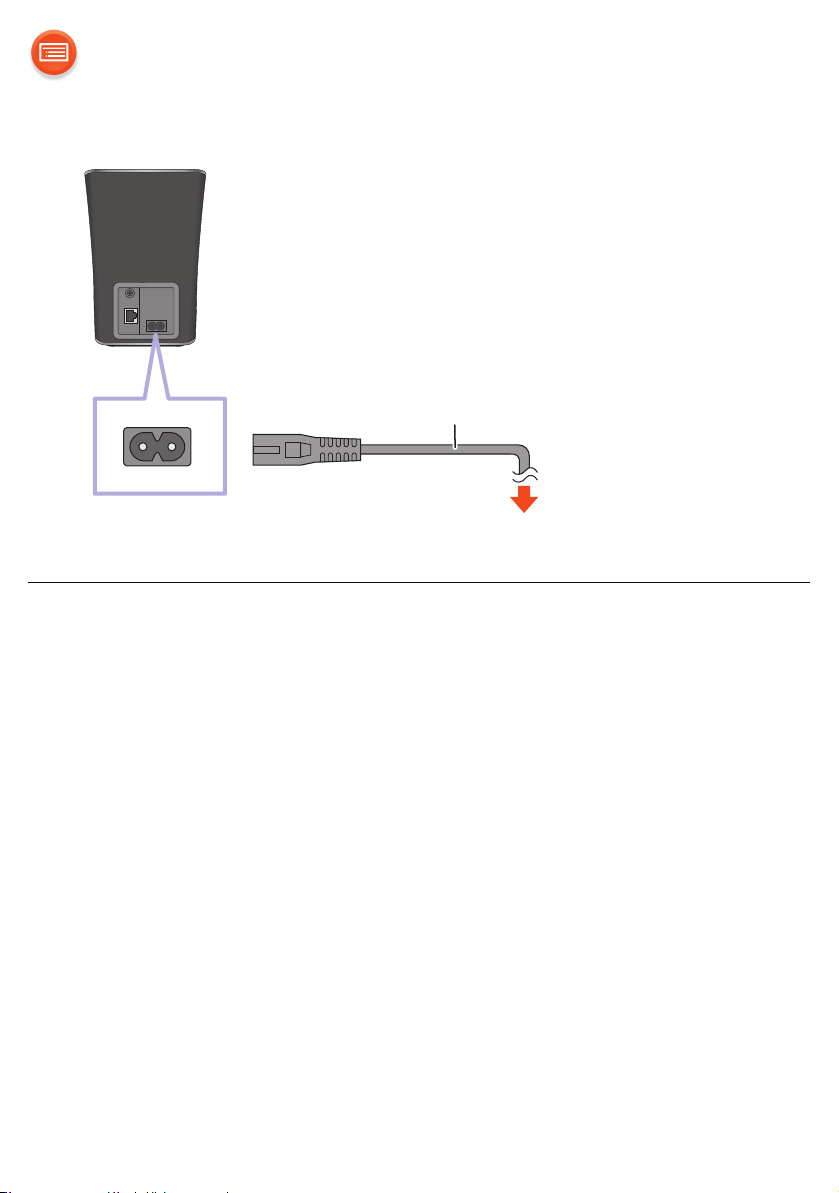
Connections
To a household mains socket
AC mains lead
(supplied)
≥ This unit consumes a small amount of AC power (l 52) even when turned off.
≥ For the purpose of power conservation, disconnect the power supply if you will
not be using it for extended period of time.
Some settings will be lost after you disconnect the system. You have to set
them again.
≥ This speaker does not have magnetic shielding. Do not place them near a TV,
PC or other magnetic devices.
≥ Do not disconnect the AC mains lead when the unit is on. Doing so may cause
malfunction or damage.
- 10 -
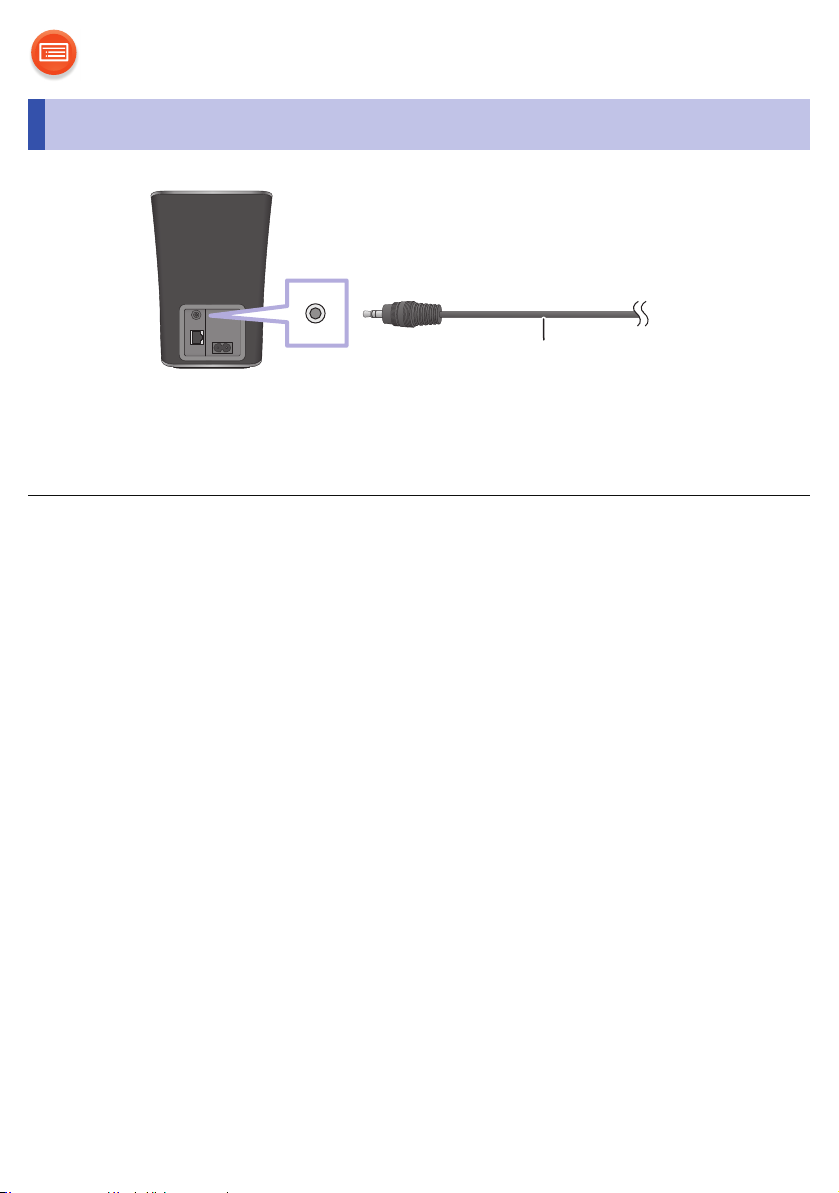
Connection of an external device
Audio cable (not supplied)
Plug type:
3.5 mm stereo
≥ For details, refer to the operating instructions of the device.
- 11 -

Network settings
“Using an Internet browser” (l 13)
≥ You can access this unit’s network settings from the Internet
browser on your smartphone or tablet, etc.
“Using WPS (Wi-Fi Protected Setup™)” (l 17)
≥ If your wireless router supports WPS, you can set up a
connection by either pressing the WPS button, or entering the
WPS PIN code.
“Using a LAN cable” (l 19)
≥ You can make a stable connection to the network with a LAN
cable.
You can stream music from a device on the network by using the
Qualcomm® AllPlay™ smart media platform or DLNA feature. To use
these features, this unit must join the same network as the device.
Qualcomm® AllPlay™ smart media platform is a product of Qualcomm Connected Experiences, Inc.
≥
Please update the unit’s firmware after the network settings are complete. (l38)
Choose a network setting method from the following.
≥ The setting will be cancelled after the set time limit. In that case, try the setting
again.
≥ To cancel this setting in the middle, touch [Í/I] to turn off the unit.
- 12 -
Using an Internet browser
Settings Wi-Fi Settings
≥ The following steps are based on a smartphone.
≥ Do not connect a LAN cable. Doing so will disable the Wi-Fi® function.
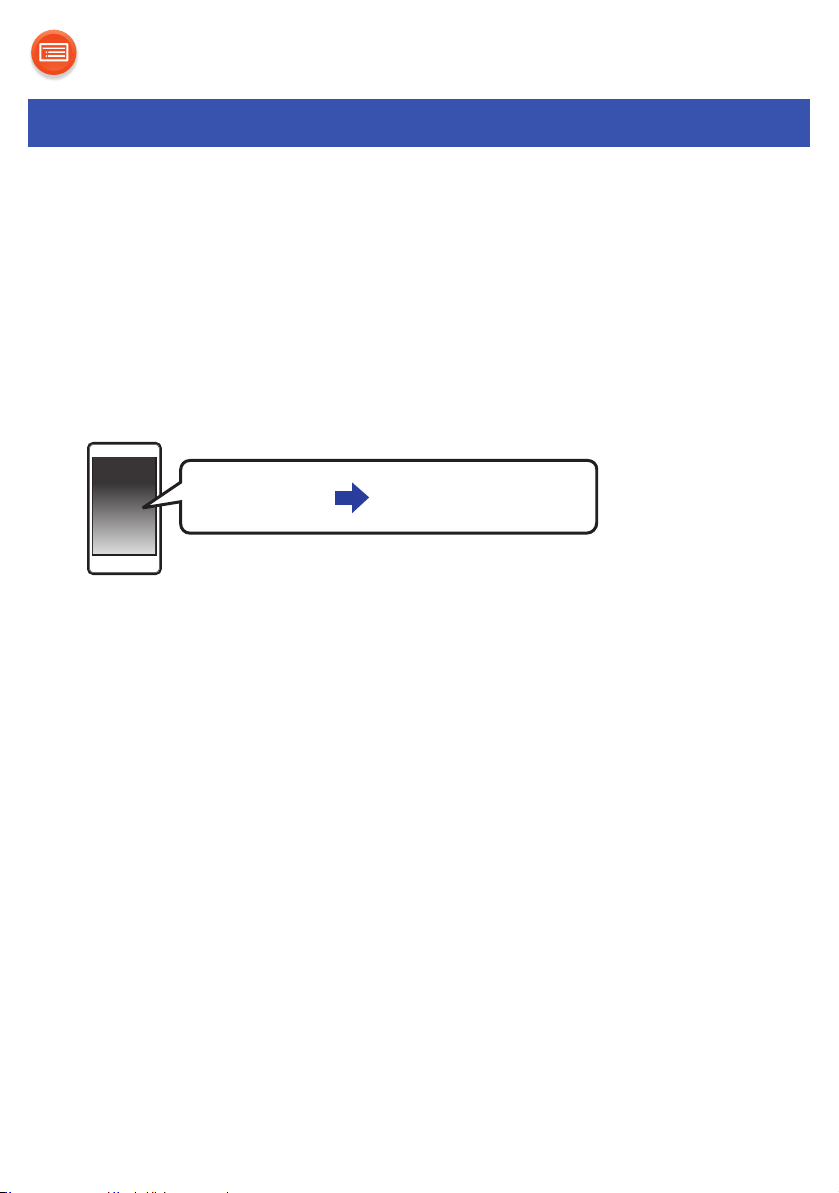
1 Turn this unit on.
2 Go to Wi-Fi
≥ Proceed to the next step after the network indicator changes from blinking in
blue and red to blinking slowly in blue
§ The blinking in blue starts after approximately 1 minute. If the blinking in
blue does not start, perform a network reset. (l 16)
®
settings on the device.
§
.
- 13 -
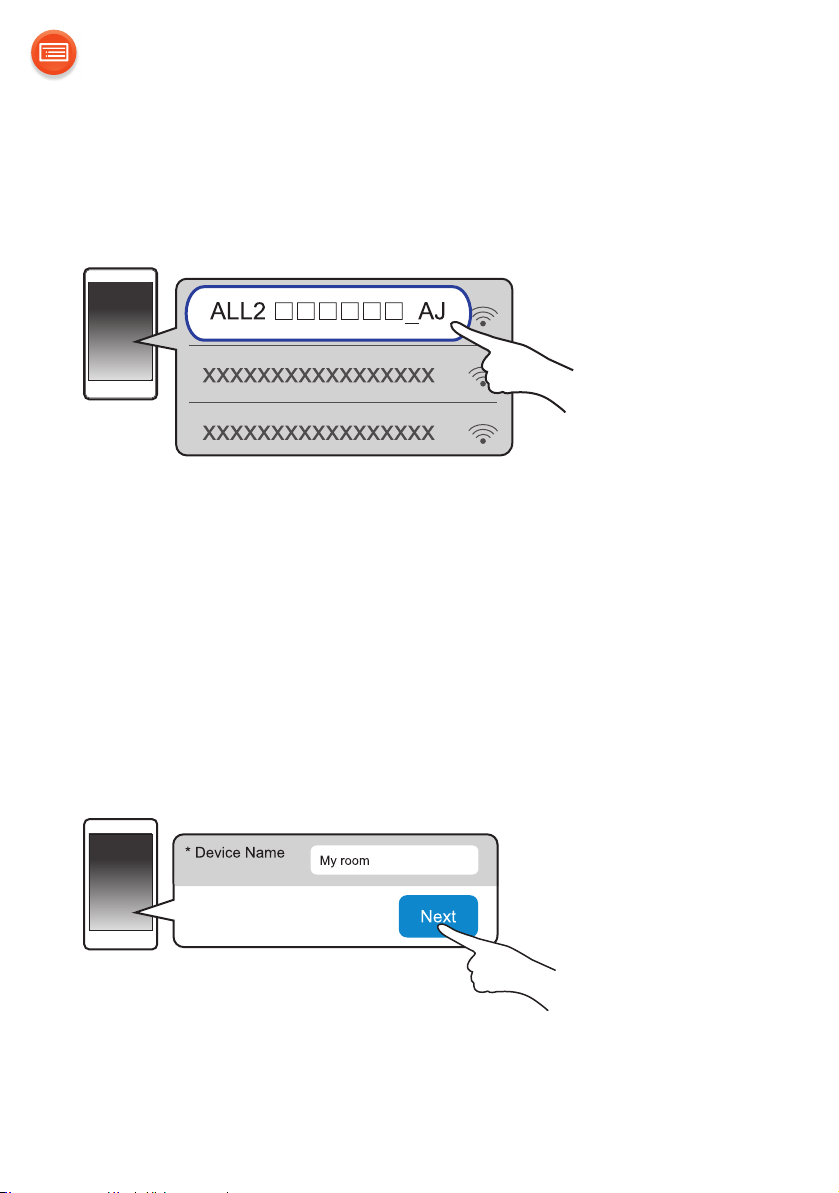
3 Select “ALL2 _AJ” to connect to this unit.
Wi-Fi
≥ “” stands for a character that is unique to each set.
≥ This can take up to 1 minute to appear in your Wi-Fi list.
≥ If this operation does not work correctly, please repeat it several times.
≥ Make sure that DHCP is enabled for the network setting on your compatible
device.
[iOS_device]: The settings page will be automatically displayed in the Internet
browser.
[Except_iOS_device]: Open the Internet browser and refresh the page to display
the settings page.
≥ If the settings page is not displayed, type “http://172.19.42.1/” into the URL
address field.
4 Type a device name and then select “Next”.
≥ The device name will be displayed as this unit’s name on the network.
≥ The guaranteed limit is 32 characters.
≥ The device name is set when “Next” is selected.
≥ You can also change the device name after the network connection is set
up. (l 20)
- 14 -

5 Select your network name (SSID) and type the password.
●●●●●●●●
≥ Check the wireless router for the network name (SSID) and the password.
≥ A list of network names (SSIDs) will be appeared when you select the
“Network Name” box.
≥ To show the characters typed in the “Password” box, select “Show
Password”.
≥ If your network requires specific settings, deselect “DHCP” to disable DHCP.
– You can use specific IP address, subnet mask, default gateway, primary
DNS, etc.
6 Select “Connect” to apply the settings.
≥ When the connection is established, the network indicator (blue) lights up.
≥ Depending on the device, the connection complete screen may not be
displayed.
If the network indicator does not light up, check the network name
(SSID) and the password, and then try the setting again.
7 Make sure to connect your compatible device back to your
home wireless network.
≥ Enable Java and cookies in your browser settings.
- 15 -

∫ Network standby
This unit will turn on automatically from standby mode when you select the
unit as the output speakers.
≥ Network standby is normally active while the unit is connected to a network.
≥ The power consumption in standby mode will increase when the network
standby is active. To reduce the power consumption in standby mode, turn off
the network standby.
To turn off the network standby
1
Touch and hold [NET] and [2] for at least 4 seconds
.
2 Touch [VOL –] or [VOL +] to select “OFF”.
3 Touch [DISP] to confirm the setting.
≥ To keep the network standby turned off, select a source other than “NET”
before switching the unit to standby mode.
≥ To turn the function on, select “On” in step 2.
≥ If this function is set to on, the network (wired LAN/Wi-Fi) remains active even
in standby mode.
– The power consumption in standby mode will increase.
≥
If this function is set to off, the network (wired LAN/Wi-Fi) is disabled in standby mode.
– The network (wired LAN/Wi-Fi) will be enabled when the unit is turned on.
– The power consumption in standby mode will be reduced.
≥ If the network indicator is blinking in blue and red, wait until the blinking stops.
≥ When the unit is turned on by this feature, the beginning part of the music may
not be played back.
≥ Depending on the app, the conditions for activating this function may differ.
≥ The unit may not turn on even when selected as the output speakers. In that
case, start playback.
≥ The network standby is active if an alarm is turned on. (l 43)
∫ Network reset
1 Touch and hold [NET] and [1] for at least 4 seconds, “-- --” on the
display will start blinking.
2 Touch [NET] within 10 seconds, the network indicator starts blinking
blue/red.
- 16 -

Using WPS (Wi-Fi Protected Setup™)
e.g.,
≥ Do not connect a LAN cable. Doing so will disable the Wi-Fi function.
A compatible wireless router may have the WPS
identifier mark.
1 Turn this unit on.
≥ Proceed to the next step after the network indicator changes from blinking in
blue and red to blinking slowly in blue
§ The blinking in blue starts after approximately 1 minute. If the blinking in
blue does not start, perform a network reset. (l 16)
§
.
2 Touch and hold [NET] on the unit for at least 4 seconds.
≥ The network indicator (blue) blinks faster and “PUSH” is indicated on the
display.
3 Activate the WPS button on the wireless router.
≥ When the connection is established, the network indicator (blue) lights up.
∫ Using the WPS PIN code
After step 2
3 Touch and hold [NET] again for at least 4 seconds.
≥ The network indicator (blue) blinks even faster and “PIn” is indicated on the
display.
4 Enter the PIN code “64428147” into the wireless router.
≥ When the connection is established, the network indicator (blue) lights up.
- 17 -

≥ Once the unit enters WPS PIN code mode, you cannot set up using the WPS
button. To use the WPS button, turn off and then on the unit, and redo the
network settings.
≥ Depending on a router, other connected devices may temporarily lose their
connection.
≥ For details, refer to the operating instructions of the wireless router.
- 18 -

Using a LAN cable
Broadband router, etc.
e.g.,
LAN cable (not supplied)
1 Disconnect the AC mains lead.
2 Connect this unit to a broadband router, etc. using a LAN cable.
3 Connect the AC mains lead to this unit, and turn the unit on.
≥ When the connection is established, the network indicator (blue) lights up.
≥ Use category 5 or above straight LAN cables (STP) when connecting to
peripheral devices.
≥ The LAN cable must be connected or disconnected while the AC mains lead is
disconnected.
≥ Inserting any cable other than a LAN cable in the LAN port can damage the
unit.
≥ If the LAN cable is disconnected, the network-related settings (l 20) will be
initialized. In that case, make the settings again.
≥ When a LAN cable is connected, the Wi-Fi function will be disabled.
– Power consumption will be reduced when the unit is turned on or is in
standby mode.
- 19 -

To make network-related settings
You can change this unit’s name on the network, and use specific IP
address, subnet mask, default gateway, primary DNS, etc.
You can also change the name of this unit by changing a setting in the app
“Panasonic Music Streaming” (version 2.0.8 or later) (l 21). For details on the
app, refer to the site below.
http://panasonic.jp/support/global/cs/audio/app/
Preparation
≥ Complete the network settings. (l 12)
(This site is in English only.)
1 Connect your device to the same network as this unit.
2 Check this unit’s IP address (l 46), and note it down.
3 Start an Internet browser on your device and then type this
unit’s IP address into the address field to display the settings
page.
≥ It may take a few minutes until the settings page is displayed depending on
the environment. In that case, reload the browser.
≥ If the unit is connected with Wi-Fi, only a device name can be changed.
Close the settings page after changing the device name.
– To change the device name, select “Change”, and type a new device
name, and then select “Apply”.
4 Type a device name and then select “Next”.
≥ Refer to the step 4 of “Using an Internet browser” (l 14) for details on a
device name.
5 Select and input the details.
≥ If your network requires specific settings, deselect “DHCP” to disable DHCP.
– You can use specific IP address, subnet mask, default gateway, primary
DNS, etc.
6 Select “Connect” to apply the settings.
≥ When the connection is established, the network indicator (blue) lights up.
- 20 -

Streaming music over the network
You can stream music from your devices or online music services to this
unit and other speakers powered by AllPlay.
You can also stream music source of this system to other speakers
powered by AllPlay.
Streaming music on network devices
You can use the AllPlay or the DLNA function to stream music from the
device on the network to this unit by using the app “Panasonic Music
Streaming” (free of charge), etc.
≥ [iOS] : App Store
≥ [Android] : Google Play™
The operations and on-screen display items, etc. of the app “Panasonic Music
Streaming” are subject to change.
For the latest information, visit
http://panasonic.jp/support/global/cs/audio/app/
More apps are available. For details, visit
www.panasonic.com/global/consumer/homeav/allseries/service
(These sites are in English only.)
Preparation
≥ Complete the network settings. (l 12)
≥ Connect the following devices to the same network as this system.
– Device with “Panasonic Music Streaming”, etc. installed
– Device containing music
- 21 -

The following steps are based on “Panasonic Music Streaming”.
My room
e.g.,
1 Turn this unit on.
≥ Check that the network indicator (blue) lights up.
– If the network indicator is blinking in blue and red, wait until the blinking
stops.
2 Start the app “Panasonic Music Streaming”.
≥ Always use the latest version of the app.
3 Select a music source.
≥ To add music source, select “+ My Music Network” and then select the
device containing music.
– The added music source is numbered in order from 1.
4 Select a song.
5 From “Select Speaker”, select this
system as the output speakers.
≥ If you have multiple speakers powered by
AllPlay, you can enjoy synchronised
sound from them. Select “ ” and then
select the speakers to group.
– You can change the speaker mode setting for SC-ALL2 to left or right
channel to make stereo pairing.
– You can also play different songs on other speakers powered by AllPlay at
the same time.
– The number of speakers powered by AllPlay that can perform playback at
the same time differs depending on the situation of use.
– When you turn off one of the speakers powered by AllPlay, other
speakers in the same group may stop the playback.
∫ Enhancing the sound
When using the app “Panasonic Music Streaming”, you can use the below
sound functions from the settings of the app.
≥ Equaliser
≥ Clear mode dialog
- 22 -

≥ This system will be displayed as “Panasonic ALL2” if the device name is not
set.
≥ When playing back music from the DLNA server (PC with Windows 7 or later
installed, smartphone, Network Attached Storage (NAS) device, etc.), add the
contents and folder to the libraries of the Windows Media
smartphone, or the NAS device, etc.
®
– Playlist of Windows Media
Player can play back only the contents that are
stored in the libraries.
≥ When this system is selected as DLNA speakers ( ):
– The volume control on the unit may not apply to the app.
– Playback control using a progress bar on playback screen may not work.
– The volume level applied to speakers powered by AllPlay will not be
reflected.
– If the system is selected as output speakers by another device, the music
source is changed to the new device. However the former device’s display
may not change.
≥ About supported format, refer to “Audio support format” (l 53, 54).
– File formats that are not supported by your DLNA server cannot be played.
≥ Depending on the contents and the connected equipment, playback may not
be performed properly.
≥ Ensure to stop playback on your device before turning it off.
®
Player, the
- 23 -

Streaming online music
This unit is compatible with several music services.
Visit the following website for the compatibility information.
www.panasonic.com/global/consumer/homeav/allseries/service
Preparation
≥ Make sure that the network is connected to the Internet.
≥ Connect a device with a compatible app installed to the same network
as this system.
1 Turn this unit on.
≥ Check that the network indicator (blue) lights up.
– If the network indicator is blinking in blue and red, wait until the blinking
stops.
2 Start the app, and select a song to playback.
∫ Using Spotify
≥ You will need Spotify Premium. For details, visit the following website.
www.spotify.com/connect/
After step 2
3 Select the square image of the song’s cover art in the bottom
left of the playback screen.
4 From “ ”, select this system as the output speakers.
≥ To enjoy synchronised sound from the multiple speakers powered by
AllPlay, you need to group the speakers using the app “Panasonic Music
Streaming”. (l 21)
- 24 -

∫ Using online music services other than Spotify
After step 2
3 From “ ”, select this system as the output speakers.
≥ Depending on the service, you might need to open full screen player to
display “ ”.
≥ If you have multiple speakers powered by AllPlay, you can enjoy
synchronised sound from them. Select “Group” and then select the
speakers to group.
≥ This system will be displayed as “Panasonic ALL2” if the device name is not
set.
≥ Registration/subscription is required.
≥ Fees may apply.
≥ Services, icons, and specifications are subject to change.
≥ For details, visit the individual music service’s website.
- 25 -

Streaming music on this system to other speakers
e.g.,
powered by AllPlay
You can use the app “Panasonic Music Streaming” (l 21) to stream this
system’s music source (Bluetooth®/AUX source, etc.) to other speakers
powered by AllPlay.
Preparation
≥ Complete the network settings. (l 12)
≥ Prepare the desired audio source on this system (e.g. turn on the
connected device, etc.).
≥ Install your device with the app “Panasonic Music Streaming”.
≥ Connect your device and your speakers powered by AllPlay to the same
network as this system.
1 Turn this unit on.
≥ Check that the network indicator (blue) lights up.
– If the network indicator is blinking in blue and red, wait until the blinking
stops.
- 26 -

2 Start the app “Panasonic Music Streaming”.
≥ Always use the latest version of the app.
3 Go to the “Music Source”.
≥ The available music sources from this system will be listed on your device,
under the device name for this system.
4 Select your desired music source from the list.
5 The device will start to read the selected music source’s
information from this system.
≥ This system will change to the selector mode for the selected music source.
≥ Depending on the selected music source, playback may start. If a content
list appears on your device, select the desired content to start playback.
6 To stream this system’s audio to the other speakers powered
by AllPlay
1 From “Select Speaker”, select “ ” next to the device name for this
system.
2 Select the speakers to group.
≥ You can change the speaker mode setting for SC-ALL2 to left or right
channel to make stereo pairing.
≥ The number of speakers powered by AllPlay that can perform playback at
the same time differs depending on the situation of use.
≥ When you turn off one of the speakers powered by AllPlay, other
speakers in the same group may stop the playback.
≥ This system will be displayed as “Panasonic ALL2” if the device name is not
set.
≥ When enjoying video contents with this function, the video and audio output
may not be synchronised.
≥ If music is streamed to other speakers powered by AllPlay for more than
8 hours, the other speakers powered by AllPlay will automatically stop playing
the music. (The specifications are subject to change without notice.)
≥ This function will be cancelled when an alarm is activated. (l 43)
- 27 -

Presetting stations (Only when playback using internet radio app)
This unit is compatible with the Qualcomm® AllPlay™ Radio powered by
TuneIn.
You can preset stations when playback using internet radio app “AllPlay Radio”.
Qualcomm® AllPlay™ Radio powered by TuneIn is a product of Qualcomm Connected
Experiences, Inc.
You can preset up to 6 channels.
≥ A station previously stored is overwritten when another station is stored
in the same channel preset.
Preparation
≥ Make sure that the network is connected to the Internet.
≥ Connect a device with an “AllPlay Radio” app installed to the same
network as this unit.
1 Turn this unit on.
≥ Check that the network indicator (blue) lights up.
– If the network indicator is blinking in blue and red, wait until the blinking
stops.
2 Start the app “AllPlay Radio”, and select a station to playback.
≥ Always use the latest version of the app.
3 Touch and hold one of [1] to [6] on the unit for at least
4 seconds to preset the selected station.
e.g.,
“P1” blinks 3 times when [1] is selected.
- 28 -

∫ Listening to a preset channel
Touch one of [1] to [6] on the unit.
≥ If the selected preset channel has not been preset or this unit is not connected
to the network, “no:ch” is displayed.
- 29 -

Bluetooth® operations
By using the Bluetooth® connection, you can listen to the sound of the
Bluetooth® audio device wirelessly.
≥ Refer to the operating instructions of the Bluetooth® device for further
instruction on how to connect a Bluetooth® device.
Connecting via Bluetooth® menu
Preparation
≥ Turn on the Bluetooth® feature of the device and place the device near
this unit.
∫ Bluetooth® pairing
1 Touch [ ].
≥ If [ ] blinks fast, go to step 3.
2 To enter pairing mode, touch and hold [ ] for at least
2 seconds.
≥ [ ] will blink fast.
3 Select “SC-ALL2” from the Bluetooth
menu.
≥ The MAC address (e.g., 6C:5A:B5:B3:1D:0F) may be displayed before
“SC-ALL2” is displayed.
≥ [ ] lights up and the device is connected to this unit.
®
device’s Bluetooth®
- 30 -

∫ Connecting a paired Bluetooth® device
1 Touch [ ].
≥ [ ] blinks slowly.
≥ If [ ] lights, a Bluetooth
Disconnect it. (l below)
®
device is already connected with this unit.
2 Select “SC-ALL2” from the Bluetooth
®
device’s Bluetooth®
menu.
3 Start playback on the Bluetooth
®
device.
∫ Disconnecting a Bluetooth® device
Touch and hold [ ] for at least 2 seconds.
≥ [ ] blinks slowly.
≥ If prompted for the passkey, input “0000”.
≥ You can register up to 8 devices with this unit. If a 9th device is paired, the
device that has not been used for the longest time will be replaced.
≥ When [ ] is selected as the source, this unit will automatically try and
®
connect to the last connected Bluetooth
try to establish a connection again.
≥ When the unit is selected as the speakers powered by AllPlay or DLNA, the
audio source will change to the network.
≥ Bluetooth
the WPS PUSH or WPS PIN code connection.
≥ This unit can only be connected to one device at a time.
≥ When enjoying video contents with this function, the video and audio output
may not be synchronised.
®
cannot be selected as the audio source when the unit is waiting for
device. If the connection attempt fails,
- 31 -

Bluetooth® standby
This function allows you to connect a paired Bluetooth® device when this
unit is in standby mode.
≥ This unit will be turned on automatically when you connect a paired
Bluetooth® device.
– If this function is set to “On”, the standby power consumption will increase.
1 Touch and hold [ ] and [1] for at least 4 seconds.
2 Touch [VOL –] or [VOL +] to select “On”.
3 Touch [DISP] to confirm the setting.
≥ To turn the function off, select “OFF” in step 2.
≥ The factory default is “OFF”.
- 32 -

Bluetooth® transmission mode
You can change the transmission mode to prioritise transmission quality or
sound quality.
Preparation
≥ To uc h [ ] .
≥ If a Bluetooth® device is already connected, disconnect it.
1 Touch and hold [ ] and [2] for at least 4 seconds.
2 Touch [VOL –] or [VOL +] to change the setting.
Ll: 1: Emphasis on connectivity
Ll: 2: Emphasis on sound quality
3 Touch [DISP] to confirm the setting.
≥ Select “Ll: 1” if the sound is interrupted.
≥ The factory default is “Ll: 2”.
- 33 -

Bluetooth® input level
If the sound input level from the Bluetooth® device is too low, change the
input level setting.
Preparation
≥ Make sure that a Bluetooth® device is already connected with this unit.
(l 31)
1 Touch and hold [ ] and [3] for at least 4 seconds.
≥ “In: 0” blinks on the display.
2 Touch [VOL –] or [VOL +] to change the setting.
Display
In: 0
In: 1
In: 2
3 Touch [DISP] to confirm the setting.
≥ Select “In: 0” if the sound is distorted.
≥ The factory default is “In: 0”.
Bluetooth® input level
Low
High
- 34 -

AUX input
You can also listen to music from an external music player through this
unit.
Preparation
≥ Connect an external device. (l 11)
1 Touch [AUX].
≥ [AUX] indicator lights up.
2 Start playback on the connected device.
∫ To select the sound input level of the external device
1 While in AUX mode, touch and hold [AUX] for at least 4 seconds.
≥ “In: 0” is blinking on the display.
2 Touch [VOL –] or [VOL +] to change the setting.
In: 0: Normal level
In: 1: High level
≥ The factory default is “In: 0”.
3 Touch [DISP] to confirm the setting.
≥ To improve sound distortion when “In: 1” is selected, select “In:0”.
≥ Turn the volume of the external device down to reduce the input signal. High
level of input signal will distort the sound.
≥ For details, refer to the operating instructions of the device.
≥ When the unit is selected as the speakers powered by AllPlay or DLNA, the
audio source will change to the network.
≥ AUX cannot be selected as the audio source when the unit is waiting for the
WPS PUSH or WPS PIN code connection.
- 35 -

Rear surround
Blinking
If you have a compatible Panasonic Home Theater Audio System (e.g.
SC-ALL70T/SC-ALL30T), you can use two SC-ALL2 units as rear
surround speakers to enjoy surround speaker sound.
≥ Refer to the operating instructions for your compatible Panasonic Home
Theater Audio System.
Pairing
Preparation
≥ Turn SC-ALL2 and SC-ALL70T/SC-ALL30T on.
1 Start the pairing mode on SC-ALL70T/SC-ALL30T.
2 Touch and hold [AUX] and [6] on each SC-ALL2 for at least
4 seconds.
≥ The network indicator goes off.
≥ [NET] starts to blink slowly.
3 Touch and hold [AUX] for at least 4 seconds.
≥ The below display is indicated.
4
Make the left and right surround speaker settings on each SC-ALL2.
To set SC-ALL2 as left surround speaker
Touch [VOL –] to select “0-: ”, and then touch [DISP] to confirm.
To set SC-ALL2 as right surround speaker
Touch [VOL +] to select “:-0”, and then touch [DISP] to confirm.
When you have finished the speaker selections, SC-ALL2 will
enter pairing mode.
≥ “0000” blinks on the display.
– When pairing is successful, “good” appears on the display.
– If you try to set left and right surround speakers to the same channel on
SC-ALL2, pairing fails.
– If pairing fails, “FAIL” is displayed.
Repeat the procedure from the beginning if this occurs.
- 36 -

∫ To switch to network speaker mode
Turn SC-ALL70T/SC-ALL30T and SC-ALL2 off and then turn SC-ALL2 on
again.
≥ The network indicator will light up or blink.
≥ The audio source will change to the network.
∫ To switch to rear surround mode
Touch and hold [AUX] and [6] on each SC-ALL2 for at least 4 seconds.
≥ The network indicator will go off.
≥ The pairing mode is cancelled after about 2 minutes elapses. You can also
touch [Í/I] to cancel it.
≥ When this unit is in rear surround mode, turning the paired SC-ALL70T/
SC-ALL30T on/off will automatically turn this unit on/off.
≥ The below functions may not be available when this unit is paired as rear
surround speaker.
– Streaming music by network
– Alarm/Sleep timer
– Changing to other selector (AUX, Bluetooth
– Adjusting volume with this unit
≥ You cannot adjust the delay time with this unit.
®
, Network)
- 37 -
Firmware updates
Occasionally, Panasonic may release updated firmware for this unit that
may add or improve the way a feature operates. These updates are
available free of charge.
You can also update the firmware from a pop-up prompting you to do so
on-screen within the app “Panasonic Music Streaming” (version 2.0.8 or later)
(l 21). For details on the app, refer to the site below.
http://panasonic.jp/support/global/cs/audio/app/
DO NOT DISCONNECT the AC mains lead while one of the following
messages is displayed.
“UPd” or “U ” (“ ” stands for a number.)
≥ During the update process, no other operations can be performed.
Preparation
≥ Connect this unit to the network. (l 12)
– Make sure that the network is connected to the Internet.
≥ If the network indicator is blinking in blue and red, wait for it to light up in
blue.
1 Touch and hold [NET] for at least 4 seconds to show “UPd”
blinking. While continuing to hold [NET], touch [AUX].
(This site is in English only.)
2 After the update has finished, “End” is indicated on the display.
Disconnect the AC mains lead and reconnect it after 1 minute.
≥ Downloading will require several minutes. It may take longer or may not work
properly depending on the connection environment.
≥ If there are no updates, “no nEEd” is displayed.
- 38 -

Others
Displaying the clock
You can stream the clock information from the device to this unit by using
the app “Panasonic Music Streaming” (l 21).
Preparation
≥ Complete the network settings. (l 12)
≥ Install your device with the app “Panasonic Music Streaming”.
1 Turn this unit on.
≥ Check that the network indicator (blue) lights up.
– If the network indicator is blinking in blue and red, wait until the blinking
stops.
2 Start the app “Panasonic Music Streaming”.
≥ Always use the latest version of the app.
≥ The clock will be displayed on this unit.
- 39 -

Changing the clock display
You can change the clock display.
∫ To change to 12-hour clock
Touch and hold [DISP] and [2] for at least 4 seconds.
∫ To change to 24-hour clock
Touch and hold [DISP] and [1] for at least 4 seconds.
≥ The factory default is 24-hour clock.
- 40 -

Changing the display mode
Blank display Clock display / “--:--”
Blank display
Clock display / “--:--”
Preset channel
number
Preset channel
number
Touch [DISP].
Each time you touch [DISP], the display changes as follows:
≥ During playback of a preset channel, the current preset channel number will be
shown for a few seconds when you touch [DISP].
– When you touch [DISP] repeatedly, the display changes as follows:
Dimmer function
You can change the brightness of the display and indicators.
1 Touch and hold [DISP] for at least 4 seconds.
2 Touch [VOL –] or [VOL +] to change the setting.
3 Touch [DISP] to confirm the setting.
Display Brightness
d: 0
d: 1
d: 2
≥ If “d: 1” or “d: 2” is selected, the display and indicators will brighten when you
perform some operations.
- 41 -
Bright
Dim

Auto off function
As a factory default, this unit will turn to standby mode automatically if
there is no sound and it is not being used for approximately 20 minutes.
To cancel this function
1 Touch and hold [DISP] and [6] for at least 4 seconds.
2 Touch [VOL –] or [VOL +] to select “OFF”.
3 Touch [DISP] to confirm the setting.
≥ To turn the function on, select “On” in step 2.
≥ About one minute before the unit turns off by this function, “A_OFF” is
displayed. Touch any switch to cancel it.
≥ When connected to a Bluetooth
≥ This setting cannot be selected when network standby is on. If network
standby is set to on, this function will also be set to “On”. To change the setting,
set the network standby to “OFF”. (l 16)
®
device, the function does not work.
- 42 -

Alarm and sleep functions
You can make settings for the alarm and sleep functions by using the app
“Panasonic Music Streaming”. (l 21)
The operations and on-screen display items, etc. of the app “Panasonic Music
Streaming” are subject to change.
For the latest information, visit
http://panasonic.jp/support/global/cs/audio/app/
(This site is in English only.)
≥ The available settings are
– Alarm 1-5 on/off
– Alarm 1-5 setting (time, day, music source
§
Preset channel 1-6, buzzer
– Snooze duration (off, 1 minute to 30 minutes at 1-minute interval)
– Sleep duration (off, 30 minutes to 120 minutes at 30-minute interval)
Sleep timer operation
≥ The remaining time is indicated at every minute (scrolling display) and then the
last minute is indicated until the unit’s off.
≥ After the set time has elapsed, this unit will turn off, and sleep timer setting will
not be memorised.
§
)
- 43 -

∫ When an alarm is activated
The indicators on the top panel of the unit blink fast.
Turning the alarm off
≥ If snooze is not set:
Touch any key on the unit to turn off the alarm.
≥ If snooze is set:
– Touch any key on the unit to enter snooze mode.
(The indicators on the top panel of the unit blink slowly.)
§
1
– During snooze mode, touch [ ]
or [Í/I]
§1 The unit will be off when the alarm is turned off with
§2 The unit will be on when the alarm is turned off with
§
2
on the unit to turn off the alarm.
[].
[Í/I].
≥ When you turn on an alarm, [ ] indicator will light up.
≥ When the current alarm is turned off, [ ] indicator goes off if you have not
turned on any other set alarm. (If another set alarm has been turned on, [ ]
indicator will light up.)
≥ When no operation is performed during the alarm activation, the alarm will be
off after approximately 1 hour.
≥ When an alarm is activated with preset channel, the playback condition will
depend on the connection environment.
- 44 -

Operation sound setting
As a factory default, there will be a beep sound when you touch the switch
on the unit.
∫ To cancel this function
Touch and hold [DISP] and [VOL –] for at least 4 seconds.
≥ “OFF” is indicated.
≥ To turn the function on, perform the same operation as the above.
(“On” will be indicated.)
Wi-Fi signal strength
To check the Wi-Fi signal strength where the unit is located.
Touch and hold [NET] and [3] for at least 4 seconds.
Display Wi-Fi signal strength
L:0
L:1
L:2
L:3
Weak
Strong
≥ If the network indicator is blinking in blue and red, wait until the blinking stops.
≥ If the Wi-Fi signal strength cannot be checked, deselect the unit from speakers
powered by AllPlay or DLNA, and try again.
- 45 -

IP/MAC address
My room
e.g.,
My room
XX:XX:XX:XX:XX:XX
XXX.XXX.XXX.XXX
My room
e.g.,
IP address
MAC address
To check the unit’s IP address and the MAC address.
Preparation
≥ Download the app “Panasonic Music Streaming”. (l 21)
1 Start the app “Panasonic Music Streaming”.
2 Select “Select Speaker”.
3 Select “ ”.
4 Touch and hold “Group”
in the title bar at the top.
≥ This unit will be displayed as “Panasonic ALL2” if the device name is not set.
≥ If the network indicator is blinking in blue and red, wait until the blinking stops.
- 46 -

Troubleshooting
Blinking
Display
Before requesting service, make the following checks.
If the problem remains unresolved, consult your dealer for instructions.
Do you have the latest firmware installed?
≥ Panasonic is constantly improving the unit’s firmware to ensure that
our customers are enjoying the latest technology. (l 38)
For further dedicated help, support and advice about your ALL
Series product please visit:
http://panasonic.jp/support/global/cs/audio/ALL/index.html
(This site is in English only.)
General
To restore the settings to the factory defaults
≥ If you want to restore the network settings to factory defaults, perform a
network reset. (l 16)
1 Turn this unit on.
2 Touch and hold [Í/I] for at least 4 seconds.
3 While continuing to hold [Í/I], touch [NET].
4 During the reset process, “--:--” will be displayed.
(The indicators on the top panel of the unit will blink 4 times.)
5 The unit will turn off.
“-- --” appears and the reset is complete.
- 47 -

Cannot turn on the unit.
≥ After connecting the AC mains lead, wait about 10 seconds before
turning on the unit.
Humming heard during playback.
≥ There are cords of other appliances or fluorescent light near the unit’s
AC mains lead. Turn the appliances off or keep them away from the AC
mains lead.
The sound is distorted when using the AUX IN jack.
≥ High level of input signal distorts the sound. Turn down the volume of
the connected device to reduce the input signal.
The network indicator does not stop blinking in blue and red.
≥ The unit needs to be repaired. Consult your dealer.
The unit does not work as described in the Operating Instructions.
≥ Update the unit’s firmware. (l 38)
- 48 -

Bluetooth
Pairing cannot be done.
≥ Check the Bluetooth® device condition.
The device cannot be connected.
≥ The pairing of the device was unsuccessful or the registration has been
replaced. Try pairing the device again. (l 30)
≥ This system might be connected to a different device. Disconnect the
other device and try pairing the device again.
The device is connected but audio cannot be heard through this
system.
≥ For some Bluetooth® devices, you have to set the audio output to
“SC-ALL2” manually. Read the operating instructions for the device for
details.
Connection is interrupted.
Sound is interrupted/sound skips/there is a lot of noise.
≥ Remove any obstacle between this system and the device.
≥ Other devices that use the 2.4 GHz frequency band (wireless router,
microwaves, cordless phones, etc.) are interfering. Bring the Bluetooth®
device closer to this system and distance it from the other devices.
≥ Select “Ll: 1” for stable communication. (l 33)
If the above does not fix the problem, you may be able to fix the problem
by reconnecting this unit and the Bluetooth® device. (l 31)
®
- 49 -

Firmware updates
“FAIL” is indicated on the display.
≥ The update has been failed. Touch any switch, and then try again.
≥ When using a LAN cable, make sure to connect the LAN cable while the
AC mains lead is disconnected. (l 19)
Network
Cannot connect to the network.
≥ This unit’s Wi-Fi security supports WPA2™ only. Your wireless router
must therefore be WPA2™ compatible. For details on the security
supported by your router and how to change the settings, please refer to
the operating instructions or contact your Internet service provider.
≥ If the network is set to be invisible, make the network visible while you
set up the network for this unit or make a wired LAN connection. (l 19)
≥ Make sure that the multicast function on the wireless router is enabled.
≥ Depending on the routers, WPS button may not work. Try other
methods. (l 12)
Cannot select this unit as the output speakers.
≥ Make sure that the devices are connected to the same network as this
unit.
≥ Reconnect the devices to the network.
≥ Turn off and then on the wireless router.
- 50 -

Playback does not start.
The sound is interrupted.
≥ If using the 2.4 GHz band on the wireless router, simultaneous use with
other 2.4 GHz devices, such as microwaves, cordless telephones, etc.,
may result in connection interruptions. Increase the distance between
this unit and these devices.
– If your wireless router supports 5 GHz band, try using the 5 GHz band.
To change to the 5 GHz band, perform a network reset (l 16), and redo the
network settings using an Internet browser (l 13). On the step 5, make sure
to select your network name (SSID) for the 5 GHz band.
≥
Do not place this unit inside a metal cabinet, for it might block the Wi-Fi signal.
≥ Place this unit closer to the wireless router.
≥ If several wireless devices are simultaneously using the same network
as this unit, try turning off the other devices or reducing their network
usage.
≥ Reconnect the devices to the network.
≥ Turn off and then on the wireless router.
≥ Try a wired LAN connection. (l 19)
Messages
The following messages or service numbers may appear on the
unit’s display.
“F” / “F” (“ ” stands for a number.)
≥ There is a problem with this unit.
Write down the displayed number, disconnect the AC mains lead and
consult your dealer.
“FAIL”
≥ Updating or setting has failed. Read the instructions and try again.
- 51 -

Specifications
∫ GENERAL
Power supply
Power consumption
Power consumption in standby mode
(When Bluetooth® standby is off)
(When Bluetooth® standby is on)
(When Network standby is on)
Dimensions (WkHkD)
Mass
Operating temperature range
Operating humidity range
§1, §2
§1, §2
35 % to 80 % RH (no condensation)
AC 220 V to 240 V, 50 Hz
12 W
Approx. 0.3 W
Approx. 0.4 W
Approx. 3.5 W
120 mmk180 mmk135 mm
Approx. 1.5 kg
0 oC to r40 oC
∫ TERMINALS SECTION
Ethernet interface LAN (10BASE-T/100BASE-TX)
AUX IN Stereo, 3.5 mm jack
- 52 -

∫ Bluetooth® SECTION
Version
Bluetooth® Ver.2.1 +EDR
Class
Class 2
Supported profiles
A2DP
Frequency band
2.4 GHz band FH-SS
Operating distance
Approx. 10 m Line of Sight
∫ Wi-Fi SECTION
Wi-Fi
WLAN Standard IEEE802.11a/b/g/n
Frequency range 2.4 GHz band / 5 GHz band
Security WPA2™
WPS version Version 2.0
Audio support format (AllPlay)
MP3/AAC
Sampling frequency 32/44.1/48 kHz
Audio word size 16 bits
Channel count 2ch
FLAC§3/ALAC/WAV
Sampling frequency 32/44.1/48/88.2/96/176.4/192 kHz
Audio word size 16 bits/24 bits
Channel count 2ch
- 53 -

Audio support format (DLNA)
MP3
Sampling frequency 32/44.1/48 kHz
Audio word size 16 bits
Channel count 2ch
FLAC§3/WAV
Sampling frequency 32/44.1/48/88.2/96/176.4/192 kHz
Audio word size 16 bits/24 bits
Channel count 2ch
∫ WIRELESS RECEIVER SECTION
Wireless module
Frequency range
2.4034 GHz to 2.47735 GHz
No. of channels
∫ AMPLIFIER SECTION
38
RMS output power
Front Ch
Total RMS power
40 W per channel (4 ≠), 1 kHz, 10 % THD
40 W
- 54 -

∫ SPEAKER SYSTEM SECTION
Speaker unit
Full range 8 cm cone typek1
Impedance 4 ≠
≥ Specifications are subject to change without notice.
≥ Mass and dimensions are approximate.
≥ Total harmonic distortion is measured by a digital spectrum analyzer.
§1 Network standby inactive
§2 When the display is off
§3 Uncompressed FLAC files may not operate correctly.
- 55 -

Qualcomm is a trademark of Qualcomm Incorporated, registered in the United States,
and other countries and used with permission.
AllPlay is a trademark of Qualcomm Connected Experiences, Inc., and used with
permission.
TuneIn is a trademark of TuneIn Inc., registered in the United States and other
countries and used with permission.
This product incorporates Spotify software which is subject to 3rd party licenses found
here: www.spotify.com/connect/third-party-licenses
®
The Bluetooth
word mark and logos are registered trademarks owned by Bluetooth
SIG, Inc. and any use of such marks by Panasonic Corporation is under license.
Other trademarks and trade names are those of their respective owners.
Google Play and Android are trademarks of Google Inc.
DLNA, the DLNA Logo and DLNA CERTIFIED are trademarks, service marks, or
certification marks of the Digital Living Network Alliance.
App Store is a service mark of Apple Inc.
®
The Wi-Fi CERTIFIED™ Logo is a certification mark of Wi-Fi Alliance
Protected Setup™ Identifier mark is a certification mark of Wi-Fi Alliance®. “Wi-Fi®” is a
registered trademark of Wi-Fi Alliance
®
. “Wi-Fi Protected Setup™”, “WPA™”, and
. The Wi-Fi
“WPA2™” are trademarks of Wi-Fi Alliance®.
Windows is a trademark or a registered trademark of Microsoft Corporation in the
United States and other countries.
MPEG Layer-3 audio coding technology licensed from Fraunhofer IIS and Thomson.
- 56 -

This product incorporates the following software:
(1)the software developed independently by or for Panasonic Corporation,
(2)the software owned by third party and licensed to Panasonic Corporation,
(3)the software licensed under the GNU General Public License, Vers ion 2.0
(GPL V2.0),
(4)the software licensed under the GNU LESSER General Public License, Version 2.1
(LGPL V2.1), and/or
(5)open source software other than the software licensed under the GPL V2.0 and/or
LGPL V2.1.
The software categorized as (3) - (5) are distributed in the hope that it will be useful,
but WITHOUT ANY WARRANTY, without even the implied warranty of
MERCHANTABILITY or FITNESS FOR A PARTICULAR PURPOSE.
Please refer to the detailed terms and conditions thereof shown in our website below.
http://panasonic.jp/support/global/cs/audio/oss/all8_3_1c.html
At least three (3) years from delivery of this product, Panasonic will give to any third
party who contacts us at the contact information provided below, for a charge no more
than our cost of physically performing source code distribution, a complete
machine-readable copy of the corresponding source code covered under GPL V2.0,
LGPL V2.1 or the other licenses with the obligation to do so, as well as the respective
copyright notice thereof.
Contact Information: oss-cd-request@gg.jp.panasonic.com
The source code and the copyright notice are also available for free in our website
below.
http://panasonic.net/avc/oss/
- 57 -

FLAC Decoder
Copyright (C) 2000,2001,2002,2003,2004,2005,2006,2007,2008,2009 Josh Coalson
Redistribution and use in source and binary forms, with or without modification, are
permitted provided that the following conditions are met:
– Redistributions of source code must retain the above copyright notice, this list of
conditions and the following disclaimer.
– Redistributions in binary form must reproduce the above copyright notice, this list of
conditions and the following disclaimer in the documentation and/or other materials
provided with the distribution.
– Neither the name of the Xiph.org Foundation nor the names of its contributors may
be used to endorse or promote products derived from this software without specific
prior written permission.
THIS SOFTWARE IS PROVIDED BY THE COPYRIGHT HOLDERS AND
CONTRIBUTORS "AS IS" AND ANY EXPRESS OR IMPLIED WARRANTIES,
INCLUDING, BUT NOT LIMITED TO, THE IMPLIED WARRANTIES OF
MERCHANTABILITY AND FITNESS FOR A PARTICULAR PURPOSE ARE
DISCLAIMED. IN NO EVENT SHALL THE FOUNDATION OR CONTRIBUTORS BE
LIABLE FOR ANY DIRECT, INDIRECT, INCIDENTAL, SPECIAL, EXEMPLARY, OR
CONSEQUENTIAL DAMAGES (INCLUDING, BUT NOT LIMITED TO,
PROCUREMENT OF SUBSTITUTE GOODS OR SERVICES; LOSS OF USE, DATA,
OR PROFITS; OR BUSINESS INTERRUPTION) HOWEVER CAUSED AND ON ANY
THEORY OF LIABILITY, WHETHER IN CONTRACT, STRICT LIABILITY, OR TORT
(INCLUDING NEGLIGENCE OR OTHERWISE) ARISING IN ANY WAY OUT OF THE
USE OF THIS SOFTWARE, EVEN IF ADVISED OF THE POSSIBILITY OF SUCH
DAMAGE.
- 58 -

For the United Kingdom and Ireland customers
Sales and Support Information
Customer Communications Centre
≥ For customers within the UK: 0344 844 3899
≥ For customers within Ireland: 01 289 8333
≥ Monday – Friday 9:00 am – 5:00 pm (Excluding public holidays).
≥ For further support on your product, please visit our website:
www.panasonic.co.uk
Direct Sales at Panasonic UK
≥ Order accessory and consumable items for your product with ease
and confidence by phoning our Customer Communications Centre
Monday – Friday 9:00 am – 5:00 pm (Excluding public holidays).
≥ Or go on line through our Internet Accessory ordering application at
www.pas-europe.com.
≥ Most major credit and debit cards accepted.
≥ All enquiries transactions and distribution facilities are provided
directly by Panasonic UK.
≥ It couldn't be simpler!
≥ Also available through our Internet is direct shopping for a wide range
of finished products. Take a browse on our website for further details.
- 59 -

Manufactured by: Panasonic Corporation
Kadoma, Osaka, Japan
Importer for Europe: Panasonic Marketing Europe GmbH
Panasonic Testing Centre
Winsbergring 15, 22525 Hamburg, Germany
Panasonic Corporation
Web Site: http://www.panasonic.com
C Panasonic Corporation 2015
p
RQT0A27-1B
F0515HA3085
 Loading...