

Panasonic SCAKX12EG User Manual [en, cs, pl]
Operating Instructions
Instrukcja obsługi
Návod k obsluze
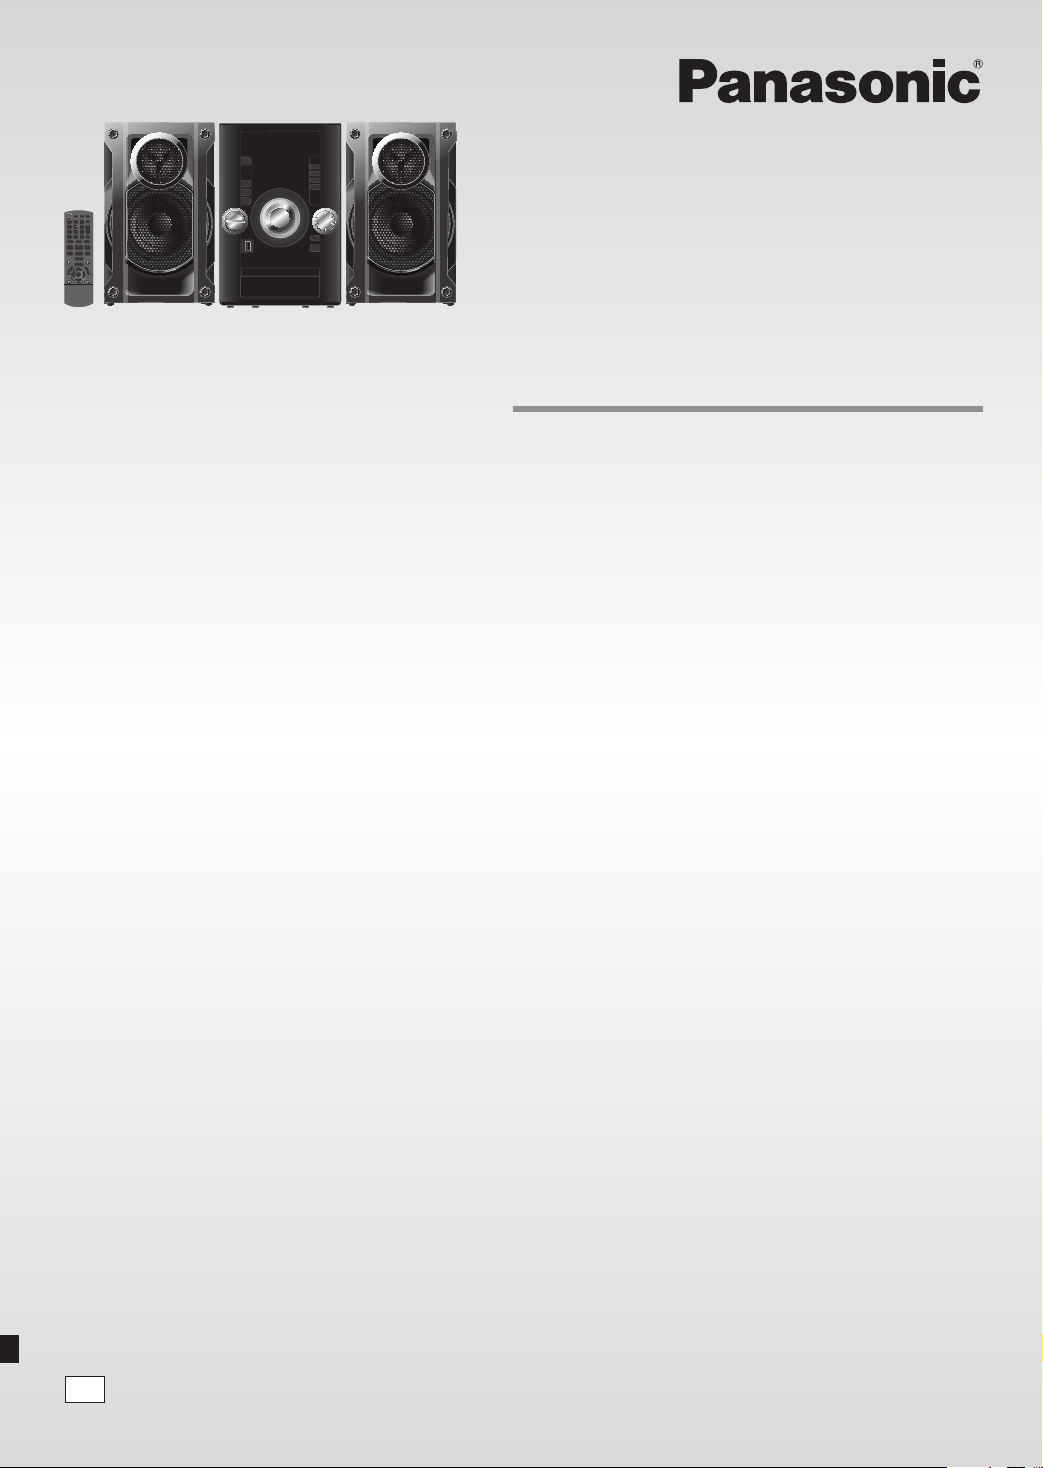
CD Stereo System
Zestaw stereo z CD
Dear Customer
Thank you for purchasing this system.
For optimum performance and safety, read these instructions
fully before you connect, operate or adjust this system.
Keep this manual for future reference.
Your system and the illustrations can look differently.
Drogi Kliencie
Dziękujemy Ci za zakupienie tego zestawu.
W celu zapewnienia optymalnej jakości odbioru i
bezpieczeństwa, przed podłączeniem, uruchomieniem lub
zmianą ustawień urządzenia należy dokładnie zapoznać się
z niniejszą instrukcją obsługi.
Prosimy o zachowanie niniejszej instrukcji obsługi.
Zakupione urządzenie może różnić się od przedstawionego
na ilustracjach.
Niniejsza instrukcja została opracowana na podstawie
oryginalnej publikacji firmy Panasonic Corporation.
Vážený Zákazníku
Děkujeme za zakoupení tohoto systému.
Pro optimální využití a bezpečnost si před připojováním,
používáním nebo nastavováním tohoto systému tento návod
pečlivě přečtěte.
Uschovejte si prosím tento návod k obsluze.
Váš systém a obrázky se mohou lišit.
Stereosystém s CD
Model No. SC-AKX12
EG
RQTX1290-E
ENGLISH
Do the procedures with the remote control. You can also use the
buttons on the main unit if they are the same.
These operating instructions are applicable to the following system.
System SC-AKX12
ENGLISH
Main unit SA-AKX12
Speakers SB-AKX12
Back of product
Inside of product
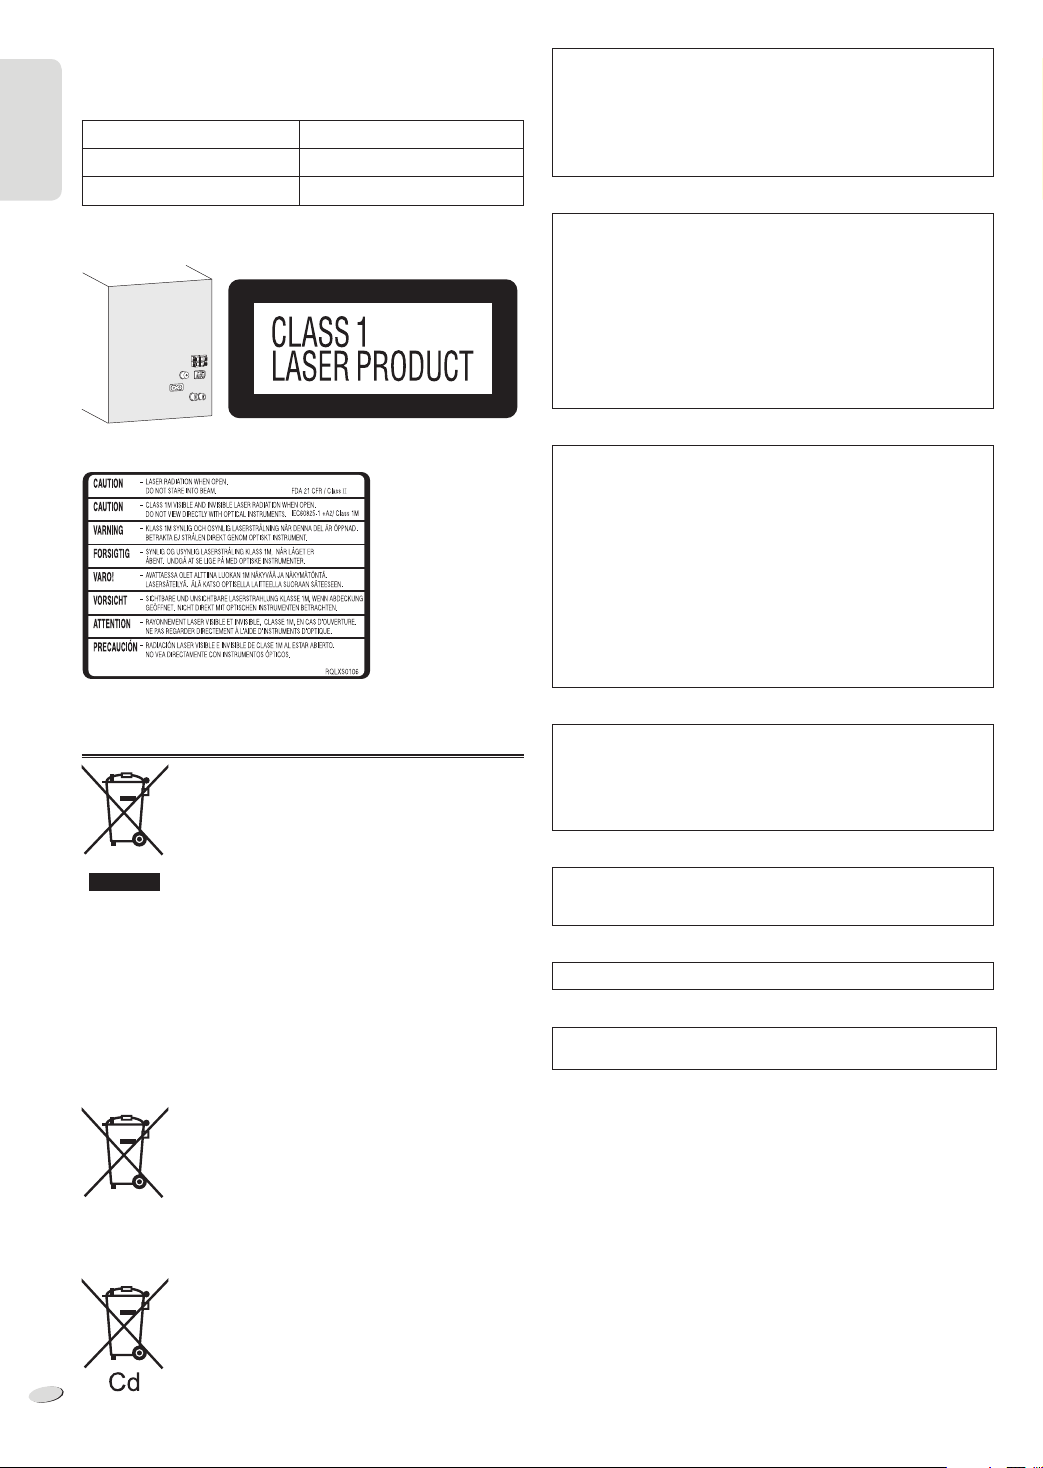
CAUTION!
THIS PRODUCT UTILIZES A LASER.
USE OF CONTROLS OR ADJUSTMENTS OR PERFORMANCE
OF PROCEDURES OTHER THAN THOSE SPECIFIED HEREIN
MAY RESULT IN HAZARDOUS RADIATION EXPOSURE.
DO NOT OPEN COVERS AND DO NOT REPAIR YOURSELF.
REFER SERVICING TO QUALIFIED PERSONNEL.
WARNING:
TO REDUCE THE RISK OF FIRE, ELECTRIC SHOCK OR
PRODUCT DAMAGE,
• DO NOT EXPOSE THIS APPARATUS TO RAIN, MOISTURE,
DRIPPING OR SPLASHING AND THAT NO OBJECTS FILLED
WITH LIQUIDS, SUCH AS VASES, SHALL BE PLACED ON
THE APPARATUS.
• USE ONLY THE RECOMMENDED ACCESSORIES.
• DO NOT REMOVE THE COVER (OR BACK); THERE ARE NO
USER SERVICEABLE PARTS INSIDE. REFER SERVICING TO
QUALIFIED SERVICE PERSONNEL.
CAUTION!
• DO NOT INSTALL OR PLACE THIS UNIT IN A BOOKCASE,
BUILT-IN CABINET OR IN ANOTHER CONFINED SPACE.
ENSURE THE UNIT IS WELL VENTILATED. TO PREVENT
RISK OF ELECTRIC SHOCK OR FIRE HAZARD DUE TO
OVERHEATING, ENSURE THAT CURTAINS AND ANY OTHER
MATERIALS DO NOT OBSTRUCT THE VENTILATION VENTS.
• DO NOT OBSTRUCT THE UNIT’S VENTILATION OPENINGS
WITH NEWSPAPERS, TABLECLOTHS, CURTAINS, AND
SIMILAR ITEMS.
• DO NOT PLACE SOURCES OF NAKED FLAMES, SUCH AS
LIGHTED CANDLES, ON THE UNIT.
• DISPOSE OF BATTERIES IN AN ENVIRONMENTALLY
FRIENDLY MANNER.
Information for Users on Collection and Disposal of Old
Equipment and used Batteries
These symbols on the products, packaging, and/or
accompanying documents mean that used electrical
and electronic products and batteries should not be
mixed with general household waste.
For proper treatment, recovery and recycling of old
products and used batteries, please take them to
applicable collection points, in accordance with your
national legislation and the Directives 2002/96/EC and
2006/66/EC.
By disposing of these products and batteries correctly,
you will help to save valuable resources and prevent
any potential negative effects on human health and
the environment which could otherwise arise from
inappropriate waste handling.
For more information about collection and recycling of
old products and batteries, please contact your local
municipality, your waste disposal service or the point
of sale where you purchased the items.
Penalties may be applicable for incorrect disposal of
this waste, in accordance with national legislation.
For business users in the European Union
If you wish to discard electrical and electronic
equipment, please contact your dealer or supplier for
further information.
[Information on Disposal in other Countries
outside the European Union]
These symbols are only valid in the European Union.
If you wish to discard these items, please contact
your local authorities or dealer and ask for the correct
method of disposal.
Note for the battery symbol (bottom two symbol
examples):
This symbol might be used in combination with a
chemical symbol. In this case it complies with the
requirement set by the Directive for the chemical
RQTX1290
involved.
2
2
The socket outlet shall be installed near the equipment and easily
accessible.
The mains plug of the power supply cord shall remain readily
operable.
To completely disconnect this apparatus from the AC Mains,
disconnect the power supply cord plug from AC receptacle.
This product may receive radio interference caused by mobile
telephones during use. If such interference is apparent, please
increase separation between the product and the mobile telephone.
THIS UNIT IS INTENDED FOR USE IN MODERATE CLIMATES.
MPEG Layer-3 audio coding technology licensed from Fraunhofer IIS
and Thomson.

ENGLISH
Safety precautions
Table of contents
Placement
Set the system up on an even surface away from direct sunlight, high
temperatures, high humidity, and excessive vibration. These conditions
can damage the cabinet and other components, thereby shortening the
service life of the system.
Place it at least 15 cm away from wall surfaces to avoid distortion and
unwanted acoustical effects.
Do not place heavy items on the system.
Voltage
Do not use high voltage power sources. This can overload the system
and cause a fire.
Do not use a DC power source. Check the source carefully when
setting the system up on a ship or other place where DC is used.
AC mains lead protection
Ensure the AC mains lead is connected correctly and not damaged.
Poor connection and lead damage can cause fire or electric shock. Do
not pull, bend, or place heavy items on the lead.
Grasp the plug firmly when unplugging the lead. Pulling the AC mains
lead can cause electric shock.
Do not handle the plug with wet hands. This can cause electric shock.
Foreign matter
Do not let metal objects fall inside the system. This can cause electric
shock or malfunction.
Do not let liquids get into the system. This can cause electric shock or
malfunction. If this occurs, immediately disconnect the system from the
power supply and contact your dealer.
Do not spray insecticides onto or into the system. They contain
flammable gases which can ignite if sprayed into the system.
Safety precautions ............................................3
Supplied accessories ........................................ 3
Preparing the remote control ...........................4
Placement of speakers...................................... 4
Making the connections ....................................5
Overview of controls ......................................... 6
Discs ................................................................... 7
USB ..................................................................... 8
Radio ...................................................................8
Clock and timers................................................ 8
Sound effects ..................................................... 9
External equipment ...........................................9
Remote control code ......................................... 9
Troubleshooting guide ....................................10
Maintenance ..................................................... 10
Specifications .................................................. 11
ENGLISH
Service
Do not attempt to repair this system by yourself. If sound is interrupted,
indicators fail to light, smoke appears, or any other problem that is
not covered in these instructions occurs, disconnect the AC mains
lead and contact your dealer or an authorised service centre. Electric
shock or damage to the system can occur if the system is repaired,
disassembled or reconstructed by unqualified persons.
Extend operating life by disconnecting the system from the power
source if it is not to be used for a long time.
Supplied accessories
Please check and identify the supplied accessories.
1 x AC mains lead
1 x AM loop antenna
1 x FM indoor antenna
1 x Remote control battery
1 x Remote control
(N2QAYB000636)
RQTX1290
3
3
ENGLISH
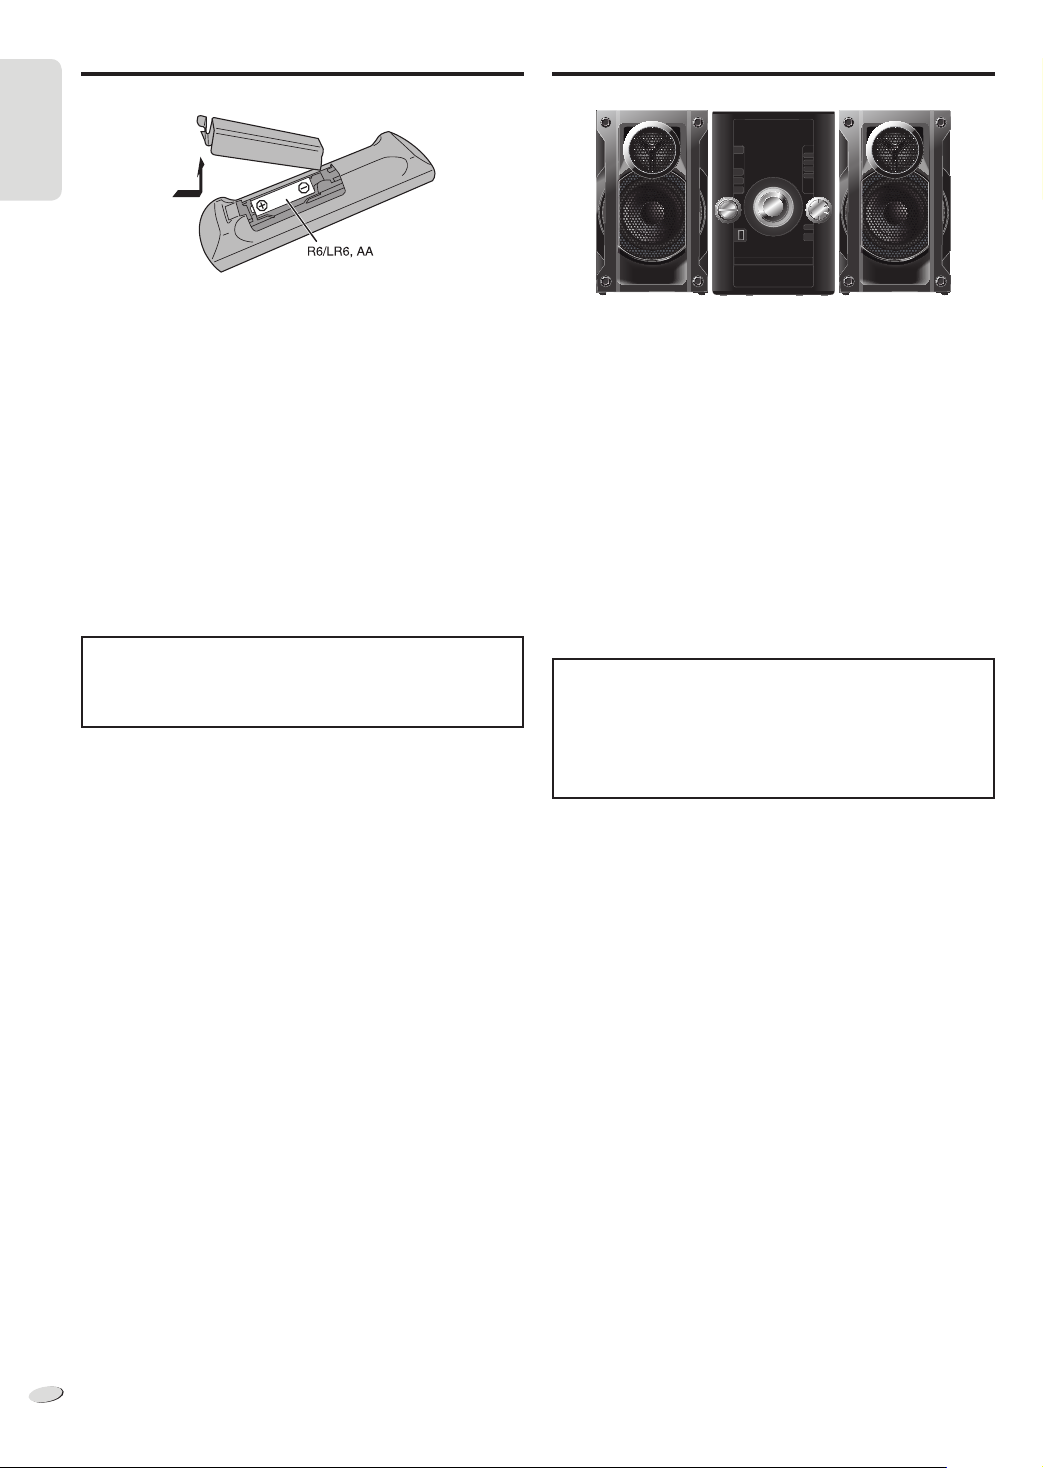
Preparing the remote control
ENGLISH
Placement of speakers
Use alkaline or manganese battery.
Install the battery so that the poles (+ and –) align with those in the
remote control.
Point the remote control at the remote control sensor (Z 6), away from
obstacles, at a maximum range of 7 m directly in front of the main unit.
CAUTION!
• Do not break open or short-circuit the battery.
• Do not charge the alkaline or manganese battery.
• Do not use the battery if the cover has peeled off.
• Do not heat or expose to flame.
• Do not leave the battery(ies) in an automobile exposed to direct
sunlight for a long period of time with doors and windows closed.
• Mishandling of battery can cause electrolyte leakage, which can
cause a fire.
• Remove the battery if you do not use the remote control for a long
period of time. Keep in a cool, dark area.
CAUTION!
Danger of explosion if battery is incorrectly replaced. Replace
only with the same or equivalent type recommended by the
manufacturer. Dispose of used batteries according to the
manufacturer’s instructions.
The right and left speakers are the same.
You cannot remove the net of the speakers.
Use only the supplied speakers.
The combination of the main unit and speakers give the best sound.
You can cause damage to the system and decrease the sound quality if
you use other speakers.
Note:
• Keep your speakers more than 10 mm from the main unit for
ventilation.
• Put the speakers on a flat safe surface.
• These speakers do not have magnetic shielding. Do not put them
near TVs, PCs or other equipment easily influenced by magnetism.
• When you play at high levels for a long period, it can cause damage
to the system and decrease the life of the system.
• Decrease the volume in these conditions to prevent damage:
– When you play distorted sound.
– When you adjust the sound quality.
CAUTION!
• Use the speakers only with the recommended system. If not,
you can cause damage to the amplifier and speakers and
can cause a fire. Consult an approved service personnel if
damage occurs or if there is a sudden apparent change in
performance.
• Do the procedures included in these instructions when you
attach the speakers.
RQTX1290
4
4
ENGLISH
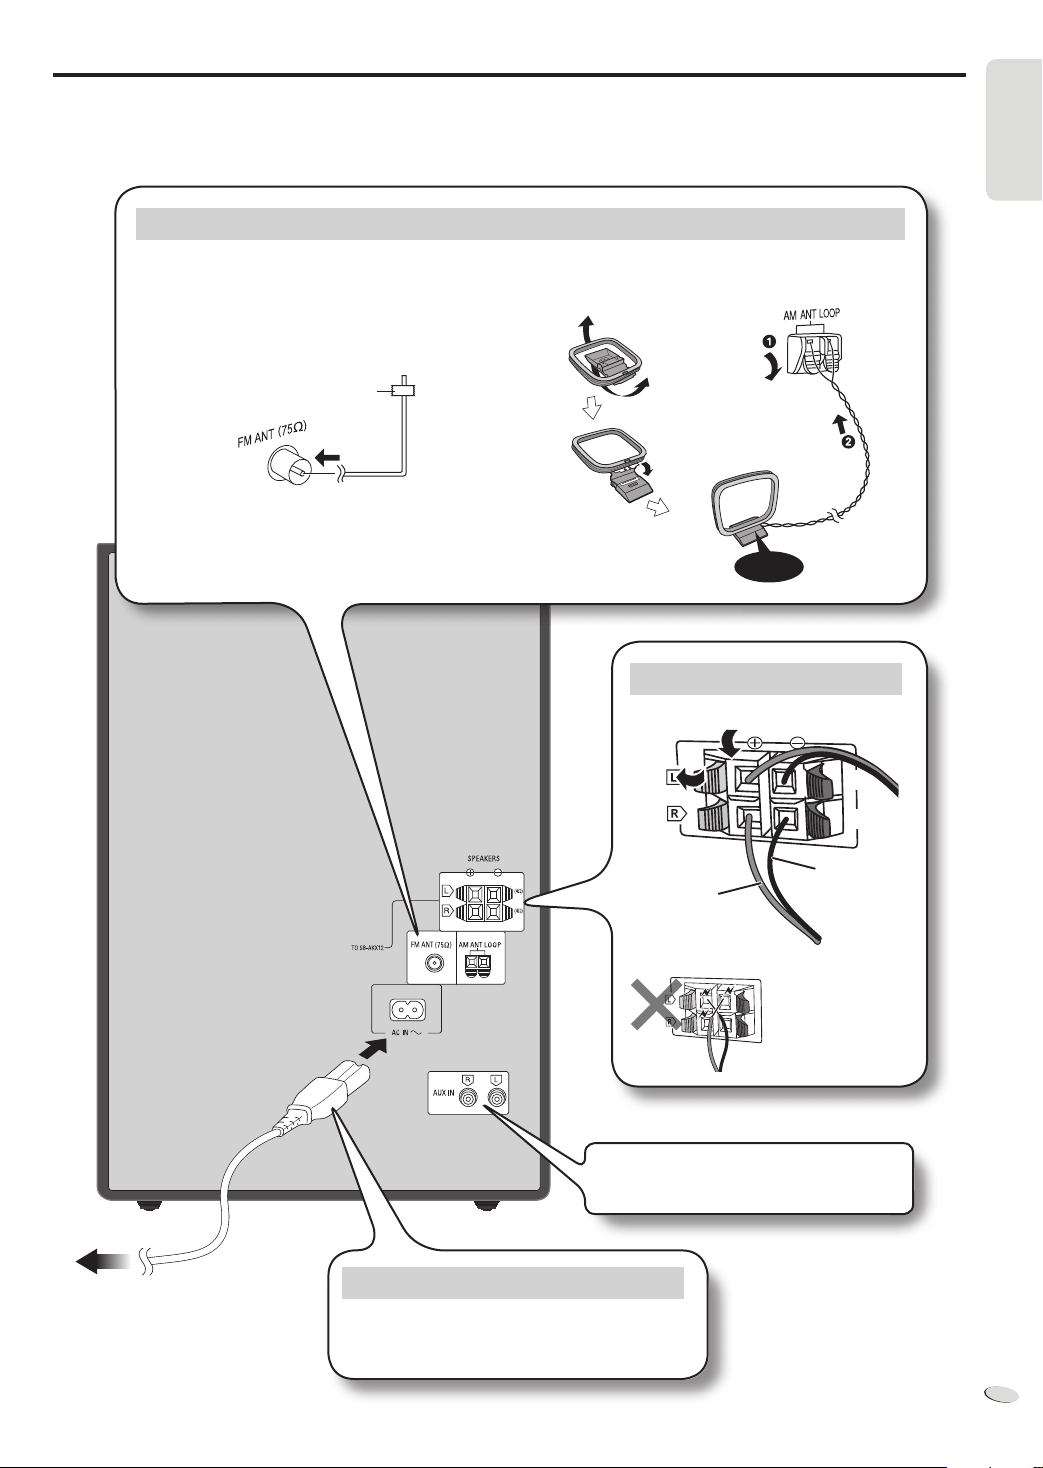
Making the connections
Connect the AC mains lead only after all the other connections have been made.
Conserving power
The system consumes approximately 0.3 W when it is in standby mode. Disconnect the power supply if you do not use the system.
Some settings will be lost after you disconnect the system. You have to set them again.
Connect the antennas
Place the antenna where reception is best.
ENGLISH
FM indoor antenna
AM loop antenna
Adhesive tape
Click!
Connect the speakers
B
A
(4:)
(4:)
Black
Red
To household mains socket
Be careful not to
cross (short-circuit) or
reverse the polarity of
the speaker wires as
doing so may damage
the speakers.
Refer to “Using the auxiliary input” (Z 9) for
more information on AUX connection.
Connect the AC mains lead
Use the included AC mains lead with this system only.
Do not use an AC mains lead from other equipment.
RQTX1290
5
5
ENGLISH
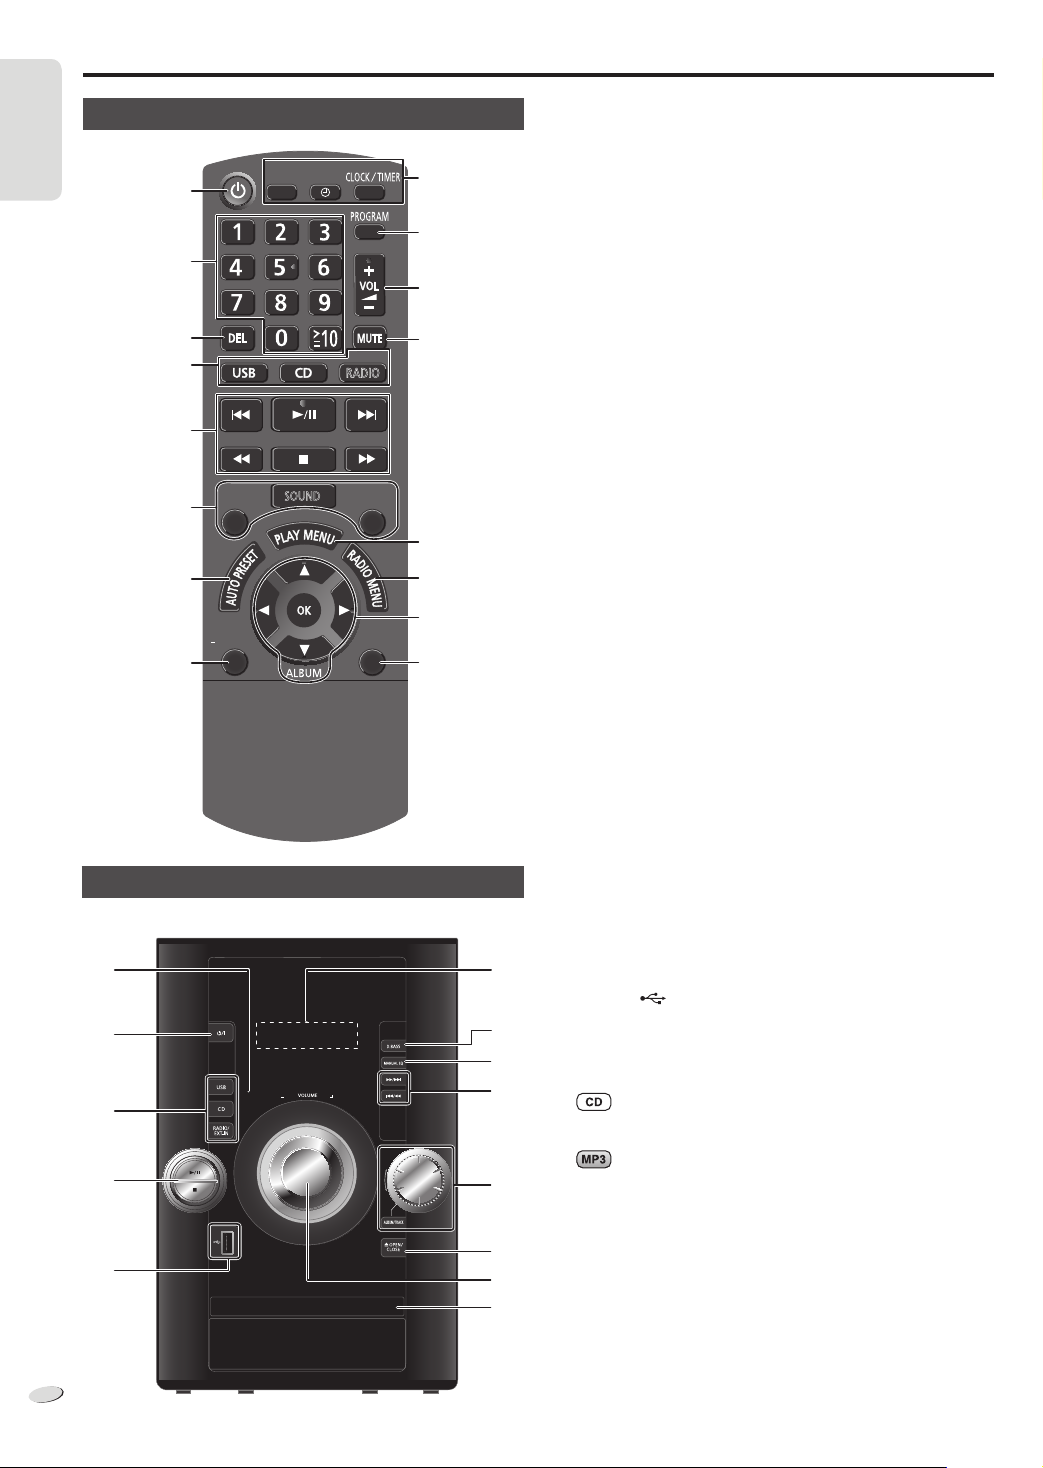
Overview of controls
Q
S
F
T
E
U
V
K
W
Remote control
ENGLISH
Main unit
A
D
E
R
A
B
C
D
E
F
G
H
D.BASS
DISPLAY
DIMMER
SLEEP
SOUND
PLAY
EXT-IN
RADIO
PRESET EQ
AUTO OFF
I
J
K
L
M
N
O
P
A Standby/on switch [`], [1] (Z 9, 10)
Press to switch the unit from on to standby mode or vice versa. In
standby mode, the unit is still consuming a small amount of power.
B Numeric buttons [1 to 9, 0, ≧10]
To select a 2-digit number
Example: 16: [≧10] → [1] → [6]
C Delete a programmed track (Z 7)
D Select source
[USB]: Select USB (Z 8)
[CD]: Select disc (Z 7)
[RADIO, EXT-IN]: Select radio, USB or AUX (Z 8, 9)
E Basic operation
[4/9]: Playback or pause operation
[8]: Stop playback
[2], [6]: Skip track
[3], [5]: Search track
[2/3], [5/6]: Skip and search track
F Select the sound effects (Z 9)
G Auto preset the radio station (Z 8)
H View the information shown on the display panel.
Decrease the brightness of the display panel
Press and hold the button to use this function.
To cancel, press and hold the button again.
I Set the sleep timer (Z 8)
Set the clock and timer (Z 8)
J Set the program function (Z 7, 8)
K Adjust the volume of the system
L Mute the sound of the system
Press the button again to cancel.
“MUTE” is also cancelled when you adjust the volume or when you
switch off the system.
M Set the play menu item (Z 7)
N Set the radio menu item (Z 8)
O [R, T]: Skip album
[Y, U]: Select the item in the menu
[OK]: Confirm the setting
P Automatically switch off the system
When you are in disc or USB source, the auto off function switches
off the system if you do not use the system for 30 minutes.
To cancel, press the button again.
Q Remote control sensor
R USB port ( )
S Display panel
T Set the Manual EQ effects (Z 9)
U Browse tracks or albums
Turn the knob to browse track.
Press [4/9] to start playback from the selection.
Press [ALBUM/TRACK] to select album or track and turn the knob
to browse.
Press [4/9] to start playback from the selection.
V Open or close the disc tray
W Disc tray
Select preset radio station
Tune in to the radio station
Select preset radio station
Adjust clock setting
RQTX1290
6
6

ENGLISH
Discs
Program playback
Playing discs
1
Press [x , OPEN/CLOSE] on the main unit to open the disc
tray.
Put in a disc with the label facing up.
Press [x, OPEN/CLOSE] again to close the disc tray.
2
Press [CD] and then press [4/9] to start playback.
Stop playback
Pause
playback
Skip album
Skip track
Search
through track
Press [8] during playback.
Press [4/9] during playback.
Press again to continue playback.
Press [R, T].
Press [2] or [6] (main unit: [2/3] or
[5/6]).
Press and hold [3] or [5] (main unit:
[2/3] or [5/6]).
Playmode function
1
Press [PLAY MENU] to select “PLAYMODE”.
2
Press [Y, U] and then press [OK] to select the desired mode.
OFF
PLAYMODE
1-TRACK
1TR
1-ALBUM
1ALBUM
RANDOM
RND
1- ALBUM
RANDOM
1ALBUM RND
Note:
• This function does not work with “Program playback”.
• The setting returns to the default “OFF PLAYMODE” when you open
the disc tray.
Play all tracks.
Play one selected track on the disc.
Press the numeric buttons to select the track.
Playback starts from the selected track.
Play one selected album on the disc.
Press [R, T
Play a disc randomly.
Play all tracks in one selected album randomly.
Press [R, T
]
to select the album.
]
to select the album.
This function allows you to program up to 24 tracks.
1
Press [PROGRAM] in the stop mode.
“PGM” is shown.
2
Press the numeric buttons to select the desired track.
Do this step again to program other tracks.
3
Press [4/9] to start playback.
1
Press [PROGRAM] in the stop mode.
2
Press [R, T] to select the desired album.
3
Press [6] and then press the numeric buttons to select the
desired track.
4
Press [OK].
Do steps 2 through 4 again to program other tracks.
5
Press [4/9] to start playback.
Cancel
program mode
Replay the
program
Check
program
contents
Clear the last
track
Clear all
programmed
tracks
Note:
The program memory is cleared when you open the disc tray.
Note on CDs
• This system can access up to 99 tracks.
• This system can play MP3 files and CD-DA format audio CD-R/RW
that have been finalised.
• This system can fail to play some CD-R/RW because of the condition
of the recording.
Press [PROGRAM] in the stop mode.
Press [PROGRAM] and then press [4/9].
Press [2] or [6] when “PGM” is shown in the
stop mode.
To check while programming, press [PROGRAM]
two times after “PGM” is shown, then press [2]
or [6].
Press [DEL] in the stop mode.
Press [8] in the stop mode. “CLR ALL” is shown.
Within 5 seconds, press [8] again.
ENGLISH
Repeat playback
You can repeat “Program playback” or other selected “Playmode
function”.
1
Press [PLAY MENU] to select “REPEAT”.
2
Press [Y, U] to select “ON REPEAT” and then press [OK].
” is shown.
“
To cancel, select “OFF REPEAT”.
Viewing available information
You can view the available information on the display panel.
Press [DISPLAY].
Note:
• Maximum characters that can be shown: approximately 16
• This system supports ver. 1.0 and 1.1 ID3 tags.
• Text data that the system does not support can show differently.
Note on MP3s
• Files are treated as tracks and folders are treated as albums.
• This system can access up to 999 tracks, 255 albums and 20
sessions.
• Disc must conform to ISO9660 level 1 or 2 (except for extended
formats).
• To play in a certain order, prefix the folder and file names with 3-digit
numbers in the order you want them to play.
Limitations on MP3 playback
• If you have recorded MP3s on the same disc as CD-DA, only the
format recorded in the first session can be played.
• Some MP3s cannot be played because of the condition of the disc or
recording.
• Recordings will not necessarily be played in the order you recorded
them.
RQTX1290
7
7
ENGLISH
USB
RDS broadcasting
You can connect and play MP3 tracks from your USB mass storage
device.
Do not use a USB extension cable. The system cannot recognise USB
ENGLISH
mass storage device connected through a cable.
1
Decrease the volume and connect the USB mass storage
device to the USB port.
2
Press [USB] and then press [4/9] to start playback.
Stop playback
For other operations, refer to “Discs” (Z 7).
Compatible devices
• USB mass storage devices that support bulk-only transfer.
• USB mass storage devices that support USB 2.0 full speed.
Supported format
• Folders are defined as album.
• Files are defined as track.
• Track must have the extension “.mp3” or “.MP3”.
• CBI (Control/Bulk/Interrupt) is not supported.
• NTFS file system is not supported (only FAT 12/16/32 file system is
supported).
• Some files can fail to work because of the sector size.
Note:
• Maximum album: 255 albums (include albums without MP3 tracks)
• Maximum track: 2500 tracks
• Maximum track in one album: 999 tracks
Press [8] during playback.
“RESUME” is shown.
Press [4/9] to continue playback.
OR
Press [8] two times to stop the playback fully.
Radio
Manual tuning
1
Press [R ADIO, EXT-IN] to select “FM” or “AM”.
2
Press [3] or [5] to select the frequency of the required
station.
To tune automatically, press and hold the button until the frequency
starts changing quickly.
To improve the sound quality
When “FM” is selected
1
Press [R ADIO MENU] to select “FM MODE”.
2
Press [Y, U] to select “MONO” and then press [OK].
To cancel, select “STEREO”.
• “MONO” is also cancelled when you change the frequency.
• Switch off “MONO” for normal listening.
When “AM” is selected
1
Press [R ADIO MENU] to select “B.PROOF”.
2
Press [Y, U] to select “BP 1” or “BP 2” and then press [OK].
RQTX1290
8
8
This system can display the text data transmitted by the radio data
system (RDS) available in some areas.
Press [ DISPLAY].
PS
(Station name)
Note:
RDS displays may not be available if reception is poor.
→
PTY
(Program type)
→
(Frequency)
FREQ
Memory presetting
30 FM and 15 AM stations can be preset.
Preparation
Press [RADIO, EXT-IN] to select “FM” or “AM”.
Automatic presetting
1
Press [OK] to select “CURRENT” or “LOWEST” frequency.
2
Press [AUTO PRESET] to start presetting.
To cancel, press [8].
Manual presetting
1
Press [3] or [5] to tune in to the station.
2
Press [PROGRAM].
3
Press the numeric buttons to select a preset number.
The new station replaces any station that occupies the same preset
number.
4
Do steps 1 through 3 again to preset more stations.
Selecting a preset station
Press the numeric buttons, [2] or [6] (main unit: [2/3]
or [5/6]) to select the preset station.
AM allocation setting (by main unit only)
This system can also receive AM broadcasts allocated in 10 kHz steps.
1
Press [R ADIO, EXT-IN] to select “FM” or “AM”.
2
Press and hold [RADIO, EXT-IN].
After a few seconds, the display panel shows the current minimum
radio frequency. Release the button when the minimum frequency
changes.
• To go back to the initial setting, do the above steps again.
• After you change the setting, preset frequencies are erased.
Clock and timers
Setting the clock
This is a 24-hour clock.
1
Press [CLOCK/TIMER] to select “CLOCK”.
2
Within 10 seconds, press [R, T] to set the time.
3
Press [OK].
Press [CLOCK/TIMER] to show the clock for a few seconds.
Note:
Reset the clock regularly to maintain accuracy.
ENGLISH
Sleep timer
The sleep timer switches off the system after the set time.
Press [SLEEP] to select the setting (in minutes).
To cancel, select “OFF”.
30 MIN OFF→120 MIN→→ 60 MIN→90 MIN
To show the remaining time
Press [SLEEP].
Note:
• The sleep timer can be used together with the play timer.
• The sleep timer always comes first. Be sure not to set an overlap of
timers.
Play timer
You can set the timer to come on at a certain time to wake you up.
Switch on the system and set the clock.
Prepare the music source you want to listen to (disc, radio, USB or
AUX) and set the volume.
1
Press [CLOCK/TIMER] to select “#PLAY”.
2
Within 10 seconds, press [R, T] to set the start time.
3
Press [OK].
4
Do steps 2 and 3 again to set the end time.
To start the timer
5
Press [#, PLAY] to start the timer.
6
Press [`] to switch off the system.
The system must be switched off for the timer to operate.
Change the settings
Change the source
or volume
Check the settings
Cancel
Note:
• The play timer starts at a low volume and increases gradually to the
preset level.
• The timer comes on at the set time every day if the timer is on.
• If you switch off the system and switch on again while a timer is in
operation, the timer will not stop at the end time.
Do steps 1 through 4 and 6 again (Z above).
1) Press [#, PLAY] to remove the timer
indicator on the display panel.
2) Change the source or volume.
3) Do steps 5 and 6 (Z above).
Press [CLOCK/TIMER] to select “#PLAY”.
Press [#, PLAY] to remove the timer indicator
on the display panel.
Preset EQ
Press [PRESET EQ] to select a setting.
HEAVY Adds punch to rock
SOFT For background music
CLEAR Clarifies higher frequencies
VOCAL Adds gloss to vocal
FLAT Cancels the sound effect
D.BASS
Press [D.BASS] to select “D.BASS”, “AUTO D.BASS” or
“OFF D.BASS”.
D.BASS Enhances bass effect
AUTO D.BASS Automatically adjusts the bass effect
OFF D.BASS Cancels the function
according to the sound or music track
External equipment
Using the auxiliary input
You can connect a VCR, DVD player etc. and listen to the audio
through this system.
Preparation
• Disconnect the AC mains lead.
• Switch off all equipment and read the appropriate operating
instructions.
1
Connect the external equipment.
2
Press [RADIO, EXT-IN] to select “AUX”.
3
Play the external equipment.
Note:
• Components and cables are sold separately.
• If you want to connect equipment other than those described, refer to
the audio dealer.
• Sound distortion can occur when you use an adaptor.
ENGLISH
Sound effects
Changing the sound quality
1
Press [SOUND] to select a sound effect.
2
Press [Y, U] to select the desired setting.
BASS -4 to +4
TREBLE
SURROUND “ON SURROUND” or “OFF SURROUND”
INPUT LEVEL
(For AUX source)
RE-MASTER
By main unit only
1
Press [MANUAL EQ] to select “BASS” or “TREBLE”.
2
Press [2/3] or [5/6] to adjust the level.
“NORMAL” or “HIGH”
“ON RE-MASTER” or “OFF RE-MASTER”
Remote control code
When other Panasonic equipment responds to the remote control of
this system, change the remote control code for this system.
Preparation
Press [RADIO, EXT-IN] to select “AUX”.
To set the code to “REMOTE 2”
1
Press and hold [RADIO, EXT-IN] on the main unit and [2] on
the remote control until “REMOTE 2” is shown.
2
Press and hold [OK] and [2] for a minimum of 4 seconds.
To set the code to “REMOTE 1”
1
Press and hold [RADIO, EXT-IN] on the main unit and [1] on
the remote control until “REMOTE 1” is shown.
2
Press and hold [OK] and [1] for a minimum of 4 seconds.
RQTX1290
9
9

ENGLISH
Troubleshooting guide
Before requesting service, make the following checks. If you are in
doubt about some of the check points, or if the solutions indicated do
not solve the problem, consult your dealer for instructions.
ENGLISH
■
Common problems
The display panel lights up and changes continuously in standby
mode.
• Press and hold [8] on the main unit to select “DEMO OFF”.
No operations can be done with the remote control.
• Examine that the battery is installed correctly.
Sound is distorted or no sound.
• Increase the volume.
• Switch off the system, determine and correct the cause, then switch
the system on again. It can be caused by straining of the speakers
through excessive volume or power, and when using the system in a
hot environment.
A “humming” sound can be heard during playback.
• An AC mains lead or fluorescent light is near the cables. Keep other
appliances and cords away from the cables of this system.
■
Discs
Display not shown correctly.
Playback does not start.
• You have not put in the disc correctly. Put it in correctly.
• Disc is dirty. Clean the disc.
• Replace the disc if it is scratched, warped, or non-standard.
• There is condensation. Let the system dry for 1 to 2 hours.
The total number of tracks displayed is incorrect.
The disc cannot be read.
Distorted sound is heard.
• You put in a disc that the system cannot play. Change to a playable
disc.
• You put in a disc that has not been finalised.
■
Radio
Sound is distorted.
• Use an optional FM outdoor antenna. The antenna should be
installed by a competent technician.
A beat sound is heard.
• Switch off the TV or move it away from the system.
• Set to “BP 1” or “BP 2” when in AM tuner mode.
A low hum is heard during AM broadcasts.
• Move the antenna away from other cables and cords.
■
Main unit displays
“NO PLAY”
• Examine the content. You can only play supported format.
• If there are more than 255 albums or folders (audio and non-audio),
some of the MP3 files in these albums cannot be read and played.
Transfer these music albums to another USB mass storage device.
Alternatively, reformat the USB mass storage device and save these
music albums prior to saving the other non-audio folders.
“F61”
• Examine and correct the speaker cords connection.
• Disconnect the USB mass storage device. Switch off the system and
then switch it on again.
“ERROR”
• An incorrect operation was done. Read the instructions and try again.
“NOT MP3/ERROR”
• An unsupported MP3 format. The system will skip that track and play
the next one.
“VBR–”
• The system cannot show the remaining play time for variable bit rate
(VBR) tracks.
“NORMAL”
• The “INPUT LEVEL” of AUX source automatically charges from
“HIGH” to “LOW” when the system detects distorted music sounds.
“NODEVICE”
• The USB mass storage device is not connected. Examine the
connection.
Memory reset (Initialisation)
When the following situations occur, refer to the instructions below
to reset the memory:
• There is no response when buttons are pressed.
• You want to clear and reset the memory contents.
To reset the memory
1
Disconnect the AC mains lead.
(Wait 3 minutes before you continue with step 2.)
2
While you press and hold [1] on the main unit, connect the
AC mains lead again.
“– – – – – – – –” shows on the display panel.
3
Release [1].
All the settings are set back to the factory preset.
It is necessary to set the memory items again.
■
USB
The USB mass storage device or the contents in it cannot be read.
• The format of the USB mass storage device or the contents in
it is/are not compatible with the system.
• USB mass storage devices with storage capacity of more than
32 GB cannot work in some conditions.
Slow operation of the USB mass storage device.
• Large content size or large memory USB mass storage device takes
longer time to read.
RQTX1290
10
10
Maintenance
To clean this system, wipe with a soft, dry cloth.
• Never use alcohol, paint thinner or benzine to clean this system.
• Before using chemically treated cloth, read the instructions that came
with the cloth carefully.
 Loading...