

Page 1
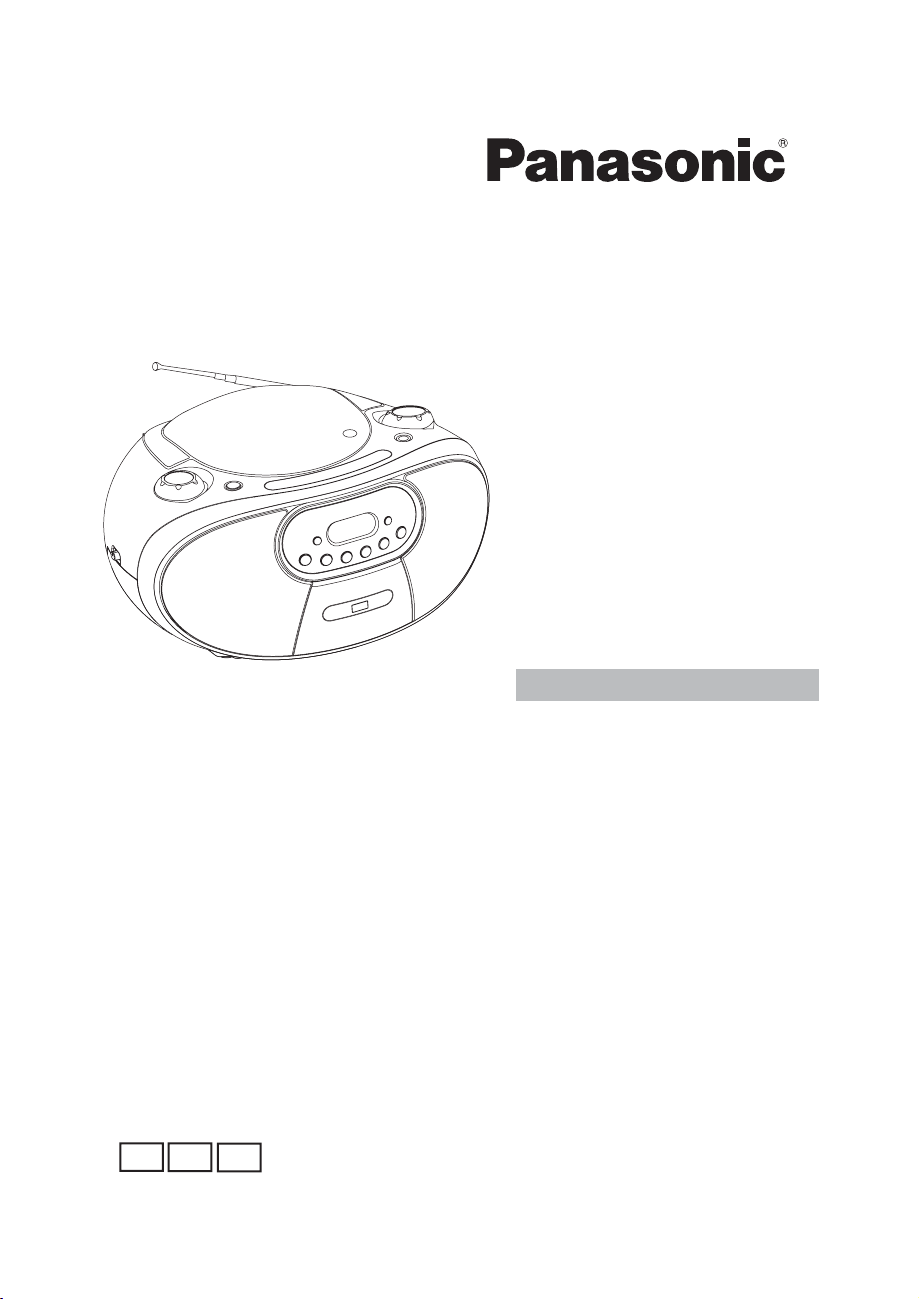
Portable Stereo CD System
Thank you for purchasing this product.
For optimum performance and safety, please read
these instructions carefully.
Please keep this manual for future reference.
Operating Instructions
Model No. RX-DU10
Table of contents
Caution for AC mains lead................3
Supplied accessory............................4
Safety precautions.............................4
Power supply......................................5
Control reference guide....................6
General operation..............................7
CD play................................... ..........7
MP3 CD operation.............................8
Program play.....................................9
USB.................................................10
Listening to other sources............10
Using the FM/AM radio....................10
Maintenance......................................10
Troubleshooting guide....................11
Specifi cations.....................backcover
GA
GJ
GS
VQT4K90
Page 2
CLASS 1
LASER PRODUCT
IEC60825-1:2001
CAUTION
This product contains a laser diode of higher class than 1.
To ensure continued safety, do not remove any covers or attempt to gain access to the
inside of the product. Refer all servicing to qualified personnel.
WARNING:
To reduce the risk of fire, electric shock or product damage,
• Do not expose this unit to rain, moisture, dripping or splashing.
• Do not place objects fi lled with liquids, such as vases,on this unit.
• Use only the recommended accessories.
• Do not remove covers.
• Do not repair this unit by yourself. Refer servicing to qualifi ed service personnel.
CAUTION!
To reduce the risk of fire, electric shock or product damage,
• Do not install or place this unit in a bookcase, built-in cabinet or in another confi ned space.
Ensure the unit is well ventilated.
• Do not obstruct the unit’s ventilation openings with newspapers, tablecloths, curtains, and
similar items.
• Do not place sources of naked fl ames, such as lighted candles, on this unit.
This unit is intended for use in tropical climates.
Install this unit so that the AC mains lead can be unplugged from the socket outlet immediately
if any problem occurs.
The mains plug of the power supply cord
shall remain readily operable.
To completely disconnect this unit from the
AC Mains, disconnect the power supply cord
plug from AC receptacle.
This unit may receive radio interference
caused by mobile telephones during use. If
such interference occurs, please increase
separation between this unit and the mobile
telephone.
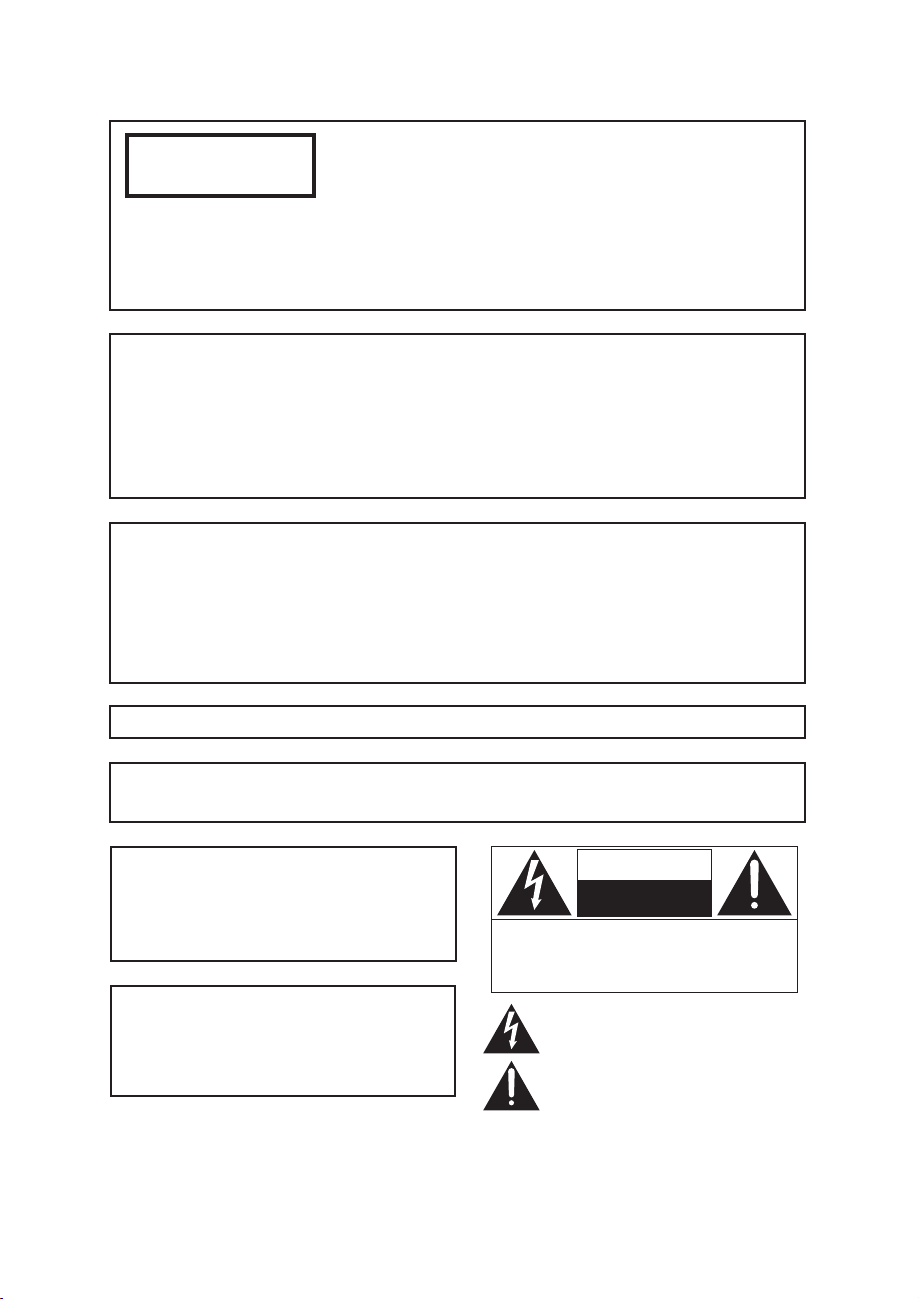
CAUTION : TO REDUCE THE RISK OF ELECTRIC
CAUTION
RISK OF ELECTRIC SHOCK
NOT OPEN
DO
SHOCK, DO NOT REMOVE SCREWS.
NO USER-SERVICEABLE PARTS
INSIDE.
REFER SERVICING TO QUALIFIED
SERVICE PERSONNEL.
The lightning flash with arrowhead symbol, within an
equilateral triangle, is intended to alert the user to the
presence of uninsulated “dangerous voltage” within
the product’s enclosure that may be of sufficient
magnitude to constitute a risk of electric shock to persons.
The exclamation point within an equilateral triangle is
intended to alert the user to the presence of important
operating and maintenance (servicing) instructions in
the literature accompanying the appliance.
VQT4K90
2
Page 3
Caution for AC mains lead
(When using the moulded three pin
mains plug)
For your safety, please read the following text
carefully.
This appliance is supplied with a moulded
three pin mains plug for your safety and convenience.
A 5-ampere fuse is fitted in this plug.
Should the fuse need to be replaced please
ensure that the replacement fuse has a rating
of 5-ampere and that it is approved by ASTA
or BSI to BS1362.
Check for the ASTA mark or the BSI mark
on the body of the fuse.
If the plug contains a removable fuse cover
you must ensure that it is refitted when the
fuse is replaced.
If you lose the fuse cover the plug must not be
used until a replacement cover is obtained.
A replacement fuse cover can be purchased
from your local dealer.
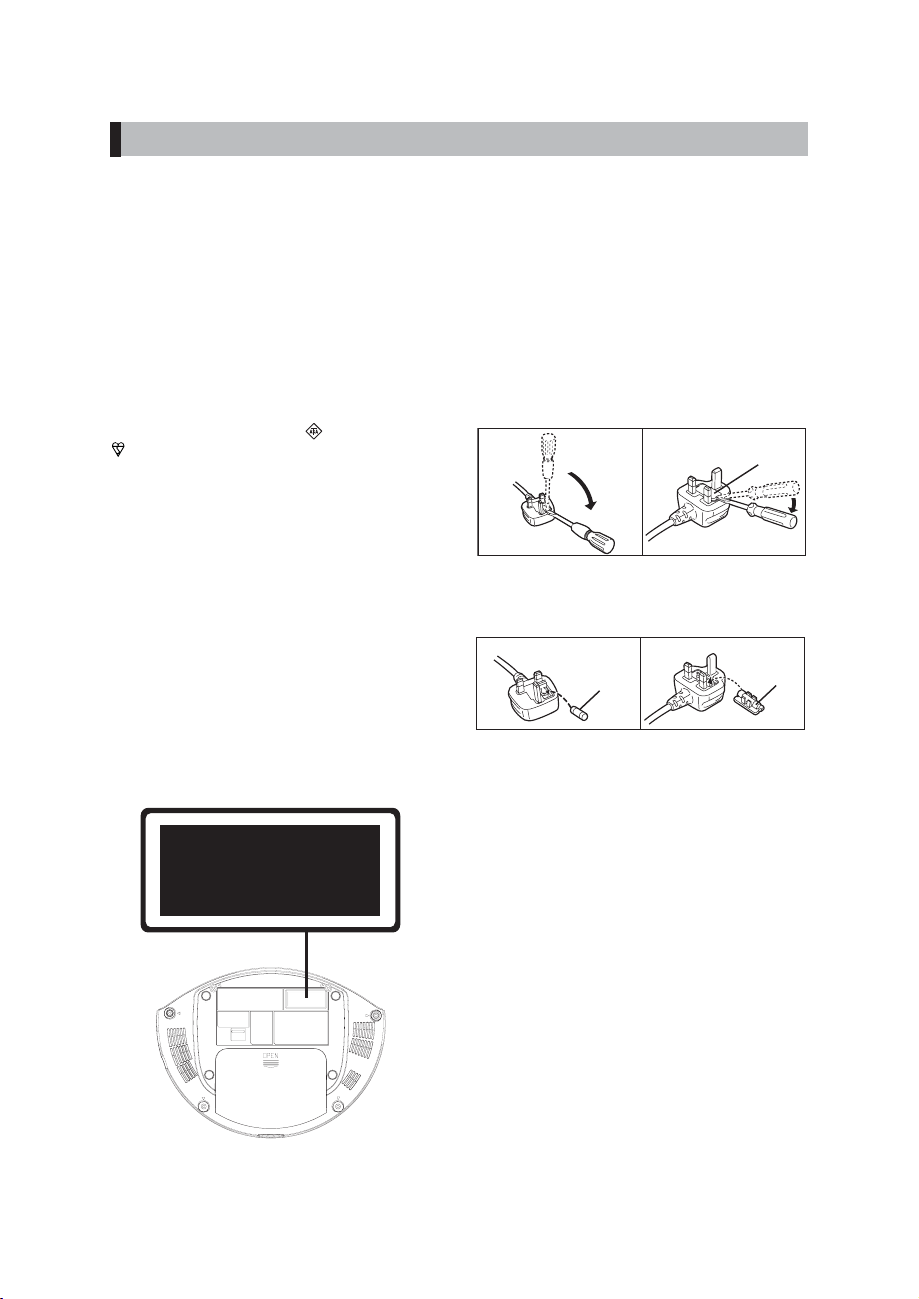
Before use
Remove the connector cover.
How to replace the fuse
The location of the fuse differ according to the
type of AC mains plug(figures A and B). Confirm the AC mains plug fitted and follow the instructions below.
Illustrations may differ from actual AC mains
plug.
1. Open the fuse cover with a screwdriver.
Figure A
2. Replace the fuse and close or attach the
fuse cover.
Figure A
Fuse
(5 ampere)
Figure B
Figure B
Fuse cover
Fuse
(5 ampere)
CLASS 1
LASER PRODUCT
VQT4K90
3
Page 4
Supplied accessory
Safety precautions
Please check and identify the supplied accessory.
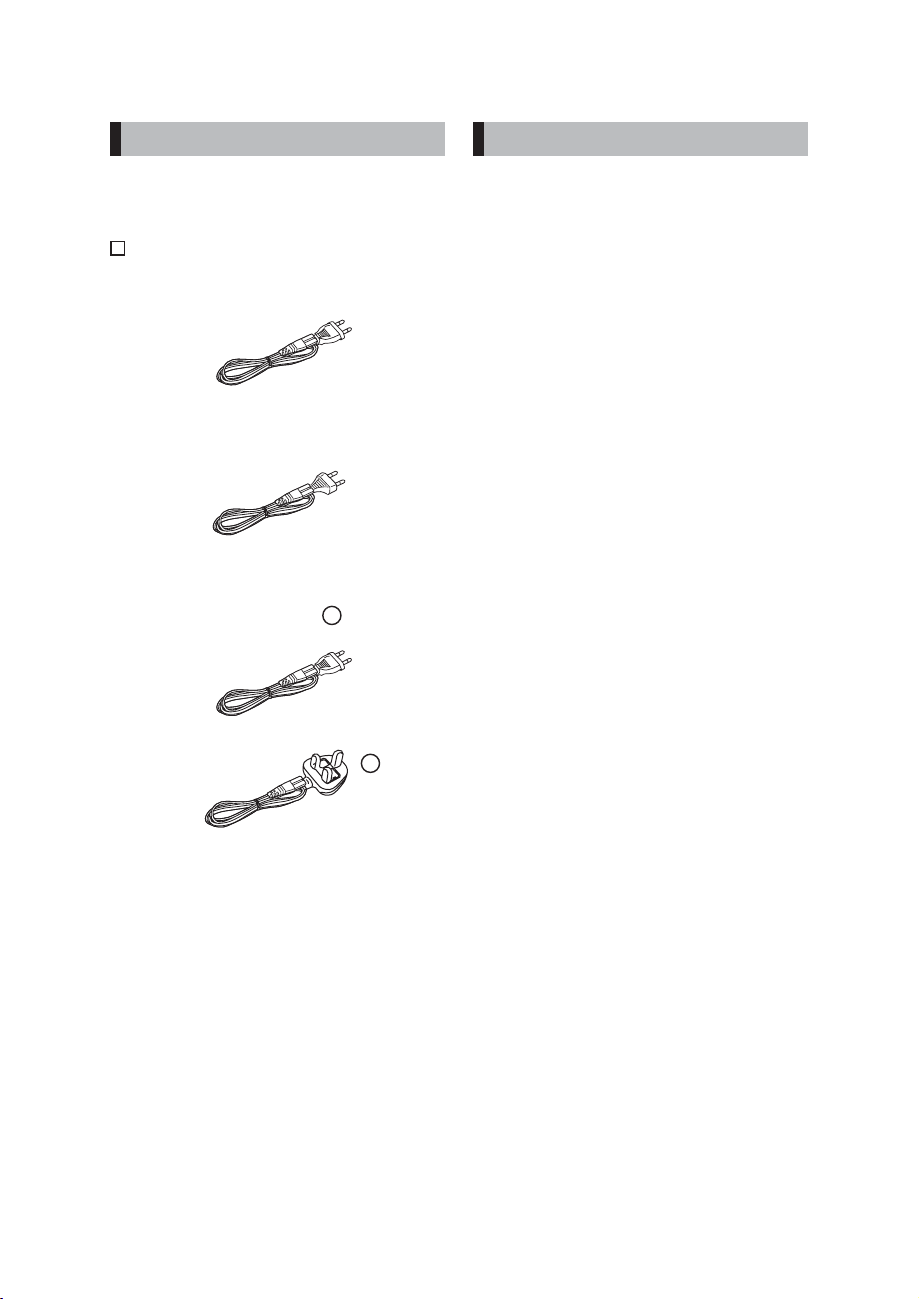
AC mains lead
1 For South East Asia and Hong Kong
1 For Thailand
2 For Middle East and South Africa
• In Saudi Arabia always use
.
A
A
• Avoid using or placing this unit near sources of
heat. Do not leave it in an automobile exposed
to direct sunlight for a long time with the doors
and windows closed as this may deform the
cabinet.
• Avoid cuts, scratches, or poor connections in the
AC mains lead, as they may result in possible
fi re or electric shock hazard. Also, excessive
bending, pulling or splicing of the lead should
be avoided.
• Do not unplug the AC mains lead by pulling on
the lead. To do so may cause premature failure
or shock hazard.
• Do not operate this unit in a bathroom, as a
potential shock hazard may result.
• When not in use, disconnect the AC mains lead
from the household mains socket.
• Product Identifi cation Marking is located on the
bottom of the unit.
VQT4K90
4
Page 5

Power supply
AC Power
Connect the AC mains lead firmly to the unit
and the household mains socket.
To household
mains socket
AC mains lead
(included)
Note:
Use the AC mains lead that matches the socket for the area you live in.
• In Saudi Arabia, always use the 3-pin AC mains
lead.
Battery power
Note:
• The installed batteries are automatically
disconnected when the mains lead is connected
to the unit.
• The function selector switch does not separate
entire unit from mains even if in “OFF”
position.
• With the consuming of the batteries, the sound
may become distorted or weak, or the unit may
not perform functions correctly. When it occurs
replace the batteries in time.
CAUTION
• Danger of explosion if battery is incorrectly
replaced. Replace only with the type
recommended by the manufacturer.
• When disposing the batteries, please
contact your local authorities or dealer and
ask for the correct method of disposal.
Use of batteries
• If this unit is not used for a long period of
time or is used only from an AC power
source,remove all the batteries to prevent
potential damage due to possible battery
leakage.
• Do not mix old and new batteries.
• Do not use different types of batteries at the
same time.
• Do not take apart or short circuit the
batteries.
• Do not attempt to recharge alkaline or
manganese batteries.
• Do not use batteries if the covering has been
peeled off.
• Do not heat or expose to fl ame.
• Do not leave the batteries in a car exposed
to direct sunlight for a long period of time
with doors and windows closed.
• Mishandling of batteries can cause
electrolyte leakage,which may cause a
fi re.
1 Open the battery compartment.
2 Insert six 1.5V R14/LR14 batteries (not
included) with correct polarity (+/-) as
indicated.
3 Close the battery compartment.
VQT4K90
5
Page 6

Control reference guide
1
9
10
11
2
3
4
5
6
7
8
1. Bass button (D.BASS)
2. Volume control (VOLUME)
3. Display
4. Headphones jack ( )
5. Function selector switch (CD/USB, RADIO,
MUSIC PORT, OFF)
6. CD function button (CD)
7. Program/Folder select button (PROGRAM/
FOLDER)
8. USB function button (USB)
17
12
13
14
15
16
9. Tuning control (TUNING)
10. CD compartment lid (q OPEN/CLOSE)
11. Music port jack (MUSIC PORT)
12. Repeat/Random button
(REPEAT/ RANDOM)
13. Play/Pause button (i PLAY/PAUSE)
14. Stop button (n STOP)
15. Skip/Search up or down buttons (e,
f)
16. USB port (
5V 500mA)
19
20
18
17. Frequency indication window
18. Band selector switch (BAND)
19. Handle
20. Telescopic antenna
21. Socket for the power cord (AC MAINS~)
22. Battery compartment lid
VQT4K90
6
21
22
Page 7

General operation
CD play
Adjusting the volume
Turn the VOLUME control.
Expanding the bass sound
Press [D.BASS] to ZON to enhance the bass
sound.
Headphone
Plug type:ø3.5 mm stereo (not included).
• Listening at full volume for long periods may
damage the user’s ears.
• Excessive sound pressure from earphones and
headphones can cause hearing loss.
• Be sure to use the recommended headphones.
Use compact discs bearing the
symbol shown as right. In addi-
tion to conventional 12cm CDs,
this system can be used to play 8cm CDs without an adapter.
Basic play
1 Set function selector switch to [CD/
USB].
2 Press [CD].
3 Press [q OPEN/CLOSE] to open the disc
compartment and then load the disc with
the label facing up.
4 Press [q OPEN/CLOSE] again to close.
5 Press [i PLAY/PAUSE] to start play.
6 Press [n STOP] to end disc play.
7 Set function selector switch to [OFF] to
turn the CD player off .
Note:
Do not open the CD compartment during disc
play.
Always press [n STOP] and wait for the disc
to stop rotating before opening the CD compartment.
This unit can play back the CD-R/RW as well.
However, some CD-R/RW can not be played
back depending on the recording conditions.
Notes on handling compact discs
• Do not expose the disc to direct sunlight, high
humidity or high temperature for extended
periods of time.
• Discs should be returned to their cases after
use.
• Do not apply paper or write anything on the
disc surface.
• Handle the disc by its edge. Do not touch
the playing surface (glossy side).
• Fingerprints and dust should be carefully
wiped off from the playing surface of the
disc with a soft cloth.
Wipe in a straight motion from the center to
the outside of the disc.
• Never use chemicals such as record cleaning
sprays, antistatic sprays or fl uids, benzene
or thinner to clean compact discs.
VQT4K90
7
Page 8

Pause play
Press [i PLAY/PAUSE] during play. Press
the button again to resume play.
Skip tracks
Press [e] or [f].
MP3 CD operation
This unit can play the CD-R/RW that has recorded music data, MP3 files. Before playing
MP3 CD, please read the following.
Search (forward/reverse)
Press and hold [e] or [f] during play.
Various play mode
Press [REPEAT/RANDOM] repeatedly to select a various play mode available. Each time
the button is pressed, the mode changes as
below:
[CD]
“REPEAT 1” appears
(Repeat one track)
v
Released
(Normal play)
[MP3] [USB]
“REPEAT 1” appears
(Repeat one track)
Released
(Normal play)
v
v
“RANDOM” appears
(All tracks on the disc
are played randomly.)
“REPEAT” appears
v
(Repeat all tracks)
v
“RANDOM” appears
v
(All tracks on the disc
are played randomly.)
“REPEAT FOLDER”
v
appears
(Repeat all tracks in
the folder)
v
v
“REPEAT” appears
(Repeat all tracks)
MP3 CD information
• MP3 CD is the disc that standardized by
ISO9660, its file name must have the extension
letters, “.MP3” or “.mp3”.
• MPEG Layer-3 audio coding technology
licensed from Fraunhofer IIS and Thomson.
• Standard, sampling frequency, and the bit
rate:
MP3 files:
MPEG-1 Audio
32 kHz, 44.1 kHz, 48 kHz
32 kbps - 320 kbps (constant bit rate or variable
bit rate)
• The directory and fi le names of the MP3 CD
must be corresponded to the ISO standardized
files.
• Single-session disc can be played back. As for
multi-session disc, only the first session can
be played back.
• This unit can recognize up to 99 folders or 999
files per disc. The CD with 100 folders or 1000
files and over is not available to this unit.
• This unit can access up to 8 folder directories.
9 folder directories or above may not be
accessed.
• MP3 CD may not be played in the recorded
order.
• Music section in “CD Extra” can be played back,
not Data section.
• Mixed CD cannot be played back.
• Some MP3s may not be played due to the
condition of the disc or recording.
Note:
• Random play will not be selected during
programmed play.
VQT4K90
8
Page 9

MP3 CD directory sample:
x
Play order: song01vsong02v... song14
Program play
MP3 CD
Folder number F01
F01 albumF01
song01.mp3
song02.mp3
song03.mp3
song04.mp3
song05.mp3
F02 albumF02
song06.mp3
song07.mp3
song08.mp3
song09.mp3
song10.mp3
F03 albumF03
song11.mp3
song12.mp3
Note:
• The CD-R/RW that has no music data or nonMP3 fi les cannot be played back.
• Do not make an empty folder. It may not work
correctly.
• In this model, recommend recording setting is
128 kbps of fi xing bit rate. If fi les are recorded
in other bit rate (for example: 320 kbps) or in
variable bit rate, track-jump may sometimes
happen according to recording conditions.
There is no MP3 file.
The unit skips it.
douc01.doc
photo01.jpg
F04 albumF04
song13.mp3
song14.mp3
Basic play
1 Load the MP3 CD.
(
P.7 Step1 to Step4)
2 Press [i PLAY/PAUSE] to start play.
3 Press [PROGRAM/FOLDER].
While “FOLDER” blinks on the display,
press [e] or [f] to select the folder.
4 When the fi le number appears, press [e]
or [f] to select a file.
5 Press [n STOP] to stop the play.
Note:
• If there is no music data, “no” appears.
• Only select the folder in playing mode.
Up to 20 tracks on a disc can be programmed
for play in any order.
• Before programming procedure, set function
switch to [CD/USB] fi rst.
• The same track can be programmed more than
once.
[CD][MP3]
1 Press [n STOP].
2 Press [PROGRAM/FOLDER].
“PROGRAM” blinks on the display.
Press [e] or [f] to select desired
3
track.
4 Press [PROGRAM/FOLDER].
Repeat steps 3 - 4 to program additional
tracks.
5 Press [i PLAY/PAUSE] to start play.
• Any attempt to program more than 20 tracks
will result in “FUL” appears.
• To cancel program play, press [n STOP]
in stop mode.
Checking the program
Press [PROGRAM/FOLDER] repeatedly when
“PROGRAM” remains lit in stop mode.
Adding to the program
1 In stop mode, press [PROGRAM/FOLDER]
repeatedly until “00” is displayed.
2 Select a track as explained above.
3 Press [PROGRAM/FOLDER].
Changing a track
1 In stop mode, press [PROGRAM/FOLDER]
repeatedly until the program number to
be replaced is displayed.
2 Select a desired track as explained
above.
3 Press [PROGRAM/FOLDER].
Note:
Programmed details cannot be partially deleted or inserted.
VQT4K90
9
Page 10

USB
Listening to other sources
Before use
Connect the USB memory device to the USB
port of the unit correctly.
USB memory device
• Some USB memory devices cannot be used.
• Track must have the extension “.mp3” or
“.MP3”.
However, some cannot be recognized
depending on the folder structure.
• Maximum folder:99 folders
Maximum file in one folder:999 files
(not included)
Basic play
1 Set function selector switch to [CD/
USB].
2 Press [USB].
3 Press [i PLAY/PAUSE] to start play.
4 Press [PROGRAM/FOLDER].
While “FOLDER” blinks on the display,
press [e] or [f] to select the desired
folder.
5 When the fi le number appears press [e]
or [f] to select a file.
6 Press [n STOP] to end play.
7 To turn the USB player off, set function
selector switch to [OFF].
• If there is no fi le in the USB memory device, or
just some empty folders in the USB memory
device, “no” appears.
1 Connect the audio cable (not supplied) from
the audio output socket of a video/auxiliary
equipment to the MUSIC PORT jack. (Stereo
Mini Plug: ø3.5mm)
2 Set function selector switch to [MUSIC
PORT].
3 Follow the instructions supplied with the
other equipment.
Using the FM/AM radio
1
Set function selector switch to [RADIO].
2 Set [BAND] to “FM” or “AM”.
3 Turn [TUNING] to tune in a desired
station.
To improve reception
FM: Pull out the telescopic antenna and adjust
its position.
AM: Rotate the unit.
Maintenance
Cleaning the CD player lens
The lens should never be touched. If dust is
on the lens, blow it off using a camera lens
blower. (Consult your dealer.)
Cleaning the unit
Clean the outside of the unit with a clean soft
cloth, moistened with lukewarm water. Do not
use benzene, thinner or alcohol since they will
mar the finish of the surfaces.
Note:
Only select the folder in playing mode.
VQT4K90
10
Page 11

Troubleshooting guide
x
Before requesting service, make the following checks. If you are in doubt about some of the check
points, or if the solutions indicated in the chart do not solve the problem, consult your dealer for
instructions.
■ Common problems
No sound.
Turn the volume up.(
A “humming” sound can be heard during
play.
An AC mains lead or fl uorescent light is near
the unit. Keep other appliances and cords
away from the unit.
■ Discs
Display “no” or play will no start.
You have not inserted the disc correctly,
insert it correctly.
Disc may be dirty. Wipe it clean.
Replace the disc if it is scratched, warped,
or non-standard.
Condensation has formed: Wait 1 to 2 hours
for it to evaporate.
■ Radio
A beat sound is heard.
Turn the television off or move it away from
the unit.
A low hum is heard during AM broadcast.
Separate the antenna from other cables and
cords.
x P.7)
■ USB
The USB drive or its contents cannot be
read.
The USB drive format or its contents is/are not
compatible with the system, “no” is displayed.
Unplug the USB device and insert it again.
The USB host function of this product may
not work with some USB devices.
USB devices with storage capacity of more
than 8 gigabytes may not work in some
instances.
Slow operation of the USB device.
Large fi le size or high memory USB fl ash
drive takes longer time to read.
VQT4K90
11
Page 12

N
N
N
N
N
G
L
Specifi cations
AMPLIFIER SECTION
AMPLIFIER SECTIO
RMS MAX OUTPUT POWER (8Ω) 2W per ch
TOTAL RMS MAX OUTPUT POWER 4W
PMPO Output Power 50W
FM/AM TUNER SECTION
FM/AM TUNER SECTIO
Frequency range
AM 520 - 1610 kHz
FM 87.50 - 108.00 MHz
TERMINALS SECTION
TERMINALS SECTIO
Music port jack
Terminal Stereo, ø3.5mm jack
Headphone jack
Terminal Stereo, ø3.5mm jack
Recommend impedance 16-32Ω
CD SECTION
CD SECTIO
Disc played (8 cm or 12 cm)
CD (CD-DA)
CD-R/RW (CD-DA, MP3)
Sampling frequency
CD 44.1 kHz
MP3 32,44.1,48 kHz
Bit rate (MP3) 32-320 kbps
Pick up
Wave length(CD) 790 ± 25 nm
Laser power CLASS 1
Note:
Specifications are subject to change without
notice.
Mass and dimensions are approximate.
USB SECTION
USB SECTIO
USB standard USB 2.0 full speed
Media fi le format support MP3 (*.mp3)
USB device file system
FAT12, FAT16, FAT32
Playable USB Storage Media
USB Thumbdrives
USB port power 500mA (Max)
Sampling frequency 32,44.1,48 kHz
Bit rate 32-320 kbps
SPEAKER SECTION
SPEAKER SECTION
Speaker unit(s) 9cm, CORN type, 8Ω x 2
GENERAL
ENERA
Power consumption 14W
Standby power consumption Approx.0.8W
Power supply
AC
Battery DC 9 V (6 x R14/LR14)
Battery duration time
Approx. 12 hours
*Panasonic alkaline battery LR14 type
(Continuation playback of CD the volume at
the time of reproduction is about 70%)
Dimensions 291 mm x 146 mm x 243 mm
Mass Approx. 1.8 kg
Operating temperature range
0 °C to +40 °C
Operating humidity range
35% to 80% RH(no condensation)
For Thailand
For others 220 - 240V, 50/60 Hz
220V 50Hz
-If you see this symbol-
Information on Disposal in other Countries outside the
European Union
This symbol is only valid in the European Union.
If you wish to discard this product, please
contact your local authorities or dealer and ask
for the correct method of disposal.
Panasonic Corporation
En
Web Site: http://panasonic.net
VQT4K90
© Panasonic Corporation 2012
VQT4K90
SD0712JR0
12
 Loading...