

Page 1
Stereo Radio Cassette Recorder
Hand strap
Ring
A
-
+
Two R6/LR6,AA, UM-3 batteries
( Not included )
+
-
a
B
EmptyFull
C
DC IN 3V
K
AC adaptor
D
Plug type : 3.5mm Stereo
Ë
RL
XBS
A
A
A
Side A
Tab for Side B
Tab for Side A
Adhesive tape
E
RQ-A320A/RQ-A220
Instrucciones de funcionamiento
Nhctpykunr go ˙kcgjyataunn
Before connecting, operating or adjusting this product, please read
GC GU
Matsushita Electric Industrial Co., Ltd. pryy |
Web Site: http://www.panasonic.co.jp/global/
these instructions completely. Please keep this manual for future
reference.
Specifications
RADIO
Frequency range: AM; 520–1610 kHz
CASSETTE PLAYER/RECORDER
Track system: 4 track, 2 channel, stereo
Recording system: AC bias, magnet erase
Frequency range:
Playback 40–16000 Hz (j6 dB)
Recording 70–8000 Hz
Tape speed: 4.8 cm/s / 1.6 cm/s
GENERAL:
Input jack: STEREO MIC;
Output jack: PHONES
Power Output:
Speaker: 490 mWi490 mW
Earphones: 7 mWi7 mW (RMS…max)
Speaker: 4.5 cmk2
Power requirement:
Battery: DC 3 V
AC:
DC IN 3 V with optional Panasonic AC adaptor
[For\Saudi\Arabia\and\Kuwait] RP-AC32
FM; 87.50–108.00 MHz
0.6 mV (200–600 ≠)
i20 mW (RMS…max)
1.1 cmk1
(two R6/LR6, AA, UM-3 batteries)
(not available in some countries)
[For\others] RP-AC30
Texhn≠eckne xapaktepnctnkn
PALNOGPNEMHNK
¨actothsØ lnagaÎoh:
KACCETHSÆ GJEÆEP/LEKA
Iopmat Îagncn:
Cnctema Îagncn: golmafhn≠nbahne gepeme
¨actothsØ lnagaÎoh:
BocgponÎbelehne 40±16000 Fu (j6 lø)
„agncv 70±8000 Fu
Ckopoctv jehts: 4,8 cm/c / 1,6 cm/c
OøQNE CBELEHNR:
FheÎlo bxolhoe: STEREO MIC; 0,6 mB
FheÎlo bsxolhoe: PHONES
Bsxolhar moqhoctv:
Lnhamnk: 490 mBti490 mBt
Haywhnkn: 7 mBti7 mBt (makc. RMS)
Lnhamnk: 4,5 cmk2
Tpe°obahnr k gntahnd:
øatapeØkn: goctorhhsØ tok 3 B
(lbe °atapeØkn R6/LR6, AA, UM-3)
GepemehhsØ tok: goctorhhsØ tok 3 B
Ljr CaylobckoØ Apabnn n KybeØta
(b hekotopse ctpahs he goctabjretcr)
AM; 520± 1610 kFu
FM; 87,50±108,00 MFu
4 tpekob, 2 kahajob, ctepeo
hhsm tokom, mafhnthoe ctnpahne
(200± 600 Om)
i20 mBT (makc. RMS)
1,1 cmk1
c gpno°petaemsm logojhntejvho
cetebsm alagtepom Panasonic
Ljr lpyfnx
RP-AC32
RP-AC30
Operating Instructions
Cn
RQTT0518-5G
F0203TJ5014
Dimensions(WtHtD): 113.0k86.6k42.0 mm
Mass
(without batteries): (RQ-A320A) 225 g
(When used at 25 oC on a flat, stable
surface)
Alkaline dry cell battery:
Tape: About 24 hours (Earphones)
Radio: About 57 hours (Earphones)
Recording:
The play time may be less depending on
the operating conditions.
Note:
Specifications are subject to change without
notice.
Mass and dimensions are approximate.
PaÎmeps (WtBtF): 113,0k86,6k42,0 mm
Bec (°eÎ °atapeek): (RQ-A320A) 225 f
(Gpn ncgojvÎobahnn gpn temgepatype
25 oC ha pobhoØ yctoØ≠nboØ
gobepxhoctn)
Qejo≠hse cyxne ˙jemehts:
Kacceta: Okojo 24 ≠acob
Palnogpnemhnk: Okojo 57 ≠acob
„agncv: Okojo 20 ≠acob
Bpemr bocgponÎbelehnr moÒet °stv
mehvwe b Îabncnmoctn ot ycjobnØ
˙kcgjyataunn.
Gpnme≠ahne: Texhn≠eckne xapaktepnctnkn
mofyt °stv nÎmehehs °eÎ ybelomjehnr.
Bec n paÎmeps lahs gpn°jnÎntejvho.
Ctepeomafhntoja
Mauywnta Íjektpnk Nhlactpnaj Ko., Jtl.
1006 Kaloma, Ocaka, Rgohnr
Clejaho b TaØbahe
(RQ-A220) 211 g
About 14 hours (Speakers)
About 21 hours (Speakers)
About 20 hours (MIC)
(RQ-A220) 211 f
(Haywhnkn)
Okojo 14 ≠acob
(Lnhamnk)
(Haywhnkn)
Okojo 21 ≠acob
(Lnhamnk)
(MIC)
Plug in firmly.
Enchufe a
fondo.
Gjotho
golcoelnhnte.
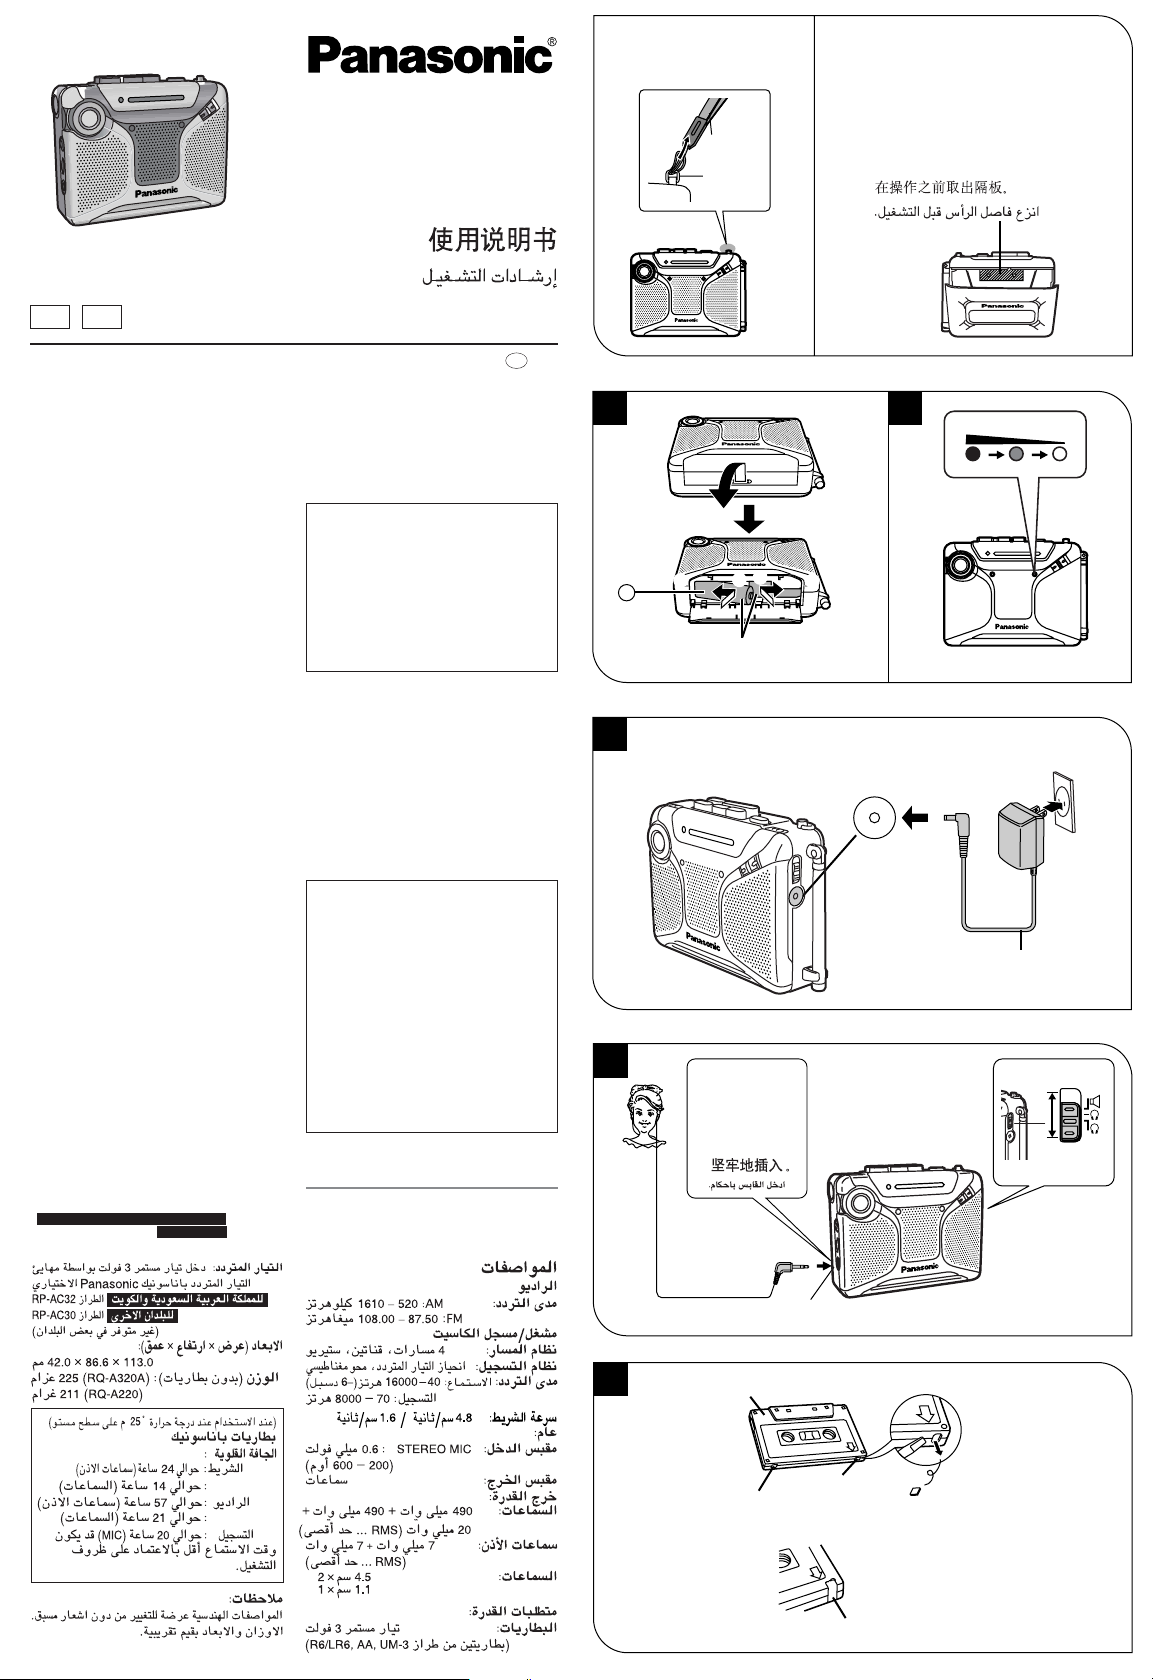
Remove the head spacer before
operation.
Antes de la puesta en
funcionamiento no se olivide de
quitar el espaciador de
protección de la cabeza.
Gepel ÎkcgjyatauneØ cjelyet
ylajntv gpeloxpahntejvhyd
gpokjalky c fojobkn.
Page 2
The illustrations show RQ-A320A.
Supplied Accessories
≥Stereo earphones
≥Stereo microphone (RQ-A320A only)
≥Hand strap
≥Carrying case (RQ-A320A only)
Power Sources
∫ Dry cell batteries A
Insert two R6/LR6, AA, UM-3 batteries.
a Press in and down towards the minus end.
∫ Battery condition indicator B
The [OPR/BATT] indicator lights during
operation.
The battery indicator fades and goes out as the
battery runs out.
Replace when the battery runs down.
∫ AC power operation C
Connect only Panasonic AC adaptor.
[For\Saudi\Arabia\and\Kuwait] RP-AC32
[For\others] RP-AC30
(not included, not available in some countries.)
The configuration of the AC adaptor differs
according to the area.
Before operation D
Use [!, Ë, Ë XBS] to select speaker sound
[!], earphone sound [Ë], or earphone sound
with the XBS function on [Ë XBS].
∫ Listening through stereo
earphones
Plug the included stereo earphones into [Ë].
If a gritty noise is heard, wipe away the dirt on
the plug.
∫ To listen with emphasized bass
Set [!, Ë, Ë XBS] to [Ë XBS].
Note:
≥
If the sound is distorted, turn down the volume.
≥You cannot make a recording nor listening
through the speaker with XBS effect.
ENGLISH
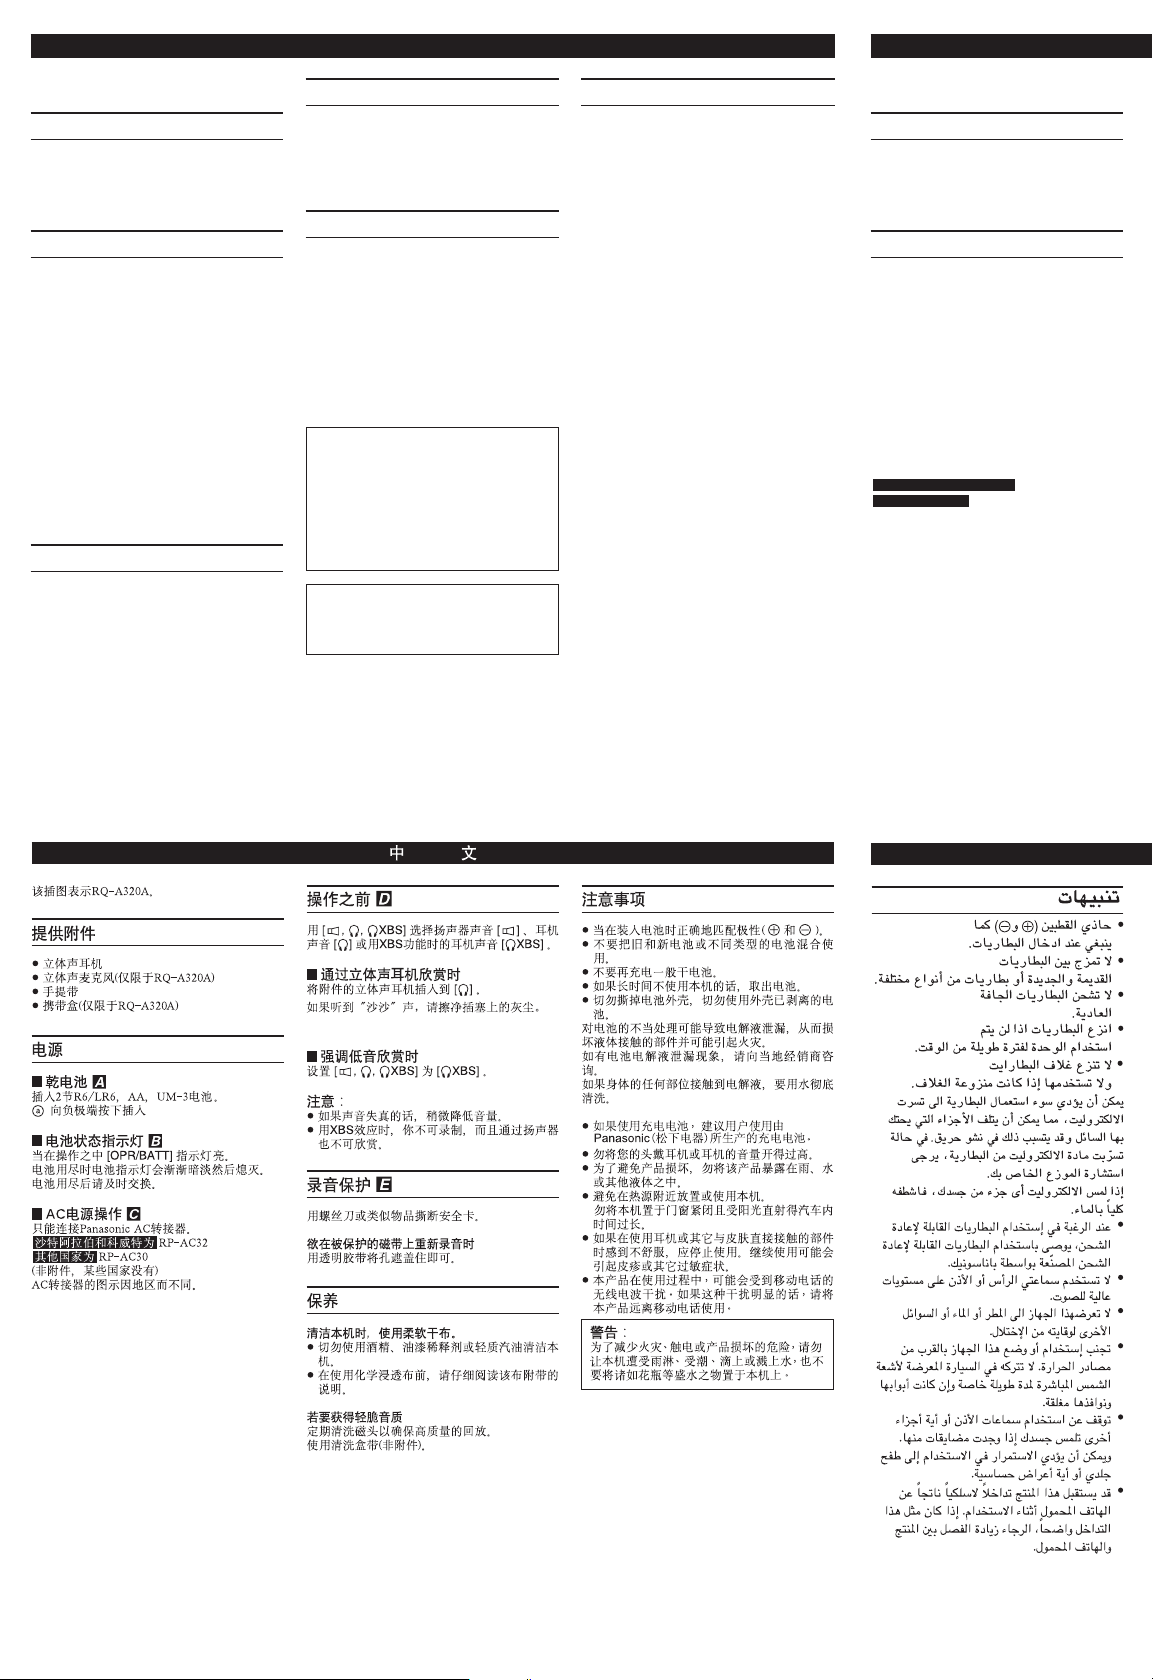
Erasure prevention E
Use a screwdriver or similar object to break out
the tab.
To re-record on a protected cassette
Cover the hole with adhesive tape.
Maintenance
To clean this unit, wipe with a soft, dry
cloth.
≥Never use alcohol, paint thinner or benzine to
clean this unit.
≥Before using chemically treated cloth, read
the instructions that came with the cloth
carefully.
For a cleaner crisper sound
Clean the heads regularly to assure good
quality playback. Use a cleaning tape (not
included).
WARNING:
TO REDUCE THE RISK OF FIRE,
ELECTRIC SHOCK OR PRODUCT
DAMAGE, DO NOT EXPOSE THIS
APPARATUS TO RAIN, MOISTURE,
DRIPPING OR SPLASHING AND THAT
NO OBJECTS FILLED WITH LIQUIDS,
SUCH AS VASES, SHALL BE PLACED
ON THE APPARATUS.
The socket outlet shall be installed near
the equipment and easily accessible or the
mains plug or an appliance coupler shall
remain readily operable.
Cautions
≥Align the poles (+ and -) properly when
inserting the batteries.
≥Do not mix old and new batteries or different
types of batteries.
≥Do not recharge ordinary dry cell batteries.
≥Remove the batteries if the unit is not to be
used for a long time.
≥Do not peel off the covering on batteries and
do not use if the covering has been peeled
off.
Mishandling of batteries can cause electrolyte
leakage which can damage items the fluid
contacts and may cause a fire.
If electrolyte leaks from the batteries, consult
your dealer.
Wash thoroughly with water if electrolyte comes
in contact with any part of your body.
≥If rechargeable batteries are to be used,
rechargeable batteries manufactured by
Panasonic are recommended.
≥Do not play your headphones or earphones at
a high volume.
≥To avoid product damage, do not expose this
product to rain, water or other liquids.
≥Avoid using or placing this unit near sources
of heat. Do not leave it in an automobile
exposed to direct sunlight for a long period of
time with doors and windows closed.
≥Discontinue use if you experience discomfort
with the earphones or any other parts that
directly contact your skin. Continued use may
cause rashes or other allergic reactions.
≥This product may receive radio interference
caused by mobile telephones during use. If
such interference is apparent, please increase
separation between the product and the
mobile telephone.
Las ilustraciones muestran el RQ-A320A.
Accesorios incluidos
≥Auriculares estéreo
≥Micrófono estéreo (sólo para RQ-A320A)
≥Pulsera
≥Estuche (sólo para RQ-A320A)
Alimentación
∫ Pilas secas A
IInserte dos pilas tamaño R6/LR6, AA, UM-3.
a Presione hacia adentro y hacia abajo en
dirección al polo negativo.
∫ Indicador del estado de las pilas B
El indicador [OPR/BATT] se enciende durante
el funcionamiento.
El indicador de la pila se desvanece y se
apaga al agotarse la pila.
Reemplace la pilas cuando se agote.
∫ Funcionamiento con CA C
Conecte solamente el adaptador de CA
Panasonic.
Para Arabia Saudí y Kuwait
Para otros países
(no incluido, no disponible en algunos países.)
La forma del adaptador de CA cambia según la
zona en la que va a ser utilizado.
RP-AC30
RP-AC32
Page 3

ESPAÑOL
PYCCKNÆ R„SK
Antes del funcionamiento D
Utilice [!, Ë, Ë XBS] para seleccionar
sonido de altavoz [!], de auriculares [Ë] o
sonido de auriculares con la función XBS en
[Ë XBS].
∫ Escuchando a través de
auriculares estereofónicos
Enchufe los auriculares estereofónicos en la
toma [Ë].
Si se oye un ruido áspero, limpie la suciedad
de la clavija.
∫ Para escuchar cono sonido bajo
enfatizado
Ponga [!, Ë, Ë XBS] en [Ë XBS].
Nota:
≥Si el sonido se distorsiona, baje el volumen
un poco.
≥Con el efecto XBS no podrá hacer una
grabación ni escuchar a través de los
altavoces.
Prevención contra el borrado E
Utilice un destornillador u objeto similar para
romper la lengüeta.
Para volver a grabar en una cinta de casete
protegida
Tape el agujero con cinta adhesiva.
Mantenimiento
Utilice un paño suave y seco para limpiar
este aparato.
≥Para limpiar este aparato, no utilice nunca
alcohol, diluyente de pintura ni bencina.
≥Antes de utilizar un paño impregnado
químicamente, lea con atención las
instrucciones suministradas con él.
Para obtener un sonido más claro
Limpie los cabezales con frecuencia para
garantizar una reproducción de calidad. Utilice
una cinta limpiacabezales (no incluida).
Precauciones
≥Alinee las polaridades (+ y -)
correctamente cuando inserte la pila.
≥No mezcle pilas viejas y nuevas o tipos
diferentes de pilas.
≥No recargue pilas secas ordinarias.
≥Quite todas las pilas si el aparato no va a ser
utilizado durante mucho tiempo.
≥No desprenda el recubrimiento protector de
las pilas y no las utilice si se ha desprendido
el recubrimiento.
El mal manejo de las pilas puede causar fugas
en el electrolito, lo que puede dañar objetos
que entran en contacto con él y puede causar
un incendio.
Si hay fuga del electrolito de las pilas, consulte
con su distribuidor.
Lave concienzudamente con agua si el
electrolito entra en contacto con cualquier parte
de su cuerpo.
≥Si van a utilizarse baterías recargables, se
recomiendan las fabricadas por Panasonic.
≥No haga funcionar sus auriculares a alto
volumen.
≥Para evitar que se estropee el aparato, no lo
exponga a la lluvia, al agua ni a otros
líquidos.
≥Evite utilizar o poner este aparato cerca de
fuentes de calor. En especial, no lo deje en el
interior de un automóvil expuesto a la luz
directa del sol durante mucho tiempo estando
sus puertas y ventanas cerradas.
≥Deje de utilizarlo si experimenta molestias
con los auriculares o con otras partes que
estén en contacto directo con la piel. El uso
continuo puede producir erupciones u otras
reacciones alérgicas.
≥Este producto puede tener interferencias
causadas por teléfonos móviles durante su
utilización. Si tales interferencias resultan
evidentes, aumente la separación entre el
producto y el teléfono móvil.
AVISO:
PARA REDUCIR EL RIESGO DE
INCENDIOS, DESCARGAS ELÉCTRICAS
O DAÑOS EN ESTE APARATO, NO LO
EXPONGA A LA LLUVIA, HUMEDAD,
GOTEO NI SALPICADURAS, Y NO
COLOQUE ENCIMA DE ÉL OBJETOS
QUE CONTENGAN LÍQUIDOS COMO,
POR EJEMPLO, FLOREROS.
Ha pncyhke gokaÎaha molejv RQ-A320A.
Gpnjafaemse gpnhaljeÒhoctn
≥Ctepeohaywhnkn
≥Ctepeomnkpoioh (tojvko ljr RQ-A320A)
≥Pemewok ljr gepehockn
≥Iytjrp ljr gepehockn (tojvko ljr
RQ-A320A)
Ncto≠hnkn gntahnr
∫ Cyxne °atapeØkn gntahnr A
Bctabvte lbe °atapeØkn paÎmepa R6/LR6,
AA, UM-3.
a BctabjrØte cyxoØ Îjemeht cha≠aja
otpnuatejvhsm gojdcom.
∫ Nhlnkatops ypobhr Îaprlkn
°atapeek
Nhlnkatop [OPR/BATT] fopnt bo bpemr
iyhkunohnpobahnr.
Nhlnkatop °atapeek goctegehho tyckheet n
fachet go mepe tofo, kak °atapeØkn paÎ
prÒadtcr.
„amehnte °atapeØkn, kofla ohn paÎprlrtcr.
B
∫ Pa°ota ot cetn gepemehhofo
C
toka
Golkjd≠nte tojvko ceteboØ alagtep
Panasonic.
Ljr CaylobckoØ Apabnn n KybeØta
Ljr lpyfnx
(he gpnjafaetcr, b hekotopsx ctpahax b
gpolaÒe het.)
Iopma cetebofo alagtepa paÎjn≠aetcr b
cootbetctbnn c paØohom.
RP-AC30
RP-AC32
Gepel ha≠ajom ˙kcgjyataunn
D
BocgojvÎyØtecv o°oÎha≠ehnrmn [!, Ë,
Ë XBS], ≠to°s bs°patv peÒnm Îby≠ahnr
≠epeÎ lnhamnkn [!], Îby≠ahnr ≠epeÎ
haywhnkn [Ë] njn Îby≠ahnr ≠epeÎ
haywhnkn c bkjd≠ehhoØ iyhkuneØ
[Ë XBS].
∫ Gpocjywnbahne ≠epeÎ
ctepeohaywhnkn
Golkjd≠nte gpnjafaemse ctepeohaywhnkn
b fheÎlo [Ë].
Ecjn cjsweh ckpng, cotpnte ÎafprÎhehne
co wtekepa.
∫ Ljr gpocjywnbahnr c
ycnjehhsm hnÎko≠actothsm
lnagaÎohom
Yctahobnte gepekjd≠atejv [!, Ë, Ë XBS]
b gojoÒehne [Ë XBS].
Gpnme≠ahnr:
≥Ecjn Îbyk nckaÒaetcr, hemhofo y°abvte
fpomkoctv.
≥Bs he moÒete bsgojhrtv Îagncv njn
gpocjywnbahne ≠epeÎ fpomkofobopntejv c
ncgojvÎobahnem ˙iiekta XBS.
„aqnta ot ctnpahnr E
BocgojvÎyØtecv otbeptkoØ njn golo°hsm
gpelmetom ljr tofo, ≠to°s ylajntv
gjactnhy gpotnboctnpadqeØ Îaqnts.
¨to°s ocyqectbntv Îagncv ha
Îaqnqehhyd kaccety
„akjeØte otbepctne jngkoØ jehtoØ.
Yxol
Ljr o≠nctkn lahhofo yctpoØctba
ncgojvÎyØte mrfkyd cyxyd tkahv.
≥Hnkofla he ncgojvÎyØte cgnpt,
pactbopntejv ljr kpackn njn °ehÎnh ljr
≠nctkn yctpoØctba.
≥Gepel ncgojvÎobahnem xnmn≠eckn
o°pa°otahhoØ tkahn bhnmatejvho
gpo≠ntaØte nhctpykunn go gpnmehehnd
˙toØ tkahn.
¨to°s Îbyk octabajcr ≠nctsm
Pefyjrpho o≠nqaØte fojobkn, ≠to°s
o°ecge≠ntv xopowee ka≠ectbo
bocgponÎbelehnr. NcgojvÎyØte ≠nctrqyd
kaccety (he gpnjafaetcr).
Meps gpeloctopoÒhoctn
≥Gpn yctahobke °atapeek co°jdlaØte
gojrphoctv (+ n -).
≥He cmewnbaØte ctapse n hobse °atapeØkn
njn °atapeØkn paÎhsx tngob.
≥He gepeÎaprÒaØte o°s≠hse cyxne
°atapeØkn.
≥Ecjn aggapat he ncgojvÎyetcr b te≠ehne
ljntejvhofo gepnol bpemehn, ylajnte bce
°atapeØkn.
≥He chnmaØte o°ojo≠ky °atapeek n he
ncgojvÎyØte °atapeØkn co chrtoØ
o°ojo≠koØ.
Hegpabnjvhoe o°paqehne c °atapeØkamn
moÒet bsÎbatv yte≠ky ˙jektpojnta, ≠to
moÒet gobje≠v Îa co°oØ gobpeÒlehne
letajeØ aggapata n boÎfopahne.
B cjy≠ae yte≠kn ˙jektpojnta
gpokohcyjvtnpyØtecv c Bawnm lnjepom.
Gpn gogalahnn ˙jektpojnta ha koÒy
tqatejvho cmoØte efo boloØ.
≥Gpn ncgojvÎobahnn gepeÎaprÒaemsx
°atapeek pekomehlyetcr gojvÎobatvcr
°atapeØkamn gponÎbolctba Panasonic.
≥He cjelyet gpocjywnbatv b Bawnx
fojobhsx tejeiohax njn haywhnkax ha
°ojvwoØ fpomkoctn.
≥Bo nΰeÒahne gobpeÒlehnr nÎlejnr he
golbepfaØte lahhsØ aggapat
boÎleØctbnd loÒlr, bols njn lpyfnx
ÒnlkocteØ.
≥NΰefaØte ncgojvÎobahnr njn
paÎmeqehnr ˙tofo aggapata boÎje
ncto≠hnkob tegja. B oco°ehhoctn, he
octabjrØte efo b abtomo°nje,
golbepÒehhom boÎleØctbnd gprmsx
cojhe≠hsx jy≠eØ b te≠ehne ljntejvhofo
gepnola bpemehn c Îakpstsmn lbeprmn n
okhamn.
≥Gpekpatnte gojvÎobahne yctpoØctbom,
ecjn bs ncgstsbaete lnckomiopt ot
haywhnkob njn jd°sx lpyfnx ≠acteØ,
kotopse hegocpelctbehho kacadtcr
baweØ koÒn. Ljntejvhoe ncgojvÎobahne
moÒet bsÎsbatv gorbjehne csgn njn
lpyfnx ajjepfn≠ecknx peakunØ.
≥Íto nÎlejne moÒet gpnhnmatv palno
gomexn, o°ycjobjehhse gepehochsmn
tejeiohamn. Ecjn takne gomexn
rbjrdtcr o≠ebnlhsmn, ybejn≠vte,
goÒajyØcta, pacctorhne meÒly nÎlejnem
n gepehochsm tejeiohom.
GPELYGPE·LEHNE:
LJR YMEHVWEHNR PNCKA
BO„HNKHOBEHNR GO·APA,
GOPA·EHNR ÍJEKTPN¨ECKNM
TOKOM NJN GOBPE·LEHNR
N„LEJNR HE GOLBEPFAÆTE
LAHHSÆ AGGAPAT BO„LEÆCTBND
LO·LR, BJAFN, øPS„F NJN
KAGEJV, N HE CTABVTE HA AGGAPAT
GPELMETS, HAGOJHEHHSE
·NLKOCTRMN, TAKNE, KAK BA„S.
Ljr Poccnn
“YctahobjehhsØ gponÎbolntejem b
goprlke g. 2 ct. 5 Ielepajvhofo
„akoha PI “O Îaqnte gpab
gotpe°ntejeØ” cpok cjyÒ°s nÎlejnr
pabeh 7 folam c lats gponÎbolctba gpn
ycjobnn, ≠to nÎlejne ncgojvÎyetcr b
ctpofom cootbetctbnn c hactorqeØ
nhctpykuneØ go ˙kcgjyataunn n
gpnmehnmsmn texhn≠ecknmn
ctahlaptamn.”
Gpnmep mapknpobkn:
±±1 A ±±±±±±±
Íjemehts kola:
„-nØ cnmboj– fol nÎfotobjehnr
(1± 2001 f., 2± 2002 f., 3± 2003 f., …);
4-sØ cnmboj– mecru nÎfotobjehnr
(A± rhbapv, B± iebpajv, …, L± leka°pv)
PacgojoÒehne mapknpobkn:
Bhytpehhrr ctopoha kpswkn
kaccethofo otceka
Page 4

To playback tapes F
F
5FF/CUE
6REW/REV
Speakers
∫STOP
Ë
(OFF)
TAPE
OFF
FM AM
PLAY
PAUSE
1
VOL
3
4
2
5
a
G
Speakers
Ë
TUNING
TAPE
OFF
FM AM
VOL
1
3
2
a
b
c
d
AM
FM
FM MODE
/
B.P.
STEREO
/
MONO
/
STEREO MIC (Plug type : 3.5mm Stereo)
H
∫STOP
Built-in MIC
STEREO MIC
(PLUG IN POWER)
Ë
(OFF)
TAPE
OFF
FM AM
PAUSE
REC
FM MODE
/
B.P.
STEREO
/
MONO
/
1
REC
MODE
NORM
3X
VOL
4
2
3
5
6
a
Only normal position tapes can be used.
Follow steps 1–5
a Forward side
∫ To stop playback
Press [∫, STOP].
∫ To temporarily stop playback
Set [PAUSE] to PAUSE.
To resume playback, set it OFF position.
∫ To fast forward and rewind
Press [5, FF/CUE] or [6, REW/REV].
The tape will rapidly move in the direction of
the arrow.
≥When the tape reaches the end after fast
forward or rewind, press [∫, STOP] to
release the button.
∫ Cue and review
Sound can be monitored at a high speed for as
long as the [5, FF/CUE] (cue) or
[6, REW/REV] (review) is held down during
playback.
When the button is released, normal playback
will start.
∫ Auto Stop
During playback or recording, when the tape
reaches its end, the automatic stop system will
release the playback and record buttons and
automatically turn off the unit.
Note:
Do not open the cassette compartment cover
during tape operation.
Page 5

ENGLISH ESPAÑOL
TAPE
FM
AM
TAPE
TAPE
FMAMFM
AM
REC
3X
3X
REC
TAPE
FM
AM
TAPE
TAPE
FM
AMFMAM
REC
Listening to the radio G
Follow steps 1–3
In step 2, when a station is tuned in (a).
∫ To stop the radio
Set [ (OFF), , ] to [ (OFF)].
Note:
If you set [ (OFF), , ] to []or
[ ] during tape operation, the button will not
be released. In this case, press [∫, STOP] to
release the button.
[RQ-A220]
The earphones must be plugged-in during FM
broadcasting regardless listening from speaker
out or earphones.
∫ Adjusting the antennas
AM: Try various directions to obtain optimum
reception. G-b
FM: [RQ-A220]
Extend the earphone cord. G-c
FM: [RQ-A320A[
FM: Pull out the telescopic antenna and adjust
its length and angle for optimum
reception. G-d
∫ To receive FM broadcast clearly
To receive FM stereo broadcasts, set
[FM MODE/B.P.] to [STEREO/I].
If reception is poor (excessive noise), set to
[MONO/II]. This will reduce noise, however,
sound becomes monaural.
To make recordings H
Only normal position tapes can be used.
The sound may not be recorded properly if high
position tapes and metal position tapes are
used with this unit.
∫ To record through the built-in
microphone (monaural)
Follow steps 1–6
a Recording side
In step 6, [1, PLAY] is also depressed with
[¥,].
Use a tape with tabs in place.
The recording level is automatically adjusted.
∫ To stop recording
Press [∫, STOP].
∫ To temporarily stop recording
Set [PAUSE] to PAUSE.
To resume recording, set it to OFF position.
∫ To record the radio
Tune the station then do steps 1, 3–6.
∫ Long play recording
NORM: Normal recording
: Long play recording
180 minutes worth of material can be recorded
onto a 60 minute tape by setting [RECMODE]
to [].
Play tapes recorded with long play only on the
decks with the same function.
∫ To record through an external
microphone (
[RQ-A220] not included)
Plug the external stereo microphone into
[STEREO MIC (PLUG IN POWER)].
≥You can use a condenser microphone with or
without a built-in power supply.
≥The built-in microphone will be automatically
disconnected.
∫ Follow up recording
Recording can be started during playback by
simply pressing [¥,].
∫ Monitoring
The sound can be heard with a stereo
earphones plugged into [Ë].
Note:
≥When there is too much interference during
AM recording set [FM MODE/B.P.] to
[STEREO/I] or [MONO/II] whichever yields
less noise.
[RQ-A320A[ Included
Para reproducir la cinta F
En este aparato sólo pueden utilizarse cintas
normales.
Siga los pasos 1–5
a Lado de avance
∫ Para parar la reproducción
Pulse [∫, STOP].
∫ Para parar la temporalmente la
reproducción
Ponga [PAUSE] en PAUSE.
Para reanudar la reproducción, póngalo en la
posición OFF.
∫ Para avanzar rápidamente y
rebobinar la cinta
Pulse [5, FF/CUE] o [6, REW/REV].
La cinta se moverá rápidamente en la
dirección de la flecha.
≥Cuando la cinta llegue al final después del
avance rápido o del rebobinado, pulse
[∫, STOP] para dejar libre el botón.
∫ Localización progresiva y
regresiva
El sonido podrá comprobarse a alta velocidad
mientras se mantenga pulsado [5, FF/CUE]
(localización progresiva) o [6, REW/REV]
(localización regresiva) durante la
reproducción.
Cuando se deje de pulsar el botón, la
reproducción normal empezará.
∫ Parada automática
Durante la reproducción o la grabación,
cuando la cinta llegue al final, el sistema de
parada automática dejará libres los botones de
reproducción y grabación, y el aparato se
apagará automáticamente.
Nota:
No abra la tapa del compartimiento del casete
durante la operación de la cinta.
Escuchando la radio G
Siga los pasos 1–3
En el paso 2, cuando se sintonice una emisora
(a).
∫ Para parar la radio
ponga [ (OFF), , ] en [
(OFF)].
Nota:
Si Vd. pone [ (OFF), , ] en
[]o []durante la operación de cinta, el
botón no se soltará. En este caso, pulse
[∫, STOP] para soltar el botón.
[RQ-A220]
Los auriculares deben estar enchufados para
las radiodifusiones en FM, sin tenerse en
cuenta si se va a escuchar por los altavoces o
por los auriculares.
∫ Ajustando las entenas
AM: Pruebe varias direcciones para obtener
una recepción óptima. G-b
FM: [RQ-A220]
Alargue el cable de los auriculares. G-c
FM: [RQ-A320A[
FM: Extienda la antena telescópica y ajuste su
longitud y ángulo hasta lograr la óptima
recepción. G-d
∫ Para recibir radiodifusión en FM
claramente
Para recibir radiodifusiones estereofónicas en
FM, ponga [FM MODE/B.P.] en [STEREO/I].
Si la recepción es pobre (excesivo ruido)
ponga en [MONO/II]. Esto reducirá el ruido,
sin embargo el sonido se convierte en
monaural.
Para grabar H
En este aparato sólo pueden utilizarse cintas
normales.
El sonido tal vez no se grabe correctamente si
se utilizan cintas de alta posición (high
position) o de metal con este aparato.
∫ Grabando a través del micrófono
incorporado (monaural)
Siga los pasos 1–6
a Lado de grabación
En el paso 6, [1, PLAY] se pulsa también con
[¥,].
Utilice un casete con las lengüetas puestas.
El nivel de grabación se ajustará
automáticamente.
Page 6

∫ Para parar la grabación
3X
3X
REC
3X
TAPE
FM
AM
TAPE
FMAMFM
AM
TAPE
Extra
Heavy Duty
SIZE
D
Alkaline
S
IZ
E
Heavy Duty
SIZE
D
3X
REC
REC
Pulse [∫, STOP].
∫ Para parar temporalmente la
grabación
Ponga [PAUSE] en PAUSE.
Para reanudar la grabación, póngalo en la
posición OFF.
∫ Para grabar de la radio
Sintonice la estación, luego siga los pasos 1,
3–6.
∫ Grabación de larga duración
NORM: grabación normal
: grabación de larga duración
Es posible grabar 180 minutos de material en
una cinta de 60 minutos ajustando
[RECMODE] en [].
Reproduzca las cintas grabadas con larga
duración sólo en los decks de la misma
función.
∫ Para grabación mediante
micrófono externo
[RQ-A220] opcional)
Conecte el micrófono externo estéreo en el
enchufe [STEREO MIC (PLUG IN POWER)].
≥Se puede usar un micrófono electrostático
con fuente de alimentación incorporada o un
micrófono electrostático sin fuente de
alimentación incorporada.
≥El microfóno incorporado se desconectará
automáticamente.
∫ Continuación de la grabación
La grabación podrá iniciarse durante la
reproducción pulsando simplemente
[¥,].
∫ Monitoreo
El sonido puede ser oido con un auriculares
estéreo opcional enchufado en la toma [Ë].
Nota:
≥Cuando haya demasiada interferencia
durante la grabación en AM Ponga el selector
[FM MODE/B.P.] en [STEREO/I] o
[MONO/II], el que produzca menos ruido.
([RQ-A320A[ incluido
BocgponÎbelehne kaccets F
MoÒho ncgojvÎobatv tojvko jehts
hopmajvhofo tnga.
CjelyØte gyhktam 1±5
a Jnuebar ctopoha
∫ Ljr octahobkn
bocgponÎbelehnr
HaÒmnte khogky [∫, STOP].
∫ ¨to°s bpemehho gpnoctahobntv
bocgponÎbelehne
Gepemectnte gepekgd≠atejv [PAUSE] b
gojoÒehne PAUSE.
¨to°s boÎo°hobntv bocgponÎbelehne,
yctahobnte ˙tot gepekjd≠atejv b
gojoÒehne OFF.
∫ Ljr yckopehhoØ gepemotkn
bgepel n haÎal
HaÒmnte khogky [5, FF/CUE] njn
[6, REW/REV].
Jehta ha≠het °sctpo gepematsbatvcr b
hagpabjehnn ctpejkn.
≥Kofla jehta loxolnt lo kohua gocje
yckopehhoØ gepemotkn bgepel njn haÎal,
haÒmnte khogky [∫, STOP], ≠to°s
otkjd≠ntv khogky.
∫ Yckopehhoe gpocjywnbahne b
gprmom n o°pathom hagpabjenn
Bo bpemr bocgponÎbelehnr gpn haÒatnn n
ylepÒahnn b haÒatom gojoÒehnn khogkn
[5, FF/CUE] (gpocjywnbahne b gprmom
hagpabjehnn) njn [6, REW/REV]
(gpocjywnbahne b o°pathom hagpabjehnn)
moÒho gpocjywnbatv Îbyk c bscokoØ
ckopoctvd. Gpcje otgyckahnr khogkn
ha≠hetcr o°s≠hoe bocgponÎbelehne.
∫ Abtoctog
Bo bpemr bocgponÎbelehnr ngn Îagncn,
kofla jehta loctnfaet kohua, cnctema
abtomatn≠eckoØ octahobkn bscbo°olnt
khogkn bocgponÎbelehnr n Îagncn n
abtomatn≠eckn bskjd≠nt aggapat.
Gpnme≠ahne:
He otkpsbaØte kpswky kaccetolepÒatejr
bo bpemr ˙kcgjyataunn kaccets.
Gpocjywnbahne
palnogpnemhnka G
CjelyØte gyhktam 1±3
B gyhkte 2, kofla ctahunr hactpontcr ha
(a).
∫ ¨to°s otkjd≠ntv
palnogpnemhnk
yctahobnte gepekjd≠atejv [ (OFF),
, ] b gojoÒehne [ (OFF)].
Gpnme≠ahne:
Ecjn bo bpemr ˙kcgjyataunn kaccets Bs
yctahobnte gepekjd≠atejv [ (OFF),
, ] b gojoÒehne []njn [],
˙ta khogka he otkjd≠ntcr. B ˙tom cjy≠ae,
≠to°s otkjd≠ntv ˙ty khogky, haÒmnte
khogky [∫, STOP].
[RQ-A220]
Ljr FM-palnobewahnr haywhnkn lojÒhs
°stv golkjd≠ehs hebÎnpar ha
gpocjywnbahne c fpomkofobopntejr njn c
haywhnkob.
PYCCKNÆ R„SK
∫ Pefyjnpobka ahtehh
AM: Gpobepvte paÎjn≠hse
hagpabjehnr, ≠to°s gojy≠ntv
ogtnmajvhsØ gpnem. G- b
¨M (FM): [RQ-A220]
Pacgpabvte whyp haywhnkob.
G- c
[RQ-A320A[
Bslbnhvte tejeckogn≠eckyd
ahtehhy n otpefyjnpyØte ee
ljnhy n yfoj hakjoha ljr
ogtnmajvhofo gpnema. G- d
∫ Ljr ≠nctofo gpnema FM-gpofpam
Ljr gpnema FM-ctepeogpofpamm yctahobnte
gepekjd≠atejv [FM MODE/B.P.] b
gojoÒehne [STEREO/I]. Ecjn gpnem gjoxoØ
(cnjvhse gomexn), to yctahobnte efo b
gojoÒehne [MONO/II]. Íto ymehvwnt
gomexn, olhako Îbyk ctahet
mohoiohn≠ecknm.
„agncv H
MoÒho ncgojvÎobatv tojvko jehts
hopmajvhofo tnga.
Gpn ncgojvÎobahnn ha ˙tom aggapate jeht
xpomnpobahhofo n metajjnÎnpobahhofo
tngob Îbyk moÒet he Îagncatvcr
haljeÒaqnm o°paÎom.
∫ „agncv ≠epeÎ bctpoehhsØ
mnkpoioh (mohoiohn≠ecknØ
peÒnm)
CjelyØte gyhktam 1±6
a „agncsbaemar ctopoha
B gyhkte 6, Khogka [1, PLAY] takÒe
haÒata bmecte c khogkoØ [¥, ].
NcgojvÎyØte kaccety c uejsmn gjactnhamn
°joknpobkn Îagncn. Ypobehv Îagncn
pefyjnpyetcr abtomatn≠eckn.
∫ Ljr octahobkn Îagncn
HaÒmnte khogky [∫, STOP].
∫ Ljr bpemehhoØ octahobkn
Îagncn
Yctahobnte gepekjd≠atejv [PAUSE] b
gojoÒehne PAUSE.
Ljr boÎo°hobjehnr Îagncn yctahobnt efo b
gojoÒehne OFF (bskj.).
∫ Ljr Îagncn palnogpofpamm
HactpoØtecv ha ctahuhd, Îatem bsgojhnte
gyhkts 1, 3–6.
∫ Lojfonfpadqar Îagncv
NORM: Hopmajvhar Îagncv
: Lojfonfpadqar Îagncv
Aylnomatepnajs gpolojÒntejvhoctvd
Îby≠ahnr 180 mnhyt moÒho Îagncatv ha
kaccety, pacc≠ntahhyd ha 60 mnhyt,
yctahobnb gepekjd≠atejv [RECMODE] b
gojoÒehne [].
BocgponÎbelehne kaccets, Îagncahhse b
peÒnme ljntejvhofo bocgponÎbelehnr,
tojvko ha lekax, gollepÒnbadqnx lahhyd
iyhkund.
∫ Ljr Îagncn ≠epeÎ bhewhnØ
mnkpoioh (
komgjekt goctabkn, [RQ-A220] b komgjekt
goctabkn he bxolnt)
Golkjd≠nte bhewhnØ ctepeomnkpoioh k
fheÎly [STEREO MIC (PLUG IN POWER)].
≥Bs moÒete ncgojvÎobatv kohlehcophsØ
mnkpoioh co bctpoehhsm ncto≠hnkom
gntahnr njn kohlehcophsØ mnkpoioh °eÎ
bctpoehhofo ncto≠hnka gntahnr.
≥BctpoehhsØ mnkpoioh °ylet
abtomatn≠eckn otkjd≠eh.
∫ Gocjelydqar Îagncv
„agncv moÒho ha≠atv bo bpemr
bocgponÎbelehnr gytem gpoctofo haÒatnr
khogky [¥,].
∫ Kohtpojv Îbyka
Kohtpojv Îbyka moÒet ocyqectbjrtvcr c
gomoqvd gpno°petaemofo logojhntejvho
ctepeohaywhnkn, golcoelnhehhofo k fheÎly
[Ë].
Gpnme≠ahne:
≥Ecjn bo bpemr Îagncn b lnagaÎohe AM
cjnwkom cnjvhs bÎanmhse gomexn
Yctahobnte gepekjd≠atejv
[FM MODE/B.P.] b gojoÒehne [STEREO/I]
njn [MONO/II] kotopoe laet mehswe
gomex.
ONLY FOR AUSTRALIA/NEW ZEALAND
1. The product is warranted for labour and parts for twelve (12) months from the date of purchase.
2. This Warranty is for normal domestic use only and excludes any defect or injury caused by or resulting
from misuse, abuse, neglect, accidental damage, improper voltage, vermin infestation or any alteration
which affects the reliability or performance of the unit, not attributable to faulty manufacture, parts and
labour.
3. This warranty does not cover the following items unless fault or defect being complained of existed at the
time of purchase.
(a) Video or Audio Tapes. (c) Shaver Heads or Cutters.
(b) Video or Audio Heads and Stylus resulting (d) Cabinet parts.
from wear and tear in normal use. (e) Batteries.
4. If warranty service is required you should:
≥Contact your nearest Panasonic Authorised Service Centre.
≥Enclose a copy of your purchase receipt as proof of date of purchase.
≥Send or bring the product to Panasonic Authorised Service Centre. Warranty does not include any freight
to and from the user or insurance so please arrange this yourself.
≥Note that home service is available for following products in the Metropolitan area or the normal
operating areas of the nearest Authorised Service Centres.
≥Television Receivers (screen size greater than 39 cm)
≥Electronic Organs or Pianos
≥Microwave Ovens
≥Washing Machines
≥Air Conditioners
5. The warranties hereby conferred do not extend to any costs associated with the delivery, handling,
freighting or transportation of the product or any part thereof or replacement of and do not extend to any
damage or loss occurring during, or associated with, transit.
WARRANTY
[RQ-A320A[ bxolnt b
Unless otherwise specified to the consumer the benefits conferred by this express warranty are additional to
all other conditions, warranties, guarantees, rights and remedies expressed or implied by the Trade Practices
Act 1974 and similar consumer protection provisions contained in legislation of the States and Territories and
all other obligations and liabilities on the part of the manufacturer or supplier and nothing contained herein
shall restrict or modify such rights, remedies, obligations or liabilities.
THIS WARRANTY CARD SHOULD BE RETAINED BY THE CUSTOMER AT ALL TIMES
IF YOU REQUIRE ASSISTANCE REGARDING WARRANTY CONDITIONS,
OR ANY OTHER ENQUIRIES, PLEASE TELEPHONE:
PANASONIC CUSTOMER CARE CENTRE 132 600
PANASONIC AUSTRALIA PTY. LIMITED OFFICE LOCATIONS:
NEW SOUTH WALES
P.0. Box. 505 Frenchs Forest N.S.W. 2086
VICTORIA
Private Mail Bag 13, South Eastern Mail Centre VIC. 3176
SOUTH AUSTRALIA
P.0. Box. 500 Welland 5007
WESTERN AUSTRALIA
P.0. Box. 376 Welshpool 6986
QUEENSLAND
P.0. Box. 260 Nundah QLD. 4012
RQTT0518
 Loading...