

Page 1
First, acquire
pictures to PC!
Cover
Operating Instructions
Digital photo management software
PHOTOfunSTUDIO -viewer- 2.1E
Thank you for using PHOTOfunSTUDIO.
Before use, please read these instructions completely.
Categorize
pictures!
© 2008 Matsushita Electric Industrial Co., Ltd.
Process
pictures!
Output pictures!
VQT1U24
Page 2

Contents
Contents
Before Use
Introduction.......................................................................4
What can PHOTOfunSTUDIO do?...................................5
System requirements .......................................................6
Setting up
Connecting the digital camera to PC................................7
Starting PHOTOfunSTUDIO.............................................8
Basic operations
Switching among display modes.................................. ..1 1
List mode ..................... ... ... ... ...... ... ... .... ... ...... ... ... ... ... .. 12
Focus mode ................. ... ... ... ... ...... ... .... ... ... ...... ... ... ... .. 14
Full Screen mode .............................. .... ... ... ...... ... ... ... .. 15
Calendar Mode.......... ... ... ... ... ...... ... ... .... ... ...... ... ... ... ... .. 16
Selecting pictures...........................................................18
Marking on pictures........................................................19
Copying pictures....... ....... ...... ...... ....... ...... ....... ...... ....... ..2 1
Moving pictures............... ...... ...... ....... ...... ....... ...... ....... ..2 2
Deleting pictures....... ....... ...... ...... ....... ...... ....... ...... ....... ..2 3
Refreshing the display....................................................23
Displaying enlarged pictures..........................................29
Playing back slide shows...............................................30
Playing back pictures in an open folder as
a slide show................ ... ... ... ...... ... ... ... .... ...... ... ... ... ... ....30
Creating a slide show from your favorite pictures ... ...... .31
Opening the saved slide show.... ...... ... .... ...... ... ... ... ...... .31
Settings for slide shows .... ... ... ...... ... ... .... ... ... ...... ... ... ... .32
Playing music files .........................................................34
Categorization
Flow of categorization....................................................36
Details on categorization ............................. ...... ....... ..... 37
Categorization by recording date............. ...... ...... ......... .37
Categorization by recording scene ................................37
Categorization by face detecti on ...................... ... ...... ... .39
Categorization by model name ............ .... ...... ... ... ... ... ....39
Categorization by storage fo lder....... ... ....... ... ... ... ... ...... .40
Categorization by keywords ............. ... .... ...... ... ... ...... ... .40
Changing the keyword...................................................41
Deleting categorization ..................................................42
Deleting pictures from categorization .................. ...... ....42
Deleting a folder in a cat egori zation ................. ... ...... ... .43
Deleting all categorizations .............. ... .... ... ... ...... ... ... ... .44
Acquiring and displaying pictures
Acquiring pictures from a digital camera........................25
Displaying the acquired pictures in list view...................27
Displaying pictures by recording date ............................28
2
Process
Process flow ..................................................................46
Resizing a picture ..........................................................48
Converting picture format ..............................................49
Page 3

Contents
Changing several picture file names at one time
(Batch renaming)............................................................50
Adding date and title information to a picture (Burn-in)..52
Changing the recording date........................................ ..5 4
Creating still pictures from motion pictures ....................55
Rotating picture (Rotate) ................................................57
Retouch
Start and exit the retouch function..................................59
Screen configuration for the retouch function.................60
Correcting pictures or add effects ..................................62
Saving retouched pictures..............................................65
Retouch function menu ..................................................66
Outputting
Output flow.....................................................................69
Printing picture ...............................................................70
Attaching pictures to e-mail............................................76
Using a picture as wallpaper ..........................................79
DPOF-setting..................................................................80
Writing pictures onto a memory card..............................81
Writing pictures to a CD or a DVD..................................83
Other settings
Customising picture display............................................86
Changing view format of pictur e browser
(View format)...... ... ....... ... ... ... ... ...... ... .... ... ... ...... ... ... ... .. 86
Changing order of display ( Sort).... ... ....... ... ... ... ... ...... ... .87
Setting types of pictures to be displayed in
picture browser (View type)........................ ......... ...... ....88
Registering application in Launcher...............................89
Managing folders ...........................................................91
Properties of picture file.................................................94
Setting the operations at the time of start......................96
Changing the settings of acquisition..............................97
Changing the settings of rotation...................................99
Convenient information
Tool bar........................................................................100
Picture browser view setting area................................100
Status bar ....................................................................101
Output view..................................................................101
Menu............................................................................102
Context menu ..............................................................106
Context menu on the picture brow ser ............ ...... ... ... ..106
Context menu on the folder view ............................... ..107
Picture files that can be displayed
by PHOTOfunSTUDIO.................................................108
Troubleshooting (Q&A)................................................109
Glossary.......................................................................111
Precautions for use......................................................112
3
Page 4

Before Use
Introduction
Before Use Introduction
zPlease note that some of the explanation and screens
covered in these operating instructions may differ from
actual ones depending on the operating environment of
your PC. Please be aware of this beforehand.
zNo information is provided about basic PC operations
and terms. Please refer to the relevant PC manual.
zThe contents of these operating instructions may be
subjected to changes without prior notice.
zReproduction of these operating instructions in part or in
full without permission is prohibited.
zThe description of Windows
instructions is based on the Windows
zThe English, French, German, Spanish and simplified
®
in these operating
®
XP screen.
Chinese versions of this software are available to the OS
of the corresponding languages. If you use an OS of
other language, the English version of this software will
be installed and become available.
zPages to be referred to are shown as “00”.
zIn these operating instructions, PHOTOfunSTUDIO
-viewer- 2.1E is indicated as “PHOTOfunSTUDIO”.
zIn these operating instructions, a memory card refers to
an SD memory card, including the internal memory.
zThe usable operation items on the menu and context
menu depend on the operation status of
PHOTOfunSTUDIO or status of the selection of the
pictures. The unusable items are displayed in grey.
Please be aware of this beforehand.
zSome digital cameras may not be equipped with the
[BABY] mode, [PET] mode, [TRAVEL DATE] function,
[DATE STAMP] function, [TEXT STAMP] function, RAW
file function, etc. described in these operating
instructions.
zMicrosoft
®
, Windows®, Windows Vista® and DirectX® are
either registered trademarks or trademarks of Microsoft
Corporation in the United States and/or other countries.
®
zIBM
and PC/AT are registered trademarks of
International Business Machines Corporation of the U.S.
®
zIntel
, Pentium® and Celeron® are registered trademarks
or trademarks of Intel Corporation in the United States
and other countries.
zQuickTime and the QuickTime logo are trademarks or
registered trademarks of Apple, Inc., used under license
therefrom.
zMicrosoft product screen shot(s) reprinted with
permission from Microsoft Corporation.
zOther names of systems and products mentioned in
these instructions are usually the registered trademarks
or trademarks of the manufacturers who developed the
system or product concerned.
4
Page 5
Before Use What can PHOTOfunSTUDIO do?
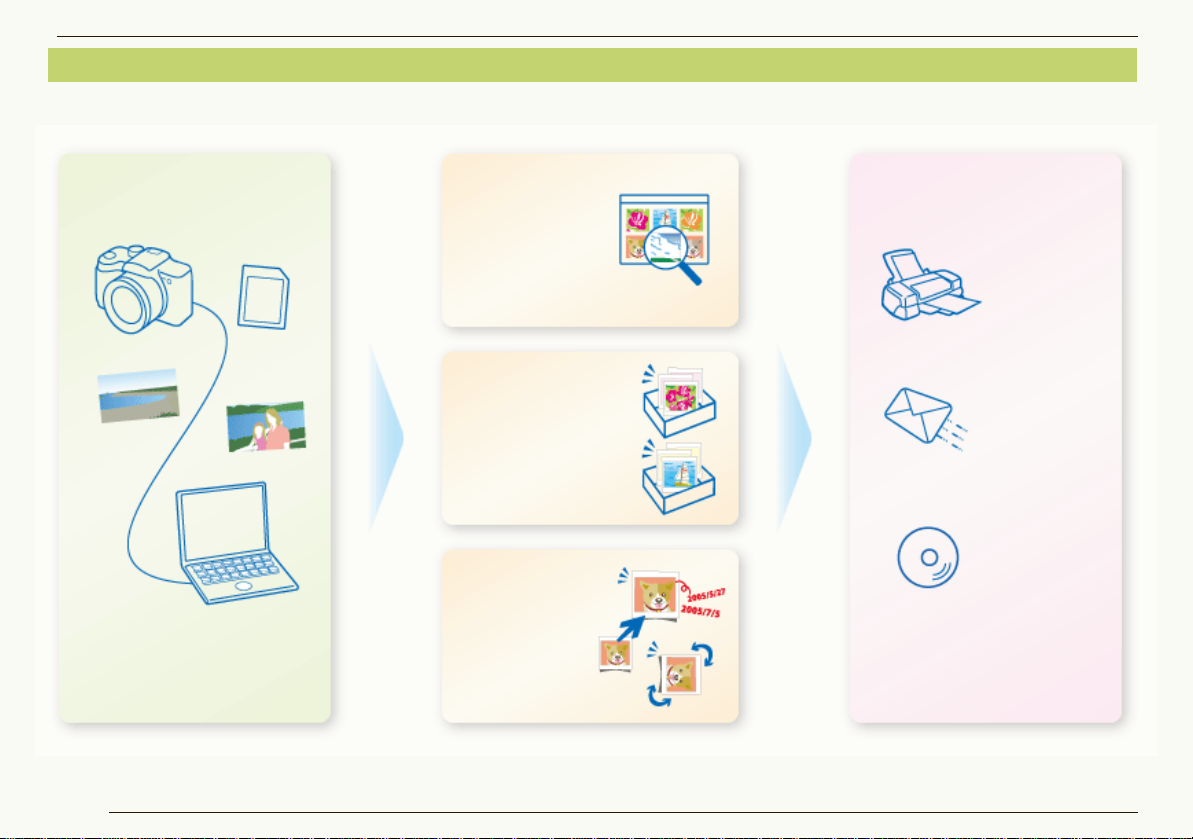
Acquire OutputDisplay
Categorize
Process
In thumbnail
Enlarged view
Slide show
By date
By recorded scene
By keyword, etc.
Resize
Retouch, etc.
You can acquire still pict ur es
or motion pictures all at once.
Print
E-mail
CD/DVD
etc.
What can PHOTOfunSTUDIO do?
PHOTOfunSTUDIO allows you to easily acquire, di splay, categorize, process and output the pic ture on the personal computer.
5
Page 6

System requirements
Before Use System requirements
J PHOTOfunSTUDIO -viewer- 2.1E
Personal
computer
OS Preinstalled
RAM 256 MB or more
Display High Color (16 bit) or more
Free hard
disk space
Necessary
software
Sound Windows compatible sound device
Drive
IBM® PC/AT compatible personal computer
having Intel
(including compatible CPU)
(Intel® Pentium® III 800 MHz or higher CPU if
using Windows Vista
Microsoft® Windows® 2000 Professional
Microsoft
Microsoft
Microsoft
Microsoft
Microsoft
Microsoft
(512 MB or more if using Windows Vista
Desktop resolution of 800k600 pixels or more
(1024k768 pixels or more recommended)
200 MB or more
QuickTime 6.1 or later
CD
-ROM drive (required to install t his pr ogram)
®
Pentium® III 500 MHz or higher CPU
®
)
®
Windows® XP Home Edition
®
Windows® XP Professional
®
Windows Vista® Ultimate
®
Windows Vista® Business
®
Windows Vista® Home Premium
®
Windows Vista® Home Basic
Interface USB port (USB2.0 or USB1.1)
(When devices are connected through USB hub
or by using USB extension cable, ope rati on is
not guaranteed.)
zEven if the system requirements mentioned in these
operating instructions are fulfilled, some personal
computers cannot be used.
z
The operation of this software will not be guaranteed when
fonts other than English fonts are selected and used.
zThis software cannot be used on Macintosh.
zThis software cannot be used on Microsoft Windows
3.1, Windows
Windows
zOperation on an upgraded OS is not guaranteed.
zOperation on an OS other than the one pre-installed is
®
)
not guaranteed.
zMulti-boot environment is not supported.
zLog on with an administrator account or standard user
®
95, Windows® 98, Windows® 98SE,
®
Me and Windows NT®.
®
account before using this software. You cannot use this
software with a guest account.
zOnly the system administrator can install or uninstall this
software.
z
This software may not run properly on user-built computers.
z
If the settings for th e siz e of ch arac ters in the s cre en set ting s
dialog box in Windows is larger than the standard size, some
buttons may be displayed off-screen and cannot be
operated. In this case, restore the font size to standard size.
zThis software cannot be used on 64-bit OS.
zQuickTime is needed to play motion pictures.
6
Page 7
Setting up
DIGITAL
AV OUT
DC IN
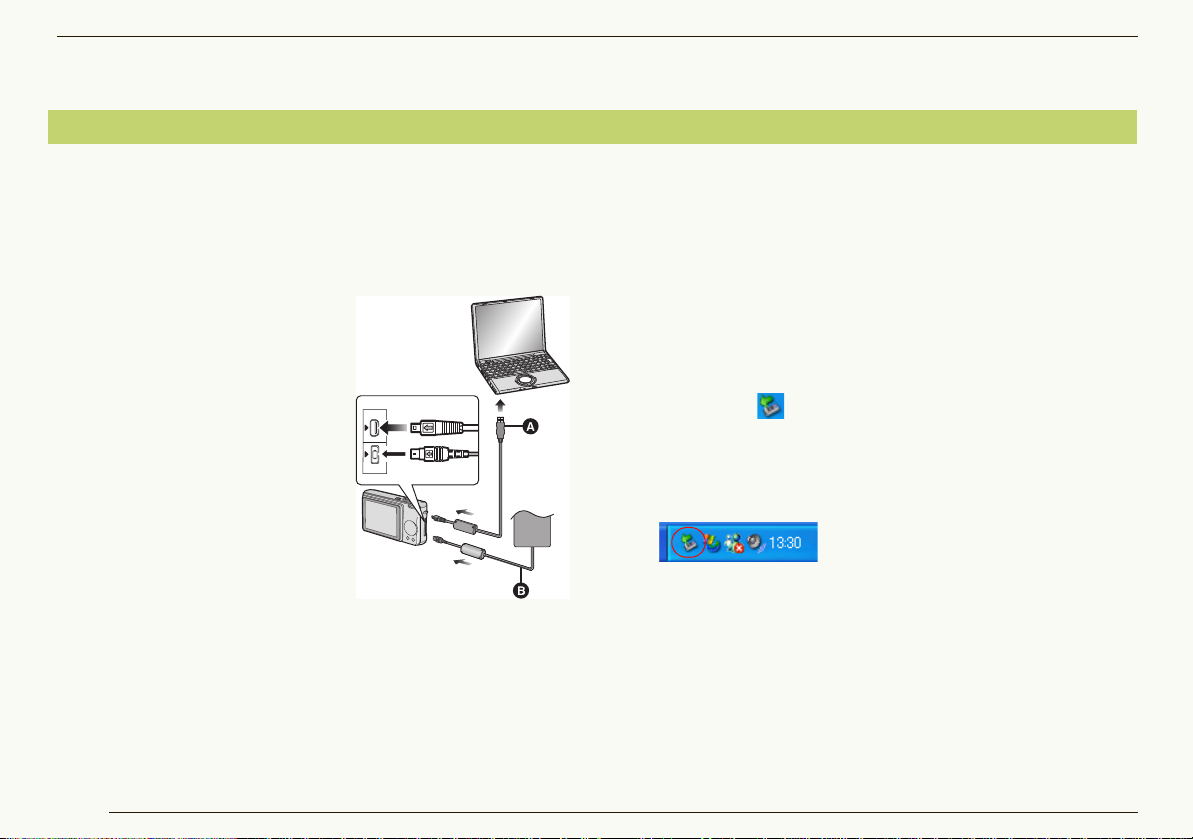
A: USB connection cable
B: AC adaptor
Connecting the digital camera to PC
Setting up Connecting the digital camera to PC
When you connect the digital camera to the PC, use
batteries with sufficient battery power or the AC
adaptors. If the remaining battery power is exhausted
during communication, the reco rded data may be
damaged.
1 Prepare the digital camera.
• If you use the AC adapter,
connect it.
• Turn on the digital camera.
2 Connect the digital camera
to the PC via the USB
connection cable.
• Set the digital camera for
connecting to a PC. (For
details, refer to the
operating instructions for
the digital camera.)
3 Make sure that the digital camera is properly
recognized by the PC.
You may judge that the digital camera is properly
recognized if a [Removable Disk] is added in [My
Computer].
PHOTOfunSTUDIO or LUMIX Simple Viewer may start
automatically. For details, refer to 9.
Before removing the USB connection cable, make sure
that the digital camera is not accessing the card.
Double-click [ ] icon in the system tray, and select the
USB connection cable ([USB Mass Storage Device]) and
click [Stop]. Then you can safely remove the USB
connection cable without causing any error message to
appear.
Do not operate the digital camera or disconnect the USB
connection cable while transferring data in the digital
camera. The software may not function correctly and
damage the data being transferred.
The shape of the terminal varies depending on the digital
camera used. For details, refer to the operating
instructions for the digital camera.
7
Page 8
Starting PHOTOfunSTUDIO
1
2
3
Setting up Starting PHOTOfunSTUDIO
Before using for the first time, select [start] [All
Programs] [Panasonic] [PHOTOfunSTUDIO
-viewer-] [Readme] and make sure to read the
supplementary explanation and the latest information.
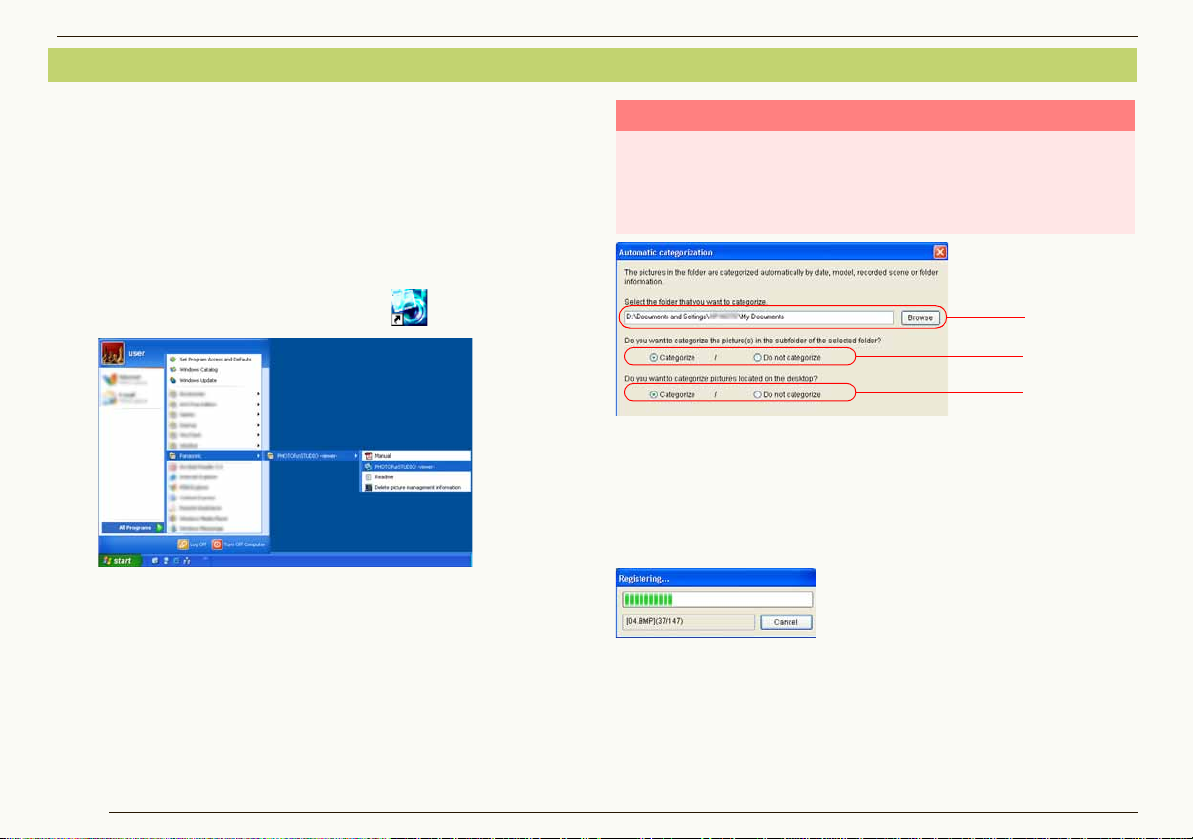
1 Select [start ] [All P rograms ] [ Panaso nic]
[PHOTOfunSTUDIO -viewe r-] [PHOTOfunSTUDIO
-viewer-].
• Or double-click the shortcut icon [ ] on the desktop.
J Automatic categorization of pictures
Whenever starting PHOTOfunSTUDIO, the [Automatic
categorization] panel opens. Here, pictures saved on the
personal computer are automatically categorized based on
recording date, model of camera, recorded scene, stored
folder, number of persons with detected faces and
registered in PHOTOfunSTUDIO.
Caution
When automatic categoriza tion is execut ed, cat egoriza t ion d ata w hi ch
has already been set for pi ctures in t he specifi ed folder will b e deleted ,
and the picture files will be recategorized based on data contained
within the picture files themselves. Be aware that categorization data
for pictures categorized with user-selected keywords will be lost.
1 Click [Browse] to select the folder where pictures are saved
on the PC.
2 Select whether pictures saved in the subfolder of the
selected folder (1) are categorized or not.
3 Select whether pictures on the desktop are categorized or not.
Click the [Start] button to start categorization.
Click [Cancel] while the [Registering] window is displayed
to interrupt automatic categorization.
PHOTOfunSTUDIO can be set to perform automatic
categorization on every startup. (96)
For details on categorization, refer to 37.
8
Page 9
Setting up Starting PHOTOfunSTUDIO
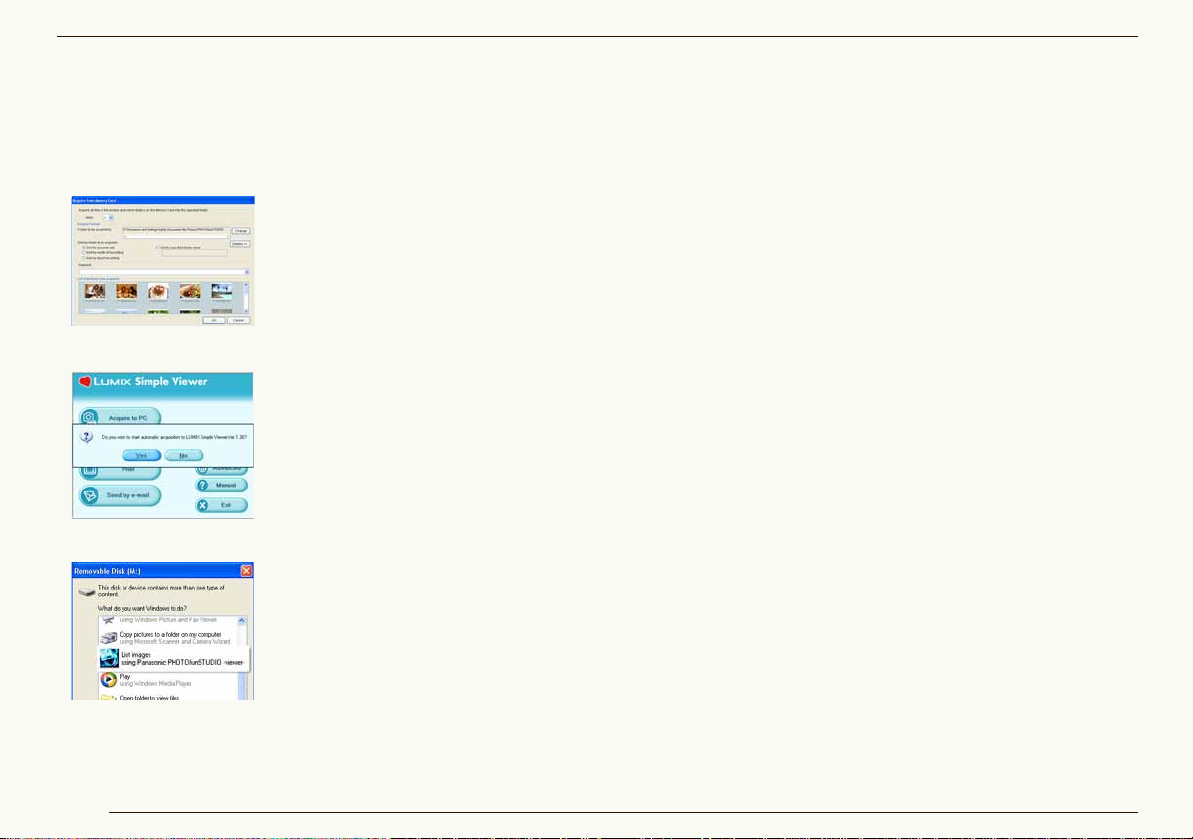
J Auto start
When a digital camera is connected to a PC or a memory
card is inserted, the following window opens. (Depending
on the settings)
• W in dow for PH OTO fu nST UD IO
When the auto start of
PHOTOfunSTUDIO is enabled, the
[Acquire from Memory Card]
window opens. (25)
• W in dow for LUMIX Si mpl e Vie wer
When the auto start of LUMIX
Simple Viewer is enabled, this
opens.
To use PHOTOfunSTUDIO, click
[No] to close the window.
• Window for selecting the operation of Windows
Depending on the settings, the
window shown in the left opens.
Select the icon for
PHOTOfunSTUDIO and click [OK]
to start PHOTOfunSTUDIO;
the [Acquire from Memory Card]
window opens.
Auto start operation can be changed in Setting screen.
(96)
J Exiting PHOTOfunSTUDIO
1 Select [File] [Exit] on t h e m e nu .
• You may also exit the PHOTOfunSTUDIO by pressing
the [Alt] key and the [F4] key at the same time when
the picture browser is displayed.
9
Page 10

Basic operations
Basic operations
The explanation of PHOTOfunSTUDIO screen and basic operation method is given.
Switching among display modes 11
You can view in the following four modes.
-List mode 12
-Focus mode 14
-Full Screen mode 15
-Calendar mode 16
Select pictures 18
You can select one or more pictures.
Mark pictures 19
With the mark, you can select pictures in different folders at one time. Marked pictures become candidates for
processing when you categorize, process or output pictures.
Copy, move or delete pictures 21 22 23
Refresh the display 23
Even after pictures are copied, moved or deleted, the result of the processes may not be reflected on the screen. In this
case, refresh the picture browser or the folder view.
10
Page 11
Switching among display modes
You can also switch
by double-clicking a
picture.
You can also switch the mode by
clicking [ ].
23
4
1
2
4
3
Switching mode with a single click! (86)
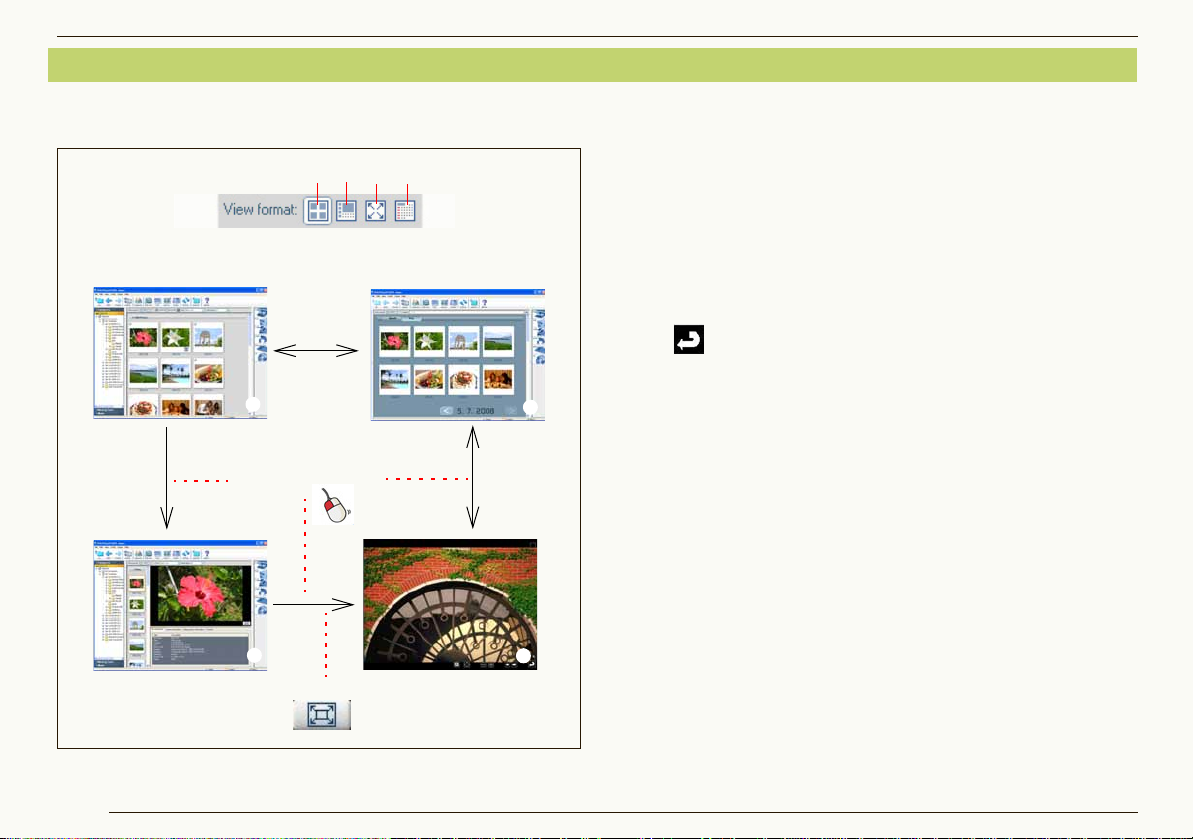
1
Basic operations Switching among display modes
With PHOTOfunSTUDIO, you can view in the following
four modes.
1 List mode (12)
Displays pictures with reduced ones (thumbna il) in list fo rm.
•The thumbnail size can be cha nged in 5 l evels.
2 Focus mode (14)
A selected picture is displayed in the browser in enlarged view.
•Pictures information can also be displayed.
•Motion pictures can a lso be played.
3 Full Screen mode (15)
A selected picture is enlarged to full scr een .
•To return to the previo us screen ( mode), pr ess [Esc] key or
click [ ].
4 Calendar Mode (16)
Sorts pictures by recording date and then displays them in the
format for Monthly Calendar mode or the Daily Calendar mode.
You can also select each of the modes by selecting
[View] [View Format] from the menu, or by
right-clicking in the picture browser and selecting [View
Format].
If you switch to the Focus mode or the Full Screen mode
without selecting any picture, the first picture within the
folder is displayed.
For the file formats that can be displayed, consult
“Picture files that can be displayed by
PHOTOfunSTUDIO” (108).
11
Page 12
Basic operations Switching among display modes
1
2
3
4
5
6
8
9
10
11
12
7
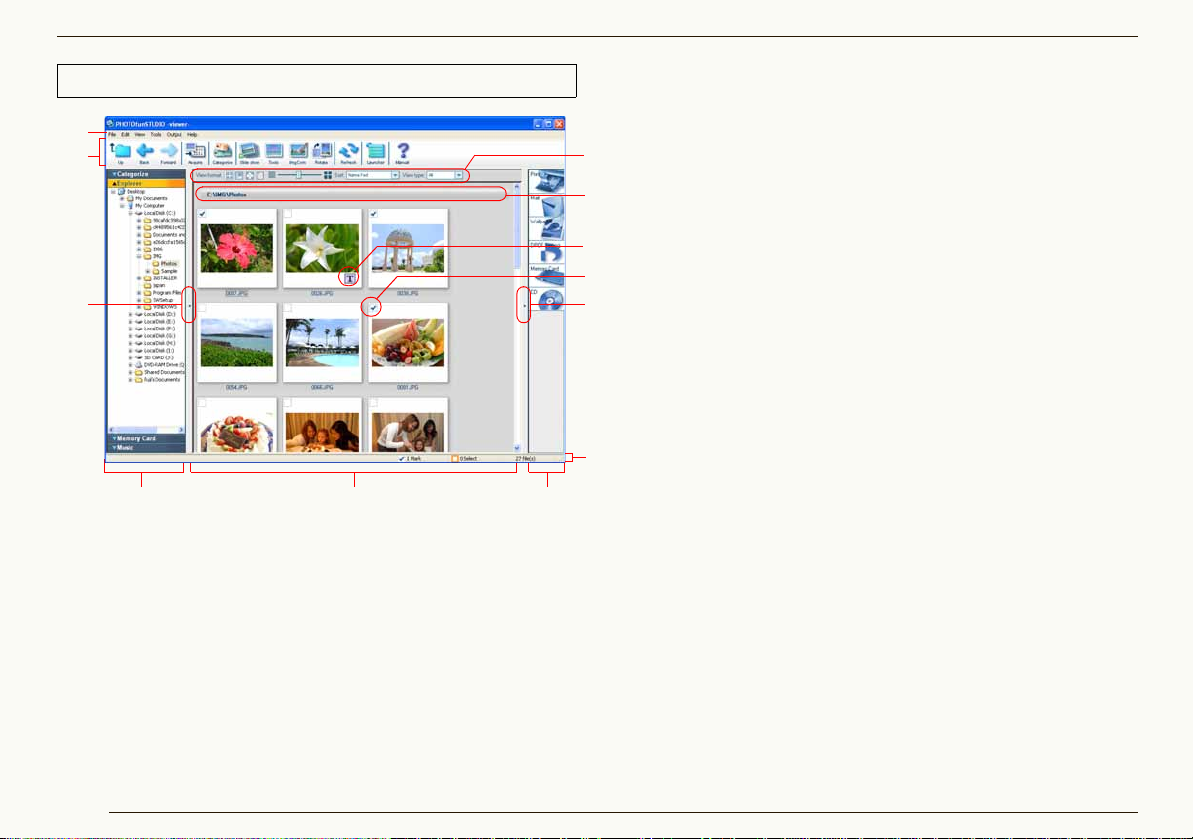
List mode
1 Me nu ba r
The operating items in PHOTOfunSTUDIO are arranged
according to the classifications such as [File], [Edit], [View] and
[Output]. (102)
2 Tool bar
The operating items frequently used such as acquiring,
categorizing, and processi ng ar e arrang ed with buttons to
facilitate operations. (100)
3 Folder view
Folders can be displayed by type ([Categorize],
[Explorer], [Memory Card] and [Music]).
The pictures within the folder selected here are
displayed in the picture browser.
• To open the window of any type, click its title bar
(e.g., [Explorer]). The currently open window is
closed when another window is opened.
• Nothing can be displayed in the picture browser
when [My Computer] is selected on [Explorer].
• Thumbnails may not be displayed when you select
a folder including more than 10,000 pictures.
•For more detailed setting, see 91.
z [Categorize] (35)
z [Explorer]
All folders on the PC are displayed.
z [Memory Card]
Displays folders where pictures recorded by the
digital camera are saved.
z [Music] (34)
4 Picture browser
The pictures within the folder selected in the folder
view (3) are displayed.
• If there are many pictures in a folder, it may take
time until they are thumbnail-displayed.
• Even incompatible files are indicated with data file
icons of their associated applications, if installed.
12
Page 13
Basic operations Switching among display modes
5 Output view
Operation it ems conc erned with pi cture ou tput are plac ed
as buttons. (68)
• You can output in the following ways
-Printing
-Attaching t o E-mail
-Setting as Wallpap er
-DPOF Set ting
-Outputting to the memory
card
-Writing to a C D/DVD
6 Sta tu s ba r
The total number of files in the selected folder, the
number of files selected and the number of files marked
are displayed.
7 Folder view open/close button
The folder view can be opened or closed by clicking this
button.
8 Output view open/close button
The output view can be opened or closed by clicking this
button.
9 Check box
This is the check box for marking. This is selected when
you left-click the mouse in the box and the picture
becomes marked. (19)
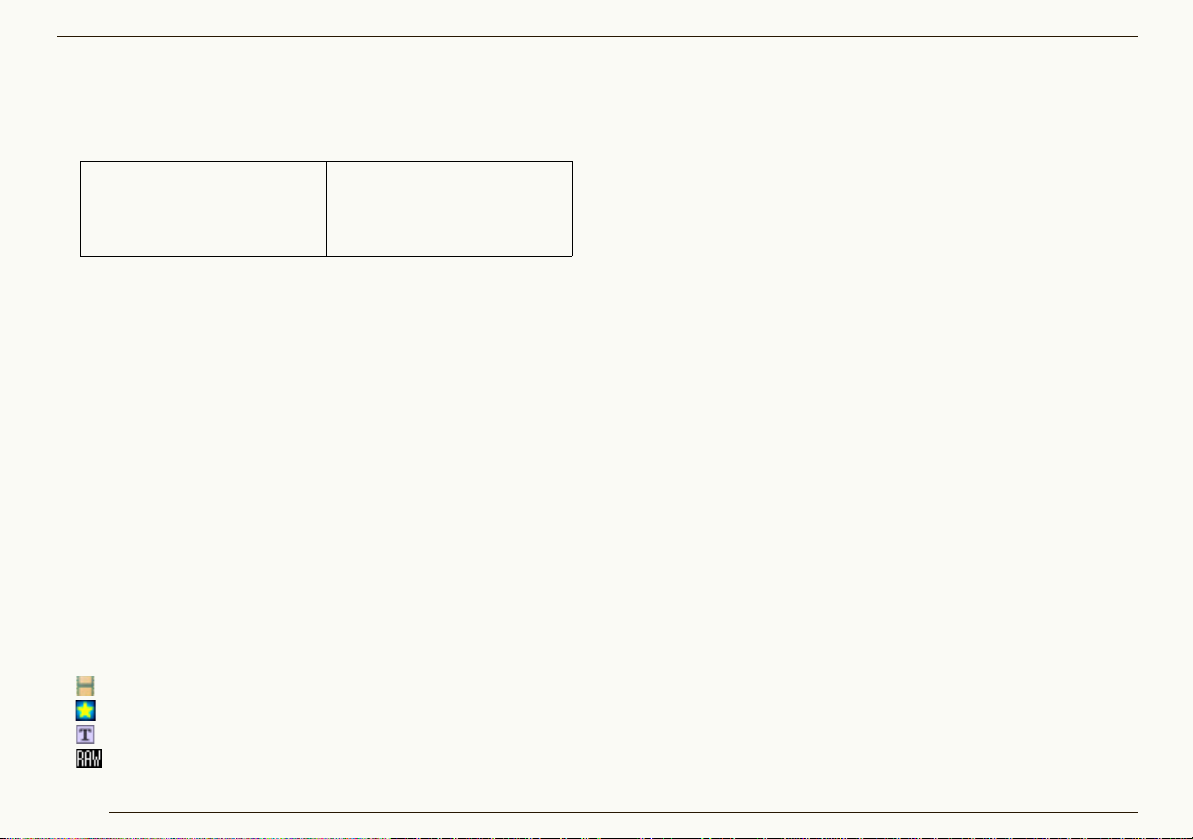
10 Identification icon
In the following cases, icons appear on the thumbnails.
[ ]: Motion pictures
[ ]: Pictures set to “My favorites” (40)
[ ]: Pictures with tit le informati on
[]: RAW files
11 Folder name display area
Displays the name or location (path) of the folder whose
pictures are displayed in the picture browser.
12 Picture browser vi ew setting area
-Changing the vie w format ( mode) (11) (86)
-Sorting pictures (87)
-Narrowing types o f pi cture s (88)
13
Page 14
Basic operations Switching among display modes
Same as the
List mode.
1
2
3
54 7
8
6
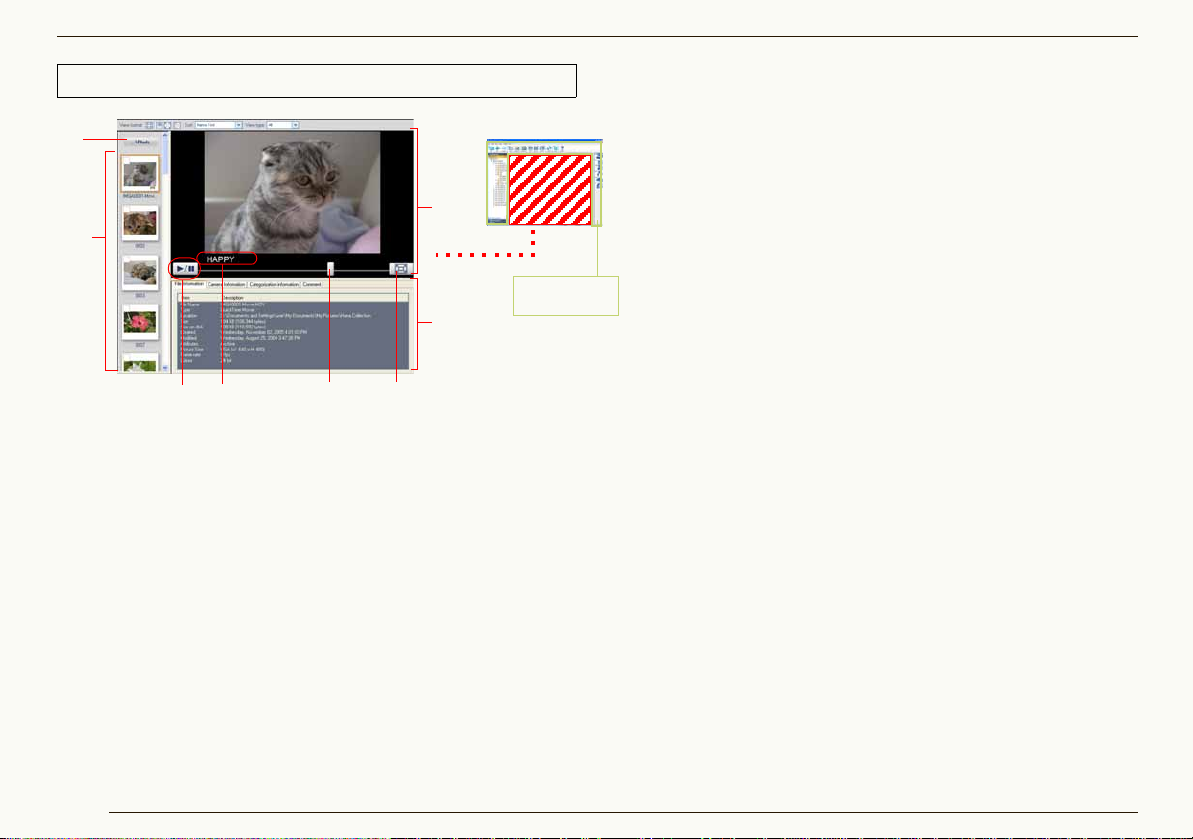
Focus mode
1 Folder name display area
The name or path of the folder whose pictures are being
displayed in the picture browser are shown.
2 Thumbnail window
The picture selected here appears in enlarged view.
3 Enlarged picture window
4 Title information display area
Title information is displayed here, if it is included in the picture.
5 Motion picture PLAY/PAUSE button*
Each time this button is clicked, the motion picture switches
between playback and pausing.
• Motion pictures automatically play when selected, and play
repeatedly until pausin g.
6 Motion picture playback slider*
The playback position can be changed by dragging
this slider.
7 Full Screen mode select button
When clicking this button, a selected picture is
enlarged to full screen.
•For motion pictures, playback starts automatically.
8 Information window
Information about the pictur e is disp lay ed .
Clicking each information tab switches the contents
displayed.
• The contents displayed are the same as those on
the Properties screen. (94)
* Displayed only when a motion picture is selected.
When playing motion pictures, the pictures and/or
voice may be interrupted depending on the
performance of your PC.
14
Page 15
Basic operations Switching among display modes
12345678910
11
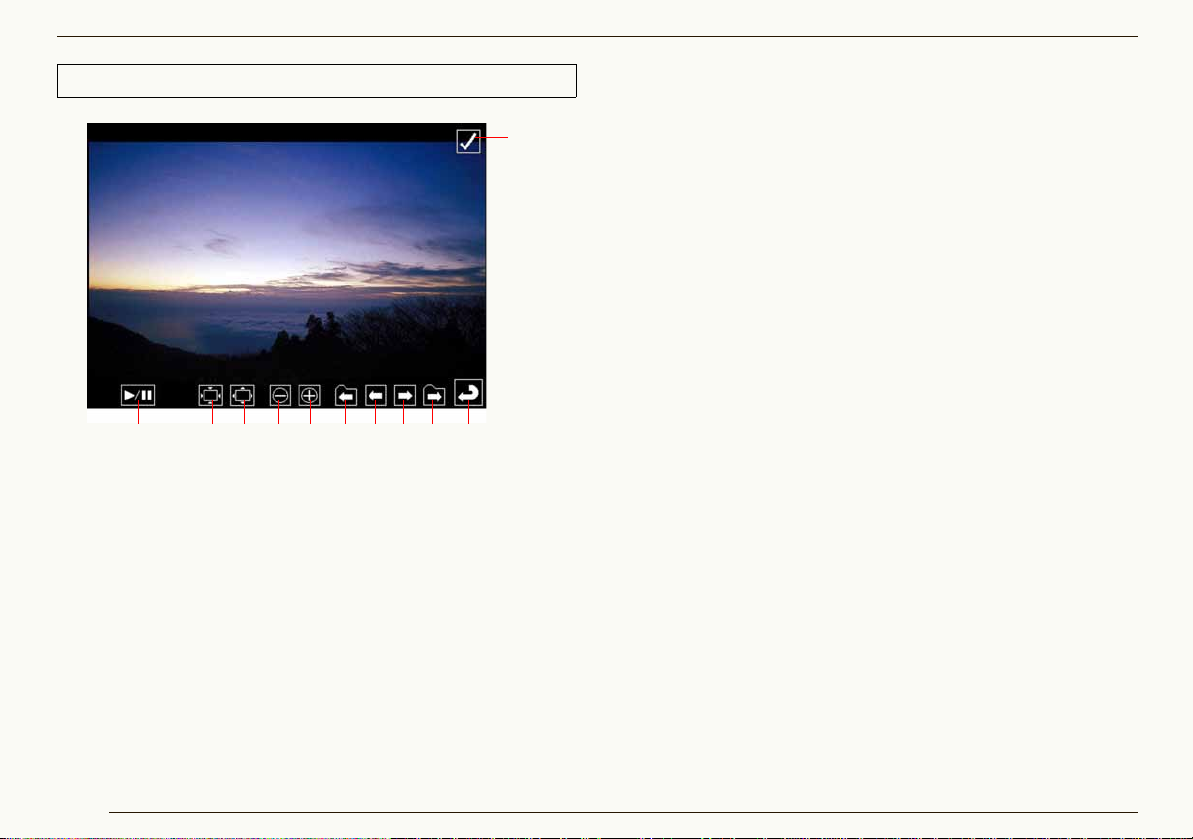
Full Screen mode
1 Motion picture PLAY/PAUSE button
Each time this button is clicked, the motion picture switches
between playback and pausing.
• Motion pictures automat ically play, and play re peatedly u ntil pausing.
2 Restores the picture to the original size.
3 Fits to the window.
4 Zoom out
5 Zoom in
6 To the first picture in the previous folder.
(Displayed only when two or more folders are selected.)
7 To the previous picture.
8 To the next picture.
9 To the first picture in the next folder.
(Displayed only when two or more folders are selected.)
10 Returns to the previous scree n (mode ).
11 Check box
Sets/Cancels mark on the picture. (20)
Only available buttons can be displayed. When the
mouse cursor is not operated, the buttons
disappear.
When the whole of the picture is not displayed, you
can move the position of the picture by dragging it
with a mouse. (For still picture)
When playing motion pictures, the pictures and/or
voice may be interrupted depending on the
performance of your PC.
Depending on the picture, a black band may appear
around it.
Pausing playback and switching to the original
mode while motion pictures are playing back in Full
Screen mode may result in audio being output
momentarily. In that case, install QuickTime from
the install CD-ROM for this software.
15
Page 16
Basic operations Switching among display modes
Same as the
List mode
(12).
However, some
buttons are not
available.
12
3
4
5
6
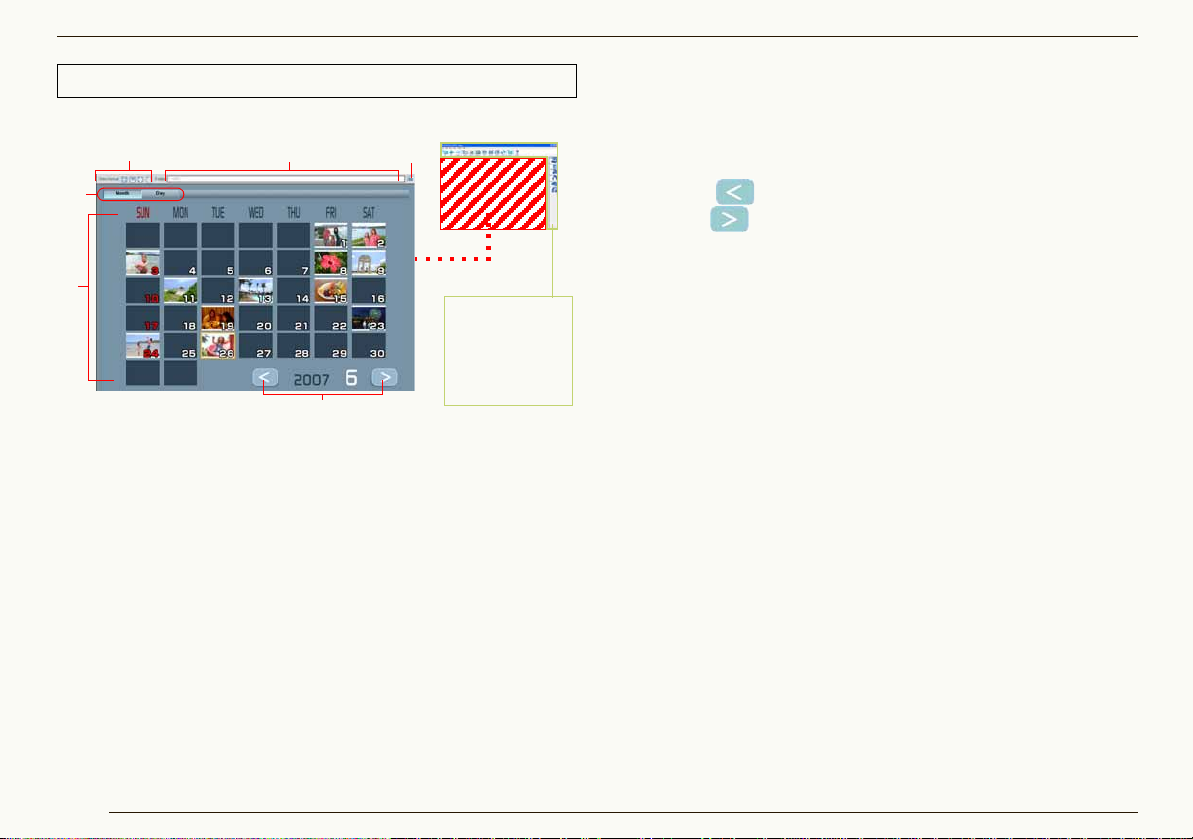
Calendar Mode
J Monthly calendar display
1 Folder name display area
Displays the location (path) of the folder containing the
pictures displayed in Calendar mode.
2 Folder change button
Click this button to open the folder selection screen and
change the folder displayed in Calendar mode.
3 Calendar display area
Pictures in the selected folder (including pictures in the
sub folders) are sorted by recording date according to the
Exif information (111) and displayed in thumbnail view
on the calendar. Double-click the date displayed in
thumbnail view to switch to the daily calendar display
(17), and display pictures recorded on that day.
16
• If there are two or more pictures recorded on the same
day, the latest picture will be used in thumbnail view.
• Pictures with no recording date in Exif will be sorted
according to the date the file was updated.
4 Month back/forward button
Click the [ ] button to display the previous month, and
click the [ ] button to display the next month; however,
a month with no picture to display will be skipped.
5 Month/Day button
Select a date with pictures in the calendar display area
and click [Day] to switch the screen to the daily calendar
display (17).
6 Picture browser display setting area
You can change the display format (mode). (11) (86)
• You cannot switch to Focus mode or Full Screen mode.
Page 17
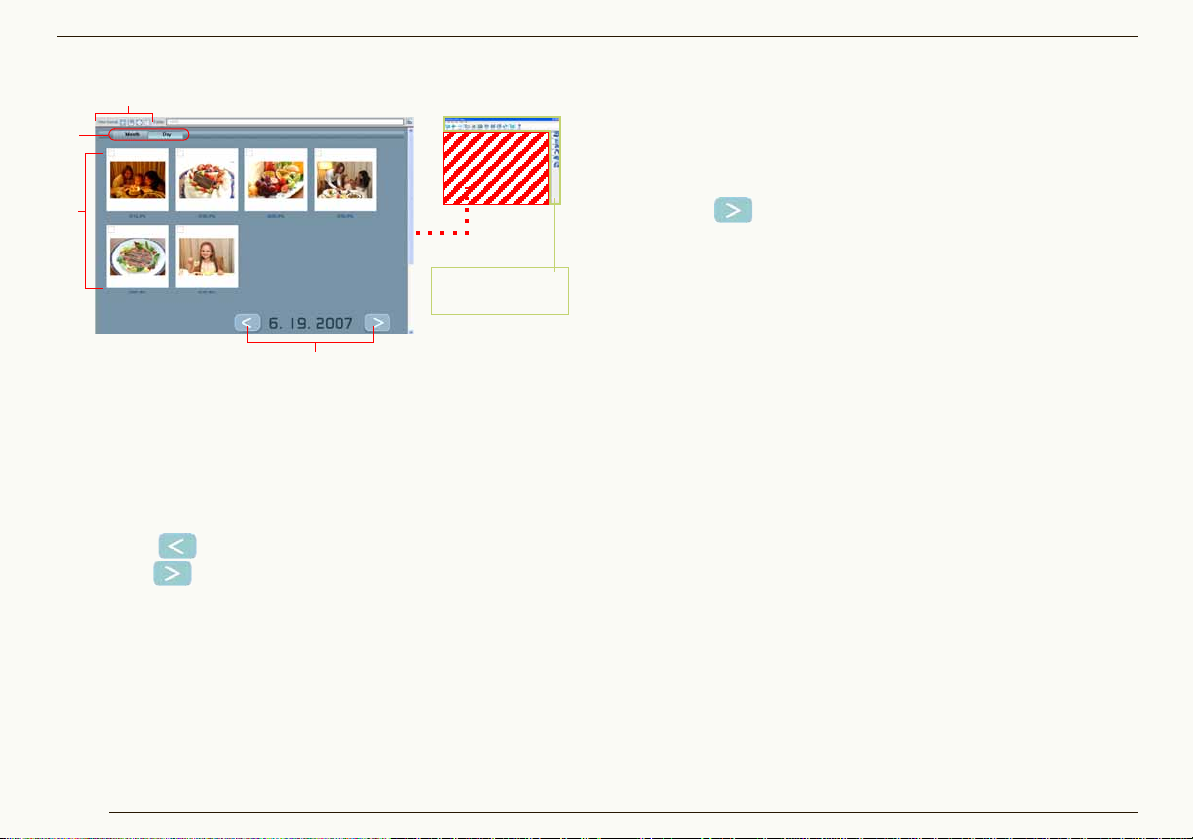
J Daily calendar display
Same as the List
mode (12).
1
2
3
4
1 Picture browser
Pictures recorded on the selected day will be displayed in
thumbnail view. You can select and mark pictures just like
in List mode.
Double-click a picture to enlarge it to full-screen mode.
2 Day back/forward button
Click the [ ] button to display the previous day, and
click the [ ] button to display the next day; however, a
day with no picture to display will be skipped.
3 Month/Day button
Click [Month] to switch the screen to the monthly calendar
display. (16)
4 Picture browser display setting area
You can change the display format (mode). (11) (86)
•You cannot switch to Focus mode.
Basic operations Switching among display modes
Only a calendar during the period from 1971 to 2037 can
be displayed. Pictures that were recorded/updated in
1970 or before or pictures that will be recorded in 2038
or after will be displayed collectively on the last page that
can be displayed using the month forward/day forward
buttons [ ]. (The year and date will be displayed with
`].)
[
Since pictures are sorted according to the date when the
file is first created or updated with the calendar display
function on the digital camera, the same pictures may be
displayed with a different date in PHOTOfunSTUDIO.
17
Page 18
Selecting pictures
Basic operations Selecting pictures
Pictures cannot be selected while in the monthly
calendar display in the Calendar mode. Double-click a
desired date to switch the screen to the daily calendar
display.
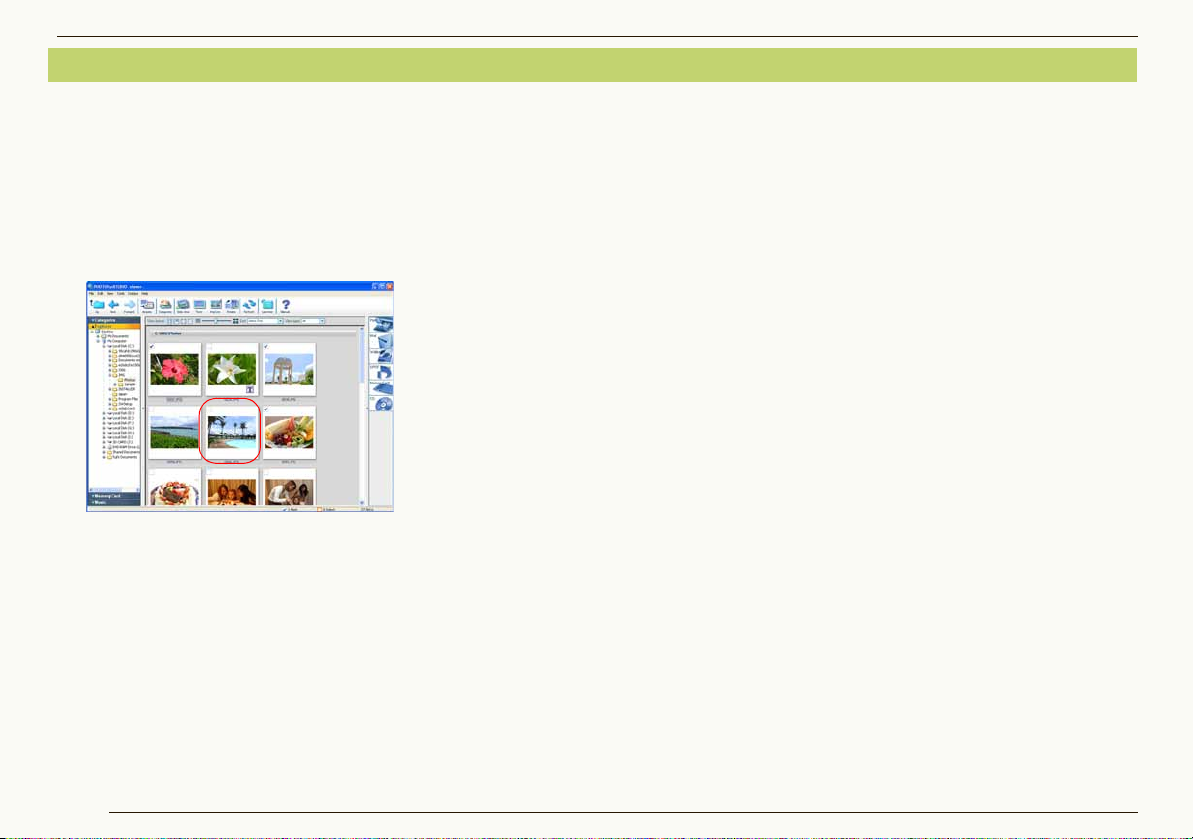
1 Click a thumbnail of the picture to be selected on
the picture browser.
Clicked picture is enclosed by a frame and the picture is
selected.
z To select two or more pictures
Click the pictures to be selected while holding down the
[Ctrl] key.
z To select two or more successive pictures
Select the first picture, then hold down the [Shift] key while
you select the last picture.
z To select all pictures in the displayed folder
Select [Edit] [Select All] from the menu, or press the [A]
key while holding down the [Ctrl] key after left-clicking the
picture browser.
z To invert the selection
Select [Edit] [Invert Selection] from the menu. The
selected pictures will be deselected and the deselected
pictures will be selected.
z To deselect pictures
Select [Edit] [Deselect All] from the menu or click
anywhere in the picture browser other than the thumbnails.
J In Focus mode and Full Screen mode
You can select only one picture in Focus mode. When in
the Full Screen mode, you cannot bring any picture into
selected state.
To select multiple pictures in the Focus mode or select
pictures in the Full Screen mode, mark them. (20)
18
Page 19
Marking on pictures
Basic operations Marking on pictures
With the mark, you can select pictures in different folders
at one time.
Moreover, the marks are kept until PHOTOfunSTUDIO is
stopped unless you cancel them. Therefore, you can
prevent mistakes in operations such as canceling the
selection after you select multiple pictures, etc.
The mark function cannot be used for operations such
as Cut and Delete. Select files to execute these
operations.
It is impossible to mark pictures in the monthly calendar
display in the Calendar mode. Double-click a desired
date to switch the screen to the daily calendar display.
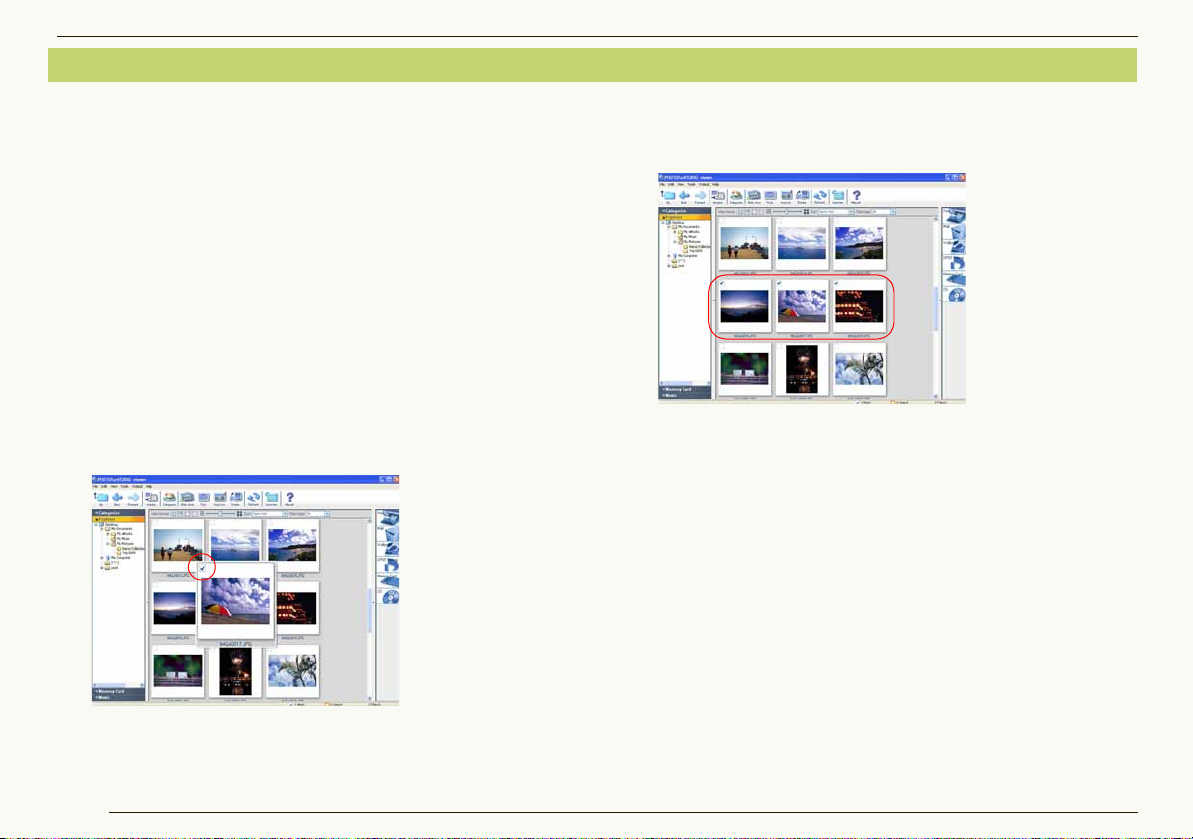
1 Click the check box on the picture you wa nt to
mark on the picture browser.
The check box is selected and the picture is marked.
z Marking multiple pictures
Click the check box on the pictures you want to mark by
turns.
• You can also mark multiple pictures by selecting multiple
pictures you want to mark and then clicking the check box
of any 1 picture.
z Canceling all marks
•Select [Edit] [Cancel all marks] from the menu.
• Right-click on the picture browser and select [Cancel all
marks] from the context menu.
The marks are kept until PHOTOfunSTUDIO is stopped
unless you cancel them. When you select [Marked
pictures] to operate files or output files, all of the marked
pictures are processed at the same time even they are
not displayed on the browser.
19
Page 20
Basic operations Marking on pictures
J Switching marks with [Ctrl] key + [M] key
If you press the [M] key while holding down the [Ctrl] key
with the picture selected, marks on the selected pictures
are alternatively switched.
When the conditions of the marks on the selected multiple
pictures are different, all of the selected pictures follow the
condition of the mark on the picture selected last.
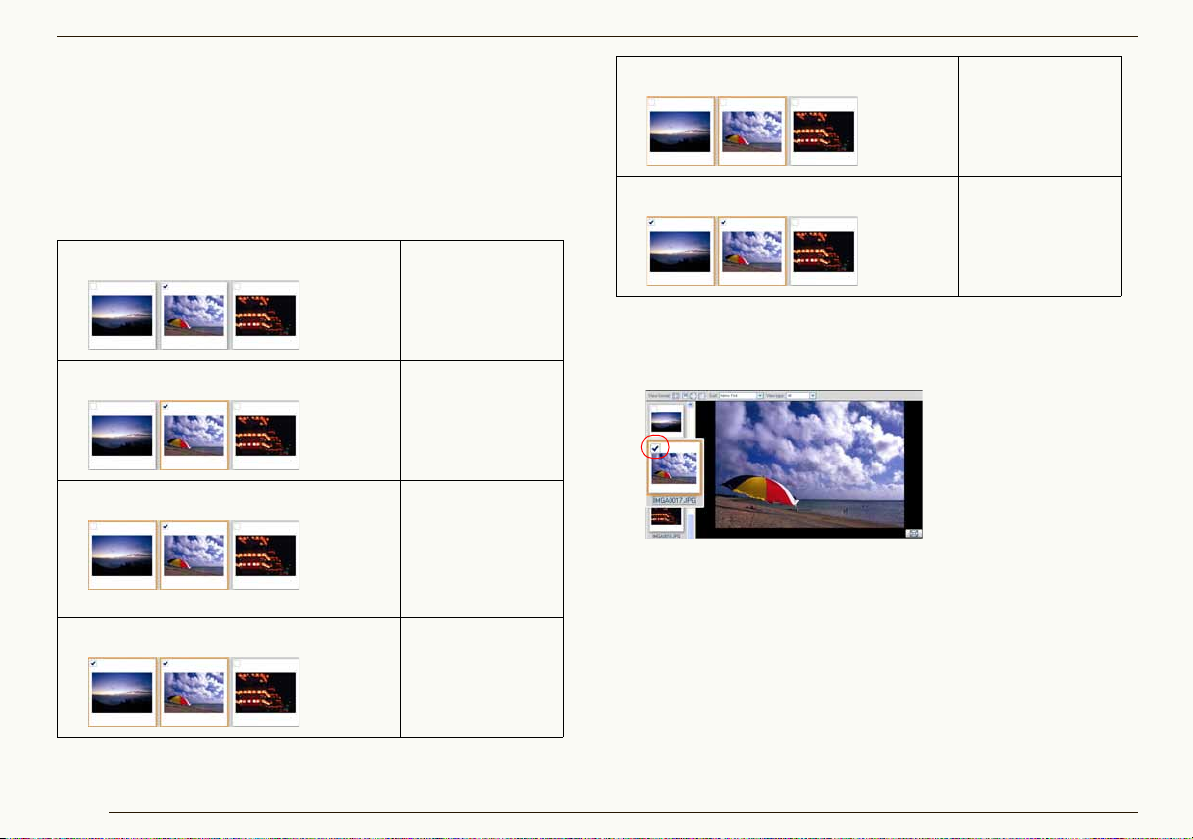
1 Initial state.
2 Select the picture on the center.
3 Select the picture on the left.
•How to select multiple pictures: 18
4 Press [Ctrl] and [M] key.
Only the picture on
the center is
marked.
The picture on the
left is marked .
Along with it, the
picture on the
center i s also
marked.
5 Press [Ctrl] and [M] key again.
6 Press [Ctrl] and [M] key once mor e.
Marks on both
pictures are
canceled.
Both pictures are
marked again.
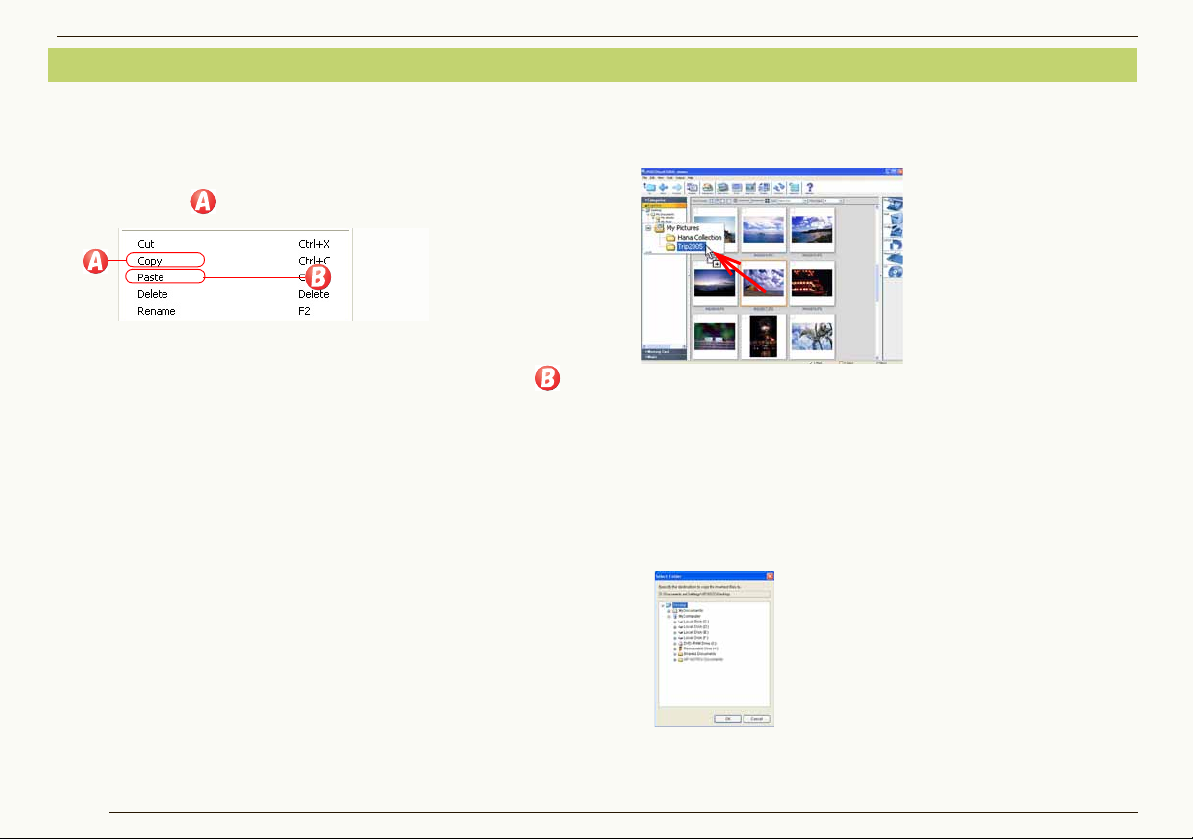
J Setting/Canceling marks in Focus mode
In Focus mode, click the check box on any thumbnail
picture to set/cancel the mark.
• You can also set/cancel the mark of a picture in selected
state (with focus), by pressing the [M] key while holding
down the [Ctrl] key on the PC.
J Setting/Canceling marks in Full Screen mode
When in the Full Screen mode, click the check box at the
top right corner to set or cancel the mark.
• You can also set/cancel the mark of a picture, by pressing
the [M] key while holding down the [Ctrl] key on the PC.
20
Page 21
Copying pictures
Basic operations Copying pictures
1 Select a picture to be copied in the picture browser.
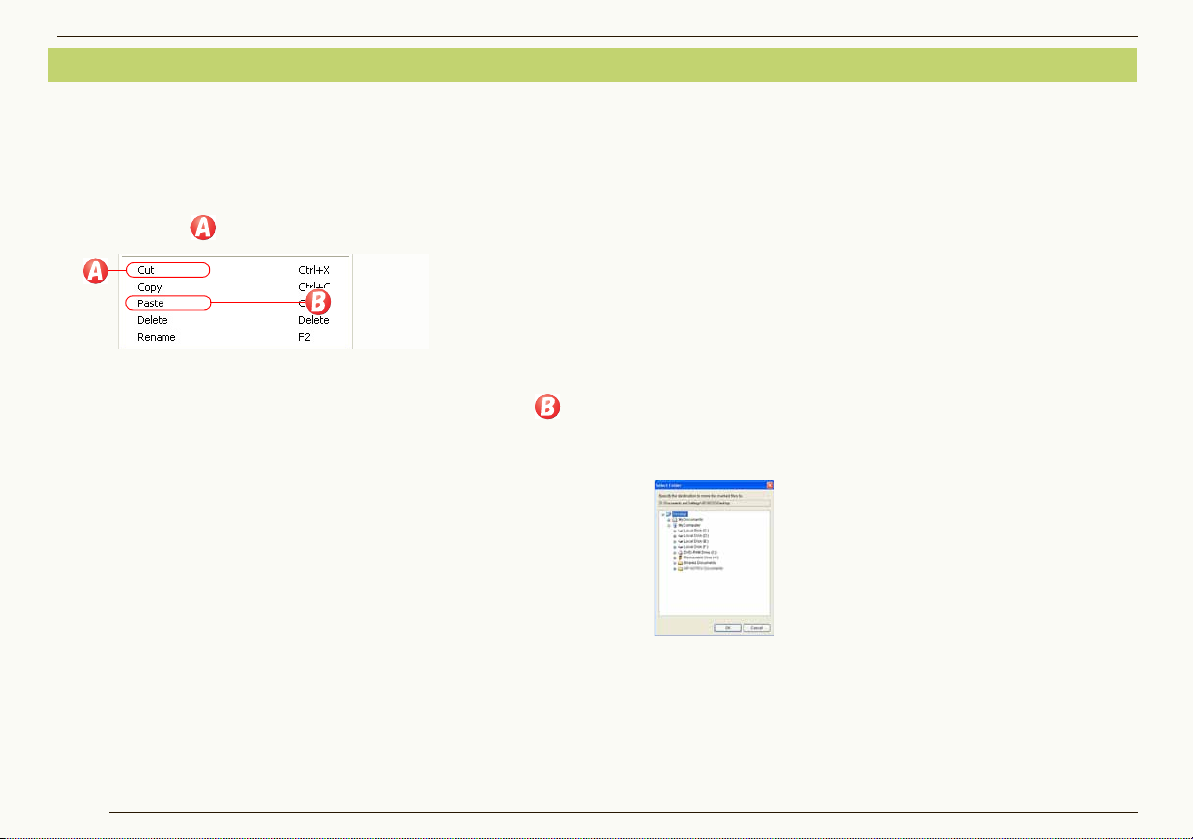
2 Right-click the picture to open the context menu
and select .
3 Open a target folder, right-click in the picture
browser to open the context menu, and select .
• You cannot copy any picture into [Categorize].
• When you apply this operation to a file in the
[Categorize], its registration itself is also copied.
• When you want to copy pictures into [Memory Card],
refer to “Writing pictures onto a memory card” (81).
J Copying using Menu
1 )Select a picture to be copied in the picture browser.
2 )Select [Edit] [Copy] from the menu.
3 )Open a target folder and select [Edit] [Paste] from
the menu.
J Copying by dragging and dropping
In the case of the List mode or the Focus mode, pictures
can be copied by dragging the desired picture while
pressing the [Ctrl] key on the picture browser and then
dropping it into the destination folder in the folder view.
• When you copy a picture to a folder in a different drive,
you can copy it by simply dragging and dropping it into
the folder without holding down the [Ctrl] key.
J To copy marked pictures
1 )Select [Edit] [Copying marked files] from the menu.
The folder selection screen will appear.
2 )Select the destination folder and click [OK].
21
Page 22
Moving pictures
Basic operations Moving pictures
1 Select a picture to be moved in the picture
browser.
2 Right-click the picture to open the context menu
and select .
3 Open the target folder, right-click in the picture
browser to open the context menu, and select .
• You cannot move any picture into the [Categorize].
• When you apply this operation to files in the
[Categorize], the original files are moved.
• No picture can be moved into [Memory Card]. To copy,
refer to “Writing pictures onto a memory card” (81).
J Moving using Menu
1 )Select a picture to be moved in the picture browser.
2 )Select [Edit] [Cut] from the menu.
3 )Open a target folder and select [Edit] [Paste] from
the menu.
J Moving by dragging and dropping
In the case of the List mode or the Focus mode, pictures
can be moved by dragging the desired picture on the
picture browser and then dropping it into the destination
folder in the folder view.
• When you move a picture to a folder in a different drive,
hold down the [Shift] key while you drag and drop it into
the folder. If you do not hold the [Shift] key while you drag
and drop it, the file will be copied, not moved.
J To move marked pictures
1 )Select [Edit] [Moving marked files] from the
menu.
The folder selection screen will appear.
2 )Select the destination folder and click [OK].
If the result of moving is not reflected in the picture
browser after these operations, refresh the display on
the picture browser. (23)
22
Page 23
Basic operations Deleting pictures
Deleting pictures
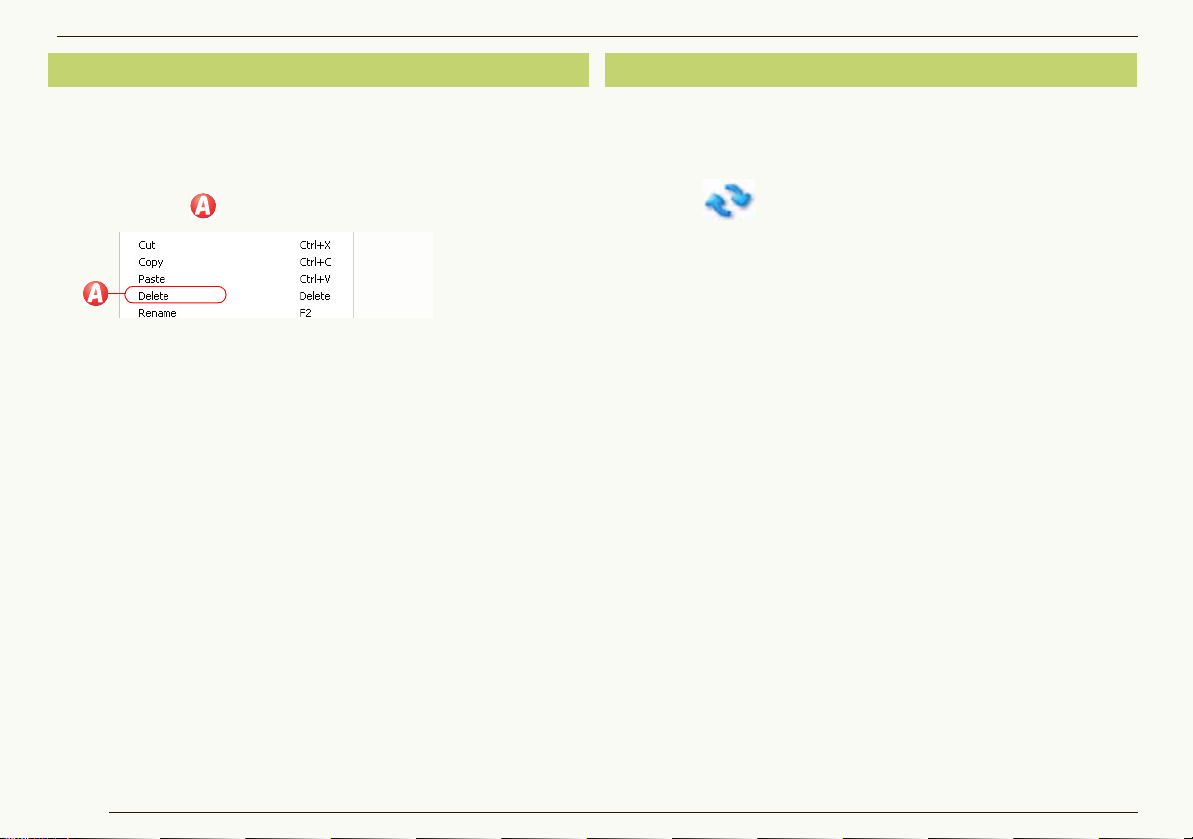
1 Select a picture to be deleted in the pic ture brow ser .
2 Right-click the picture to open the context menu
and select .
The confirmation message will be displayed. Select
[Yes] to delete the picture.
• You may also delete the picture by pressing the
[Delete] key while the picture is selected.
• If you delete pictures in the [Categorize], the pictures
will be deleted only from the registration. The original
pictures themselves will not be deleted.
J Deleting using Menu
1 )Select a picture to be deleted in the picture browser.
2 )Select [File] [Delete] from the menu.
The confirmation message will be displayed. Select
[Yes] to delete the picture.
Refreshing the display
When the result of the operating such as copying, moving
or deleting pictures, etc. is not reflected on the picture
browser, refresh the display on the picture browser.
1 Click [ ] .
• The display on the picture browser is also refreshed by
pressing [F5] key or selecting [View] [Refresh] from
the menu.
When the operations to the files and folders performed
on the software except PHOTOfunSTUDIO are not
reflected on the picture browser or the folder view,
refresh the display on the picture browser or the folder
view.
When you eject a memory card from the digital camera
or re-insert a memory card to the digital camera, refresh
the display.
If the result of deleting is not reflected in the picture
browser after these operations, refresh the display on
the picture browser. (23)
23
Page 24

Acquiring and displaying pictures
Acquiring and displaying pictures
Acquire recorded pictures from the digital camera to the PC 25
Acquire pictures from a digital camera using PHOTOfunSTUDIO.
Displaying the acquired pictures in list view 27
Acquired pictures can be displayed in a list by the picture browser.
Displaying pictures by reco rd ing date 28
Pictures can be displayed by sorting in calendar format based on their recording date.
Displaying enlarged pictures 29
Pictures can be displayed by enlarging them to full screen size.
Playing back slide shows 30
Slide shows can playback using the acquired pictures.
You can also set desired switching effect and music to the slide shows.
Pictures may not be acquired normally if digital cameras other than Panasonic products are used. To acquire or to
categorize pictures properly, set the clock setting properly on the digital camera before recording. You can properly
acquire pictures with recording dates from 1971 to 2037 with this software.
24
Page 25
Acquiring pictures from a digital camera
1
2
3
5
4
A
B
C
D
Acquiring and displaying pictures Acquiring pictures from a digital camera
Connect a digital camera and a PC. (7)
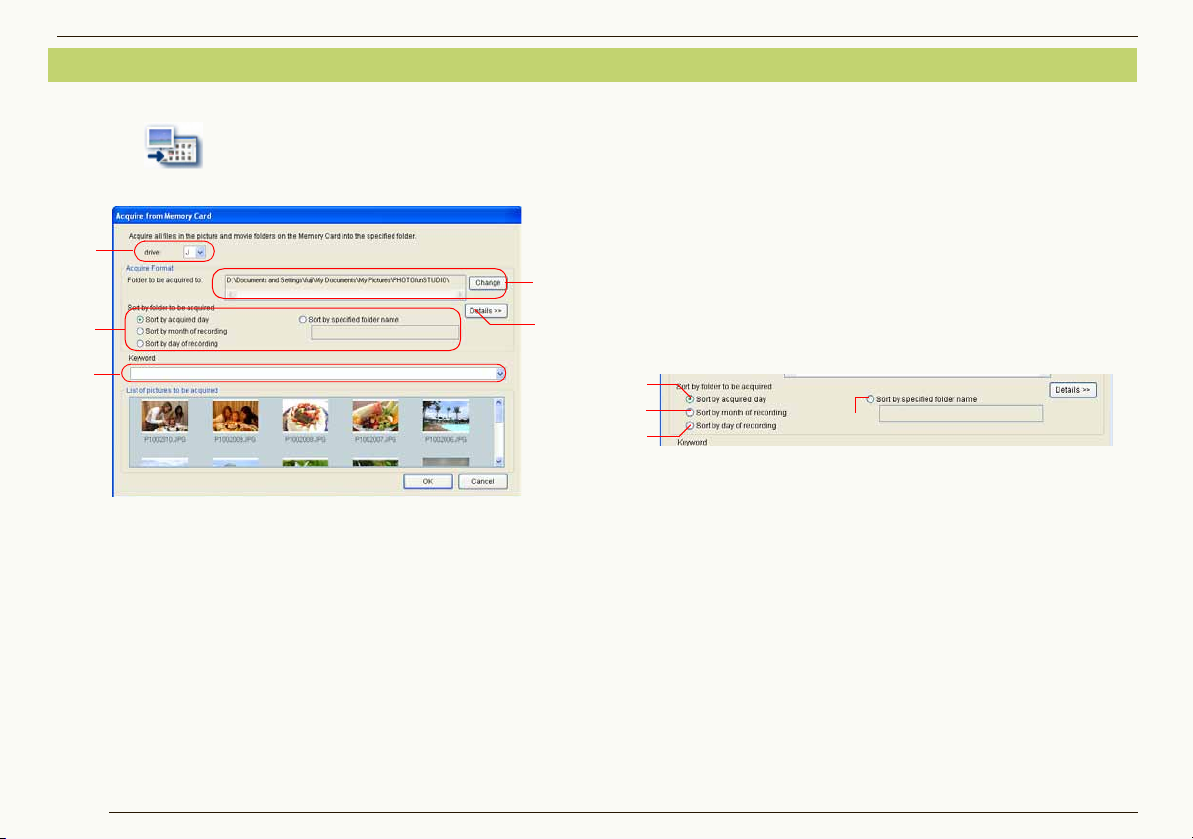
1 Click [ ].
[Acquire from Memory Card] panel is opened.
• When two or more digital cameras are connected,
select the appropriate drive letter (e.g., E, F) from 1
for the digital camera you wish to acquire from.
• Right-click the thumbnail of any picture and select
[Properties], and you can see the picture information.
2 Check the acquisition destination folder. (2)
• The acquisition destination folder is
[PHOTOfunSTUDIO] by default.
Folder path
(when Windows
25
®
is installed on drive C):
C:\Users\(User Name)\Pictures\PHOTOfunSTUDIO
(Windows Vista
C:\Documents and Settings\(User Name)\
My Documents\My Pictures\PHOTOfu nS TUDIO
(Windows
• When you change the folder to save the acquired
pictures, click [Change] to select the desired folder.
®
)
®
2000/XP)
3 Set the classification (sub-folder). (3)
In the acquisition destination folder, pictures can be
classified by creating sub-folders based on conditions.
A.Classifies and stores the pictures in sub-folders
created according to the acquisition date (today's
date). (Example: 081225).
B.Classifies and stores the pictures in sub-folders
according to the month when recorded. (Example:
0812).
C.Classifies and stores the pictures in sub-folders
created according to the day when recorded.
(Example: 081225).
D.Classifies and stores pictures in entered name
sub-folders.
Page 26

Acquiring and displaying pictures Acquiring pictures from a digital camera
E
F
G
Memory card
4 Set optional settings.
The following setting items are displayed by clicking on
[Details] (4).
E.Method of handling files with the same file name
F. File naming method
G. Setting automatic categorization
Refer to 97 – 98 for these settings.
5 Set a keywor d.
The acquired picture ca n be categor ized by giv i ng a
common keyword. (40) Keyword can be directly
entered in 5 or selected from the existing keywords by
clicking .
6 Click [OK].
Pictures are acquired based on the above settings.
After acquisition of picture is completed, the following
message will be displayed.
The picture file saved to the computer is deleted from
the memory card, if [Yes] is clicked.
Pictures will remain in memory card, if [No] is clicked.
• With some types of digital camera, it will not be
possible to d elete pictures in the memory card using
PC operations.
If the message [Insert a memory card containing pictures
taken by a digital still camera.] appears, check the
following:
-Whether the USB conn ection cable is secur ely inserted
into both the digital camera and the PC.
-Whether the d igital camera is po wered on .
-Whether the d igital camera is set for conn ecting to a PC.
(For details, refer to the op erat ing in struct ions for the
digital camera.)
-Whether the folder shown below is present on the memory
card.
If there is no folder shown in the figure, the card is not
recognized as the memory card. In such case s, insert the
card into the card slot of the digital camera again and record
pictures, and folders are automatical ly created and the card
comes to be recognized as the memory card.
(However, only the files stored in the folder enclosed in a red
frame can be acquired.)
26
Page 27

Acquiring and displaying pictures Displaying the acquired pictures in list view
Displaying the acquired pictures in list view
Displays pictures acquired from the digital camera in the
picture browser.
1 Click [Explorer] title bar in the folder view to open
[Explorer] window.
2 Click the folder where acquired pictures are saved.
Acquired pictures are displayed in a list by the picture
browser.
• For details about various kinds of icons to display
on thumbnails, refer to 13.
• If [Explorer] is not displayed, select [View] [Folder]
[Explorer] from the menu.
• If the whole folder view is not displayed, click folder
view open/close button to display it. (12)
• To display folders in the picture browser, check [View
subfolder] on [View] menu.
When the screen display is distorted because the screen
saver is started or other reasons, refresh the screen
display. (23)
The acquisition destination folder is
[PHOTOfunSTUDIO] by default.
Folder path (when Windows
C:\Users\(User Name)\Pictures\PHOTOfunSTUDIO
(Windows Vista
C:\Documents and Settings\(User Name)\
My Documents\My Pictures\PHOTOfunSTUDIO
(Windows
®
)
®
2000/XP)
®
is installed on drive C):
27
Page 28
Displaying pictures by recording date
1
2
Acquiring and displaying pictures Displaying pictures by recording date
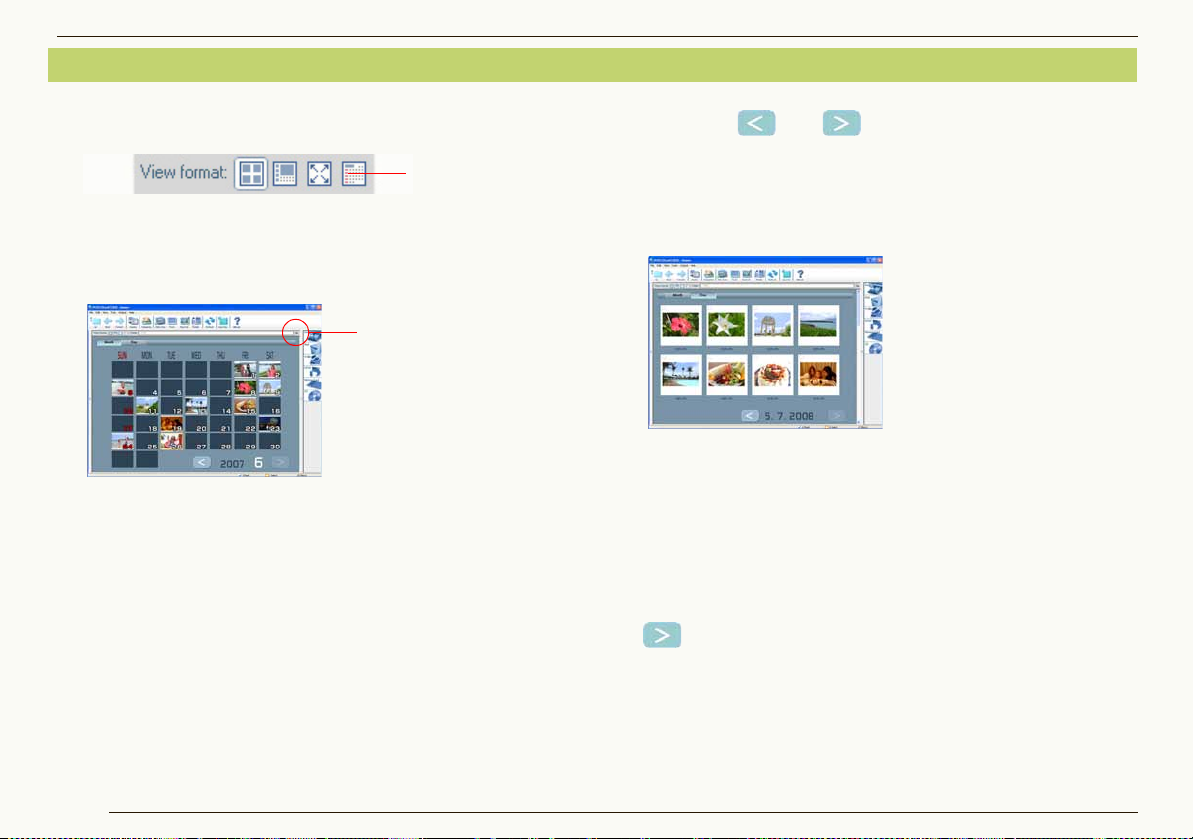
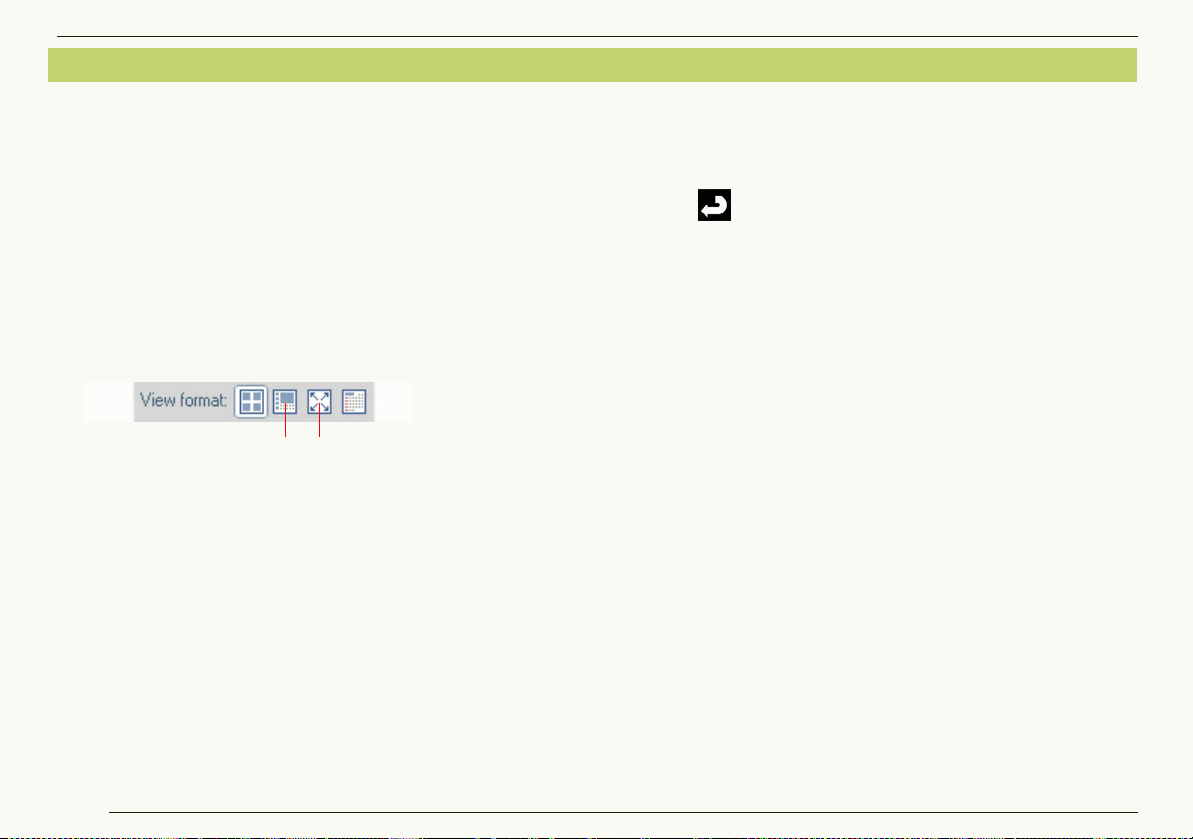
1 Select Calendar mode (1) from [View fo rma t ].
Pictures in the [My pictures] ([Pictures]) folder (including
pictures in the sub folders) are sorted by recording date
according to the Exif information (111) and displayed
in the calendar.
• The calendar for a month wit h a picture with the latest
recording date in the folde r will be displa yed. If there a re
pictures from 1970 or before and 2038 or later, pages
showing the se pic tu res co llective ly ar e displa ye d first.
• If there are two or more pictures recorded on the same
day, the latest picture will be used in thumbnail view.
• Pictures with no recording date in Exif will be sorted
according to the date the file was updated.
•To display pictures in other folders, click the folder
selection button (2) to select and display the desired
folder.
2 Click the [ ] or [ ] button to display a specific
month.
3
Double-click the thumbnail of the date to be displayed.
The calendar will switch to the daily calendar display and a
list of the pictures recorded on that day will be displayed.
• You can switch to the daily calendar display by
selecting the thumbnail view and clicking the [Day]
button on the top of the calendar.
Only a calendar during the period from 1971 to 2037 can
be displayed. Pictures that were recorded/updated in 1970
or before or pictures that will be recorded in 2038 or after
will be displayed collectively on the last page that can be
displayed using the month forward/day forward buttons
[ ]. (The year and date will be displayed with [
Since pictures are sorted according to the date when the
file is first created or updated with the calendar display
function on the digital camera, the same pictures may be
displayed with a different date in PHOTOfunSTUDIO.
If displays on the screen are corrupted, such as after
starting the screen saver, update the display. (23)
`
].)
28
Page 29
Displaying enlarged pictures
1
2
Acquiring and displaying pictures Displaying enlarged pictures
In the Focus mode or the Full Screen mode, pictures can
be seen in enlarged view.
You cannot enlarge pictures from the monthly calendar
display in Calendar mode. Switch to the daily calendar
display or List mode. (86)
1 To enlarge a picture, click to select the picture in
the picture browser.
2 Select Focus mode (1) or Full Screen mode (2)
from [View format].
• You cannot switch from the daily calendar display to
focus mode.
z Pictures can also be enlarged by the following
methods.
• Double-click a picture.
• Right-click a picture and select [Focus] or [Full Screen]
from [View Format].
• Select a picture and select [View] [View Format]
[Focus] or [Full Screen] from the menu.
z To return from the Full Screen mode (2) to the
previous screen (mode):
• Press [Esc] key.
• Double-click the picture.
• Click [ ] on the screen.
When playing motion pictures, the pictures and/or voice
may be interrupted depending on the performance of
your PC.
29
Page 30
Playing back slide shows
1 2 3
Acquiring and displaying pictures Playing back slide shows
Pictures saved on the PC can be played back as a slide
show.
The number of pictures in any one slide show should be
restricted to 1000 or fewer. When there are more than
1000, the pictures may not play back correctly.
Playing back pictures in an open folder as a slide show
1 Display the folder to be played back as a slide
show in the picture browser.
2 Click [ ] on the toolbar and select [Start slide
show].
The slide show of pictures saved in the folder starts.
• If a slide show starts in the daily calendar mode,
pictures recorded on the same day play back as a
slide show.
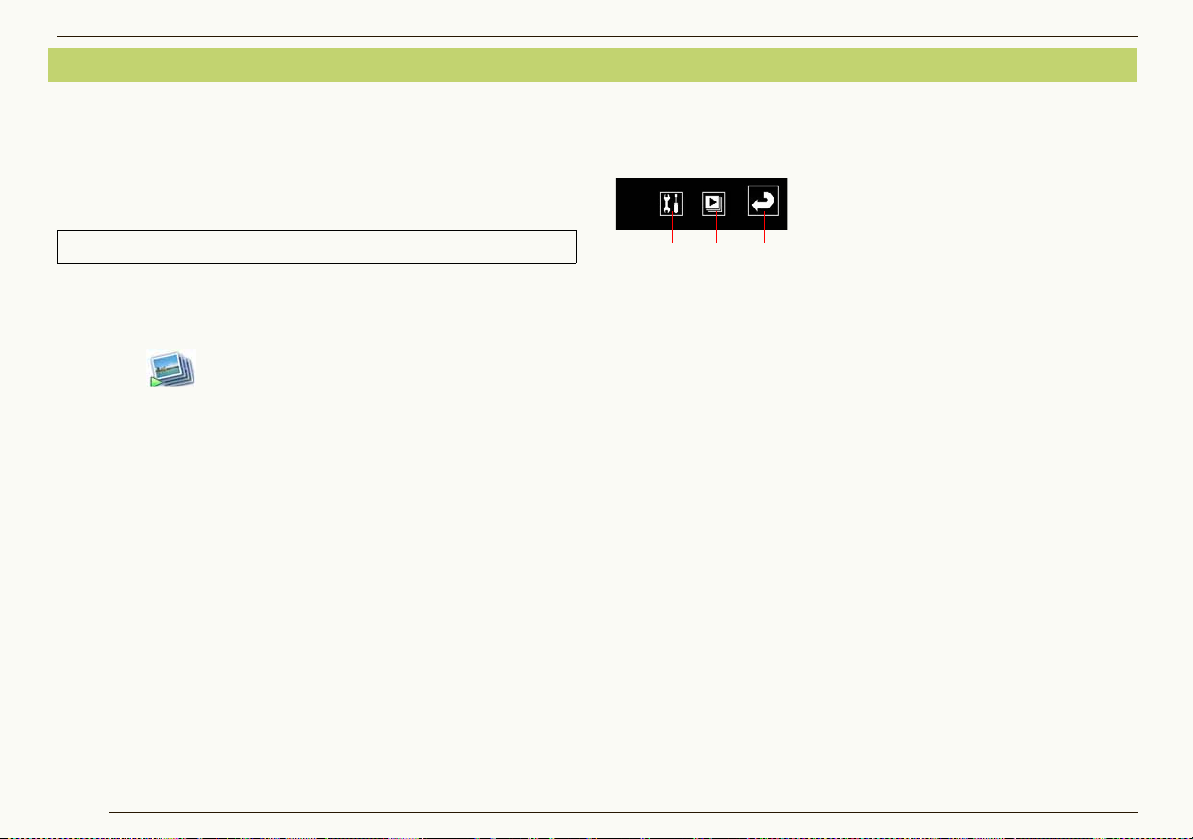
J Operation handling during slide show
If the mouse is moved during the slide show, the operation
button is displayed at the bottom of the screen.
1 Slide show settings button
Click this button to display the settings window for the
slide show. (32)
2 Slide show start/stop button
Click this button to start the slide show. Click again to
stop.
3 Exit button
Click this button to return to previous screen and
terminate the slide show.
30
Page 31

Acquiring and displaying pictures Playing back slide shows
A
B
Creating a slide show from your favorite pictures
1 Put a mark on the pictures you want to use in slide
show. (19)
• To play back a slide show including pictures from
specific folders, select folders containing the pictures
using the folder view (no marks required).
2 Click [ ] on the toolbar and select [Create slide
show].
3 Select the set of pictures you want to use, and
click [OK].
A.The marked pictures
B.All pictures in the folder
4 Adding, deleting and rearranging pictures using
the playback list window.
•See 33 for more details of these operations.
• Click [Detld settngs] to set picture effects, music and
other settings relating to the slide show. (32)
Opening the saved slide show
1 Click [ ] from tool bar, and select [Registered
slide shows].
Saved slide shows will be displayed.
2 Click [Open] by selecting file to be opened.
3 Perform desired operations using the play list
window. (33)
31
Page 32

Acquiring and displaying pictures Playing back slide shows
A
B
C
D
1
2
3
5
6
4
Settings for slide shows
J Detailed settings for slide shows
Click [ ] during the slide show to open the [Slide show
settings] window.
These settings can also be changed from the menu.
Display [Settings] window by selecting [Tools]
[Settings], click [Slide Show] tab and perform settings.
1 Effects settings
A Selected picture effects are used while switching pictures.
B The pictures are switched over at regular intervals without
using picture effects. Set the number of seconds by clicking
.
2 Music settings
Background music can be added to a slide show by
putting a check mark on .
C Music matched with the settings of switching effects is
selected automatically.
D Click [Browse] to select a music file.
• Files in M4A format, MP3 format, WMA format or WAV
format can be used. However, some files may not be played
back.
3 Settings for repeat operations
If a check mark is put on , the slide show will be
replayed from start after picture reaches the end.
4 Setting image quality
Selects picture quality of the slide show to be displayed.
• Recommended system requirements are as follows:
[Prioritize picture
quality]
[Standard] Pentium
[Prioritize speed] Pentium® III 800 MHz or higher
• Please note that depending on the system environment and
usage status it may not play back normally even with the
recommended systems. For example:
-When this software is being used while other software is
operating
-When using a computer equipped with a video card that
shares the vi deo memory and main memory
-When the free space on the system drive or temporary file
destination drive is extremely low
Core™2 Duo 2.4 GHz or higher
®
4 1.6 GHz or higher
32
Page 33

Acquiring and displaying pictures Playing back slide shows
1
2
5
3
6
A
4
5 [OK] button
[Slide show settings] window will be closed after saving
the changes.
6 [Cancel] button
[Slide show settings] window will be closed after
canceling the changes.
J Operations performed on the play list window
Add/delete/sort operations of the pictures used in the play
list window can be executed.
1 Play list
The pictures used in slide show are displayed in the
sequence of play back.
z Switching of picture sequence
Change the sequence of the pictures by dragging and
dropping i n the play list.
z Adding the pictures
Drag and drop the pictures to be added from the picture
browser in the play list.
• Motion pictures cannot be used in the slide show.
z Deleting the pictures
Click on the [Cancel reg.] button (A) after selecting
unwanted pictures from the play list.
(The picture file itself is not deleted.)
2 Music files
Music files used in slide show are displayed.
To change the music, click on the [Music] from the folder
view and drag and drop the desired tune to the play list
window from the music browser.
3 [Save] button
The slide show under creation can be saved by giving it a
name by clicking this button. Music and picture effect
settings can also be saved together.
4 [Detld settngs] button
Click this button to open the detailed settings window
(32). Picture effect, music and other settings can be
made using the detailed settings window.
5 [Start] button
The slide show under creation can be played by clicking
on this button.
6 [Back] button
Click this button to exit slide show creation and return to
the previous window.
33
Page 34

Playing music files
Acquiring and displaying pictures Playing music files
PHOTOfunSTUDIO comprises a function to access and play
the music files saved in the computer. It is very convenient
while previewing the music files used in slide show.
Supported file format:
M4A, MP3, WMA, WAV
1 Click [Music] title bar in the folder view.
Music folder tree will be displayed.
2 Select the folder to be viewed.
The music file list in the selected folder is displayed in
the browser.
3 Click on play button [ ] of music file you want to
listen to.
Music file will be played.
The play button changes to [ ] when the music is
playing. Click to stop the music.
Music files only can be accessed or played.
Music files cannot be copied, deleted or moved in
PHOTOfunSTUDIO.
J To change the location (path) of the music folder
Display the [Settings] window by selecting the [Tools]
[Settings] from the menu, and click on the [Music setting]
tab.
Folder tree from the hard disk will be displayed by clicking
on [Browse]. Select the folder in which music files are
saved and click [OK].
34
Page 35

Categorization
Categorization
The PHOTOfunSTUDIO has functions to categorize acquired pictures in accordance with a specified condition
and to group them.
The pictures categorized are registered in the [Categorize] to be easily viewed in a list form. When the number of
recorded pictures increases, it is hard to find pictures to be viewed. However, if the complete pictures are
categorized, the target pictures will be found easily.
Flow of categorization 36
Details on categorization 37
-Categorization by record ing da te 37
-Categorization by record ing scene 37
-Categorization by face det ection 39
-Categorization by model name 39
-Categorization by st orage fol der 40
-Categorization by keyw ords 40
The pictures which can be categorized are the pictures in the following formats. (However, only pictures in JPEG format
or TIFF format with Exif information can be categorized by model name and recording scene.)
Still picture:
JPEG format (extension .JPG, .JPEG, .JPE), BMP format (extension .BMP), TIFF format (extension .TIF, .TIFF)
Motion picture:
MOV format (extension .MOV)
Others:
RAW format (extension. RAW, RW2)
Up to 10,000 pictures can be categorized at one time.
However, depending on the amount of the memory installed in the PC, the number of pictures to be categorized may be
restricted to less than 10,000.
Pictures except those acquired in the PC (pictures in a CD-ROM, memory card, etc.) cannot be categorized. Categorize
pictures after acquiring them on the hard disk of the PC.
35
Page 36

Flow of categorization
A
B
1
2
C
D
E
F
G
H
Categorization Flow of categorization
Only the pictures in the hard disk can be categorized.
Acquire the pictures from the memory card (digital
camera) into the PC beforehand. (25)
1 Put a mark on the pictures to be categorized. (19)
• If you want to process the pictures from each of the
folders, select the folder from the folder view in
which pictures are available. (In such cases, it is not
necessary to mark the pictures)
2 Click [ ] on the tool bar.
3 Select pictures.
A.The marked pictures
B.All pictures in the folder
•If 1 is checked, pictures in the subfolder are also
categorized at the same time.
36
4 Select a categorization condition.
• Refer to the following pages for details.
C.Categorization by recording date (37)
D.Categorization by recording scene (37)
E.Categorization by face detection (39)
F. Categorization by model name (39)
G. Categorization by storage folder (40)
H.Categorization by keywords (40)
• Directly enter the categorization condition in 2 or
select from the registered keywords by clicking on .
• Up to 64 characters (single-byte) can be registered
as the keyword.
• The following characters cannot be used.
\ ? / ” ; : , < > ! * | ’ ^ [ ] % _
5 Click [OK].
If you categorize many files at one time, it may take time
to proceed with registration of the files to a database.
Page 37

Details on categorization
Categorization Details on categorization
Categorization by recording date
If you want to categorize the pictures by recording date,
the year/month/day folders are created in [Categorize] –
[Date] of the folder view and corresponding pictures are
registered in it.
When there is no information about the recording date
on the picture file, the date of update is replaced as the
recording date.
Pictures recorded by digital cameras made by other than
Panasonic may not be categorized normally. To
categorize pictures properly, check the clock setting on
the digital camera before recording. You can properly
categorize pictures with recording date from 1971 to
2037 by using this software.
The pictures that could not be categorized are registered
in [Keyword] folder of [Categorize] as [Pictures with no
date].
Categorization by recording scene
If you want to categorize the pictures based on recording
scene, the folder for each scene mode is created in
[Categorize] – [Recorded Scene] of the folder view and
corresponding pictures are registered in it.
Only JPEG and TIFF files with Exif information
containing recording scene information can be
categorized.
Pictures recorded in Intelligent Auto mode are
categorized in subfolders of the respective scenes that
are automatically identified in the [INTELLIGENT AUTO]
folder.
37
Page 38

Categorization Details on categorization
Pictures recorded in Advanced scene mode are
categorized in subfolders by detailed scenes in the
respective folders in [PORTRAIT], [SCENERY],
[SPORTS], [NIGHT PORTRAIT], or [MACRO].
Pictures categorized in [Travel date], [Pet mode] or
[Baby mode] of [Keyword] in the PHOTOfunSTUDIO 1.4
or before are transferred to the respective folder in
[Recorded Scene].
For [Travel date], [PET] and [BABY], subfolders are
created according to title information attached to the
pictures , and pictures are categorized into each folder.
Pictures with no title information are categorized into a
subfolder named [Travel date], [PET] or [BABY].
In the [Category] folder, pictures are categorized in
subfolders of the respective categories, similar to the
[CATEGORY] function of LUMIX digital cameras.
Category Scene modes
[PORTRAIT], [i-POR TR AIT], [SO FT SKIN],
PORTRAIT
SCENERY
NIGHT
SCENERY
EVENTS
BABY
PET
FOOD
UNDERWATER
Travel date
MOTION
IMAGE
[SELF PORTRAIT], [NIGHT PORT RAIT],
[i-NIGHT PORTRAIT], [BA BY]
[SCENERY], [i-SCENERY], [SUNSET],
[AERIAL PHOTO]
[NIGHT PORTRAIT], [i- NI GHT PORT RA IT] ,
[NIGHT SCENERY], [i-NIGHT SCENERY],
[STARRY SKY]
[SPORTS], [PART Y], [CAN DL E LI GHT] ,
[PANNING], [FIR EWOR KS ], [BEAC H] ,
[SNOW], [AERIAL PHOTO]
[BABY]
[PET]
[FOOD]
[UNDERWATER]
[TRAVEL DATE]
[MOTION PICTURE]
38
Page 39

Categorization Details on categorization
Categorization by face detection
If you want to categorize the pictures based on face
detection, the folders are created based on the number of
detected faces in [Categorize] – [Face recognition] of the
folder view and corresponding pictures are registered.
Pictures in which 3 or more faces are detected will be
categorized as [Group] pictures.
There may be cases where the count of number of
persons whose face has been detected and count of
actual number of persons who are in the photo does not
match depending upon the recording conditions.
Categorization by model name
If you want to categorize the pictures by model, the folders
based on the manufacturer’s name or model name are
created in [Categorize] – [Model Name] of the folder view
and corresponding pictures are registered in it.
Only JPEG and TIFF files with Exif information
containing model name information can be categorized.
39
Page 40

Categorization Details on categorization
Categorization by storage folder
If you want to categorize the pictures based on the folders
in which pictu r e s ar e st or ed , th e fol de r tr ee wi th pi ct u re s is
displayed in [Categorize] – [Folders Containing Pictures] of
the folder view. Picture storage destination can be easily
accessed from this folder tree.
The following operations are disabled in the folder tree
for [Folders Containing Pictures]. Execute them in the
folder tree in the [Explorer] window.
• To change folder names
• To move or copy pictures
Categorization by keywords
If you want to categorize the pictures based on keywords,
the folders for individ ual keywords are created in
[Categorize] – [Keyword] of the folder view.
You can add two or more keywords to a picture. Pictures
with two or more keywords are registered in each
corresponding keyword folder redundantly.
J When categorizing pictures by [My favorites]
If you enter [My favorites] as a keyword, [ ] is placed onto
the pictures just like those set to “FAVORITE” with a
compatible digital camera.
• When outputting these pictures to the memory card and
reproducing them with a compatible digital camera,
“FAVORITE” icon is also displayed in the pictures on the
digital camera. (Only for JPEG and TIFF files with Exif
information)
This is also applicable to the pictures set to “My favorite”
on the simplified version of PHOTOfunSTUDIO, “LUMIX
Simple Viewer”.
40
Page 41

Changing the keyword
Categorization Changing the keyword
When categorizing [Keyword], you can change the folder
name.
1 Select a folder with a name you want to change
from [Keyword] folder in [Categorize] on the folder
view.
• You cannot select the whole categorization or multiple
items in the categorizatio n.
• You cannot change [My favorites].
• The categorization name, other than [Keyword],
cannot be changed.
2 Right-click to select .
Now the folder name can be changed. Input a new
name and then press [Enter] key.
• Up to 64 alphanumeric (single-byte) characters can be
set as a folder name.
• The following characters cannot be used for the folder
name.
\ ? / ” ; : , < > ! * | ’ ^ [ ] % _
• You cannot change the folder name to the following
names.
“Enter a keyword.”
41
Page 42

Deleting categorization
Categorization Deleting categor i za ti o n
You can delete (cancel) pictures from the categorization
and delete (cancel) one complete folder in the
categorization. You can also delete all the categorizations
at one time.
Even if the p ictures are deleted from the categoriza tions,
the original pictures still remain as they are.
Deleting pictures from categorization
Pictures can be deleted from folders in each
categorization.
1 Select the categorization folder which in cludes a
desired picture from the [Categorize] on the folder
view.
2 Select the pictures to be deleted on the picture
browser.
• If you click pictures while holding down the [Ctrl] key,
you can select multiple pictures.
3 Right-click to open the context menu and then
select [Delete].
The confirmation message for deleting categorization
information appears. Click [Yes] to delete pictures from
the categorization.
• The picture is deleted only from the registered
categorization database, not deleted from the hard
disk.
If the picture deleted from the categorization item folder
is still displayed, click [ ] to refresh the display or
open another folder, then open the categorization item
folder again.
In the [Recorded Scene] category, if one picture is
registered in multiple folders, and any one of the pictures
is deleted, all registrations of that picture will be
removed.
When the original picture is deleted, the picture in the
[Categorize] is also deleted.
42
Page 43

Deleting a folder in a categorization
You can delete unnecessary categorizations.
1 Select a categorization folder to be deleted from
the [Categorize] in the folder view.
• You cannot select the whole categorizations or two or
more folders in a categorization.
However, if the categorizations are hierarchized, all
folders in the lower hierarcy below the selected folder
are selected. For example, in the case of [Date],
selecting the “Month” folder selects all “Day” items in
the sub folder and selecting the “Year” folder selects
all “Month” and “Day” items in the sub folder.
Categorization Deleting categor i za ti o n
2 Right-click to select .
The confirmation message for deleting categorization
appears. If you click [Yes], the selected categorization
folders are deleted.
You cannot delete [My favorites] folder in [Keyword]
categorization.
J To delete the whole of one categorization
Repeat the deletion procedure for each categorization
folders. When all the folders in the categorization are
deleted, the categorization in the [Categorize] will be
deleted.
43
Page 44

Deleting all categorizations
You can delete all the categorizations at one time.
When you want to delete the whole categorization status
because it is erroneous, PHOTOfunSTUDIO is reinstalled
(the picture categorization information was not deleted
when PHOTOfunSTUDIO was uninstalled), etc., delete it
using the following procedure:
Delete categorizations when PHOTOfunSTUDIO is
stopped.
Categorization Deleting categor i za ti o n
2 Click [Yes].
1 Select [start ] [All P rograms ] [ Panaso nic]
[PHOTOfunSTUDIO -viewer-] [Delete picture
management information].
44
3 Click [Yes].
The categorization information and the comment
information (95) are deleted, however, the original
picture files cannot be deleted.
Page 45

Process
The PHOTOfunSTUDIO allows a picture acquired or organized to be proces sed.
When you process pictures, it is recommended to save the pictures on the hard disk beforehand.
Process flow 46
To resize a picture 48
You can reduce the size of pictures and decrease the file size by changing the data compression ratio of JPEG.
To convert the format of a picture 49
You can convert pictures into BMP (bitmap) format, TIFF format or JPEG format.
To change the file names of pictures at one time 50
You can change the file name of pictures by numbering sequentially.
To add date and title information on pictures 52
The recording date and the title information can be added to the picture.
To change the recording date of a picture 54
You can correct recording date information for pictures which have incorrect recording dates (because you forgot the
clock setting of the digital camera in recording, etc.).
To create still pictures from motion pictures 55
It is possible to divide motion pictures into frames and display them. It is also possible to save your favorite frames as
still pictures (JPEG format), including saving a successive nine frames as a single still picture (JPEG format).
To rotate a picture 57
Process
If the results of the processes are not reflected on the picture browser after the operations described above, refresh the
display on the picture browser. (23)
45
Page 46

Process flow
1
2
3
4
5
6
7
A
B
Process Process flow
You can process pictures as follows.
1 Put a mark on the pictures to be processed. (19)
• If you want to process the pictures from each of the
folders, select the folder from the folder view in
which pictures are available. (In such cases, it is not
necessary to mark the pictures)
• For the file format that can be processed, refer to the
page corresponding to each processing.
2 Select a desired process type.
1 Changing the picture size
2 Converting the picture
format
3 Changing several file
names at one time
4 Adding date and title
information to a picture
46
5 Changing the recording
date
6 Creating still pictures
from motion pictures
7 Rotation
3 Select pictures and click [OK].
A.The marked pictures
B.All pictures in the folder
• If [Create still picture] is selected in Step 3, only one
motion picture (MOV format) can be processed by a
single operation. If there are two or more motion
pictures to be processed, click [Yes] when the
confirmation message is displayed to open the settings
screen for the first motion picture only. Click [No] to
return to the previous screen without processing.
4 Set the details of the process on the setting screen.
1 Changing the picture size
48
2 Converting the picture
format 49
3 Changing several file
names at one time
4 Adding date and title
information to a picture 52
50
5 Changing the
recording date
6 Creating still pictures
from motion pictures
55
7 Rotation
54
57
Page 47

Process Process flow
A
B
C
D
E
5 Specify how to save.
• In this description, the screen for changing the picture
size (1) is used.
z Processing the original picture directly:
A.Select the check box.
• In case of converting the picture format (2), select
[Delete the original file] check box in the lower part
of the screen.
• If the original picture must be maintained, deselect it.
z Creating a new picture without deleting the
original picture:
Clear the check box A and perform the following settings.
[Save Destination Folder]
B.The created picture is saved in the same folder as the
original picture.
C.Saved in any folder you designate.
Click [Browse] and [Select Folder] screen will appear.
Select any folder you want to designate as the save
designation and click [OK].
47
[Name of File for Storage]
D.The same name as the file name of the original
picture is given.
If a file having the same name already exists, a
parenthesized number is suffixed. (Example:
[P1000123 (1)])
• If you select this item for picture files on the memory
card, those files may not be reproduced by your
digital camera.
E.A file name that can be reproduced by digital
cameras is given. (4 alphabet characters + 4-digit
number. Example: [IMGA0123])
•However, only JPEG files (extension .JPG) can be
reproduced by digital cameras.
6 Click [OK].
• If [Create still picture] is selected in Step 3, different
saving procedures will apply. Refer to 55.
Page 48

Resizing a picture
A
B
C
Process Resizing a picture
1 Select [Resize] as the process type. (46)
• You can resize pictures in BMP format, JPEG format
and TIFF format.
• You can select two or more pictures to resize at one
time.
2 Set the picture size.
[Resize picture]
A.Enter the desired size into [Width] and [Height].
• The maximum value to be entered depends on the
memory size on the PC.
• Check [Length-to-width ratio fixed] and set either
[Width] or [Height], and the other will be
automatically set.
If the aspect ratio is changed, the picture will be
distorted. Unless otherwise necessary, it is
recommended not to deselect [Length-to-width ratio
fixed].
48
B.Set the desired picture size with the
[Expansion/reduction ratio] with reference to the
original picture size.
• The settable range is 1% to 200%. However, you
cannot set the maximum value depending on the
memory size of the PC.
• If either [Width] or [Height] is changed to 1 or less
after resizing, 1 will be set.
[Change JPEG compression ratio]
C.If the picture to be resized is in JPEG format, the
compression ratio can be set by the slider.
• Move the slider to the right for lower compression
ratio or to the left for higher compression ratio.
• The higher the compression ratio is set, the smaller
the file size becomes and the more the picture
quality is degraded.
3 Specify how to save. (47)
4 Click [OK].
A resized picture is created.
• If you select multiple pictures, the same settings are
applied to all pictures.
Page 49

Converting picture format
Process Converting picture format
1 Select [Format conversion] as the process type.
(46)
• You can convert pictures in BMP format, JPEG format
and TIFF format.
• You can select two or more pictures and convert their
format at one time.
2 Set the picture format.
[Format conversion]
Sets the picture format you would like to convert to. You
can select any of BMP (bitmap), JPEG or TIFF.
• You cannot select the same format as that of the
original picture.
•If two or more pi ctures are s elect ed, yo u can sel ect th e
same picture format as that of the original picture, but
the conversion will be carried out only for the pictures
in different formats.
For example, if the formats of the original pictures are
BMP, JPEG and TIFF and [JPEG] is selected in
[Format conversion], the BMP and TIFF pictures will
be converted into JPEG format but the conversion will
not be carried out for the JPEG pictures.
3 Specify how to save. (47)
4 Click [OK].
The format of the picture selected is converted.
• If you select multiple pictures, the same settings are
applied to all pictures.
Even if a JPEG picture is converted to TIFF or BMP
format, the quality of the picture cannot be improved.
49
Page 50

Process Changing several picture file names at one time (Batch renaming)
Changing several picture file names at one time (Batch renaming)
You can change the names of files in numerical serial
sequence.
1 Select [Batch renaming] as the process type. (46)
2 Enter the name which is commonly used as the
first half of the file names of all files on and
click .
The names of the picture files selected are changed to
the common name + a serial number at one time.
• If there is a file having the same name and the same
serial number, the serial number will be skipped and
ascended for renaming the next file.
• If you want to set in detail, see 51.
When the file name of the picture in the memory card is
changed, the picture cannot be played on the digital
camera in some cases.
If you cannot play the picture after you changed the file
name of the picture, acquire the picture file to the hard
disk once and then write it onto the memory card with
the procedure described in “Writing pictures onto a
memory card” (81). The file will be written with its file
name automatically changed to be suitable for playing
on the digital camera.
However, given attention to the free space of the
memory card because the original file is left on it.
50
Page 51

Process Changing several picture file names at one time (Batch renaming)
A
B
D
E
F
H
C
G
I
1
J Advanced settings for Batch renaming
z Display of the files to be renamed
A.The file names before and after changing can be
checked.
In [After the change], the results of the naming rule
set in [Name Settings] reflected are displayed. Verify
them before clicking [OK].
z Name Settings
[Character String]
B.You can add any character string common to the
names of all the files.
The character string set here and the serial number
to be set in the [Numeric Value] below are combined
to make file names.
51
• Up to 64 alphanumeric (single-byte) characters can
be set.
C.The serial number to be set in the [Numeric Value]
below and the original file name are combined to
make file names.
[Numeric Value]
Sets the serial number which is a part of the name.
(Clicking 1 displays the serial number part.)
D.Sets the start number from which the serial number
starts. The settable range is 0 to 1,000.
E.Sets the number of digits for the serial number. The
settable range is 1 to 9.
F. Sets the increment of the serial number. Up to 1,000
can be set.
G. You can put parentheses around the numeric value
or set a symbol between the character string and the
numeric value. How these options are reflected can
be verified in [After the change].
[Order]
Sets the order of the ch aracter st ring a nd the num eric va lue.
H.The character string comes first, then the numeric
value.
I. The numeric value comes first, then the character
string.
Page 52

Process Adding date and title information to a picture (Burn-in)
A
B
C
D
Adding date and title information to a picture (Burn-in)
2 Set the information to be added together with the
date and title information.
1 Select [Burn-in] as the process type. (46)
• You can select and insert the recording date and title
information onto two or more pictures at one time.
• If there are pictures imprinted with the date and the
title information from a digital camera compatible with
the [DATE STAMP ] and [T EXT STAMP] functi on s, t he
message “The same data will be inserted over the
existing date and the title information” appears when
the insertion is performed.
If [Yes] is clicked, the insertion will continue.
If [No] is clicked, the insertion will stop.
(If there are pictures with the date and title information
inserted by other than the [DATE STAMP] and the
[TEXT STAMP] functions, the mess age wil l not
appear, so check the contents carefully before
performing the insertion.)
A.Insert the date.
(Only pictures with the recording date information in
JPEG or TIFF format of Exif)
B.Insert the number of travel days (kkth day of travel).
(Only pictures recorded with the [TRAVEL DATE]
function on a digital camera)
Insert the age in months/years.
C.
(Only pictures recorded with the [WITH AGE] function
on a digital camera with [BABY] mode and [PE T]
mode.)
D.
Insert the title information.
(Only pictures recorded together with title information
on a digital camera equipped with a [TITLE ED IT]
function.)
• The date and title information will be inserted on the
bottom right of the picture. A maximum of three lines
will be indica t e d in the or de r o f A, B/C, and D from the
52
top.
Page 53

3 Specify how to save. (47)
4 Click [OK].
Pictures with the date and title information will be saved.
• When you select multiple pictures, the equal settings
will be applied to all of the pictures.
The color and size of the characters used for the
inserted date and title information cannot be changed.
When the date and title information are inserted, the
picture will be recompressed, and picture quality may be
degraded.
The date may not be properly added and printed on
pictures if the date was not set on the digital camera
when the picture was taken or if it was recorded by a
digital camera not manufactured by Panasonic.
Process Adding date and title information to a picture (Burn-in)
53
Page 54

Changing the recording date
A
B
D
E
C
Process Changing the recording date
You can change the recording date of only JPEG and
TIFF pictures with Exif information (con taini ng the
recording date information).
1 Select [Recording date change] as the process
type. (46)
• You can select multiple pictures and change the
recording date at one time.
2 Set the date and time of recording.
z Display of the target picture
A.Displays the file name of the target picture.
• When you select multiple pictures, you can switch
them with [ ], [ ] and [ ].
B.The date which is now set as the recording date is
displayed.
z Setting new date and time
C.Sets the month, day, year, hour, minute and second.
D.When this button is clicked, the calendar dialog is
opened and you can set the date from the calendar
dialog.
E.The same settings can be applied to all of the
selected pictures.
3 Specify how to save. (47)
4 Click [OK].
The pictures whose date and time of recording have
been changed are saved.
• You can set the recording dates from 1971 to 2037.
In the case of pictures recorded with the [BABY] mode,
[PET] mode or with the [TRAVEL DATE] function by the
digital camera that supports these functions, the age in
months/years or the number of travel days is not
changed even if the recording date has changed.
54
Page 55

Creating still pictures from motion pictures
1
Process Creating still pictures from motion pictures
You can divide motion pictures into frames of a certain
time length and save your favorite frames as still pictures
(in JPEG format of Exif).
Only motion picture files recorded in the MOV format,
recorded on Panasonic’s LUMIX digital still cameras can
be processed.
1 Select [Create still picture] as the process type.
(46)
• It is impossible to process two or more motion pictures
at one time.
2 Set the number of frames per second.
• If the value [15] is set, for instance, motion pictures will
be divided into still pictures every 1/15 (one-fifteenth)
of a second.
• You cannot select a number of frames that exceeds
the number of frames (fps) in the motion picture files.
3 Click the [ ] button to play back the mo tion
picture.
The motion picture will be played back at the center of
frames that are divided into nine sections.
4 Click [ ] button at yo ur favo rite position to
stop the motion picture being played back.
The motion pictures stop and the previous and next
frames are displayed as still pictures.
• You can move the displayed position by moving the
motion picture playbac k slide r (1) horizontally while
the motion picture is being played back or while
stopped.
• You can move frames forward/backward one by one
by clicking the [ ] button or the [ ] button while
stopped.
5 Click the frame that you want to save as a still
picture.
• Double-click the frame to enlarge the displayed still
picture so that the detailed contents can be confirmed.
55
Page 56

6 Specify how to save. (47)
7 Click [Save picture].
The selected frame will be saved as a still picture.
• If you want to continue to save other scenes as still
pictures, repeat Step 3 to 7.
z To save nine successive frames as a single still
picture
Click the [Save 9 screens] button to save the nine
frames collectively displayed as a single still picture.
8 Click [Exit].
The [Create still picture from video] screen will close
and return to the original screen.
Some motion blur can occur on the created picture,
especially if there is fast moving action in the motion
picture. T his is normal and not a malfunction.
Process Creating still pictures from motion pictures
56
Page 57

Rotating picture (Rotate)
A
B
Process Rotating picture (Rotate)
1 Select [Rotate] as the process type. (46)
• You can rotate pictures in BMP, JPEG and TIFF format.
• You can select two or more pictures to rotate them at
one time.
•When you rotate many pictures at one time, it may
take time to finish the process.
2 Set the direction of rotating the picture.
• When the setting panel does not appear, select [Show
setting panel before rotating.] in [Rotate] tab on the
Option setting panel. (99)
Select the direction and angle to rotate the picture.
A.
You can sele ct [R otate 90 d egree s clockw ise] , [Rot ate
180 degrees] or [Rotate 90 degrees anticlockwise].
B.If checked, not only the picture with its Exif
information being rewritten is rotated, but also the
actual picture data will be rotated as well.
• However, when the actual picture is rotated, it is
recompressed and the picture quality may be
deteriorated.
3 Specify how to save. (47)
4 Click [OK].
The selected pictures will be rotated.
• When you select multiple pictures, the equal settings
will be applied to all of the pictures.
• You can also rotate pictures with the settings set
beforehand without displaying the setting panel. Select
[Hide setting panel] in [Rotate] tab on the Option
setting panel and set in detail. (99)
J Rotating pictures using the context menu
You can rotate only JPEG and TIFF pictures with Exif
information using the context menu.
1 )Select the pictures to be rotated from the picture
browser.
2 )Right-click the picture to open the context menu
and then select [Clockwise 90-degree rotation] or
[Anticlockwise 90-degree rotation].
• The original picture is directly rotated by the change in
Exif information.
57
Page 58

Retouch
Retouch
PHOTOfunSTUDIO is equipped with the retouch function, which is capable of correcting pictures and adding
effects.
By using the retouch function, you can adjust the brightness and color tone of pictures as well as adding such
effects as blur and sharpness.
Start and exit the retouch function 59
Screen configuration of the retouch function 60
To correct pictures or add effects 62
To save retouched pictures 65
Please note: When adjustments made to a picture’s color, contrast, brightness or hue are made, the appearance of the
printed pictures may differ slightly from that which is seen on your PC’s monitor. This is due to the individual adjustments
of your PC’s monitor and video card. This is normal and does not indicate a malfunction.
When any adjustments or modification to a picture is made, we suggest you save the modified picture by another name.
This way, the original picture is preserved for possible use in the future.
When performing any modification to a photo, the amount you can adjust, and still maintain good quality, is limited. For
example, if you have a very dark photo, it's not possible to lighten extremely and maintain very good quality.
58
Page 59

Start and exit the retouch function
Retouch Start and exit the retouch function
Start
1 Select the picture to be retouched from the picture
browser.
2 Click [ ] on the toolbar.
The retouch function starts and the selected picture will
be displayed in the picture window.
• If multiple pictures are selected, the confirmation
message will be displayed. Select [Yes] to start the
retouch function for the top picture. Select [No] to
cancel the retouch function and return to the original
window.
• With the retouch function, you can edit and process
only files in JPEG, BMP or TIFF formats, among the
picture formats supported by PHOTOfunSTUDIO.
Exit
1 Select [File] [Exit] on the menu bar for the
retouch function.
• You can also exit by clicking [ ] on the top right of
the retouch screen.
• Alternatively, click the [Return to original screen]
button on the left-hand side of the retouch screen.
59
Page 60

Screen configuration for the retouch function
1
2
3
4
5
1 Picture window
Displays the pictures being retouched. When pictures are
retouched, the operation results will be reflected every
time.
2 Me nu ba r (66)
Collectively displays available retouch function operations
by type.
3 Toolbar
Collectively displays the buttons for frequently used
functions.
Retouch Screen configuration for the retouch function
: Magnification ratio
Displays the current magnification ratio of the picture
window.
[Actual Size]
When this button is clicked, the picture is displayed in the
actual size.
[Zoom]
When clicked, the button turns orange, and the mouse
pointer becomes a magnifying glass (Enlarged/Reduced
mode). Left-click once in this state to increase
magnification by one step. Right-click once to decrease
the magnification by one step.
To return to normal mode from the enlarged/reduced
mode, click the button again.
[Undo]
Cancels the last operation and returns the screen to the
state before executing the operation.
[Redo]
Executes the same operation again that had been
canceled.
[Undo All]
Cancels all of the executed retouch operations and
returns to the initial state.
60
Page 61

[Rotate Left]
When this button is clicked, the displayed picture rotates
90 degrees to the left.
[Rotate Right]
When this button is clicked, the displayed picture rotates
90 degrees to the right.
4 Editing panel
[Picture]
The picture files in the selected folder when starting the
retouch function will be displayed in thumbnail view.
However, files that cannot be displayed in thumbnail view
will be displayed with [k]. Files that were deleted with
software other than PHOTOfunSTUDIO after starting the
retouch function may be displayed with an [k].
[Effect] (62)
With these buttons, you can change brightness, contrast,
chroma, colour phases, sharpness and other
characteristics of the picture and execute auto correction.
5 [Return to original screen] button
Click this button to exit the retouch function, and return to
the original window.
Retouch Screen configuration for the retouch function
61
Page 62

Correcting pictures or add effects
1
2
1
1
Retouch Correcting pictures or add effects
1 Double-click a picture to be retouched in the
[Picture] panel.
• This operation is not required if the picture to be
retouched has already been displayed in the picture
window.
2 Select items corrections and add effects on the
[Effect] panel and set details.
[Brightness & Contrast]
Click this button to display the slider (1) for adjusting
brightness, contrast and gamma.
Adjust by moving the slider and checking the effects in
the picture window.
By clicking 2, you can select colours to be corrected
among [Red], [Green], [Blue] and [All colors].
[Hue & Saturation]
Click this button to display the slider (1) for adjusting
hue and saturation.
Adjust by moving the slider and checking the effects in
the picture window.
[Sharpness]
Click this button to display the slider (1) for sharpening
or shading pictures.
Adjust by moving the slider and checking the effects in
the picture window.
[Sepia]
Click this button to convert picture colors to sepia.
62
Page 63

Retouch Correcting pictures or add effects
1
2
[Negative]
Click this button to invert negative and positive pictures.
[Grey Scale]
Click this button to convert pictures to gray scale
(monochrome pictures).
[Red Eye Remove]
Click this button to display a frame (1) for setting the
range of red eye elimination. Set the frame on the area
of red eye effects and cli ck [Apply] (2) to reduce red
eye.
• Effects of red eye elimination may vary with the
picture.
[Auto Enhancement]
Click this button to automatically correct brightness and
contrast.
• This function is effective when the subject has been
photographed in backlight and it is too dark. However,
the expected effects may not be obtained with some
pictures.
• When a picture is printed incorporating the picture
quality correction function, do not execute auto
correction with the retouch function. The picture may
be corrected too much.
J To cancel retouching effects
Click [ ] on the toolbar or select [Edit] [Undo] on the
menu to cancel the previous operation and return the
picture to the state before executing the retouch operation.
With this function, it is possible to cancel the previous
operations of up to 20 times.
To execute again the canceled operation, click [ ] on the
toolbar or select [Edit] [Redo] on the menu.
Click [ ] on the toolbar or select [Edit] [Undo All] on
the menu to cancel all retouching operations. The picture
then returns to the initial state.
63
Page 64

Retouch Correcting pictures or add effects
1
2
J To execute retouching using the menu
Instead of the editing panel, you can correct or add effects
to pictures from [Effect] on the menu bar.
To set [Brightness & Contrast], [Hue & Saturation] and
[Sharpness], the respective windows for detailed settings
will be opened.
The setting methods are the same as the editing panel.
Whenever settings are changed, the results will be reflected in
the picture window and in the set values on the editing panel.
To fix the contents and close the detailed settings screen,
click [OK].
Click [Cancel] to cancel the setting and close the detailed
settings screen. Pictures in the picture window and the
settings on the editing panel will also return to the initial
states before the detailed setting screen was opened.
J To extract a part of a picture
It is also possible to extract only the necessary part of a picture.
1 )Select [Effect] [Crop Picture] on the menu.
The [Crop Picture] panel will be displayed.
2 )Designate the necessary part by dragging the
anchor point (1) and click [OK].
The designated part will be extracted.
• You can also set the size of the part to be extracted by
entering a numerical value in (2).
The printed quality of the extracted portion may be of a
lesser quality than the original. This occurs more often
when the extracted portion is printed at a large size. This
is normal and not a malfunction.
64
Page 65

Saving retouched pictures
1
Retouch Saving retouched pictures
To save with a new name
1 Select [File] [Save As] from the menu.
2 Set the location for saving pictures, the file name
and the file type, and then click [Save].
• Only files in BMP format, JPEG format and TIFF
format can be saved.
• If the original pictures are recorded in JPEG format,
the recording information for the original pictures can
be saved by checking (1) to save in JPEG format.
To overwrite
1 Select [File] [Save] from the menu.
The [Save As] window will be displayed for pictures that
have not been saved. To overwrite the original picture,
save the picture using the same name as the original.
From the second time, pictures will be overwritten
simply by selecting [Save].
65
Page 66

Retouch function menu
Retouch Retouch function menu
J [File] Menu
[Save]
Overwrites the edited file.
[Save As]
Renames and saves the edited file.
[Exit]
Exits from the retouch function.
J [Edit] Menu
[Undo]
Cancels the previous operation.
[Undo All]
Cancels all of the executed retouch operations and returns
to the initial state.
[Redo]
Restores a canceled operation.
J [View] Menu
[Actual Size]
Cancel the zoom on the edit window to switch to the actual
size display (100%).
[Fit Window]
Adjusts the image to the size of the edit window. (The
aspect ratio is not changed.)
[Zoom]
You can select the magnification from 25% to 600%.
[Toolbar]
When you tick off this menu, the toolbar is displayed on the
screen.
[Editing Panels]
When you tick off this menu, the editing panel is displayed
on the screen.
[Frame Line]
When you tick off this menu, a frame line is displayed on
the edit window.
66
Page 67

J [Effect] Menu
[Brightness & Contrast] (62)
[Hue & Saturation] (62)
[Sharpness] (62)
[Sepia] (62)
[Negative] (63)
[Grey Scale] (63)
[Red Eye Remove] (63)
[Auto Enhancement] (63)
[Crop Picture] (64)
J [Help] Menu
Retouch Retouch function menu
[About Retouch]
Displays the version information of Retouch function.
67
Page 68

Outputting
Outputting
Not only can you enjoy looking at pictures acquired from a digital camera in the picture browser, but you can also
print them with a printer, or attach them to e-mails. You can also make wallpaper from them. One of the features of
the PHOTOfunSTUDIO is the ability to output pictures acquired in various formats.
Output flow 69
To print pictures 70
Not only can you print pictures one by one, but print multiple pictures (2, 4, or 8 pictures) on a sheet of paper to the
paper size and print multiple reduced pictures in list form. You can also print the pictures recorded using “SIMPLE
MODE” of digital camera to sizes appropriate to those pictures.
To attach pictures to e-mails 76
You can easily process pictures so that you can attach them to e-mails.
To make wallpaper from pictures 79
You can make wallpaper from the acquired pictures.
To DPOF-set 80
You can set DPOF setting on the pictures in a memory card.
To copy pictures into the memory card 81
You can write edited or altered pictures into a memory card.
To write pictures to a CD or a DVD 83
You can save pictures to a CD-R/RW or a DVD R/RW.
68
Page 69

Output flow
1 Print
2 Attaching to E-mail
3 Setting as Wallpaper
4 DPOF Setting
5 Outputting to the memory card
6 Writing to a CD/DVD
A
B
C
Outputting Output flow
You can output pictures as follows.
1 Put a mark on the pictures to be output. (19)
• If you want to process the pictures from each of the
folders, select the folder from the folder view in
which pictures are available. (In such cases, it is not
necessary to mark the pictures).
• For the file format that can be output, refer to the page
corresponding to each outputting.
2
Select a desired output destination in the Output view.
• If you drag the selected pictures to the output
destination button, go to Step 4.
• You can also select any output destination from the
context menu opened by right-clicking a picture.
69
3 Select pictures and click [OK].
A.The marked pictures
B.All pictures in the folder
• When you select [DPOF Setting] (4) as the output
destination:
C.Reads the pictures already subjected to DPOF
setting on the memory card.
4 Set and output.
1 Print 70
2 Attaching to E-mail 76
3 Setting as Wallpaper 79
4 DPOF Setting 80
5 Outputting to the
memory card 81
6 Writing to a CD/DVD
83
Page 70

Printing picture
Outputting Printing picture
This function cannot be used when the printer setting is
®
not completed on Windows
.
1 Select [ ] as the output destination. (69)
•The printable picture formats are JPEG, BMP, TIFF
and MOV format.
• Up to 1,000 pictures can be printed at one time.
2 Select a desired print type.
Print type Description
Print 1 picture on a page Prints one picture on one sheet.
Print 2 pictures on a page Prints 2 pictures on one sheet.
Print 4 pictures on a page Prints 4 pictures on one sheet.
Print 8 pictures on a page Prints 8 pictures on one sheet.
Index printing (large thumbnail) Prints about 20 thumbnails on
Index printing (medium
thumbnail)
one sheet.
Prints about 40 thumbnails on
one sheet.
Print type Description
Index printing (small thumbnail) Prints about 80 thumbnails on
Index printing (Adjust to paper) Prints up to about 160
Print file inform a tio n Prints thumbnail s a nd fi le
Print camera informa ti on Prints thumbnails and camera
Simple Print
*1
one sheet.
thumbnails on one sheet,
which are sized to the sheet.
information as an index print.
information as an index print.
Prints th e pictures rec orded
using “SIMPLE MODE” of
digital camera to sizes
appropriate to picture mode.
• Pictures are arranged after automatically enlarged or
reduced to the sheet size (except in [Simple Print]) and
rotated.
*1:In [Simple Print], pictures are arranged on the sheet of paper by the
picture mode specified on recording.
The print size of pictures is as given below.
Mode Picture size
4zk6z/10k15cm L size (89 × 127 mm)
E-MAIL A7 size (70 × 93 mm)
ENLARGE Size adapted to print paper
Pictures recorded in different modes are not printed together on the
same sheet of paper.
When printing pictures other than the ones recorded in “SIMPLE
MODE”, those pictures are printed in the size adapted to printing paper.
70
Page 71

Outputting Printing picture
1
2
3 Set the layout.
• The contents of the setting vary depending on the print
type. (73)
• A picture to be printed is displayed in [Print Preview].
Clicking 2 displays the previous or next page, and
typing a page number in 1 and pressing [Enter] key
displays the corresponding page.
• When you want to examine the picture in the enlarged
view, click [Enlarged view].
• The inside of the dotted-line frame (red) is to be printed.
• If there are pictures imprinted with the date and title
information from a digital camera that is compatible
with the [DATE STAMP] and [TEXT STAMP] functions,
the message “The same data will be printed over the
existing date and the title information” appears when
[Show date] or [Show title information] is checked.
If [Yes] is clicked, the recording date and the title
information will be added when printing because these
check boxes remain selected. (Confirm the printed
contents in [Print Preview].)
If [No] is clicked, these check boxes are cleared, and
the recording date and the title information will not be
added.
(If there are pictures with the date and the title
information inserted by other than the [DATE STAMP]
and the [TEXT STAMP] functions, the message will
not appear, so check the contents carefully with [Print
Preview] before printing.)
4 Select when compensating using PRINT Image
*2
Matching
• You cannot compensate thumbnail pictures.
• If you select any printer or paper incompatible with
PRINT Image Matching or Exif Print, the selection is
canceled.
*2:Refer to Glossary. (111)
information or Exif Print*2 information.
71
Page 72

Outputting Printing picture
A
B
C
D
E
F
A
B
C
5 Perform paper setting.
A.Select a printer.
B.When you select this check box, borderless printing
(which refers to printing without leaving any marg ins
of the paper) is set.
• This option can be selected when you use a printer
compatible with EPSON EasyPrintModule
printer is incompatible with it, set from D.
• You cannot select this check box if your printer is
incompatible with borderless printing.
C.Select a paper size.
D.When you click this button, the Properties screen of
the printer appears. You can adjust Advanced
settings of the printer there.
• The settings specified in the Properties screen are
reflected on items A to F.
E.Set the picture quality.
• This option can be selected only when you select a
paper type permitting picture qua lity setting.
F. Select a paper type.
72
*3
. If your
• This option can be selected when you use a printer
compatible with EPSON EasyPrintModule
printer is incompatible with it, set from D.
*3:EPSON EasyPrintModule is a program, supplied from EPSON, which
permits you to easily configure the print settings of your printer from
compatible application software. If you use an EPSON printer, install
the module supplied with your printer.
*3
. If your
6 Set the print range.
[Page Ran ge]
A.Prints all pages.
B.Pr in ts only pag es dis pl ayed in [Pr i nt Previ ew].
[Number of copies]
C.Sets the number of prints for one page.
7 Click [Print start].
• To stop printing, click [Exit].
• To break printing halfway, click [Cancel].
With motion pictures, the first scene of the motion picture
is printed. You cannot select a scene halfway to print.
Page 73

Outputting Printing picture
A
B
C
E
F
D
A
B
C
D
A
G
H
I
A
G
H
A
B
C
J Details of layout setting
z [Print 1 picture on a
page]
z [Print 2 pictures on
a page], [Print 4
pictures on a page],
[Print 8 pictures on
a page]
z [Index printing]
73
z [Print file
information], [Print
camera information]
z [Simple Print]
A.Select a desired orientation of paper.
B.If you check this box, the date of recording is displayed on the
picture.
• If there is no information about the recording date, the last
update date is displayed.
• The date is set in accordance with the Regional Settings in
®
Windows
Control Panel.
• The date may not be properly added and printed on pictures for
which the date was not set on the digital camera or those
recorded by digital cameras made by other than Panasonic.
• Set a digital camera equipped with the [BABY] mode to [WITH
AGE] and take pictures, and the pictures are printed with the age
in months/years as well as the date of recording. (This setting
can be changed. (75))
• Set a digital camera equipped with the [PET] mode to [WITH
AGE] and take pictures, and the pictures are printed with the age
in months/years as well as the date of recording. (This setting
can be changed. (75))
• If the digital camera is equipped with a [TRAVEL DATE] function
and you set this function and take pictures, the pictures are
printed with number of travel days (kkth day of travel) as well
as the date of recording. (This setting can be changed. (75))
C.If you check this box, the title information will be printed on the
picture.
D.If you check this box, a frame is added around the picture.
• Clicking [ ] opens the color selection panel, on which you can
set the color of the frame.
E.If you check this box, the picture is printed without changing its
size.
Page 74

• When the picture lies off the edges of the paper, you
can adjust its position by clicking the operating
buttons ([Top]/[Bottom]/[Left]/[Right]).
If you click [Centring], the picture is adjusted so that
its center will match the center of the print area
(inside the dotted-line frame).
• When you adjust the picture to print it in full on the
paper, the picture may be cut due to errors in
feeding paper, in process to enlarge or minimize the
size of the picture, etc. When you trim the picture,
leave a little blank/white space on the sides of the
paper.
• If you clear this check box, the whole picture is
printed.
F. If you check this box, categorization information
(comment, keyword) are displayed in the lower part
of the paper.
• This takes effect only when information is set in the
picture file.
• The line feed position of the comment on the
preview screen may differ from the line feed position
on the actual print.
G. Enter letters and they will appear in the upper part of
the paper.
H.If you check this box, the paper number is displayed
in the lower part of the paper.
I. Set the contents displayed under each thumbnail.
Outputting Printing picture
74
Page 75

Outputting Printing picture
A
B
D
F
G
H
I
C
E
z Clicking [Options] button enables you to make more
detailed settings.
[Date setting]
If adding the recording date on the picture, you can set the
following items.
A.You can show/hide information other than the
recording date ([Travel date] <kkth day of travel>
and [Baby/Pet] <age in months/years>).
B.Set the display position.
C.Clicking [ ] opens the color selection panel, on
which you can set the color of the letters.
[Set title information]
To add title information to a picture, set the following items.
D.You can select either [Top] or [Bottom] of the display
position.
• Printing is normally done from the left side of the
picture.
• If the position for the printing date is the same
position as the title information (top left or bottom
left), the title information will be printed on the right
side of the picture.
E.Clicking [ ] opens the colour selection panel,
where you can set the colour of the characters.
[Set the categorisation information]
If adding the categorization information, you can set the
following items.
F. You can select categorization items to be displayed.
G. Set the display position.
H.You can make the background transparent/opaque.
[Font setting]
I. Types of characters (fonts) used for the date, title
information and categorization information can be
set.
If you rotate pictures recorded in portrait orientation
lengthwise beforehand, you can print the date etc. on the
position determined.
75
Page 76

Attaching pictures to e-mail
1
2
Outputting Attaching pictures to e-mail
You can attach acquired pictures to e-mail. You can
change both the file size and picture size at the same time
that is necessary when attaching pictures to e-mail.
With e-mail software other than Windows
Microsoft
attaching pictures to e-mails using this function may not
work.
®
Outlook® and Microsoft® Outlook Express,
®
Mail,
1 Select [ ] as the output destination. (69)
• The picture formats that can be attached to e-mails are
BMP, JPEG, TIFF and MOV.
• You can attach up to 20 pictures at one time.
2 Set the picture size and file size to appropriate size
and click .
• For details, se e 78.
3 Check the current settings and then click .
• If the file size exceeds the set size, the file size (1) is
displayed in red. When you want to review the picture
size or other information, you can return to the setting
panel by clicking 2.
• It is recommended to restrict the total file size of an
e-mail (the file size of the message text plus those of
pictures to be attached) to 1 MB.
4 The e-mail software starts and the message box is
opened with the picture attached. Enter the
required items.
76
• Enter the destination, title and message and send it as
you normally would.
Page 77

J If you cannot attach a file to an e-mail
The e-mail software must be set up. Exit from the
PHOTOfunSTUDIO, and set up as follows:
1 )Activate the mail software to be set up.
• If you activate it for the first time, set the mail
addresses, etc.
2 )If the message, [Would you like to make it your
default client?] appears, select [Yes].
• If the message does not appear, refer to the operating
instructions of the e-mail software to set the e-mail
software as the default client.
Example: Select [start] [Control Panel] and open
[Internet Options]. Then click [Programs] tab, select
the software you use on [E-mail] and click [OK].
• The contents of the message vary by the e-mail
software you are using.
• Also read the operating instructions for the e-mail
software.
Outputting Attaching pictures to e-mail
77
Page 78

Outputting Attaching pictures to e-mail
AB
C
I
J
D
E
F
G
H
J Advanced settings for e-mail sending
z Picture file confirmation buttons
A.Clicking these buttons switches to the previous and
the next picture when multiple pictures are selected.
B.A picture converted with the set conditions is
temporarily displayed. (Preview)
• Preview is allowed by an application associated with
the conver ted picture.
• You cannot switch to the previous or subsequent
pictures on the preview screen.
C.The properties of the original picture are displayed.
z Picture size setting
D.You can specify any size. The settable maximum
picture size depends on the amount of memory
installed in the PC.
• Be aware that the attached picture will be skewed if
the set aspect ratio differs from that of the original
picture.
• With [Length-to-width ratio fixed] selected, when
you enter any number in either [Width] or [Height]
area, an appropriate number that maintains the
original picture’s length-to-width ratio is
automatically set in the other area.
E.Sets the picture size by the zoom ratio. The settable
zoom ratio is 1% to 200%.
z Setting the file size and picture format
F. Sets the target file size for a picture to be attached.
The selectable target values are [About 100 KB],
[About 300 KB], [About 500 KB], [About 1 MB], and
[Not specified].
However, if formats other than JPEG is selected in
[Format], the file size cannot be set.
G. Set if you convert the format of the picture when it is
attached to an e-mail.
The selectable picture formats are [JPG], [BMP] and
[TIF].
z Others
H.The picture size, file size and file format currently set
is applied to all the pictures selected. Click this if you
apply the same settings to all the files to be attached.
I. Opens [Check Sending].
J. The attachment is canceled and the panel is closed.
MOV file cannot be converted to other size or file
formats. (The buttons are greyed out.)
78
Page 79

Using a picture as wallpaper
Outputting Using a picture as wallpaper
1 Select [ ] as the output destination. (69)
• The picture formats that can be used as Wallpaper are
BMP, JPEG and TIFF.
• Only one picture can be set.
2 Select the display position with and click .
z You can select a desired display position from
among the following.
[Stretch]:
The picture is expanded as large as the desktop to be
displayed.
[Center]:
The picture is displayed on the center of the desktop.
[Tile]:
The picture is duplicated and laid on the entire screen.
• If the selected picture is larger than the desktop size, a
message asking whether or not the picture size is
changed will appear. If you want to change the picture
size to the desktop size to use the picture as
wallpaper, click [Yes].
If the wallpaper is not displayed, click the desktop and
press the [F5] key, and it will be displayed.
When the aspect ratio of the picture set as a wallpaper is
different from that of the display of your PC, the picture
may be stretched vertically or horizontally. In this case,
set [Picture Display] to [Center] or [Tile].
[PHOTOfunSTUDIO wallpaper] will be created on the
desktop setting screen of the PC.
79
Page 80

DPOF-setting
A
D
F
B
C
E
Outputting DPOF-setting
Only the still pictures (JPEG format or TIFF format) in
the memory card recorded by a digital camera can be
DPOF-set. Select pictures in [Memory Card] on the
folder view. (Cannot be set if the pictures are selected
from memory card drive in [Explorer].)
1 Select [ ] as the o utpu t destination . (69)
• Only one memory card can be DPOF-set at one time.
If pictures are selected from multiple memory cards
(selected with the mark), the memory card selection
screen will appear. Specify a desired memory card by
the drive letter (e.g., C, D) and click [OK]. (Pictures in
other memory cards cannot be DPOF-set.)
2 Set the number of prints and other items.
z Displaying the target picture
A.Displays the file name of the target picture.
•When two or more pictures are selected, you can
switch between them using [ ], [ ], and [ ].
80
z Setting the number of copies to be printed
B.You can set the number of copies to be printed.
• Specify the number of copies to be printed with
[ ][ ]. (0 to 999 can be specified.)
• If 0 is specified in [Number of copies being printed],
the DPOF setting for the picture will be canceled.
• If [Do not print] is selected, the DPOF setting will not
be allowed.
C.No printing.
D.The same settings are applied to all the selected pictures.
z Setting the date printing
E.If you select it, you can print pictures with the date
(recording date). You cannot select this when the
pictures have no recording date information.
z Displaying the total number of copies to be printed
F. The total number of copies to be printed for pictures
in the memory card is displayed .
3 Click .
The contents set are written onto the memory card.
Refer to the “Glossary” for “DPOF”. (111)
If you change a file name of a picture etc. on the PC, the
picture cannot be DPOF-set.
Pictures on unsupported memory cards cannot be DPOF-set.
The contents of the DPOF setting will be saved as
[AUTPRINT.MRK] in the [MISC] folder in the memory card.
After setting, the DPOF data saved in the memory card
can be used on a printer supporting DPOF, etc.
Page 81

Writing pictures onto a memory card
1
Outputting Writing pictures onto a memory card
You can copy (output) pictures acquired to the PC (hard
disk) or pictures processed to a memory card in the format
that can be reproduced by your digital camera.
Connect a digital camera with a memory card, or a USB
reader/writer (optional) or PC card adapter (optional) for
memory card to your PC in advance. (For the method of
connecting this camera: 7, For the method of
connecting USB reader/write r or PC card adapte r: se e
operating instructions of each devices)
Depending on your type of digital camera, data may not
be written to the memory card from the connected PC.
1 Select [ ] as the output destination. (69)
2 Click [Yes].
Pictures are copied to the memory card.
• Pictures are saved in the format that can be
reproduced by the digital camera. (82)
• The picture formats that can be written into memory
cards are BMP, JPEG, TIFF, MO V and RAW .
• When multiple memory cards are connected, the
following screen appears. Click 1 to select a
desired memory card to copy pictures to by the
drive letter (e.g., C, D) and click [OK].
• When no memory card is connected, the following
screen appears if any removal disk drive is connected.
Click [OK] and pictures are copied onto the removal
disk.
Use a memory card with a sufficient free space. If the
free space is lacking, pictures are copied only halfway.
When outputting pictures with “FAVORITE” icon [ ] and
reproducing them with a compatible digital camera,
“FAVORITE” icon is also displayed in the pictures on the
digital camera. (Only for JPEG and TIFF files with Exif
information.)
Pictures of wh ich t he as pect r ati o is ch ang ed or t o which
other modif icati ons made may not be displ ayed cor rectl y
on your digital camera.
81
Page 82

Outputting Writing pictures onto a memory card
A:100-999 (Folder number)
B:0001-9999 (File number)
Memory card
J Saving folder, saving format, and file name
Pictures are copied to 1 folder with file name like 2.
The saving format of each file is as follows.
files save format
BMP Exif JPEG
JPEG, TIFF, MOV, RAW unchanged
If any selected file is associated with a different file
(hereafter referred to as an “associated file”), both of two
files are copied onto the memory card with the
association maintained. (This holds true only when both
two files can be copied to a memory card.)
If the association with one another is not established,
they sometimes cannot be reproduced by the digital
camera.
(Associated file: 111)
The alphabetic characters of folder names differ from
those in the figure, depending on the model used.
If there are multiple saving folders, pictures are saved in
the folder with the largest folder number.
If [100_PANA] and [102_PANA] exist, for example,
pictures are saved in [102_PANA].
If there is no saving folder, a folder is created
automatically. (The folder name is [100_PSDV].)
Numbers following the last number in the folder are
assigned to files.
For example, if the picture file with the largest number
among the picture files that exist in a folder is
[P1050005.JPG], the file names of pictures to be saved
are [P1050006.JPG], [P1050007.JPG]...
Some files are incapable of reproduction, depending on
digital cameras.
Even if a file is of a format capable of reproduction, it
sometimes cannot be reproduced depending on its file
specifications such as picture size and frame rate.
For the specifications of com patib le file s, re fer to the
operating instructions supplied with the digital camera.
82
Page 83

Writing pi ct ures to a CD or a D VD
A
B
Outputting Writing pictures to a CD or a DVD
You can save pictures to a CD-R/RW, DVD-R/RW or
+R/RW discs.
Types of the writable files:
JPEG, TIFF, BMP, RAW, MOV
A drive capable of writing to a CD or a DVD is required.
Types of discs on which pictures can be written using
this software may vary with the version of Windows:
CD-R/RW DVD R/RW
Windows 2000 ss
Windows XP ±s
Windows Vista ±±
±: Writable s: Not writable
Open [Properties] of the drive to be used for writing
pictures, and set following items in the [Recording] panel
in advance.
For Windows Vista:
Click A to select the drive to
be used for writing pictures.
For Windows XP:
Check B.
When a Panasonic DVD MULTI drive is used with
Windows XP, a message will be displayed confirming
the writing of data to a DVD-RAM disc. To write data to a
CD-R/RW, select [No] to enable the CD writing function.
Insert a disc into the drive for recording.
1 Select [ ] as the output destination (69)
The CD/DVD writing wizard of Windows starts.
• For Windows 2000, the button is not available.
• For Windows XP, the indication is [CD].
2 Enter the disc title.
83
• For Windows Vista, the writing speed can also be set.
Page 84

Outputting Writing pictures to a CD or a DVD
A
3 Click [Next ].
Writing to a disc starts.
Pictures are written in the root folder of a CD or DVD as
the original file without any changes. If there is a file
having the same name in the folder, a number with
parentheses is added to the file name.
If there is a file that is ready for being written onto a disc
by using Explorer of Windows, the file that is ready for
being written will be canceled when data is written onto a
CD/DVD from PHOTOfunSTUDIO.
It is impossi ble to w rite p ictures from t he writ ing wiza rd to
a disc formatted in the Windows Vista Live File System.
Pictures can be written onto a disc in the Live File
System format by the same way of DVD-RAM. Refer to
the description of the following section.
J Writing to a DVD-RAM
If Windows XP/Vista is used, pictures can also be written
to a DVD-RAM.
To write pictures to a DVD-RAM, the output menu will not
be used. Copy pictures to a DVD-RAM in list mode, in the
same way as copying pictures to the hard disk (21).
For Windows XP, open [Properties] on the DVD-RAM
drive to set the following items for the [Recording] panel.
Uncheck A.
84
Page 85

Other settings
Other settings
To customize picture display 86
You can narrow types of pictures to be displayed in the picture browser or change the order of pictures displayed.
-To select a display for mat (m ode) 86
-To change the order of pictur es di splayed 87
-To narrow types of pi cture s to be disp layed 88
To register an application in the launcher 89
If an application is registered in the launcher, you can activate the application by clicking it on the PHOTOfunSTUDIO
screen.
To manage folders 91
You can set the types of folders to be displayed in the folder view and create, delete or rename a folder.
To view the properties of a picture file 94
If you open the properties sheet for a picture file, you can get various information about the picture.
To change the operating settings of PHOTOfunSTUDIO
-Setting the opera tions at the t ime of star t 96
-Changing the default settings of acquisition 97
-Changing the default settings of rotation 99
85
Page 86

Customising picture display
ABCD 1
Other settings Customising picture display
Changing view format of picture browser (View format)
1 Select view format in .
A.Displ ay s pictu re s in thumbnai l vi ew (List mode)
• The size of the thumbnail can be changed in 5
levels by moving slider 1 left or right.
B.The view format of the selected pictures is changed
to the Focus mode.
• When no pictures are selected, the first picture in
the folder is displayed.
• Picture information is also displayed.
C.The view format of the selected pictures is changed
to the Full Screen mode.
• When no pictures are selected, the first picture in
the folder is displayed.
• To return to the previou s scre en (mode ), pr ess the
[Esc] key or click [ ].
D.Pictures are sorted by recording date and displayed
in the calendar format. (Calendar mode)
When the size of the picture file is huge or the picture is
in special format, the picture browser may not be
changed to the Focus mode or the Full Screen mode.
86
Page 87

Other settings Customising picture display
A
B
E
F
I
J
C
D
G
H
Changing order of display (Sort)
1 Click in .
2 Select the sorting order from the pull-down menu.
A.Files are sorted in ascending order of the alphabet
and numbers in the file names.
B.Files are sorted in descending order of the alphabet
and numbers in the file names.
C.Files are sorted in ascending order of the file size.
D.Files are sorted in descending order of the file size.
87
E.Files are sorted in ascending order of the file types
(ascending order of the alphabet and numbers of the
extensions).
F. Files are sorted in descending order of the file types
(descending order of the alphabet and numbers of
the extensions).
G. Files are sorted in ascending order of the date of
update.
H.Files are sorted in descending order of the date of
update.
I. Files are sorted in ascending order of the date of
recording (or the date of update if no information
about the date of recording is available).
J. Files are sorted in descending order of the date of
recording (or the date of update if no information
about the date of recording is available).
Page 88

Other settings Customising picture display
A
B
C
D
Setting types of pictures to be displayed in picture browser (View type)
1 Click in .
2 Select a type of picture to be displayed from the
pull-down menu.
A.Displays JPEG files (only extensions .JPG, .JPEG,
and .JPE).
B.Displays all still picture files that can be displayed by
the PHOTOfunSTUDIO in thumbnail format. (108)
Displays all motion picture files that can be displayed by
C.
PHOTOfunSTUDIO
the
D.Displays all files. (108)
• Files that cannot be displayed in thumbnail format
are displayed as icons.
88
in thumbnail format.
(108)
Pictures in the types selected and folders are displayed.
However, when [View subfolder] on the [View] menu is
not selected, no folders are displayed.
Pull down menu of [View Type] might be hidden
according to the window size of PHOTOfunSTUDIO. In
such cases, perform the sett in gs from [View] [View
Type] of the menu.
Page 89

Registering application in Launcher
1
2
Other settings Registering application in Launcher
The PHOTOfunSTUDIO allows up to three applications to
be registered in the menu of the launcher button.
1 Click [ ] in order to open the pull-down menu
and click the [Not registered] column.
2 Click .
3 Select the application to be registered and click .
The registered application starts up.
• When selec ted and mark ed pic tures exist , [Pic ture
selection setting] panel is displayed. After you select
picture and click [OK], the picture will be displayed in
the application. (This takes effect only when the
selected or marked pictures are compatible with the
application.)
• When there are no selected or marked pictures, the
application simply starts up.
• If large number of pictures are selected, the
confirmation screen is displayed. To display all
pictures, click [Yes]. If [No] is clicked, the application
does not start up.
J To activate the application registered
Click [ ] to open the pull-down menu, and click the
desired application there.
• You can also start the application and display the file by
dragging pictures or icons from the picture browser and
dropping them on the application column in the pull-down
menu.
J To cancel the registration of an application
1 )Right-click the application to be removed.
2 )Click 1.
3 )Click 2.
89
Page 90

Other settings Registering application in Launcher
1
2
3
4
5
6
J To replace an application registered
Right-click the application to be replaced. Click
[Registered]. Subsequently, follow the normal application
registration procedure.
J To register/delete applications from the menu
You can also register/delete applications from the menu.
1 )Select [Tools] [Settings] from the menu.
2 )Click 1 and then click 4.
[Open] panel appears.
3 )Select the application to be registered and click
[Open].
The application name and the path name appear on 2.
4 )Click 5.
Registration is completed.
• To delete the registration, click 3. When you click
[Yes] on the confirmation screen, the registration of the
application will be deleted. (The application cannot be
restored after this even if you click 6.)
90
Page 91

Managing folders
12
Other settings Managing folders
J Opening/closing the folder view
You can open or close the folder view by clicking the folder
view open/close button.
J Opening the window
To open each window, click its title bar (e.g., [Explorer]).
When you open another window, the currently-open
window closes.
J Setting types of folders to be displayed
You can set the type of folder to be displayed in the folder
view by selecting 1 2 from the menu. (If the type of
folder ([Categorize], [Explorer], [Memory Card], [Music]) is
clicked to be deselected, it will be hidden.)
91
Page 92

Other settings Managing folders
1
2
3
1
2
3
J Creating a new folder
You can create a new folder in [Explorer].
1 )Select a folder in which a new folder is to be
created. Select 1 2 from the menu.
• You can also create a new folder by right-clicking the
folder and selecting 3 from the context menu.
You cannot create a new folder in [Categorize], [Memory
Card] or [Music].
J Deleting a folder
1 )Select the folder to be deleted. Select 1 2 from
the menu.
• You can also delete the folder by right-clicking the
folder and clicking 3 from the context menu. (It is
displayed as [Delete Category] on [Categorize].)
[My favorites] folder in [Keyword] categorization in
[Categorize] cannot be deleted.
In the case of [Categorize], the categorization
information will be deleted. The picture itself registered
in [Categorize] will not be deleted from the PC.
You cannot delete folders in [Memory Card] or [Music].
92
Page 93

Other settings Managing folders
1
2
3
1
2
3
J Renaming a folder
1 )Select the folder to be renamed. Select 1 2 from
the menu.
• You may also rename the folder by right-clicking the
folder and selecting 3 from the context menu.
2 )Input a new name and press [Enter] key.
You can only rename folders in [Keyword] categorization
in [Categorize]. (However, you cannot rename [My
favorites] folder. If you rename a folder with the name
[My favorites], the folder cannot be renamed again after
that.)
You cannot rename a folder in [Memory Card] or [Music].
J Changing the color of folder icon
You can change the color of the folder in [Explorer].
1 )Right-click the folder that you want to change in
color, and select 1 from the context menu.
2 )Select a desired color and click 2.
• If you want to bring the color to the original, click 3.
93
You cannot change the color of any folder in other than
[Explorer].
Page 94

Properties of picture file
Other settings Properties of picture file
You can confirm various pieces of picture information in
[Properties] screen.
If there is no information about an item, it will be
displayed as [
`] etc.
1 Select a picture in the picture browser.
2 Right-click the picture to open the context menu
and select [Properties].
The properties sheet for the picture file opens.
• You can also open the properties sheet by selecting
[File] [Properties] from the menu.
• When in the Focus mode, the same information is
displayed in the information window. (You cannot open
the properties sheet.)
J File information
J Camera information
• The name of manufacturer of the digital camera used,
model name, recording date, shutter speed, aperture
value, etc. are displayed. However, the camera
information of the picture files recorded by a digital
camera made by other than Panasonic or processed may
not be properly displayed.
• The file name, file size, file size on the disk, file type, file
location, etc. will appear.
94
Page 95

Other settings Properties of picture file
J Categorization information
• If categorization information is registered, each item is
displayed.
J Comment information
• You can directly enter and edit comments.
•Up to 256 characters can be entered.
• You can add a comment only to compatible pictures on
your hard disk.
It is impossible for you to add a comment to pictures on
the memory card, etc.
95
Page 96

Setting the operations at the time of start
A
B
D
E
C
Other settings Setting the operations at the time of start
Auto-start of PHOTOfunSTUDIO and LUMIX Simple
Viewer, as well as the auto-categorization carried out while
booting, can be set.
Select [Tools] [Settings] on the menu, and then click the
[General] tab.
z To change the settings for auto start
The operations carried out when the digital camera and
memory card are connected to the computer can be set.
A.PHOTOfunSTUDIO starts automatically.
B.LUMIX Simple Viewer starts automatically.
(only when LUMIX Simple Viewer is installed)
C.Disables auto-start.
It is impossible to start LUMIX Simple Viewer and
PHOTOfunSTUDIO simultaneously.
z Setting the auto-categorization
The setting of whether to categorize the pictures existing in
the computer automatically at the time of starting
PHOTOfunSTUD IO is poss ib le.
D.Auto-categorization is done at every start.
E.Auto-categorizati on is not done at every star t.
96
Page 97

Changing the settings of acquisition
A
B
C
F
H
J
L
E
D
G
I
K
M
N
Other settings Changing the settings of acquisition
To change the settings of acquisition, select [Tools]
[Settings] on the menu, and click [Acquisition setting] tab.
z Destination folder
A.You can change the acquisition destination folder.
Click [Change] and select a desired folder.
z Setting the distribution (sub-folder)
Pictures can be distributed by creating sub-folders based
on conditions in the acquisition destination folder. Put a
check mark on the desired distribution condition.
97
B.Pictures are distributed according to each picture
acquisition date.
(Example: [081225] [090101])
C.Pictures are distributed according to the month when
recorded.
(Example: [0812] [0901])
D.Pictures are distributed according to the day when
recorded.
(Example: [081225] [090101])
E.Pictures are distributed in the specified name folders.
(Example: [Party] [Families])
z Method of handling files with the same file name
You can select a handling method from among the
following, when a file (picture) with the same name already
exists in the acquisition destination folder.
• Pictures stored in acquisition destination folder and all the
sub-folders are searched.
• In the case of associated files, if there is a file with the
same name as one of them, both of the two undergo the
same processing. (Associated file: 111)
Modification date, time and size of file are co mpared.
F.
And if a same file is identified, then it is judged as an
identical file and thus pictures from it are not acquired.
If one of them is different from the other, then pictures
from the file are acquired by adding a numerical
characte r in the brackets at the end of the file name.
G. Specified process is executed withou t comparing the
files. Select the process by clicking on .
Page 98

Other settings Changing the settings of acquisition
z File naming method
H.You can select this option when sorting acquisition
destination folders by recording month or date. Files
are named after the date and time of recording.
For example, if the date and time of recording is at
12:34:56 on May 1, 2005, the picture file is named
[01123456] and saved in the folder [200505] when
sorted by the recording month. When sorted by the
recording day, the picture file is named [123456] and
saved in the folder [20050501].
• If associated files are acquired by this method, the
association comes not to be established.
When acquiring associated files, you are
recommended to save them without changing their
original file names. (Associated file: 111)
I. Files are saved using their original file names.
z Setting automatic categorization
You can categorize and register pictures on a selected
condition concurrently with acquisition. (This holds true
only when the pictures have such information.)
All items are checked by default.
J. Files are categorized by the date of recording.
K.Files are categorized by the scene mode during
recording.
L. Files are categorized based on the number of
persons whose faces are detected.
M.Files are categorized by the model name of the digital
camera.
N.Files are categorized by the folder where the pictures
are copied.
Categorization by keyword ([My favorites], [Pictures
acquired kkk(date)]) is executed at all times. This
setting cannot be canceled.
-[My favorites]: The p ictur es set to “FA VORITE” by a
compatible digital camera are categorized by keyword [My
favorites].
-[Pictures acquired kkk(date)]: A ll acqui red pictur es ar e
categorized by keyword [Pictures acquired kkk(date)].
If pictures are recorded by digital cameras made by
other than Panasonic or whose recording date is outside
the 1971 to 2037 range, they may not be sorted into the
acquisition destination folder by recording date or
categorized by recording date.
Pictures that cannot be sorte d into ac qui sition
destination folders by recording date will be saved with
the original file name in the specified folder.
Pictures that cannot be categorized by recording date
will be registered as [Pictures with no date] files in
[Keyword] folder in [Categorize].
98
Page 99

Changing the settings of rotation
A
C
E
G
H
I
B
D
F
Other settings Changing the settings of rotation
Select [Tools] [Settings] from the menu to open the
[Settings] panel, and then click the [Rotate] tab.
z Setting the panel display
A.When [ ] is clicked, the advanced settings panel
for rotation will be displayed. (57)
B.When [ ] is clicked, the advanced settings panel
will not be displayed and the rotation will be executed
in the following settings.
z Setting the Exif rotation
C.Only the Exif information of a picture file is
overwritten and the picture is rotated. It may not look
rotated on some applications. (Picture files without
Exif information cannot be rotated.)
D.The picture data itself is rotated. However, the picture
quality may be deteriorated because the picture will
be recompressed.
z Setting the rotating direction
E.Rotates the object 90e anticlockwise.
F. Rotates the object 90e cl oc kw is e.
z Setting the saving method
G. The rotated picture is saved with the same file name
as the original picture by overwriting it.
H.A parenthetic number, such as [P1000123(1)] will be
suffixed to the file name.
I. A file name consisting of four alphabetical characters
and four digits, such as [IMGA0123] is given.
• Note that only JPEG pictures can be played on a
digital camera.
99
Page 100

Convenient information
1
23 4 5
6
78
9
10 11 12
1
2
3
Tool bar
Convenient information Tool bar
1 Opens the parent folder of the currently-open folder in the
picture browser.
2 Opens the folder selected previously in the picture browser.
3 Opens the folder selected next in the picture browser.
4 Acquires pictures from the memory card. (25)
5 Categorizes pictures. (35)
6 Plays back a slide show. (30)
Picture browser view setting area
1 Selects the display format (mode) of the picture browser.
(86)
2 Selects the order of picture display of the picture browser.
(87)
100
7 Executes picture processing, e.g. resizing, format
conversion, and date insertion. (45)
8 Starts the retouch function. (59)
9 Rotates the picture. (57)
10 Refreshes the picture browser and the folder view. (23)
11 Launches an application registered. (89)
12 Starts the operating instructions on the PC.
3 Selects a file type of picture to be displayed in the picture
browser. (88)
 Loading...