

Panasonic NV-SV120, NV-MV15, NV-HV15 User Manual
Video Cassette Recorder
NV-HV60 Series (Hi-Fi)
NV-HV50
NV-MV15
Series (Hi-Fi)
Series (Mono)
NV-SV120 Series (S-VHS, Hi-Fi)
625
VHS
PAL
PULL-OPEN
VPS / PDC
NV-SV120
INTELLIGENTTIMER
PROG PLAY
3D DNR
S-VHSET
Super VHS
EJECT
Hi-Fi STEREO.SUPER LP
REC
TIMER CHECK
VHS
PAL
625
CH
TIMERREC
Operating Instructions
Contents page
Precautions 2
Warning 3
Remote control functions 4- 5
Front 6
Connectors 7
Settings 8
Auto Setup 9
Recording 10
Timer recording
Automatic SP/LPselection
VPS/PDC function
Timer recording 12-13
ShowView 14
INTELLIGENT TIMER 15
General functions 16-17
Menu Overview 18
Manual Setup
Setting a new Channel
Changing the name ofTV stations
Changing the order ofTV stations
Creating a new station table
Shipping condition
Menu Others 22-23
Decoder 24
External recording control 25
Amplifier,
NTSC playback
Batteries, 27
Before requesting service
Specifications 30-31
Index 32
, factory defaults
NICAM sound system
Cassette erasureprotection
2
28-29
11
11
19
20
20
21
21
26
26
Dear customer
Thank you for purchasing this product. For optimum performance and safety, please read
these instructions carefully. Please keep this manual for future reference.
Precautions
Voltage:
You may otherwise overload the unit and cause fire. Do not use DC power sources. Check
the source carefully when setting up the unit on a ship or other place where DC is used.
AC mains lead protection:
damaged. Poor connection and lead damage can cause fire or electric shock.
Service:
smoke escapes from the unit or any other problem occurs that is not described in these
operating instructions, disconnect the power supply and contact your dealer or an authorised
aftersales service centre.
Only use power sources complying with the specifications
Ensure the AC mains lead is connected correctly and not
Do not attempt to repair this unit by yourself. If the sound fails, the display is off,
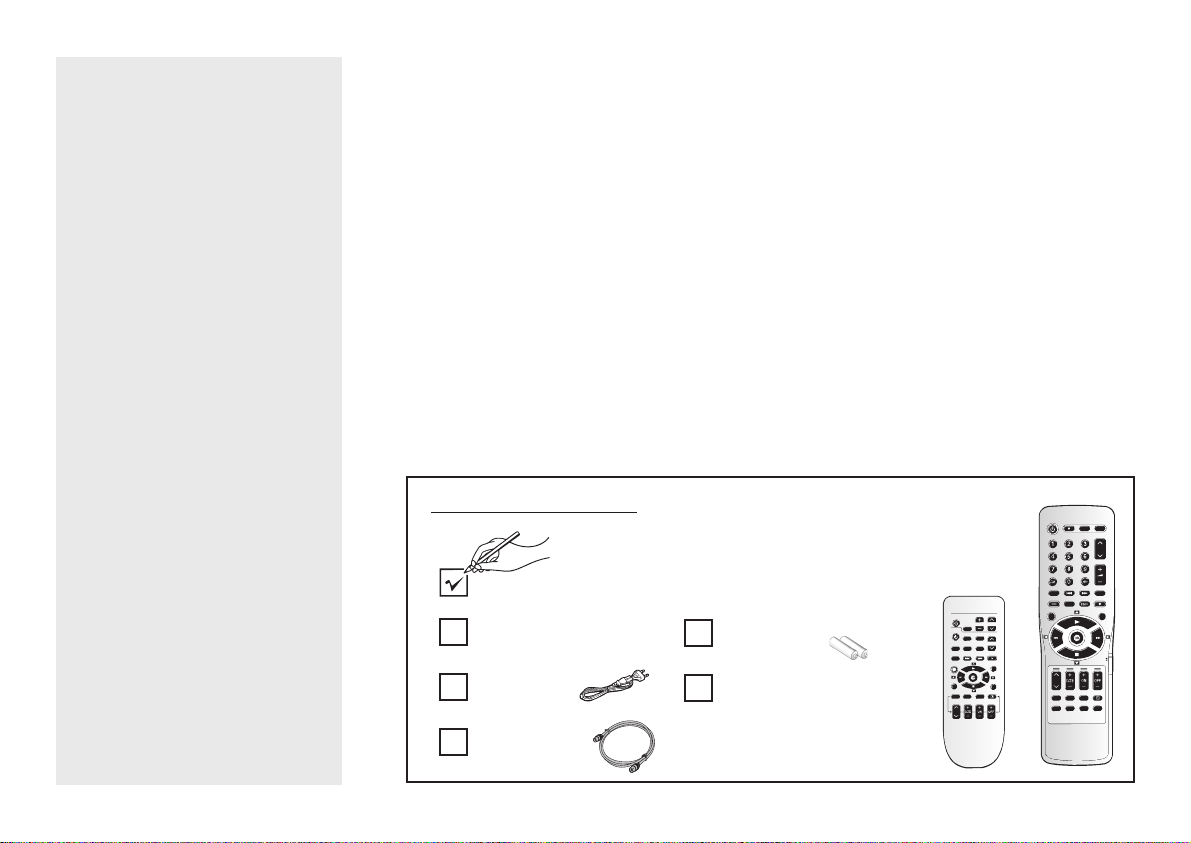
Accessories Included (Remote control unit depends on the model)
Remote Control
N2QAKB000043/ N2QAHB000031
AC Mains Lead
RJA0043-1C
RF Coaxial Cable
Remote Control Batteries
AA, UM3 or R6
Operating Instructions
RQTD0080-Y
(220-240 VAC, 50/60 Hz).
N2QAHB000031
N2QAKB000043

Warning
WARNING:
TO REDUCE THE RISK OF FIRE, ELECTRIC SHOCK OR PRODUCT DAMAGE, DO NOT
EXPOSE THIS APPARATUS TO RAIN, MOISTURE, DRIPPING OR SPLASHING AND ENSURE
THAT NO OBJECTS FILLED WITH LIQUIDS, SUCH AS VASES, SHALL BE PLACED ON THE
APPARATUS.
CAUTION!
!
DO NOT INSTALL, OR PLACE THIS UNIT, IN A BOOKCASE, BUILT-IN CABINET OR IN
ANOTHER CONFINED SPACE. ENSURE THE UNIT IS WELL VENTILATED. TO PREVENT
RISK OF ELECTRIC SHOCK OR FIRE HAZARD DUE TO OVERHEATING, ENSURE THAT
CURTAINS AND ANY OTHER MATERIALS DO NOT OBSTRUCT THE VENTILATION VENTS.
!
DO NOT OBSTRUCT THE UNIT’S VENTILATION OPENINGS WITH NEWSPAPERS,
TABLECLOTHS, CURTAINS, AND SIMILAR ITEMS.
!
DO NOT PLACE SOURCES OF NAKED FLAMES, SUCH AS LIGHTED CANDLES, ON THE
UNIT.
!
DISPOSE OF BATTERIES IN AN ENVIRONMENTALLY FRIENDLY MANNER.
THIS UNIT IS INTENDED FOR USE IN MODERATE CLIMATES.
This product may receive radio interference caused by mobile telephones during
use. If such interference is apparent, please increase separation between the
product and the mobile telephone.
3
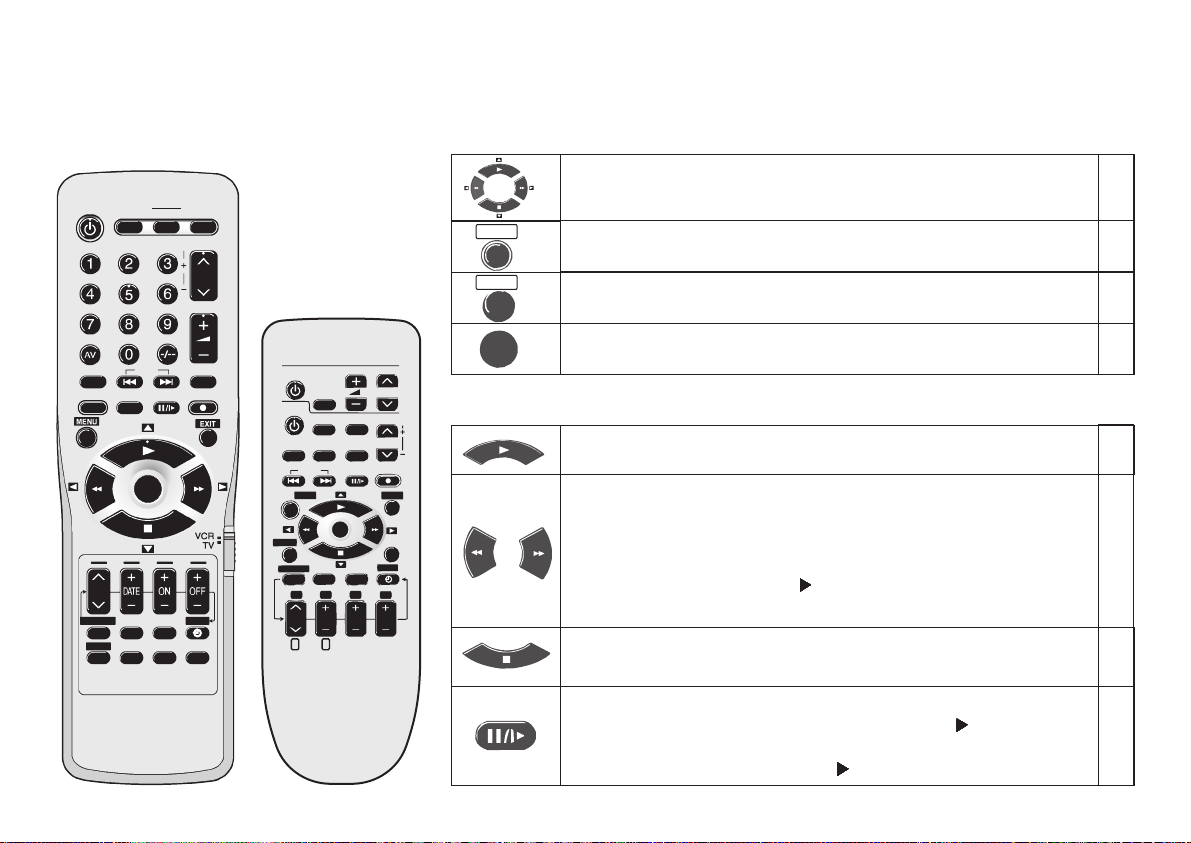
Remote control functions
Some Panasonic TV sets accept control signals from the video recorder's
remote control unit. In the table, the TV buttons are marked with ' ', the
video recorder buttons with ' '.
VCR
TV
Control menu
INPUT SELECT
PROG PLAYPROG PLAY
CH
PROG./CHECK
I-TIMER
EXT LINK
AUDIO
VPS/PDC
OFF TIMER
INDEX
ENTER
SP/LP/EP
OSD/DISPLAY
AV LINKAV LINK
TV ASPECT
TRACKING/V-LOCK
TV/TEXT
CH
VOLUME
ShowView
REC
TIMER
RESET/CANCEL
TV
AV
VCR
OSD/DISPLAY
PROG PLAY AVLINK AUDIO
INDEX
MENU
ENTER
I-TIMER
EXT LINK
PROG/CHECK
1 2 3
DATE
CH
B
A
VOLUME
RESET/CANCEL
SP/LP/EP
ON
CH
TRACKING/V-LOCK
CH
REC
EXIT
OFF TIMER
TIMER
4
OFF
OSD menu selection buttons.
MENU
EXIT
ENTER
Displays the menu.
Quits a menu.
Selects or saves a setting.
Playback functions
Playback
Fast winding / Forward and backward search
!
Goes from Stop into Fast Forward or Fast Rewind mode.
!
Starts the search for a frame during playback. Press button
twice to increase the speed of search (JET SEARCH).
Press the Playback button to quit the Search mode.
!
The unit keeps searching while the button is pressed.
Press to stop recording, playing back or winding.
Stop
To eject a cassette:
Still Playback:
Press button again or press the Playback button to quit.
Slow Playback:
Press button for more than 3 seconds.
In Playback mode.
Press for more than 2 seconds while in Playback
VCR
VCR
VCR
VCR
VCR
VCR
P. 1 7
VCR
VCR
P. 1 7
mode. Press the Playback button to quit.
4
EXT LINK
AV LINK
TV ASPECT
TV/TEXT
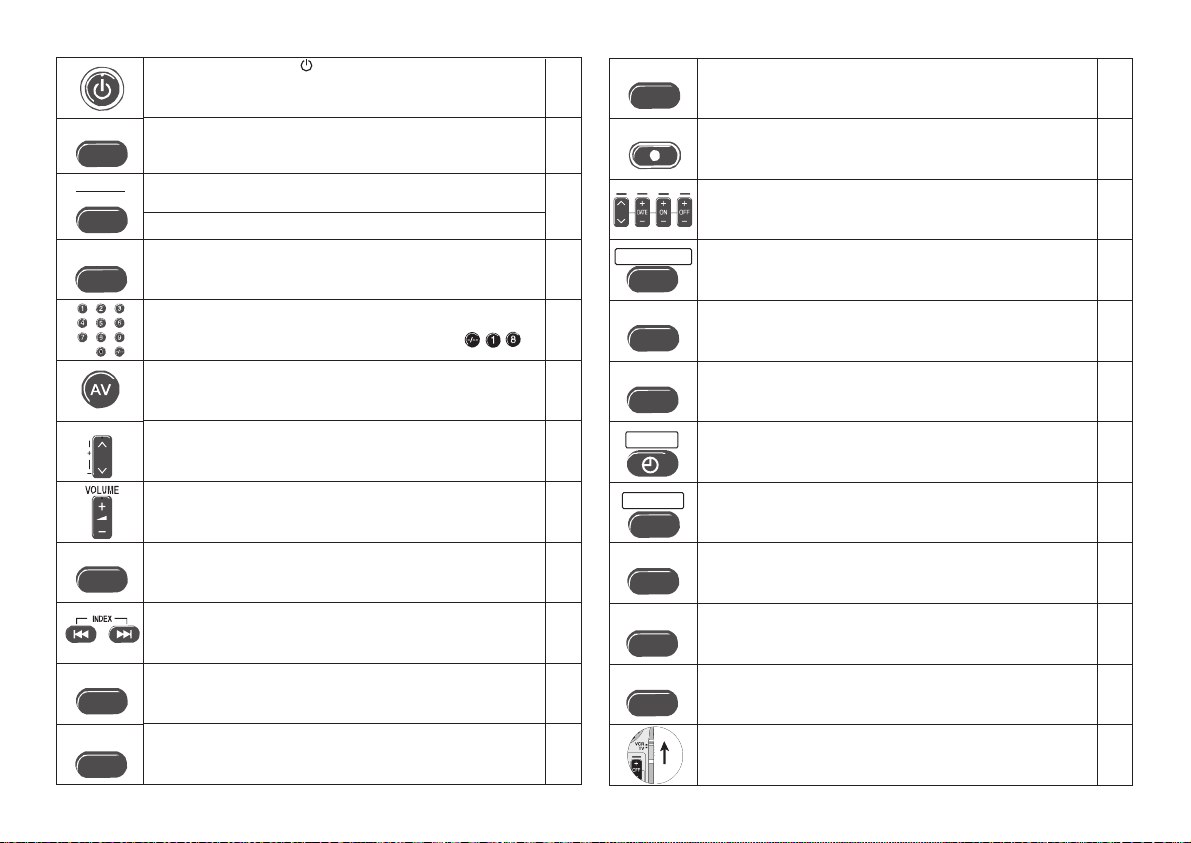
Stand-by/on switch /I
Press to switch the unit from on to stand-by mode or vice
versa. In stand-by mode, the unit is still consuming a small
amount of power.
Activates the recording timer for externally
controlled recording.
Toggles between TV reception and video playback
channel.
Changes the screen format.
Toggles between TV reception and video text
reception.
VCR
TV
VCR
P. 2 5
VCR
TV
TV
AUDIO
Audio mode
REC
Record
CH
CH
TV :
VCR:
PROG/CHECK
Displays the Timer menu.
Selects the AV input and navigates in
the menu.
teletext
Menu entries.
VCR
P. 1 6
VCR
P. 1 0
VCR
TV
VCR
P. 1 2
TRACKING/V-LOCK
CH
INPUT SELECT
ShowView
PROG PLAY
Selects a programme memory location and inputs
the ShowView number. Example:
18=
Selects the TV set's AV port.
Channel selector
Tracking control of disturbed VCR image.
Volume control.
Toggles between AV inputs A1, A2 and A3.
Finds the start of a programme.
Displays the ShowView menu.
Plays back programmed recordings.
VCR
TV
TV
VCR
TV
TV
VCR
VCR
P. 1 6
VCR
P. 1 4
VCR
P. 1 3
VPS/PDC
Controls the beginning and end of a recording
session by a special signal.
SP/LP/EP
TIMER
I-TIMER
Sets the tape speed.
Activates the recording timer.
Defines programmes transmitted to the same
programme memory location at the same time.
OFF TIMER
Switches the unit into stand-by mode after the
set time of recording, playback or in Stop mode.
OSD/DISPLAY
Press the button repeatedly to display the time,
tape counter or remaining tape.
RESET/CANCEL
RESET :
CANCEL:
VCR / TV switch
Resets the counter to 0:00.00.
Clears an entry you made.
VCR
P. 1 1
VCR
P. 1 0
VCR
P. 1 2
VCR
P. 1 5
VCR
P. 1 7
VCR
P. 1 0
VCR
VCR
TV
5
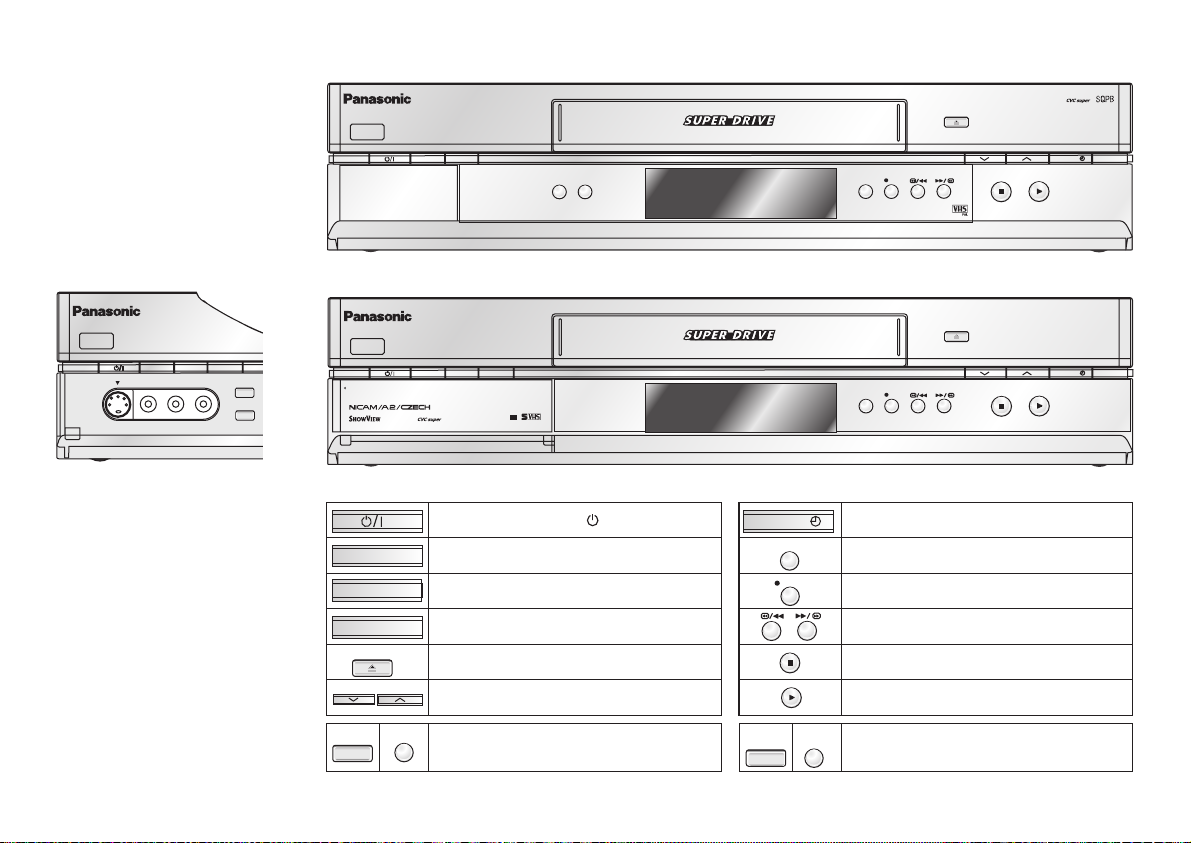
Front
NV-SV120
3DDNR
PROGPLAY
INTELLIGENTTIMER
S-VIDEO
L-MONO-AUDIO-R
VIDEO
AV3 IN
CVC Super
The CVC function provides
a picture of perfect quality.
The picture is automatically
rendered as clear and sharp
as possible.
3D DNR
To ensure high playback
picture quality with less noise.
EXTLINK
QUICK
ERASE
NV-HV60, NV-HV50, NV-MV15
PROGPLAY
INTELLIGENTTIMER
QUICK
EXTLINK
ERASE
NV-SV120
NV-SV120
3DDNR
PROGPLAY
3D DNR
EJECT
CH
INTELLIGENTTIMER
VHS
PAL
VPS / PDC
S-VHSET
625
Stand-by/on switch /I
Defines timer programmes.
Plays back programmed recordings.
3-Dimensional Digital Noise Reduction
(S-VHS only )
Ejects the cassette.
Selects a channel.
EXT LINK
Activates the recording timer for
externally controlled recording.
PULL-OPEN
INTELLIGENT TIMER
PROG PLAY
EXT LINK
Hi-Fi STEREO.SUPER LP
QUICK
ERASE
TIMER REC
TIMER CHECK
REC
EJECT
CH
REC
TIMERCHECK
EJECT
CH
REC
TIMERCHECK
Activates the recording timer.
Displays the timer programme for verification.
Record button
Fast winding / jet search
Stop button
Playback button
QUICK
ERASE
Erases a cassette.
TIMERREC
Super VHS
TIMERREC
6
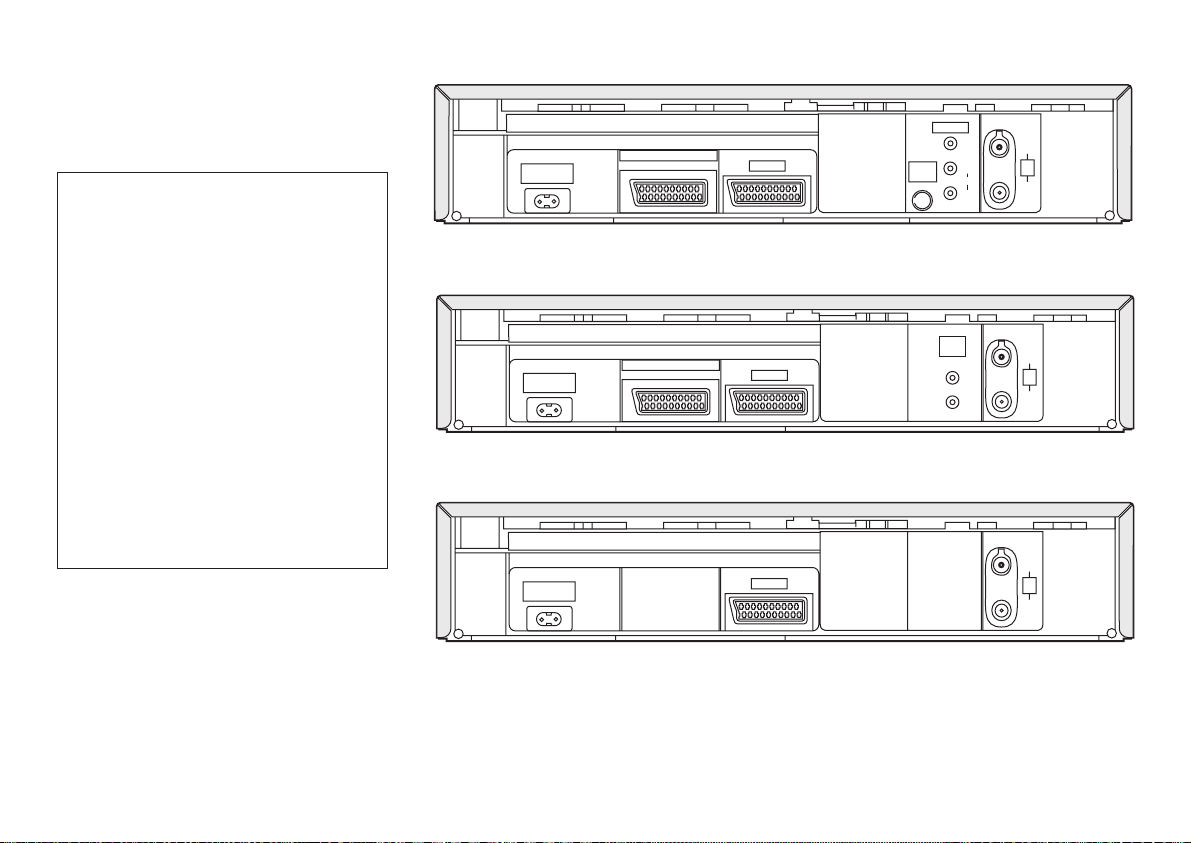
Connectors
NV-SV120
AC IN~
=
Power supply
SECTEUR~
AV2 (DECODER/DECODEUR/EXT)
AV1 (TV)
S-VIDEO
= S-VIDEO output
OUT/SORTIE
VIDEO
L/G
R/D
IN/
= VIDEO output
= AUDIO output left channel
= AUDIO right channel
output
= Antenna input
ENT
OUT/
= Antenna output
SORTIE
NV-HV60
NV-MV15
AC
IN~
SECTEUR~
AC
IN~
SECTEUR~
NV-HV50
AC
IN~
SECTEUR~
AV2 (DECODER/DECODEUR/EXT)
AV2 (DECODER/DECODEUR/EXT)
AV1 (TV)
AV1 (TV)
AV1 (TV)
S-VIDEO
OUT/SORTIE
AV OUT SORTIE/
AUDIO
OUT/SORTIE
VIDEO
L/G
AUDIO
R/D
L/G
R/D
IN/
ENT
RF/
ANT
OUT/
SORTIE
SORTIE
SORTIE
IN/
ENT
RF/
ANT
OUT/
IN/
ENT
RF/
ANT
OUT/
7
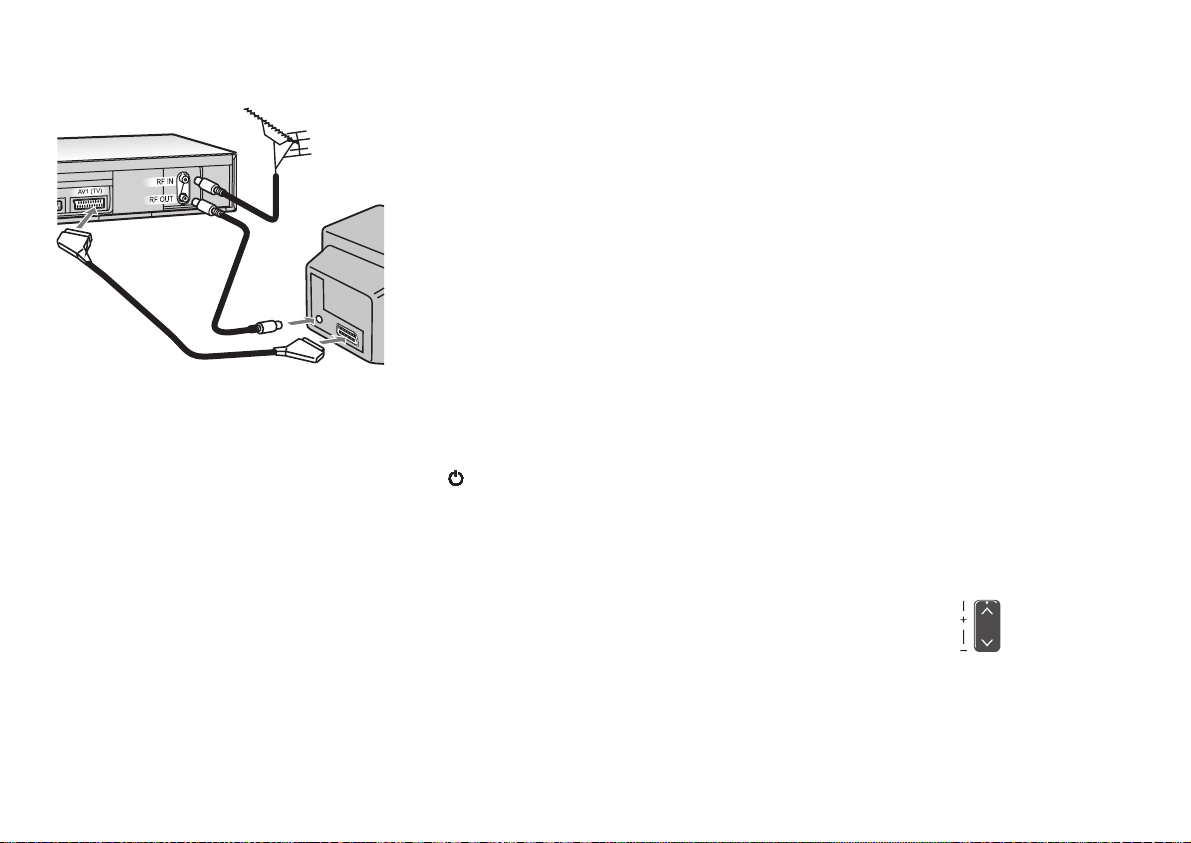
Settings
VCR
21-pin Scart cable
RF-Coaxial cable
Aerial
Connect all the cables as shown in the illustration, then connect the AC Mains
lead (part of the package) to an AC wall outlet.
To be able to receive TV programmes it is mandatory to connect the RF-Coaxial
cable even if the video recorder is connected by a 21-pin Scart cable.
TV
If you decide to just use the RF-Coaxial cable to connect the TV set you must
adjust the video output channel with the TV set's input channel.
!
Switch on the video recorder
!
Press the button for approx. 7 seconds. The preset channel appears
MENU
on the display.
!
Tune the TV set until the test pattern appears.
If there is any interference select another channel for the TV set and
video recorder.
!
Press the button to change the channel (e.g. to 38).
!
Tune the TV set until the test pattern appears.
!
Press to confirm.
CH
ENTER
CH
8
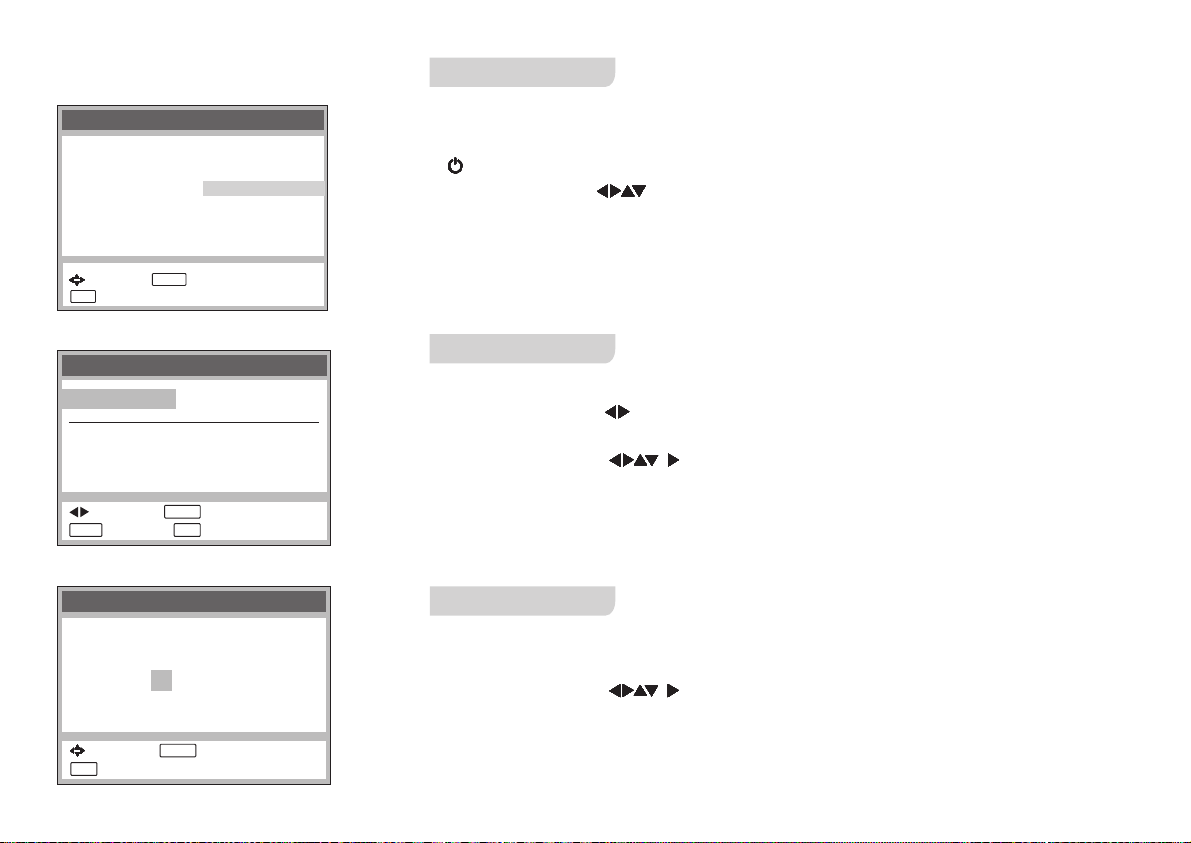
Auto Setup
SV120 HV60 HV50 MV15
Country
ENTER
ENTER
ENTER
ENTER
ENTER
Polska
Pocc
èÿ
others (OIRT)
others (CCIR)
store
speichern
Deutschland
eskČ á Rep.
Magyarország
::
select access
EXIT
exit
:
Datum / Zeit
Clock set
AUTO : AUS
AUTO
Zeit : 12 : 00 : 00
Time :12:00:00
Datum : 11. 6. 02
Date : 11. 6. 03
::
wählen anwählen
::
select access
MENU EXIT
MENU EXIT
::
zurück abbrechen
return exit
::
Datum / Zeit
Clock set
Zeit : 12 : 00 : 00
Time :12:00:00
Datum : 11. 6. 02
Date : 11. 6. 03
::
select
::
wählen
EXIT
MENU EXIT
exit
:
::
zurück abbrechen
The VCR starts the automatic tuning.
(The search will take approx. 5 minutes to be completed.)
!
Switch on the video recorder.
!
Select a country
!
ENTER
If the enu does not appear after switching on you can restart Automatic
Country m
The Country menu will be displayed.
Tuning (Page 21). You can afterwards set date and time either automatically or
manually.
If you choose Russia from the Country menu, the 2nd screen for setting
date and time will be shown when automatic tuning has finished.
SV120 HV60 HV50 MV15
Manually setting Time / Date
!
AUTO - MANUAL
!
ENTER
!
Set time and date
!
ENTER
!
D
MENU
Press to return to the Menu screen.
Mind that a wrong date or time will influence the programmed recording of TV
programmes (don't forget to change ).
,
summer- and wintertime
SV120 HV60 HV50 MV15
After running the automatic tuning, you must manually set the date and time.
!
Set time and date
!
ENTER
,
9
Recording
SV120 HV60 HV50 MV15
10
REC
Set the TV set to the video channel and insert a cassette into the video recorder;
make sure that the cassette's protection tab is still in.
!
Select a channel to record from.
Select the AV channel if you are recording via the 21-pin scart cable.
!
!
!
REC
Press to start recording.
Press the Stop button to stop recording.
To pause recording:
The function will switch itself off after approx. 5 minutes to protect the video heads.
!
To resume recording:
D
Recordings in the S-VHS or S-VHS ET REC mode are supported by the PAL
TV system only. (Only SV120, page 23)
SV120 HV60 HV50 MV15
SP
VCR
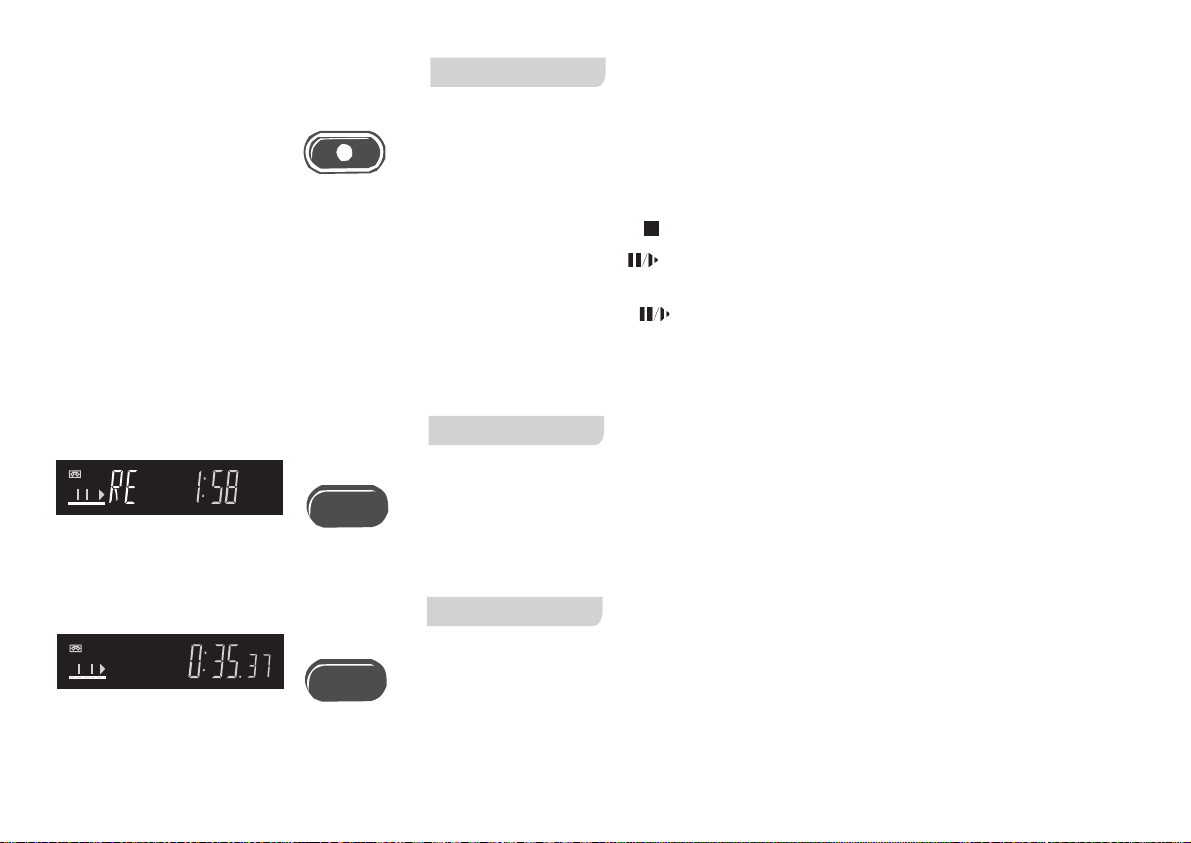
OSD/DISPLAY
Tape remain counter
The display of the video recorder shows: time - counter - tape remain
The start of a cassette is indicated as .
!
OSD/DISPLAY RE'
Press until ' is displayed.
-----
SV120 HV60 HV50 MV15
!
SP
VCR
SP/LP/EP
Prior to starting the recording session, press to set the tape speed.SP/LP/EP
SP :
normal recording time - optimal picture quality
LP :
double recording time - simple picture quality
EP :
triple recording time - reduced picture quality
D
When you play back LP or EP recordings, some cassettes (e.g. type)
E-300
may produce interference. This is not indicative of a malfunction.
 Loading...