

Page 1
Operating Instructions.......Microwave Oven.....................For Commercial Use
Bedienungsanleitung.........Mikrowellengerät.............Für Gewerbliche Nutzung
Mode d’emploi.................. Four à Micro-ondes..........Pour Usage Professionnel
Gebruiksaanwijzing.............Magnetronoven............Voor Professioneel Gebruik
Manual de Instrucciones..Horno Microondas.................Para Uso Commercial
Istruzioni............................Forno a Microonde................Per Uso Professionale
Bruksanvisning.....................Mikrovågsugn..........För Yrkesmässig Användning
Brugsanvisning...................Mikrobølgeovne...................Til Professionelt Brug
Bruksanvisning...................Mikrobølge Ovn..For Profesjonell Bruk/Storkjøkken
Käyttöohjeet.........................Mikroaaltouuni...........................Ammattikäyttöön
Please read these instructions completely before operating this oven and keep for future reference.
Vor Gebrauch des Gerätes bitte die Bedienungsanleitung ausführlich durchlesen.
Lire attentivement ces instructions avant toute utilisation du four. Les garder pour un usage ultérieur.
Leest U s.v.p. eerst deze handleiding in zijn geheel door, voordat U de oven in gebruik neemt.
Por favor lea atentamente el manual de instrucciones antes de utilizar este horno microondas y mantengalo
accesible para futuras consultas.
Prima di utilizzare l’apparecchio, leggete attentamente queste istruzioni.
Läs instruktionema noga innan du använder ugnen och spara dessa för framtida bruk.
Læs omhyggelig brugsanvisningen før ovnen tages i brug.
Les bruksanvisningen før ovnen benyttes, og behold den så lenge ovnen er i drift.
Lue nämä käyttöohjeet huolellisesti ennen uunin käyttöönottoa ja säilytä ne seuraavaa ker taa var ten.
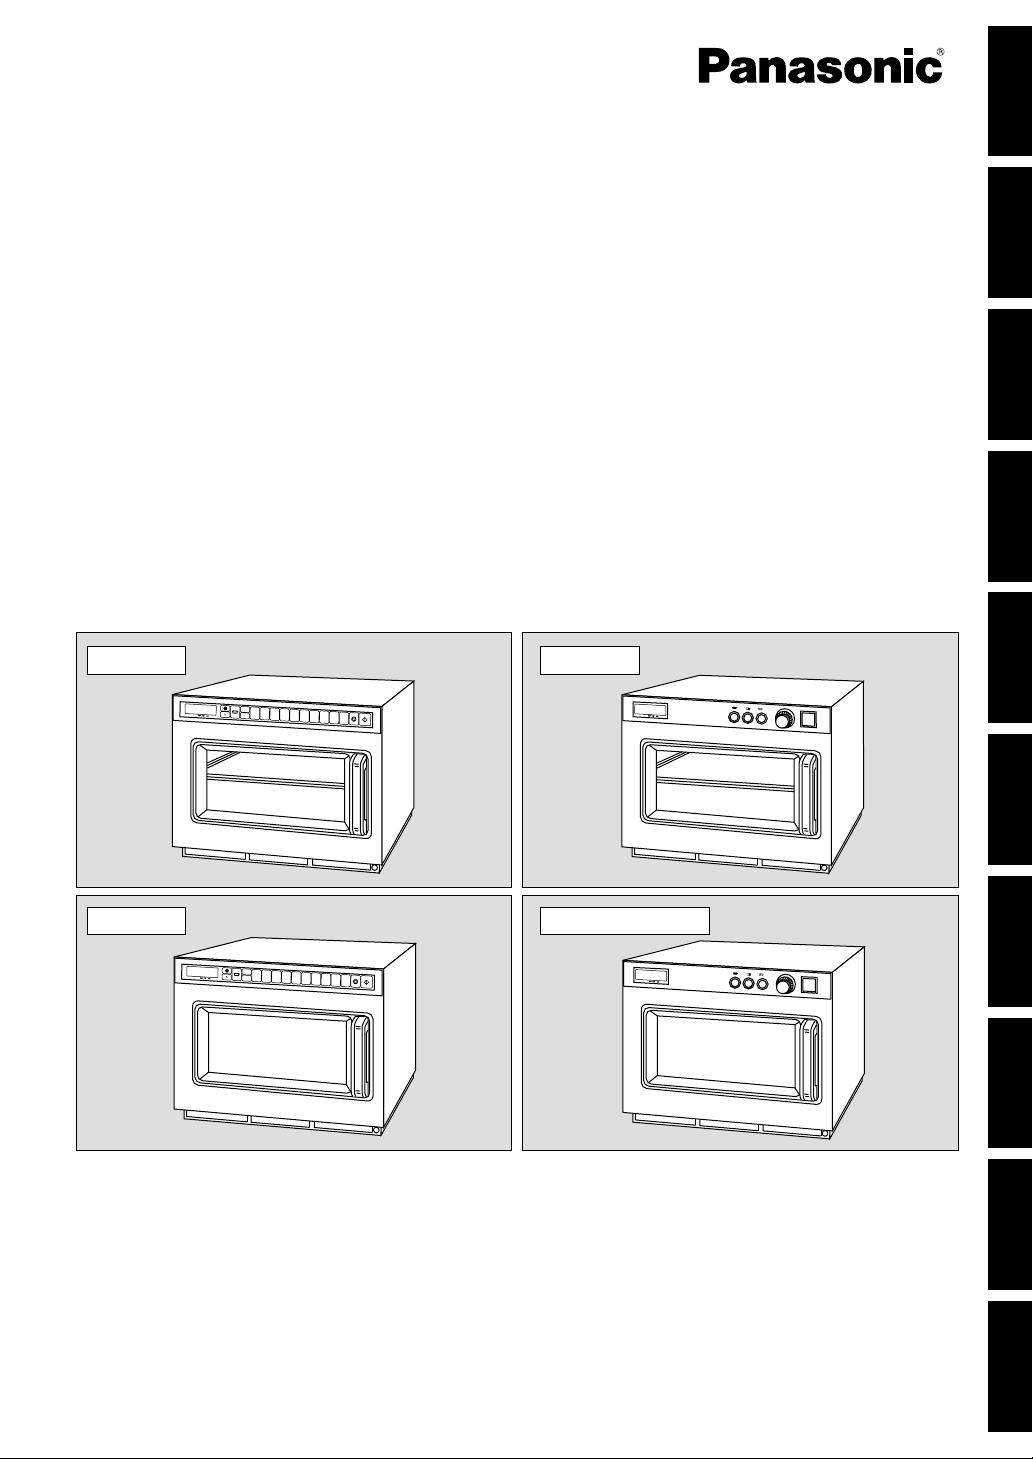
NE-2156-2/NE-1656
NE-2146-2/NE-1846/NE-1646
English Nederlands Español ItalianoDeutsch
Svenska Dansk Norsk Suomi
Français
NE-2156-2
NE-1656 NE-1846/NE-1646
NE-2146-2
x2
1
A
23
B
x3
4
567
8
9
0
x2
12
A
B
3
x3
45
67
89
0
Page 2

Contents
Important Safety Instructions . . . . . . . . . . . . . . . . . . . . . . . . . . . . . . . . . . . . . . . . . . . . . .1-2
Outline Diagram and Operation of NE-2146-2/NE-1846/NE-1646 . . . . . . . . . . . . . . . . . . . .3
Outline Diagram of NE-2156-2/NE-1656 . . . . . . . . . . . . . . . . . . . . . . . . . . . . . . . . . . . . . . .4
How to Operate NE-2156-2/NE-1656
A.Manual Heating . .single stage heating . . . . . . . . . . . . . . . . . . . . . . . . . . . . . . . . . . .5
. . . . . . . . . . . . . .2 or 3 stages heating . . . . . . . . . . . . . . . . . . . . . . . . . . . . . . . . . .6
B.Programmed Heating . . . . . . . . . . . . . . . . . . . . . . . . . . . . . . . . . . . . . . . . . . . . . . . . .7
C. Programming Number/Memory pads . .single stage heating . . . . . . . . . . . . . . . . . .7-8
. . . . . . . . . . . . . . . . . . . . . . . . . . . . . .2 or 3 stages heating . . . . . . . . . . . . . . . . . . .8
D.Programming Double or Treble Quantity pad . . . . . . . . . . . . . . . . . . . . . . . . . . . . . . . .9
E.Program Lock . . . . . . . . . . . . . . . . . . . . . . . . . . . . . . . . . . . . . . . . . . . . . . . . . . . .9-10
F. Beep Tone . . . . . . . . . . . . . . . . . . . . . . . . . . . . . . . . . . . . . . . . . . . . . . . . . . . . . .10-11
G.Program List . . . . . . . . . . . . . . . . . . . . . . . . . . . . . . . . . . . . . . . . . . . . . . . . . . . . . .11
H. Cycle Counter . . . . . . . . . . . . . . . . . . . . . . . . . . . . . . . . . . . . . . . . . . . . . . . . . . .11-12
I. Air Filter . . . . . . . . . . . . . . . . . . . . . . . . . . . . . . . . . . . . . . . . . . . . . . . . . . . . . . . . . .12
Installation Instructions for Stacking . . . . . . . . . . . . . . . . . . . . . . . . . . . . . . . . . . . . . . . . .13
Self Diagnostics Failure Code Explanation . . . . . . . . . . . . . . . . . . . . . . . . . . . . . . . . . . . .13
Care of Your Oven . . . . . . . . . . . . . . . . . . . . . . . . . . . . . . . . . . . . . . . . . . . . . . . . . . . . . .14
Cooking Instructions
Cookware . . . . . . . . . . . . . . . . . . . . . . . . . . . . . . . . . . . . . . . . . . . . . . . . . . . . . . . . . .15
Defrosting Frozen Foods . . . . . . . . . . . . . . . . . . . . . . . . . . . . . . . . . . . . . . . . . . . . . . .15
Other Helpful Instructions . . . . . . . . . . . . . . . . . . . . . . . . . . . . . . . . . . . . . . . . . . . . . . .15
Two Level Cooking . . . . . . . . . . . . . . . . . . . . . . . . . . . . . . . . . . . . . . . . . . . . . . . . . . . .15
Microwave Basics . . . . . . . . . . . . . . . . . . . . . . . . . . . . . . . . . . . . . . . . . . . . . . . . . . . .16
General Guidelines for Heating in a Panasonic Microwave Oven . . . . . . . . . . . . . . . . . .16
Cooking Instructions –– Heating and Defrosting Time Charts . . . . . . . . . . . . . . . . . . . . . .17
Technical Specifications . . . . . . . . . . . . . . . . . . . . . . . . . . . . . . . . . . . . . . . . . . . . . . . . .119
Page 3

- 1 -
English
Important Safety Instructions
INSTALLATION
EARTHING
IMPORTANT:
FOR PERSONAL SAFETY, THIS
APPLIANCE MUST BE PROPERLY EARTHED.
When an outlet is not earthed, it is personal
responsibility and obligation of the customer to have it
replaced with a properly earthed outlet.
VOLTAGE AND POWER WARNING
The voltage used must be the same as specified on
the microwave oven. Using a higher voltage than that
which is specified is dangerous, and may result in a
fire or other type of accident causing damage.
PLACEMENT OF THE OVEN
Locate the oven on a surface which is flat and stable.
Do not place the oven in a hot or damp place;
e.g. near a gas or electric range. Do not operate the
oven when the room temperature is higher than 40˚C
(104˚F) and/or the humidity is more than 85%. Free
airflow around the oven is important.
There is a possibility of a small amount of interference
with weak broadcast signals if the microwave oven is
too close to a radio or TV.
For safe and efficient operation, the oven must have
sufficient air flow to the air vents i.e.5 cm (2 inches) at
the side and rear; 20 cm (8 inches) at the top.
This microwave oven must be positioned so that the
plug is accessible.
CAUTION
REMOVAL OF PROTECTIVE FILM
A protective film is used to prevent scratching of the
outer case during transportation. Peel this film off
before installation or use.
DO NOT TURN ON THE OVEN WHEN IT IS EMPTY.
In order to maintain the high quality of the magnetron
tubes and other components, you are requested not to
turn the oven on with no food inside.
DO NOT OPEN THE CABINET.
High voltages are present inside the cabinet. Repairs
and adjustments should be done only by qualified
service personnel.
DO NOT BLOCK THE AIR VENTS.
This microwave oven requires free airflow in the back
for maximum cooling efficiency. You should keep the
air vents clear while cooking.
DO NOT DRY CLOTHES IN THE OVEN.
Do not dry clothes in the microwave oven since there
is a possibility of the clothes burning if left in the oven
for too long of a time.
ATTACH CAUTION LABEL.
If caution label is enclosed with your oven, a suitable
caution label must be attached before using.Please
select appropriate label provided and attach to top of
appliance.
This product is an equipment that fulfills the European standard for EMC disturbances (EMC = Electromagnetic
Compatibility) EN 55011. According to this standard this product is an equipment of group 2, class B and is
within required limits. Group 2 means that radio-frequency energy is intentionally generated in the form of
electromagnetic radiation for warming and cooking of food.Class B means that this product may be used in
normal household areas.
Page 4

- 2 -
Important Safety Instructions
WARNING
1. The door seals and door seal areas should be
cleaned with a damp cloth.
2. The appliance should be inspected for damage
to the door seals and door seal areas and if
these areas are damaged the appliance should
not be operated until it has been repaired by
service technician trained by the manufacturer.
3. It is dangerous for anyone other than a service
technician trained by the manufacturer to perform
repair service.
4. If smoke is observed, press Stop/Reset pad and
keep door closed. Disconnect the power cord, or
shut off power at the fuse or circuit breaker
panel.
5. If the supply cord is damaged, it must be
replaced by the manufacturer or its service agent
or a similarly qualified person in order to avoid a
hazard.
6. Before use, the user should check that utensils
are suitable for use in the microwave ovens.
7. When heating liquids, e.g.soup, sauces and
beverages in your microwave oven, overheating
the liquid beyond boiling point can occur without
evidence of bubbling. This could result in a
sudden boil over the hot liquid.To prevent this
possibility the following steps should be taken:
a) Avoid using straight-sided containers with
narrow necks.
b) Do not overheat.
c) Stir the liquid before placing the container in
the oven and again halfway through cooking
time.
d) After heating, allow to stand in the oven for a
short time, stirring again before carefully
removing the container.
8. When heating food in plastic or paper containers,
check the oven frequently due to the possibility of
ignition.
9. The contents of feeding bottles and baby food
jars are to be stired or shaken.
The temperature has to be checked before
consumption to avoid burns.
10
. Liquids or other foods must not be heated in
sealed containers since they are liable to
explode.
11
. Eggs in their shell and whole hard-boiled eggs
should not be heated in microwave ovens since
they may explode.
12
. Microwave heating of beverages can result in
delayed eruptive boiling, therefore care has to be
taken when handling the container.
13
. Only allow children to use the oven without
supervision when adequate instructions have
been given so that the child is able to use the
oven in a safe way and understands the hazards
of improper use.
Page 5
- 3 -
English
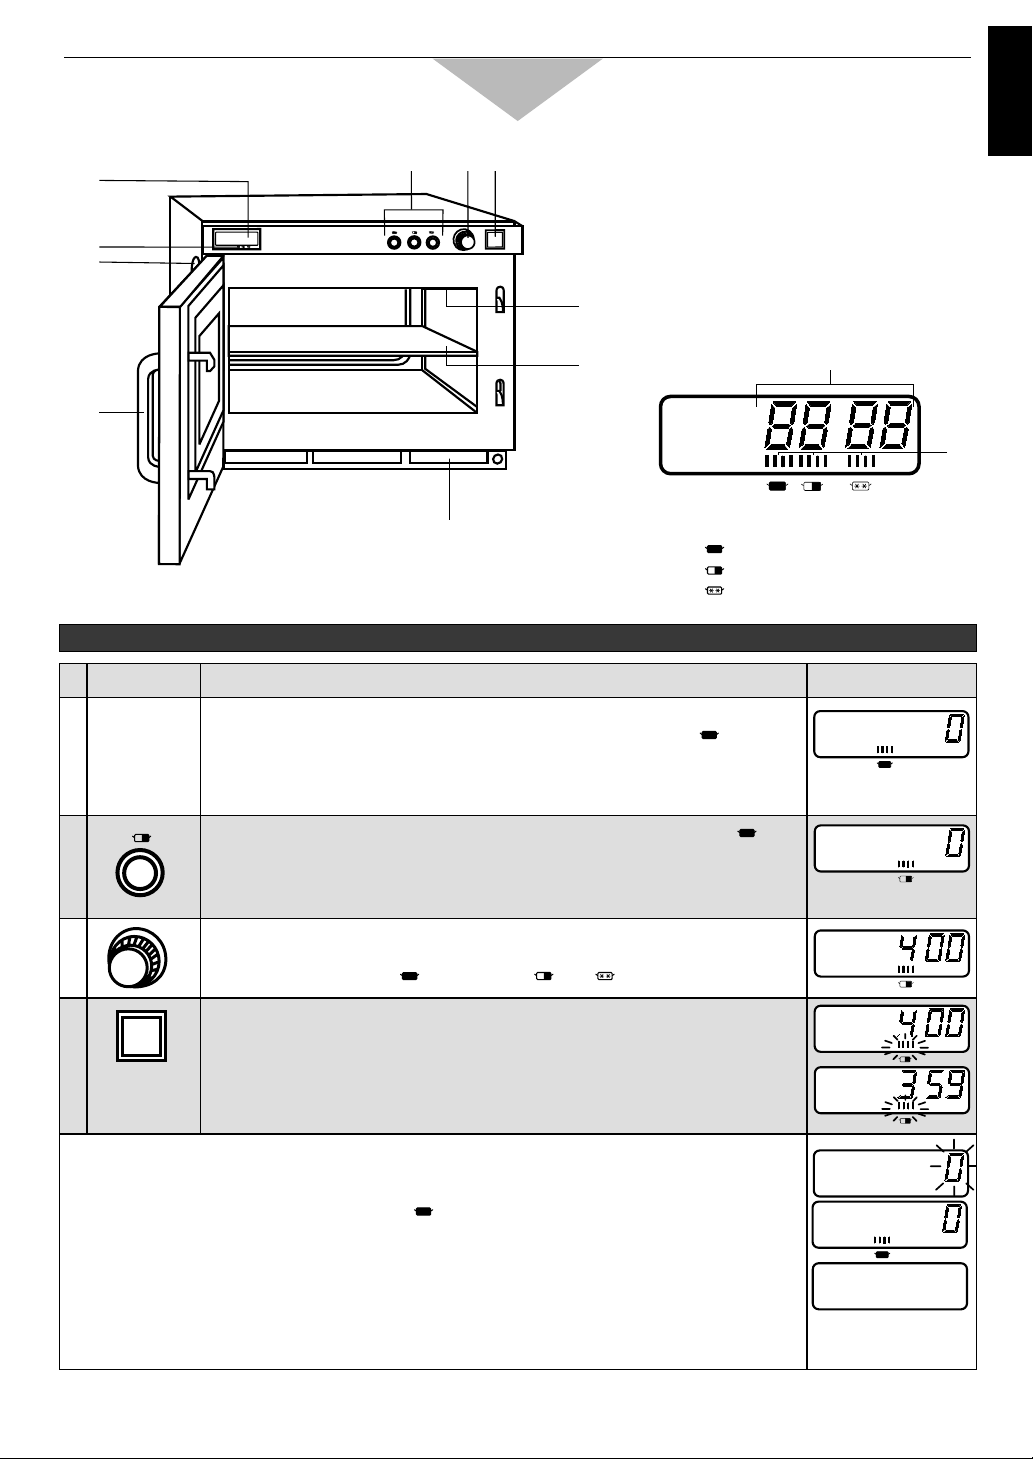
Outline Diagram and Operation of NE-2146-2/NE-1846/NE-1646
(8)
(7)
(6)
(9)
(1)
(2)
(3) (4)
(5)
(10)
A
B
(1) Digital Display Window (see below)
(2) Power Level Indicator Display
(3) Power Level Selector Buttons
(4) Timer Dial
(5) Start Button
(6) Door Handle
(7) Oven Lamp Cover
(8) Air Filter
(9) Splatter Shield (top of inner cavity)
(10) Middle Shelf (NE-2146-2 only)
A –– Heating Time Display (min.sec.)
B –– Power Level Indicator
:
HIGH
: MEDIUM
: DEFROST
Example:To cook food at MEDIUM power for 4 minutes
INSTRUCTION
DIGITAL DISPLAY WINDOW
PAD
2
Press the desired Power Level Selector Button,if other than
(HIGH).
3
Set heating time.
☛ Please check the heating time will appear.
Note:up to 25 min. on , 30 min. on or
4
Press Start Button.
☛ The oven lamp will turn on and heating will star t. Power Level Indicator
will start to blink, and heating time will count down.
• When all time expires, beep tone will sound and heating will stop.The oven lamp will
turn off.“0” will blink until the door is opened. One minute later, cooling fan will stop.
• Open the door and take the food out.The oven lamp will turn on. Digital Display Window
will show “0” and Power Level Indicator
• Close the door.The oven lamp will turn off. One minute later, Digital Display Window will
go blank.
• When you press the Start Button with door open, “0” will appear in the display in all
cases.
• Even after setting the heating time you can still change the power level.
• If you wish to change the heating time during heating, simply adjust the timer to desired
minutes and seconds.
1
Open the door and put the food in the oven.
☛ The oven lamp will turn on. “0” and Power Level Indicator will
appear.
Note:While “0” appears, operation is available.One minute after the door
is closed, “0” will disappear.
Page 6
- 4 -
Outline Diagram of NE-2156-2/NE-1656
(1) Digital Display Window (see below)
(2) Power Level Indicator Display
(3) Program pad
(4) Shift (A/B) pad
(5) Power Level Selector pad
(6) Double Quantity pad
(7) Treble Quantity pad
(8) Number/Memory pads
(9) Stop/Reset pad
(10) Start pad
(11) Oven Lamp Cover
(12) Door Handle
(13) Air Filter
(14) Splatter Shield (top of inner cavity)
(15) Middle Shelf (NE-2156-2 only)
A –– Program Display
B –– Heating Time Display (min.sec.)
C –– Memory Pad Number Display
D –– 1st Stage Heating Indicator
E –– 2nd Stage Heating Indicator
F –– 3rd Stage Heating Indicator
G –– Power Level Indicator
:
HIGH
: MEDIUM
: DEFROST
A
1234567890
B
(13)
(11)
(12)
(14)
(15)
(8)
(1) (2)
(3)(4) (5) (6)(7)
(9)
(10)
x 2
x 3
PROG
231
AB
C
DE F
G
This oven is preset at the factory for the following:
◆ Manual operation
◆ Number/Memory pads preset HIGH power at the indicated heating times for single stage heating
1 = 10 sec. 2 = 20 sec. 3 = 30 sec. 4 = 40 sec. 5 = 50 sec.
6 = 1 min. 7 = 1 min. 15 sec.8 = 1 min. 30 sec.9 = 1 min. 45 sec.0 = 2 min.
(There are two sides, A and B.Only A-side is preset.)
◆ Program Unlock
◆ Cycle Counter set to “0” on all pads
If you wish to change these times, please consult the operating instructions to find how to program them.
Page 7
- 5 -
English
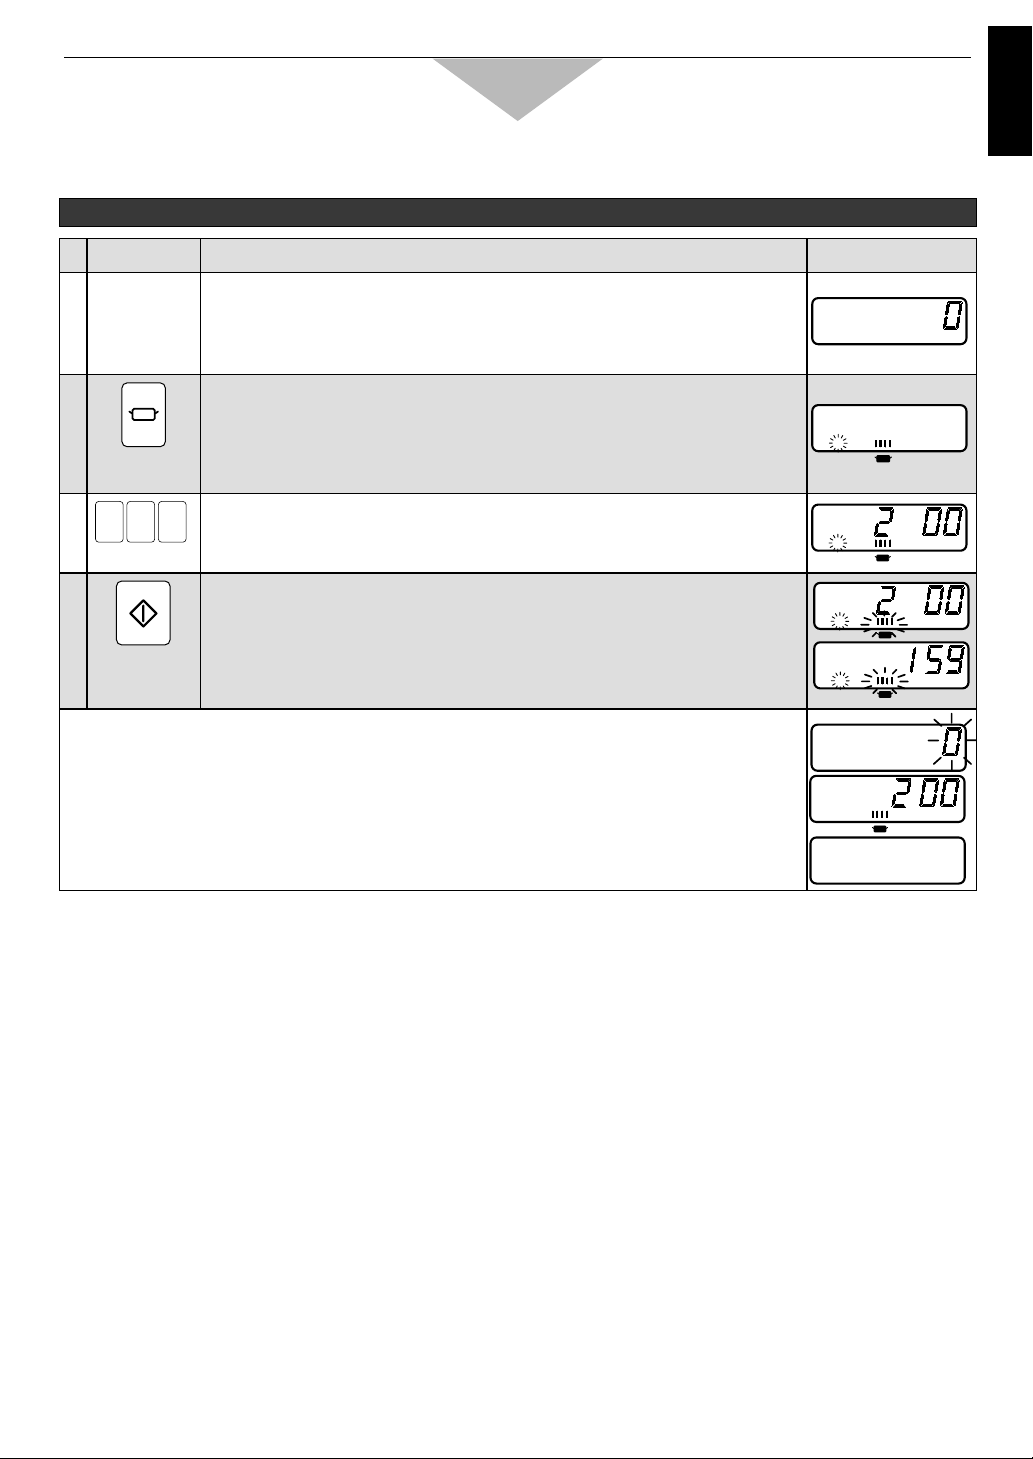
How to Operate NE-2156-2/NE-1656
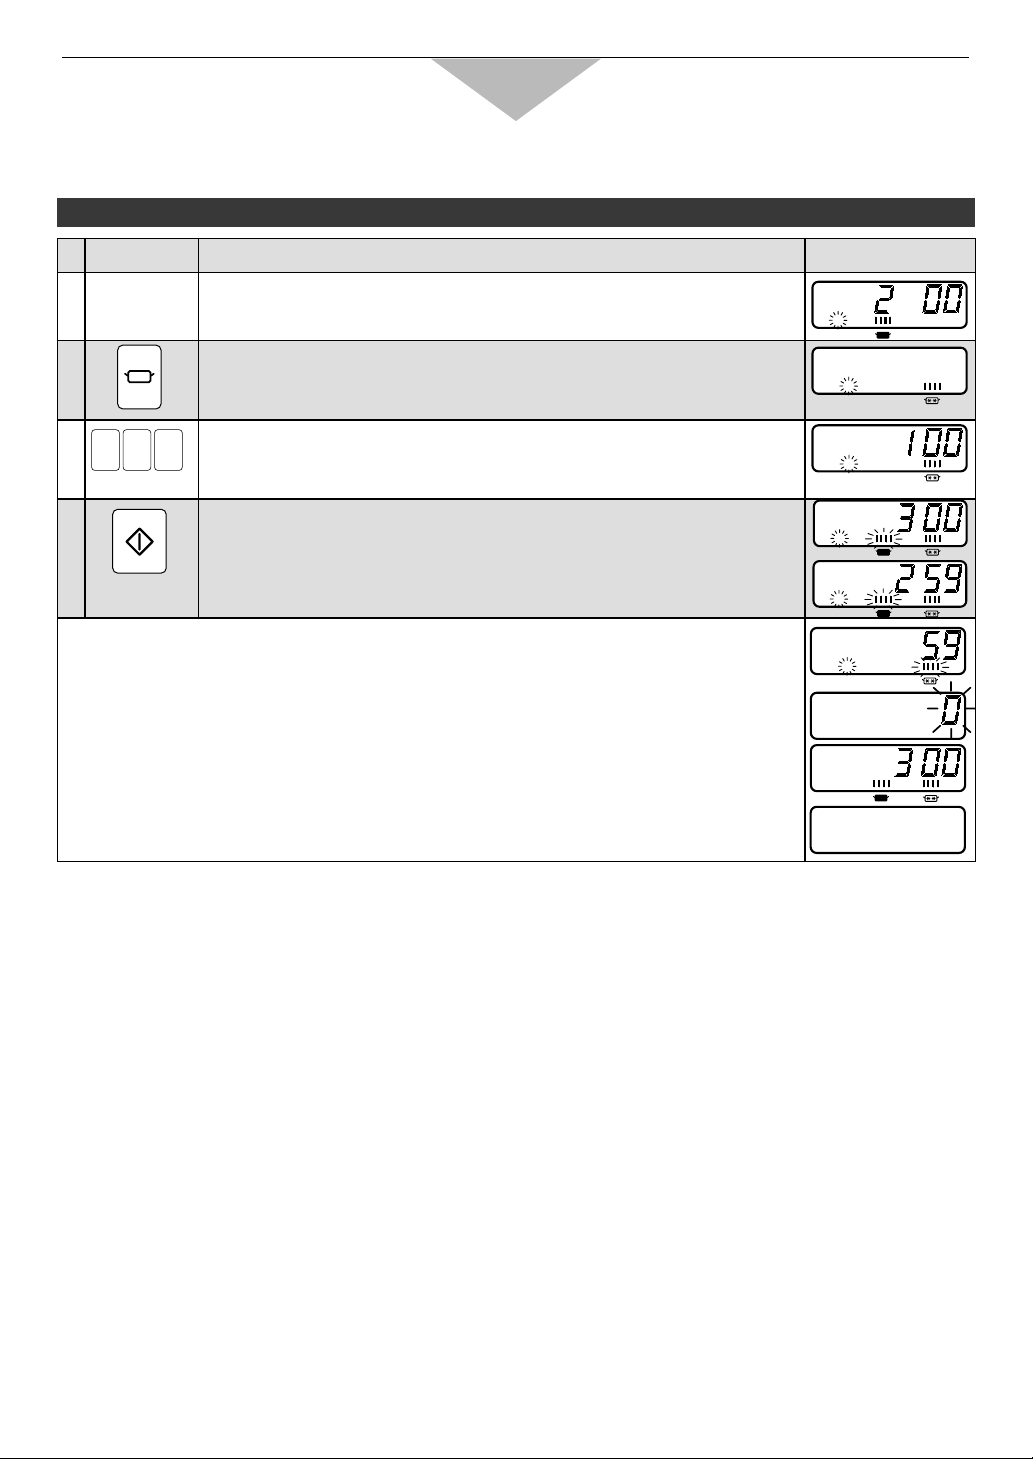
A. MANUAL HEATING –– single stage heating ––
Example:To cook food at HIGH power for 2 minutes
INSTRUCTION
DIGITAL DISPLAY WINDOW
PAD
2
Press Power Level Selector pad once.
☛ The selected power level will be indicated and 1st Stage Heating
Indicator “1” will star t to blink.
Note:To select HIGH power, press once. To select MEDIUM power, press
twice.To select DEFROST power, press three times.
3
Press Number/Memory pads “2”,“0” and “0”.
☛ The set heating time will appear.
Note:up to 15 min. on HIGH or MEDIUM power, 30 min.on DEFROST
2 0 0
1
4
Press Start pad.
☛ The oven lamp will turn on and heating will star t. Power Level Indicator
will start to blink, and heating time will count down.
• When all time expires, beep tone will sound and heating will stop.The oven lamp will
turn off.“0” will blink until the door is opened. One minute later, cooling fan will stop.
• Open the door and take the food out.The oven lamp will turn on. Digital Display Window
will show the originally selected time and power.
• Close the door.The oven lamp will turn off. One minute later, Digital Display Window will
go blank.
1
1
Open the door and put the food in the oven.
☛ The oven lamp will turn on and “0” will appear.
Note:While “0” appears, operation is available.One minute after the door
is closed, “0” will disappear.
1
1
1
Page 8
- 6 -
A. MANUAL HEATING –– 2 or 3 stages heating ––
INSTRUCTION
DIGITAL DISPLAY WINDOW
PAD
Follow steps 1 to 3 on page 4.
1
4
Press Power Level Selector pad three times.
☛ The selected power level will be indicated and 2nd Stage Heating
Indicator “2” will star t to blink.
5
Press Number/Memory pads “1”,“0” and “0”.
☛ The set heating time will appear.
Note:up to 15 min. on HIGH or MEDIUM power, 30 min.on DEFROST
0 01
21
6
Press Start pad.
☛ The oven lamp will turn on. The total time for both stages will appear
and start to count down. 1st Stage Heating Indicator “1” and Power
Level Indicator for the first stage heating will star t to blink.
• After the first stage heating, beep tone will sound.2nd Heating Stage Indicator “2” and
Power Level Indicator for the second stage heating will start to blink and the remaining
heating time will count down.
• When all time expires, beep tone will sound and heating will stop.The oven lamp will
turn off.“0” will blink until the door is opened. One minute later, cooling fan will stop.
• Open the door and take the food out.The oven lamp will turn on. Digital Display Window
will show the originally set time and power.
• Close the door.The oven lamp will turn off. One minute later, Digital Display Window will
go blank.
2
21
Note:For 3 stages heating, select a power level once again after step 5 and set a heating time.
SPECIAL NOTE: For both single and 2 stages heating
1. While heating, one touch on Stop/Reset pad stops the operation.You can restart it by pressing Start pad or a
second touch on Stop/Reset pad will cancel the selected program.
2. While not heating, one touch on Stop/Reset pad cancels the selected program.
3. You can repeat exactly the same manually selected heating time by pressing only Start pad you use the oven
again within one minute.
4. One minute later of non-use with door closed, the repeat feature will be cancelled.
Example:To cook food at HIGH power for 2 minutes and at DEFROST power for 1 minute
How to Operate NE-2156-2/NE-1656
21
21
21
Page 9
- 7 -
English
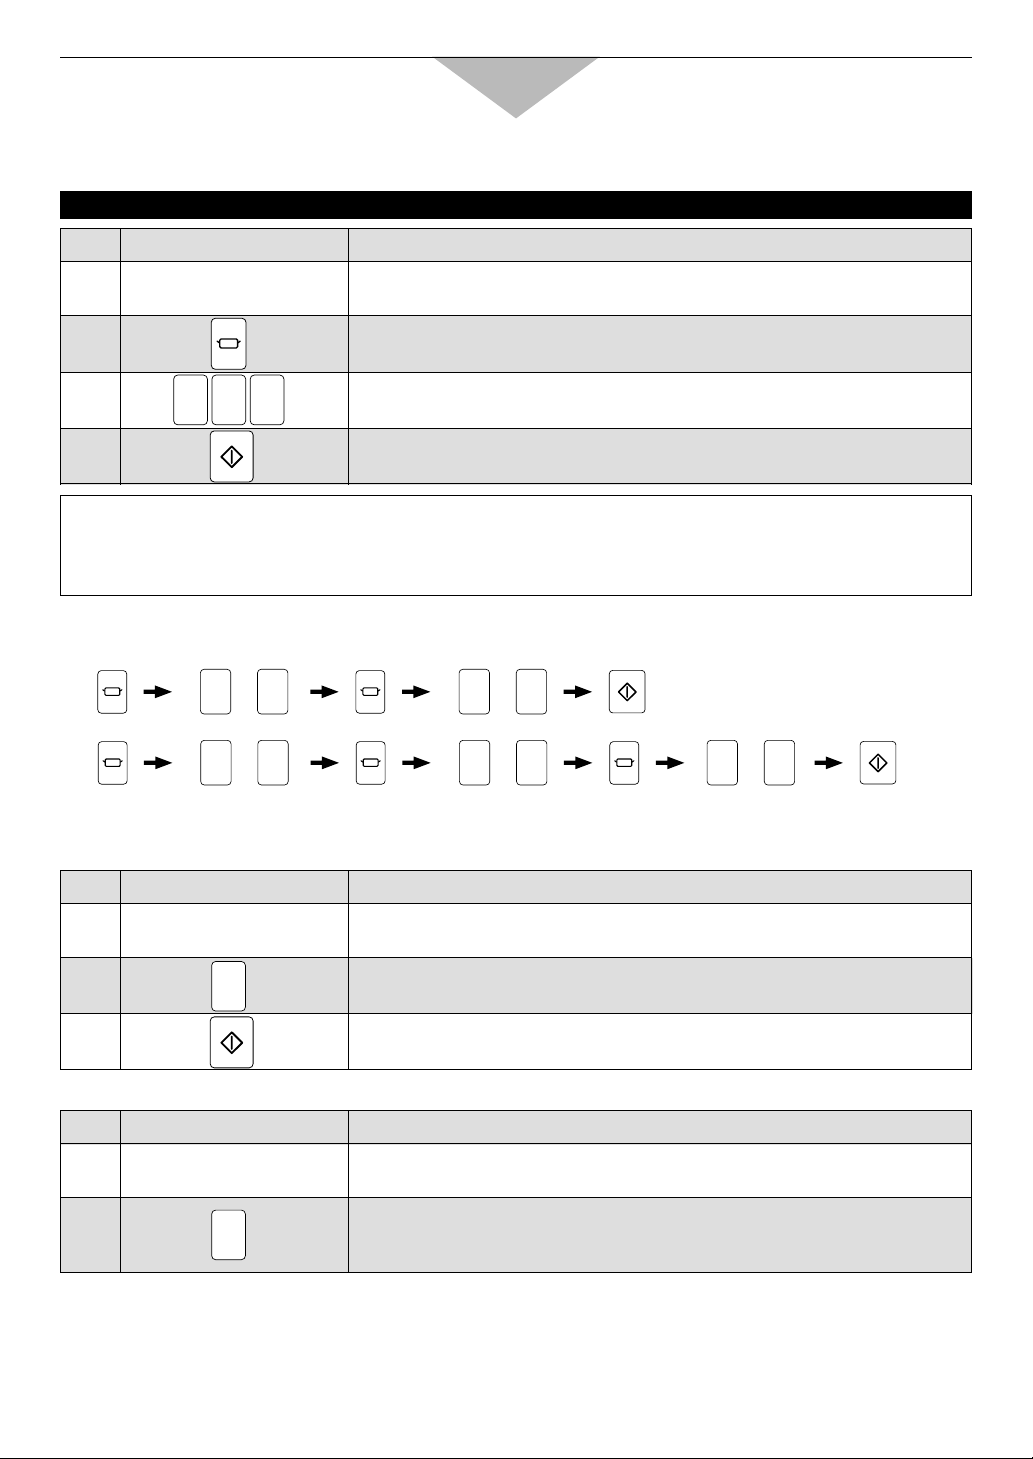
C. PROGRAMMING NUMBER/MEMORY PADS –– single stage heating ––
INSTRUCTION
DIGITAL DISPLAY WINDOW
PAD
2
Press Program pad.
☛ “PROG”will start to blink.
THE OVEN CAN NOT BE PROGRAMMED WHEN PROGRAM LOCK IS ACTIVATED! (see page 9-10)
DO NOT OPEN THE DOOR WHILE PROGRAMMING!
Example:To program cooking at DEFROST power for 1 minute into Number/Memory pad “5”
How to Operate NE-2156-2/NE-1656
1
Keep the door closed.
☛ Digital Display Window must be blank.
B. PROGRAMMED HEATING
INSTRUCTION
DIGITAL DISPLAY WINDOW
PAD
2
Press the desired Number/Memory pad “3”.
☛ The currently programmed information will be indicated.
3
Press Start pad.
☛ The oven lamp will turn on and heating will star t. The heating time will
count down.
PROG
1
◆
In Program Unlock Mode:
• When all time expires, beep tone will sound and heating will stop.The oven lamp will
turn off.“0” will blink until the door is opened. One minute later, cooling fan will stop.
• Open the door and take the food out.The oven lamp will turn on.
• Close the door.The oven lamp will turn off. One minute later, Digital Display Window will
go blank.
◆
In Program Lock Mode:
Just press the desired Number/Memory pad. Heating will automatically star t without pressing Start pad.
✐ For Double (or Treble) Quantity heating:
Press Double (or Treble) Quantity pad before pressing the desired Number/Memory pad.
Example: To select Number/Memory pad “3” at A side in which your desired heating program (at HIGH
power for 3 min., single stage heating) is set
1
Open the door and put the food in the oven.
☛ The oven lamp will turn on and “0” will appear.
Note:While “0” appears, operation is available.One minute after the door
is closed, “0” will disappear.
Note:
• When you want to select the number at B side, press Shift (A/B) pad before pressing the desired
Number/Memory pad.
3
PROG
1
PROG
Page 10
- 8 -
6
Press Power Level Selector pad once.
☛ The power level for 2nd stage will be indicated, 2nd Stage Heating
Indicator “2” will star t to blink, and Heating Time Display will go blank.
7
Press Number/Memory pads “2”,“0” and “0”.
☛ The set heating time will appear.
Note:up to 15 min. on HIGH or MEDIUM power, 30 min.on DEFROST
2 0 0
PROG
21
8
Press Prog pad.
☛ “PROG”and 2nd Stage Heating Indicator “2” will stop blinking.The
total time for both stages will appear. This means that you have
completed programming.
• Three seconds later, Digital Display Window will go blank.
Note:
• Program the remaining Number/Memory pads as desired by repeating steps above.
• When “PROG” is blinking in Digital Display Window, the program can be cancelled and/or one touch on
Stop/Reset pad erases the programmed Number/Memory pad number.
• When you want to program the B side, press Shift (A/B) pad before pressing Number/Memory pad.
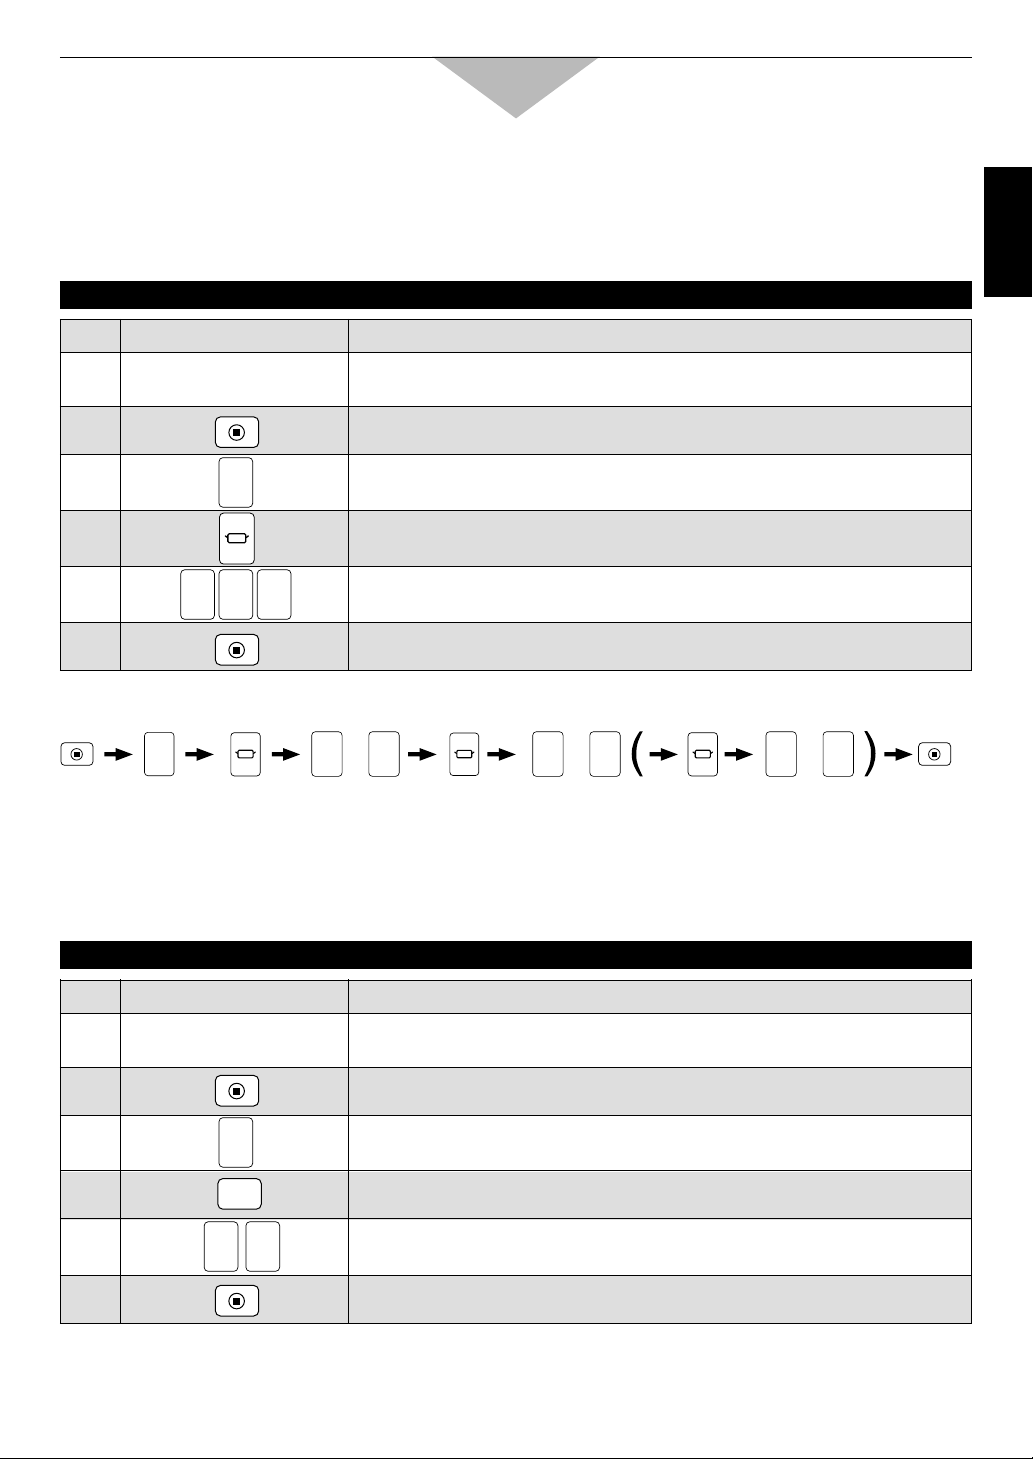
C. PROGRAMMING NUMBER/MEMORY PADS –– 2 or 3 stages heating ––
INSTRUCTION
DIGITAL DISPLAY WINDOW
PAD
Follow steps 1 to 5 above.
PROG
1
Example:To program cooking at DEFROST power for 1 minute and at HIGH power for 2 minutes into Number/Memory pad “5”
THE OVEN CAN NOT BE PROGRAMMED WHEN PROGRAM LOCK IS ACTIVATED! (see page 9-10)
DO NOT OPEN THE DOOR WHILE PROGRAMMING!
How to Operate NE-2156-2/NE-1656
4
Press Power Level Selector pad three times.
☛ The selected power level will be indicated, 1st Stage Heating Indicator
“1” will star t to blink, and Heating Time Display will go blank.
5
Press Number/Memory pads “1”,“0” and “0”.
☛ The set heating time will appear.
Note:up to 15 min. on HIGH or MEDIUM power, 30 min.on DEFROST
0 01
PROG
1
6
Press Program pad.
☛ “PROG”and 1st Stage Heating Indicator “1” will stop blinking.
This means that you have completed programming.
• Three seconds later, Digital Display Window will go blank.
Note:
• Program the remaining Number/Memory pads as desired by repeating steps 1-6 above.
• When “PROG” is blinking in Digital Display Window, the program can be cancelled and/or one touch on
Stop/Reset pad erases the programmed Number/Memory pad number.
• When you want to program the B side, press Shift (A/B) pad before selecting the desired Number/Memory pad.
3
Press Number/Memory pad “5”.
☛ The selected pad number will appear and currently programmed
information will be indicated.
5
PROG
1
PROG
1
PROG
1
PROG
21
PROG
21
Page 11
- 9 -
English
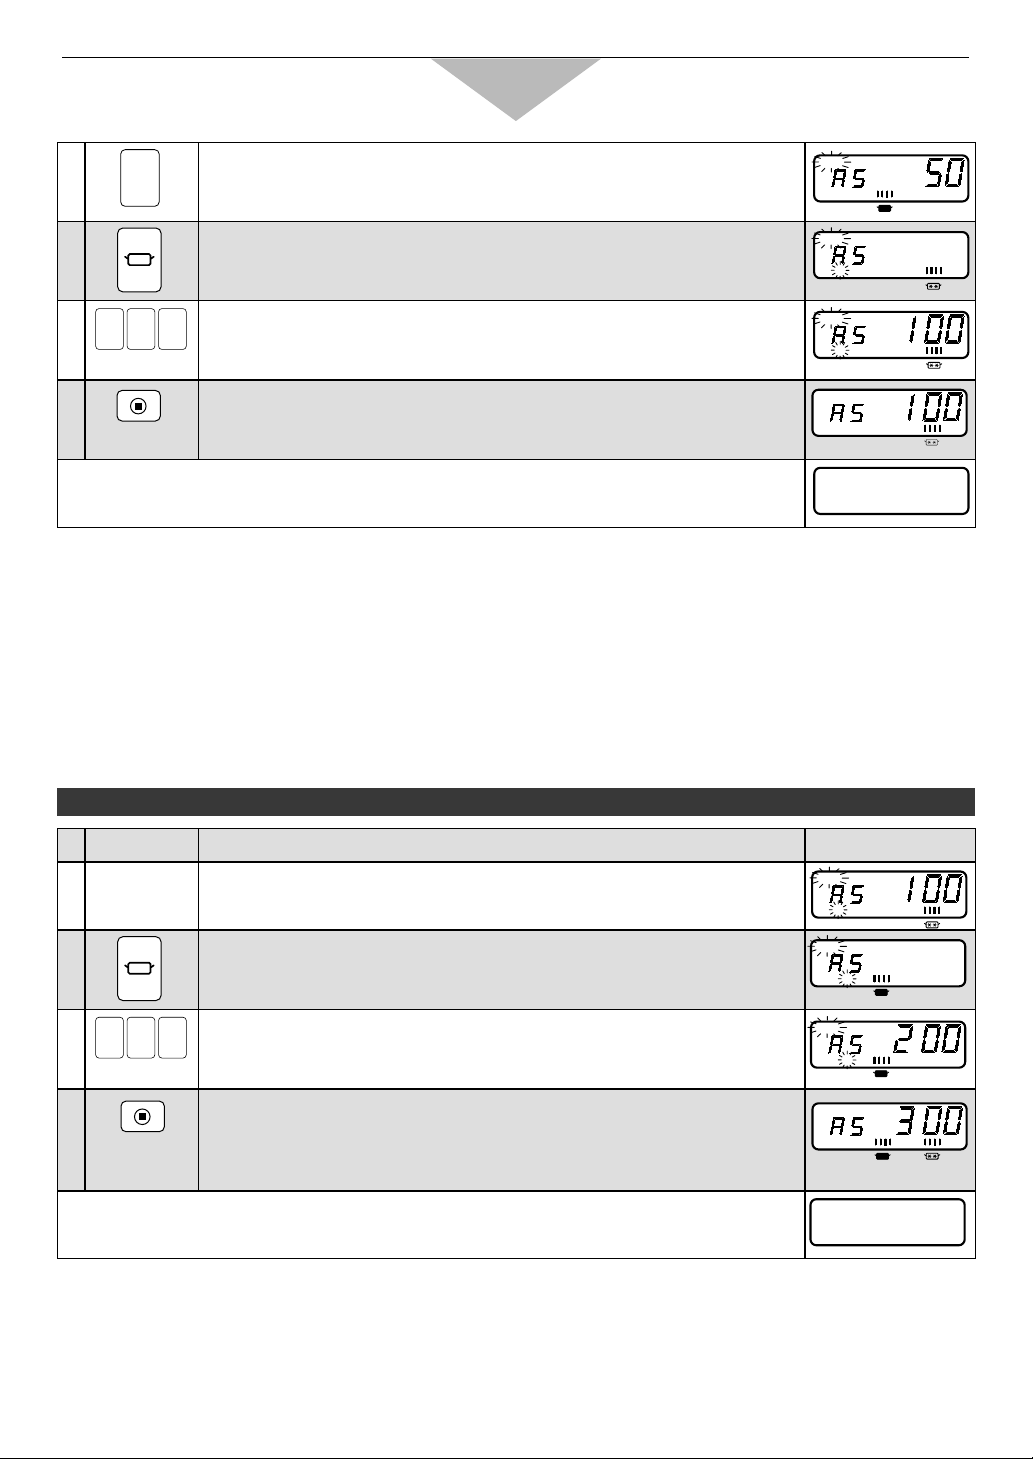
How to Operate NE-2156-2/NE-1656
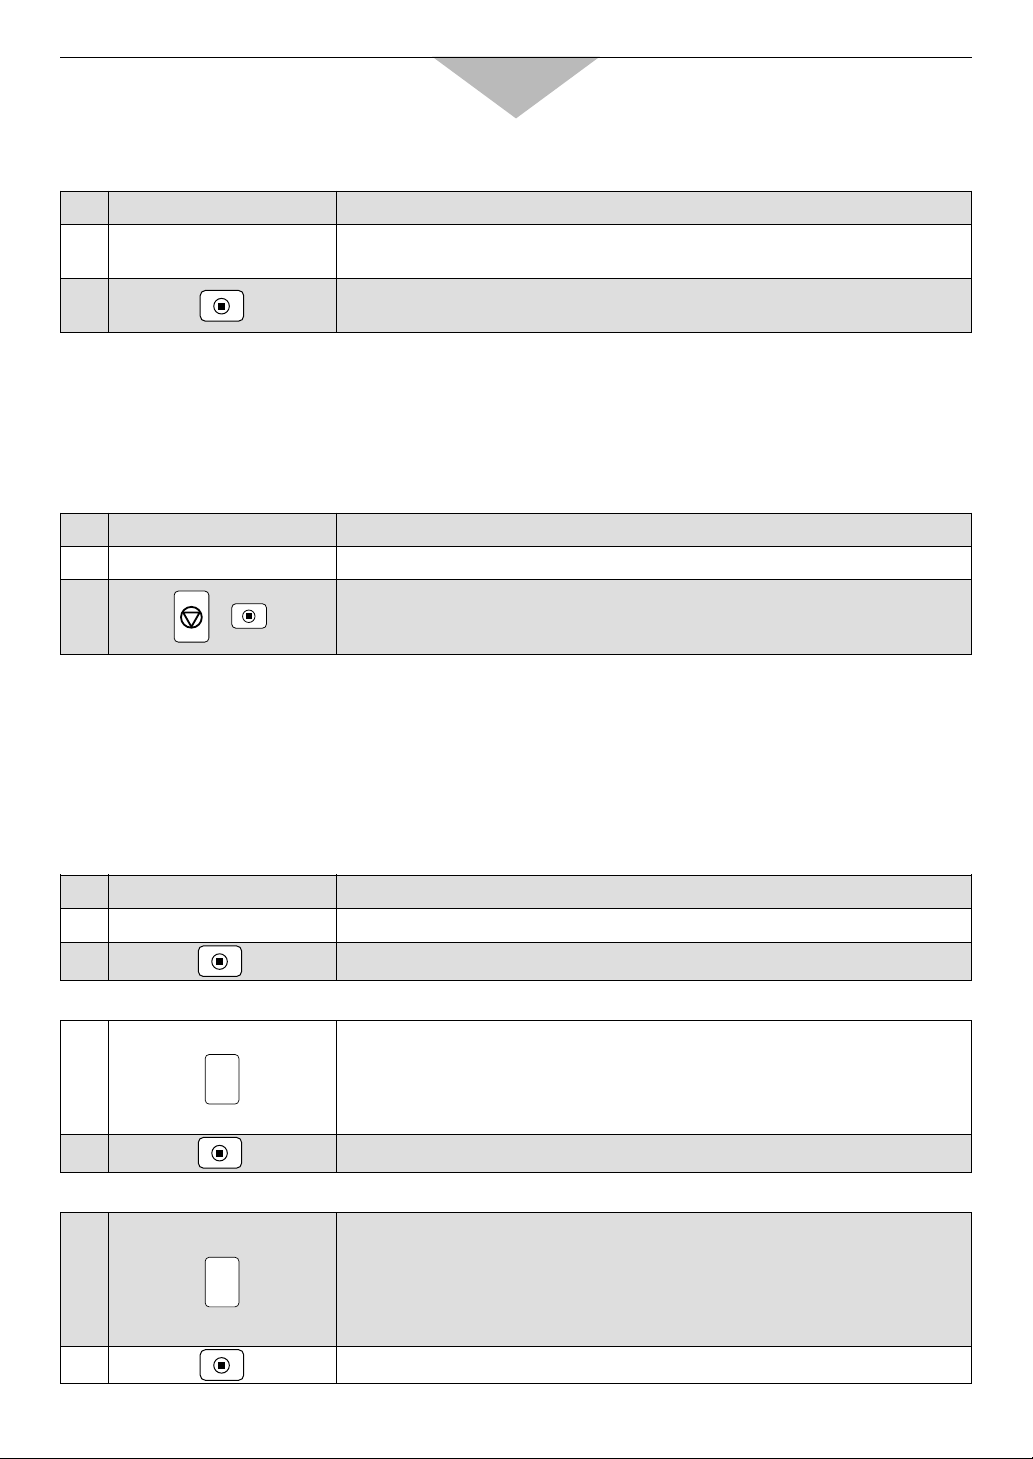
E. PROGRAM LOCK
INSTRUCTION
DIGITAL DISPLAY WINDOW
PAD
1
Keep the door closed.
☛ Digital Display Window must be blank.
2
Press Prog pad until “PROG”,“P” and “L” appear. (more than five
seconds)
☛ “PROG”, “P” and “L” will appear.
In Program Lock mode:
• The oven is started by pressing the desired Number/Memory pad. There is no need to press Star t pad.
• Opening the door cancels the remaining time on the program.
• The oven can not be programmed or run manually until the program lock is released.
◆
To Activate Program Lock:
INSTRUCTION
DIGITAL DISPLAY WINDOW
PAD
2
Press Prog pad.
☛ “PROG”will start to blink.
4
Press Double Quantity pad.
☛ The currently programmed magnification number will appear.
Note:1.6 times is preset at factory.
5
Press Number/Memory pads “1”and “5”.
☛ The programmed magnification number will appear.
1
5
PROG
6
Press Prog pad.
☛ “PROG”will stop blinking.
This means that you have completed programming.
• Three seconds later, Digital Display Window will go blank.
Note:
• If you want to program your desired magnification number for treble quantity, repeat as above, using Treble
Quantity pad instead of Double Quantity pad.
3
Press Number/Memory pad “5”.
☛ The selected pad number will appear and currently programmed
information will be indicated.
5
PROG
1
Example:To program 1.5 times of heating time for double quantity into Number/Memory pad “5”
1
Keep the door closed.
☛ Digital Display Window must be blank.
D. PROGRAMMING DOUBLE OR TREBLE QUANTITY PAD
THE OVEN CAN NOT BE PROGRAMMED WHEN PROGRAM LOCK IS ACTIVATED! (see page 9-10)
DO NOT OPEN THE DOOR WHILE PROGRAMMING!
x 2
PROG
PROG
PROG
PROG
Page 12
- 10 -
How to Operate NE-2156-2/NE-1656
F . BEEP TONE
The loudness of beep tone and the length of beep tone
at the end of heating cycle can be set.
There are four levels of the loudness. The level is
indicated by a number followed by the word “bEEP”.
3bEEP = loudest
2bEEP = middle
1bEEP = quietist
0bEEP = silent
There are two options of the length of beep tone at the
end of heating cycle.The length is indicated by 1 st or
2 nd Stage Heating Indicator.
1 = 3 beeps
2 = short beeps for 60 seconds
The loudest level and 3 beeps are preset at the factory.
◆
To Select Loudness Level and Length “3 beeps”:
INSTRUCTION
DIGITAL DISPLAY WINDOW
PAD
1
Open the door and leave it open.
☛ The oven lamp will turn on and “0” will appear.
2
Press Prog pad.
3
Press Number/Memory pad “0”once.
☛ The tone will sound at its loudness level and the loudness level “3”
followed by the word “bEEP” will appear. “PROG” will start to blink and
1st Stage Heating Indicator “1” (the length of beep tone “3 beeps”) will
be indicated.
Note:Repeating to press the pad “0” will lower the loudness all the way
to silent. (3 bEEP –– loudest, 2 bEEP –– middle,
1 bEEP –– quietest, and 0 bEEP –– silent)
0
PROG
1
4
Press Prog pad.
☛ “PROG”will stop blinking. That means that you have completed
program.
Three seconds later, “0” will appear.
• Close the door. One minute later, Digital Display Window will go blank.
Example:To select loudest beep tone
In Program Unlock mode:
• Oven reverts to a two-touch operating mode (Number/Memory pad + Start pad).
• Repeat and interrupt feature are operational.
• Number/Memory pads can be programmed.
• Tone loudness control and length control are operational.
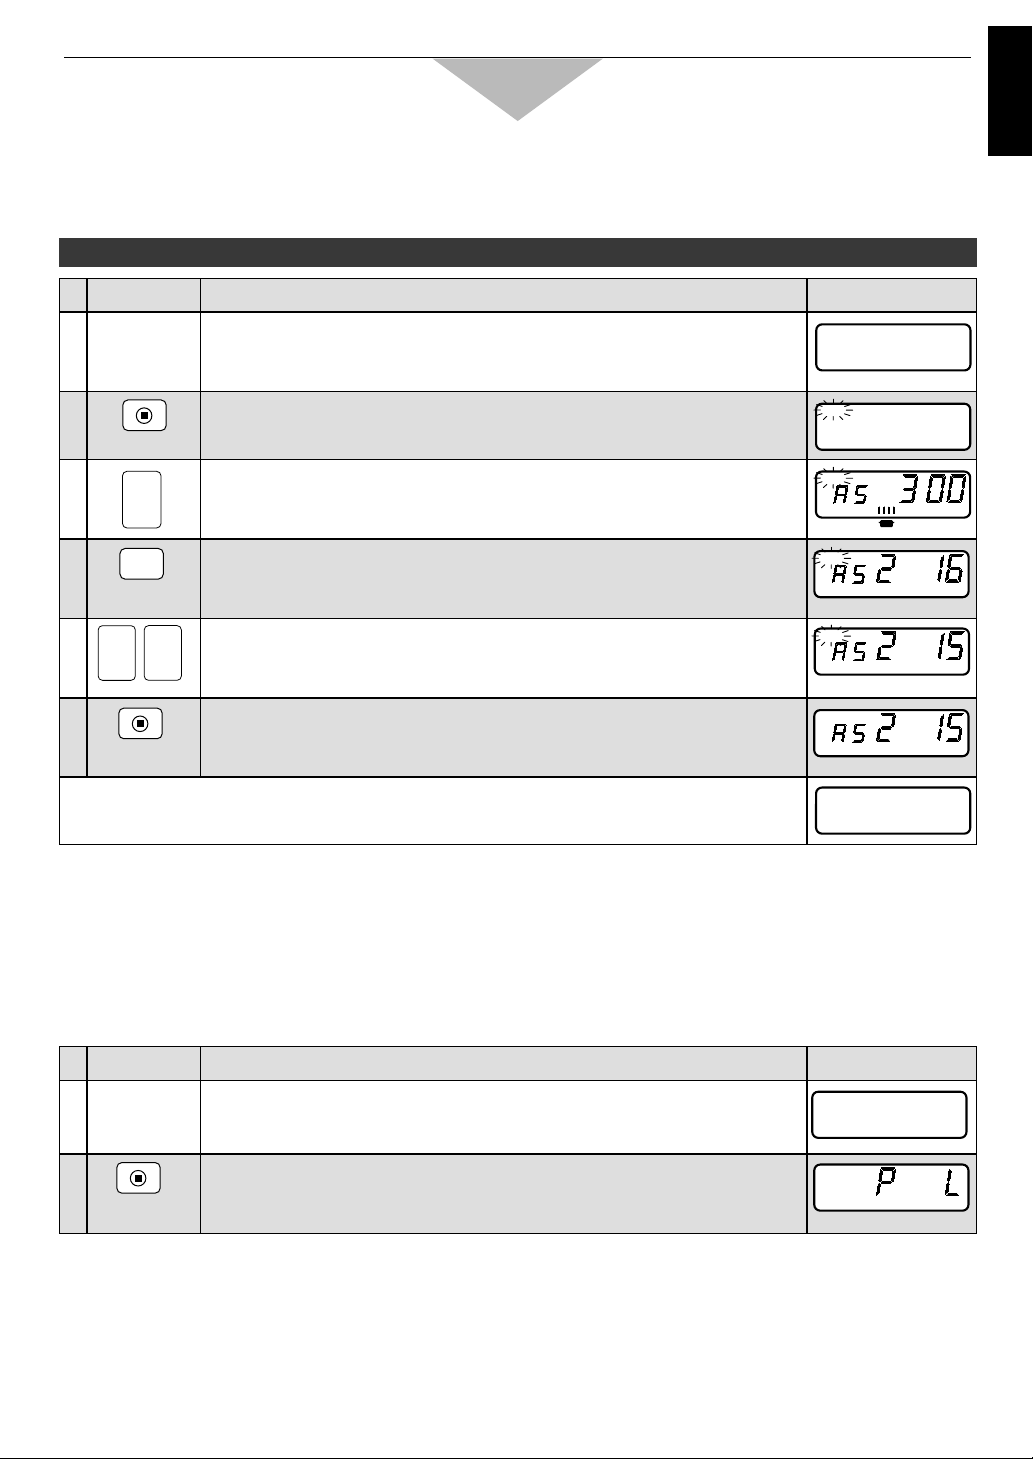
◆
To Release Program Lock:
INSTRUCTION
DIGITAL DISPLAY WINDOW
PAD
1
Open the door and leave it open.
☛ The oven lamp will turn on, and “0” will appear.
2
While pressing Stop/Reset pad, press Prog pad until “PROG”and
“P” appear. (more than five seconds)
☛ “PROG”and “P ” will appear.
+
PROG
PROG
1
Page 13
- 11 -
English
How to Operate NE-2156-2/NE-1656
H. CYCLE COUNTER
✐ For selecting length of tone “short beeps for 60 seconds”:
INSTRUCTION
DIGITAL DISPLAY WINDOW
PAD
Follow step 1-4 on page 9. DO NOT CLOSE THE DOOR!
PROG
1
5
Within three seconds after pressing Prog pad at step 4, press
Number/Memory pad “0”once.
☛ “PROG”will start to blink and 2nd Stage Heating Indicator “2” (the
length of beep tone “short beeps for 60 seconds”) will be indicated.
6
Press Prog pad.
☛ “PROG”will stop blinking. This means that you have completed
programming.
Three seconds later, “0” will appear.
PROG
2
• Close the door. One minute later, Digital Display Window will go blank.
G. PROGRAM LIST
INSTRUCTION
DIGITAL DISPLAY WINDOW
PAD
1
Open the door and leave it open.
☛ The oven lamp will turn on and “0” will appear.
2
While pressing Stop/Reset pad, press Star t pad.
☛ All currently programmed information (the program set into each
Number/Memory pad (A/B sides), Beep Tone, and Program Lock
information) will continuously appear.
+
Example:To select short beeps for 60 seconds
INSTRUCTION
DIGITAL DISPLAY WINDOW
PAD
1
Open the door and leave it open.
☛ The oven lamp will turn on and “0” will appear.
2
While pressing Stop/Reset pad, press Number/Memory pad “3”.
☛ The times that the pressed Number/Memory pad has been used will
appear.
+
◆
To Read The Number of Times Each Memory Pad Has Been Used:
Example:To read times of Number/Memory pad “3” at A side (6666 times used)
Note
:
• When you want to read the times of each pad at B side, press Shift (A/B) pad while the display is still showing
the number of cycles in step 2.
0
PROG
2
e.g.
PROG
1
PROG
1
PROG
2
PROG
3
e.g.
Page 14
- 12 -
How to Operate NE-2156-2/NE-1656
I. AIR FILTER
INSTRUCTION
DIGITAL DISPLAY WINDOW
PAD
1
Open the door and leave it open.
☛ The oven will turn on and “0” will appear.
2
While pressing Start pad, close and open the door.
3
Press Number/Memory pad “3”.
☛ The currently programmed hour will appear.
3
e.g.
4
Press Number/Memory pads “6”,“0” and “0”.
☛ The programmed hour will appear.
Note:up to 9999 hours
5
Press Prog pad.
☛ Three seconds later, “0” will appear.
To check the total number of hours used,
◆ Open the door and leave it open.
◆ Press Number/Memory pad “3” while pressing Start pad.
◆ The total number of hours used and “H” will appear in Digital Display Window.
e.g. If the oven has been used for 20 hours,
Three seconds later, “0” will appear in Digital Display Window.
Note:If the oven cuts out after short operation, check if Air Filter is clean before calling an engineer.
Note:When “FILT” sign appears in Digital Display Window, remove Air FIlter and clean it with soapy water. Press
Stop/Reset pad to clear the display.
Example:To program cleaning Air Filter every 600 hours
3
Close the door while the display is still showing the number of
cycles that each pad has been used.
☛ The total cumulative cycles that the oven has been used in
Number/Memory pads at A/B sides and manual mode will appear.
◆
To Read Total Cumulative Cycles That The Oven Has Been Used:
INSTRUCTIONPAD
DIGITAL DISPLAY WINDOW
◆
To Read The Number of Cycles That The Oven Has Been Used In Manual Mode:
INSTRUCTIONPAD
4
Open the door and leave it open.
☛ The oven lamp will turn on and “0” will appear.
5
While pressing Stop/Reset pad, press Power Level Selector pad.
☛ The times that the oven has been used in manual mode will appear.
+
DIGITAL DISPLAY WINDOW
e.g.
e.g.
0 06
e.g.
Page 15
- 13 -
English
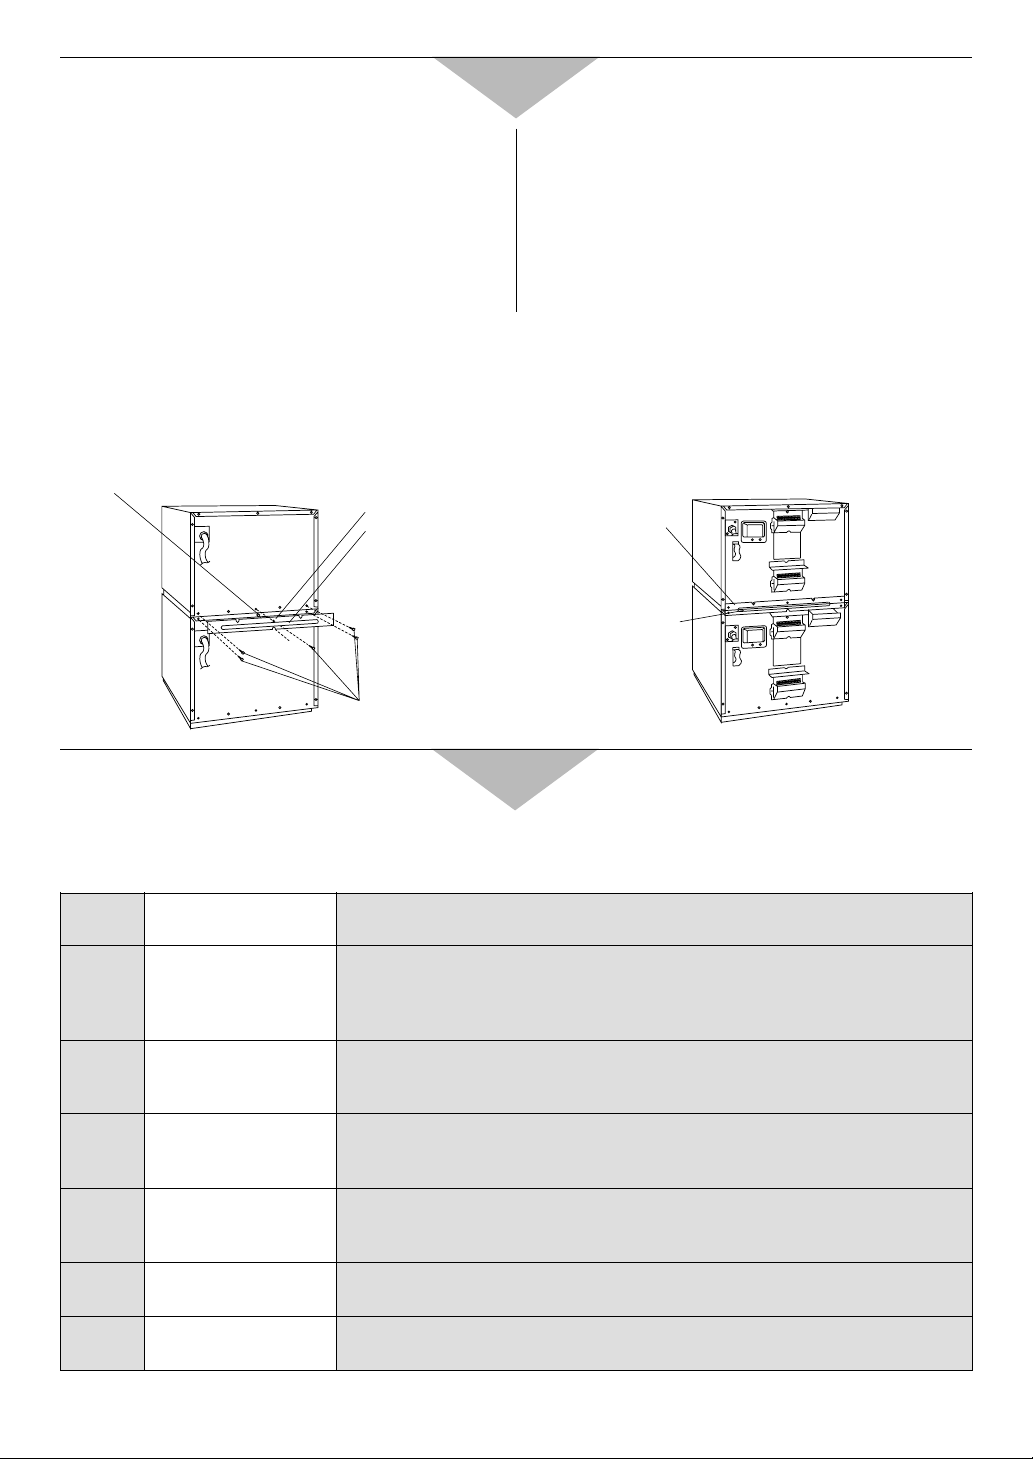
Installation Instructions for Stacking
IMPORTANT
1. Disconnect the power cord from the wall socket
before attempting installation.
2. For stacking installation, you must use the
PANASONIC Joint Plate which is enclosed with this
unit.
3. Combination of the unit for stacking is limited within
only the following PANASONIC models:
NE-1057, NE-1457, NE-1247, NE-1747, NE-1047,
NE-1447, NE-1257, NE-1757, NE-1442, NE-1856,
NE-1456, NE-1846, NE-1446, NE-2146-2,
NE-2156-2
4. The maximum stacking height is the total heights of
two units.
PREPARATION
Be sure the oven cavity is empty.
INSTALLATION
1. Stack the units and remove five screws (a) as shown in Fig.1.
2. Loosen the screw (b).
3. Projection on Joint Plate must face away from the oven.Place Joint Plate on the screw (b).
4. Attach and tighten five screws (a) and the screw (b). See Fig.2.
5. Ensure the top oven is at a safe and workable height.
Self Diagnostics Failure Code Explanation
This oven monitors its operation and displays a Failure Code in Digital Display Window when a problem occurs.
What to do when a Failure Code appears: Unplug the oven and wait more than ten seconds before
reconnecting. If normal operation does not resume, follow the next chart.
CODE
F01
F33-34
F05
F81-82
F86-87
F44
PROBLEM
Too high temperature of
exhausted air
Defective thermistor circuit
Defective memory IC
Defective relay circuit
Defective relay circuit
Defective control panel
WHA T TO DO
The oven shuts off automatically. Disconnect the power cord from the wall socket.
The oven beeps continuously and resets for operation when cool. Move the oven
to the cooler location. If the problem persists, call service agent.
The oven shuts off automatically. If the problem persists, call service agent.
If the problem persists, call service agent.The oven will operate even if Failure
Code appears, just not as designed. If the problem occurs during memory
heating, press Stop/Reset pad.Then other memor y program and manual heating
will be possible.
If the problem persists, call service agent.The oven will operate even if Failure
Code appears, just not as designed. Press Stop/Reset pad and try again.
The oven shuts off automatically. If the problem persists, call service agent.
The oven shuts off automatically. If the problem persists, call service agent.
Note:Above codes shown in Digital Display Window do not indicate all possible failures on the unit.
(b)
Joint Plate
Projection
(a)
Fig. 1
Joint Plate
Projection
Fig. 2
Page 16
- 14 -
Care of Your Oven
1. Remove the plug from the electrical socket before
cleaning.
2. Keep the inside of the oven [and Middle shelf
(NE-2146-2, NE-2156-2 only)] clean. If pieces of
food or spilled liquids stick to the oven walls, or
between door seal and door surface, they will
absorb microwaves and may cause arcing or
sparks.Wipe up all spills with a damp cloth. Kitchen
detergent or Food Sanitizer Solution may be used if
the oven gets very dirty. Do not use harsh
detergents or abrasives.
The middle shelf can be washed either in hot soapy
water or in the dishwasher.
3. The outside surface of this microwave oven should
be cleaned with soap and water, then dried with a
soft cloth. Make sure that water does not get into
the back ventilation or control panel, opening since
this can damage the unit.
4. The window of the door should be washed with
very mild soap and water.Be sure to use a soft
cloth. Never use window clearer. The front door can
be scratched by harsh soap or cleaners.
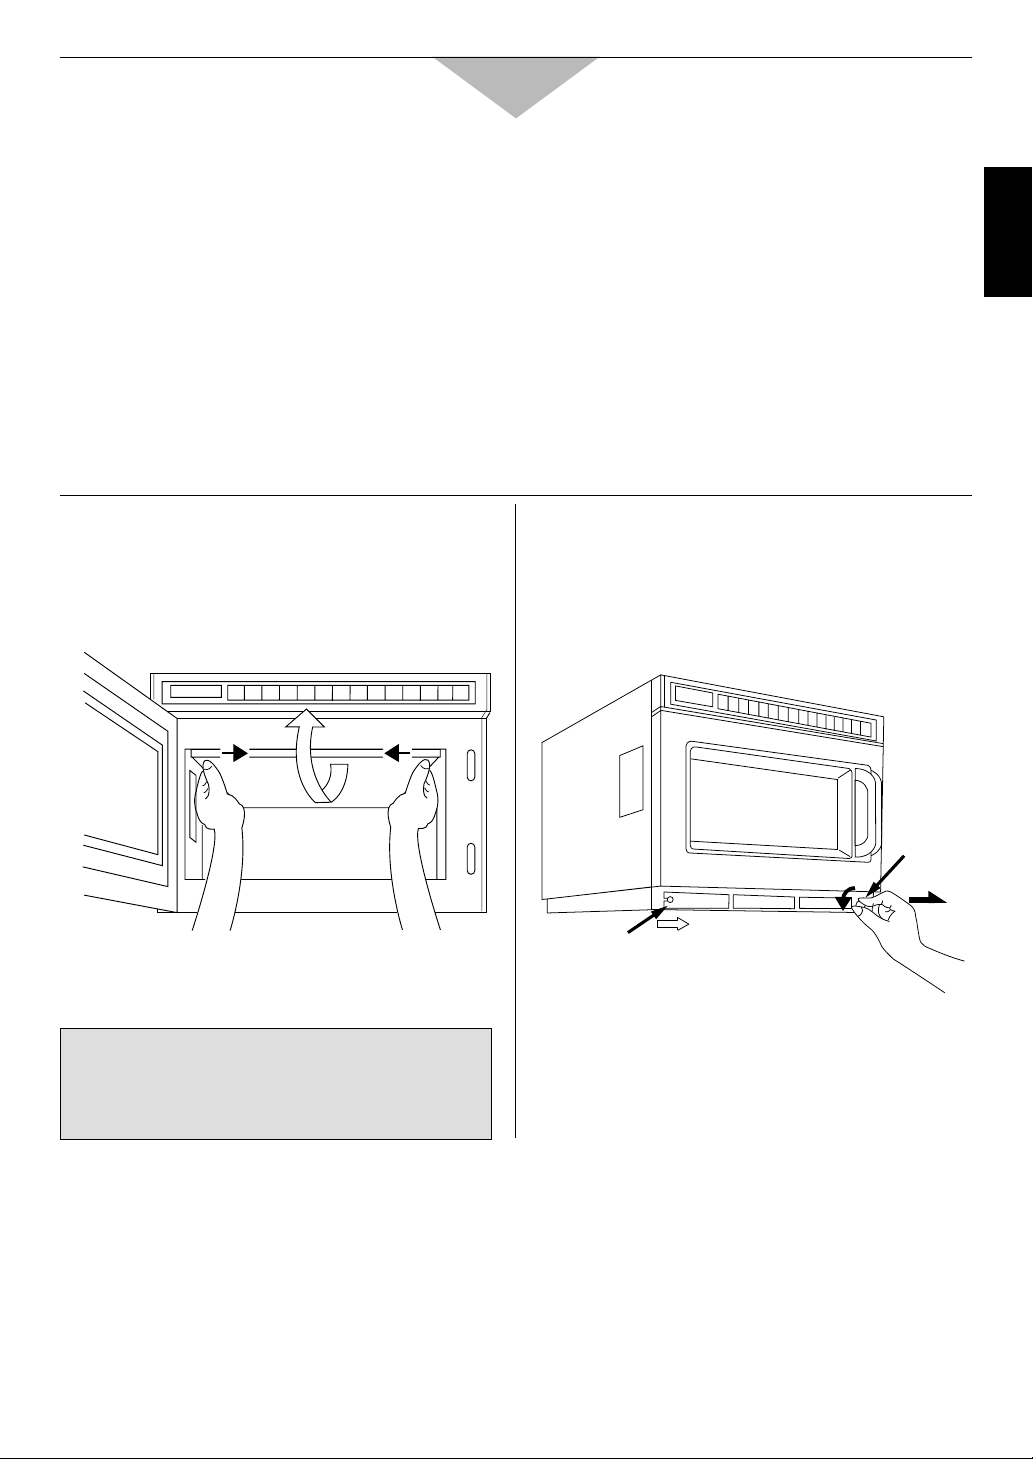
CLEANING OF THE
SPLATTER SHIELD
1. Hold snap in-snap out side stoppers of splatter
shield with both hands and pull them in and down.
Then take the splatter shield out of the oven cavity.
2. Rinse splatter shield in soapy water or Food
Sanitizer Solution. Dry.
3. Be sure to replace the shield before using the oven.
CAUTION
Splatter shield must be in place securely when
you use the oven.
CLEANING AIR FILTER
Cleaning Air Filter regularly according to the following
instructions.The oven may have problems when Air
Filter becomes clogged with dust.(*)
1. Remove Air Filter from the front bottom skirt by
returning the right screw to the left. Then slide the
filter to the right and lift it off the post at the left.
screw
post
2. Wash this filter in warm soapy water.
3. Be sure to replace Air Filter before using the oven.
(*)If Air Filter becomes clogged with debris this will
cause an overheating problem on the oven.
Page 17

- 15 -
English
Cooking Instructions
COOKWARE
1. Before using the oven always check that containers
are suitable.DO NOT MICROWAVE sealed
containers as they may explode.
N.B. Always check manufacturer’s instructions as
some food manufacturers are producing food in
containers that do not require piercing.
2. DO NOT leave the appliance unattended if paper,
plastic or other combustible containers are used.
Do not use re-cycled paper products, as they may
contain impurities which may cause sparks and/or
fires when used, unless packaging states they are
specifically designed for MICROWAVE use.
3. Heat-proof glassware, such as Pyroceram and
Pyrex, is best suited for use in the microwave oven.
4. Do not use metal ware, ceramics trimmed with gold
or silver, or any container with a metal content.
5. If “arcing” should occur, check the cookware
carefully again for metal.
6. You may use ordinary glassware, chinaware,
plastic-ware and paper-ware, when cooking food
that requires a low temperature.Using this type of
cookware for high temperature cooking may cause
cracking or warping.
7. You can cook steamed vegetables in special “see-
through” wrapping film, such as Saran Wrap, or wax
paper.Do not cook in a plastic bag.
CAUTION
Do not use METAL UTENSILS in this oven.
OTHER HELPFUL
INSTRUCTIONS
FOR BEST RESULTS
1. When determining time for particular foods, always
figure minimum time and check occasionally during
cooking for progress.The microwave oven cooks so
quickly, therefore it is easy to overcook your foods.
2. Be careful of the cooking time for small quantities of
foods, or foods with low water content. They may
burn if cooked too long.
3. Do not use the oven for drying kitchen towels or
napkins.They may burn if heated too long.
4. Do not try to boil eggs in the oven.
5. When you cook an egg be sure to pierce the yolk
membrane prior to placing into the oven to prevent
the egg bursting.
HOW TO GET BROWNED FINISH
Generally foods do not brown when cooked by a
microwave oven.This is one of the features of the
equipment.To brown chickens, brush sauce on the
surface before or during cooking.You can also brown
meat in a conventional frying pan before cooking in
the oven.A browning skillet for the microwave oven
can obtain the same result.
FOR EVEN FINISHED COOKING
Open the door and give the dish a half turn, or turn
the food over during cooking.This helps to achieve
more even cooking.When you cook chicken the legs
cook faster than other parts.Wrap the legs with
aluminum foil during cooking to reflect the microwave
energy in order to create even cooking.
TWO LEVEL COOKING
(NE-2146-2/2156-2 only)
When heating, one item always place the container in
the centre of the bottom shelf.
When using the microwave mainly for reheating one
item at a time, remove the middle shelf and work on
the bottom shelf.
When reheating two items at a time place both dishes
on the bottom shelf side by side, unless the containers
are too large and then place one on the shelf.
When heating more than two plates, place the dishes
evenly on the two shelves.
Allow some space between each plate, do not cram
too much food into the oven.
If the middle shelf is not used, it should be stored
outside the oven and must not be put on the bottom
shelf.
DEFROSTING FROZEN
FOODS
1. If you try to completely defrost frozen foods in the
microwave oven, uneven defrosting may occur due
to the differences in the thickness and shape of the
food. Drippings may also result, and sometimes a
part of the food cooks although other parts still
remain frozen. In actual usage of frozen foods, you
should not normally defrost them 100%. 70%
defrosting in the microwave oven is ideal and
helpful for the next cooking operation.
2. To defrost evenly, turn over or rearrange the food
during defrosting.
3. To defrost fatty meat, heat it in the microwave oven
for a short time and leave it to stand at room
temperature, or heat it intermittently until defrosted.
4. When you defrost a whole chicken, or any frozen
food of irregular shape, wrap legs or thin parts with
aluminum foil.Otherwise thin parts will be defrosted
faster and sometimes cooked before other par ts
have properly defrosted. For big pieces of meat,
wrap the sides with aluminum foil so that they will
be uniformly thawed by ver tical microwaves only.
5. Ice should be removed at times during defrosting.
Page 18

- 16 -
Cooking Instructions
MICROWAVE BASICS
Fundamental principles determine the success of
microwave food preparation.
They include:
1.
TEMPERATURE OF FOODS –– Frozen or
refrigerated food items will require longer heating
times to reach a desired serving temperature than
foods from room temperature.
2.
FOOD COMPONENTS –– Foods high in sugar,
salt, fats and moisture content heat faster because
these properties attract microwave energy. Denser
foods high in protein and fiber, absorb microwave
energy slower which means a lengthier heating
time.
3.
BULK/VOLUME –– The greater the mass of food,
the longer it takes to heat.
4.
CONTAINERS –– Ceramic, paper, china,
styrofoam, glass and plastic are suitable for use in
microwave ovens with the following caution.
DO NOT HEAT foods in a SEALED container or
bag. Foods expand when heated and can break the
container or bag.
5.
AVOID METAL because it “bounces” the
microwaves, causing uneven heating and
sometimes even flashes, which may pit or mark the
interior of the oven, the metal container or plate
trim.
6. Heated liquids can erupt if not mixed with air. Do
not heat liquids in your microwave oven without first
stirring.
Heating foods with either high sugar or high fat
content should be done ONLY in high
temperature-resistant containers since these
foods get very hot. Using styrofoam containers for
these foods will cause the styrofoam to war p.
Other low temperature restaurant glass or plastic
platters may crack or war p under similar
conditions.
GENERAL GUIDELINES FOR
HEATING IN A PANASONIC
MICROWAVE OVEN
For specific time, see each food categor y for
appropriate heating techniques, plus necessary prepreparation of foods.
HEATING FOODS FROM REFRIGERATED TEMPERATURE
Foods stored in the refrigerator (5˚C) should be
covered before reheating with the exception of breads,
pastries or any breaded product, which should be
heated uncovered to prevent sogginess.
Most conventionally prepared foods should be slightly
undercooked, and held in the refrigerator, so that
overcooking does not occur during microwave heating.
Cooked items, such as vegetables, may be portion
plated and covered for reheating without loss of color,
texture or nutritional content.
HEATING FOODS FROM ROOM TEMPERATURE
Food items such as canned entree, vegetables, etc.
will require significantly less heating time than those
from refrigerated temperatures.
IMPORTANT RECOMMENDATIONS
1. For best results it is recommended that foods
conventionally prepared be slightly undercooked
when subsequently heated in this oven.
2. REMEMBER that after the heating cycle has been
completed, internal food temperatures continue to
rise slightly in foods heated in this oven.
3. A major abuse of microwave applications is the
category of breads, pastries and pies.They are drier
than insides or fillings, they heat more slowly.
Therefore, baked goods should ONLY be heated
until the crust is warm to the touch (50˚C-55˚C).
4. DO NOT OVERHEAT YOUR FOOD: 99% of all food
quality complaints of microwave heated foods can
be traced to overheating.
Page 19
- 17 -
English
Cooking Instructions –– Heating and Defrosting Time Charts ––
The times given in the chart below are a guideline only. Many factors eg starting temperature of the food can
affect the final heating time required.The cooking and defrosting times must be adjusted when necessary.
All times are tested using foods at
starting temperatures as below;
Chilled foods . . . . . .Approx. +5˚C
Frozen foods . . . . . .Approx. -18˚C
Always check for the correct core temperature with a temperature probe to comply with current Government Food
Hygiene Regulations.
Function
Food Weight
Power
Level
Approx.Time
NE-2156-2
NE-1846 NE-1656/1646
NE-2146-2
Defrosting
Fish Fillets
Minced Beef
Whole Chicken
Composite Dish
Multi portion
Single portion
Apple Pie
Gateau
Bread Rolls
500 g
500 g
1.36 kg
1.36 kg
275 g
1 portion
1 portion
1 portion 50 g
8 min 8 min 8 min
5 min 5 min 5 min
25 min 25 min 25 min
20 min 20 min 20 min
8 min 8 min 8 min
1 min 15 s 1 min 15 s 1 min 15 s
2 min 2 min 2 min
30 s 30 s 30 s
Cooking from
Chilled Raw
Food
Scrambled Egg
Broccoli
Fish Fillets
Bacon
Chicken Por tions
2 eggs + 2 tbsp.milk
500 g
500 g
2 rashers
500 g
20-25 s 25-30 s 30-40 s
3 min 3 min 30 s 3 min 55 s
2 min 20 s 2 min 45 s 3 min
40 s 50 s 1 min
4 min 4 min 45 s 5 min 20 s
Cooking and/or
Reheating from
Frozen
Peas
Cooked Rice
Cooked Sausages
Cooked Wings of
Fire
Cooked Boxed
Cheeseburger
Chocolate Fudge
Cake
500 g
167 g
x 3 (50 g each)
x 7 pieces
75 g
1 portion
3 min 20 s 4 min 4 min 30 s
1 min 20 s 1 min 40 s 1 min 55 s
50 s 1 min 1 min 5 s
1 min 20 s 1 min 40 s 1 min 55 s
50 s 1 min 1 min 5 s
30 s 30 s 30 s
Reheating from
Cooked Chilled
Lasagne
Chilli
Apple Pie
Pepper Sauce
Baked Beans
Soup
325 g
325 g
1 portion
100 ml
100 ml
125 ml
3 min 20 s 4 min 4 min 30 s
2 min 30 s 3 min 3 min 15 s
14 s 16 s 18 s
40 s 50 s 56 s
40 s 50 s 56 s
48 s 56 s 1 min 10 s
HINTS:•Do not cook/reheat/defrost directly onto the base of the oven –– use a suitable container.
•
When defrosting multi portions of foods, turn over and break apart halfway through defrost time to
allow better penetration of microwave energy.
•
Solid/dense foods should not be cooked from frozen as they will be overcooked round the edges
before the centre has reached the required temperature.
•
Cover dishes where appropriate during cooking/reheating.This will retain moisture and prevent
splashing/spillages.
•
Loosen lids/pierce clingfilm before cooking/reheating covered foods.
•
Stir or shake foods halfway through cooking/defrosting time to distribute the heat evenly.
•
Allow a Stand Time before food temperature is checked and/or offered for consumption.
Page 20

Wichtige Sicherheitshinweise
Montage
Erdung
WICHTIGER HINWEIS: ZUR PERSÖNLICHEN
SICHERHEIT MUSS
DIESES GERÄT
ORDNUNGSGEMÄSS
GEERDET SEIN.
Sollte die für das Gerät vorgesehene Wandsteckdose
nicht geerdet sein, ist der Kunde verpflichtet, eine
vorschriftsmäßig geerdete- Steckdose anbringen zu
lassen.
Spannung und Leistung
Das Gerät muß an das Netz über eine mindestens
16-A-Installationssicherung angeschlossen werden.
Die Netzspannung und die für das Mikrowellengerät
vorgeschriebene Betriebsspannung müssen
übereinstimmen. Ein Betreiben des Gerätes mit
höherer Netzspannung als zulässig kann Brand und
andere Schäden verursachen.
Montageort des Mikrowellengerätes
Das Gerät niemals in sehr feuchter, heißer oder
fettiger Umgebung aufstellen, z. B. direkt neben oder
über einer Heizquelle bzw. Friteuse. Das Gerät nicht
direkt über oder neben einem Gas- oder Elektroherd
aufstellen.
Das Mikrowellengerät könnte beschädigt werden. Bei
Raumtemperaturen von mehr als 40 Grad Celsius,
einer Luftfeuchtigkeit von mehr als 85% und einem
hohen Fettgehalt in der Umgebungsluft, ist der
Betrieb nicht zulässig.
Ungehinderte Luftzirkulation ist unbedingt erforderlich.
Das Gerät ist auf einer geraden und stabilen
Oberfläche aufzustellen. Dabei muß ein
Mindestabstand von 5 cm rechts und links von den
Seitenwänden und der Rückwand des Gerätes
eingehalten werden. Ein Abstand von mindestens
20 cm ist über dem Gerät einschließlich der beiden
Ventilationsöffnungen einzuhalten.
Stehen Radio- bzw. Fernsehgeräte in unmittelbarer
Nähe des Mikrowellengerätes, so sind gelegentliche
Störungen beim Empfang schwacher Sender
während des Gebrauchs nicht ganz vermeidbar.
Stellen Sie das Gerät so auf, dass der Stecker frei
zugänglich ist.
Wichtiger Hinweis:
Vor der ersten Inbetriebnahme des Gerätes unbedingt
die beigefügte Warnung am Gerät befestigen. Bitte
das dafür vorgesehene Etikett auf die
Gehäuseoberfläche kleben.
Vorsicht
Das Mikrowellengerät nicht bei Ieerem Garraum
einschalten.
Um den Zustand der Magnetron-Röhren und anderer
Teile im Inneren des Gerätes nicht zu
beeinträchtigen, sollte das Gerät niemals im Leerlauf
betrieben werden.
Das Gehäuse nicht abbauen.
Das Mikrowellengerät arbeitet mit Hochspannung.
Reparaturen dürfen nur von geschulten.
Fachkräften ausgeführt werden.
Ventilationsöffnungen nicht blockieren.
Eine ungehinderte Luftzirkulation hinter dem Gerät ist
für Kühlzwecke unbedingt erforderlich.
Während des Betriebs dürfen die Luftöffnungen am
Mikrowellengerät also nicht blockiert werden.
Der Garraum ist kein Wäschetrockner!
Im Mikrowellengerät niemals Wäsche trocknen.
Bei längerem Verbleib könnten Brandflecke im
Gewebe entstehen.
Metallgeschirr
Kein Metallgeschirr im Gerät verwenden.
Bitte Warnhinweis Aufkleben (bei Modellen
NE-2156-2/NE-2146-2)
Vor der ersten Inbetriebnahme des Gerätes unbedingt
die beigefügte Warnung am Gerät befestigen. Bitte
das dafür vorgesehene Etikett auf die
Gehäuseoberfläche kleben.
Bei diesem Produkt handelt es sich um ein Gerät,
das die europäische Norm für EMVFunkstörungen (EMV = Elektromagnetische
Verträglichkeit), EN 55011, erfüllt. Gemäß dieser
Norm ist dieses Produkt ein Gerät der Gruppe 2,
Klasse B und hält alle Grenzwerte ein. Gruppe 2
bedeutet, dass in diesem Gerät HochfrequenzEnergie für das Erwärmen oder Garen von
Lebensmitteln absichtlich als elektromagnetische
Strahlung erzeugt wird. Klasse B sagt aus, dass
dieses Produkt in einem normalen Wohnbereich
betrieben werden darf.
- 18 -
Page 21

Warnung
Warnung
01. Vor Gebrauch ist vom Benutzer zu prüfen, ob
Geschirr und Gefäße für den Gebrauch in
Mikrowellengeräten geeignet sind.
02. Wenn Behälter aus Kunststoff, Papier oder
anderen leicht entflammbaren Materialien zum
Erwärmen verwendet werden, darf das Gerät
nicht unbeaufsichtigt betrieben werden.
3. Beim Erhitzen von Flüssigkeiten im
Mikrowellengerät kann es ggf. sehr kurzfristig
zum Kochen kommen (Siedeverzug). Das heiße
Lebensmittel spritzt in diesem Fall aus offenen
Behältern in den Garraum.
Verwenden Sie daher stets abgedeckte Gefäße,
um eine Verbrennungsgefahr zu vermeiden.
4. Lebensmittel in Gläsern oder Flaschen—
insbesondere Babynahrung—nach dem Erhitzen
gut schütteln oder umrühren, damit ein
Temperaturausgleich stattfinden kann.
Überprüfen Sie die Temperatur vor dem Verzehr.
5. Garen Sie weder Eier in der Schale noch gepellte
hartgekochte Eier. Durch Ausdehnung
explodieren sie.
6. Keine geschlossenen Konserven, Flaschen oder
Gläser zum Garen oder Erhitzen benutzen. Diese
könnten platzen.
07. Im Garraum dürfen während der Nichtbenutzung
des Gerätes keine Gegenstände aufbewahrt
werden, die bei unbeabsichtigtem Einschalten
eine Gefahr für die Umgebung darstellen können.
Im Falle des Versagens eines elektronischen
Bauelementes kann das Gerät nur durch Ziehen
des Netzsteckers oder durch die
installationsseitig vorhandene Trennvorrichtung,
z. B. vorgeschaltete Sicherung/
Sicherungsautomatik ausgeschaltet werden.
08. Die Reinigung der Türdichtungen und
Türdichtungsflächen sollte mit einem milden
Reinigungsmittel vorgenommen werden. Das
Gerät ist vom Verwender auf mögliche
Beschädigungen der Türdichtungsflächen zu
besichtigen und falls ein solcher Schaden
aufgetreten ist darf das Gerät nicht betrieben
werden, bevor es vom Panasonic-Kundendienst
repariert worden ist.
09. Dieses Gerät darf nicht mit einem Wasserstrahl
gereinigt werden.
10. Falls während des Mikrowellenbetriebs Rauch
aus dem Gerät tritt, ist die Gerätetür geschlossen
zu halten, und das Gerät ist abzuschalten sowie
der Netzstecker zu ziehen.
11. Das Mikrowellengerät darf nur vom PanasonicKundendienst geprüft oder repariert werden. Die
Inanspruchnahme eines nicht besonders
geschulten Kundendienst-Technikers könnte
gefährlich sein.
12. Sind Stromkabel oder Stecker beschädigt, muss
die Reparatur von geschultem Servicepersonal
durchgeführt werden, um eine einwandfreie
Instandsetzung zu gewährleisten.
13. Die zum Anschluß dieses Gerätes verwendete
Spezial-Anschlußleitung darf nur durch einen
qualifizierten Kundendienst unter Verwendung
einer Spezialleitung, die nur beim PanasonicKundendienst (siehe Kundendienstliste) erhältlich
ist, ersetzt werden.
14. Es wird auf die Möglichkeit der Gefährdung durch
elektromagnetische Felder hingewiesen und
empfohlen, daß sich insbesondere Personen mit
Herzschrittmachern nicht elektromagnetischen
Feldern aussetzen, dabei sind unbedingt die
Herstellerangaben zu beachten.
15. Es muß eine jährliche Kontrolle des Gerätes
durch geschultes Servicepersonal ausgeübt
werden. Ein schriftlicher Nachweis ist zu führen
und auf Verlangen der Berufsgenossenschaft
vorzulegen.
Der Emissionswert des Mikrowellengerätes liegt nach
der Maschinenlärminformations-Verordung (3. GSGV
vom 18. Januar 1991) unter dem vorgeschriebenen
Grenzwert von 70 dB (A).
Deutsch
- 19 -
Page 22
Außenansicht (NE-2146-2/NE-1846/NE-1646)
(1)
(2)
(7)
(6)
(3) (4)
(8)
(5)
(9)
(10)
(1) Display/Anzeigenfeld
(siehe auch unten)
(2) Anzeige für die Leistungsstufen
(3) Leistungswahltasten
(4) Drehknopf für die Zeiteingabe
(5) Starttaste (f)
(6) Türgriff
(7) Garraumbeleuchtung
(8) Luftfilter
(9) Kunststoff-Abdeckung
(10) Einschub für den 2-Etagen-Betrieb
(NE-2146-2)
A
B
A—Zeitanzeige (Min/Sek)
B—Anzeige für die Leistungsstufen
A—d: maximale Leistung
A—a: halbe Leistung
A—b: Auftaustufe
Bedienung (NE-2146-2/NE-1846/NE-1646)
BEDIENELEMENTE BEDIENUNG
1
2
oder
3
4
≥Wenn Sie die Starttaste bei geöffneter Garraumtür drücken, springt die Zeit auf „0“ zurück.
≥Sogar nach dem Wählen der Garzeit können Sie noch die Leistung wechseln.
≥Wenn Sie während der Garzeit die Zeiteingabe verändern wollen, können Sie durch drehen am Drehknopf für
die Zeiteingabe die Garzeit ändern.
Öffnen Sie die Garraumtür und stellen Sie die Speisen in das
Mikrowellengerät.
☛ Versichern Sie sich, daß „0“ und die Leistungsstufen d im Display
angezeigt werden.
Drückern Sie die Leistungswahtaste, falls eine andere Leistung als
maximale Leistung
Wählen Sie die gewünschte Zeit am Drehknopf für die Zeiteingabe.
☛ bis zu 25 Min. mit d oder a, 30 Min. mit b
Drücken Sie die Starttaste.
dd
d gewünscht wird.
dd
- 20 -
Page 23
Außenansicht (NE-2156-2/NE-1656)
(1) (2)
(3)(4) (5) (6)(7)
x
A
B
x
(11)
(12)
(8)
2
1234567890
3
(13)
(9)
(14)
(15)
(10)
Deutsch
(1) Display/Anzeigenfeld (siehe unten)
(2) Anzeige für die Leistungsstufen
(3) Programmiertaste (g)
(4) Taste zur Wahl der Speicherplätze (j)
(5) Leistungswahltaste (c)
(6) Doppel-Taste
(7) Dreifach-Taste
(8) Programmspeichertasten bzw.
Zeiteingabetasten
AB
PROG
C
231
DE F
Das Gerät ist ab Werk wie folgt modifiziert:
√ Manueller Betrieb
√ Die Programmspeichertasten bzw. Zeiteingabetasten A1 bis A0 sind bei maximaler Leistung mit folgender
Betriebszeit programmiert.
1l10 sek. 2l20 sek. 3l30 sek. 4l40 sek. 5l50 sek. 6l1 min.
7l1 min. 15 sek. 8l1 min. 30 sek. 9l1 min. 45 sek. 0l2 min.
(Die Programmspeicher B1–B0 sind nicht vorprogrammiert.)
Alle o.g. Einstellungen können Sie nach Ihren Wünschen ändern.
G
(9) Stop/Löschtaste (e)
(10) Starttaste (f)
(11) Abdeckung der Garraumbeleuchtung
(12) Türgriff
(13) Luftfilter
(14) Kunststoff-Abdeckung
(15) Einschub für den 2-Etagen-Betrieb
(NE-2156-2)
A . . Anzeige/Programmspeicher
B . . Anzeige/Zeit in Min. und Sek.
C . .Anzeige/Programmnummer der Speichertasten
D . .Anzeige/Ein-Phasen-Betrieb
E . . Anzeige/Zwei-Phasen-Betrieb
F . . Anzeige/Drei-Phasen-Betrieb
G . .Anzeige/Leistungsstufen
G . .d: maximale Leistung
G . .a: halbe Leistung
G . .b: Auftaustufe
- 21 -
Page 24
Bedienung (NE-2156-2/NE-1656)
A. MANUELLER BETRIEB
√
Ein-Phasen-Betrieb
Beispiel: Zweiminütiges Garen von Speisen bei voller Leistung
BEDIENELEMENTE BEDIENUNG
1
2
Öffnen Sie die Garraumtür und stellen Sie die Speisen in das Mikrowellengerät.
☛ Versichern Sie sich, daß die „0“ im Display erscheint.
Drücken Sie einmal die Leistungswahltaste.
3
2 0 0
4
≥Wenn Sie die Starttaste bei geöffneter Garraumtür drücken, springt die Zeit auf „0“ zurück.
≥Sogar nach dem wählen der Garzeit können Sie die Leistung wechseln.
≥Wenn Sie während der Garzeit die Zeiteingabe verändern wollen, können Sie durch derhen am Drehknopf
für die Zeiteingabe die Garzeit ändern.
√
Zwei-/Drei-Phasen-Betrieb
Wiederholen Sie die oben angegebenen Schritte 2 und 3 bevor Sie die Starttaste drücken f.
Zwei-Phasen-Betrieb:
01
-
Drei-Phasen-Betrieb:
01
-
erste Phase
Stellen Sie mit den Zeiteingabetasten die Zeit ein.
☛ bis zu 25 Min. mit d oder a, 30 Min. mit b
Drücken Sie die Starttaste.
01
-
01
-
zweite Phase dritte Phase
01
-
B. BETRIEB MIT SPEICHERTASTEN
√
Betriebsart manueller Betrieb nicht gesperrt
BEDIENELEMENTE
1
2
z. B.
3
Öffnen Sie die Garraumtür und stellen Sie die Speisen in das Mikrowellengerät.
☛ Versichern Sie sich das die „0“ im Display erscheint.
Drücken Sie die gewünschte Programmspeichertaste bzw.
Zeiteingabetaste.
BEDIENUNG
3
√
Betriebsart manueller Betrieb gesperrt (Direktstart)
BEDIENELEMENTE
1
2
z. B.
3
Um die Programmspeicher B1–B0 zu benutzen,
drücken Sie die Taste j, bevor Sie die gewünschte Programmspeichertaste drücken.
Zur Erhitzung von doppelten (dreifachen) Mengen,
drücken Sie zuerst die Doppel- (oder Dreifach-) Taste bevor Sie die gewümschte Programmspeichertaste
drücken.
Drücken Sie die Starttaste.
BEDIENUNG
Öffnen Sie die Garraumtür und stellen Sie die Speisen in das Mikrowellengerät.
☛ Versichern Sie sich das die „0“ im Display erscheint.
Drücken Sie die gewünschte Programmspeichertaste bzw.
Zeiteingabetaste.
☛ Der Mikrowellenbetrieb startet automatisch.
- 22 -
Page 25
Bedienung (NE-2156-2/NE-1656)
C. PROGRAMMIEREN DER SPEICHERTASTEN/
C. ZEITEINGABETASTEN
√
Ein-Phasen-Betrieb
IN DER BETRIEBSART „MANUELLER BETRIEB GESPERRT“ KANN DAS GERÄTE NICHT
PROGRAMMIERT WERDEN!
WÄHRED DES PROGRAMMIERENS DIE GARRAUMTÜR NICHT ÖFFNEN!
Beispiel: Belegung von Programmspeichertaste Nr. 5 mit einminütigem Auftauen
BEDIENELEMENTE BEDIENUNG
Deutsch
1
2
3
5
4
5
0 01
6
√
Zwei-/Drei-Phasen-Betrieb
Wiederholen Sie die oben angegebenen Schritte 4 und 5 bevor Sie die Programmiertaste drücken g.
5
erste Phase zweite Phase dritte Phase
Um die Programmspeicher B1–B0 zu benutzen,
drücken Sie die Taste j, bevor Sie die gewünschte Programmspeichertaste drücken.
Halten Sie die Garraumtür geschlossen.
☛ Versichern Sie sich, daß Display leer ist.
Drücken Sie die Programmiertaste.
Drücken Sie die Programmspeichertaste „5“.
Drücken Sie die Leistungswahltaste drei mal.
Stellen Sie mit den Zeiteingabetasten die Zeit ein.
Drücken Sie die Programmiertaste.
01
-
01
-
01
-
D. PROGRAMMIEREN DER DOPPEL- BZW. DREIFACH-TASTE
IN DER BETRIEBSART „MANUELLER BETRIEB GESPERRT“ KANN DAS GERÄTE NICHT
PROGRAMMIERT WERDEN!
WÄHRED DES PROGRAMMIERENS DIE GARRAUMTÜR NICHT ÖFFNEN!
Beispiel: Programmieren der 1,5 fachen Garzeit for doppelte Mengen für Programmspeichertaste Nr. 5
BEDIENELEMENTE BEDIENUNG
1
2
3
4
5
5
x
2
5
1
6
Möchten Sie den Multiplikator für die Dreifach-Taste verändem,
drücken Sie in Schritt 4 die Dreifach-Taste.
Halten Sie die Garraumtür geschlossen.
☛ Versichern Sie sich das Display leer ist.
Drücken Sie die Programmiertaste.
Drücken Sie die Programmspeichertaste „5“.
Drücken Sie die Doppel-Taste.
Geben Sie den Verlängerungsfaktor ein. (Minimum 0,1–Maximum 3,0)
Bemerkung: 1,6 fach ist bereits fabrikseitig voreingestellt.
Drücken Sie die Programmiertaste.
- 23 -
Page 26
Bedienung (NE-2156-2/NE-1656)
+
E. SPEICHERTASTEN
√
Direktstart über die Speichertasten einrichten
BEDIENELEMENTE BEDIENUNG
1
2
Hinweis:
≥Das Gerät kann mit dieser Einstellung nur über die Speichertasten (1 bis 8) in Betrieb gesetzt werden.
≥Eine Unterbrechung des Betriebes durch Öffnen der Tür löscht automatisch die noch verbliebene Zeit im
Display.
≥Das Gerät kann erst wieder manuell betrieben werden, wenn der Direkstart über die Speichertasten aufgehoben
ist.
≥Die Speichertasten können erst durch Aufheben des Direktstarts neu programmiert werden.
√
Direktstart über die Speichertasten aufheben
BEDIENELEMENTE BEDIENUNG
1
2
Hinweis:
≥Zum Starten des gewünschten Programmspeichers muß jetzt die entsprechende Speichertaste und die
Starttaste gedrückt werden.
≥Der Betrieb kann durch Drücken der Stop-/Löschtaste e unterbrochen werden. Der Betrieb wird nach Betätigen
der Starttaste f wieder aufgenommen.
≥Die Speichertasten können neu programmiert werden.
≥Die Auswahl der Lautstärke und der Länge des akustischen Signals sind wieder möglich.
Halten Sie die Garraumtür geschlossen.
☛ Versichern Sie sich das Display leer ist.
Drücken Sie die Programmiertaste bis „PROG“, „P“ und „L“
erscheinen (mehr als fünf Sekunden).
Öffnen Sie die Garraumtür.
Während Sie Stop-/Löschtaste drücken, drücken Sie sie gleichzeitig die
Programmiertaste bis „PROG“ und „P“ erscheinen (mehr als fünf
Sekunden).
F. AKUSTISCHES SIGNAL
Die Lautstärke und die Länge des Tones am Ende der Garzeit kann eingestellt werden.
Die größte Lautstärke und drei Töne in Folge sind fabrikseitig voreingestellt.
BEDIENELEMENTE BEDIENUNG
1
2
Öffnen Sie die Garraumtür.
Drücken Sie die Programmiertaste.
√
Lautstärke einstellen
3
0
4
√√
√
Tonlänge einstellen
√√
5
0
6
Wahl der Lautstärke des akustischen Signales durch Drücken der
Programmspeichertaste „0“.
☛ Die Lautstärke wird angezeigt durch eine Zahl gefolgt von dem Wort
„bEEP“;
„3bEEP“llaut, „2bEEP“lmittel, „1bEEP“lam leise, „0bEEP“laus
Drücken Sie die Programmiertaste.
Innerhalb von drei Sekunden nach drücken der
Programmspeichertaste „0“ in Schritt 4, wählen Sie die Lautstärke des
akustischen Signales durch drücken der Programmspeichertaste „0“.
☛ Die Tonlänge wird angezeigt durch die Anzeige für den 1 oder
2 Phasenbetrieb im Display;
„1“lDrei Töne, „2“l60 Sekunden Kurztonfolge
Drücken Sie die Programmiertaste.
- 24 -
Page 27
Bedienung (NE-2156-2/NE-1656)
+
+
+
G. ABRUF DER GESPEICHERTEN PROGRAMME
Mit dieser Ausstattung können Sie alle gespeicherten Daten der Speichertasten fortlaufend abrufen.
BEDIENELEMENTE BEDIENUNG
1
2
H. ABLESEN DER GESAMTBENUTZUNGSZYKLEN
√
Ablesen der Benutzungszyklen der Programmspeichertasten
BEDIENELEMENTE BEDIENUNG
1
2
01
-
√
Ablesen der Gesamtbenutzungszyklen
3
Öffnen Sie die Garraumtür.
Während Sie die Stop/Löschtaste drücken, drücken Sie gleichzeitig die
Starttaste.
Öffnen Sie die Garraumtür.
Während Sie Stop-/Löschtaste drücken, drücken Sie gleichzeitig die
gewünschte Programmspeichertaste.
Bemerkung: Zum Ablesen der Programmspeichertaste auf Ebene B,
drücken Sie die Taste zur Wahl der Speicherplätze j währen das
Display die Benutzungszyklen anzeigt.
Schließen Sie die Tür, während das Display die Benutzungzyklen der
einzelnen Programmspeichertasten anzeigt.
Deutsch
√
Ablesen der Benutzungszyklen im manuellen Betrieb
BEDIENELEMENTE BEDIENUNG
4
5
Öffnen Sie die Garraumtür.
Während Sie Stop-/Löschtaste drücken, drücken Sie gleichzeitig die
Leistungswahltaste.
I. LUFTFILTER
Beispiel: Luftfilterreinigung alle 600 Stunden Programmieren
BEDIENELEMENTE BEDIENUNG
1
2
3
4
3
0 06
5
Wenn „FILT“ im Display erscheint,
den Luftfilter entfernen und mit Seifenwasser reinigen. Druch Drücken der Stop-/Löschtaste wird das Display
gelöscht.
Überprüfung der bisher abgelaufenen Betriebszeit,
√ Öffnen Sie die Tür.
√ Während Sie die Starttaste gedrückt halten, betätigen Sie die Taste „3“ der Programmspeichertasten bzw.
Zeiteingabetasten.
√ Im Display erscheint die Anzeige die bisher abgelaufene Betriebszeit in Stunden („H“).
Bemerkung: Falls sich das Gerät nach kurzer Benutzung abschaltet, prüfen Sie ob der Luftfilter sauber ist, bevor
Sie einen Servicetechniker benachrichtigen.
Öffnen Sie die Garraumtür.
Halten Sie die Starttaste gedrückt, schließen und öffnen Sie die Tür.
Drücken Sie Programmspeichertaste „3“.
Wählen Sie die gewünschen Stunden bis 9999 Stunden.
Drücken Sie die Programmiertaste.
- 25 -
Page 28
Zwei Geräte übereinander installieren
HINWEIS
Mit der dem Gerät beigelegten Verbindungsplatte
können 2 Geräte auch platzsparend übereinander
installiert werden.
1. Ziehen Sie den Stecker aus der Steckdose, bevor
Sie mit der Installation beider Geräte beginnen.
2. Verwenden Sie nur die dem Gerät beigelegte
Verbindungsplatte.
3. Folgende Modelle von Panasonic können
raumsparend übereinander installiert werden:
NE-1057, NE-1457, NE-1247, NE-1747, NE-1047,
NE-1447, NE-1257, NE-1757, NE-1442, NE-1856,
NE-1456, NE-1846, NE-1446, NE-2156-2,
NE-2146-2
4. Nicht mehr als maximal 2 Geräte übereinander
installieren.
5. Stellen Sie sicher, daß der Garraum beider Geräte
zur Montage leer ist.
INSTALLATION
1. Stellen Sie die Geräte übereinander und entfernen Sie die fünf Schrauben (a) auf der Rückseite (siehe Abb. 1).
2. Lösen Sie die Schraube (b).
3. Setzen Sie die Verbindungsplatte mit dem Vorsprung nach außen auf die Schraube (b).
4. Fügen Sie die fünf Schrauben (a) wieder ein.
5. Ziehen sie alle Schrauben [(a) und (b)] fest.
(b)
Abb. 1
Verbindungsplatte
Vorsprung
(a)
Verbindungsplatte
Vorsprung
Abb. 2
Automatische Fehlerdiagnose
Durch die automatische Fehlerdiagnose überwacht sich das Gerät in allen wesentlichen Funktionen selbständig.
Durch Vergleich der angezeigten Codenummer im Display mit der nachfolgenden Tabelle kann die Fehlerursache
schnell und einfach festgestellt werden.
CODE-
NUMMER
F01
F33–34
F05
F81–82
F86–87
F44
Hinweis: Die vorgenannte Tabelle beinhaltet nur die wichtigsten Fehlerursachen, die auftreten können.
URSACHE
Die
Umgebungstemperatur
ist zu hoch
Der Thermistor ist
defekt
(Temperaturschutz)
Der
Programmspeicher
IC ist defekt
Ein Relais ist defekt
Kurzschluß eines
Relais
Das Bedienfeld ist
defekt
ABHILFE
Das Gerät schaltet sich automatisch ab. Ziehen Sie den Netzstecker des Gerätes
aus der Steckdose. Es ertönt ein fortlaufender Signalton. Sofern das Gerät abgekühlt
ist, setzt der Betrieb ein. Stellen Sie das Gerät an einen kühleren Platz. Sofern das
Problem weiter besteht, rufen Sie den autorisierten Kundendienst.
Das Gerät schaltet sich automatisch ab. Ziehen Sie den Netzstecker des
Gerätes aus der Steckdose. Sofern das Problem weiter besteht, rufen Sie
den autorisierten Kundendienst.
Sofern das Problem weiter besteht, rufen Sie den autorisierten Kundendienst. Das Gerät
kann wieder in Betrieb genommen werden, nachdem die Stop-/Löschtaste betätigt wurde;
allerdings mit verminderter Leistung. Rufen Sie den autorisierten Kundendienst.
Sofern das Problem weiter besteht, rufen Sie den autorisierten Kundendienst. Das Gerät
kann wieder in Betrieb genommen werden, nachdem die Stop-/Löschtaste betätigt wurde;
allerdings mit verminderter Leistung. Rufen Sie den autorisierten Kundendienst.
Das Gerät schaltet sich automatisch ab. Ziehen Sie den Netzstecker des Gerätes aus der
Steckdose. Sofern das Problem weiter besteht, rufen Sie den autorisierten Kundendienst.
Das Gerät schaltet sich automatisch ab. Ziehen Sie den Netzstecker des Gerätes aus der
Steckdose. Sofern das Problem weiter besteht, rufen Sie den autorisierten Kundendienst.
- 26 -
Page 29
Pflege des Mikrowellengerätes
1. Ziehen Sie zur Reinigung den Netzstecker aus der
Steckedose.
2. Halten Sie den Garraum der Mikrowelle [und den
Einschub (NE-2146-2/2156-2)] stets sauber.
Speisereste oder Flüssigkeitsspritzer, die an den
Garraumwänden, der Türdichtung oder der
Türoberfläche haften, werden von den Mikrowellen
absorbiert und können Funken oder
Funkenüberschläge verursachen.
Entfernen Sie deshalb alle Speisereste oder
Flüssigkeitsspritzer mit einem feuchten Tuch.
Bei starker Verschmutzung können milde
Reinigungsmittel benutzt werden.
Von dem Gebrauch aggressiver Reinigungs- und
Scheuermittel wird jedoch abgeraten.
Der Einschub kann in heißem Spülwasser oder in
der Spülmaschine gewaschen werden.
REINIGUNG DER KUNSTSTOFFABDECKUNG
IM GARRAUM
1. Halten Sie die Abdeckung beidseitig an den
Schnappverschlüssen fest und drücken Sie diese
gleichzeitig zur Mitte und nach unten.
3. Die Außenfläche des Gerätes ggf. mit einem
milden Reinigungsmittel säubern und trocken
wischen. Stellen Sie sicher, daß kein Wasser in die
Geräteöffnung gelangt. Das Gerät könnte Schaden
nehmen.
4. Das Türfenster vorsichtig mit Seife und Wasser
reinigen. Keine scharfen Reinigungsmittel
benutzen, die Kratzspuren hinterlassen.
REINIGUNG DES LUFTFILTERS
Der Luftfilter an der Frontseite des Gerätes sollte
regelmäßig gereinigt werden, um den Betrieb nicht zu
beeinträchtigen (*).
1. Lösen Sie den Luftfilter aus der Halterung, indem
Sie zuerst die recht Schraube nach links drehen.
Ziehen Sie den Filter anschließend heraus.
Deutsch
2. Reinigen Sie die Kunststoffabdeckung außerhalb
des Gerätes.
3. Setzen Sie die Abdeckung wieder ein, bevor Sie
das Gerät benutzen.
HINWEIS
Achten Sie darauf, daß die
Kunststoffabdeckung im Gerät wieder fest
arretiert ist.
Schraube
Halterung
2. Reinigen Sie den Filter mit einem milden
Reinigungsmittel.
3. Setzen Sie den Luftfilter wieder ein, bevor Sie das
Gerät erneut in Betrieb setzen.
(*)Ein verstopfter Luftfilter führt zur Überhitzung des
Gerätes.
- 27 -
Page 30

Das geeignete Geschirr (NE-2146-2/2156-2)
1. Für den Mikrowellenbetrieb eignet sich Geschirr
aus Glas, Glaskeramik oder Porzellan.
Es darf jedoch kein Metalldekor haben, z. B.
Goldränder, da dieses beschädigt werden und
abplatzen könnte.
2. Auch glasiertes Keramikgeschirr kann benutzt
werden. Achten Sie aber bitte darauf, daß die
Glasur keine Beschädigungen oder Risse aufweist.
Hier kann beim Spülen Wasser eindringen, sich
beim anschließenden Erhitzen ausdehnen und
zum Platzen des Geschirrs führen.
3. Einweggeschirr aus Kunststoff und beschichtete
Pappgefäße eignen sich nur zum kurzfristigen
Regenerieren, nicht aber zum Garen, da diese
Materialien leicht entflammbar sind.
4. Verwenden Sie kein Metallgeschirr oder
Aluminiumgefäße. Da Mikrowellen an Metall
reflektiert werden, kann es zu sehr
unterschiedlicher Erhittzung der Speisen kommen.
Um ebenfalls Funkenbildung zu vermeiden, füllen
Sie die Speisen bitte in mikrowellengeeignete
Gefäße um.
5. Falls Sie nicht sicher sind, ob sich ein Geschirr für
den Mikrowellenbetrieb eignet, stellen Sie es ohne
Inhalt für 20 Sekunden bei maximaler Leistung ins
Gerät. Das Geschirr sollte kalt oder höchstens
lauwarm werden.
6. Bei Nichtbenutzung der mittleren Einschubplatte
sollte diese außerhalb des Gerätes aufbewahrt
werden und darf nicht auf den Garraumboden
gelegt werden.
Um Fehler bei der Geschirrbenutzung zu vermeiden,
verwenden Sie bitte nur mikrowellengeeignets und
hitzebeständiges Geschirr.
- 28 -
Page 31

Hinweise zur Zubereltung
—Zeittabelle für das Auftauen und Erwärmen—
Die Zeitangaben in der folgenden Tabelle, sind nur Anhaltswerte. Für die zum Erwärmen notwendige Zeit sind
mehrere Faktoren ausschlaggebend, unter anderen die Temperatur des Kochgutes vor dem Erhitzen. Die
Koch- bzw. Auftauzeiten sind also gegebenenfalls entsprechend anzupassen.
Die Zeiten wurden von uns mit Lebensmitteln getestet, die folgende Ausgangstemperaturen hatten:
Bei Berücksichtigung der Vorschriften zur Lebensmittelsicherheit müssen Sie die lnnentemperatur mit einem
Spezialthermometer überprüfen.
Funktion
Auftauen
Kochen von
gekühlten,
nicht
vorgekochten
Lebensmitteln
Gekühlte Lebensmittel . . . . . . . . . ca. i5oC
Tiefgekühlte Lebensmittel . . . . . . ca. j18oC
Lebensmittel
Fischfilets
Hackfleisch
Hähnchen (ganz)
Komplettes
Gericht
Mehrere
Portionen
Eine
Portion
Apfelkuchen
Kuchen
Brötchen
Rührei
Broccoli
Fischfilets
Schinken
Hähnchenteile
Gewichte
500 g
500 g
1,36 kg
1,36 kg
275 g
1 Portion
1 Portion
1 Portion 50 g
2 Eleri
2 Eßl. Milch
500 g
500 g
2 dünne
Scheiben
Schinken
500 g
Leistungs-
Einstellung
b
b
b
b
b
b
b
b
d
d
d
d
d
Zeitdauer (ca.)
NE-2156-2/2146-2
8 min
5 min
25 min
20 min
8 min
1 min 15 s
2 min
30 s
20–25 s
3 min
2 min 20 s
40 s
4 min
NE-1846
8 min
5 min
25 min
20 min
8 min
1 min 15 s
2 min
30 s
25–30 s
3 min 30 s
2 min 45 s
50 s
4 min 45 s
NE-1656/1646
8 min
5 min
25 min
20 min
8 min
1 min 15 s
2 min
30 s
30–40 s
3 min 55 s
3 min
1 min
5 min 20 s
Deutsch
Kochen
und/oder
Aufwärmen
von
tiefgekühlten
Lebensmitteln
Aufwärmen
von
vorgekochten
gekühlten
Gerichten
Hinweise: ≥Gerichte zum Kochen/Aufwärmen/Auftauen niemals direkt auf den Boden des Mikrowellengerätes
≥Wenn Sie große gefrorene Lebensmittelportionen in der Mikrowelle auftauen wollen, nach der halben
≥
≥Beim Kochen/Aufwärmen Teller immer abdecken, dadurch werden die Lebensmittel nicht trocken
≥Vor dem Kochen/Aufwärmen Behälterdeckel lösen und Folien mehrfach durchstechen.
≥Nach der Hälfte der Koch-/Auftauzeit Lebensmittel umrühren, damit sie gleichmäßig erhitzt werden.
≥Vor dem Prüfen der Temperatur und/oder dem Servieren erwärmte Gerichte kurz stehenlassen.
Erbsen
Vorgekochter
Reis
Gebrühte
Würstchen
Vorgegarte
Chicken
Wings
Fertig-
Cheeseburger
Schokokuchen
Lasagne
Chili
Apfelkuchen
Pfeffersoße
Baked Beans
Suppe
stellen—immer ein geeignetes Gefäß verwenden.
Auftauzeit umrühren bzw. zerkleinern, damit die Mikrowellenenergie besser eindringen kann.
Sehr fest/dichte Lebensmittel (z. B. Tiefkühlspinat) sollten nicht direkt aus dem tiefgekühlten Zustand
gekocht werden. Dabei werden die Kanten überhitzt, bevor das Innere erforderliche Temperatur erreicht ist.
und das Innere des Garraumes wird nicht durch Spritzer verunreinigt.
500 g
167 g
3 Stück à 50 g
7 Stück
75 g
1 Portion
325 g
325 g
1 Portion
100 ml
100 ml
125 ml
d
d
d
d
d
b
d
d
d
d
d
d
3 min 20 s
1 min 20 s
50 s
1 min 20 s
50 s
30 s
3 min 20 s
2 min 30 s
14 s
40 s
40 s
48 s
4 min
1 min 40 s
1 min
1 min 40 s
1 min
30 s
4 min
3 min
16 s
50 s
50 s
56 s
4 min 30 s
1 min 55 s
1 min 5 s
1 min 55 s
1 min 5 s
30 s
4 min 30 s
3 min 15 s
18 s
56 s
56 s
1 min 10 s
- 29 -
Page 32

Jährliche Prüfung gewerblicher Mikrowellenherde
Schriftlicher Nachweis erforderlich
Jahr der Prüfung
(Datum)
Siehe Baujahr
Falls erforderlich, bitte weitere Seite hinzufügen!
ŸŸŸŸŸŸŸŸŸŸŸŸŸŸŸŸŸŸŸŸŸŸŸŸŸŸŸŸŸŸŸŸŸŸŸŸŸŸŸŸŸŸŸŸŸŸŸŸŸŸŸŸ⁄ŸŸŸŸŸ
geprüfte Details: Ergebnis
Tür-Leckstrahlung: O5 mW/cm
Öffnungen: O1 mW/cm
Sichtprüfung: <O.K.
Sicherheitsbestätigung des geschulten
Fachpersonals der Firma (Stempel,
Unterschrift)
2
2
Matsushita Electric Industrial Co., Ltd.
Panasonic-Erzeugnisse sind Markenartikel von höchster Qualität, die mit größter Sorgfalt gefertigt werden.
Sie erhalten auf gewerbliche Panasonic-Mikrowellenherde.
24 Monate Material-Garantie
gerechnet vom Tage des Verkaufs durch den Fachhändler an den Endverbraucher. Die Garantie besteht darin,
daß während der Garantiezeit dem Fachhändler die Teile kostenlos geliefert werden, die zur Behebung eines
nachgewiesenen Fabrikations- oder Materialfehlers notwendig sind.
Ausgenommen von der Garantieleistung sind:
a) Schäden und Verluste, die durch das Gerät oder den Gebrauch desselben entstehen, sowie Schäden, die auf
lokale Verhältnisse, wie Fehler der Installation, Brand, Blitzschlag; Verschleißteile, Plastikteile und Zubehör etc.
zurückzuführen sind.
b) Schäden durch Nichtbeachtung der Bedienungsanleitung, z. B. Anschluß an eine falsche Netzspannung und
Schäden durch fahrlässige Behandlung oder Mißbrauch.
c) Schäden, die aufgrund äußerer Einflüsse entstanden sind.
Lohn-, Transport- und Verpackungskosten gehen zu Lasten des Käufers. Der Garantiedienst wird von dem
Fachhändler wahrgenommen, der das Gerät verkauft hat, es sei denn, er weist eine spezielle, für ihn tätige
Servicestelle nach.
Bitte beachten Sie:
Dieser Garantieschein hat nur Gültigkeit in Verbindung mit der Garantieerklärung, die ausgefüllt, mit HändlerStempel und Kaufdatum versehen, innerhalb von 14 Tagen an die Panasonic Deutschland GmbH zurückgeschickt
werden muß.
Bei Beanstandungen eines Gerätes bitten wir, diesen Garantieschein mit einzureichen.
Verkaufsdatum __________________
Serien-Nr. ______________________
Modell-Nr. ______________________
- 30 -
Page 33

Installation et consignes de sécurité
Installation
Mise à la terre
IMPORTANT: PAR MESURE DE SECURITE, CET
APPAREIL DOIT ÊTRE MIS A LA
TERRE.
Le cordon d’alimentation de cet appareil est pourvu
d’une fiche avec mise à la terre. Lorsque la prise n’est
pas mise à la terre, il y a lieu de la faire remplacer par
une autre dûment pourvue, d’une borne de terre.
Avertissement en matière de tension et de
puissance électrique
La tension utilisée doit correspondre à celle
mentionnée sur le four. L’emploi d’une autre tension
d’alimentation est dangereux: il peut occasionner un
incendie ou d’autres accidents.
Emplacement du four
Placez le four sur une surface plane et stable. Ne le
disposez jamais en un endroit chaud ou humide—par
exemple, à proximité du chauffage électrique ou au
gaz—ou sous l’effet d’un rayonnement solaire direct.
N’utilisez pas le four lorsque la température ambiante
est supérieure à 40oC et/ou lorsque l’humidité relative
de l’air est supérieure à 85%. Il est important de
maintenir une bonne circulation de l’air autour du four.
Des interférences légères avec la radio ou la
télévision sont possibles lorsque ces appareils sont
placés près du four. Afin d’assurer un fonctionnement
optimum de votre four, il importe de laisser l’air
circuler autour des ouvertures d’aération. Laisser au
moins 5 cm sur les côtés et à l’arrière et 20 cm audessus.
Le four doit être placé de manière à pouvoir
facilement être débranché.
Précautions
Retrait de la couverture de vinyle
Le coffret a été entouré d’une couverture de vinyle
afin d’empêcher les surfaces extérieures du four
d’être éraflées pendant son transport. Avant d’utiliser
le four, ne pas oublier de retirer cette protection en
vinyle.
Ne mettez pas le four en fonctionnement lorsqu’il
est vide.
Ne mettez jamais le four en fonctionnement sans qu’il
s’y trouve des aliments, afin de préserver toutes les
qualités des magnétrons.
Ne démontez jamais le four.
L’appareil est sous haute tension. Les réparations et
les réglages doivent dès lors être confiés à un
technicien qualifié.
N’obstruez jamais les orifices de ventilation.
Le four nécessite un espace de ventilation maximal à
l’arrière, afin d’en assurer le bon refroidissement.
Durant la cuisson, tous les orifices de ventilation
doivent être libres de toute obstruction.
Ne séchez jamais de linge dans le four.
Vous risqueriez de voir s’enflammer ce linge.
Etiquette de mise en garde
Si l’étiquette concernant les précautions d’emploi est
jointe à votre four, l’étiquette de mise en garde doit
être collée avant l’utilisation. Veuillez sélectionner
l’étiquette adéquate fournie et la coller sur le dessus
de votre appareil.
Français
Ce produit est un matériel qui répond aux normes européennes sur les perturbations électromagnétiques EMC
(EMC = compatibilité électromagnétique) EN 55011. Selon cette norme, ce produit est classé Groupe 2,
classe B et reste dans les limites requises. La classification groupe 2 signifie que l’énergie à fréquence radio
est intentionnellement émise sous forme d’une radiation éléctromagnétique afin de réchauffer ou de cuire des
aliments. Classe B signifie que ce produit peut être utilisé dans un environnement domestique usuel.
- 31 -
Page 34

Installation et consignes de sécurité
Sécurité
01. Les surfaces de la porte et des aérations doivent
être nettoyées à l’aide d’un chiffon humide.
02. Si l’appareil présente des dommages sur la porte
ou les aérations, vous ne devez pas l’utiliser
avant qu’il n’ait été vérifié par un spécialiste.
03. Ne confier la réparation ou le réglage de ce four
qu’à un spécialiste compétent et qualifié.
04. Si un aliment prend feu à l’intérieur du four,
maintenir la porte du four fermée. Débrancher le
cordon d’alimentation ou couper l’alimentation au
niveau du fusible ou du disjoncteur.
05. Si le câble d’alimentation de cet appareil est
endommagé, il doit être remplacé soit par le
fabricant, soit par une station de maintenance
agréée par le fabricant, soit par une personne de
qualification similaire afin d’éviter tout accident.
06. Avant toute utilisation, vérifier que les récipients
employés conviennent à cet usage.
07. Si on chauffe aux micro-ondes un liquide épais
(soupe, sauce, boisson) qui n’a pas été remué, il
risque de déborder et d’envoyer des projections
brûlantes pendant et après le réchauffage. Pour
éviter cet inconvénient:
a) Eviter de réchauffer dans des récipients hauts
et étroits.
b) Ne pas surchauffer.
c) Remuer le liquide avant et au moins une fois
pendant le réchauffage.
d) En fin de réchauffage, laisser reposer le
liquide dans le four un instant puis remuer de
nouveau avant de le sortir.
08. Ne pas laisser le four sans surveillance lorsque
des récipients en papier, en plastique ou dans un
autre matériau combustible (inflammable) sont
utilisés.
Ne pas utiliser de récipient en papier recyclé;
celui-ci peut contenir des impuretés susceptibles
de créer des étincelles, sauf si l’utilisation microondes est spécifiée sur l’emballage.
09. BIBERON ET ALIMENTS POUR BÉBÉ:
ATTENTION: après le réchauffage, il faut
toujours tester la température du lait ou de
l’aliment de la façon habituelle (par exemple avec
le dos de la main), AVANT de nourrir le bébé ou
le jeune enfant, afin d’éviter des brûlures internes
graves. Le biberon doit être secoué
énergiquement, la température pouvant varier
entre le haut et le bas du biberon.
10. Les liquides ou autres aliments ne doivent pas
être chauffés dans des récipients hermétiques
car ils risquent d’exploser.
11. Ne pas utiliser votre four pour faire cuire des
œufs dans leur coquille afin d’éviter leur
explosion sous la pression.
12. Il ne faut laisser les enfants utiliser le four qu’à la
seule condition qu’ils en connaissent le
fonctionnement et soient à même de comprendre
les dangers d’une utilisation inappropriée.
- 32 -
Page 35

Schéma descriptif (NE-2146-2/NE-1846/NE-1646)
(1)
(2)
(7)
(6)
(3) (4)
(8)
(5)
(9)
(10)
(1) Fenêtre à affichage numérique
(voir l’agrandissement)
(2) Affichage du niveau de puissance
(3) Sélecteur de niveau de puissance
(4) Sélecteur de minuterie
(5) Bouton de mise en Marche
(6) Poignée de porte
(7) Cache de la lampe du four
(8) Filtre à air
(9) Ecran anti-éclaboussures
(voûte du four)
(10) Étagère intermédiaire amovible en
céramique
(sur le NE-2146-2 uniquement)
A
A—Affichage du temps de cuisson
(min. sec.)
B—Indicateur du niveau de puissance
d: FORT
a: MOYEN
b: DECONGELATION
Français
B
Mode d’emploi (NE-2146-2/NE-1846/NE-1646)
Touche
1
2
ou
3
4
≥Dans tous les cas, lorsque la porte est ouverte et que vous pressez le bouton de mise en Marche, un “0”
s’affiche dans la fenêtre.
≥Une fois la durée de cuisson sélectionnée, vous pouvez encore modifier la puissance.
≥Une fois la cuisson commencée, vous pouvez encore modifier la durée en tournant le sélecteur de minuterie.
Ouvrir la porte et placer l’aliment dans le four.
☛ “0” ainsi que le niveau de puissance d doivent s’afficher dans la
fenêtre.
Si vous desirez une autre puissance que
de puissance appropriée.
Afficher le temps de cuisson désiré.
☛ jusqu’à 25 min. à d ou a , 30 min. à b
Presser le bouton de mise en Marche.
Comment procéder
dd
d (Fort), pressez la touche
dd
- 33 -
Page 36

Schéma descriptif (NE-2156-2/NE-1656)
(1) (2)
(3)(4) (5) (6)(7)
x
A
B
x
(11)
(12)
(8)
2
1234567890
3
(13)
(9)
(14)
(15)
(10)
(1) Fenêtre à affichage numérique
(voir l’agrandissement)
(2) Affichage du niveau de puissance
(3) Touche de programme (g)
(4) Touche de zone de mémoire (j)
(5) Touche de sélection du niveau de puissance
(c)
(6) Touche de doublement du temps
(7) Touche de triplement du temps
AB
PROG
C
231
DE F
Le four est préréglé en usine comme suit:
√ Fonctionnement manuel
√ Touches mémoire préréglées sur puissance FORT suivant les temps de cuisson indiqués pour une cuisson à
une étape.
1l10 sec. 2l20 sec. 3l30 sec. 4l40 sec. 5l50 sec.
6l1 min. 7l1 min. 15 sec. 8l1 min. 30 sec. 9l1 min. 45 sec. 0l2 min.
(Il y a 2 zones de mémoires, A et B. Seule la zone A est préréglée.)
√ Déverrouillage des programmes
√ Compteur de cycles remis à zéro pour toutes les touches mémoire.
Si vous désirez utiliser toute autre fonction, consultez le manuel de l’utilisateur pour trouver comment activer cette
fonction.
G
(8) Touches de mémoire numérotées
(9) Touche d’Arrêt/Annulation (e)
(10) Touche de mise en Marche (f)
(11) Cache de la lampe du four
(12) Poignée de porte
(13) Filtre à air
(14) Ecran anti-éclaboussures
(voûte du four)
(15) Étagère intermédiaire amovible en céramique
(sur le NE-2156-2 uniquement)
A . . Affichage du programme
B . . Affichage du temps de cuisson (min. sec.)
C . . Affichage du numéro de touche de mémoire
D . . Indicateur de 1ère étape de cuisson
E . . Indicateur de 2ème étape de cuisson
F . . Indicateur de troisième étape de cuisson
G . . Indicateur du niveau de puissance
d: FORT
a: MOYEN
b: DECONGELATION
- 34 -
Page 37

Mode d’emploi (NE-2156-2/NE-1656)
A. CUISSON MANUELLE
√
Cuisson en 1 phase
Exemple: Pour cuire sur FORT pendant 2 minutes
Touche Comment procéder
1
2
Ouvrir la porte et placer l’aliment dans le four.
☛ “0” ainsi que le niveau de puissance doivent s’afficher dans la fenêtre.
Presser une fois la touche de sélection du niveau de puissance.
Français
3
2 0 0
4
≥Dans tous les cas, lorsque la porte est ouverte et que vous pressez la touche de mise en Marche, un “0”
s’affiche dans la fenêtre.
≥Une fois la durée de cuisson sélectionnée, vous pouvez encore modifier la puissance.
≥Une fois la cuisson commencée, vous pouvez encore modifier la’durée en tournant le sélecteur de
minuterie.
√
Cuisson en 2 ou 3 phases
Répétez les étapes 2 et 3 ci-dessus avant de presser la touche Marche f.
Cuisson en 2 phases:
01
-
Cuisson en 3 phases:
01
-
1 phase 2 phases 3 phases
Afficher le temps de cuisson désiré.
☛ jusqu’à 25 min. à d ou a, 30 min. à b
Presser la touche de mise en Marche.
01
-
01
-
01
-
B. CUISSON PAR TOUCHE MÉMOIRE
√
En mode déverrouillé
Touche
1
Ouvrir la porte et placer l’aliment dans le four.
☛ “0” ainsi que le niveau de puissance doivent s’afficher dans la fenêtre.
Comment procéder
2
Ex.
3
3
√
En mode verrouillé
Touche
1
2
Pour utiliser une mémoire de la zone B,
presser la touche de zone de mémoire avant de presser la touche mémoire désirée.
Pour cuire une double ou triple portion,
presser la touche de doublement ou de triplement avant de presser la touche mémoire désirée.
Ex.
3
Presser la touche mémoire désirée.
Presser la touche de mise en Marche.
Comment procéder
Ouvrir la porte et placer l’aliment dans le four.
☛ “0” ainsi que le niveau de puissance doivent s’afficher dans la fenêtre.
Presser la touche mémoire désirée.
☛ La cuisson démarre immédiatement.
- 35 -
Page 38

Mode d’emploi (NE-2156-2/NE-1656)
C. PROGRAMMATION DES TOUCHES DE MÉMOIRE
√
Cuisson en 1 phase
LE FOUR NE PEUT ÊTRE PROGRAMMÉ TANT QUE LA FONCTION DE VERROUILLAGE EST ACTIVÉE!
N’OUVREZ PAS LA PORTE PENDANT LA PROGRAMMATION!
Exemple: Pour programmer une décongélation d’une minute sur la touche mémoire Nou5
Touche Comment procéder
1
2
3
5
Maintenir la porte fermée.
☛ La fenêtre d’affichage doit être vide.
Presser la touche de programme.
Presser la touche mémoire N
o
u5.
4
5
0 01
6
√
Cuisson en 2 ou 3 phases
Répétez les étapes 4 et 5 ci-dessus avant de presser la touche de programme g.
5
1 phase 2 phases 3 phases
Pour programmer la zone de mémoire B,
presser la touche de zone de mémoire avant de choisir la touche mémoire désirée.
Presser 3 fois la touche de sélection du niveau de puissance.
Afficher le temps de cuisson désiré.
Presser la touche de programme.
01
-
01
-
01
-
D. POUR ADAPTER LE DOUBLEMENT (t2) OU LE TRIPLEMENT
(t3) SELON LES TOUCHES MÉMOIRES
LE FOUR NE PEUT ÊTRE PROGRAMMÉ TANT QUE LA FONCTION DE VERROUILLAGE EST ACTIVÉE!
N’OUVREZ PAS LA PORTE PENDANT LA PROGRAMMATION!
Exemple: Pour programmer un temps de réchauffaget1,5 en touche double portion pour la touche
mémoire N
1
2
o
u5
Touche Comment procéder
Maintenir la porte fermée.
☛ La fenêtre d’affichage doit être vide.
Presser la touche de programme.
3
4
5
5
x
2
5
1
6
Pour une triple portion,
répétez les opérations ci-dessus, en pressant la touche triple portion (au lieu de double portion) à l’étape 4.
Presser la touche mémoire Nou5.
Presser la touche de Double portion.
Programmer le coefficient multiplicateur. (Minimum 0,1–maximum 3,0)
Note: Le four est préréglé en usine avec le coefficient 1,6.
Presser la touche de programme.
- 36 -
Page 39

Mode d’emploi (NE-2156-2/NE-1656)
+
E. VERROUILLAGE DES PROGRAMMES
√
Pour activer le verrouillage des programmes
Touche Comment procéder
1
2
Avec “verrouillage des programmes”:
≥Le four est mis en marche en enfonçant la touche de mémoire désirée. Il n’est pas nécessaire d’appuyer sur la
touche Marche.
≥La fonction d’interruption est désactivée: le fait d’ouvrir la porte annule le temps restant du programme.
≥≈Le four ne peut être programmé ou utilisé manuellement tant que la fonction de verrouillage n’est pas
désactivée.
√
Pour déverrouiller le panneau de contrôle
Touche Comment procéder
1
2
Lorsque les programmes sont déverrouillés:
≥Le four fonctionne de nouveau en 2 opérations (touche mémoire plus touche Marche).
≥Les fonctions d’annulation et répétition sont opérationnelles.
≥Les touches mémoire peuvent être programmées.
≥L’intensité et la durée du bip sonore peuvent être réglées.
F. BIPS SONORES
Le bip est réglé en usine sur l’intensité #3 et pour 3 bips.
Maintenir la porte fermée.
☛ La fenêtre d’affichage doit être vide.
Maintenir appuyée la touche de programme pendant 5 secondes,
jusqu’à ce qu’apparaissent “PROG”, “P” et “L” dans la fenêtre.
Ouvrir la porte et la laisser ouverte.
Tout en pressant la touche d’Arrêt/Annulation, maintenir appuyée la
touche de programme pendant 5 secondes, jusqu’à ce qu’apparaissent
“PROG” et “P” dans la fenêtre.
Français
Touche Comment procéder
1
2
√
Pour régler le niveau d’intensité
3
0
4
√√
√
Pour choisir la longueur des bips
√√
5
0
6
Ouvrir la porte et la laisser ouverte.
Presser la touche de programme.
Choisissez l’intensité du son voulue en appuyant sur la touche
mémoire N
☛ Le niveau d’intensité s’affiche de 3 à 0 suivi du mot “bEEP”.
“3bEEP”lfort, “2bEEP”lmoyen, “1bEEP”lfaible,
“0bEEP”lsilencieux
Presser la touche de programme.
Après avoir presser la touche de programme (étape 4 ci-dessus),
appuyer rapidement (dans les 3 secondes) sur la touche mémoire “0”.
☛ La longueur des bips est affichée par l’indicateur d’étape de cuisson;
“1”l3 bips, “2”lbips courts pendant 60 secondes.
Presser la touche de programme.
o
u0.
- 37 -
Page 40

Mode d’emploi (NE-2156-2/NE-1656)
+
+
+
G. LISTE DES PROGRAMMES
Tous les paramètres programmés (programme de cuisson de chaque touche mémoire (zones A et B), bips
sonores et verrouillage des touches), défileront en continu.
Touche Comment procéder
1
2
Ouvrir la porte et la laisser ouverte.
Tout en pressant la touche d’Arrêt/Annulation, presser la touche
Marche.
H. COMPTEUR DE CYCLES
√
Pour connaître le nombre d’utilisations de chaque touche
mémoire
Touche Comment procéder
1
2
01
-
√
Pour connaître le nombre total d’utilisations du four
3
√
Pour connaître le nombre d’utilisations du four en mode manuel
Touche Comment procéder
4
5
Ouvrir la porte et la laisser ouverte.
Tout en pressant la touche d’Arrêt/Annulation, presser la touche
mémoire désirée.
Note: pour lire le nombre d’utilisations de chaque touche de la zone de mémoire B,
presser la touche de zone de mémoires pendant que la fenêtre affiche encore le cumul.
Fermer la porte pendant que la fenêtre affiche encore le cumul de
chaque touche mémoire.
Ouvrir la porte et la laisser ouverte.
Tout en pressant la touche d’Arrêt/Annulation, presser la touche de
sélection du niveau de puissance.
I. FILTRE À AIR
Exemple: Pour programmer le nettoyage du filtre à air au bout de 600 utilisations
Touche Comment procéder
1
2
3
4
3
0 06
5
Lorsque “FILT” s’affiche dans la fenêtre, retirer le filtre à air et le nettoyer à l’eau savonneuse. Presser la touche
d’arrêt/annulation pour vider l’affichage.
Pour vérifier le nombre total d’heures d’utilisation.
√ Ouvrir la porte et la laisser ouverte.
√ Tout en pressant la touche Marche, presser la touche mémoire N
√ L’affichage indiquera le nombre d’heures d’utilisation du four déja écoulées, ainsi que “H”.
Note: Si le four s’arrête après quelques secondes d’utilisation, vérifiez la propreté du filtre avant d’appeler un
technicien.
Ouvrir la porte et la laisser ouverte.
Tout en pressant la touche Marche, ouvrir puis fermer la porte.
Presser la touche mémoire Nou3.
Afficher ou modifier la durée désirée jusqu’à 9999 heures.
Presser la touche de programme.
o
l3.
- 38 -
Page 41

Instructions de montage pour superposer deux appareils
Important
1. Retirez la fiche d’alimentation de la prise de
courant avant de procéder au montage.
2. Pour superposer deux appareils, vous devez
utiliser la “plaque de fixation” PANASONIC, qui est
fournie avec cet appareil.
3. La superposition de fours n’est possible qu’avec
les modèles PANASONIC suivants:
NE-1057, NE-1457, NE-1247, NE-1747, NE-1047,
NE-1447, NE-1257, NE-1757, NE-1442, NE-1856,
NE-1456, NE-1846, NE-1446, NE-2156-2,
NE-2146-2
4. Il est possible de superposer deux appareils au
maximum.
Préparation
Assurez-vous que l’intérieur du four est vide.
Installation
1. Superposer les 2 fours et retirer les 5 vis (a) comme indiqué sur le schéma 1.
2. Desserrer la vis (b).
3. Positionner la plaque de fixation avec la partie saillante vers l’extérieur. La placer au-dessus de la vis (b).
4. Fixer et serrer les 5 vis (a) et la vis (b). (Fig. 2)
5. S’assurer que le dessus du four se trouve à une hauteur conforme aux règles de sécurité en vigueur.
(b)
Fig. 1 Fig. 2
Plaque de fixation
Partie saillante
(a)
Plaque de fixation
Partie saillante
Français
Explications des codes de panne de l’autodiagnostic
Le four contrôle son fonctionnement et affiche un code de panne sur la fenêtre d’affichage quand un problème se présente.
Que faire lorsqu’un code de panne apparaît: débrancher le four, attendre plus de 10 secondes avant de le
rebrancher. Si le disfonctionnement persiste, référezvous au tableau ci-dessous.
Code
F01
F33–34
F05
F81–82
F86–87
F44
Panne détectée
Température trop élevée
de l’air expulsé
Panne du circuit de
thermostat
Panne du circuit intégré
mémoire
Panne du circuit de
commande des relais
Panne du circuit de
commande des relais
Panne du panneau de
commandes
Que faire?
Le four s’arrête automatiquement. Le débrancher. Le four émet un bip
continu. Le four peut à nouveau être utilisé quand il est refroidi.
Déplacez le four vers un endroit plus frais. Si le problème persiste,
appelez un technicien pour l’entretien.
Le four s’arrête automatiquement. Le débrancher. Si le problème
persiste, appelez un technicien pour l’entretien.
Si le problème persiste, appelez un technicien pour l’entretien. Le four
peut fonctionner même si un code de panne est affiché, mais pas
comme prévu. Survient lors de l’utilisation d’une mémoire. Presser la
touche d’Arrêt/Annulation. Les autres touches mémoires ainsi que le
réchauffage en mode manuel sont alors disponibles.
Si le problème persiste, appelez un technicien pour l’entretien. Le four
peut fonctionner même si un code de panne est affiché, mais pas
comme prévu. Presser la touche d’Arrêt/Annulation, et essayer de
nouveau.
Le four s’arrête automatiquement. Le débrancher. Si le problème
persiste, appelez un technicien pour l’entretien.
Le four s’arrête automatiquement. Le débrancher. Si le problème
persiste, appelez un technicien pour l’entretien.
Note: Les codes ci-dessus affichés par la fenêtre d’affichage n’indiquent pas toutes les pannes possibles de l’appareil.
- 39 -
Page 42

Entretien du four à micro-ondes
1. Debranchez le four avant tout nettoyage.
2. Veillez à garder propre l’intérieur du four (et
l’étagère amovible sur le NE-2146-2/2156-2).
Si des particules de nourriture ou des projections
liquides adhèrent aux parois du four ou sur les
joints ou la surface de la porte, elles peuvent
absorber les micro-ondes et être la cause
d’étincelles ou même d’arcs électriques. Nettoyez
soigneusement les salissures avec une éponge
humide.
Vous pouvez nettoyer le four avec du liquide
détergent ou un produit désinfectant pour surface
alimentaire. N’utilisez pas de décapants ou de
produits abrasifs.
Nettoyage de l’écran anti-
éclaboussures
1. Prenez à deux mains les arrêts latéraux
encliquetables, rentrez-les et abaissez-les. Sortez
ensuite l’écran anti-éclaboussures du four.
L’étagère amovible peut être lavée dans l’eau
savonneuse ou dans le lave vaisselle.
3. La surface extérieure du four doit être nettoyée à
l’eau savonneuse, puis essuyée avec un linge
doux. Faites attention à ce que l’eau ne rentre pas
par l’ouverture de ventilation arrière car cela
pourrait endommager l’appareil.
4. La vitre de la porte doit être nettoyée avec une eau
légèrement savonneuse. Veillez à utiliser un linge
doux. N’employez jamais de produit pour nettoyer
les vitres. La porte peut être abîmée par les
produits détergents ou nettoyants abrasifs.
Nettoyage du filtre à air
Nettoyez le filtre à air de temps à autre en suivant les
instructions ci-dessous. Le bon fonctionnement du
four peut être compromis quand le filtre à air est
obstrué par la poussière (*).
1. Retirer le filtre à air de la plinthe avant en tournant
sur la gauche la vis placée à droite de la plinthe.
2. Lavez l’écran anti-éclaboussures à l’eau
savonneuse.
3. Veillez à remettre l’écran anti-éclaboussures avant
d’utiliser le four.
ATTENTION
L’écran anti-éclaboussures doit être bien remis
en place quand vous utilisez le four.
Cuisson sur 2 niveaux
(sur le NE-2146-2/2156-2 uniquement)
1. Lorsque vous réchauffez un seul plat, il faut
toujours placer ce dernier au milieu de la sole.
2. Lorsque vous utilisez le four essentiellement pour
réchauffer un seul plat à la fois, retirez l’étagère
amovible afin de n’utiliser que la sole.
3. Lorsque vous réchauffez en même temps
2 aliments, placez-les autant que possible tous
deux sur la sole.
Visser
Barrette
2. Lavez le filtre à l’eau savonneuse.
3. Veillez à remettre le filtre à air en place avant
d’utiliser le four.
(*)Si les filtres à air sont trop encrassés, le four risque
de surchauffer et de ne plus fonctionner.
4. Lorsque vous réchauffez plus de 2 assiettes à la
fois, essayez de les répartir équitablement sur les
2 niveaux.
5. Laisser un peu d’espace entre chaque assiette. Ne
pas empiler les plats.
6. Si l’étagère amovible n’est pas utilisée, il faut la
ranger à l’extérieur du four et ne pas la poser sur
la sole du four.
- 40 -
Page 43

—Guide Décongélation/Réchauffage—
Les temps donnés dans le tableau ci-dessous ne sont qu’indicatifs. De nombreux facteurs tels que la température
initiale, la teneur en graisse ou en sucre, etc…peuvent affecter le résultat. Il importe donc d’adapter les durées de
cuisson ou de décongélation en conséquence. Les temps donnés correspondent à des aliments dont la
température initiale est de:
Aliments réfrigérés . . . . . . . Env. i5oC
Vérifier toujours la température à coeur des aliments à l’aide d’un thermomètre afin d’être en conformité avec les
normes d’hygiène en vigueur.
Fonction
utilisée
Décongélation
Cuisson
d’aliment
réfrigéré cru
Cuisson et/ou
réchauffage
d’aliment
surgelé
Réchauffage
d’aliment
réfrigéré
Aliments surgelés . . . . . . . Env. j18oC
Aliment
Filets de
poisson
Viande hachée
Volaille entière
Plat cuisiné
Multi portions
Portion
unique
Tarte aux
pommes
Gâteau
Petit pain
Oeufs brouillés
Brocolis
Filets de
poisson
Bacon
Morceaux de
poulet
Petits pois
Riz cuit
Saucisses
cuites
Cheeseburgers
cuits
Gâteau au
chocolat
Lasagne
Chili con carne
Tarte aux
pommes
Sauce au poivre
Flageolets
Soupe
Poids
500 g
500 g
1,36 kg
1,36 kg
275 g
1 portion
1 portion
1 portion 50 g
2 oeufsi2 cs lait
500 g
500 g
2 rashes
500 g
500 g
167 g
3k50 g
75 g
1 portion
325 g
325 g
1 portion
10 cl
100 g
12,5 cl
Puis-
sance
b
b
b
b
b
b
b
b
d
d
d
d
d
d
d
d
d
b
d
d
d
d
d
d
NE-2156-2
NE-2146-2
8 min
5 min
25 min
20 min
8 min
1 min 15 s
2 min
30 s
20–25s
3 min
2 min 20 s
40 s
4 min
3 min 20 s
1 min 20 s
50 s
50 s
30 s
3 min 20 s
2 min 30 s
14 s
40 s
40 s
48 s
Durée
NE-1846
8 min
5 min
25 min
20 min
8 min
1 min 15 s
2 min
30 s
25–30 s
3 min 30 s
2 min 45 s
50 s
4 min 45 s
4 min
1 min 40 s
1 min
1 min
30 s
4 min
3 min
16 s
50 s
50 s
56 s
NE-1656/1646
8 min
5 min
25 min
20 min
8 min
1 min 15 s
2 min
30 s
30–40 s
3 min 55 s
3 min
1 min
5 min 20 s
4 min 30 s
1 min 55 s
1 min 5 s
1 min 5 s
30 s
4 min 30 s
3 min 15 s
18 s
56 s
56 s
1 min 10 s
Français
CONSEILS GÉNÉRAUX:
≥Ne pas poser directement dans le four les aliments à cuire/réchauffer/décongeler—utiliser un récipient
approprié.
≥Lorsque vous décongelez des plats cuisinés en multiportions, pensez à découper, retourner et mélanger à mi-
décongélation afin d’améliorer la pénétration des ondes et d’optimiser la décongélation.
≥Il vaut mieux éviter de cuire directement des aliments surgelés très denses. Ils seraient trop cuits sur les bords
avant d’atteindre la température désirée à coeur.
≥Lorsque c’est nécessaire, pensez à recouvrir les plats pendant le réchauffage ou la cuisson. Cela évitera le
dessèchement de l’aliment et préviendra les éventuelles projections.
≥Relâcher un peu le couvercle ou percer le film étirable avant de cuire ou de réchauffer les aliments emballés ou
contenus dans un récipient hermétique.
≥Remuer ou mélanger les aliments à mi-cuisson ou mi-décongélation afin de favoriser la diffusion de chaleur.
≥Respecter un temps de repos avant de vérifier la température ou de servir l’aliment.
- 41 -
Page 44

Veiligheidsvoorschriften
Installatie
Aarden
BELANGRIJK: VOOR UW PERSOONLIJKE
VEILIGHEID MOET DIT APPARAAT
GEAARD WORDEN.
Het netsnoer van dit apparaat is voorzien van een
randaarde stekker. Wanneer het stopcontact niet is
geaard, dient de gebruiker het te laten vervangen
door een volgens voorschrift van randaarde voorzien
stopcontact.
Waarschuwing betreffende voltage
Het gebruikte voltage moet overeenkomen met het op
deze magnetronoven gespecificeerde voltage.
Toepassing van een hogere netspanning is gevaarlijk
en kan brand of andere ongelukken veroorzaken.
Plaatsing van de oven
Zet de oven op een vlak en stabiel oppervlak. Zet
deze nooit op een warme of vochtige plaats—
bijvoorbeeld vlakbij een elektrische- of gasverwarming
of in direkt zonlicht. Gebruik de oven niet, wanneer de
omgevingstemperatuur hoger dan 40oC is en/of
wanneer de relatieve luchtvochtigheid meer dan 85%
bedraagt. Een vrije luchtcirculatie rond de oven is erg
belangrijk.
De magnetron kan alleen goed functioneren als er
voldoende ruimte voor ventilatie aanwezig is
(ongeveer 5 cm aan de linker-, rechter-, en achterkant
en ongeveer 20 cm aan de bovenkant).
De magnetronoven moet zodanig geplaatst worden
dat de stekker goed bereikbaar is.
Voorzorgsmaatregelen
Waarschuwings-sticker.
Voordat u de oven ingebruik neemt, dient u de
waarschuwings-sticker op een zichtbare plaats te
bevestigen.
Schakel de oven niet in, wanneer deze leeg is.
Om de goede kwaliteit van de magnetronbuizen te
behouden, moet u de oven nooit inschakelen zonder
dat er zich voedsel in bevindt.
Open nooit de behuizing.
Het apparaat functioneert op hoogspanning.
Reparaties en afregelingen dient u aan een
gekwalificeerd vakman over te laten.
Blokkeer nooit de ventilatie-openingen.
De magnetronoven heeft voor een goede koeling een
maximale ventilatie ruimte aan de achterzijde nodig.
Tijdens het koken moeten alle ventilatie-openingen
goed vrij zijn.
Droog nooit kleding in de oven.
Droog geen kleding in de oven omdat er dan kans
bestaat op verbranding.
Bevestig de waarschuwingslabel.
Indien een waarschuwings-sticker is bijgesloten, dient
u deze aan de bovenzijde van de magnetronoven te
bevestigen.
Dit produkt voldoet aan de Europese standaard (EN 55011) voor EMC interferentie ’s (EMC =
Elektromagnetische Compabiliteit) Overeenkomstig deze standaard behoord dit produkt tot de groep 2
apparatuur, klasse B en voldoet deze aan alle normeringseisen. Groep 2 houdt in dat de Frequentie energie
wordt opgewekt in de vorm van elektromagnetische straling bedoeld voor het verwarmen en koken van
voedsel. Groep B informeerd dat dit produkt toegepast kan worden voor normaal huishoudelijk gebruik.
- 42 -
Page 45

Waarschuwing
Veiligheidsvoorschriften
01. Deurafdichtingen en de plaatsen hieromheen
moeten worden schoongemaakt met een
vochtige doek.
2. Voor aflevering is dit toestel nagekeken op
beschadigingen aan de deurafdichtingen,
mochten zich hier toch beschadigingen
voordoen, dan mag het toestel pas in gebruik
worden genomen nadat de oven is gerepareerd
of nagekeken door hiervoor gekwalificeerd
servicepersoneel.
3. Het is gevaarlijk zelf reparaties uit te voeren of
deze te laten verrichten door niet gekwalificeerd
servicepersoneel.
4. Als u tijdens het gebruik van de magnetronoven
rook ziet, dan dient u altijd de deur gesloten te
houden en direct op de stop toets te drukken of
de stekker uit het stopcontact te halen.
Waarschuw uw leverancier.
5. Indien het netsnoer van dit apparaat beschadigd
is, dient het vervangen te worden door uw
leverancier.
6. Het te gebruiken kookgerei moet magnetronoven
bestendig zijn.
7. Indien vloeistoffen, zoals soep, sauzen en drank
opgewarmd worden in uw magnetronoven,
kunnen deze bij het bereiken van het kookpunt
beginnen te spatten op de binnenwand van de
oven. Om dit te voorkomen, moet men het
volgende doen:
a) Gebruik geen vierkante schotels met smalle
rand.
b) Niet oververwarmen.
c) Roer de vloeistof voor en nog een keer
halverwege de kooktijd.
d) Zodra de vloeistof op de juiste temperatuur
gebracht is, laat ze nog even in de oven
rusten en roer ze goed door voordat u de
schotel uit de oven haalt.
08. Blijf bij het toestel indien gebruik wordt gemaakt
van brandbare verpakkingen, zoals papier of
plastic.
9. De inhoud van babyflesjes en potjes dienen
halverwege de bereidingstijd geschud of
omgeroerd te worden. Controleer altijd de
temperatuur voor gebruik om verbranding te
voorkomen.
10. Vloeistoffen en ander (vast) voedsel in
luchtdichte verpakking dienen niet in de oven te
worden verwarmd in verband met
ontploffingsgevaar.
11. Ongekookte eieren in schaal en hardgekookte
eieren mogen niet in de oven worden verwarmd
in verband met ontploffingsgevaar.
12. Het verwarmen van dranken in de magnetron kan
plotseling “nakoken” tot gevolg hebben. Wees
daarom voorzichtig bij het verwijderen van de
beker.
13. Laat kinderen alleen gebruik maken van de
magnetronoven nadat ze zorgvuldig geïnstrueerd
zijn.
Nederlands
- 43 -
Page 46

Functieschema (NE-2146-2/NE-1846/NE-1646)
(1)
(2)
(7)
(6)
(3) (4)
(8)
(5)
(9)
(10)
(1) Digitaal uitleesvenster (zie onder)
(2) Vermogensaanduiding
(3) Tijdschakelaar
(4) Vermogenstoetsen
(5) Starttoets
(6) Deurgreep
(7) Deksel ovenlamp
(8) Luchtfilter
(9) Spatscherm
(bovenkant binnenruimte)
(10) Glasplaat (NE-2146-2)
A
B
A—Uitlezing kooktijd in min./sec.
B—Vermogensaanduiding
d: HOOG
a: MIDDEN
b: ONTDOOIEN
Bediening van de magnetronoven
(NE-2146-2/NE-1846/NE-1646)
TOETSEN
1
2
of
3
4
≥Indien u de starttoets indrukt terwijl de ovendeur open is, zal “0” in het uitleesvenster verschijnen.
≥Na het instellen van de kooktijd kan het vermogen worden gewijzigd.
≥Gedurende het kookproces kan de kooktijd worden gewijzigd met de tijdknop.
Open de ovendeur en plaats het voedsel in de oven.
☛ Let op dat “0” en het vermogenssymbool d in het uitleesvenster
verschijnen.
Druk een van de toetsen in indien u een ander vermogen wilt gebruiken
dan d HOOG.
Stel de gewenste kookduur in.
☛ Tot 25 min. op stand d of a, 30 minuten op stand b
Druk de starttoets in.
INSTRUCTIES
- 44 -
Page 47

Functieschema (NE-2156-2/NE-1656)
(1) (2)
(3)(4) (5) (6)(7)
x
A
B
x
(11)
(12)
(8)
2
1234567890
3
(13)
(9)
(14)
(15)
(10)
Nederlands
(1) Digitaal uitleesvenster (zie onder)
(2) Vermogensaanduiding
(3) Programmeertoets (g)
(4) Wisseltoets (j)
(5) Keuzetoets vermogen (c)
(6) Dubbele portietoets
(7) Drievoudige portietoets
AB
PROG
C
231
DE F
Deze magnetronoven is in de fabriek reeds afgesteld op de volgende punten:
√ Bediening met de hand
√ Nummertoetsen zijn vooraf ingesteld op hoge capaciteit op de aangegeven kooktijden met éénstaps
verwarming.
1l10 seconden 2l20 seconden 3l30 seconden 4l40 seconden
5l50 seconden 6l1 minuut 7l1 minuut 15 seconden
8l1 minuut 30 seconden 9l1 minuut 45 seconden 0l2 minuten
(Er zijn twee mogelijkheden A en B. Alleen A is voorgeprogrammeerd.)
√ Programma ontgrendeling
√ De bedrijfsteller is voor alle toetsen op “0” ingesteld.
Voor andere gewenste functies gelieve u de handleiding door te lezen, om na te gaan, hoe zij in werking worden
gesteld.
G
(8) Tijdsinstelling-/voorkeuzetoetsen
(9) Stop-/hersteltoets (e)
(10) Starttoets (f)
(11) Deksel ovenlamp
(12) Deurgreep
(13) Luchtfilter
(14) Spatscherm (bovenkant binnenruimte)
(15) Glasplaat (NE-2156-2)
A—Programma uitlezing
B—Uitlezing kooktijd in min./sec.
C—Nummer geheugentoets
D—Indikatie 1e stap kookprogramma
E—Indikatie 2e stap kookprogramma
F—Indikatie 3e stap kookprogramma
G—Vermogensaanduiding
d: HOOG
a: MIDDEN
b: ONTDOOIEN
- 45 -
Page 48

Bediening van de magnetronoven (NE-2156-2/NE-1656)
A. HANDINSTELLING KOOKPROCES
√
Eénstaps koken
Voorbeeld: Koken op HOOG vermogen gedurende 2 minuten
TOETSEN INSTRUCTIES
1
2
Open de ovendeur en plaats het voedsel in de oven.
☛ In het uitleesvenster verschijnt het getal “0”.
Druk de vermogenstoets 1 t in.
3
2 0 0
4
≥Indien u de START toets indrukt met geopende deur, zal in alle gevallen “0” in het display verschijnen.
≥Ook na het instellen van de kooktijd kunt u het ingestelde vermogen wijzigen.
≥Als de oven aanstaat is het mogelijk de ingestelde kooktijd met de cijfertoetsen te wijzigen.
√
Twee- of driestaps koken
Herhaal de hierboven genoemde stappen 2 en 3, voordat u de starttoets indrukt f.
Tweestaps koken:
01
-
Driestaps koken:
01
-
Eerste stap
Stel de gewenste kookduur in.
☛ Tot 25 min. op stand d of a, 30 minuten op stand b
Druk de starttoets in.
01
-
01
-
Tweede stap Derde stap
01
-
B. GEPROGRAMMEERD KOKEN
√
In de gedeblokkeerde stand
TOETSEN
1
voorb.
2
3
Open de ovendeur en plaats het voedsel in de oven.
☛ In het uitleesvenster verschijnt het getal “0”.
Druk de gewenste geheugentoets in.
INSTRUCTIES
3
√
In de geblokkeerde stand
TOETSEN
1
voorb.
2
Het programmeren met de wisseltoets B,
druk eerst op de wisseltoets j, voordat u de gewenste geheugentoets kiest.
Voor het verwarmen van dubbele (of 3-voudige) porties,
druk de dubbele (of 3-voudige) portietoets in voordat u de gewenste geheugentoets kiest.
3
Druk de starttoets in.
INSTRUCTIES
Open de ovendeur en plaats het voedsel in de oven.
☛ In het uitleesvenster verschijnt het getal “0”.
Druk de gewenste geheugentoets in.
☛ Het verwarmen begint automatisch.
- 46 -
Page 49

Bediening van de magnetronoven (NE-2156-2/NE-1656)
C. HET PROGRAMMEREN VAN DE GEHEUGENTOETSEN
√
Eénstaps koken
DE OVEN KAN NIET GEPROGRAMMEERD WORDEN ALS DE PROGRAMMABLOKKERING IS
GEACTIVEERD!
ZORG DAT DE DEUR GESLOTEN BLIJFT TIJDENS HET PROGRAMMEREN!
Voorbeeld: Het programmeren van de ontdooistand gedurende 1 minuut onder geheugentoets “5”
TOETSEN
1
2
voorb.
3
5
4
5
0 01
6
√
Twee- of driestaps koken
Herhaal de bovengenoemde stappen 4 en 5, voordat u de programmeertoets indrukt g.
5
Eerste stap Tweede stap Derde stap
Het programmeren met de wisseltoets B,
druk eerst op de wisseltoets j, voordat u de gewenste geheugentoets kiest.
Houdt de deur gesloten.
☛ Het uitleesvenster moet leeg zijn.
Druk de programmeertoets in.
Druk de geheugentoets “5” in.
Druk drie maal op de vermogentoets.
Stel de gewenste kooktijd in.
Druk de programmeertoets in.
01
-
INSTRUCTIES
01
-
01
-
D. INSTELLING VAN DE VERMENIGVULDIGINGSFACTOR VOOR
DUBBELE OF DRIEVOUDIGE PORTIES
DE OVEN KAN NIET GEPROGRAMMEERD WORDEN ALS DE PROGRAMMABLOKKERING IS
GEACTIVEERD!
ZORG DAT DE DEUR GESLOTEN BLIJFT TIJDENS HET PROGRAMMEREN!
Voorbeeld: Het programmeren van 1,5 keer de kooktijd van een dubbele portie onder geheugentoets “5”
Nederlands
TOETSEN INSTRUCTIES
1
2
3
4
5
5
x
2
5
1
6
Voor driedubbele hoeveelheid,
herhaal de bovenstaande stappen, druk bij stap 4 de driedubbele-hoeveelheid toets in, in plaats van de
dubbele hoeveelheid.
Houdt de deur gesloten.
☛ Het uitleesvenster moet leeg zijn.
Druk de programmeertoets in.
Druk de geheugentoets “5” in.
Druk op de dubbele portietoets.
Stel de vermenigvuldigwaarde in. (minimum 0,1–maximum 3,0)
Noot: Vanuit de fabriek is 1,6 keer voorgeprogrammeerd.
Druk de programmeertoets in.
- 47 -
Page 50

Bediening van de magnetronoven (NE-2156-2/NE-1656)
+
E. PROGRAMMA BLOKKERING
√
Programma blokkering
TOETSEN INSTRUCTIES
1
2
programma blokkering:
≥De oven wordt in werking gesteld door de gewenste geheugentoets aan te tippen. Het is niet nodig de starttoets
f aan te tippen.
≥De oven kan niet met de hand worden geprogrammeerd of met de hand worden geregeld voordat het
programma is gedeblokkeerd.
√
Deblokkering van het programma
TOETSEN INSTRUCTIES
1
2
programma deblokkering:
≥Oven gaat nu terug naar bediening met 2 toetsen (nummertoets plus f toets).
≥De herhaal en onderbrekingsfuncties werken weer.
≥De geheugentoestsen kunnen worden geprogrammeerd.
≥Het volume en de lengte van de pieptoon kunnen weer worden ingesteld.
Houdt de deur gesloten.
☛ Het uitleesvenster moet leeg zijn.
Druk de programmeertoets in tot “PROG”, “P” en “L” verschijnen
(langer dan 5 seconden).
Open de ovendeur.
Houdt de stop/hersteltoets ingedrukt terwijl u op de programmeertoets
drukt en “PROG” en “P” verschijnen (langer dan 5 seconden).
F. HET KIEZEN VAN DE PIEPTOONAFSTELLINGEN
Het volume en de lengte van de pieptoon aan het einde van de kookcyclus, kunnen ingesteld worden.
Het hoogste volume en 3 pieptoontjes zijn reeds door de fabriek ingesteld.
TOETSEN INSTRUCTIES
1
Open de ovendeur.
2
√
Het kiezen van het volume
3
0
4
√√
√
Het kiezen van de pieptoon lengte
√√
5
0
6
Druk de programmeertoets in.
Selecteer het geluidsniveau door het indruken van geheugentoets “0”.
☛ Het niveau wordt aangeven door een nummer gevolgd door het woord
“bEEP”; “3bEEP”lhoog volume, “2bEEP”lgemiddeld, “1bEEP”llaag,
“0bEEPlstil
Druk de programmeertoets in.
Binnen 3 seconden nadat u de programmeertoets in stap 4 heeft
ingedrukt, kunt u de lengte van de pieptoon instellen door de
geheugentoets “0” in te drukken.
☛ De lengte wordt aangegeven door de 1
pieptoontjes, “2”lkorte pieptoontjes gedurende 60 seconden.
Druk de programmeertoets in.
- 48 -
e
of 2c stap kookindicatie; “1”l3
Page 51

Bediening van de magnetronoven (NE-2156-2/NE-1656)
+
+
+
G. HET AFLEZEN VAN DE PROGRAMMALIJST
Alle geprogrammeerde informatie, [programma’s onder alle geheugentoetsen (A en B kant), pieptonen en
programmablokkering] zal achtereenvolgens verschijnen.
TOETSEN INSTRUCTIES
1
2
H. BEDRIJFSTELLER
√
Aflezen Hoe Vaak Iedere Geheugentoets Is Gebruikt
TOETSEN INSTRUCTIES
1
2
01
-
√
Aflezen Van De Gebruiksteller
3
Open de ovendeur.
Houdt de stop/hersteltoets ingedrukt en druk de starttoets in.
Open de ovendeur.
Houdt de stop/hersteltoets ingedrukt terwijl u de geheugentoetsen
indrukt.
NOOT: Om de geheugentoetsen in B uit te lezen, drukt u op de j toets
terwijl het display nog het gebruiksaantal aangeeft.
Sluit de deur terwijl het display nog het gebruiksaantal van de
geheugentoetsen aangeeft.
NederlandsNederlands
√
Aflezen Hoe Vaak De Oven Is Gebruikt In Handmatige Bediening
TOETSEN INSTRUCTIES
4
5
Open de ovendeur.
Houdt de stop/hersteltoets ingedrukt terwijl u de vermogenstoets
indrukt.
I. LUCHTFILTER
Voorbeeld: Het programmeren van het luchtfilter onderhoud na 600 uur
TOETSEN INSTRUCTIES
1
2
3
3
4
0 06
5
Als in het display de melding “FILT” verschijnt, verwijdert u het filter en reinigt het in een sopje.
Druk de stop/hersteltoets in om de filtermelding in het display te verwijderen.
Om het, reeds verstreken, aantal uren te bepalen, handelt u als volgt:
√ Open de deur en laat deze open.
√ Houdt de f toets ingedrukt en druk op de “3” toets.
√ Het display toont nu de verstreken tijd terwijl “H” in het display verschijnen.
Noot: Als de oven na een korte tijd stopt, controleer dan eerst het filter voordat u een servicemonteur waaschuwt.
Open de ovendeur.
Terwijl u de starttoets indrukt, sluit en opent u de deur.
Druk de geheugentoets “3” in.
Stel de gewenste tijd in tot maximaal 9999 uur.
Druk de programmeertoets in.
- 49 -
Page 52

Installatie instructies voor gestapelde opstelling
BELANGRIJK
1. Voordat u begint met installeren moet de steker
van de oven uit het stopcontact worden verwijderd.
2. Maak bij een gestapelde opstelling uitsluitend
gebruik van de Panasonic verbindingsplaat, welke
bij het toestel is ingesloten.
3. Alleen de volgende magnetronoven types van
Panasonic kunnen worden Ggecombineerd:
NE-1057, NE-1457, NE-1247, NE-1747, NE-1047,
NE-1447, NE-1257, NE-1757, NE-1442, NE-1856,
NE-1456, NE-1846, NE-1446, NE-2156-2,
NE-2146-2
4. Er mogen slechts twee ovens op elkaar worden
gestapeld.
VOORBEREIDING
Vergewis u ervan, dat de oven leeg is.
HET INSTALLEREN
1. Stapel de ovens en verwijder, per apparaat, de vijf schroeven (a) zoals in fig. 1 aangegeven.
2. Draai schroef (b) los.
3. Breng de Panasonic verbindingsplaat aan en draai schroef (b) aan volgens fig. 2.
N.B.: Breng de verbindingsplaat zodanig aan dat de uitstulping in de plaat van de oven af staat.
4. Schuif nu voorzichtig de bovenste oven richting de verbindingsplaat om zo de schroefgaten van de bovenste
oven in lijn te brengen met de gaten van de verbindingsplaat. Nu kunt u de vijf schroeven opnieuw aanbrengen.
(b)
Fig. 1
Verbindingsplaat
Uitstulping
(a)
Verbindingsplaat
Uitstulping
Fig. 2
Zelf-diagnose
(opsporen van fouten)-verklaring van de codes
Code
F01
F33–34
F05
F81–82
F86–87
F44
Opmerking: De bovengenoemde codes die verschijnen in het uitleesvenster, geven slechts een beperkt aantal
Uitblaastemperatuur te
hoog
Storing in thermistor
circuit
Defekt geheugen IC
Storing in relais circuit
Storing in relais circuit
Defekt bedieningspaneel
Probleem
storingsmogelijkheden aan.
Wat te doen
De oven schakelt automatisch uit. Haal de steker uit het stopcontact. De
oven laat constant een pieptoon horen. De oven schakelt zichzelf weer
in, nadat deze is afgekoeld. Plaats de oven in een koelere omgeving.
Indien dit euvel zich blijft voordoen, roep dan de hulp van de
servicedienst in.
De oven schakelt automatisch uit. Indien dit euvel zich blijft voordoen,
roep dan de hulp van de servicedienst in.
Indien dit euvel zich blijft voordoen, roep dan de hulp van de
servicedienst in. De oven werkt zelfs indien er een foutcode verschijnt.
Deze foutcode kan verschijnen bij het koken met de geheugentoetsen.
Druk op de reset toets en vervolgens op een andere geheugentoets
teneinde de over te gaan op handmatige bediening.
Indien dit euvel zich blijft voordoen, roep dan de hulp van de
servicedienst in. De oven werkt zelfs indien er een foutcode verschijnt.
Druk op de reset toets en probeer nogmaals.
De oven schakelt automatisch uit. Indien dit euvel zich blijft voordoen,
roep dan de hulp van de servicedienst in.
De oven schakelt automatisch uit. Indien dit euvel zich blijft voordoen,
roep dan de hulp van de servicedienst in.
- 50 -
Page 53

Onderhoud en verzorging van uw magnetronoven
1. Verwijder eerst de steker van de magnetronoven
uit het stopcontact voordat u begint deze schoon te
maken.
2. Houdt de binnenzijde van de oven (en tussenplaat
type NE-2146-2/2156-2) schoon.
Indien voedselresten of gemorste vloeistoffen
achterblijven op de bodem of zijden van de
wanden, of tussen randen en oppervlakte van de
deur zullen deze microgolven absorberen en
kunnen deze tevens leiden tot vonkvorming.
Reinig alle resten met een vochtige doek.
U kunt gebruik maken van een keuken
schoonmaakmiddel indien de oven erg vuil is
geworden.
Gebruik geen aggressieve schoonmaakmiddelen
of schuurmiddelen.
SCHOONMAKEN VAN HET
SPATSCHERM
1. Houd de pallen van het spatscherm met beide
handen vast en trek deze naar beneden. Haal het
spatscherm dan uit de oven.
De tussenplaat kan ook gereinigd worden met een
heet zeepachtig sopje of in de vaatwasser.
3. De buitenkant van de magnetronoven moet
worden schoongemaakt met water en zeep en
vervolgens worden afgedroogd met een zachte
doek. Zorg ervoor, dat er geen water in de
ventilatie openingen aan de achterkant van het
toestel kan lopen-op deze wijze zou het toestel
beschadigd kunnen worden.
4. Het deurvenster moet worden afgewassen met
een zeer zachte water en zeepoplossing. Maak
altijd gebruik van een zachte doek. Maak nooit
gebruik van een ruiten schoonmaakmiddel. Het
venster kan krassen bij het gebruik van een
agressieve zeepsoort of schoonmaakmiddelen.
NederlandsNederlands
REINIGING VAN HET
LUCHTFILTER
Maak het luchtfilter zo af en toe schoon op basis van
de volgende aanwijzingen. Er zouden problemen
kunnen ontstaan indien het luchtfilter vol met stof
zit (*).
1. Verwijder het luchtfilter door de rechterschroef los
te draaien (naar links).
2. Reinig het spatscherm in zeepwater.
3. Let er goed op, het scherm weer in de oven te
plaatsen, voordat u deze weer in gebruik neemt.
WAARSCHUWING
Tijdens het gebruik van de oven moet het
spatscherm precies op zijn plaats zitten.
Koken op twee niveau’s
(NE-2146-2/2156-2)
1. Indien u 1 portie opwarmt, moet u deze altijd in het
midden van bodemplaat plaatsen.
2. Indien de oven hoofdzakelijk gebruikt wordt voor
het verwarmen van kleine portie’s, werwijder dan
de keramische tussenplaat.
3. Voor het verwarmen van 2 portie’s dient u deze
naast elkaar op de bodemplaat te zetten. Voor
grotere schalen kunt u ook gebruik maken van de
tussenplaat.
Schroef
Staander
2. Was het filter met zeepsop.
3. Let er goed op, het filter weer op zijn plaats te
zetten voordat u de oven weer in gebruik neemt.
(*) NOOT: Een vuil filter kan oververhitting van de
oven tot gevolg hebben.
4. Indien u meerdere portie’s wilt verwarmen, moeten
de portie’s evenredig over de twee platen verdeeld
worden.
5. Laat wat ruimte open tussen de portie’s, plaats niet
teveel voedsel tegelijk in de oven.
6. Indien de tussenplaat niet wordt gebruikt, dan dient
u deze uit de oven te halen en niet enkel de
bodemplaat te gebruiken.
- 51 -
Page 54

Kook-instructies
—Tabellen voor verwarmen en ontdooien—
De tijden aangegeven in de tabel zijn slechts richtlijnen. Vele factoren, zoals de begintemperatuur van het voedsel
zijn van invloed op de opwarm, of ontdooitijd. De tijden voor het verwarmen en ontdooien moeten, indien nodig,
worden aangepast. Alle tijden zijn gebaseerd op de volgende temperaturen;
gekoeld voedsel . . . . . . . . . ca. i5 graden.
bevroren voedsel . . . . . . . . ca. j18 graden.
Controleer altijd of de temperatuur binnen in het voedsel, in overeenstemming is, met de geldende wettelijke
hygiëne voorschriften.
Funktie
Ontdooien
Koken van
gekoeld,
ongekookt
voedsel
Koken en/of
opwarmen
van bevroren
voedsel
Voedsel
visfilet
gehakt
hele kip
samengestelde
maaltijd
meervoudige
portie
enkelvoudige
portie
appeltaart
taart
broodjes
roerei
broccoli
visfilet
spek
kip portie’s
erwten
gekookte rijst
gekookte worst
kippevleugels
kant en klaar
cheeseburger
chocolade cake
Gewicht
500 g
500 g
1,36 kg
1,36 kg
275 g
1 punt
1 punt
1 punt 50 g
2 eiereni
2 eetl. melk
500 g
500 g
2 lapjes
500 g
500 g
167 g
150 g
k7 stuks
75 g
1 portie
Mag-
netron
ver-
mogen
b
b
b
b
b
b
b
b
d
d
d
d
d
d
d
d
d
d
b
NE-2156-2
NE-2146-2
8 min
5 min
25 min
20 min
8 min
1 min 15 s
2 min
30 s
20–25 s
3 min
2 min 20 s
40 s
4 min
3 min 20 s
1 min 20 s
50 s
1 min 20 s
50 s
30 s
Tijd
NE-1846
8 min
5 min
25 min
20 min
8 min
1 min 15 s
2 min
30 s
25–30 s
3 min 30 s
2 min 45 s
50 s
4 min 45 s
4 min
1 min 40 s
1 min
1 min 40 s
1 min
30 s
NE-1656/1646
8 min
5 min
25 min
20 min
8 min
1 min 15 s
2 min
30 s
30–40 s
3 min 55 s
3 min
1 min
5 min 20 s
4 min 30 s
1 min 55 s
1 min 5 s
1 min 55 s
1 min 5 s
30 s
Opwarmen
van gekookt,
gekoeld
voedsel
Aanwijzingen: ≥Niet rechtstreeks op de bodemplaat van de oven koken, verwarmen of ontdooien. Gebruik
lasagna
chili
appeltaart
peper saus
gebakken
bonen
soep
hiervoor een geschikte schaal.
≥Indien er meervoudige portie’s ontdooit moeten worden, moet deze halverwege de ontdooitijd
omgedraaid, en in stukken gebroken worden. Zodoende wordt een betere werking van de
microgolven verkregen.
≥Bevroren voedsel met een hoge dichtheid, moet niet direct gekookt worden, omdat anders de
randen al gaar zijn voordat het binnenste gaar is.
≥Dek borden of schalen af teneinde uitdroging en spetteren te voorkomen.
≥Maak deksels los of prik gaatjes in de folie voordat u begint met koken of opwarmen.
≥Roer of schep het voedsel om halverwege de ontdooitijd om het voedsel gelijkmatig op te
warmen.
≥Laat het voedsel een tijdje staan voordat u de temperatuur controleert en/of aanbiedt voor
consumptie.
325 g
325 g
1 portie
100 ml
100 ml
125 ml
d
d
d
d
d
d
3 min 20 s
2 min 30 s
14 s
40 s
40 s
48 s
4 min
3 min
16 s
50 s
50 s
56 s
4 min 30 s
3 min 15 s
18 s
56 s
56 s
1 min 10 s
- 52 -
Page 55

- 53 -
Español
Importante: Instrucciones de seguridad
Instalación
Conexión a tierra
IMPORTANTE:
COMO MEDIDA DE SEGURIDAD,
ESTE APARATO HA DE SER DEBIDAMENTE
CONECTADO A TIERRA.
Si la base del enchufe no está conectada a tierra, es
obligación del cliente y de su responsibilidad
cambiarla por otra que reúna este requisito.
Advertencia relativa al voltaje
El voltaje utilizado ha de ser el mismo que se indique
en el Horno Microondas. El uso de un voltaje mayor
es peligroso y podría ser causa de incendio u otro tipo
de accidente.
Colocación del horno
El horno debe colocarse sobre una superficie llana y
estable; pero no debe estar en un lugar cálido o
húmedo (como, por ejemplo, junto a una cocina de
gas o eléctrica). No se hará funcionar el hor no cuando
la temperatura ambiente sea superior a 40˚C y/ó la
humedad mayor del 85%.
Es importante que el aire circule libremente alrededor
del horno.
Existe la posibilidad de que se produzcan pequeñas
interferencias con señales de emisión débiles, si el
Horno Microondas está demasiado cerca de un
aparato de radio o de un televisor.
Para un uso eficiente y seguro, el microondas deberá
tener suficiente espacio libre, tanto por delante y
detrás (5 cm.) como por la parte superior (20 cm.).
El microondas siempre deberá instalarse dejando
accesible el enchufe.
Precauciones
Saque la película protectora
Para evitar que se raye la parte exterior del horno
durante su transporte, éste lleva una película
protectora que deberá retirarse antes de instalar o
utilizar el aparato.
No conecte el horno cuando esté vacío
A fin de mantener la alta calidad de los tubos de
magnetrón, así como de los otros componentes, tenga
la precaución de no conectar el horno si no hay
alimentos en su interior.
No abra la caja del horno
Dentro del aparato hay alto votaje. Las reparaciones y
los ajustes sólo debe realizarlos personal de servicio
cualificado.
No tape las aberturas de ventilación
Este Horno Microondas necesita que el aire circule
libremente por su parte posterior, para la máxima
eficacia en su refrigeración. Durante el
funcionamiento, procure que las aberturas de
ventilación estén despejadas.
No ponga ropas a secar dentro del horno
No ponga ropas a secar dentro del Horno Microondas,
ya que podrían quemarse si se dejaran en él
demasiado tiempo.
Etiqueta De Precaucion Adjunta
Si la etiqueta de precaución está incluida en su horno,
está deberá estar pegada antes de usarlo. Por favor
seleccione una apropiada etiqueta preventiva y
peguela encima del aparato.
Este producto es un equipo que cumple con el standard EMC (EMC = Compatibilidad Electromagnética)
EN 55011.De acuerdo con este standard este producto es un equipo del gr upo 2 clase B y se encuentra
dentro de los límites exigidos.Gr upo 2 significa que la energía de radio frecuencia es generada en forma de
radiación electromagnética para calentar o cocinar alimentos.Clase B significa que este producto debe de ser
usado en áreas domésticas.
Page 56

- 54 -
Importante: Instrucciones de seguridad
Consejos
1. Los cierres de la puerta y áreas adyacentes
deben estar siempre limpios. Use un trapo
húmedo para ello.
2. Deben revisarse los cierres de la puerta y áreas
adyacentes por si han sufrido algún desperfecto.
En caso afirmativo, el aparato no debe utilizarse
hasta que lo haya reparado un operario de
servicio técnico autorizado por el fabricante.
3. Es peligroso para cualquier persona que no sea
un operario de servicio técnico autorizado por el
fabricante, efectuar la reparación.
4. Si los materiales colocados en el horno se
encendieran, mantenga las puertas del mismo
cerradas, pulse el botón de PARO, desconecte el
aparato y desenchúfelo de la base, si es posible.
O bien desconecte el interruptor
magnetotérmico.
5. Si el cable de la corriente está dañado, deberá
ser reemplazado por el fabricante o por un
servicio técnico autorizado para prevenir posibles
riesgos.
6. Previamente, el usuario debe comprobar que los
accesorios son apropiados para el uso correcto
de los hornos microondas.
7. Cuando caliente líquidos con MICROONDAS
(por ejemplo, sopas, salsas y bebidas), si se
dejan mucho tiempo pueden llegar a hervir sin
que se perciban burbujas, lo que podría dar
como resultado un repentino derrame de líquido
caliente. Para evitar esta posibilidad, deben
tomarse las siguientes precauciones:
a) Evitar el uso de envases de superficie lateral
recta con cuello estrecho.
b) No calentar en exceso.
c) Agitar el líquido antes de colocar el utensilio
en el horno y a mitad de cocción.
d) Una vez calentado, déjese en el horno unos
instantes y agítese una vez más, antes de
retirar con cuidado el utensilio.
8. Al calentar comida en recipientes de plástico ó
papel, no deje de vigilar el horno debido a la
posibilidad de ignición.
9. El contenido de los biberones y tarritos para
bebés deben ser agitados. La temperarura tiene
que verificarse antes de su consumo, para evitar
quemaduras.
10
.Líquidos u otras comidas no deben ser
calentados en recipientes precintados debido a
una posible explosión.
11
. No cocine huevos con cáscara ni huevos duros
enteros en el microondas.
12
. Cuando caliente líquidos en el microondas
puede producirse una ebullición retardada, con
lo cual tenga cuidado al sacar el recipiente.
13
.Permítase a los niños usar el horno sin
supervisión, sólo en el caso de haberles dado
instrucciones adecuadas para que el niño pueda
utilizar el horno conociendo los peligros y los
usos indebidos del mismo.
Page 57

- 55 -
Español
Modo de funcionamiento (NE-2146-2/NE-1846/NE-1646)
Esquema descriptivo (NE-2146-2/NE-1846/NE-1646)
(8)
(7)
(6)
(9)
(1)
(2)
(3) (4)
(5)
(10)
A
B
(1) Ventanilla indicadora digital (vea la
ampliación más abajo)
(2)
Ventanilla indicadora del nivel de
potencia
(3) Botón del selector de nivel de
potencia
(4) Botón del temporizador
(5) Botón de cocción
(6) Tirador de la puerta
(7) Tapa de acceso a la lámpara del
horno
(8) Filtro de aire
(9) Protección contra salpicaduras (parte
superior de la cavidad interior)
(10)Repisa Central (NE-2146-2)
A ––
Indicador de tiempo (minutos segundos)
B –– Indicador del nivel de potencia
:
ALTA
: MEDIA
: DESCONGELACIÓN
Información
Mandos
2
Pulse otro botón de selección de potencia que no sea el de máxima
potencia .
3
Seleccione el tiempo de cocción deseado.
☛ hasta 25 minutos para y , 30 minutos para
4
Presione el botón de cocción.
1
Abra la puerta y ponga la comida en el horno.
☛ Asegúrese de que en el display digital aparezca “0” y el indicador de nivel
de potencia .
or
• Cuando presione el botón de comienzo con la puer ta abier ta, aparecerá “0” en el display.
• Aun habiendo establecido el tiempo de cocción, puede cambiar el nivel de potencia.
• Si desea cambiar el tiempo de cocción durante la cocción, simplemente ajuste el dial al tiempo deseado.
Page 58

- 56 -
Este horno es preajustado en fábrica para lo siguiente:
◆ Funcionamiento manual
◆ Los sensores de números se preajustan a una potencia elevada en los indicados tiempos de calentamiento
para una única etapa de calentamiento.
1 = 10 segundos 2 = 20 segundos 3 = 30 segundos 4 = 40 segundos 5 = 50 segundos
6 = 1 minuto 7 = 1 minuto 15 segundos 8 = 1 minuto 30 segundos
9 = 1 minuto 45 segundos 0 = 2 minutos
◆ Desbloqueo de programas.
◆ Contador cíclico se ajusta a “0” en todos los sensores.
Si usted desea cualquier otra característica, por favor consulte el manual para encontrarla.
Esquema descriptivo (NE-2156-2/NE-1656)
(1) Ventanilla indicadora digital (vea la ampliación
más abajo)
(2)
Ventanilla indicadora del nivel de potencia
(3) Sensor de programa
(4) Tecla de cambio
(5) Sensor selector del nivel de potencia
(6) Tecla de cantidad doble
(7) Tecla de cantidad tr iple
(8) Sensores de memoria/números
(9) Sensor de parada/reposición
(10)Sensor de inicio
(11)Tapa de acceso a la lámpara del horno
(12)Tirador de la puerta
(13)Filtro de aire
(14)Protección contra salpicaduras (parte superior de
la cavidad interior)
(15)Repisa Central (NE-2156-2)
A . .Indicador de programa
B . .Indicador de tiempo (minutos/segundos)
C . .Indicador numérico del sensor de memoria
D . .Indicador de la primera etapa
E . .Indicador de la segunda etapa
F . .Ciclo de calentamiento en tres etapas
G . .Indicador del nivel de potencia
:
ALTA
: MEDIA
: DESCONGELACIÓN
A
1234567890
B
(13)
(11)
(12)
(14)
(15)
(8)
(1) (2)
(3)(4) (5) (6)(7)
(9)
(10)
x 2
x 3
PROG
231
AB
C
DE F
G
Page 59

- 57 -
Español
Modo de funcionamiento (NE-2156-2/NE-1656)
A. Función manual
◆Funcionamiento en una etapa
◆Funcionamiento en dos o tres etapas
B. Calentamiento programado
◆Modo Programa Unlock
Repita los pasos 2 y 3 anteriores antes de presionar el sensor de inicio .
Información
Mandos
2
Presione el selector de nivel de potencia una vez.
3
Selecccione el tiempo de cocción deseado.
☛ hasta 25 minutos para ó , 30 minutos para
2 0 0
4
Pulse el sensor de inicio.
1
Abra la puerta y ponga la comida en el horno.
☛ Asegúrese de que aparezca “0”.
• Cuando presione el sensor de inicio de puesta en marcha con la puerta abierta, aparecerá “0” en el display.
• Aunque haya seleccionado el tiempo de cocción, Vd. puede cambiar el nivel de potencia.
• Si desea cambiar el tiempo de cocción durante la cocción, simplemente ajuste el dial al tiempo deseado.
Ejemplo: para cocinar comida a alta potencia durante 2 minutos
Calentar en dos etapas:
Calentar en tres etapas:
primera etapa segunda etapa tercera etapa
Información
Mandos
2
Presione el sensor de memoria/número deseada.
3
Pulse el sensor de inicio.
1
Abra la puerta y ponga la comida en el horno.
☛ Asegúrese de que aparezca “0”.
Ej.
◆Modo Bloqueo de Programa
Para usar programas de la cara B,
pulse la tecla de cambio antes de pulsar el sensor de memoria/número deseada.
Para calentar doble (o triple) cantidad,
presione doble (o triple) cantidad antes de seleccionar el sensor de memoria/número deseada.
Información
Mandos
2
Presione el sensor de memoria/número deseada.
☛ La cocción empezará automáticamente.
1
Abra la puerta y ponga la comida en el horno.
☛ Asegúrese de que aparezca “0”.
Ej.
01
-
01
-
01
-
01
-
01
-
3
3
Page 60

- 58 -
Modo de funcionamiento (NE-2156-2/NE-1656)
C. Programación de sensores de memoria/número
◆Funcionamiento en una etapa
¡EL HORNO NO PUEDE SER PROGRAMADO CUANDO ESTÁ ACTIVADO EL BLOQUEO DE PROGRAMAS!
¡Tampoco deberá abrir la puerta durante la programación!
◆Funcionamiento en dos o tres etapas
Para programar el área de memoria B,
pulse la tecla de cambio antes de pulsar el sensor de memoria/número deseada.
Información
Mandos
2
Presione el sensor de programa.
3
Presione el sensor de memoria/número “5”.
5
4
Presione el selector de nivel de potencia tres veces.
1
Mantenga la puerta cerrada.
☛ Asegúrese de que la pantalla del display aparece en blanco.
Ejemplo: Para programar con potencia descongelación durante 1 minuto en el número de memoria “5”
6
Presione el sensor de programa.
5
Seleccione el tiempo de cocción.
0 01
Repita los pasos 4 y 5 anteriores antes de presionar el sensor de programa .
()
Primera etapa segunda etapa tercera etapa
D. Programación de cantidad doble o triple
Si desea usted cambiar a la tecla de cantidad triple,
en el paso 4 anterior pulse dicha tecla.
¡EL HORNO NO PUEDE SER PROGRAMADO CUANDO ESTÁ ACTIVADO EL BLOQUEO DE PROGRAMAS!
¡Tampoco deberá abrir la puerta durante la programación!
Información
Mandos
2
Presione el sensor de programa.
3
Presione el sensor de memoria/número “5”.
5
4
Presione la tecla de cantidad doble.
☛ Aparecerá en la pantalla el anterior número de aumentos.
1
Mantenga la puerta cerrada.
☛ Asegúrese de que la pantalla del display aparece en blanco.
Ejemplo: Para programar 1,5 veces el tiempo de recalentamiento para doble cantidad, en el sensor de Memoria “5”
6
Presione el sensor de programa.
5
Fije el aumento deseado pulsando las teclas de los números
correspondientes. (Mínimo 0,1 - Máximo 3,0)
1
5
5
01
-
01
-
01
-
x 2
Page 61

- 59 -
Español
Modo de funcionamiento (NE-2156-2/NE-1656)
E. Bloqueo de programas
◆Para activar el bloqueo del programa
En el “Bloqueo de programas”:
• El horno empieza a funcionar pulsando el sensor de memoria deseado.No es necesario pulsar el sensor de inicio.
• La cocción se interrumpirá, si abre la puerta durante la misma, cancelándose el tiempo restante de cocción.
• El horno no puede ser programado manualmente hasta que la característica de “Bloqueo de programas” sea
desactivada.
Información
Mandos
2
Presione el sensor de programa (más de 5 segundos) hasta que
“PROG”,“P” y “L” aparezcan.
1
Mantenga la puerta cerrada.
☛ Asegúrese de que la pantalla del display aparece en blanco.
F. Para seleccionar las opciones de tono “Bip”
El sonido “BIP” y la longitud del tono “BIP” puede ser establecido al final del ciclo de cocción.
El nivel más bajo y 3 beeps (ó bips) son preestablecidos en la fábrica.
◆Para seleccionar el nivel de compensación
◆Para seleccionar la duración del tono
En el “Desbloqueo de programas”:
• El horno vuelve al modo de operación por pulsación 2 (sensor numeral más el sensor de inicio).
• Las características de repetición e interrupción son operacionales.
• Los sensores de memoria/número pueden ser programados.
• El control de compensación de tono y el control de extensión son operacionales.
◆Para desactivar el panel de control
Información
Mandos
2
Mientras está pulsando el sensor de parada/reposición, presione el
sensor de programación hasta que “PROG” y “P”aparezcan en el
display (más de cinco segundos).
+
1
Abra la puerta y déjela abierta.
Información
Mandos
2
Presione el sensor de programa.
3
Seleccione el nivel del tono “BIP”, pulsando el sensor de memoria/número “0”.
☛ La posición se indica con un número seguido por la palabra “bEEP”;
“3bEEP” = máximo, “2bEEP”= medio, “1bEEP”= mínimo, “0bEEP”= silencio
0
4
Presione el sensor de programa.
1
Abra la puerta y déjela abierta.
5
Tres segundos después de pulsar el sensor de programación en el paso 4,
seleccione el nivel del tono “BIP”, presionando el sensor de memoria/número “0”.
☛ Se mostrará con el primer ó segundo botón del indicador de cocción.;
“1” = 3 “bips”, “2” = 60 segundos de “Bips”
0
6
Presione el sensor de programa.
Page 62

- 60 -
Modo de funcionamiento (NE-2156-2/NE-1656)
G. Lista de programas
Le permite revisar todos los números de sensores programados, tiempo de calentamiento y nivel de potencia de
cada etapa.
H. Contador cíclico
I. Filtro de aire
Para verificar el número total de horas de utilización,
◆ Abra la puerta y déjela abier ta.
◆ Pulse la tecla “3” al mismo tiempo que el sensor de inicio.
◆ El indicador señalará el número de horas de utilización y aparecerán en él las indicaciones “H” .
Nota:Si el horno no funcionase después de haber lo utilizado unas pocas veces, compruebe si el filtro de aire
está limpio antes de contactar con el Servicio Técnico.
Cuando la señal de “FILT”aparezca en el display,
saque el filtro de aire y límpielo con agua jabonosa. Presione el sensor de parada/reposición.
Ejemplo: Para programar la limpieza del filtro de aire cada 600 horas
Información
Mandos
2
Mientras presione el sensor de parada/reposición, presione el sensor
de inicio.
+
1
Abra la puerta y déjela abierta.
◆Para leer las veces que el horno ha sido utilizado en el modo manual
Información
Mandos
5
Mientras presiona el sensor de parada/reposición, seleccione el nivel
de potencia.
+
4
Abra la puerta y déjela abierta.
◆Para leer las veces que el sensor de memoria ha sido utilizado
◆
Para leer el total acumulado de veces que el horno ha sido utilizado
Información
Mandos
2
Mientras presione el sensor de parada/reposición, seleccione el sensor
de memoria/número deseado.
NOTA: Para leer las veces de cada sensor en la posición de programa B,
presione la tecla de cambio de programa (A/B) mientras el display está
mostrando las veces.
1
Abra la puerta y déjela abierta.
+
+
01
-
3
Cierre la puerta mientras el display está mostrando la veces que cada
sensor ha sido utilizado.
Información
Mandos
2
Mientas presione el sensor de inicio, cierre y abra la puer ta.
1
Abra la puerta y déjela abierta.
3
Pulse el sensor de memoria/número “3”.
3
4
Seleccione la hora deseada hasta un máximo de 9999 horas.
5
Presione el sensor de programa.
0 06
Page 63

- 61 -
Español
Instrucciones de instalación para apilar
Importante
1. Desconecte el cable de potencia del enchufe antes
de intentar la instalación.
2. Para ello debe utilizar la varilla de unión de
PANASONIC que se incluye con este aparato.
3. La combinación de aparatos para apilar está
limitada sólo en los siguientes modelos
NE-1057, NE-1457, NE-1257, NE-1757, NE-1247,
NE-1747, NE-1856, NE-1456, NE-1846, NE-1446,
NE-2156-2, NE-2146-2
4. Se pueden apilar dos aparatos como máximo.
Preparación
Asegúrese de que el interior del horno esté vac ío.
Instalación
1. Apile las unidades y retire 5 tornillos (a) tal y como se indica en la Fig.1.
2. Afloje el tornillo (b).
3. El saliente de la Placa de Unión debe mirar hacia fuera del horno.Coloque la Placa de Unión en el tornillo (b).
4. Ponga y apriete los 5 tornillos (a) y el tornillo (b).
Códigos de auto-comprobación
Este horno monitoriza su funcionamiento y cuando ocurre un problema muestra un código de fallo en la ventanilla
indicadora del display.
CÓDIGO
F01
F33-34
F05
F81-82
F86-87
F44
PROBLEMA
La temperatura del aire
expulsado es demasiado
alta
Circuito del termistor
defectuosa
Circuito integrado de
memoria defectuosa
Circuito de relé defectuoso
Circuito de relé defectuoso
Panel de control
defectuoso
GUÉ HAY QUE HACER
El horno se desconecta automáticamente. Desconecte el cable de potencia de la
toma de corriente. El horno hace “bips” contínuamente. El horno se repone para
funcionar cuando se enfríe. Mueva el horno hacia un lugar más frío.Si el
problema persiste llame a un Agente del Servicio Técnico.
El horno se desconecta automáticamente. Desconecte el cable de potencia de la
toma de corriente.
Si el problema persiste llame a un Agente del Servicio Técnico.
Si el problema persiste llame a un Agente del Servicio Técnico. El horno
funcionará incluso si aparece un código de fallo.Ocurrirá cuando se caliente La
memoria, Pulse la tecla de reposición (“Reset”). Es posible utilizar otros
programas de memoria y el calentamiento manual.
Si el problema persiste llame un Agente del Servicio Técnico. El horno
funcionará incluso si aparece un código de fallo.Pulse la tecla de reposición
(“Reset”) e inténtelo de nuevo.
El horno se desconecta automáticamente. Desconecte el cabie de potencia de la
toma de corriente.
Si el problema persiste llame a un Agente del Servicio Técnico.
El horno se desconecta automáticamente. Desconecte el cabie de potencia de la
toma de corriente. Si el problema persiste llame a un Agente del
Servicio Técnico.
Note: Los códigos mostrados arriba en el display no indican todos los fallos posibles del aparato.
(b)
Joint Plate
Projection
(a)
Fig. 1
Joint Plate
Projection
Fig. 2
Varilla
Unión
Varilla
Unión
Page 64

- 62 -
Cuidado de su horno microondas
1. Desenchufe el cable del aparato antes de limpiarlo.
2. Mantenga el interior del microondas (y la repisa
central en el modelo NE-2146-2/2156-2) limpia.
Si restos de comida o líquidos se adhieren a las
paredes del microondas, al cierre de la puerta o la
superficie de la puerta, pueden causar chispas.
Limpie el líquido con un trapo húmedo.
Detergente de cocina debe ser utilizado si el
microondas esta muy sucio.
No utilizar detergentes abrasivos.
Limpieza del protector contra
salpicaduras
1. Sujete los retenes laterales del protector contra
salpicaduras con las dos manos y tire de ellos
hacia dentro y hacia abajo.Sáquelo del interior del
horno.
2. Aclárelo con aqua jabonosa.
3. Asegúrese de situar la bandeja dentro del horno
antes de utilizarlo.
PRECAUCIÓN
Esta bandeja debe estar situada adecuadamente
dentro del horno para poder poner en
funcionamiento el aparato.
Limpieza del filtro de aire
Limpie el filtro del aire ocasionalmente de acuerdo con
las siguientes instrucciones.
El horno causará problemas de funcionamiento
cuando el filtro del aire empiece a atascarse de polvo.*
1. Saque el filtro de aire del “borde” frontal inferior
aflojando el tornillo derecho.
tornillo
Montante
2. Limpie este filtro con agua y jabón.
3. Asegúrese de situar el filtro del aire antes de
utilizar el horno.
* Si el filtro de aire se obstruye a causa de la
acumulación de polvo o grasa, originará un problema
de sobrecalentamiento del horno.
La repisa central del microondas puede ser
limpiada en agua caliente o en el lavaplatos.
3. La superficie exterior de este horno microondas
debe de ser limpiada con agua y jabón y luego
secada con un trapo suave.Asegúrese de que el
agua no penetra dentro de la ventilación trasera
pues esto dañaría la unidad.
4. La ventanilla de la puerta debe ser limpiada con
agua y jabón. Pásele luego un trapo suave para
secar.Nunca utilice limpiacr istales.
1. En la cocción de un solo elemento, coloque
siempre el recipiente en el centro del estante del
microondas.
2. Al usar el microondas principalmente para
recalentar un solo elemento en un determinado
tiempo, extraiga el estante del microondas ó sitúe
el recipiente sobre el plato de cristal del
microondas.
3. Al calentar dos elementos a la vez, sitúe los dos
platos en la base del estante, uno al lado del otro, a
menos que los recipientes sean demasiado
grandes (en ese caso, coloque cada uno de los
recipientes en estantes distintos.)
4. Cuando cocine más de dos platos, sitúe los platos
equitativamente en los dos entantes.
5. Deje algún espacio entre los platos y no
sobrecargue con demasiada comida el horno.
6. Si la repisa central no se utiliza debe ser
almacenada fuera del microondas, no debe
almacenarse en la repisa inferior del microondas.
Cocción en 2 Etapas
(NE-2146-2/2156-2)
Page 65

- 63 -
Español
Guía de cocción/Descongelación
Los tiempos que se dan en la tabla que sigue son sólo como orientación.Hay muchos factores - como, por ejemplo, la
temperatura de los alimentos en el momento de la puesta en marcha - que pueden afectar al tiempo final de
calentamiento necesario.Los tiempos de cocción y descongelación deben ajustarse cuando sea necesario.
Todos los tiempos se han probado con las siguientes temperaturas de los alimentos en el momento de la puesta en marcha:
Alimentos fríos . . . . . . . . . . .Aprox.+5°, aproximadamente
Alimentos congelados . . . . .Aprox. -18°, aproximadamente
Para verificar la correcta temperatura en el interior de los alimentos, utilice siempre un termómetro sonda, de acuerdo con las
normas de higiene en la alimentación vigentes.
Función
Alimento
Peso
Poten
cia
Tiempo
NE-2156-2
NE-1846 NE-1656/1646
NE-2146-2
Descongelación
Filetes de pescado
Carne picada de buey
Pollo entero
Plato combinado
Varias porciones
Una sola porción
Tarta de manzanas
Pastel
Panecillos
500 g
500 g
1,36 kg
1,36 kg
275 g
1 porcion
1 porcion
1 porcion 50 g
8 min 8 min 8 min
5 min 5 min 5 min
25 min 25 min 25 min
20 min 20 min 20 min
8 min 8 min 8 min
1 min 15 s 1 min 15 s 1 min 15 s
2 min 2 min 2 min
30 s 30 s 30 s
Cocción de
alimentos
crudos fríos
Huevos revueltos
Brócoli
Filetes de pescado
Bacon
Porciones de pollo
2 huevos + 2
cucharadas de leche
500 g
500 g
2 lonchas
500 g
20–25 s 25–30 s 30–40s
3 min 3 min 30 s 3 min 55 s
2 min 20 s 2 min 45 s 3 min
40 s 50 s 1 min
4 min 4 min 45 s 5 min 20 s
Cocción y/ó
recalentamiento
de alimentos
congelados
Guisantes
Arroz cocido
Salchichas cocidas
Hamburguesas
con queso
cocidas
Pastel de chocolate
500 g
167 g
x 3 (50 g cada una)
75 g
1 porción
3 min 20 s 4 min 4 min 30 s
1 min 20 s 1 min 40 s 1 min 55 s
50 s 1 min 1 min 5 s
50 s 1 min 1 min 5 s
30 s 30 s 30 s
Reheating from
Cooked Chilled
Lasaña
Chili
Tarta de manzanas
Salsa de pimienta
Judías en salsa de
tomate
Sopa
325 g
325 g
1 porción
100 ml
100 ml
125 ml
3 min 20 s 4 min 4 min 30 s
2 min 30 s 3 min 3 min 15 s
14 s 16 s 18 s
40 s 50 s 56 s
40 s 50 s 56 s
48 s 56 s 1 min 10 s
CONSEJOS•No cocine/recaliente/descongele directamente sobre la base del horno, use un recipiente adecuado.
•
Cuando descongele multiporciones de comida, vuelque y sepárela, hacia la mitad del tiempo de
descongelación, a fin de obtener una mejor penetración de la energía del microondas.
•
Comida sólida/densa no deberá ser cocinada estando congelada, pues deberá ser sobrecocinada
por los bordes cuando el centro haya alcanzado la temperatura requerida.
•
Cubra los platos, por donde sea apropiado, durante la cocción/recalentamiento. Esto retendrá la
humedad y evitará posibles salpicaduras y ver tidos.
•
Extraiga las tapas o plástico de envolver antes de cocinar/recalentar comidas cubier tas.
•
Agítese la comida hacia la mitad del tiempo de cocción/descongelación a fin de distribuir la cocción
equitativamente.
•
Espere un cierto tiempo, antes de comprobar la temperatura de la comida y/ó ofrecerla para su consumo.
Page 66

Istruzioni di Sicurezza
Installazione
Messa a terra
IMPORTANTE: PER GARANTIRE LA VOSTRA
SICUREZZA, QUESTO APPARECCHIO NECESSITA
DI UNA CORRETTA MESSA A TERRA.
Quando la presa di corrente a muro non ha la messa
a terra, è obbligo e responsabilità dell’acquirente
provvedere alla sostituzione con una che sia provvista
di messa a terra.
Avvertenze su voltaggio e potenza
Il voltaggio usato deve essere quello specificato sul
forno a microonde. L’uso di un voltaggio superiore a
quello specificato è pericoloso e può causare incendi
o altri incidenti.
Sistemazione del forno
Sistemate il forno su una superficie stabile e piana. Non
collocate il forno in luoghi caldi o umidi, ad esempio
vicino a sorgenti elettriche o di gas. Non fate funzionare
il forno quando la temperatura dell’ambiente è superiore
ai 40 gradi C. e/o il tasso di umidità è superiore all’85%.
È importante mantenere attorno al forno un giusto
ricambio di aria.
Se il forno a microonde è troppo vicino ad apparecchi
tipo radio o televisore, si possono verificare delle
interferenze. Al fine di garantire la massima efficienza e
sicurezza, è necessario mantenere una buona areazione
esterna al forno, distanziandolo da altre superfici
lateralmente e posteriormente di 5 cm, nella parte
superiore di 20 cm.
Il microonde deve essere posizionato in prossimita di
una presa elettrica facilmente accessibile.
Precauzioni
Rimozione della pellicola protettiva.
Una pellicola protettiva è avvolta attorno al forno per
evitare che venga graffiato durante il trasporto.
Levatela completamente prima di procedere all’
installazione e all’uso.
Non accendete il forno quando è vuoto.
Per mantenere inalterata l’alta qualità del magnetron
e di altri componenti, vi preghiamo di non accendere il
forno senza cibo all’interno.
Non aprite l’apparecchio.
All’interno dell’unità sono presenti alti voltaggi, per
questo motivo ogni tipo di manutenzione deve essere
effettuata da personale qualificato.
Non bloccate le feritoie.
Per la massima efficienza del sistema di raffreddamento,
questo forno a microonde richiede un continuo flusso
d’aria sul retro; è necessario quindi non ostruire le prese
d’aria quando il forno è in funzione.
Non asciugate vestiti nel forno.
Non asciugate vestiti nel forno per evitare che questi
prendano fuoco se lasciati nel forno troppo a lungo.
Non usate il forno senza la parte superiore.
Quando rimuovete la parte interna superiore per pulirla,
risistematela prima di far funzionare il forno, altrimenti
rischiate di danneggiare il sistema di ventilazione.
Attaccare l’etichetta con le avvertenze
Prima di usare l’apparecchio, bisogna attaccare allo
stesso l’etichetta con le avvertenze. Scegliere tra
quelle fornite, l’etichetta adatta, ed attaccarla sulla
parte superiore dell’apparecchio.
Questo prodotto è conforme agli attuali standard Europei per la Compatibilità Elettromagnetica, in
ottemperanza alle norme EN 55011. Secondo gli standard menzionati questo prodotto rientra nel gruppo 2,
classe B, all’interno dei limiti richiesti. Gruppo 2; significa che la radio frequenza è generata sotto forma di
emissione elettromagnetica adatta allo scopo di riscaldare o cuocere i cibi. Classe B: significa che questo
prodotto può essere utilizzato nel normale ambito casalingo.
- 64 -
Page 67

Avvertenze
Istruzioni di Sicurezza
1. Le guarnizioni del portello e le zone circostanti
devono essere pulite con un panno morbido.
Se le guarnizioni del portello e le zone circostanti
2.
vengono danneggiate, non bisogna mettere in funzione
il forno fino a quando un tecnico autorizzato lo ripari.
3. Le eventuali riparazioni devono essere eseguite
dal servizio di assistenza tecnica autorizzato dal
produttore. È pericoloso tentare di riparare il
forno per qualsiasi persona che non sia un
tecnico istruito dalla casa produttrice.
4. Se notate la presenza di fumo durante la cottura
a microonde, tenete il portello chiuso e spegnete
il forno dall’interruttore o estraendo la spina dalla
presa. Contattate immediatamente un Centro di
Assistenza autorizzato.
5. Nel caso in cui il cavo di alimentazione sia
danneggiato, dev’essere sostituito per motivi di
sicurezza dal fabbricante, dal centro di
assistenza autorizzato o da personale qualificato
ad effettuare tale operazione.
6.
Prima di usare il forno, accertarsi che gli utensili e i
recipienti siano adatti per la cottura a microonde.
7.
Il riscaldamento dei liquidi (zuppe, salse e bevande)
nel forno a microonde, può arrivare fino al punto di
ebollizione senza evidenza di bolle in superficie ma
con la formazione di grumi. Per prevenire questa
possibilità basta prendere le seguenti precauzioni:
a) Evitare l’uso di contenitori con pareti alte ed
a collo stretto.
b) Non surriscaldate.
c) Mescolate i liquidi nei loro contenitori prima e
durante il riscaldamento.
d) Dopo averli riscaldati, lasciateli riposare nel
forno per qualche minuto, e mescolate con
cura prima di rimuoverli dal contenitore.
8. Seguite attentamente la cottura di cibi i cui
contenitori sono in carta, plastica o qualsiasi altro
materiale combustibile.
Non usate utensili in carta riciclata (che potrebbe
contenere impurità e causare scintille o fuoco) a
meno che non sia espressamente indicata per
l’uso nei forni a microonde.
Controllate bene che ogni contenitore usato sia
adatto per il forno a microonde.
Non mettete nel forno contenitori sottovuoto in
quanto potrebbero esplodere.
9.
Mescolate accuratamente le pappe per bambini o il
contenuto dei biberon a fine programma, per evitare
che scottino troppo controllare sempre la
temperatura prima che l’alimento venga consumato.
10. Liquidi o altri cibi non devono essere riscaldati in
contenitori sigillati che potrebbero esplodere.
11.
Le uova nel loro guscio possono esplodere, meglio
non cuocerle ne riscaldarle con le microonde.
12.
Sistemate il forno in modo che la parte superiore sia
ad almeno 20 cm. da un eventuale soffitto o mensola.
13. Non permettere che i bambini usino il forno da
soli, senza la supervisione di un adulto. Fatelo
solo nel caso in cui al bambino siano state date
istruzioni adeguate a metterlo in grado di usare il
forno in modo sicuro e di capire il pericolo che
può derivare da un uso improprio.
Italiano
- 65 -
Page 68

Schema illustrativo (parte esterna)
(NE-2146-2/NE-1846/NE-1646)
(1)
(2)
(7)
(6)
(3) (4)
(5)
(9)
(10)
(1) Display digitale (vedi particolare)
(2) Display con indicazione del livello di
intensità
(3) Timer
(4) Selettore di potenza
(5) Pulsante di inizio
(6) Maniglia portello
(7) Copertura luce forno
(8) Filtro aria
(9) Protezione antischizzi
(sul cielo del vano del forno)
(10) Ripiano medio (NE-2146-2 solo)
A
(8)
A—Display dei tempi di cottura
(min. e sec.)
B—Indicatore livello intensità
d: ALTA
a: MEDIA
b: SCONGELAMENTO
Come usare il forno (NE-2146-2/NE-1846/NE-1646)
B
Tasto
1
2
o
3
4
≥Quando premete il pulsante di inizio con la porta aperta, “0” apparirà sul display in ogni caso.
≥Anche dopo aver stabilito il tempo di cottura, potrete ancora cambiare il livello di potenza.
≥Se desiderate cambiare il tempo di cottura durante la stessa, variate semplicemente con il timer i minuti/
secondi desiderati.
Aprite la porta e mettete il cibo all’interno.
☛ Assicuratevi che appaia nel display “0” e l’indicatore di livello di potenza
d.
Premete il Selettore di potenza desiderata, se diverso da d (ALTA).
Selezionate il tempo di cottura.
☛ Fino a 25 minuti a d o a, oppure 30 minuti a b
Premete il pulsante di inizio.
Istruzione
- 66 -
Page 69

Schema illustrativo (parte esterna) (NE-2156-2/NE-1656)
(1) (2)
(3)(4) (5) (6)(7)
x
A
B
x
(11)
(12)
(8)
2
1234567890
3
(13)
(9)
(14)
(15)
(10)
(1) Display digitale (vedi particolare)
(2) Display con indicazione del livello di intensità
(3) Tasto programma (g)
(4) Tasto cambio (j)
(5) Tasto selettore livello intensità (c)
(6) Tasto per porzioni doppie
(7) Tasto per porzioni triple
AB
PROG
C
231
DE F
Questo forno è predisposto dalla casa costruttrice per le seguenti funzioni:
√ Operazione manuale
√ Tasti numeri/memoria preselezionati per alta intensità sui tempi di cottura indicati, per cottura a 1 stadio.
1l10 sec. 2l20 sec. 3l30 sec. 4l40 sec. 5l50 sec.
6l1 min. 7l1 min. 15 sec. 8l1 min. 30 sec. 9l1 min. 45 sec. 0l2 min.
(Ci sono due livelli di memorie, A e B. Solo il livello A è preselezionato.)
√ Sblocco programma
√ Contatore predisposto su “0” per tutti i tasti funzione.
Se volete cambiare questi tempi preselezionati, consultate il manuale delle istruzioni per variare le funzioni già
predisposte.
G
(8) Tasti numeri/memoria
(9) Tasto stop/reset (e)
(10) Tasto start (f)
(11) Copertura luce forno
(12) Maniglia portello
(13) Filtro aria
(14) Protezione antischizzi
(sul cielo del vano del forno)
(15) Ripiano medio (NE-2156-2 solo)
A . . Display programmi
B . . Display dei tempi di cottura (min. e sec.)
C . .Display numeri dei tasti di memoria
D . .Indicatore del 1o stadio di cottura
E . . Indicatore del 2o stadio di cottura
F . . Indicatore del 3o stadio di cottura
G . .Indicatore livello intensità
d: ALTA
a: MEDIA
b: SCONGELAMENTO
Italiano
- 67 -
Page 70

Come usare il forno (NE-2156-2/NE-1656)
A. Riscaldamento manuale
√
Riscaldamento a 1 stadio
Esempio: Per cuocere il cibo ad alta potenza per 2 minuti
Tasto Istruzione
1
2
Aprite la porta e mettete il cibo all’interno.
☛ Assicuratevi che “0” appaia nel display.
Premete il tasto Selettore di Potenza 1 volta.
3
2 0 0
4
≥Quando premete il tasto Start con la porta aperta, “0” apparirà nel display in qualsiasi caso.
≥Anche dopo aver fissato il tempo di cottura, potete cambiare il livello di potenza.
≥Se desiderate cambiare il tempo di cottura durante la stessa, cambiate semplicemente il timer per il tempo
desiderato (minuti/secondi).
√
Riscaldamento a 2 o 3 stadi
Ripetete i passi 2 e 3 prima di premere il tasto Start f.
Cottura a 2 stadi:
01
-
Cottura a 3 stadi:
01
-
Primo stadio Secondo stadio Terzo stadio
Inserite il tempo di cottura.
☛ Fino a 25 minuti a d o a, oppure 30 minuti a b
Premete il tasto Start.
01
-
01
-
01
-
B. Riscaldamento programmato
√
Inserimento programma in modo sbloccato
Tasto
1
Aprite la porta e mettete il cibo all’interno.
☛ Assicuratevi che “0” appaia nel display.
Istruzione
2
Es.
3
3
√
Inserimento programma in modo bloccato
Tasto
1
2
Per selezionare il numero nel settore memorie B,
premete il tasto Cambio j prima del tasto Numero/Memoria desiderato.
Per quantità doppia (o tripla) di cottura,
premete il tasto Quantità due o tre volte prima di premere il tasto di Numero/Memoria prescelto.
Es.
3
Premete il tasto Numero/Memoria desiderato.
Premete il tasto Start.
Istruzione
Aprite la porta e mettete il cibo all’interno.
☛ Assicuratevi che “0” appaia nel display.
Premete il tasto Numero/Memoria desiderato.
☛ La cottura parte immediatamente.
- 68 -
Page 71

Come usare il forno (NE-2156-2/NE-1656)
C. Tasti di programmazione NUMERO/MEMORIA
√
Riscaldamento a 1 stadio
IL FORNO NON PUÒ ESSERE PROGRAMMATO FINCHÈ IL BLOCCO PROGRAMMA È ATTIVATO!
NON APRITE IL FORNO MENTRE STATE PROGRAMMANDO!
Esempio: Programmare la cottura a livello Scongelamento per 1 minuto nel tasto Numero/Memoria “5”
Tasto Istruzione
1
2
3
5
4
5
0 01
6
√
Riscaldamento a 2 o 3 stadi
Ripetete i punti 4 e 5 su riportati prima di premere il tasto Programma g.
5
Primo stadio Secondo stadio Terzo stadio
Per programmare il settore memorie B,
premete il tasto Cambio j prima di selezionare il tasto Numero/Memoria desiderato.
Tenete la porta chiusa.
☛ Assicuratevi che il display sia spento.
Premete il tasto Programma.
Premete il tasto Numero/Memoria “5”.
Premete il selettore Livello di potenza 3 volte.
Inserite il tempo di cottura.
Premete il tasto Programma.
01
-
01
-
01
-
D. Tasto di programmazione per quantità doppie o triple
IL FORNO NON PUÒ ESSERE PROGRAMMATO FINCHÈ IL BLOCCO PROGRAMMA È ATTIVATO!
NON APRITE IL FORNO MENTRE STATE PROGRAMMANDO!
Esempio: Per programmare 1,5 volte il tempo di cottura per quantità doppia nel tasto Numero/Memoria
“5”
Italiano
Tasto Istruzione
1
2
3
4
5
x
2
5
5
1
6
Per quantità triple,
ripetete come sopra, premendo il tasto Quantità tripla invece di premere il tasto Quantità doppia come al
punto 4.
Tenete la porta chiusa.
☛ Assicuratevi che il display sia spento.
Premete il tasto Programma.
Premete il tasto Numero/Memoria “5”.
Premete il tasto doppia quantità.
Impostate un numero moltiplicatore (minimo 0,1–massimo 3,0) quantità di
cottura
Nota: 1,6 volte impostato in fabbrica.
Premete il tasto Programma.
- 69 -
Page 72

Come usare il forno (NE-2156-2/NE-1656)
+
E. Blocco programma
√
Per attivare la funzione di Blocco programma
Tasto Istruzione
1
2
In “Blocco programma”:
≥Il forno è messo in funzione premendo il tasto Numero/Memoria desiderato; non è necessario premere il tasto
Start f.
≥“L’interruzione programma” è disattivata. Aprendo il portello si cancella il tempo rimanente del programma.
≥Il forno non può essere programmato fino a che il “Blocco programma” è in funzione.
√
Per togliere la funzione Blocco programma
Tasto Istruzione
1
2
In “Sblocco programma”:
≥Il forno ritorna al funzionamento manuale in due riprese (tasto Numero/Memoria più tasto Start f).
≥Sono operative le funzioni di “Ripetizione” ed “Interruzione”.
≥Le memorie possono essere programmate.
≥Sono operative le funzioni di controllo dell’intensità del volume e della durata del segnale sonoro.
F. Segnale sonoro
Il volume del segnale sonoro e la lunghezza dello stesso può essere stabilito alla fine di ogni ciclo di cottura.
Il livello più alto e 3 segnali sono stabiliti in fabbrica.
Tenete la porta chiusa.
☛ Assicuratevi che il display sia spento.
Premete il tasto Program finché non apparirà “PROG”, “P” e “L” (per
più di 5 secondi).
Aprite la porta del forno e lasciatela aperta.
Mentre premete il tasto Stop/Reset, premete il tasto Programma finché
non apparirà “PROG” e “P” (per più di 5 secondi).
Tasto Istruzione
1
2
√√
√
Per scegliere il livello del volume
√√
3
0
4
√
Per scegliere la lunghezza del segnale
5
0
6
Aprite la porta del forno e lasciatela aperta.
Premete il tasto Programma.
Selezionate il livello di volume premendo il tasto Numero/Memoria “0”.
☛ Il livello indicato da un numero seguito dalla parola “Beep”;
“3bEEP”lAlto, “2bEEP”lMedio, “1bEEP”lBasso, “0bEEP”lSilenzio
Premete il tasto Programma.
Entro 3 secondi dopo aver premuto il tasto Programma al punto 4,
selezionate Livello Volume premendo il tasto Numero/Memoria “0”.
☛ La lunghezza indicata dall’indicatore di stadio di cottura 1 o 2
“1”l3 segnali, “2”lsegnali brevi per 60 secondi
Premete il tasto Programma.
- 70 -
Page 73

Come usare il forno (NE-2156-2/NE-1656)
+
+
+
G. Lista dei programmi
Tutte le informazioni attualmente programmate (il programma inserito in ciascun tasto Numero/Memoria (area
A/B), livello sonoro e Blocco Programma) appariranno di continuo.
Tasto Istruzione
1
2
H. Contatore
√
Come leggere i tempi di uso di ciascun tasto memoria
Tasto Istruzione
Aprite la porta del forno e lasciatela aperta.
Mentre premete il tasto Stop/Reset, premete il tasto Start.
1
2
01
-
√
Per leggere il totale cumulativo di quante volte il forno è stato usato
3
√
Come leggere quante volte il forno stato è usato in modo manuale
Tasto Istruzione
4
5
Aprite la porta del forno e lasciatela aperta.
Mentre premete il tasto Stop/Reset, premete il tasto Numero/Memoria desiderato.
Nota: Per leggere quante volte per ciascun tasto sul lato B, premete il tasto
Cambio j mentre il display sta ancora indicando i cicli di uso.
Chiudete la porta mentre il display sta ancora indicando quante volte
ciascun tasto è stato usato.
Aprite la porta del forno e lasciatela aperta.
Mentre premete il tasto Stop/Reset, premete il tasto selettore Livello di
Potenza.
I. Filtro aria
Esempio: Per programmare la pulizia del filtro ogni 600 ore
Tasto Istruzione
1
2
Aprite la porta del forno e lasciatela aperta.
Mentre premete il tasto Start, chiudere e aprire la porta.
Italiano
3
Premete il tasto Numero/Memoria “3”.
3
4
Inserite le ore desiderate fino a 9999 ore.
0 06
5
Quando il tasto “FILT” apparirà sul display, rimuovete il filtro dell’aria e pulitelo con acqua leggermente insaponata.
Premete il tasto Stop/Reset per azzerare il display.
Per controllare il numero totale delle ore d’uso del forno:
√ Aprite il portello e lasciatelo aperto.
√ Premete contemporaneamente il tasto Start f e il tasto Numero/Memoria “3”.
√ Sul display apparirà il numero di ore d’uso del forno e “H”.
Nota: Se il forno si interrompe dopo un breve tempo, controllate se il filtro Aria pulito, prima di chiamare un tecnico.
Premete il tasto Programma.
- 71 -
Page 74

Istruzioni per l’installazione di apparecchi sovrapposti
Importante
1. Staccare la spina dalla presa prima di iniziare
l’installazione.
2. Per sovrapporre gli apparecchi, usare la “piastra di
giunzione” PANASONIC in dotazione al forno.
3. La possibilità di sovrapporre gli apparecchi esiste
soltanto fra i modelli PANASONIC:
NE-1057, NE-1457, NE-1247, NE-1747, NE-1047,
NE-1447, NE-1257, NE-1757, NE-1442, NE-1856,
NE-1456, NE-1846, NE-1446, NE-2156-2,
NE-2146-2
4. Il numero massimo di apparecchi sovrapponibili è
2.
Preparazione
Assicuratevi che il forno sia vuoto.
Installazione
1. Sistemate i due forni uno sull’altro e rimuovete le 5 viti (a) come in Fig. 1.
2. Svitate le viti (b).
3. Applicate la lastra di congiunzione (rivolta verso l’esterno) sulle viti (b).
4. Risistemate le viti A e B ed avvitatele—vedi fig. 2
5. Assicuratevi che il forno superiore sia in posizione sicura ed ad un’altezza adatta al lavoro.
(b)
Piastra di
giunzione
Foro di
allineamento
Piastra di
giunzione
Foro di
allineamento
(a)
Figura 1 Figura 2
Codice guasti per autodiagnosi
Questo forno controlla costantemente le sue operazioni. In caso di guasto il display indicherà un codice guasti.
Codice
F01
F33–34
F05
F81–82
F86–87
F44
Temperatura dell’aria di
scarico troppo alta
Circuito termico guasto
Circuito Memoria guasto
Circuito Relay guasto
Circuito Relay guasto
Pannello di Controllo
guasto
Problema
Cosa fare
Il forno si ferma automaticamente. Togliere la spina dalla presa. Il forno
emette continuamente segnali sonori. Il forno sceglie nuovamente le
funzioni quando è freddo. Spostare il forno in un luogo più fresco. Se il
problema persiste, chiamare l’assistenza tecnica.
Il forno si ferma automaticamente. Se il problema persiste, chiamare
l’assistenza tecnica.
Se il problema persiste, chiamare l’assistenza tecnica. Il forno funziona
anche se appare il codice guasti, ma non come programmato.
Riscaldamento del circuito memoria. Premete il tasto Stop/Reset.
Se il problema persiste, chiamare l’assistenza tecnica. Il forno funziona
anche se appare il codice guasti, ma non come programmato. Premete
il tasto Reset e riprovate.
Il forno si ferma automaticamente. Se il problema persiste, chiamare
l’assistenza tecnica.
Il forno si ferma automaticamente. Se il problema persiste, chiamare
l’assistenza tecnica.
N.B.: I suddetti codici che appaiono sul display non indicano tutti i guasti possibili del forno.
- 72 -
Page 75

Manutenzione del vostro forno a microonde
1. Prima di pulire il forno, assicuratevi che sia spento
e la presa sia staccata.
2. Tenere l’interno del forno pulito (e il ripiano medio
NE-2146-2/2156-2 solo).
Se dei pezzi di cibo o liquidi rimangono attaccati
alle pareti del forno o tra la guarnizione e la
chiusura della porta, potrebbero assorbire le
microonde e creare archi voltaici o scintille. Pulire
accuratamente con un panno umido.
Se il forno è molto sporco, potete utilizzare
detersivi per la cucina.
Non utilizzate detersivi aggressivi o abrasivi.
Il ripiano medio può essere lavato con acqua calda
e sapone o in lavastoviglie.
Pulizia della protezione
antischizzi
1. Tirare con entrambe le mani i fermi della
protezione antischizzi. Estraetela dal forno.
3. L’esterno del forno deve essere pulito con acqua
tiepida e sapone quindi risciacquato ed asciugato
con un panno morbido. Assicuratevi che non vi
siano infiltrazioni d’acqua attraverso le aperture
per la ventilazione, ciò per evitare danni alle parti
operative del forno.
4. Il vetro del portello deve essere lavato con acqua e
sapone. Usate un panno molto soffice. Non usate
mai detergenti per i vetri. Il portello del forno può
rigarsi con l’uso di detergenti troppo concentrati.
Pulizia del filtro dell’aria
Ogni tanto pulite il filtro dell’aria secondo le seguenti
istruzioni. Il forno può avere degli inconvenienti se il
filtro dell’aria si ostruisce per la polvere (*).
1. Rimuovete il Filtro dell’Aria dalla fascia anteriore
sul fondo del forno girando verso sinistra il fermo
posto sul lato destro.
2. Lavare la protezione con acqua saponata.
3. Assicuratevi che la protezione sia nuovamente al
suo posto prima di mettere in funzione il forno.
ATTENZIONE
La protezione antischizzi deve essere
posizionata esattamente quando il forno viene
usato.
Cottura a due livelli
(NE-2146-2/2156-2 solo)
1. Quando riscaldate un piatto singolo, ponetelo
sempre al centro del piano inferiore del forno.
2. Quando usate il forno principalmente per
riscaldare un piatto alla volta, rimuovete il ripiano e
lavorate sul piano inferiore.
3. Quando riscaldate 2 piatti alla volta, ponete
entrambe sul piano inferiore affiancati:
se dovessero essere troppo larghi poneteli in
centro su ciascun piano.
Italiano
Avvitare
Supporto
2. Lavare il filtro con acqua saponata.
3. Assicuratevi di aver rimesso a posto il filtro prima
dell’uso del forno.
(*) Se il filtro dell’aria inizia ad intasarsi di sporcizia,
ciò causerà un problema di surriscaldamento del
forno.
4. Quando cuocete più di 2 piatti, disponeteli
equamente sui 2 ripiani.
5. Lasciate un po’ di spazio tra i piatti, non mettete
troppo cibo nel forno.
6. Quando non utilizzate il ripiano medio, dovete
riporlo fuori dal forno e non deve essere messo sul
ripiano base.
- 73 -
Page 76

—Guida per Cottura/Scongelamento—
I tempi dati nello schema sotto riportato sono solo indicativi. Molti fattori (come ad es. la temperatura iniziale del
cibo) possono influenzare i tempi di riscaldamento. I tempi di cottura e riscaldamento devono essere adattati e
modificati a seconda delle necessità.
Tutti i tempi indicati sono stati ottenuti utilizzando alimenti alla seguente temperatura iniziale;
Cibi a temperatura di frigorifero (refrigerati) . . . . Approssimativamente i5oC
E’ consigliabile controllare sempre con un termometro per cibi l’esatta temperatura raggiunta dalla parte centrale
per osservare le norme riguardanti l’igienicità degli alimenti.
Cibi congelati . . . . . . . . . . . . . . . . . . . . . . . . . . . . Approssimativamente j18oC
Funzione
Scongelamento
Cottura di
cibi crudi
refrigerati
Cottura e/o
riscaldamento
di cibi
congelati
Riscaldamento
di cibi cotti
refrigerati
Cibi
Filetti di pesce
Carne trita
(manzo)
Pollo intero
Piatto composto
porzione multipla
porzione singola
Torta di mele
Gateau
Panini
Uova strapazzate
Broccoli
Filetti di pesce
Pancetta affumicata
(bacon)
Porzioni di pollo
Piselli
Riso cotto
Salsicce
Ali di pollo con
salsa barbecue
(cotte)
Hamburger al
formaggio
(cotto)
Torta al cioccolato
Lasagne
Chili
Torta di mele
Salsa al pepe
Fagioli stufati
Minestre
Peso
500 g
500 g
1,36 kg
1,36 kg
275 g
1 porzione
1 porzione
1 porzione 50 g
2 uovai
due cucchiai
di latte
500 g
500 g
2 fettine
500 g
500 g
167 g
k3 (50 g cad.)
k7 pezzi
75 g
1 porzione
325 g
325 g
1 porzione
100 ml
100 ml
125 ml
Livello
di
potenza
b
b
b
b
b
b
b
b
d
d
d
d
d
d
d
d
d
d
b
d
d
d
d
d
d
NE-2156-2
NE-2146-2
8 min
5 min
25 min
20 min
8 min
1 min 15 s
2 min
30 s
20–25 s
3 min
2 min 20 s
40 s
4 min
3 min 20 s
1 min 20 s
50 s
1 min 20 s
50 s
30 s
3 min 20 s
2 min 30 s
14 s
40 s
40 s
48 s
Tempi
NE-1846
8 min
5 min
25 min
20 min
8 min
1 min 15 s
2 min
30 s
25–30 s
3 min 30 s
2 min 45 s
50 s
4 min 45 s
4 min
1 min 40 s
1 min
1 min 40 s
1 min
30 s
4 min
3 min
16 s
50 s
50 s
56 s
NE-1656/1646
8 min
5 min
25 min
20 min
8 min
1 min 15 s
2 min
30 s
30–40 s
3 min 55 s
3 min
1 min
5 min 20 s
4 min 30 s
1 min 55 s
1 min 5 s
1 min 55 s
1 min 5 s
30 s
4 min 30 s
3 min 15 s
18 s
56 s
56 s
1 min 10 s
SUGGERIMENTI:
≥Non cuocere/riscaldare/scongelare direttamente sul piano del forno; mettere sempre il cibo in un recipiente
adatto.
≥Quando si scongelano porzioni multiple, rigirare e spezzettare il cibo a metà del tempo di scongelamento per
permettere una migliore penetrazione dell’energia delle microonde.
≥Cibi solidi o densi non dovrebbero essere cotti partendo da congelati, poichè essi risulterebbero stracotti nelle
parti più esterne prima che la parte centrale abbia raggiunto la temperatura richiesta.
≥Durante la cottura e/o il riscaldamento di piatti che lo richiedono, ricordarsi di coprire gli alimenti. Ciò allo scopo
di trattenere l’umidità, prevenire gli schizzi e la fuoriuscita di liquidi.
≥Scostare il coperchio o bucherellare la pellicola trasparente prima di cuocere/riscaldare cibi coperti.
≥Mescolare o agitare il cibo a metà cottura/riscaldamento per distribuire il calore uniformemente.
≥Prima di controllare la temperatura finale dell’alimento o di servirlo lasciar trascorrere un tempo di riposo.
- 74 -
Page 77

Viktiga Säkerhets Instruktioner
Installation
Skyddsjordning
VIKTIGT: DENNA APPARAT MÅSTE ANSLUTAS
TILL ETT SKYDDSJORDAT ELUTTAG.
Låt en elektriker installera ett skyddsjordat eluttag
nära apparatens plats, om det inte redan finns.
Använd aldrig provisoriska kablar eller
förlängningskablar. Det kan vara livsfarligt.
Varning för felaktig elanslutning
Elnätets spänning måste vara den som anges på
mikrovågsugnen. Om du ansluter mikrovågsugnen till
högre spänning kan brand eller andra skador uppstå.
Placering av ugnen
Placera ugnen på en plan och stabil yta. Placera inte
ugnen på en varm eller fuktig plats, till exempel nära
en gasspis eller elspis. Använd inte ugnen i högre
rumstemperatur än 40eC eller högre relativ
luftfuktighet än 85 %.
Om ugnen placeras under en hylla eller i ett skåp
måste det finnas minst 20 cm fritt avstånd mellan
ugnens ovansida och hindret. Mellan ugnens sida och
hindret skall avståndet vara minst 5 cm. Mellan
ugnens baksida och hindret skall avståndet vara minst
5 cm.
Om mikrovågsugnen placeras för nära en radio eller
TV, finns en risk för störningar av svaga stationer.
Mikrovågsugnen måste placeras så att nätkontakten
är lättillgänglig.
Försiktighetsåtgärder
Borttagning av skyddsfilm
Ugnen har en skyddsfilm som skydd mot repor under
transporten. Ta bort skyddsfilmen innan du installerar
eller använder ugnen.
Starta inte ugnen utan mat.
För att den höga kvaliteten i magnetron-röret och
andra komponenter ska bevaras, får ugnen aldrig
startas när den är tom.
Öppna inte höljet.
Det finns farlig högspänning innanför höljet. Överlåt
alla reparationer och justeringar till kvalificerad
servicepersonal.
Blockera inte ventilationsöppningarna
För säker och effektiv användning skall ugnen ha fritt
luftflöde för maximal kyleffekt.
Ställ inte ugnen nära en vägg och kontrollera att
ventilationsöppningarna inte blockeras.
De säkerhetsavstånd som gäller är angivna under
rubriken “Placering av ugnen”.
Torka inte kläder i ugnen.
Torka inte kläder i ugnen. Det finns en risk att de tar
eld, om de värms upp för mycket.
Klistra på varnings märke
Om varningsmärke medföljer ugnen:
Välj ett passande varningsmärke och fäst det ovanpå
ugnen före användning.
Denna produkt uppfyller de europeiska standard EN 55011 för EMC bestämmelser (EMC = Elektromagnetisk
kompabilitet). Enligt denna standard är denna produkt en apparat i grupp 2, klass B och uppfyller kraven för
detta. Grupp 2 betyder att radio-frekvent energi produceras i form av elektromagnetiska vågor, för uppvärmning
av mat. Klass B betyder att denna produkt kan användas i det normala hushållet.
- 75 -
Svenska
Page 78

Viktiga Säkerhets Instruktioner
Varning
01. Gör ren ugnsluckans tätningslist och
tätningsytorna med en fuktig torkduk.
02. Kontrollera ofta att tätningslisten och
tätningsytorna är rena och oskadade. Om de är
skadade, får ugnen inte användas förrän den har
undersökts och reparerats av en servicetekniker,
som har utbildats av Panasonic.
03. Det är farligt för alla utom för servicetekniker, som
har utbildats av Panasonic, att reparera ugnen.
04. Om du ser att ugnen ryker, tryck på Stopp/
återställningsknappen och låt ugnsluckan vara
stängd. Dra ut nätkabeln från eluttaget eller stäng
av strömmen med huvudströmbrytaren eller en
gruppsäkring.
05. Reparation eller utbyte av skadad nätkabel skall
utföras av fackman.
06. Kontrollera att kokkärlen är lämpliga för
användning i en mikrovågsugn, innan du
använder dem.
07. Vid uppvärmning av vätskor, till exempel soppa,
sås och drycker, kan vätskan nå kokpunkten utan
att det syns genom att vätskan bubblar.
Därefter kan vätskan koka över plötsligt. Du kan
undvika detta med följande åtgärder:
a) Använd inte kärl med raka sidor och liten
öppning.
b) Värm inte vätskan för länge.
c) Rör om vätskan innan du placerar den i ugnen
och en gång till, när halva uppvärmningstiden
har gått.
d) Låt vätskan stå en stund i ugnen efter
uppvärmningen och rör om den igen, innan du
tar ut kärlet försiktigt.
08. Kontrollera ugnen då och då, när du värmer upp
eller tillagar mat i engångskärl av plast, papper
eller andra brännbara material.
09. Skaka nappflaskor och rör om barnmat extra
noga efter uppvärmningen. Kontrollera
temperaturen så att barnet inte bränner sig på
maten.
10. Vätskor och mat får inte värmas i kärl med
tättslutande lock, eftersom de kan explodera.
11. Ägg i skal och hela hårdkokta ägg får inte värmas
i mikrovågsugnen, eftersom de kan explodera.
12. Om du värmer drycker i mikrovågsugnen, kan de
koka över sedan ugnen är avstängd.
Värm dem inte för länge och var försiktig när du
tar ut kärlet.
13. Låt inte små barn hantera mikrovågsugnen.
Om större barn ska hantera ugnen, var noga med
att tala om hur de måste göra och kontrollera att
de förstår riskerna med att hantera ugnen.
- 76 -
Page 79

Översiktsbild (NE-2146-2/NE-1846/NE-1646)
(1)
(2)
(7)
(6)
(3) (4)
(8)
(5)
(9)
(10)
(1) Display (se nedan)
(2) Effektnivådisplay
(3) Effektväljare
(4) Tidsinställning
(5) Startknapp
(6) Ugnsluckans handtag
(7) Skydd för ugnslampan
(8) Luftfilter
(9) Stänkskydd (ugnstaket)
(10) Hylla (NE-2146-2)
A
B
A–Tidsdisplay för tillagning (min., sek.)
B–Effektnivåindikator
d:HÖG
a: MEDIUM
b: UPPTINING
Användning (NE-2146-2/NE-1846/NE-1646)
KNAPP
1
2
eller
3
4
≥Om du trycker på startknappen när ugnsluckan är öppen, visas alltid ”0” i displayen.
≥Du kan ändra effektnivån under tillagningen.
≥Du kan ändra den inställda tiden under tillagningen. Vrid bara tidsratten till den önskade tiden.
Öppna ugnsluckan och ställ in maten i ugnen.
☛ ”0” och effektnivån d visas i displayen.
Välj önskad effektnivå med knappen Effektväljare, om du vill välja en
annan effektnivå än d (HÖG).
Ställ in Tillagningstiden med tidsratten.
☛ upp till 25 min. för d och a, eller 30 min. för b
Tryck på Startknappen.
ANVISNING
Svenska
- 77 -
Page 80

Översiktsbild (NE-2156-2/NE-1656)
(1) (2)
(3)(4) (5) (6)(7)
x
A
B
x
(11)
(12)
(8)
2
1234567890
3
(13)
(9)
(14)
(15)
(10)
(1) Display (se nedan)
(2) Effektnivådisplay
(3) Programmeringsknapp (g)
(4) Växlingsknapp (j)
(5) Effektväljare (c)
(6) Knapp för dubbel kvantitet
(7) Knapp för tredubbel kvantitet
AB
PROG
C
231
DE F
Ugnen är förinställd på fabriken för följande:
√ Manuell manövrering
√ Sifferknapparna är förinställda för hög effekt med tillagningstiderna.
1l10 sek. 2l20 sek. 3l30 sek. 4l40 sek. 5l50 sek.
6l1 min. 7l1 min. 15 sek. 8l1 min. 30 sek. 9l1 min. 45 sek. 0l2 min.
(Det finns två sidor, A och B. Endast A-sidan är förinställd.)
√ Ej Programlås
√ Räkneverket på ”0” för alla knappar.
Om du vill ändra dessa inställningar, se i bruksanvisningen hur du kan göra.
G
(8) Siffer/programknappar
(9) Stopp/återställningsknapp (e)
(10) Startknapp (f)
(11) Skydd för ugnslampan
(12) Ugnsluckans handtag
(13) Luftfilter
(14) Stänkskydd (ugnstaket)
(15) Hylla (NE-2156-2)
A . . Programmeringsindikator
B . . Tidsdisplay för tillagning (min., sek.)
C . . Programknapparnas sifferindikator
D . . Indikator för 1:a stegets tillagning
E . . Indikator för 2:a stegets tillagning
F . . Indikator för 3:e stegets tillagning
G . . Effektnivåindikator
d:HÖG
a: MEDIUM
b: UPPTINING
- 78 -
Page 81

Användning (NE-2156-2/NE-1656)
A. MANUELL TILLAGNING
√
En-stegs tillagning
Exempel: Tillagning med HÖG effekt i 2 minuter
KNAPP ANVISNING
1
2
Öppna ugnsluckan och ställ in maten i ugnen.
☛ ”0” visas i displayen.
Tryck på Effektväljaren för att ställa in effektnivån.
3
2 0 0
4
≥När startknappen trycks in och ugnsluckan är öppen visas alltid ”0” i displayrutan.
≥Även efter det att uppvärmningstiden är inställd kan effektnivån ändras.
≥Om tiden önskas ändras medan uppvärmning pågår, kan timern enkelt justeras till önskat antal minuter
och sekunder.
√
Två-stegs eller tre-stegs tillagning
Upprepa steg 2 och 3 ovan innan du trycker på Startknappen f.
Tillagning i två steg:
01
-
Tillagning i tre steg:
01
-
Ett steg Två steg Tre steg
Ställ in tillagningstiden.
☛ upp till 25 min. för d och a, eller 30 min. för b
Tryck på Startknappen.
01
-
01
-
-
01
B. PROGRAMMERAD TILLA GNING
√
Utan programlås
KNAPP
1
2
Ex.
3
Öppna ugnsluckan och ställ in maten i ugnen.
☛ ”0” visas i displayen.
Tryck på Siffer/programknappen.
ANVISNING
Svenska
3
√
Med programlås
KNAPP
1
2
För att programmera ett nummer på B-sidan:
tryck på Växlingsknappen j innan du trycker på programknappen.
För tillagning av dubbel (eller tredubbel) kvantitet:
tryck på knappen för dubbel (eller tredubbel) kvantitet innan du trycker på programknappen.
Ex.
3
Tryck på Startknappen.
ANVISNING
Öppna ugnsluckan och ställ in maten i ugnen.
☛ ”0” visas i displayen.
Tryck på Siffer/programknappen.
☛ Tillagningen startar automatiskt.
- 79 -
Page 82

Användning (NE-2156-2/NE-1656)
C. PROGRAMMERING AV SIFFER/PROGRAMKNAPPAR
√
En-stegs tillagning
UGNEN KAN INTE PROGRAMMERAS FÖRRÄN PROGRAMLÅSET HAR TAGITS BORT!
OPPNA INTE UGNSLUCKAN UNDER PROGRAMMERINGEN!
Exempel: Programmering av UPPTINING i 1 minut på Siffer/programknapp ”5”
KNAPP ANVISNING
1
2
Låt ugnsluckan vara stängd.
☛ Kontrollera att displayen är tom.
Tryck på Programmeringsknappen.
3
5
4
5
0 01
6
√
Två-stegs eller tre-stegs tillagning
Upprepa steg 4 och 5 ovan innan du trycker på Programmeringsknappen g.
5
För att programmera ett nummer på B-sidan,
tryck på Växlingsknappen j innan du trycker på Siffer/programknappen.
Ett steg Två steg
Tryck på Siffer/programknapp ”5”.
Tryck på Effektväljaren tre gånger.
Ställ in tillagningstiden.
Tryck på Programmeringsknappen.
01
-
01
-
-
Tre steg
D. PROGRAMMERING FÖR DUBBEL ELLER TREDUBBEL
KVANTITET
UGNEN KAN INTE PROGRAMMERAS FÖRRÄN PROGRAMLÅSET HAR TAGITS BORT!
ÖPPNA INTE UGNSLUCKAN UNDER PROGRAMMERINGEN!
Exempel: Programmering av 1,5 gånger tillagningstiden för dubbel kvantitet på
Siffer/programknapp ”5”
KNAPP ANVISNING
1
2
Låt ugnsluckan vara stängd.
☛ Kontrollera att displayen är tom.
Tryck på Programmeringsknappen.
01
3
4
5
x
2
5
5
1
6
För tredubbel kvantitet,
upprepa som ovan, men tryck på knappen för Tredubbel kvantitet i stället för Dubbel kvantitet i steg 4.
Tryck på Siffer/programknapp ”5”.
Tryck på knappen för Dubbel kvantitet.
Ställ in önskad förlängningsfaktor med sifferknapparna
(minimum 0,1–maximum 3,0).
Märk: 1,6 gånger är förinställt i fabriken.
Tryck på Programmeringsknappen.
- 80 -
Page 83

Användning (NE-2156-2/NE-1656)
+
E. PROGRAMLÅS
√
Aktivering av programlåset
KNAPP ANVISNING
1
2
När programlåset är aktiverat:
≥Ugnen startas genom att du trycker på en Siffer/programknappar. Du behöver inte trycka på knappen f.
≥Om ugnsluckan öppnas raderas programmets återstående tid.
≥Du kan inte programmera ugnen förrän programlåset har stängts av.
√
Avstängning av programlåset
KNAPP ANVISNING
1
2
När programlåset är avstängt:
≥Ugnen är inställd för tvåknappsmanövrering (Siffer/programknappar plus knappen f).
≥Funktionerna för repetering och avbrott kan användas.
≥Siffer/programknappar kan programmeras.
≥Kontrollerna för signalnivå och signallängd kan manövreras.
Låt ugnsluckan vara stängd.
☛ Kontrollera att displayen är tom.
Håll Programmeringsknappen intryckt tills displayen visar
indikatorerna ”PROG”, ”P” och ”L” (mer än 5 sekunder).
Öppna ugnsluckan och lämna den öppen.
Medan du trycker på Stopp/återställningsknappen, skall du hålla
Programmeringsknappen intryckt tills displayen visar indikatorerna
”PROG” och ”P” (mer än 5 sekunder).
F. PIPSIGNAL
När tillagningstiden är slut hörs en pipsignal. Du kan ställa in pipsignalens ljudnivå och längd.
Pipsignalen är grundinställd för den högsta nivån och för 3 pipsignaler.
KNAPP ANVISNING
1
2
√√
√
Inställning av ljudnivå
√√
3
0
4
√
Inställning av pipsignalens längd
5
0
6
Öppna ugnsluckan och lämna den öppen.
Tryck på Programmeringsknappen.
Ställ in önskad ljudnivå genom att trycka på knappen ”0”.
☛ Pipsignalen hörs med den inställda ljudnivån och displayen visar nivån
med siffror (3 till 0–högt till tyst) följt av ordet ”bEEP”.
”3bEEP”lHög nivå, ”2bEEP”lMedelnivå, ”1bEEP”lLåg nivå,
”0bEEP”lHelt tyst
Tryck på Programmeringsknappen.
Inom tre sekunder sedan du har tryckt på Programmeringsknappen i
steg 4, tryck på Siffer/programknappen ”0” för att ställa in pipsignalens
längd.
☛ Indikatorn ”1” för första stegets tillagning lyserl3 pipsignaler
Indikatorn ”2” för andra stegets tillagning lyserlpipsignaler under
60 sekunder
Tryck på Programmeringsknappen.
Svenska
- 81 -
Page 84

Användning (NE-2156-2/NE-1656)
+
+
+
G. PROGRAMLISTA
Information om all programmering (programmen för varje Programknapp och sida A/B, pipsignal och programlås)
visas i följd.
KNAPP ANVISNING
1
2
H. RÄKNEVERK
√
Avläsning av antalet gånger som varje program har använts
KNAPP ANVISNING
1
2
01
-
√
Avläsning av antalet gånger som ugnen har använts
3
Öppna ugnsluckan och lämna den öppen.
Håll Stopp/återställningsknappen intryckt och tryck på Startknappen.
Öppna ugnsluckan och lämna den öppen.
Håll Stopp/återställningsknappen intryckt och tryck på respektive
Siffer/programknappar.
OBSERVERA: Om du vill se hur många gånger ugnen har använts med
programmen på B-sidan, tryck på växlingsknappen j. Håll sedan
knappen e intryckt medan du trycker på varje programknapp.
Stäng ugnsluckan snabbt medan displayen fortfarande visar
räkneverket för en programknapp. Då visar displayen det totala antal
gånger som ugnen har använts.
√
Avläsning av räkneverket
KNAPP ANVISNING
4
5
Öppna ugnsluckan och lämna den öppen.
Håll Stopp/återställningsknappen intryckt och tryck på Effektväljaren.
I. LUFTFILTRET
Exempel: Programmering för rengöring av luftfiltret efter 600 timmar
KNAPP ANVISNING
1
2
3
4
3
0 06
5
När ”FILT” visas i displayen,
ta bort luftfiltret och gör ren det med ett lämpligt rengöringsmedel. Tryck på Stopp/återställningsknappen för att
ta bort displayvisningen.
Du kan kontrollera användningstiden efter den senaste filterrengöringen,
√ Öppna ugnsluckan och lämna den öppen.
√ Håll knappen f intryckt och tryck på knappen ”3”.
√ Displayen visar antalet timmar som ugnen har använts, ”H” visas i displayen.
Observera: Om ugnen stängs av efter en kort användningstid, kontrollera att luftfiltret är rent innan du tillkallar en
servicetekniker.
Öppna ugnsluckan och lämna den öppen.
Håll Startknappen intryckt medan du stänger och öppnar ugnsluckan.
Tryck på Siffer/programknapp ”3”.
Ställ in önskat tidsintervall upp till 9999 timmar.
Tryck på Programmeringsknappen.
- 82 -
Page 85

Anvisningar för stapling
VIKTIGT
1. Lossa nätkabeln från vägguttaget innan
installationen påbörjas.
2. Vid stapling måste du använda PANASONICs
”förbindningsplåt” som medföljer ugnen.
3. Endast följande PANASONIC-modeller kan
kombineras för stapling.
INSTALLATION
1. Ställ ugnarna på varandra och ta bort de fem skruvarna (a) som Fig. 1 visar.
2. Lossa skruv (b).
3. Flänsen på förbindningsplåten måste vara vänd från ugnen (b).
4. Fäst och dra åt de fem skruvarna (a) och skruv (b). Se Fig. 2.
5. Placera den nedre ugnen ganska lågt för stapling. Om den övre ugnen blir för högt placerad, kan den inte
hanteras på ett säkert sätt.
(b)
Fig. 1 Fig. 2
Förbindningsplåt
Fläns
(a)
NE-1057, NE-1457, NE-1247, NE-1747, NE-1047,
NE-1447, NE-1257, NE-1757, NE-1442, NE-1856,
NE-1456, NE-1846, NE-1446, NE-2156-2,
NE-2146-2
4. Maximal stapelhöjd är två enheter.
FÖRBEREDELSE
Kontrollera att ugnarna är tomma.
Förbindningsplåt
Fläns
Förklaring av den automatiska felsökningens felkoder
Ugnen övervakar driften och tänder en felkod på displayen om ett problem uppstår.
Gör så här om en felkod visas i displayen: Dra ut nätkontakten från eluttaget och vänta minst 10 sekunder
innan du sätter i den igen.
Om ugnen fortfarande visar en felkod, se betydelsen i tabellen.
KOD
F01
F33–34
F05
F81–82
F86–87
F44
Observera: Ovanstående koder, som visas på displayen, anger inte samtliga tänkbara fel på apparaten.
PROBLEM
För hög
frånluftstemperatur
Defekt termistor
Defekt minneskrets
Defekt relä
Defekt relä
Defekt manöverpanel
ÅTGÄRD
Ugnen stängs av automatiskt. Lossa nätkabeln från vägguttaget. Pipljud
hörs hela tiden. Ugnen återställs för drift när den har svalnat. Flytta
ugnen till en svalare plats. Kontakta våra reparatörer om problemet
kvarstår.
Ugnen stängs av automatiskt. Lossa nätkabeln från vägguttaget.
Kontakta våra reparatörer om problemet kvarstår.
Kontakta våra reparatörer om problemet kvarstår. Ugnen fungerar även
om en felkod visas, vilket är fel. Kontakta en auktoriserad
serviceverkstad. Kan inträffa med programmerad tillagning. Tryck på
återställningsknappen. Sedan kan andra programknappar och manuell
tillagning användas.
Kontakta våra reparatörer om problemet kvarstår. Ugnen fungerar även
om en felkod visas, vilket är fel. Kontakta en auktoriserad
serviceverkstad. Tryck på återställningsknappen och försök igen.
Ugnen stängs av automatiskt. Lossa nätkabeln från vägguttaget.
Kontakta våra reparatörer om problemet kvarstår.
Ugnen stängs av automatiskt. Lossa nätkabeln från vägguttaget.
Kontakta våra reparatörer om problemet kvarstår.
Svenska
- 83 -
Page 86

Mikrovågsugnens skötsel
1. Drag ur nätkabelns kontakt från vägguttaget före
rengöring.
2. Rengör insidan av ugnen kontinuerligt [och mitten
hyllplanet (gäller endast NE-2146-2/2156-2)]. Om
matrester eller vätska fastnat på ugnens väggar,
eller mellan dörr och karm, kommer dessa
matrester absorbera mikrovågor, detta kan leda till
gnistbildning under användning. Torka bort alla
matrester med en fuktig trasa.
Köksrengöringsmedel eller diskmedel kan
användas om ugnen är mycket smutsig.
Lösnings- eller skurmedel får inte användas.
Det mittersta hyllplanet kan diskas med hett vatten
och diskmedel eller i diskmaskin.
Rengöring av stänkskyddet
1. Håll i stänkskyddets sidostoppers med båda
händerna och drag dem inåt-nedåt. Tag därefter ut
stänkskyddet från ugnen.
3. Mikrovågsugnens utsida skall rengöras med en
tvålvattenlösining, och torkas med en torr trasa.
Var försiktig så att vatten inte kommer in i
ventilationsöppningen på baksidan. Då kan ugnen
skadas.
4. Ugnsluckans fönster skall rengöras med ett mycket
milt rengöringsmedel. Var noga med att använda
en mjuk trasa. Fönstret kan skadas av kraftiga eller
repande rengöringsmedel.
Rengöring av luftfiltret
Rengör luftfiltret regelbundet på nedan beskrivna sätt.
Det kan uppstå problem med ugnen om luftfiltret
täpps igen med damm (*).
1. Tag bort luftfiltret från den främre bottenplåten
genom att vrida den högra skruven. Skjut därefter
filtret åt höger och lyft bort filtret vid det vänstra
benet.
2. Rengör stänkskyddet med ett lämpligt
rengöringsmedel.
3. Kom ihåg att sätta tillbaka stänkskyddet innan du
använder ugnen nästa gång.
OBSERVERA
Stänkskyddet måste sitta fast ordentligt när
ugnen används.
Användning av hyllan
(NE-2146-2/2156-2)
1. Om du vill värma upp eller tillaga mat i ett kärl,
placera det alltid på botten av ugnen.
2. Om du i huvudsak använder ugnen för att värma
upp ett kärl i taget, ta bort hyllan och placera kärlet
på botten av ugnen.
3. Om du vill värma upp mat i två kärl, placera båda
på botten av ugnen om de får rum bredvid
varandra. Ställ annars ett kärl på botten av ugnen
och det andra på hyllan.
Skruv
Ben
2. Rengör filtret med ett lämpligt rengöringsmedel.
3. Kom ihåg att sätta tillbaka luftfiltret innan ugnen
används nästa gång.
(*)Om luftfiltret täpps igen av damm eller fett, kan
ugnen bli överhettad.
4. Om du vill värma upp mat i flera kärl, fördela dem
jämnt mellan botten av ugnen och hyllan.
5. Lämna litet plats mellan kärlen. Ställ inte in för
mycket mat i ugnen samtidigt.
6. Om det mittersta hyllplanet inte används, skall det
tas ut ur ugnen, det för inte placeras på det
nedersta hyllplanet av ugnen.
- 84 -
Page 87

—Guide för upptining och tillagning—
Tiderna i tabellen nedan är endast ungefärliga. Många faktorer, till exempel matens temperatur vid starten, kan
orsaka att längre eller kortare tider behövs. Anpassa tiderna för upptining och tillagning, när det behövs.
Alla tider är testade med mat med dessa starttemperaturer;
Kontrollera alltid temperaturen i mitten av maten med en termometer och anpassa hanteringen så att
temperaturen överensstämmer med regler för livsmedelshantering och tillagning.
Kylförvarad mat . . . . Cirka i5oC
Fryst mat . . . . . . . . . Cirka j18oC
Funktion
Upptining
Tillagning av
kylförvarade
råa livsmedel
Tillagning
och/eller
uppvärmning
av frysta
livsmedel
eller fryst mat
Uppvärmning
av
kylförvarad
färdig mat
Mat
Fiskfiléer
Köttfärs
Hel kyckling
Färdig rätt
Flera
portioner
En portion
Äppelpaj
Tårta
Småfranska
Äggröra
Broccoli
Fiskfiléer
Bacon
Kycklingdelar
Ärter
Kokt ris
Kokt korv
Färdig
hamburgare
Kakor
Lasagne
Chili
Äppelpaj
Pepparsås
Vita bönor
Soppa
Vikt
500 g
500 g
1,36 kg
1,36 kg
275 g
1 portion
1 portion
1 portion 50 g
2 äggi
2 msk mjölk
500 g
500 g
2 skivor
500 g
500 g
167 g
3k50 g
75 g
1 portion
325 g
325 g
1 portion
100 ml
100 ml
125 ml
Effekt
b
b
b
b
b
b
b
b
d
d
d
d
d
d
d
d
d
b
d
d
d
d
d
d
NE-2156-2
NE-2146-2
8 min
5 min
25 min
20 min
8 min
1 min 15 s
2 min
30 s
20–25 s
3 min
2 min 20 s
40 s
4 min
3 min 20 s
1 min 20 s
50 s
50 s
30 s
3 min 20 s
2 min 30 s
14 s
40 s
40 s
48 s
Tid
NE-1846
8 min
5 min
25 min
20 min
8 min
1 min 15 s
2 min
30 s
25–30 s
3 min 30 s
2 min 45 s
50 s
4 min 45 s
4 min
1 min 40 s
1 min
1 min
30 s
4 min
3 min
16 s
50 s
50 s
56 s
NE-1656/1646
8 min
5 min
25 min
20 min
8 min
1 min 15 s
2 min
30 s
30–40 s
3 min 55 s
3 min
1 min
5 min 20 s
4 min 30 s
1 min 55 s
1 min 5 s
1 min 5 s
30 s
4 min 30 s
3 min 15 s
18 s
56 s
56 s
1 min 10 s
Svenska
TIPS: ≥Placera inte maten direkt på botten av ugnen–använd ett lämpligt fat eller kärl.
≥När du tinar upp flera portioner bör du dela på maten efter halva tiden för att mikrovågsenergin ska tränga
igenom bättre.
≥Täta och tunga livsmedel bör inte tillagas från fryst tillstånd, eftersom de blir överkokta eller brända i
kanterna innan de är klara i mitten.
≥Täck maten med ett lock eller en extra tallrik när det behövs för tillagning och uppvärmning. Det bevarar
fukten i maten och hindrar stänk och spill.
≥Lätta på lock och stick hål i plastfilm, innan du tillagar eller värmer upp täckt mat.
≥Rör om eller skaka maten under upptining och tillagning för att fördela värmen jämnt.
≥Låt maten stå en tid för utjämning innan du kontrollerar temperaturen eller serverar maten.
- 85 -
Page 88

Vigtige informationer om sikkerhed
Installation
Jordforbindelse
VIGTIGT: AF SIKKERHEDSHENSYN SKAL
DETTE APPARAT KORREKT
TILSLUTTES JORD.
Hvis et apparat ikke kan jordes korrekt, er det kundens
eget personlige ansvar at sikre sig, at dette bliver gjort
muligt og gennemført.
Strømstyrke
Strømstyrken skal være den samme som er angivet
på ovnen. Brug af anden strømstyrke end den angivne
kan medføre risiko for brand eller andre alvorlige
problemer.
Placering af ovnen
Placér ovnen på et stabilt fladt underlag. Placér ikke
ovnen et varmt eller fugtigt sted som f.eks,
nær en varmeafgivende el- eller gasinstallation. Benyt
ikke ovnen i temperaturer over 40˚C (104˚F) eller hvis
luftfugtigheden er højere end 85%.God luftcir kulation
omkring ovnen er meget vigtig.
Der er risiko for at ovnens mikrobølger kan påvirke
svage TV og/eller radiosignaler, hvis apparaterne står
for tæt på hinanden.
For sikker og effektiv brug må ovnen have tilstrækkelig
luft cirkulation. Der skal derfor være mindst 5 cm
bagved og ved siderne af ovnen, samt mindst 20 cm
fra toppen af ovnen op til loftet.
Mikrobølgeovnen skal placeres så stikkontakten er
tilgængeligt.
Bemærk
Fjern beskyttelsesfilmen
For at beskytte ovnen mod skrammer o.l. under
transport er der påført en beskyttelsesfilm. Fjer n filmen
før ovnen installeres og bruges.
Tænd ikke for ovnen når den er tom
For at beskytte magnetronrørene og andre
komponenter, bør man ikke tænde for ovnen, hvis den
er tom.
Åbn ikke kabinettet
Der er installationer med højt strømniveau inde i
kabinettet. Reparationer og justeringer bør derfor kun
foretages af autoriseret servicepersonale.
Blokér ikke ventilationshullerne
Mikrobølgeovnen har behov for at luften kan cirkulere
frit omkring den, for at sikre den højest mulige
køleeffekt. Sørg derfor altid for at ventilationshullerne
ikke er dækket til.
Tør ikke tøj i mikrobølgeovnen
Undlad at forsøge at tørre tøj i mikrobølgeovnen, da
der er risiko for at der går ild i tøjet hvis det ligger for
længe.
Placér advarselsetiketten på ovnen
Hvis advarselsmaerkat folger med ovnen skal denne
monteres oven pa ovnen inden ibrugtagning.
Dette produkt opfylder den europæiske standard EN 55011 for EMC forstyrelser (EMC = Elektromagnetisk
Compatibilitet). I henhold til denne standard er dette produkt et apparat i gruppe 2, klasse B og opfylder
kravene for dette. Gr uppe 2 betyder, at radio-frekevent energi danes i form af elektromagnestiske bølger, med
henblik på opvarmning af føde. Klasse B betyder, at dette produkt, må anvendes i almindelige husholdninger.
- 86 -
Page 89

Advarsel
Vigtige informationer om sikkerhed
1. Hængslerne på lågen, og områderne omkring,
skal holdes rene med en fugtig klud.
2. Hold øje med eventuelle skader på hængslerne
på lågen. Er der skader bør disse repareres før
ovnen tages i brug igen.
3. Det er farligt for andre end autoriseret
servicepersonale at udføre reparationer på
ovnen.
4. Opstår der røg - hold lågen lukket. Sluk for
strømmen på hovedafbryderen og træk stikket ud
af kontakten.
5. Såfremt netledningen er ødelagt, skal den for at
undgå ulykker, udskiftes af producenten,
producentens service center eller en tilsvarende
kvalificeret person.
6. Før brug, skal brugeren sikre sig, at servicet kan
anvendes i mikrobølgeovn.
7. Når varme drikke eller supper og saucer befinder
sig i mikrobølgeovnen kan man risikere at de
koger over uden først at have boblet.Dette kan
undgås på følgende måde:
a) Undgå ligesidede beholdere med smal hals.
b) Undgå at over-opvarme.
c) Rør i væsken før- og igen halvvejs gennem
opvarmningen.
d) Efter opvarmning, lad væsken stå i ovnen et
kort stykke tid. Rør i den igen, før den tages ud
af ovnen.
8. Check ovnen fra tid til anden når der tilberedes
eller opvarmes mad i plastic, papir eller andet
brændbart materiale.
9. Indholdet i babymad og sutteflasker skal rystes
eller omrøres før brug. Husk at kontrollere
temperaturen!
10
.Flydende væsker og anden mad må ikke
opvarmes i lukkede beholdere.Dette kan få dem
til at eksplodere.
11
.Hele æg og hårdkogte æg bør ikke opvarmes i
mikrobølgeovn, da de kan eksplodere.
12.
Flytbar hylde
Træk ikke i og skub ikke til den flytbare
midterhylde når du tager mad ud eller sætter
mad i ovnen. Dette kan skade hylden eller
medføre at den tipper og maden ryger ud over
personen ved ovnen.
- 87 -
Dansk
Page 90

Funktionsoversigt af NE-2146-2/NE-1846/NE-1646
(8)
(7)
(6)
(9)
(1)
(2)
(3) (4)
(5)
(10)
A
B
(1) Display
(2) Mikrobølgeeffekt display
(3) Mikrobølgeeffekt knapper
(4) Tids knap
(5) Start knap
(6) Dørhåndtag
(7) Ovn lys
(8) Luft filter
(9) Stænk skærm
(10) Midter hylde (kun NE-2146-2)
A –– Display for kogetid(min.sek.)
B –– Indikator for watt-effekt
:
HØJ
: MELLEM
: OPTØNING
Betjening af NE-2146-2/NE-1846/NE-1646
KNAP
Åben døren og sæt maden ind.
☛ Sørg for at “0” og watt effekten vises i displayet.
Drej på mikrobølgeeffekt knappen, hvis anden effekt ønskes.
Sæt kogetiden.
☛ Op til 25 min.på eller , og 30 min. på .
Tryk start.
1
2
or
3
4
• Trykkes startknappen, når døren er åben, vil “0” vises i displayet.
• Der kan ændres til en anden mikrobølgeeffekt efter at kogetiden er sat.
• Tilberedningstiden kan ændres, mens ovnen er i gang. Drej tidsknappen for at vælge minutter og sekunder.
INSTRUKTION
- 88 -
Page 91

Funktionsoversigt af NE-2156-2/NE-1656
A
1234567890
B
(13)
(11)
(12)
(14)
(15)
(8)
(1) (2)
(3)(4) (5) (6)(7)
(9)
(10)
x 2
x 3
PROG
231
AB
C
DE F
G
(1) Display
(2) Mikrobølgeeffekt display
(3) Programmeringsknap
(4) Omskifter knap
(5) Mikrobølgeeffekt knap
(6) Dobbel portion
(7) Tredobbel portion
Denne ovn er for programmeret fra fabrikken til følgende:
◆ Manuelt brug
◆ Hukommelsesknapperne er forud indstillet til høj effekt med de viste tilberedningstider for tilberedning i et enkelt
trin.
1 = 10 sek. 2 = 20 sek. 3 = 30 sek. 4 = 40 sek. 5 = 50 sek.
6 = 1 min. 7 = 1 min. 15 sek. 8 = 1 min. 30 sek. 9 = 1 min. 45 sek. 0 = 2 min.
(Der er to sider, A og B.Kun A-siden er vist.)
◆ Frakobling af programlås
◆ Kredsløbtæller er indstillet til “0”på alle knapper.
Hvis der øskes andre egenskaber, se i brugsavisningen, hvordan de aktiveres.
(8) Hukommelsesknapper
(9) Stop/annuleringsknap
(10) Start knap
(11) Ovn lys
(12) Dør håndtag
(13) Luft filter
(14) Stænk skærm
(15) Midter hylde (kun NE-2156-2)
A . .Program display
B . .Kogetids display (min.sek.)
C . .Hukommelses display
D . .Indikator for 1.kogestadic
E . .Indikator for 2. kogestadie
F . .Indikator for 3.kogestadie
G . .Indikator mikrobølgeeffekt
- 89 -
:
HØJ
: MELLEM
: OPTØNING
Dansk
Page 92

Betjening af NE-2156-2/NE-1656
2 0 0
A. MANUEL TILBEREDNING
◆Tilberedning i 1 trin
Eksempel:Tilberedning af ved høj mikrobølgeeffekt i 2 min.
KNAP
1
2
3
4
• Trykkes startknappen, når døren er åben, vil “0” vises i displayet.
• Der kan ændres til en anden mikrobølgeeffekt efter at kogetiden er sat.
• Tilberedningstiden kan ændres, mens oven er i gang. Drej tidsknappen for at vælge minutter og sekunder.
Åben døren og sæt maden i oven.
☛ Sørg for at “0” vises i displayet.
Tryk 1 gang på mikrobølgeeffekt knappen.
Sæt kogetiden.
☛ Op til 25 min.på eller , og 30 min. på .
Tryk start knappen.
INSTRUKTION
◆2 og 3 trin af tilberedning
Gentag andet og tredje trin fra foroven før ovnen startes .
2 tilberedningstrin :
-
3 tilberedningstrin:
-
01
01
01
-
01
-
01
-
Første trin Andet trin Tredje trin
B. PROGRAMMERET TILBEREDNING
◆I programlås
KNAP
1
2
Ex.
3
3
Åben døren og sæt maden i ovnen.
☛ Sørg for at “0” vises i displayet.
Tryk det ønskede hukommelses tal.
Tryk start knappen.
INSTRUKTION
◆I frakobling af programlås
KNAP
1
2
For at vælge nummer fra B-siden;
Tryk på omskifter knappen før den øuskede hukommelses knap.
Tilberedningstid for 2 portioner (3 portioner);
Tryk x2(eller x3) knappen før hukommelses knappen.
Ex.
3
Åben døren og sæt maden i ovnen.
☛ Sørg for at “0” vises i displayet.
Tryk det ønskede hukommelses tal.
☛ Opvarmningen vil starte automatiske.
INSTRUKTION
- 90 -
Page 93

Betjening af NE-2156-2/NE-1656
5
0 01
5
1
5
C. PROGRAMMERING AF HUKOMMELSESKNAPPEN
◆Tilberedning i 1 trin
OVNEN KAN IKKE PROGRAMMERES,NÅR PROGRAMLÅSEN ER AKTIVERET!
ÅBEN IKKE DØREN UNDER PROGRAMMERINGEN!
Eksempel: For at programmere tilberedning på optøning i 1 min. på Hukommelses knappen “5”
KNAP
1
2
3
4
5
6
Hold døren lukket.
☛ Sørg for at displayet er blankt.
Tryk program knappen.
Tryk Hukommelses knappen “5”.
Tryk på mikrobølgeeffekt knappen 3 gange.
Sæt kogetiden.
Tryk program knappen.
INSTRUKTION
◆2 og 3 tilberedningstid
Gentag trin 4 og 5 fra ovenover før programknappen trykkes .
5
Første stadie Andet stadie Tredje stadie
For at programmere B-siden;
Tryk på omskifter knappen før hukommelses knappen vælges.
01
-
01
-
()
01
-
D. PROGRAMMERING AF DOBBEL ELLER TREDOBBEL PORTION
OVNEN KAN IKKE PROGRAMMERES,NÅR PROGRAMLÅSEN ER AKTIVERET!
ÅBEN IKKE DØREN UNDER PROGRAMMERINGEN!
Eksempel: For at programmere 1,5 gang af tilberedningstiden for dobbel portion på nummerknappen “5”
KNAP
1
2
3
4
x 2
5
6
For 3 portioner;
Gentag som foroven, tryk tredobbelknappen i stedet for dobbelt por tion knappen ved trin 4.
Hold døren lukket.
☛ Sørg for at displayet er blankt.
Tryk program knappen.
Tryk hukommelsesknappen “5”.
Tr yk på dobbel portion knappen.
Den beregnet tid udregnes og vises i displayet.
Tryk program knappen.
INSTRUKTION
- 91 -
Dansk
Page 94

Betjening af NE-2156-2/NE-1656
+
0
0
E. PROGRAM LÅS
◆Programlåsen
KNAP
1
2
I “programlås”:
• Ovnen startes ved at trykke på den ønskede hukommelsesknap.Det er ikke nødvendigt at trykke på
startknappen.
• Afbrydelsesfunktionen er koblet fra - åbnes døren annuleres resten af tiden på programmet.
• Ovnen kan ikke programmeres eller bruges manuelt før programlåsen frakobles.
Hold døren lukken.
☛ Sørg for at displayet er blankt.
Tryk program knappen indtil “PROG”, “P” and “L” kommer frem
(mere end 5 sekunder).
INSTRUKTION
◆Frakobling af programlås
KNAP
1
2
I frakobling af programlås:
• Ovnen indstilles til 2-tryks funktionmåde (hukommelsesknap + startknap).
• Gentag og afbryd funktioner kan bruges.
• Hukommelsesknappen kan programmeres.
• Kontrol af tonens lydstyrke og længde kan bruges.
Åben døren og lad den stå åben.
Tryk samtidig på Stop/Anulleringsknappen og program knappen
indtil“PROG” og “P”kommer frem. (mere end 5 sekunder).
INSTRUKTION
F. BIP LYDE
Lydstryken og længden af bibtonen ved slutningen af en opvarmningsfunktion kan indstilles.
Bibtonen er på fabrikken indstillet til den højeste styrke og til 3 bip.
KNAP
1
2
Åben døren og lad døren stå åben.
Tryk program knappen.
INSTRUKTION
◆For at vælge lydstyrken
3
4
Vælg den ønskede lydstyrke ved at trykke på
☛ Styrken vises ved et nummer efterfulgt af ordet “bEEP”;
“3bEEP” = højest, “2bEEP” = middel, “1bEEP” = lav, “0bEEP”= ingen lyd
Tryk program knappen.
hukommelsesknappen “0”.
◆For at vælge lydlængden
5
6
3 sekunder efter at have trykket på program knappen ved trin 4, vælg
lydlængden ved at trykke på hukommelsesknappen “0”.
☛ Længden er bestemt efter 1.eller 2. tilberedningstid;
“1” = 3 bip, “2” = korte bip i 1 min.
Tryk program knappen.
- 92 -
Page 95

Betjening af NE-2156-2/NE-1656
+
+
01
-
3
+
G. PROGRAMLISTE
Al korrekt programmeret information (programmet bag hver t Hukommelsesknap, omskifterknap, bibtone, og
programlås information) vil hele tiden komme frem.
KNAP
1
2
Åben døren og lad den stå åben.
Tryk samitidig på stop/anulleringsknappen og start knappen.
H. KREDSLØBSTAL
◆For at aflæse, hvor længe, hver hukommelsesknap har været brugt
INSTRUKTION
KNAP
1
2
◆
For at alæse den samlet f orbrugstid
+
3
Åben døren og lad døren stå åben.
Tryk samtidig på stop/anulleringsknappen og den ønskede
hukommelsesknap
OBS:For at aflæse tiden for hver knap på B-side, tryk omskifter knappen mens displayet viser tiden.
Luk døren mens displayet stadig viser tiden som hver
hukommelsesknap har brugt.
.
INSTRUKTION
◆For at aflæse den tid, som ovnen har været brugt manuelt.
KNAP
4
5
Åben døren og lad den stå åben.
Tryk samtidig på stop/anulleringsknappen og mikrobølgeeffekt
knappen.
INSTRUKTION
I. LUFT FILTER
Eksempel: For at programmere rensning af filter efter hver 600 timer.
KNAP
1
2
Åben døren og lad den stå åben.
Mens startknappen trykkes, lukkes og åbnes døren.
INSTRUKTION
3
4
0 06
5
Når “FILT” tegnet vises i displayet;
Fjern filteret og rens det med sæbevand.Tryk stop/anuller ingsknappen for at nulstille displayet.
For at tjekke det totale forbrugstimer:
◆ Åben døren og lad den stå åben.
◆ Tryk på hukommelsesknap “3” mens der trykkes på start knappen.
◆ Det totale antal forbrugstimer og “H” vil vises i displayet.
OBS:Hvis ovnen stopper efter få ganges brug, check om luftfilteret er rent før en reparatør tilkaldes.
Tryk hukommelsesknappen “3”.
Skriv det ønskede timetal op til 9999 timer.
Tryk på program knappen.
- 93 -
Dansk
Page 96

Instruktion til at sætte ovne ovenpå hinanden
(b)
Joint Plate
Projection
(a)
Fig. 1
Joint Plate
Projection
Fig. 2
VIGTIGT
1. Tag netledningen ud af stikkontakten, før du
installerer mikroovnen.
2. Hvis du installerer flere ovne ovenpå hinanden skal
du bruge Panasonic’s “mellemplade”, som følger
med denne mikroovn.
3.
Kombinationen af mikroovne som kan anbringes ovenpå
hinanden, er begrænset sig til følgende modeller:
NE-1057, NE-1457, NE-1247, NE-1747, NE-1047,
NE-1447, NE-1257, NE-1757, NE-1442, NE-1856,
NE-1456, NE-1846, NE-1446, NE-2156-2,
NE-2146-2
4. Der kan kun stables 2 mikroovne oven på
hinanden.
FORBEREDELSE
Forvis Dem om, at ovnen er tom.
INSTALLATION
1. Sæt den ene ovn ovenpå den anden og fjern skruerne (a) fra hver ovn som vist i fig.1.
2. Løs alle skruerne (b).
3. De to fremspring på mellempladen skal vende bort fra ovnen. Placer mellempladen på skruerne (b).
4. Stram de fem skruer på øverste ovn (a) og de tre skruer på nederste (b).
5. Du skal sikre, at den øverste enhed er i arbejdshøjde.
Mellemplade
Fremspring
Mellemplade
Fremspring
Forklaring af selvdiagnose fejlkode
Denne mikroovn overvåger sig selv og viser en fejlkode i displayet, hvis der opstår problemer.
Hvad der skal gøres når en fejlkode fremkommer i displayet: Tag stikket ud af stikkontakten og vent ca.
10 sekunder med at sætte stikket i stikkontakten igen.Såfremt ovnen ikke begynder at fungere normalt aflæs
venligst nedenstående skema.
KODE
F01
F33-34
F05
F81-82
F86-87
F44
Bemærk: De ovenstående fejlkoder viser ikke alle de tænkelige fejl i mikroovnen.
PROBLEM
Temperaturen på
udsugningsluften er for
høj.
Defekt termistor enhed.
Defekt hukommelses IC
Defekt relæ enhed.
Defekt relæ enhed.
Defekt kontrolpanel.
•
Ovnen stopper automatisk.Tag ledningen ud af stikkontakten.
•
Ovnen bipper uafbrudt og er klar til brug, når den er kold.
•
Flyt oven til et koldere sted.
•
Hvis problemet fortsætter, så tilkald og informer servicemand om fejlen.
•
Ovnen stopper automatisk. Fortsætter problemet, så tilkald og informer servicemand om fejlen.
•
Fortsætter problemet tilkald og informer servicemand om fejlen.
•
Selvom fejlk ode vises, vil ovnen fungere - bare ikke efter hensigten.Tilkald servicemand.
•
Hvis fejlen opstår under hukommelsesopvarmning, tryk stop/annuleringsknappen, så vil
de andre hukommelsesprogrammer og manuel opvarmning virke.
•
Fortsætter problemet tilkald og informer servicemand om fejlen.
•
Selvom fejlk ode vises, vil ovnen fungere - bare ikke efter hensigten, så tilkald servicemand.
•
Tryk stop/annuleringsknappen og prøv igen.
•
Ovnen stopper automatisk. Fortsætter problemet tilkaid og informer servicemand om fejlen.
•
Ovnen stopper automatisk. Fortsætter problemet tilkaid og informer servicemand om fejlen.
- 94 -
LØSNING
Page 97

Vedligeholdelse af mikrobølgeovnen
1. Tag netledningens stik ud af stikkontakten, før du
rengør ovnen.
2. Hold indersiden af ovnen [og midterhylden (kun
NE-2146-2/2156-2)] ren.
Hvis madrester eller spildte väsker bliver siddende
på ovnsiderne eller imellem tätningslisten og
ovnlågen, vil de optage mikrobölger og kan
forårsage gnistbuer eller gnister.
Tör ovnen ren med en våd lunken klud.
Opvaskemiddel kan anvendes hvis ovnen bliver
meget beskidt. Anvendes ikke skrape eller slibende
rengöringsmidler.
Den midterste hylde kan enten rengöres i varm
säbevand eller i opvaskemaskinen.
RENGØRING AF
STÆNKBESKYTTEREN
1. Tag fat i de stænkbeskytterens udtagelige
sidestopper med begge hænder og træk den ind og
ned.Tag derefter stænkbeskytteren ud af ovnen.
3. Mikrobolgeovnens ydre bør rengøres med sæbe og
vand og derefter aftørres med en tør klud. Sørg for,
at vandet ikke trænger ind i ventilationsåbningerne
på bagsiden, da dette kan beskadige ovnen.
4. Dørruden bør vaskes med meget mild sæbe og
vand. Brug en blød klud.Br ug aldrig
vinduespudsemiddel. Frontdøren kan ridses, hvis
du anvender for kraftige rensemidler.
RENGØRING AF LUFTFILTERET
Rengør luftfilteret af og til som anvist herunder. Der
kan være problemer med ovnen.hvis luftfilteret er
tilstoppet af snavs.(*)
1. Fjern luftfilteret fra forsidens bundkant ved at
trække den højre tap lige ud. Tryk derefter filteret
mod højre og løft det fri af kanten til venstre.
2. Rens stænkbeskytteren med sæbevand.
3. Husk at sætte beskytteren ind igen, før du bruger
ovnen.
ADVARSEL
Stænkbeskytteren skal sidde rigtigt på plads, når
du bruger ovnen.
Tilberedning af flere ting samtidig
(kun NE-2146-2/2156-2)
1. Hvis det kun er en enkelt genstand der skal
tilberedes, sæt den i midten af ovnen.
2. Hvis mikroovnen benyttes til genopvarmning - en
genstand ad gangen - fjern da hylden og brug kun
grundpladen.
3. Er der to genstande der skal opvarmes, placér da
en genstand i hver side af hylden, medmindre
genstandene er for store.Placér da en genstand på
hver hylde.
Tap
Kant
2. Vask filteret med sæbevand.
3. Husk at montere luftfilteret igen, før du bruger
ovnen.
(*)Hvis luftfilteret er tilstoppet af snavs eller fedt, vil
dette føre til overophedning af ovnen.
4. Når to tallerkener skal opvarmes, placér da de to
tallerkener lige på hver sin hylde.
5. Tillad lidt rum mellem hver tallerken, pres ikke for
meget mad ind i ovnen.
6. Hvis den midterste hylde ikke benyttes, skal den
tages helt ud af ovenen.Den må ikke placeres i
bunden af ovnen.
Dansk
- 95 -
Page 98

Tilberednings –– og optønings guide ––
Tiderne i det nedenstående skema er kun ca. angivelser. Faktorer såsom mængde og temperaturen på maden i
ovnen samt hvilke skåle/fade der benyttes spiller også ind. Justér selv tiderne som nødvendigt.
Alle tider er sat udfra en starttemperatur på:
Vær altid sikker på, at madens indre temperatur følger de regulativer, som er givet af de danske myndigheder.
Kølevarer: . . . . . .ca. +5˚C
Frostvarer: . . . . . .ca. -18˚C
Funktion
Optøning
Tilberedning af
rå kølevarer
Tilberedning/
optøning fra
frost
Fødevaretype Vægt
Fiskefileter
Hakket oksekød
Kylling
Gryderet
Flere portioner
Enkelt portioner
Æble Pie
Kage
Rundstykker
Røræg
Broccoli
Fiskefileter
Bacon
Kylling - portion
Ærter
Kogt ris
Kogte pølser
Cheese-burger
Chokoladekage
med creme
500 g
500 g
1,36 kg
1,36 kg
275 g
1 portion
1 portion
1 portion 50 g
2 æg + 2 spsk. mælk
500 g
500 g
2 skiver
500 g
500 g
167 g
3 x 50 g
75 g
1 portion
Effekt-
niveau
Tid
NE-2156-2
NE-2146-2
8 min 8 min 8 min
5 min 5 min 5 min
25 min 25 min 25 min
20 min 20 min 20 min
8 min 8 min 8 min
1 min 15 s 1 min 15 s 1 min 15 s
2 min 2 min 2 min
30 s 30 s 30 s
20–25 s 25–30 s 30–40s
3 min 3 min 30 s 3 min 55 s
2 min 20 s 2 min 45 s 3 min
40 s 50 s 1 min
4 min 4 min 45 s 5 min 20 s
3 min 20 s 4 min 4 min 30 s
1 min 20 s 1 min 40 s 1 min 55 s
50 s 1 min 1 min 5 s
50 s 1 min 1 min 5 s
30 s 30 s 30 s
NE-1846 NE-1656/1646
Opvarmning af
tilberedt mad
fra køl
TIPS:•Optø/opvarm/tilbered ikke madvarer direkte på ovnpladen - brug en skål, et fad eller en anden beholder.
Når flere portioner skal tøes op, vend maden og del den ud i mindre stykker halvvejs gennem
•
optøningen for at opnå en bedre effekt af mikrobølgerne.
Kraftige eller kompakte retter/fødevarer bør ikke tilberedes fra dybfrost idet de ydre sider vil få for meget
•
inden kernen er tøet helt op og har nået den korrekte temperatur.
Dæk maden til hvor det er muligt.Dette vil bevare saften i fødevarerne og sikre at det ikke sprøjter på
•
ovnens indvendige sider.
Prik hul i indpakningsfilmen eller sæt låget løst på før den indpakkede mad tilberedes/optøes.
•
Ryst eller rør i maden halvvejs gennem tilberedningstiden/optøningen for at give en bedre
•
varmefordeling.
Lad maden stå et øjeblik i ovnen indtil temperaturen er kontrolleret og maden evt. kan serveres.
•
Lasagne
Chili
Æble Pie
Peber sauce
Baked Beans
Suppe
325 g
325 g
1 portion
100 ml
100 ml
125 ml
3 min 20 s 4 min 4 min 30 s
2 min 30 s 3 min 3 min 15 s
14 s 16 s 18 s
40 s 50 s 56 s
40 s 50 s 56 s
48 s 56 s 1 min 10 s
- 96 -
Page 99

- 97 -
Norsk
Viktig Sikkerhetsregler
INSTALLASJON
JORDING
VIGTIG:
AV SIKKERHETSGRUNNER MÅ DETTE
APPARATET TILKOBLES JORDET NETTKONTAKT.
Hvis stikkontakten ikke er jordet, er det brukerens eget
ansvar å sørge for at den blir byttet ut og at den blir
forskriftsmessig jordet.
NETTSPENNING
Nettspenningen skal være den samme som den som
er spesifisert på mikrobølgeovnen. Bruk av høyere
spenning enn den som er spesifisert, er farlig og kan
forårsake brann eller annen skade.
PLASSERING AV OVNEN
Sett ovnen på en jevn og stabil flate.Sett den ikke på
et varmt eller fuktig sted, f.eks.nær inntil annen ovn
eller varmekilde. Ikke bruk ovnen i høyere
rometemperatur enn 40˚C og/eller i luftfuktighet over
85%. Det er viktig at det er fri luftflyt rundt ovnen.
Mikrobølgeovnen kan forårsake noe interferens med
svake singaler hvis den plasseres for nær radio eller
TV.
For sikker installasjon må det være tilstrekkelig med
ventilasjon rundt ovnen. min. 5 cm påsidene, bak og
20 cm over.
Plassèr denne mikrobølgeovnen slik at stikkontakten
er tilgjengelig.
FORSIKTIG
FJERNING AV BESKYTTELSESFILM
Ovnen er dekket med en beskyttelsesfilm som hindrer
riping under transport. Fjern denne filmen før
installasjon og bruk.
IKKE START TOM OVN
For å unngå å svekke strålerørene eller andre
komponenter anbefales at man aldri starter ovnen
uten at det er mat i den.
IKKE ÅPNE OVNSKABINETTET
Det er høye spenninger inne i kabinettet. Reparasjoner
og justeringer skal bare utføres av kvalifiser t
servicepersonale.
IKKE BLOKKER LUFTVENTILENE
Mikrobølgeovnen må ha fri luftflyt på baksiden for
maksimal kjøleeffekt. Luftventilene må ikke være tilde
kket under bruk.
IKKE TØRK TØY I OVNEN
Tørk aldri tøy i ovnen. Det kan oppstå brann hvis tøyet
blir liggende for lenge.
SETT PÅ ADVARSEL—MERKE
Hvis et varsel-merke er lever t med din ovn, sett det på
før bruk! Velg riktig merke, og sett på toppen av ovnen!
Dette produktet opfyller den europeiske standard EN 55011 for EMC forstyrrelser (EMC = Elektromagnetisk
kompatibilitet). I henhold til denne standard er dette produkt et apparat i gruppe 2, klasse B og opfyller kravene
for dette.Gr uppe 2 betyr at radio-frekvent energi dannes i form av elektromagnetiske bølger, med henblikk på
oppvarming av mat. Klasse B betyr at dette produkt kan benyttes i almindelige husholdninger.
Page 100

- 98 -
Viktig Sikkerhetsregler
ADVARSEL
1. Tetningslistene i døren og anleggsflatene bør
rengjøres med en fuktig klut.
2. Ved skader på tetningslister eller anleggsflater
må ovnen ikke brukes før den er reparert av
kvalifisert servicepersonale.
3. Det medfører fare for andre enn kvalifisert
servicepersonale å utføre reparasjon av ovnen.
4. Ved røykutvikiling må stopp/resettasten trykkes
inn og døren holdes lukket. Ta støpselet ut av
nettkontakten.
5. Hvis nettledningen skades, må den byttes ut på
et kvalifisert verksted for å opprettholde
sikkerheten.
6. Før bruk må det kontrolleres om
kjøkkenredskapene er egnet for mikrobølgeovn.
7. Ved oppvarming av væsker, for eksampel supper,
sauser og drikker, kan væsken koke over uten at
den bobler.Dette kan gi plutselig overkoking av
den varme væsken. For å unngå overkoking, bør
følgende forholdsregler tas:
a) Ikke bruk beholdere med rette sider og smale
halser.
b) Ikke bruk for sterk varme.
c) Rør om i væsken før den helles i beholderen,
og rør om på nytt etter halvgått oppvarmimgstid.
d) Etter oppvarming bør beholderen få stå i ovnen
en kort stund. Rør så om før den tas forsiktig
ut.
8. Ved oppvarming av mat i plast eller
papirbeholdere må det kontrolleres at beholderen
ikke antennes.
9. Innholdet i tåteflasker og babymatglass må ristes
eller røres om.
10
.Væsker eller matvarer må ikke varmes i lukkede
beholdere fordi de kan utvide seg og eksplodere.
11
. Egg med skall og hele hardkokte egg bør ikke
varmes i mikrobølgeovn fordi de kan eksplodere.
12
. Oppvarming av drikker i mikrobølgeovn kan gi
forsinket etteroppkoking, slik at beholderen må
håndteres med varsomhet.
13
. Barn må bare få bruke ovnen hvis man er helt
sikker på at de virkelig skjønner betjeningen og
forstår farene ved feil bruk.
 Loading...