

Page 1
Quick Reference Guide
Colour Laser Multi-Function Printer
Model No. KX-MC6040CX
This pictured model is KX-MC6040.
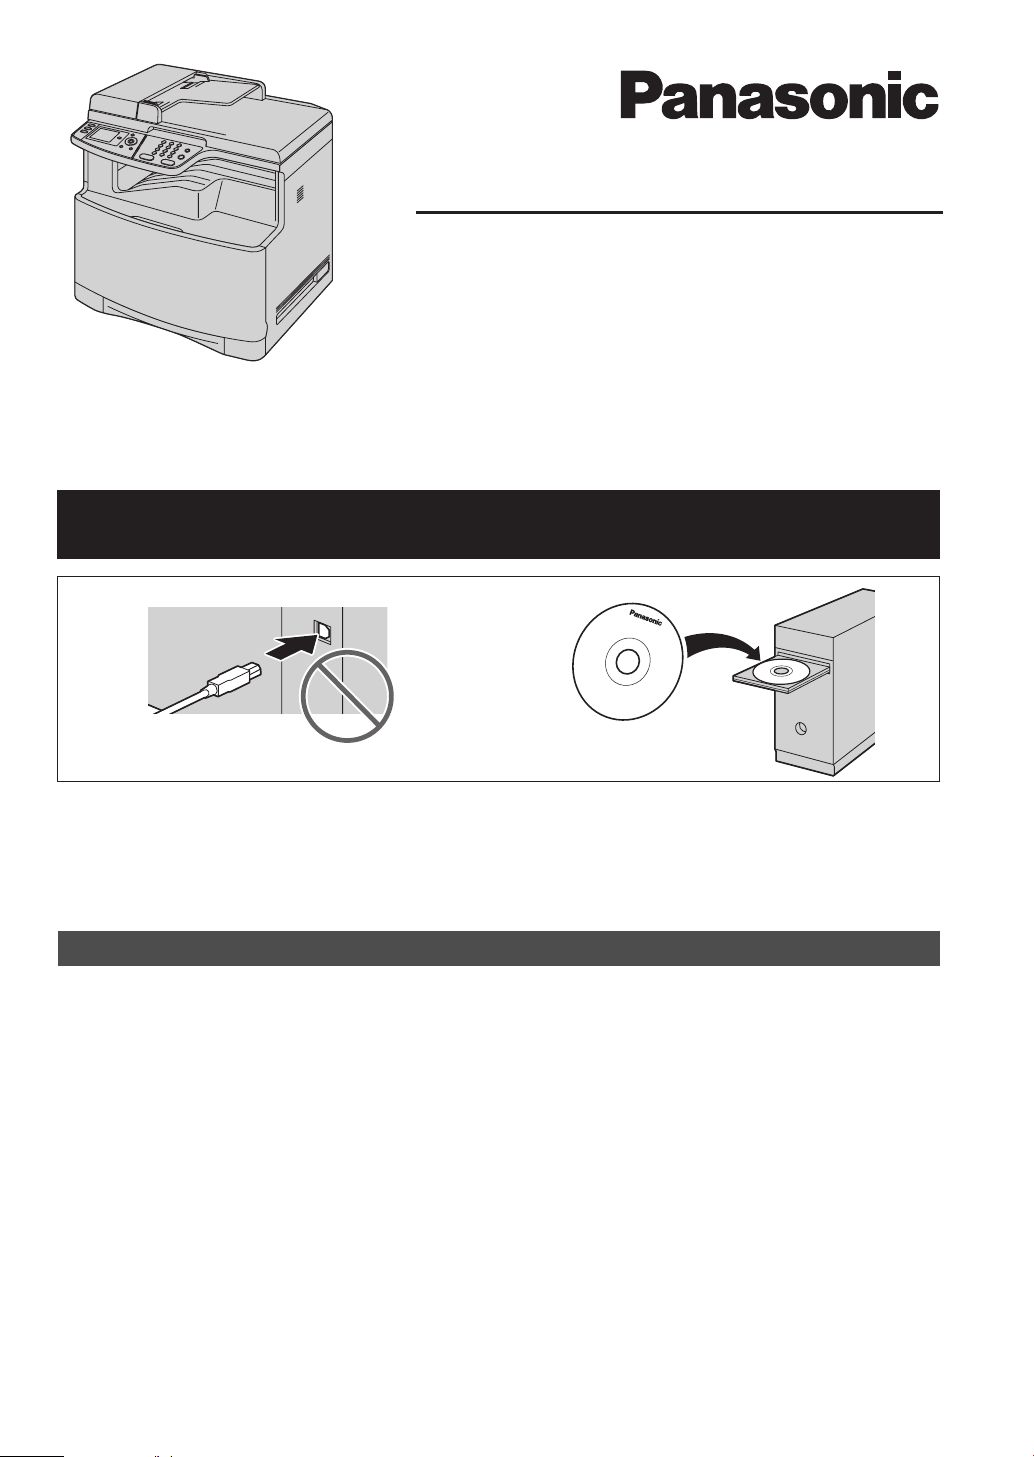
Do NOT connect the unit to a computer with the USB cable until prompted by the MultiFunction Station (CD-ROM).
KX-MC6260CX
12
This Quick Reference Guide provides safety instructions and a basic description of the unit’s functions. An
illustrated leaflet provides instructions for easy installation. Please read before using the unit and save for
future reference.
The supplied Setup CD-ROM provides the Operating Instructions in PDF format with a detailed description
on how to use the unit. Adobe
Be sure to use the USB cable supplied with this unit.
®
Reader® is required to view them.
L This unit is compatible with Caller ID. You must subscribe to the appropriate service offered
by your service provider/telephone company.
L Be sure to use the telephone line cord supplied with this unit.
Location selection:
Designed to be used in Middle East, Malaysia, Asia, Australia, New Zealand, Africa and Latin
America according to the location setting feature.
The default setting is Middle East. To change the location setting, see following:
1. {Menu} i {#}{1}{1}{4}
2. Press {1} to {7} to select the desired location. i {Set} i {Menu}
{1} “Middle East” (default): To use in Middle East.
{2} “Malaysia”: To use in Malaysia.
{3} “Asia”: To use in Asia.
{4} “Australia”: To use in Australia.
{5} “New Zealand”: To use in New Zealand.
{6} “Africa”: To use in Africa.
{7} “Lat.America”: To use in Latin America.
Page 2
Thank you for purchasing a Panasonic MultiFunction Printer.
User record (for your future reference)
Date of purchase
Serial number (found on the rear of the unit)
Dealer’s name and address
Dealer’s telephone number
Attach your sales receipt here.
Note:
L The suffix in the model number will be omitted in
these instructions.
L Most figures shown in this quick reference guide are
based on a KX-MC6040.
Trademarks:
L Windows and Windows Vista are either registered
trademarks or trademarks of Microsoft Corporation
in the United States and/or other countries.
L Adobe and Reader are either registered trademarks
or trademarks of Adobe Systems Incorporated in the
United States and/or other countries.
L SD and the SD logo are trademarks (KX-MC6260
only).
L All other trademarks identified herein are the
property of their respective owners.
Copyright:
L This material is copyrighted by Panasonic
Communications Co., Ltd., and may be reproduced
for internal use only. All other reproduction, in whole
or in part, is prohibited without the written consent of
Panasonic Communications Co., Ltd.
© 2008 Panasonic Communications Co., Ltd. All Rights
Reserved.
You can select English or Spanish for the language.
The display and reports will be in the selected language.
The default setting is English. If you want to change the
setting, see following:
1. {Menu} i {#}{1}{1}{0}
2. Press {1} or {2} to select the desired language. i
{Set} i {Menu}
{1} “English” (default): English is used.
{2} “Spanish”: Spanish is used.
Designed to be used in Middle East, Malaysia, Asia,
Australia, New Zealand, Africa and Latin America
according to the location setting feature.
The default setting is Middle East. To change the
location setting, see page 1 (feature #114).
Notice for product disposal, transfer, or return:
L This product can store your private/confidential
information. To protect your privacy/confidentiality,
we recommend that you erase the information such
as phonebook (or caller information) from the
memory before you dispose of, transfer or return the
product.
Environment:
L Panasonic’s strategic direction incorporates concern
for the environment into all aspects of the product life
cycle, from product development to energy saving
designs; from greater product reusability to wasteconscious packaging practices.
2
Page 3

For Australian users
Warning:
●
Please ensure that a separate telephone, not dependent on local power, is available for emergency
use.
●
This equipment will be inoperable when mains power fails.
●
When a failure occurs which results in the internal parts becoming accessible, disconnect the power
supply cord immediately and return this unit to an authorised service centre.
●
Disconnect the telephone connection before disconnecting power connection prior to relocating the
equipment, and reconnect the power first.
●
To minimize the possibility of lightning damage, when you know that a thunderstorm is coming, we
recommend that you:
A. Unplug the telephone line cord from the phone jack.
B. Unplug the power supply cord from the AC power outlet.
●
No “000” or other calls can be made from this device during a mains power failure.
●
The earcap on the handset is magnetised and may retain metallic objects.
For New Zealand users
Warning:
●
WHEN A FAILURE OCCURS WHICH RESULTS IN THE INTERNAL PARTS BECOMING
ACCESSIBLE, DISCONNECT THE POWER SUPPLY CORD IMMEDIATELY AND RETURN THIS
UNIT TO AN AUTHORISED SERVICE CENTRE.
●
DISCONNECT THE TELECOM CONNECTION BEFORE DISCONNECTING THE POWER
CONNECTION PRIOR TO RELOCATING THE EQUIPMENT, AND RECONNECT THE POWER
FIRST.
●
NO “111” OR OTHER CALLS CAN BE MADE FROM THIS DEVICE DURING A MAINS POWER
FAILURE.
IMPORTANT NOTICE
Under power failure conditions, this telephone may not operate. Please ensure that a separate
telephone, not dependent on local power, is available for emergency use.
Notice:
●
The grant of a Telepermit for any item of terminal equipment indicates only that Telecom has
accepted that the item complies with minimum conditions for connection to its network. It indicates no
endorsement of the product by Telecom, nor does it provide any sort of warranty. Above all,
it provides no assurance that any item will work correctly in all respects with another item of
Telepermitted equipment of a different make or model, nor does it imply that any product is compatible
with all of Telecom’s network services.
●
This equipment shall not be set to make automatic calls to the Telecom “111” Emergency Service.
●
This equipment should not be used under any circumstances which may constitute a nuisance to
other Telecom customers.
●
Not all telephones will respond to incoming ringing when connected to the extension socket.
●
Different characteristics of the equipment at the other end of the call, and/or variations in line
conditions, may mean that it will not always be possible to communicate at the higher speeds for
which this machine has been designed. Neither Telecom or Panasonic New Zealand can accept
responsibility should this situation arise.
3
Page 4
Important information (for Australian users)
Instructions to customer
Installation
Attached to this apparatus is an approval label. This label is evidence that it is a “Permitted Attachment”
which has been authorised to be connected to your telephone service.
Conditions relating to connection and operation of this Permitted Attachment are contained in
Telecommunications General By-Law 220 (5).
You are authorised to install this Permitted Attachment yourself by plugging it into the line socket of any
regular telephone. You may connect it in place of your existing telephone or to any spare telephone
socket installed in your premises.
To disconnect your existing telephone you must first remove its plug from the line socket. You can then
insert the plug of your Permitted Attachment into the socket and use your equipment.
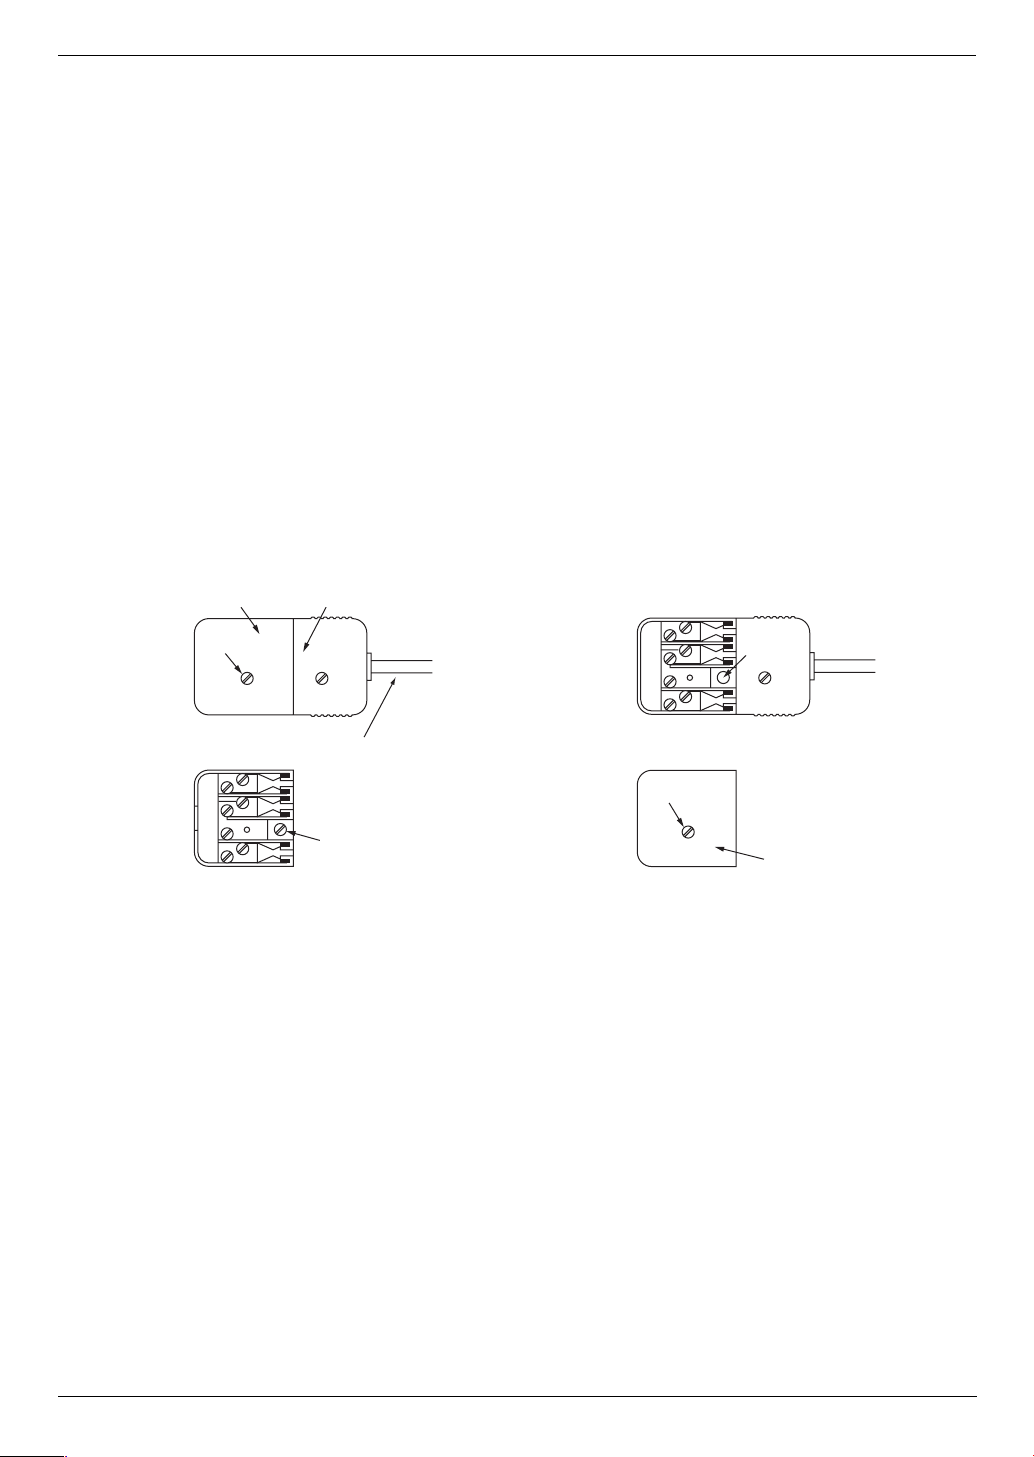
If the plug of your existing telephone cannot be readily removed, you will have to remove the screw
securing it. To do this proceed as follows:
1. Loosen screw “A” sufficiently to remove the socket cover. (See Fig. 1.)
2. Remove screw “B” and withdraw the plug. (See Fig. 2.)
3. Replace screw “B”. (See Fig. 3.) Ensure that it screws completely into the socket recess. (If the screw
is too long, increase the hole depth or replace the screw with one 5 mm shorter.)
4. Replace socket cover and tighten screw “A”. (See Fig. 4.)
SOCKET
SCREW “A”
If you are satisfied with the operation of your telephone service after plugging in your Permitted
Attachment, your installation is completed.
You will be unable to connect this Permitted Attachment if your telephone service consists only of a wall
phone or an old style telephone which is not connected by means of a modern plug and socket. In such
cases a new socket will need to be installed.
Should the Permitted Attachment not operate when plugged into a socket, it is either faulty or unsuitable
for operation with your telephone service. It should be returned to the store where purchased.
Fig. 1
Fig. 3
PLUG
Fig. 2
TELEPHONE CORD
Connect to the PLUG
( )
as shown in Fig. 1.
SCREW
“B”
SCREW “A”
Fig. 4
SCREW
“B”
SOCKET
Service difficulties
If at any time a fault occurs on your telephone service carry out the following checks before you call for
service:
L Disconnect the Permitted Attachment and try using the service with the normal telephone.
L If the telephone service then operates satisfactorily, the fault is in your Permitted Attachment. Leave
the Permitted Attachment disconnected and report the fault to its supplier or agent to arrange for
repair.
L If when using the telephone the service is still faulty, report the fault to “Service Difficulties and Faults”
for attention.
You are required to keep this Permitted Attachment in good working order while it is connected to your
telephone service. Its construction or internal circuit must not be modified in any way without permission.
4
Page 5
Important InformationSafety In struc tions1Detailed operating instructions are on th e CD-ROM.
For your safety
To prevent severe injury and loss of life/property, read
this section carefully before using the unit to ensure
proper and safe operation of your unit.
L The following symbols are used to classify and
describe the level of hazard and injury caused
when the denotation is disregarded and
improper use is performed.
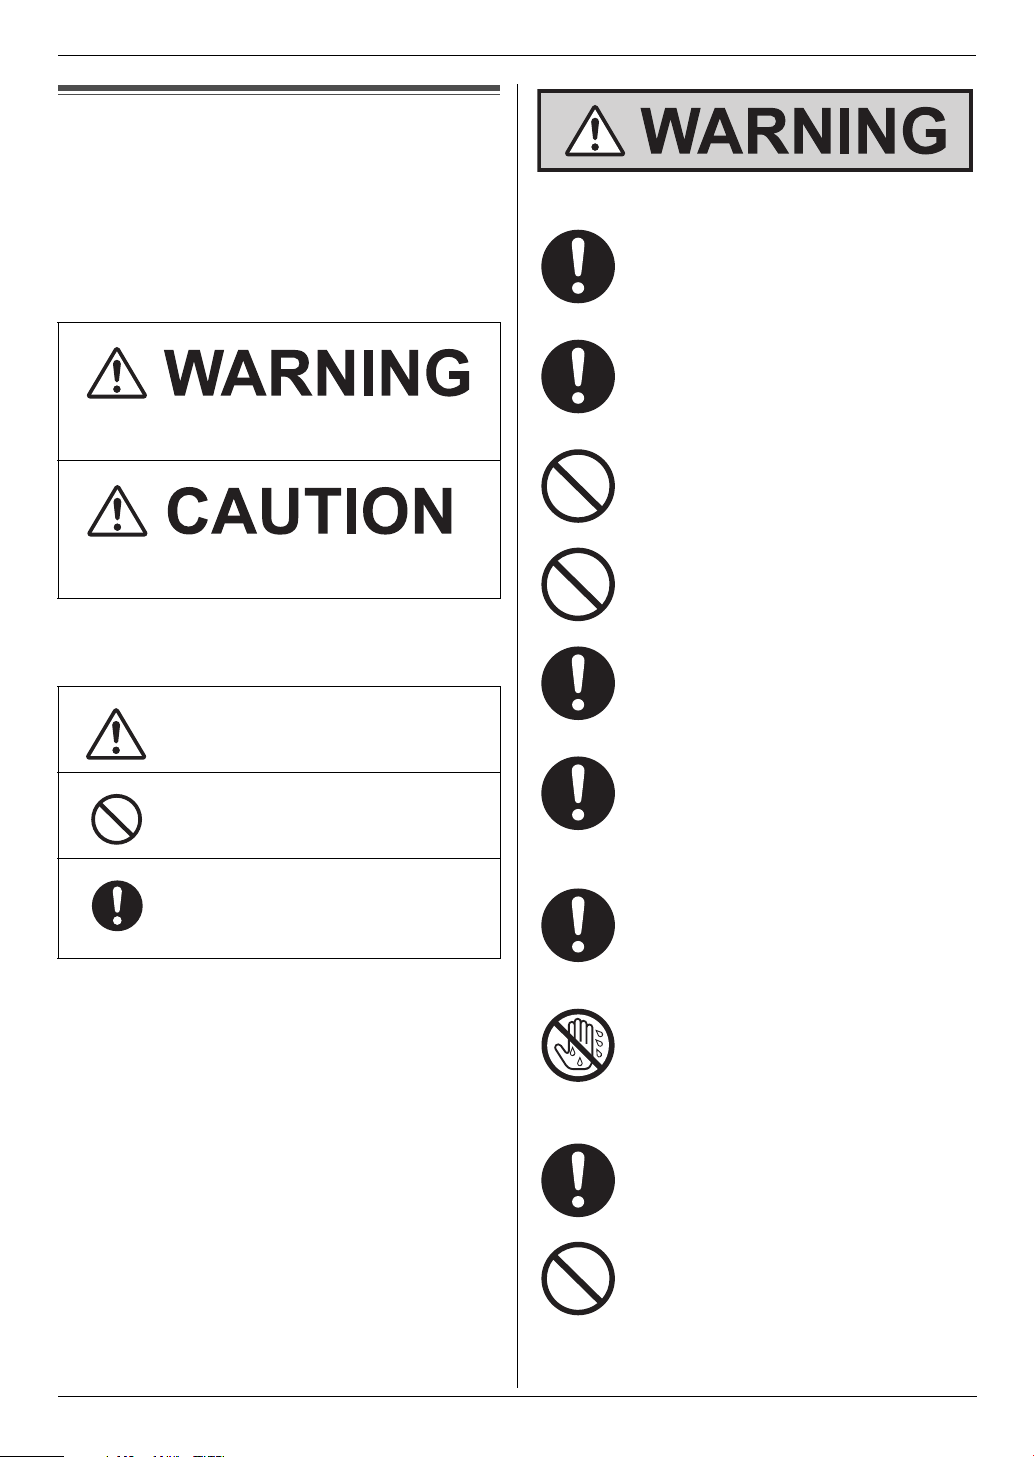
Denotes a potential hazard that could result in
serious injury or death.
Important Information
Power and ground connection
Use only the power source marked on the
unit. If you are not sure of the type of power
supplied to your home, consult your dealer
or local power company.
For safety purposes this unit is equipped
with a grounded plug. If you do not have this
type of outlet, please have one installed. Do
not defeat this safety feature by tampering
with the plug.
Do not place objects on the power cord.
Install the unit where no one can step or trip
on the cord.
Denotes hazards that could result in minor injury or
damage to the unit.
L The following symbols are used to classify and
describe the type of instructions to be observed.
This type of symbol is used to alert users
to a specific operating procedure that
must be performed carefully.
This type of symbol is used to alert users
to a specific operating procedure that
must not be performed.
This type of symbol is used to alert users
to a specific operating procedure that
must be emphasized in order to operate
the unit safely.
Do not overload power outlets and
extension cords. This can result in the risk of
fire or electric shock.
Completely insert the AC adaptor/power
plug into the power outlet. Failure to do so
may cause electric shock and/or excessive
heat resulting in a fire.
Regularly remove any dust, etc. from the AC
adaptor/power plug by pulling it from the
power outlet, then wiping with a dry cloth.
Accumulated dust may cause an insulation
defect from moisture, etc. resulting in a fire.
Unplug this unit from power outlets if it emits
smoke, an abnormal smell or makes
unusual noise. These conditions can cause
fire or electric shock. Confirm that smoke
has stopped and contact an authorised
service centre.
Never touch the plug with wet hands. There
is a danger of electric shock.
Installation
Place the unit securely on a stable, level
surface. Serious damage and/or injury may
result if the unit falls.
To prevent the risk of fire or electrical shock,
do not expose this product to rain or any
type of moisture.
Detailed operating instructions are on the CD-ROM.
5
Page 6
Important Information
Make sure that the unit is installed in a well
ventilated room so as not to increase
density of ozone in the air. Since ozone is
heavier than air, it is recommended that air
at floor level be ventilated.
Operating safeguards
Turn the power switch OFF before cleaning.
Do not use liquid or aerosol cleaners.
Do not cover slots and openings on the unit.
They are provided for ventilation and
protection against overheating. Never place
the unit near radiators, or in a place where
proper ventilation is not provided.
Never push any objects through slots in this
unit. This may result in the risk of fire or
electric shock. Never spill any liquid on the
unit.
To reduce the risk of electric shock, do not
disassemble this unit. Take the unit to an
authorised service centre when service is
required. Opening or removing covers may
expose you to dangerous voltage or other
risks. Incorrect reassembly can cause
electric shock when the unit is subsequently
used.
SD™ card
Do not place SD cards within reach of
children. If a child swallows an SD card,
seek immediate medical treatment (KXMC6260 only).
Installation and relocation
After moving the unit from cold areas to
warmer areas, wait approximately 30
minutes before turning on the power switch
to allow the unit to adjust to the ambient
temperature. If the power switch is turned on
too soon after a sudden climate change,
condensation may form inside the unit,
causing malfunction.
Never turn the unit upside down or sideways
when moving it.
Never install telephone wiring during a
lightning storm.
Follow all warnings and instructions marked
on this unit.
Do not spill liquids (detergents, cleansers,
etc.) onto the telephone line cord plug, or
allow it to become wet at all. This may cause
a fire. If the telephone line cord plug
becomes wet, immediately pull it from the
telephone wall jack, and do not use.
Unplug this unit from power outlets and refer
servicing to an authorised service centre
when any of the following conditions occur:
L If the power cord is damaged or frayed.
L If liquid has been spilled into the unit.
L If the unit has been exposed to rain or
water.
L If the unit does not work normally by
following the operating instructions.
Adjust only controls covered by the
operating instructions. Improper
adjustment may require extensive work
by an authorised service centre.
L If the unit has been dropped or
physically damaged.
L If the unit exhibits a distinct change in
performance.
Never install telephone jacks in wet
locations unless the jack is specifically
designed for wet locations.
Never touch uninsulated telephone wires or
terminals unless the telephone line has
been disconnected at the network interface.
Use caution when installing or modifying
telephone lines.
Do not position the unit in a location where it
is unstable or subject to vibrations.
6
Detailed operating instructions are on the CD-ROM.
Page 7
Laser radiation
CLASS 1 LASER PRODUCT
The printer of this unit utilises a laser. Use of
controls or adjustments or performance of
procedures other than those specified
herein may result in hazardous radiation
exposure.
See the operating instructions for the Laser
diodes properties.
Fuser unit
During or immediately after printing, the
fuser unit gets hot. This is normal. Do not
touch the fuser unit.
Note:
L The area near the recording paper exit also gets
warm. This is normal.
Toner cartridge
Be careful of the following when you handle the toner
cartridge:
Important Information
Important safety instructions
When using this unit, basic safety precautions should
always be followed to reduce the risk of fire, electric
shock, or personal injury.
1. Do not use this unit near water, for example near a
bathtub, wash bowl, kitchen sink, etc.
2. For users other than Australia:
During thunderstorms, avoid using telephones
except cordless types. There may be a remote risk of
an electric shock from lightning.
For Australian users:
During thunderstorms, avoid using telephones
including cordless phones. There is a risk of an
electric shock from lightning.
3. Do not use this unit to report a gas leak, when in the
vicinity of the leak.
SAVE THESE INSTRUCTIONS
USB cable
If you ingest any toner, drink several glasses
of water to dilute your stomach contents,
and seek immediate medical treatment.
If any toner comes into contact with your
eyes, flush them thoroughly with water, and
seek medical treatment.
If any toner comes into contact with your
skin or clothing, wash the area thoroughly
with cold water, then air dry. Do not use hot
water or hair dryer. If there is skin irritation,
seek immediate medical treatment.
If you inhale any toner, move to an area with
fresh air and consult local medical
personnel.
Use only shielded USB cable (Example: HiSpeed USB 2.0 certified cable).
Detailed operating instructions are on the CD-ROM.
7
Page 8
Important Information
For best performance
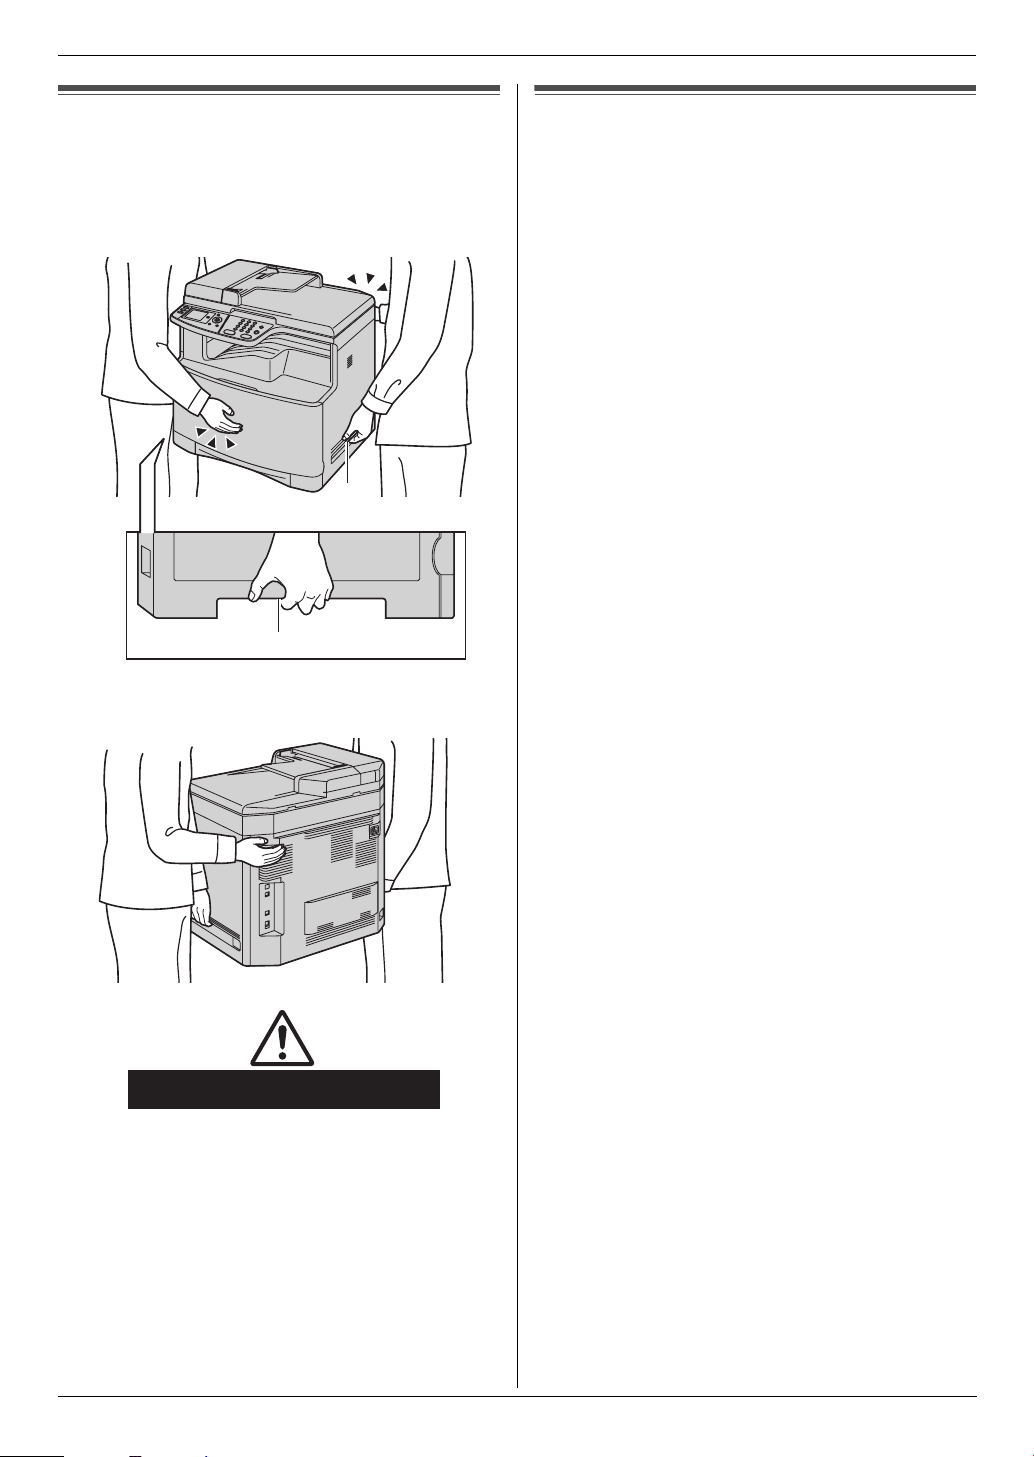
Moving the unit
The unit weighs approximately 30 kg. It is highly
recommended that two people handle this unit.
When moving the unit, hold both of the side grips (1).
1
1
Illegal copies
L It is unlawful to make copies of certain
documents.
Copying certain documents may be illegal in your
country. Penalties of fines and/or imprisonment may
be imposed on those found guilty. The following are
examples of items that may be illegal to copy in your
country.
– Currency
– Bank notes and checks
– Bank and government bonds and securities
– Passports and identification cards
– Copyright material or trademarks without the
consent of the owner
– Postage stamps and other negotiable
instruments
This list is not inclusive and no liability is
assumed for either its completeness or accuracy.
In case of doubt, contact your legal counsel.
Notice:
L Install your machine near a supervised area to
prevent illegal copies from being made.
Approx. 30 kg
8
Detailed operating instructions are on the CD-ROM.
Page 9

Operating Instructions (CD-ROM)1Detailed operating instructions are on th e CD-ROM.
Operating instructions in the CDROM
The operating instructions on the CD-ROM consist of the
following contents. Adobe Reader is required to view
them.
L To view or install the operating instructions on
the CD-ROM, see page 15.
1. Introduction and Installation
L Information prior to using the unit, for example
how to install the toner cartridge and drum
cartridge, and other accessories.
2. Preparation
L Main settings prior to activating the unit, such as
Multi-function software information.
3. Printer
L More ways to use the printer, such as printing on
special media.
4. Scanner
L More ways to use the scanner, such as saving
as a file or sending as an e-mail attachment.
Operating Instructions (CD-ROM)
5. Copier
L More ways to use the copier function, such as
enlargement/reduction, and ways to reduce
paper use.
6. Fax
L Convenient ways to send faxes such as using
navigator directory and broadcast transmission.
L More ways to receive faxes, and preventing fax
reception from undesired callers.
7. Caller ID
8. Distinctive Ring
9. Programmable Features
10.Useful Information
11.Help
L Troubleshooting
12.Paper Jams
13.Cleaning
14.General Information
L Specifications
Detailed operating instructions are on the CD-ROM.
9
Page 10

Table of Contents
1. Table of Contents
Table of Contents (Quick
Reference Guide)
1. Introduction and Installation
Accessories
1.1 Supplied accessories .................................. 11
1.2 Accessory information................................. 12
Connections and Setup
1.3 Connections ................................................ 12
1.4 Turning the power switch ON....................... 13
1.5 Dialling mode............................................... 13
1.6 Selecting the operation mode (Scan/Copy/Fax)
(Print: KX-MC6260 only) ............................. 13
Document Requirements
1.7 Setting the original....................................... 13
Vo lu m e
1.8 Adjusting the volume ................................... 14
Initial Programming
1.9 Date and time.............................................. 14
1.10 Your logo...................................................... 14
1.11 Your fax number .......................................... 14
1.12 Configuring the unit to access the LAN ....... 14
1.13 Installing Multi-Function Station .................. 15
2. How to Use
Printer
2.1 Printing from Windows applications ............ 16
Scanner
2.2 Scanning from the unit (Push Scan)............ 16
2.3 Scanning from a computer (Pull Scan)........ 16
Copy
2.4 Making a copy ............................................. 16
Sending Faxes
2.5 Sending a fax manually ............................... 16
Receiving Faxes
2.6 Receiving a fax automatically – Auto answer
ON ............................................................... 17
Useful Information
2.7 Cancelling the operations............................ 17
2.8 Maintenance (Cleaning the drum cartridge) 17
3. Help
Error Messages
3.1 Error messages – Display ........................... 18
10
Page 11

1. Introduction and Installation
1Introdu ction and Installation1Detailed operating instructions are on th e CD-ROM.Accessories
1.1 Supplied accessories
1 Toner cartridge (starter)
(Cyan/Magenta/Yellow/Black)
2 Colour drum cartridge 3 Monochrome drum
4 Waste toner cartridge
(pre-installed inside the
unit)
*1
cartridge
5 CD-ROM
9 Telephone line cord
(Use the appropriate
telephone line cord for
where you use the
unit.)
j USB cable
6 Quick reference guide 7 Quick installation guide
8 Power c ord
(Use the appropriate
power cord for where
you use the unit.)
*1 Prints about 1,000 A4-size pages with a 5 %
coverage.
Note:
L Save the original carton and packing materials for
future shipping and transportation of the unit.
L After unpacking the product, take care of the power
plug cap and/or packing materials appropriately.
L Do not remove the drum cartridges and toner
cartridges from the unit when repacking the unit for
shipping and transportation.
Detailed operating instructions are on the CD-ROM.
11
Page 12

1. Introduction and Installation
1.2 Accessory information
To ensure that the unit operates properly, we
recommend the use of Panasonic toner cartridge and
drum cartridge.
■ Replacement accessories
– Toner cartridge
Colour Model No. (Part No.)
Cyan KX-FATC501A/KX-FATC501E
Magenta KX-FATM502A/KX-FATM502E
Yellow KX-FATY503A/KX-FATY503E
Black KX-FATK504A/KX-FATK504E
L Prints about 2,000 sheets of A4-size pages with a
5 % coverage using KX-FATC501A/KXFATC501E/KX-FATM502A/KX-FATM502E/KXFATY503A/KX-FATY503E and about 2,500
sheets using KX-FATK504A/KX-FATK504E.
– Toner cartridge (high capacity)
L Do not extend the telephone line cord.
3
8
7
5
4
6
*1
1
2
Colour Model No. (Part No.)
Cyan KX-FATC506A/KX-FATC506E
Magenta KX-FATM507A/KX-FATM507E
Yellow KX-FATY508A/KX-FATY508E
Black KX-FATK509A/KX-FATK509E
L Prints about 4,000 sheets of A4-size pages with a
5 % coverage.
– Colour drum cartridge
L Model No. (Part No.): KX-FADC510A/KX-
FADC510E
– Monochrome drum cartridge
L Model No. (Part No.): KX-FADK511A/KX-
FADK511E
– Waste toner cartridge
L Model No. (Part No.): KX-FAW505A/KX-
FAW505E
■ Optional accessories
– Optional lower input tray
L Model No. (Part No.): KX-FAP317A/KX-
FAP3 17E
– Automatic duplex unit
L Model No. (Part No.): KX-FAB318A/KX-
FAB318E
Connections and Set up
1.3 Connections
Caution:
L When you operate this product, the power outlet
should be near the product and easily
accessible.
L Be sure to use the telephone line cord supplied
with this unit.
*1
1 Power cord
L Connect to a power outlet
(220–240 V, 50/60 Hz).
2 Telephone line cord
L Connect to a single telephone line jack.
3 [EXT] jack
L You can connect an answering machine or an
extension telephone. Remove the stopper if
attached.
4 Answering machine (not supplied)
5 To the internet
6 Network router/Network hub (not supplied)
L Also connect networked computers.
7 LAN cable (not supplied)
L To assure continued emission limit compliance,
only use shielded LAN cable (category 5 straight
cable).
8 Automatic duplex unit (optional) connector
*1 The power cord or telephone line cord may differ
slightly. Use the appropriate power cord or telephone
line cord for where you use the unit.
IMPORTANT NOTICE FOR THE USB
CONNECTION
L DO NOT CONNECT THE UNIT TO A
COMPUTER WITH THE USB CABLE UNTIL
PROMPTED BY THE MULTI-FUNCTION
STATION (page 15).
Note:
L If any other device is connected to the same
telephone line, this unit may disturb the network
condition of the device.
12
Detailed operating instructions are on the CD-ROM.
Page 13

L A telephone handset cannot be connected directly to
this unit. To talk to the other party, please connect an
extension telephone.
Using network router/network hub
L We recommend using network routers/network hubs
(6) under secure network environments. Consult
your network administrator for firewall settings, etc.
L The warranty does not cover damage due to security
problems or any disadvantages relating to it.
Designed to be used in Middle East, Malaysia,
Asia, Australia, New Zealand, Africa and Latin
America according to the location setting feature.
The default setting is Middle East. To change the
location setting, see page 1 (feature #114).
1.4 Turning the power switch ON
Turn the power switch to the ON position (1).
1
1. Introduction and Installation
1.6 Selecting the operation mode
(Scan/Copy/Fax) (Print: KXMC6260 only)
You can select the desired mode by pressing one of the
following buttons.
* The pictured model is KX-MC6260.
– {Scan}: Select this mode when using the unit as a
scanner.
– {Copy}: Select this mode when using the unit as a
copier.
– {Fax}: Select this mode when using the unit as a fax
machine.
– {Print} (KX-MC6260 only): Select this mode when
using the unit as a printer.
Document Requirements
1.5 Dialling mode
Important:
L Not available when “Australia” or “New
Zealand” is selected in feature #114.
If you cannot dial, change this setting according to your
telephone line service.
1 {Menu}
2 Press {#}{1}{2}{0} to display “Dialling Mode”.
3 Press {1} or {2} to select the desired setting.
{1} “Pulse”: For rotary/pulse dial service.
{2} “Tone” (default): For tone dial service.
4 {Set}
5 Press {Menu} to exit.
1.7 Setting the original
1.7.1 Using the scanner glass
1
2
1
Open the document cover (1).
2 Place the document FACE DOWN on the scanner
glass (2), aligning the top left of the document with
the corner to which the m mark points.
Detailed operating instructions are on the CD-ROM.
13
Page 14

1. Introduction and Installation
3 Close the document cover.
1.7.2 Using the automatic document feeder
1
1
Insert the document (up to 50 pages) FACE UP into
the feeder until a single beep is heard.
2 Adjust the width of the document guides (1) to fit
the actual size of the document.
Volume
1.8 Adjusting the volume
Important:
L Before adjusting the volume, set the operation
mode to fax mode. If the {Fax} light is OFF, turn it
ON by pressing {Fax}.
2 Enter the current date/month/year/hour/minute.
Press {*} repeatedly to select 12-hour time entry or
24-hour time entry.
L If you selected 12-hour time entry, press {V} or
{^} repeatedly to select “AM” or “PM”.
Example: 10 August, 2008 10:15 PM (12 hour
clock format)
1. Press {V} or {^} repeatedly to select “Date”.
i {<} / {>}
2. Press {1}{0} {0}{8} {2}{0} {0}{8}.
D:10/M:08/Y:2008
3. {Set}
4. Press {V} or {^} repeatedly to select “Time”.
i {<} / {>}
5. Press {*}, then press {1}{0} {1}{5}.
6. Press {V} or {^} repeatedly to select “PM”.
10:15PM
7. {Set}
3 Press {Menu} to exit.
1.10 Your logo
You can program your logo (name, company name, etc.)
so that it appears on the top of each page sent.
1 {Menu} i {#}{1}{0}{2} i {Set}
2 Enter your logo, up to 30 characters using the dial
keypad. i {Set}
3 Press {Menu} to exit.
Ringer volume
1. Press {V} or {^} repeatedly to select “Ringer
Volume”.
2. Press {<} or {>}.
To turn the ringer OFF
1. Press {V} or {^} repeatedly to select “Ringer
Volume”.
2. Press {<} repeatedly to display “Ringer Off” in
the status bar.
L The unit will not ring.
L To turn the ringer back ON, press {>}.
Monitor volume
1. While using the monitor, press {V} or {^}
repeatedly to select “Monitor Volume”.
2. Press {<} or {>}.
Initial Programming
1.9 Date and time
1 {Menu} i {#}{1}{0}{1} i {Set}
14
Detailed operating instructions are on the CD-ROM.
1.11 Your fax number
You can program your fax number so that it appears on
the top of each page sent.
1 {Menu} i {#}{1}{0}{3} i {Set}
2 Enter your fax number, up to 20 digits.
L To enter a “+”, press {*}.
L To enter a space, press {#}.
L To enter a hyphen, press {Flash}.
L To erase a number, press {Back}.
3 {Set}
4 Press {Menu} to exit.
1.12 Configuring the unit to
access the LAN
You can print documents, scan documents, receive
faxes or send faxes using a computer on the LAN. To
enable these features, you need to set the IP address,
subnet mask, and default gateway for the unit.
Page 15

1. Introduction and Installation
Important:
L Consult your network administrator when setting
the IP address, subnet mask, and default
gateway.
1.12.1 Setting up automatically with a
DHCP server
Your situation:
– When only one unit is connected to the LAN.
If your network administrator manages the network with
a DHCP (Dynamic Host Configuration Protocol) server, it
will automatically assign an IP (Internet Protocol)
address, subnet mask, and default gateway to the unit.
1 After connecting the LAN cable to the unit and the
computer, turn the power switch ON.
L The IP address, subnet mask, and default
gateway will be set automatically.
2 Install Multi-Function Station on the computer that
you want to use it with.
1.13 Installing Multi-Function
Station
L Install Multi-Function Station (CD-ROM) before
connecting the unit to a computer with the USB
cable. If the unit is connected to a computer with
the USB cable before installing Multi-Function
Station, the [Found New Hardware Wizard]
dialogue box will appear. Click [Cancel] to close
it.
L Software features and appearance are subject to
change without notice.
Warning:
L To assure continued emission limit compliance;
– use only shielded USB cable (example: Hi-Speed
USB 2.0 certified cable).
– use only shielded LAN cable (category 5 straight
cable).
L To protect the unit, use only shielded USB cable in
areas where thunderstorms occur.
1 Start Windows
L For Windows 2000, Windows XP and Windows
Vista® users, you must be logged in as an
administrator in order to install Multi-Function
Station.
2 Insert the supplied CD-ROM into your CD-ROM
drive.
3 [Easy Installation]
L The installation will start automatically.
4 When the setup program starts, follow the on-screen
instructions.
5 The [Connect Type] dialogue box appears.
For USB connection:
1. [Connect directly with a USB cable.] i [Next]
®
and exit all other applications.
L The [Connect Device] dialogue box will appear.
2. Connect the unit to a computer with the USB cable
(1), then click [Next].
1
3. Click [Install], then follow the on-screen
instructions.
L The files will be copied to your computer.
For LAN connection:
1. [Connect via the Network.] i [Next]
L The [Select a Network Device] dialogue box
will appear.
2. Check [Select in the searched list] and select the
unit from the list.
3. [Next]
4. Click [Install], then follow the on-screen
instructions.
L The files will be copied to your computer.
Important notice
If you use Windows XP or Windows Vista, a message
may appear after connecting the unit with the USB
cable. This is normal and the software will not cause
any difficulties with your operating system. You can
continue the installation with no problem. This kind of
message is displayed:
L For Windows XP users
“The software you are installing for this hardware
has not passed Windows Logo testing to verify its
compatibility with Windows XP.”
L For Windows Vista users
“Would you like to install this device software?”
To view or install the operating instructions data
1. Start Windows and insert the supplied CD-ROM into
your CD-ROM drive.
2. Click [Operating Instructions], then follow the on-
screen instructions to view or install the operating
instructions in PDF format.
L Adobe Reader is required to view the operating
instructions.
Note:
L If you install the operating instructions, you can view
them anytime by clicking [o] on the Multi-Function
Station launcher.
Detailed operating instructions are on the CD-ROM.
15
Page 16

2. How to Use
2How to Use2Detailed operating instructions are on th e CD-ROM.Printer
2.1 Printing from Windows
applications
You can print a file created in a Windows application. For
example, to print from WordPad, proceed as follows.
1 Open the document you want to print.
2 Select [Print...] from the [File] menu.
3 Select the unit’s name as the active printer.
4 Click [Print] or [OK].
L The unit will start printing.
Scanner
2.2 Scanning from the unit (Push
Scan)
You can easily scan the document by using the operation
panel on the unit.
2.2.1 Scan to Multi-Function Viewer
Set the original (page 13).
1
2 {Scan}
3 Press {V} or {^} repeatedly to select “PC”. i
{Set}
4 For USB connection:
Press {V} or {^} repeatedly to select “USB Host”.
i {Set}
For LAN connection:
Press {V} or {^} repeatedly to select the computer to
which you want to send the scanned image. i
{Set}
5 Press {V} or {^} repeatedly to select “Viewer”. i
{Set}
6 If necessary, change the scanning settings. Press
{V} or {^} repeatedly to select the desired setting,
then press {<} or {>}. i {Set} i
{Black}/{Colour}
2.3 Scanning from a computer
(Pull Scan)
2.3.1 Using Multi-Function scan
application
By clicking an application icon, the selected application
starts automatically after scanning.
1 Set the original (page 13).
2 Start Multi-Function Station. i [Scan]
3 Click the desired application icon.
Copy
2.4 Making a copy
2.4.1 Using the scanner glass
If the {Copy} light is OFF, turn it ON by pressing
1
{Copy}.
2 Set the original (page 13).
3 If necessary, change the copy settings according to
the type of document.
4 {Black}/{Colour}
L The unit will start copying.
5 After you finish copying, press {Stop} to reset the
settings you set in step 3.
2.4.2 Using the automatic document feeder
If the {Copy} light is OFF, turn it ON by pressing
1
{Copy}.
2 Set the original (page 14).
3 If necessary, change the copy settings according to
the type of document.
4 {Black}/{Colour}
L The unit will start copying.
5 After you finish copying, press {Stop} to reset the
settings you set in step 3.
Sending Faxes
2.5 Sending a fax manually
Important:
L You can only send faxes in monochrome.
2.5.1 Using the scanner glass
If the {Fax} light is OFF, turn it ON by pressing
1
{Fax}.
2 Set the original (page 13).
3 If necessary, change the resolution and contrast
according to the type of document.
4 Dial the fax number.
L To send a single page, go to step 7.
L To send multiple pages, go to the next step.
5 Press {V} or {^} repeatedly to select “Quick
Scan”, then press {<} or {>} repeatedly to select
“On”. i {Black}
L Wait until “Scan: Press <Set>.” “Send:
Press <Start>.” is displayed.
L Press {<} or {>} repeatedly to change the
resolution during scanning, and then press
{Set}. The setting will be applied starting with the
next page.
6 Place the next page on the scanner glass. i {Set}
L To send more pages, repeat this step.
7 {Black}
16
Detailed operating instructions are on the CD-ROM.
Page 17

2. How to Use
2.5.2 Using the automatic document feeder
If the {Fax} light is OFF, turn it ON by pressing
1
{Fax}.
2 Set the original (page 14).
3 If necessary, change the resolution and contrast
according to the type of document.
4 {Monitor}
5 Dial the fax number. i {Black}
Receiving Faxes
2.6 Receiving a fax automatically
– Auto answer ON
Important:
L You can only receive faxes in monochrome.
2.6.1 Activating FAX ONLY mode
Press {Fax Auto Answer} repeatedly to display “Fax
Only Mode”.
How faxes are received
When receiving calls, the unit will automatically answer
all calls and only receive fax documents.
Useful In formati on
2.7 Cancelling the operations
You can cancel the current operation from the unit. You
can also select the desired operation to cancel.
1 {Stop}
L The current operations will be displayed.
2 Press {V} or {^} repeatedly to select the operation
that you want to cancel. i {Set}
Solution 1: Cleaning the drum cartridge
Important:
L This solution uses at least 3 pages of recording
paper. Make sure there is enough recording
paper installed in the standard input tray
beforehand.
1. {Menu} i {#}{4}{8}{0}
2. Select the colour which has vertical, white lines in the
colour test page.
{1} “Black” (default)
{2} “Cyan”
{3} “Magenta”
{4} “Yellow”
3. {Set}
L The drum cartridge will be cleaned automatically
by printing out 3 pages of the selected colour.
L Repeat steps 1 to 3 for all lines with vertical, white
lines.
L Print the colour test again. If the vertical, white
lines remain, try the next solution.
Solution 2: Changing the drum cartridge
L If the black test page has vertical, white lines, change
the monochrome drum cartridge.
L If the cyan, magenta or yellow test page has vertical,
white lines, change the colour drum cartridge.
L Print the colour test again. If the vertical, white lines
remain, contact our service personnel.
2.8 Maintenance (Cleaning the
drum cartridge)
If vertical, white lines appear on the printed documents,
print the colour test, then clean (or change) the drum
cartridge.
1 {Menu}
2 Press {V} or {^} repeatedly to select “Print
Report”.
3 Press {<} or {>} repeatedly to select “Colour
Test”.
4 Press {Set} to start printing. i {Menu}
Colour test
The unit will print a colour test page consisting of black,
cyan, magenta and yellow lines so you can specify which
drum cartridge has the problem.
If vertical, white lines appear on the colour test page, try
the following to solve the problem.
Detailed operating instructions are on the CD-ROM.
17
Page 18

3. Help
3HelpError Messages
3.1 Error messages – Display
If the unit detects a problem, one or more of the following messages will appear on the display.
Display Cause & Solution
“Access Error” L The access to an SD card did not work correctly due to some existing
problem. Press {Stop} to clear the message, or remove the SD card, and
then try again.
“Call Service” L There is something wrong with the unit. Contact our service personnel.
“Change Supplies Toner
Empty”
“Change Supplies Black
:Empty”
L The toner cartridge life is finished. Replace the toner cartridge immediately.
Note:
L “Black”: Black toner
L “Cyan”: Cyan toner
L “Magenta”: Magenta toner
L “Yellow”: Yellow toner
“Change Supplies Toner
Low”
“Change Supplies Black
:Low”
“Change Supplies
Replace Waste Toner”
“Change Supplies
Replace Waste Toner
Cartridge”
“Change Supplies Waste
Toner Full”
“Check Document” L The document was not fed into the unit properly. Remove the document,
“Check Install Input
Tray #1”
L The toner cartridge life is near its end. Replace the toner cartridge as soon
as possible.
Note:
L “Black”: Black toner
L “Cyan”: Cyan toner
L “Magenta”: Magenta toner
L “Yellow”: Yellow toner
L The waste toner cartridge life is finished. Replace the waste toner cartridge
immediately.
L The waste toner cartridge life is near its end. Replace the waste toner
cartridge as soon as possible.
and then press {Stop} to clear the message. Re-insert the document. If
misfeeding occurs frequently, clean the document feeder rollers and try
again.
L The paper input tray is not installed correctly. Pull out the paper input tray
and re-insert it.
Note:
L “#1”: Standard input tray
L “#2”: Optional input tray
L “#1+#2”: Standard input tray and optional input tray
“Check Paper” L You are printing on envelopes. Check the standard input tray to be sure that
envelopes are installed, and then press {Black}/{Colour}.
L The recording paper size is not the same as the size selected for copy.
Change the recording paper size setting (feature #380 or feature #382), and
install the appropriate recording paper.
L The recording paper size is not the same as the size selected when printing
from the PC. Change the recording paper size setting (feature #380 or
feature #382), and install the appropriate recording paper.
L The recording paper size is not the same as the size selected for receiving
a fax. Change the recording paper size setting (feature #380 or feature
#382), and install the appropriate recording paper.
18
Detailed operating instructions are on the CD-ROM.
Page 19

Display Cause & Solution
3. Help
“Check Pick Up Input
Tray #1”
“Colour Drum Life Low”
“Monochrome Drum Life
Low”
“Colour Drum Replace”
“Monochrome Drum
Replace”
“Cool Down Fuser” L The unit is cooling down the fuser unit. Wait for a while.
“Directory Full” L There is no space to store new items in navigator directory. Erase
“Drum Not Installed” L The colour drum cartridge or the monochrome drum cartridge is not
“E-Mail Size Over” L When performing scan to e-mail server, the total file size of scanned data
“Fax in Memory” L The unit has a document in memory. See the other displayed message
“File Size Over” L When performing scan to FTP server, the total file size of scanned data
L Recording paper was not fed into the unit properly. Re-insert the recording
paper.
Note:
L “#1”: Standard input tray
L “#2”: Optional input tray
L The drum cartridge life is near its end. Replace the drum cartridge as soon
as possible.
L The drum cartridge life is finished. Replace the drum cartridge immediately.
Note:
L The continuous use of an old drum cartridge may cause malfunction. To
prevent this, when the drum life is finished, the unit will stop printing after a
while, and printing will not be possible until a new drum cartridge is
installed.
unnecessary items.
installed. Install it.
exceeded the file size limitation. Divide the document into sections.
instructions to print out the document.
L If feature #442 is set to “Always”,
– check the connection between the computer and the unit.
– check the computer is turned ON.
L If feature #448 is set to “On”,
– view, print or save the received fax documents, and then erase the
unnecessary documents.
– turn the setting to “Off”. The fax documents stored in memory will be
printed automatically.
– set feature #449 to “On”, and then print the received fax documents.
exceeded the file size limitation. Divide the document into sections.
L When printing a file on an FTP server, the total print file size exceeded the
file size limitation. Divide the document into sections.
“Front or Left Cover
Open”
“Keep Copying” L Copying has stopped due to some existing problem (example: a lack of
“Keep Printing” L Direct printing has stopped due to some existing problem (example: a lack
“Low Temperature” L The inside of the unit is extremely cold and cannot be operated. Use the unit
L The front or left cover is open. Close it.
recording paper or a recording paper jam). See the other displayed
message instructions to continue copying.
of recording paper or a recording paper jam). See the other displayed
message instructions to continue printing.
in a warmer area.
Detailed operating instructions are on the CD-ROM.
19
Page 20

3. Help
Display Cause & Solution
“Memory Full” L When performing memory transmission, the document being stored
exceeded the memory capacity of the unit. Send the entire document
manually.
L When making a copy, the document being stored exceeded the memory
capacity of the unit. Press {Stop} to clear the message. Divide the
document into sections.
“Memory Overflow” L When printing a file, the document being stored exceeded the memory
capacity of the unit. Change the printer settings.
“Modem Error” L There is something wrong with the unit’s modem. Contact our service
personnel.
“No Fax Reply” L The other party’s fax machine is busy or has run out of recording paper. Try
again.
“No Printable Data” L There is no printable data on the SD card or FTP server. Store the data in
a supported format.
“Not Support Format” L The files on the SD card are in an unsupported format. Use the supported
formats.
“Not Support Media” L The inserted SD card could not be read. Use a supported SD card.
“Out of Paper Input Tray
#1”
L Recording paper is not installed or the paper input tray has run out of paper.
Install paper.
L Recording paper was not fed into the unit properly. Reinstall the paper.
Note:
L “#1”: Standard input tray
L “#2”: Optional input tray
L “#1+#2”: Standard input tray and optional input tray
“Paper Jammed” L A recording paper jam occurred. See the other displayed message
instructions to remove the jammed paper.
“PC Fail or Busy.” L The cable or the computer power cord is not connected correctly. Check the
connections.
L The software is not running on the computer. Restart the software and try
again.
“Please Wait” L The unit is warming up. Wait for a while.
“Polling Error” L The other party’s fax machine does not offer the polling function. Check with
the other party.
“Redial Time Out” L The other party’s fax machine is busy or has run out of recording paper. Try
again.
“Remove Document” L The document is jammed. Remove the jammed document.
L Attempted to send or copy a document longer than 600 mm using the
automatic document feeder. Press {Stop} to remove the document. Divide
the document into two or more sheets and try again.
20
Detailed operating instructions are on the CD-ROM.
Page 21

3. Help
Display Cause & Solution
“RX Memory Full” L The memory is full of received documents due to a lack of recording paper
or a recording paper jam. Install paper or remove the jammed paper.
L If feature #442 is set to “Always”,
– check the connection between the computer and the unit.
– check the computer is turned ON.
L If feature #448 is set to “On”,
– view, print or save the received fax documents, and then erase the
unnecessary documents.
– turn the setting to “Off”. The fax documents stored in memory will be
printed automatically.
– set feature #449 to “On”, and then print the received fax documents.
“Same name already
exists.”
“Scanner Position Error” L There is something wrong with the scanner position. Turn the power switch
“SD Card is pulled out” L The SD card has been removed from the unit. Reinsert it.
“SD Card not installed.” L There is no SD card inserted in the unit. Insert one.
L The same file name already exists in the SD card folder. See the other
displayed message instructions to continue saving the data.
OFF, then ON. If the problem cannot be solved, contact our service
personnel.
“SD Card Write
Protection”
“SD Size Over” L There is no space to save new data on the SD card. Erase unnecessary
“Self Calibration” L The unit is changing the colour calibration. Wait for a while.
“Transmit Error” L A transmission error occurred. Try again.
“Toner Cartridge Not
Installed”
“Tray #2 Left Cover
Open”
“Waste Toner Not
Installed”
“Waste Toner Cartridge
Not Installed”
L The write-protect switch of the SD card is in the lock position. Unlock the
switch to allow write access.
data.
L The toner cartridge is not installed. Install it.
L The left cover of the optional input tray is open. Close it.
L The waste toner cartridge is not installed. Install it.
Detailed operating instructions are on the CD-ROM.
21
Page 22

Notes
22
Page 23

Notes
23
Page 24

Note for Australian users:
Panasonic Australia operates a toll free Customer Care Centre. Please visit the website for
assistance at <http://www.panasonic.com.au> or please call 132600.
Note for New Zealand users:
Panasonic New Zealand operates a Customer Support Centre. Please call (09) 2720178 for
assistance.
N52
Sales Department:
Panasonic Australia Pty. Limited
Austlink Corporate Park, 1 Garigal Road, Belrose, NSW 2085, Australia
Panasonic New Zealand Limited
350 Te lrirangi Drive, East Tamaki, Private Bag 14911, Panmure, Auckland, New Zealand
Manufacturer:
Panasonic Communications Co., Ltd.
1-62, 4-chome, Minoshima, Hakata-ku, Fukuoka 812-8531, Japan
Global web site:
http://panasonic.net
PNQW1377ZA CM0708CN0
1/5
 Loading...