

Page 1
PortÉbte СМОМ Ptaym
Operating btstructions
штщ. KXL^IOA
Щ
Page 2

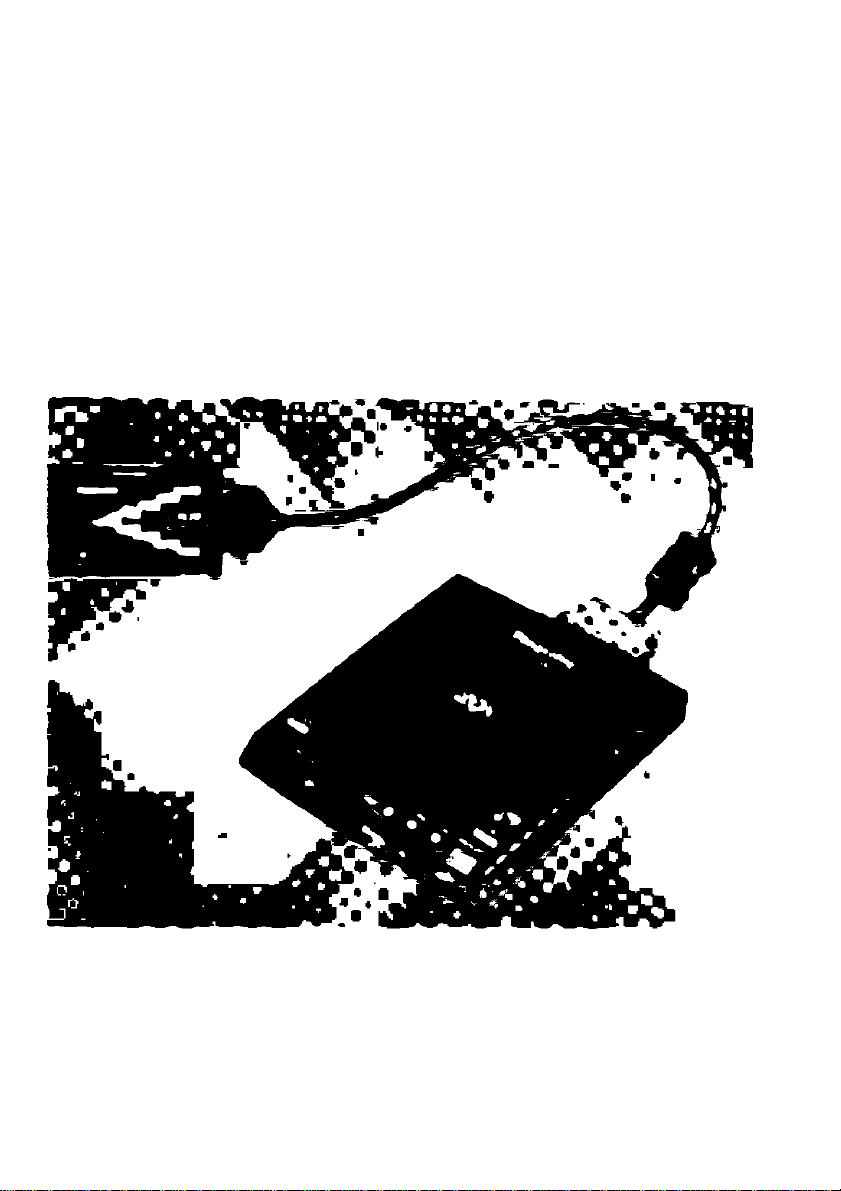
Thank you for purchasing the Panasonic Portable CD-ROM
Player KXL-810A.
WARNING
•The power source voltage of the AC adaptor is listed on the nameplate.
Plug the AC adaptor only into an outlet with the proper voltage.
•To prevent fire or shock hazard, do not expose this product to rain or any type of
moisture.
CAUTION
•When you operate this equipment, the mains socket-outlet should be near the
equipment and should be easily accessible.
•To prevent the SCSI interface connector from static electricity damage, before you
touch it, discharge any static electricity from your hands by touching a grounded metal
surface, such as the screw on the plate cover of an electrical outlet.
CAUTION FOR LASER
This product utilizes a laser.
Use of control, adjustment or performance of procedures other than those specified
herein may result in hazardous radiation exposure.
Do not open covers and do not repair yourself. Refer servicing to qualified personnel.
Laser diode properties
Material
Laser output
Wave length
AlGaAs
Less than 48.5 pW
785 nm
Emission duration Continuous
(This output is the value measured at the distance of 200 mm from the objective lens
y^surface.)
The serial number of this unit may be found on the label located at the bottom of the unit.
Write this number below and keep this book along with your proof of purchase to serve
as a permanent record of your purchase or for future reference.
For warranty service you may be required to show your proof of purchase records.
MODEL NO. KXL-810A
SERIAL NO.
_________________________________________________________
NAME OF DEALER
DATE OF PURCHASE
j
Page 3

FOR USERS IN UNITED STATES ONLY
This equipment has been tested and found to comply with the limits for a Class B digital
device, pursuant to Part 15 of FCC Rules. These limits are designed to provide
reasonable protection against harmful interference in a residential installation.
This equipment generates, uses and can radiate radio frequency energy and, if not
installed and used in accordance with the instructions, may cause harmful interference
to radio communications.
However, there is no guarantee that interference will not occur in a particular
installation. If this equipment does cause harmful interference to radio or television
reception, which can be determined by turning the equipment off and on, the user is
encouraged to try to correct the interference by one or more of the following measures:
•Reorient or relocate the receiving antenna.
•Increase the separation between the equipment and receiver.
•Connect the equipment into an outlet on a circuit different from that to which the
receiver is connected.
•Consult the dealer or an experienced radio/TV technician for help.
The user may find the booklet “Something About Interference” available from FCC local
regional offices helpful.
FCC Warning: To assure continued FCC emission limit compliance, the user must use
only the recommended shield interfacing cable when connecting to a host computer.
Also, any unauthorized changes or modifications to this equipment would void the
user’s authority to operate this device.
•Microsoft, MS-DOS, Windows and Windows NT are registered trademarks of
Microsoft Corporation in the United States and/or other countries.
•Photo CD is a registered trademark of Eastman Kodak Company,
•Adaptec is a registered trademark of Adaptec, Inc.
•Zip and Jaz are trademarks of Iomega Corporation.
All other brands and product names are trademarks or registered trademarks of their
respective companies.
It is granted from Microsoft Corporation to use Microsoft ® Windows ® Screen Shots.
Specifications given in these Operating Instructions are subject to change without notice.
© KYUSHU MATSUSHITA ELECTRIC CO., LTD. 1997
Page 4

■ Features:
•20X Speed external CD-ROM player (transfer rate Max. 3000 KB/s when
connected to a desktop computer using a commercial SCSI board or
Max. 2700 KB/s when connected to a notebook/desktop computer using
the supplied interface card).*'
• Operates on universal voltage AC adaptor (g^ P. 13), rechargeable
battery (option) (isr P. 27), six (6) '‘AA” size alkaline batteries (not
supplied) or power from a computer (via PCMCIA Type II card slot *^)
([1^ P. 29).
• Can be connected to a notebook/desktop computer which has PCMCIA
card slot with supplied interface card and cable {\s^ P. 14).
• Can be connected to a desktop computer with purchase of SCSI board
and SCSI cable (or P.16).
• Can be connected to a Zip or Jaz drives when used with a notebook/
desktop computer which has PCMCIA card slot with purchase of SCSI
cable and SCSI changer adaptor P. 15).
• Both CD-ROM and audio CD can be played when attached to your
computerP.20).
• Can be used independently as an audio CD player (or P. 18).
• Supports CD-ROM, CD-ROM XA, CD-DA, Photo CD (Multisession),
CD-i*\ VIDEO CD CD Extra.
*' Performance will vary based on computer specifications. All performance specifica
tions are based on use with AC adaptor.
‘^PCMCIA Type 11 card slot is referred to as a PCMCIA card slot in this manual.
*^To playback CD-i or VIDEO CD, software or hardware MPEG decoding capability is
required in the computer.
Important:
■ Please use CD-ROMs
with the marking below.
COMPACT
Please use audio CDs
with the marking below.
DIGITAL AUDIO
Page 5
Table of Contents
Before Use
Preparation &
Connection
Operation
Using Other
Powers
Accessories
Precautions
Part Names
Connecting the AC Adaptor
Preparation................................................
For notebook / desktop computer with
PCMCIA card slot (interface card) . .
For desktop computer with SCSI board
Inserting / Removing a CD
Using the Player Independently ....
Playing an audio CD
Using the Player with Computer ....
Playing a CD-ROM
Playing an audio CD
Insertion / Removal of the interface card
Using Alkaline Batteries (not supplied) . . 25
Using Rechargeable Battery (option).... 27
Installing / Removing rechargeable battery 27
Charging rechargeable battery
Using the Power from a Computer
(through the Interface Card)
................................
....................
.....................
..............................
..............................
.....................
........................
. 6
. 7
10
13
14
14
16
17
18
18
20
21
21
24
28
29
□
Troubleshooting
& Maintenance
Technical
^Information
Appendix
_
>1
Troubleshooting
Maintenance
SCSI ID Number and Terminator Setting . . 36
Specifications..................................................37
.............................................
....................................................
J
Option / Recommended Products
End-User License Agreement........................40
Index.................................................................42
.................
31
35
39
□□
Page 6
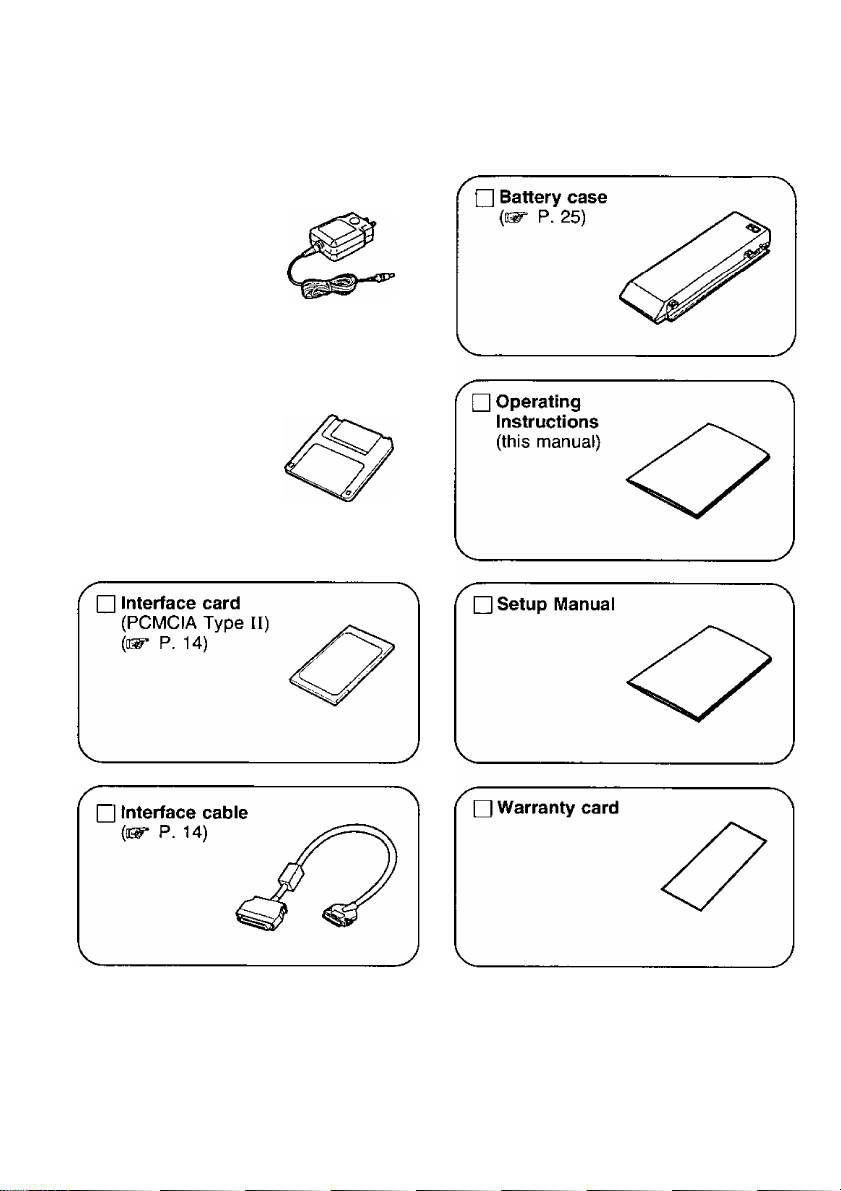
Accessories
Make sure that the following accessories are included with the player. If anything is
missing, contact your deaier immediately.
□ AC adaptor
{(ET P. 13)
rihe Model No.
of AC adaptor is
written on the
bottom of the
player.
□ Setup disk
(ii^ P. 14)
[Before opening
the packet,
please read P. 40.]
Page 7
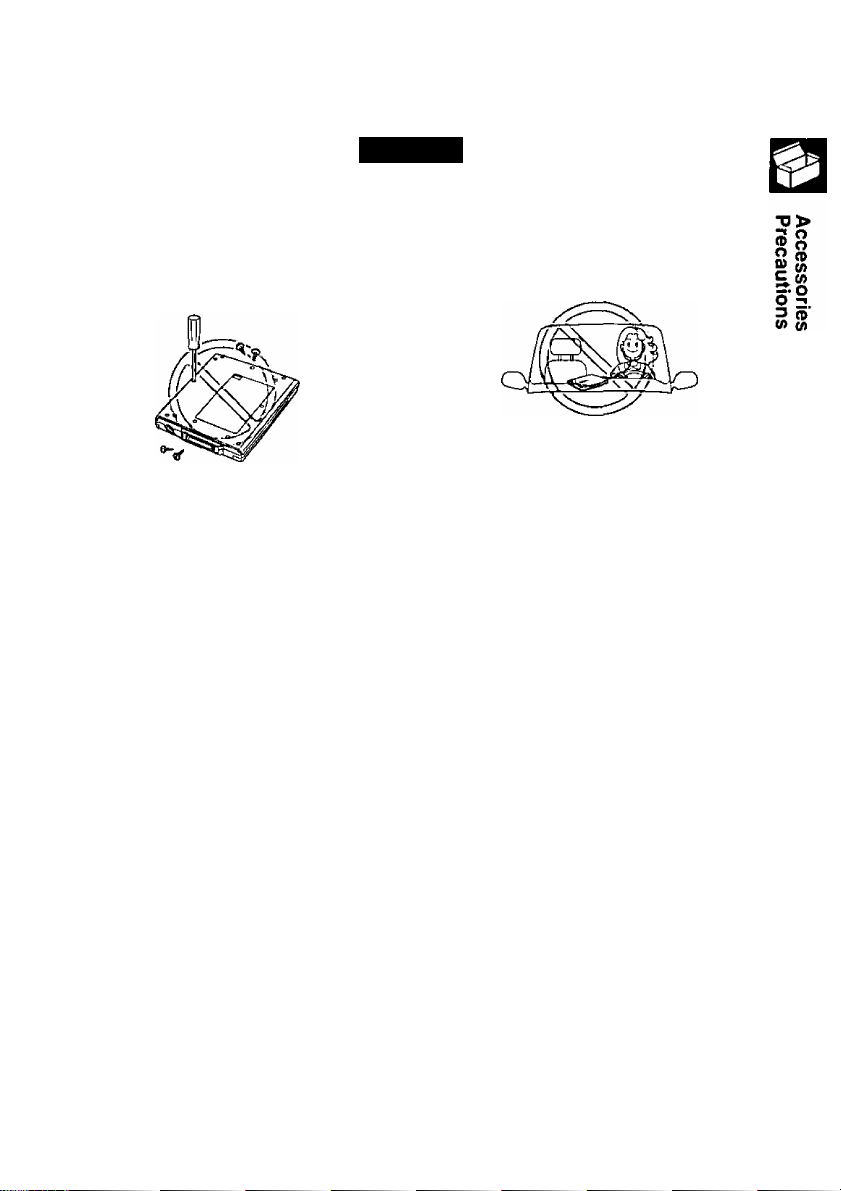
Precautions
General
Do not disassemble the player
and do not repair yourself, or it
may cause electrical shock
hazard, or a laser may damage
your eyes.
Do not store or use the player in a
dusty, humid, oily environment, or
under damp or moist conditions.
Do not turn up the volume too
high, when using the headphones.
Do not leave the player in direct
sunlight, near a heat source or
especially in a hot automobile.
Do not use the headphones or do
not operate the switches/buttons
while riding a vehicle.
When the player has been moved
from a cold place to warm place, it
may damp or moist. Leave the
player for about 1 hour before
using.
Keep magnetic objects away from
the player.
Do not insert any foreign metal
object inside the player.
Do not drop or jar the player.
Do not touch the pins/terminals of
the interface card and cable.
Do not touch the lens.
If noise is heard from radio or TV,
move the player 2 m (about 6 ft.)
away from the radio or TV.
Page 8

Precautions
AC Adaptor
Do not plug-in or remove the AC
adaptor using wet hands.
Make sure the AC outlet or cord
for the AC adaptor does not
exceed the limit of their electrical
ratings.
Make sure the prongs of AC
adaptor are fully inserted into the
AC outlet.
Do not damage the AC adaptor by
scratching or modifying, or
bending its prongs.
Do not use the AC adaptor under
the following conditions.
—when it is damaged
—when there is smoke or strange
smell
—when an abnormal sound is
heard
Use only the supplied AC adaptor
(isg^ P. 6).
Periodically remove the dust from
the prongs of AC adaptor.
Only use the AC adaptor indoors.
8
Do not disassemble the AC
adaptor.
Page 9

Precautions
Alkaline Batteries
To avoid the leakage or corrosion, observe the followings. If leakage or corro
sion occurs, replace the batteries immediately with fresh ones.
Do not charge, short-circuit,
disassemble, heat, or dispose of
batteries in fire.
Use only “AA” size alkaline
batteries.
Do not install used batteries with
new batteries. Do not mix any
other kind of batteries with
alkaline batteries.
Remove the batteries as soon as
they are used up.
Make sure the polarity (+, -)
matches the diagram inside the
battery case.
Rechargeable Battery
Use only the optional rechargeable (Ni-Cd) battery (KXL-D32).
The nickel cadmium battery you have purchased is recyclable. At the end of
its useful life, under various state and local laws, it is illegal to dispose of
this battery into your municipal waste stream.
Please call 1-800-8-BATTERY for information on how to recycle this battery.
Valid in USA only
Do not scratch, smudge, write or
label both surfaces of CD.
Do not leave the CD in direct
sunlight, near a heat source or
especially in a hot automobile.
Ni-Cd
Do not throw or bend CD.
Do not touch the signal side (the
side without the label) of CD.
Avoid finger prints and scratch
while holding it.
Page 10

Part Names
Front/Left Side view
Note:
• For the battery case, please refer to the page 25 and 26.
10
Page 11

Front (right corner) / Right Side view
Ml/PC POWER
(PLAY/PAUSE/PC POWER button)
(o®' P. 18, 19, 29)
■ (STOP button)
{!^ P. 17, 19, 20)
PHONES jack [(^] (1^ P. 18, 21)
Connects your headphones or
external speaker system (not
supplied).
VOLUME control P. 18)
Adjusts the volume of the
headphones (not supplied) attached
to the PHONES jack (O'-IO).
Rear/Bottom view
Part Names
TJ
01
3.
z
(u
3
(D
(f>
Page 12

Part Names
Display messages
Message/Indication
OP En
on
no d I 5l
rr U
(H
n I nn-nn
U I uu-uu
OP
(Error Operation)
nn c
U' » c
( RL L
03 Od
CS3
PC POWER
PC POWER
O
on uO
Description
The disc cover is open.
•When CD-ROM is inserted, a message "on" is displayed
•While CD-ROM or audio CD is first being recognized,
“on” blinks.
CD is not inserted, or the inserted CD is not recognized
because either the CD is placed with the label side facing
down, or it is damaged, dirty, wet, etc.
►When using the player connected with the supplied
interface card, you pressed Q O ■
►When using the player connected to a SCSI board, you
pressed , o O •
►When using the player independently with a CD-ROM
inserted in the player, you pressed , q Q’' O ■
•Displayed when an audio CD is recognized,
• is pressed when an audio CD is being played on
the player.
Pressing mooeQ changes the audio CD playback mode.
The modes are outlined below.
---------
This blinking indication appears when the battery or
rechargeable battery is low while being powered from it.
The player is being powered from the computer.
(“on” will blink until the player and computer preparations
are complete.)
■iXl blinks when the battery of the computer is low or the
power supply capacity from the computer is not sufficient
while being powered from the computer.
With a CD-ROM inserted in the player, if you press «ooeQ,
this message appears, P. 33)
► [ ONE ]
(Repeats one track)
— (Normal mode)
-----------------
► [ ALL ]
(Repeats all tracks)
-----
[ rand ]
(Repeats at random)
----------
----------
* “PC POWER” is displayed at the upper right hand corner of the display when the player
is being powered from the computer.
12
Page 13
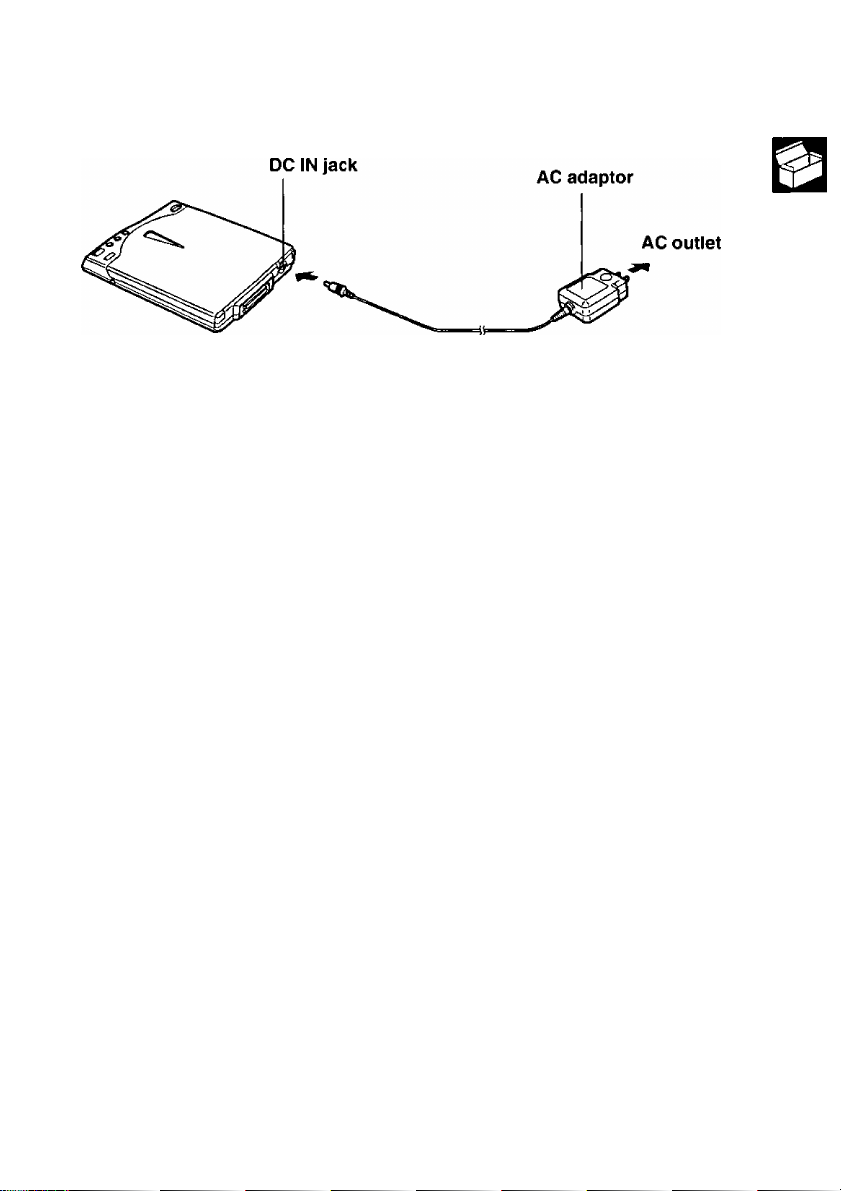
Connecting the AC Adaptor
Connect the supplied AC adaptor.
m
o fu
3 3.
Caution:
• Use only the supplied AC adaptor, since other adaptors could damage the player.
|3
3 o
(O (A
o
Notes:
• If the player is not going to be used for an extended period, unplug the AC adaptor
from the AC outlet to save power consumption. (Approximately 1 W of power is
consumed when the player is OFF and the AC adaptor is connected with 120 V
>
O
>
Q.
fi)
■D
outlet.)
•The AC adaptor is universal voltage. However, it is designed for use only in the
country where it was purchased.
13
Page 14
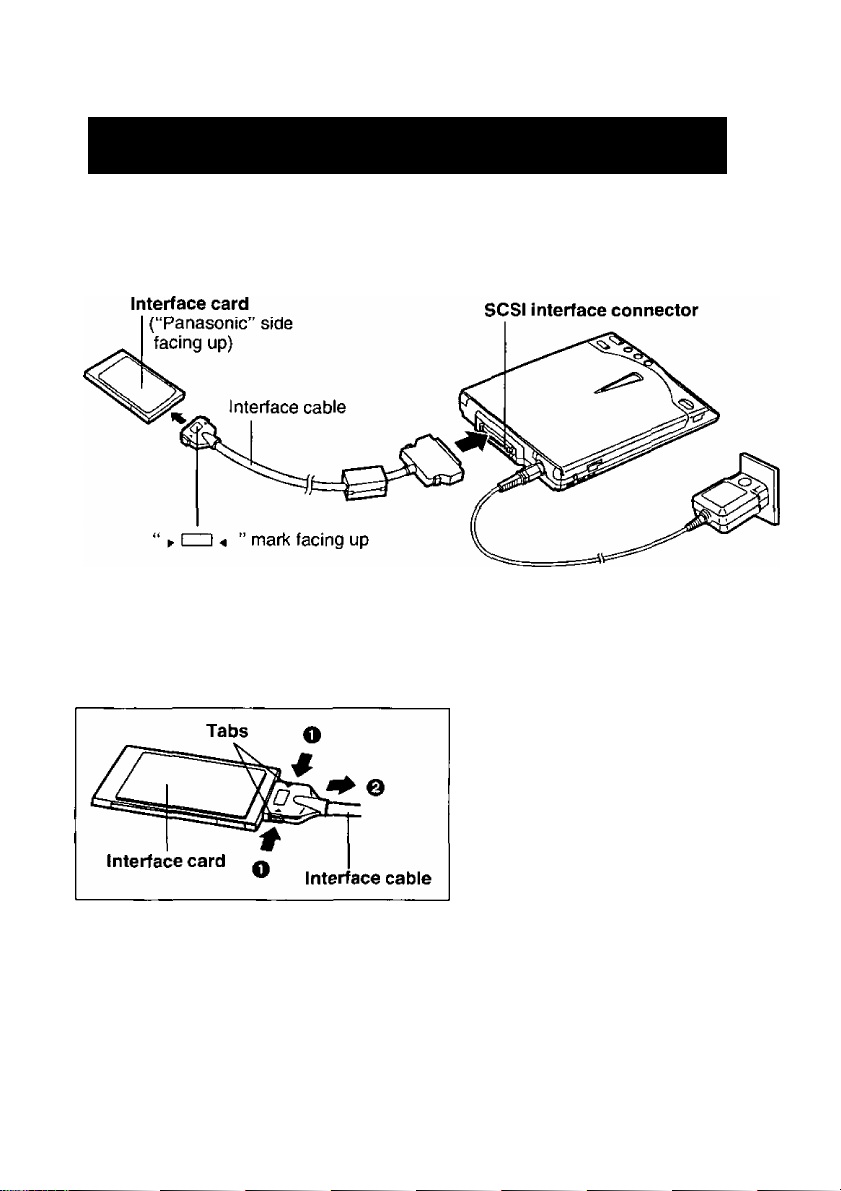
Preparation
For notebook / desktop computer with PCMCIA
card slot (interface card)
Step 1 Connection
To use the supplied interface card, connect to the supplied interface cable. For connection
with the computer, refer to the enclosed Setup Manual.
Disconnecting interface card from interface cable:
While pressing the side tabs of it (0)>
pull the interface cable straight (Q).
Caution:
•Do not force the interface cable
since this could damage the
Interface card or cable.
I
Step 2 Setting up y^r computer^
To use the player with a computer, you must set up your computer using the supplied
Setup disk.
Please refer to the enclosed Setup Manual.
14
Page 15

Preparation
■ Connection with Zip or Jaz (for Windows ® 95 * only):
You can connect the Zip or Jaz and your computer with PCMCIA card slot using the
supplied interface card and cable. The interface cable supplied with the player has a
different connector than required by your Zip. The SCSI changer adaptor will allow the
interface cable to connect to your Zip. If necessary you can connect the player and Zip or
Jaz using a commercial SCSI cable. For further information, refer to your Zip or Jaz
manual.
Example connecting with Zip or Jaz (the player is also connected)
-----
SCSI changer
adaptor (not supplied)
[D-sub 25 pin to half
pitch 50 pin (pin type)]-
Interface card
(supplied)
I I
L
----------
n
t
r 1
J
Interface cable
Zip
— D-sub
25 pin
t
I—I
- Half pitch 50 pin 5'
(pin type) 3
SCSI cable
(not supplied)
Player
(supplied)
Interface card
(supplied)
Interface
cable p
(supplied) I
“"«-I — Jaz
^t—K_.. ..w-
n Half pitch
—-50 pin
(pin type)
j— Player
Half pitch 50 pin
(pin type)
SCSI cable
(not supplied)
Notes:
•When connecting Zip or Jaz only to the computer;
— set the terminator of Zip or Jaz to "ON”.
•When connecting the computer, Zip or Jaz and player;
— for proper data transfer, set the terminator of Zip or Jaz to "OFF” and of the
player to "ON” (t^ P. 36).
— power from the computer (osr* P. 29) cannot be supplied when connected with
Zip or Jaz. Use the AC adaptor, alkaline battery or rechargeable battery.
— the supplied interface card allow connecting only one unit of Zip or Jaz between
the computer and the player.
— do not use the same SCSI ID number for both the player and Zip or Jaz.
m
<D
■a
0)
0)
* Microsoft® Windows® 95 operating system (hereafter Windows 95).
15
Page 16

Preparation
For desktop computer with SCSI board
Step 1 Connection
A commercial SCSI board and SCSI cable are required to connect the player to a desktop
computer without PCMCIA card slot. For a recommended SCSI board, refer to “Option/
Recommended Products” P. 39). For further information, refer to your SCSI board
manual.
First make sure both the player and the desktop computer are off.
Cautions for a SCSI cable:
• Use a shielded SCSI cable of 1.5 m (4.9 ft.) or shorter.
•The connector connecting to the player should be half pitch 50 pin (pin type). Refer
to your SCSI board manual for the type of the connector connecting to the computer
side.
Step 2 Setting up your desktop computer
To use the player with your desktop computer, you must set up your computer. Please
refer to the enclosed Setup Manual.
■ Daisy chain connection:
You can connect this player to other SCSI devices (up to seven devices). Make sure that
each SCSI device has different SCSI ID number.
For the setting of SCSI ID number and terminator of this player, refer to “SCSI ID Number
and Terminator Setting” ((B^ P. 36).
Since the player has only one SCSI connector, it must be the last device in the daisy chain.
In this case, set the terminator of the player to ON (E^ P. 36) and of the other SCSI
devices to OFF.
16
Page 17

Inserting /Removing a CD
Inserting a CD
(T) Press Q to open the disc
cover and then raise it.
@ Place a CD onto the disc spindle.
Press on the center of a CD until it
locks onto the disc spindle.
(3) Close the disc cover.
Press on the disc cover.
Caution:
• Insert a CD firmly until it locks onto the spindle and then close the disc cover, or
CD may spin off the spindle and get damaged.
Removing a CD
Make sure that the POWER/BUSY lamp (green) is not blinking.
the
(O
B)
O
O
© Press □ .
© After the CD stops spinning,
press Q to open the disc
cover and then raise it.
@ Carefully remove the CD by
lifting it.
Pressing on the disc spindle, lift the
CD by holding its edge.
(4) Close the disc cover.
17
Page 18

Using the Player Independently
Playing an audio CD
You can listen to the music through your headphones/external speaker system (not
supplied) connected to the PHONES jack,
The player is not specially designed to be used while walking, etc.
Be sure the VOLUME control is turned down (set to 2—4) before playing an audio CD.
(T) To turn on the player, slide the
POWER switch and hold it until
the POWER/BUSY lamp lights.
■ To turn off the player, slide
the power switch, then
release it.
POWER/BUSY lannp goes off.
Insert an audio CD (ti^ P. 17).
Elapsed time
Audio CD’s track number
Plug your headphones or
external speaker system (not
supplies) into the PHONES jack.
Press Q
Rotate the VOLUME control to
adjust the volume.
Note:
• It is recommended that the terminator of the player is set to OFF when using with
the alkaline batteries or rechargeable battery. Power consumption can be saved
(ir^ P. 36).
hlliTCPOIffiN
18
Page 19

Using the Piayer Independently
Buttons function and operation:
Function
»ttKKMER
Starts/pauses audio CD playback.
Stops audio CD playback. Press .
Skips to the next track number.
Returns to the beginning of the track
being played.
Skips to the previous track number.
Advances to your desired point. Keep pressing q .
Reverses to your desired point.
Repeats the track being played.* *
Repeats all tracks.* Press »ooeQ until “ALL” is displayed.
Repeats tracks at random.*
* Every time «*^0 is pressed, the mode changes in the following order.
—► [ONE]
---
► [ALL]
---
► [rand]
Press .
Press o once.
Press Q once.
Press Q once when the elapsed time is 00:00.
Keep pressing q .
Press MoreQ until “ONE” is displayed.
Press «ooeQ until “rand” is displayed.
---
► (Normal mode) —
Operation
c
5'
(O
S'
(D
0)
*<
(D
□
Q.
O
•o
(D
3
a
o
3
Notes:
•To cancel the Repeat mode (*), press ■ The mode is returned to Normal mode.
•When the blinking message “on” is displayed, the buttons’^g ’ Ô ’ Ô '
MODE O and cannot be used.
• If the alkaline batteries or rechargeable battery is used, the player will be
automatically turned off after the last track is played when “Normal mode” is selected.
19
Page 20

Using the Player with Computer
Make sure that all the necessary preparation is done (i^P. 13—16, 36) and your computer
has been set up properly Setup Manual).
■ Using with the supplied interface card:
Turning on the computer automatically turns on the player.
(T) Turn on the computer,
(2) Insert a CD P. 17).
Using with the SCSI board:
Slide the power switch to turn
on the player (isr P. 18).
@ Turn on the computer.
@ Insert a CD (d^ P. 17).
Notes:
•When POWER/BUSY lamp is blinking:
—Do not open the disc cover.
—Do not press .
— Do not disconnect the interface card.
— Do not turn off the player.
— Do not remove the AC adaptor when it is used.
— Do not remove the alkaline batteries or rechargeable battery when one of them
is used.
Otherwise, your computer may hang up. If this happened, reset your computer.
• If is displayed on the player’s display when using the player with the alkaline
batteries, rechargeable battery or power from the computer, quickly connect the AC
adaptor. Otherwise your computer may hang up.
•If the interface card is used to connect the player and your computer under Windows
95, the computer cannot recognize the player when the player is turned off. To use
the player again, reset the computer, or refresh the device manager after turning on
the player. Refer to the “Help” file for detailed information (tsr P. 7 in Setup Manual).
•When using the alkaline batteries, rechargeable battery or power from the computer,
you may notice the data transfer speed slows and access time increases.
20
Page 21

Using the Player with Computer
Playing a CD-ROM
To use a CD-ROM, refer to the manual or “README” file included with the CD-ROM.
Note:
•Some types of CD-ROMs [game CD-ROM with audio track, CD-Extra, Portfolio CD
(Photo CD), etc.] allow you to listen to the sound or music coming from the CD-ROM
through the headphones/external speaker system (not supplied) connected to the
PHONES jack of the player.
Connect tjie headphones/external speaker system (not supplied) with the PHONES
jack of the player. If the LINE IN jack is equipped with the sound system of your
computer, connect between the line in jack of the computer and PHONES jack of
the player using a commercial audio cable.
Playing an audio CD
You can operate an audio CD on a computer using an audio CD control software (not
supplied). Sound can be heard through the PHONES jack instead of from the computer.
Note:
•To listen to the sound or music from an audio CD, connect the headphones/external
speaker system (not supplied) with the PHONES jack of the player. If the LINE IN
jack is equipped with the sound system of your computer, connect between the line
in jack of the computer and PHONES jack of the player using a commercial audio
cable.
o
0)
'<
<D
21
T3
O
o
3
c
(D
Page 22

Using the Player with Computer
■ Running the software under Windows 95
or Windows NT®* 4.0:
You can use either of the following methods Q or 0 •
Q Select "Multimedia” from the Accessories group of Program Menu to start
“CD Player”.
(Example)
Qi CD Pldfei;
Disc Wow Dptiom tJelp
EIMHI
[01] 01:56
èrtisi: |Hew Artist
T rtfe: [i^ew Title | ~i'
MI l:»tl ±
\ Track: [Track 1 <01 >
ffotat Ray; S3:37 mcs ifTtack; 02:26 m:s
10 1 ■ Select “Multimedia" from the Accessories group of Program Menu to start
“Media Player".
2. Select “CD Audio" from the Device menu.
(Example) ,
• If an audio CD control software is not installed, install the software using
“Add/Remove Programs” in Control Panel. For detailed information, refer to the
manual of Windows 95AA/indows NT 4.0. In the case of Windows 95, also refer to
"Help” file (05^ P. 7 in Setup Manual). In the case of Windows NT 4.0, also refer to
"README.TXT” file (ET P. 16 in Setup Manual).
Note:
• "p^ ,0-0 modeQ cannnot be used when playing an audio CD with your
computer.
........
........................................-....—............... , .
!! File Edit Device Scale Help
0;02 5:00 1 0:00 20:00 30:00 40:00
: A
P.:
-,
M4I44 H
iQ0:09(mrt:secl __
53:50
* Microsoft ® Windows NT ® Workstation operating system and Microsoft ®
Windows NT ® Server network operating system (hereafter Windows NT).
22
Page 23

Using the Player with Computer
■ Running the software under Windows ® 3.1, 3.11 * /
Windows NT 3.51:
1. Start “Media Player” from the Accessories program group.
2. Select “CD Audio" from Device menu.
(Example)
File £dit Qevice Scale Help
1 2 3 4 5 G 7 89 10 121314151G17 132021 23 25
• If the “CD Audio” is not displayed, install the Windows device driver “[MCI] CD
Audio” from the Drivers in Control Panel. For detailed information, refer to the manual
of Windows 3.1,3.11/Windows NT 3.51 or “README.TXT” file (b^ P. 10. 13 in
Setup Manual).
•When you are playing an audio CD with your computer, you cannot use ^3 - O ’
Q and mooeQ However, you can use these buttons by opening and closing the
disc cover after exiting the audio CD control software. ((^ P. 19 for buttons function
and operation.)
* Microsoft ® Windows® operating system Version 3.1 or 3.11 (hereafter Windows 3.1,
3.11).
Media Player - CD Audio (stopped)
|bl 00:00 [njryec)^
DBia
(Q
S’
(0
■V
fi)
23
o
o
3
■O
c
o
Page 24

Using the Player with Computer
Insertion / Removal of the interface card
■ For Windows 95 user:
The supplied interface card supports the Hot Swapping (Plug & Play) function. With the
computer turned on, you can insert/remove the interface card without fear of hardware
damage. Before removing the interface card, perform the following steps.
Click PC Card icon
1
Slop Panasonic KXLC004
2 Click “Stop Panasonic KXLC004”.
Panasonic KXLGQ04:
HYou may safely lemove this device.
;""OK""j|
Make sure that the message “You may safely remove this device” is
3
displayed, then click I OK |.
Remove the interface card.
4
in task bar.
tn
■ For DOS / Windows 3.1,3.11
With the computer turned on, you can insert/remove the interface card, if a PC Card
Manager is installed on the computer (refer to your computer manual for details). However,
do not remove the interface card when the POWER/BUSY lamp is lit or you start running
your computer.
When you start running your computer, make sure that the interface card is inserted into
the PCMCIA card slot.
Note:
• If your computer has more than one slot, and if you want to re-insert the interface
card, you must insert it into the same slot it was inserted before.
■ For Windows NT user:
With the computer turned on, you cannot insert/remove the interface card. Please turn off
your computer to insert/remove the interface card.
24
Page 25

Using Alkaline Batteries (not supplied)
Six (6) "AA" size alkaiine batteries are required.
Note:
• If the supplied interface card is used to connect between the player and your
computer, power source is automatically changed from the batteries to the computer
when the batteries run down (o^ P. 29).
Installing the batteries into the battery case:
(T) Slide the battery cover to the
arrow direction while pressing
the battery cover.
Open the battery cover.
Install six (6) “AA” size alkaline
batteries (not supplied).
Make sure the polarities (+, -) match
the diagram.
c
tn
(O
o
X
fil
'<
(D
D"
o
O
3
■a
c
<D
□
(4) Close the battery cover.
25
C
(n
(O
>
7T
Q}
(D
tn
u
it
o
■O
■O
o
a
Page 26

Using Alkaiine Batteries (not supplied)
Installing the battery case:
Slide the battery case to the arrow direction until it ciicks.
■ Replacing the Batteries:
Replace the batteries when blinking mark “ iX] ” appears on the player’s display.
To remove the battery case from the player, while moving the release lever to the arrow
direction (O). slide the battery case to the back side (@).
After removing the battery case,
remove the batteries from the battery
case, then install the new batteries
{m’ P. 25).
26
Page 27

Using Rechargeable Battery (option)
Use only the optional rechargeable battery (osr P. 39).
Please read "Precautions” of the operating instructions supplied with the rechargeable
battery.
Notes:
• Please do not leave the rechargeable battery without charging it for extended
periods, or the life of the battery may shorten. Charge the battery once every 6
months even if you do not use it.
• Please remove the rechargeable battery and store in a cool place [less than 30°C
{86T}] when the player is not in use for extended periods (for more than 1 month)
to extend its life.
• If the supplied interface card is used to connect between the player and your
computer, power source is automatically changed from the rechargeable battery to
the computer when the rechargeable battery runs down (a^ P. 29).
•Replace the rechargeable battery if it quickly runs down with use under normal
temperature [about twice as fast as normal under 20*C {68T)]. (It has reached the
end of its life.)
Installing / Removing the rechargeable battery
Instructions are the same as the battery case of the alkaline batteries ((ET P. 26).
27
□
cc
w w
5‘ 5’
(OtQ
3I>
Ô ^
fkS
“ A
to fl>
S DO
H
o o
'2 o
cn
o
■a c
Q.
Page 28

Using Rechargeable Battery (option)
Charging rechargeable battery
Charge the rechargeable battery:
•before initial use.
•when the blinking mark appears on the player’s display.
Caution:
• Do not attempt to charge the rechargeable battery using a charger other than this
player.
Install the rechargeable battery.
Instructions are the same as the
battery case of the alkaline batteries
(lET P. 26).
@ Connect the supplied AC
adaptor {er P. 13),
(Do not turn on the player.)
The charge lamp (red) lights when
charging starts.
Charging will automatically finish when
the charge lamp goes off.
A full battery charge requires a
maximum of three (3) hours.
Notes:
•The rechargeable battery becomes warm while charging. This is not abnormal
(tET P. 33).
•The charging time may change depending on the level of remaining charge of the
rechargeable battery.
•The rechargeable battery can be charged even when you are using the player {when
the player is turned on). In this case, charging time becomes longer (maximum 30
hours).
•The rechargeable battery can be charged approximately 500 times. However, it
changes depending on how it is used.
28
Page 29

Using the Power from a Computer
(through the Interface Card)_______________
If the supplied interface card/cable is used between the computer and player, you can
operate the player using the power from the computer (you do not need to connect the AC
adaptor or install the alkaline batteries/rechargeable battery). The power from the com
puter is automatically supplied when the computer is turned on, then “PC POWER” is
displayed on the player’s display.
Notes;
•The power switch cannot be used when the power from the computer is used. To
turn off the player, press for more than 3 seconds.
•Set the terminator to OFF {DSf P. 36), or Power from computer can not be used.
•Depending on the performance of computer’s power supply, the computer may not
be able to supply power to the player, if the power of the computer or player is
turned off or fails, or the other PC card is connected to the computer as well as the
supplied interface card, use the AC adaptor with the player.
•When blinking mark is displayed, immediately connect the AC adaptor or
use the alkaline batteries or rechargeable battery, othenwise the computer may hang
up.
• For the computer, it is recommended to use the AC power instead of its battery (the
battery of the computer goes low faster when the player uses the power from the
computer).
• If the power from the computer is used, approximately 0.5 W of power is consumed
even when the player is OFF.
Depending on the computer, power is supplied from it to the player even if the
computer is in the power save mode.
If the player is not going to be used, it is recommended to remove the interface card.
• Power from the computer cannot be used when the player is connected with the
SCSI board.
• It may take some time until the player can be used (“on” blinks).
•When you connect the player, Zip or Jaz and your computer with PCMCIA card slot,
power from the computer is not sufficient for the player. Use the AC adaptor, alkaline
batteries or optional rechargeable battery.
c
»
5‘
(O
31
(D
O
to
(D
B)
CT
{D
OD
0)
o
'o
•O
o'
3
□
3-w
o 5‘
C(0
(O
3-3-
-i
<D
"i
o 3
Oti)
Q) A
" o
ao
^3
T3
(D
c
29
Page 30

Using the Power from a Computer (through the Interface Card)
■ Using the power from computer with the other power
sources installed:
You can force the player to use the power from the computer even with the other power
sources (AC adaptor, alkaline batteries or rechargeable battery) installed. Using this
function, you can stop power consumption of the alkaline batteries or rechargeable
batteries without removing them from the player.
© Press “ 'g" (PC POWER)”
button for more than 3 seconds.
“PC POWER” is displayed when the
power from the computer is selected.
To return to use the other power sources (AC adaptor, alkaline batteries or rechargeable
battery) press “PC POWER" button again for more than 3 seconds.
“PC POWER” will disappear. If no other power sources are installed, the player is turned
off.
Notes:
•You cannot switch from the other power sources to power from the computer even
if is pressed when the POWER/BUSY lamp is blinking.
•Once you switch to the power from the computer, the power does not automatically
return to the AC adaptor, alkaline batteries or rechargeable battery even if they are
installed afterwords.
•“E rr OP” (Error Operation) may appear when you press “ f~] PC POWER”.
In this case, remove and re-install the interface card for use under Windows 95 or
reset the computer for use under other operating systems.
30
Page 31

Troubleshooting
If trouble occurs, check the following points before returning the player for service.
Trouble
Your computer
does not
recognize the
player, or does not
function properly.
Possible Cause Solution
The AC adaptor is not plugged
into the outlet or DC IN jack
correctly.
The Auto Protect function of AC
adaptor is working.
The alkaiine batte ries/battery
case or rechargeable battery
are/is not installed correctly, or
dead.
■ For notebook/desktop computer with PCMCIA card slot user:
The computer has not been set
up yet.
The interface cable or card is
not connected to the player or
to the computer properly.
The interface cable pin is bent
or broken.
When using under Windows 95,
the player is turned off.
When the power from the
computer is used, the player’s
terminator is set to ON.
When the power from the
computer is used, the
computer’s battery is low.
When the power from the
computer is used, power supply
capacity of the computer is not
sufficient.
Plug the AC adaptor correctly
{(ET P. 13).
Disconnect the AC adaptor and
connect it again after 2—3
minutes.
install the alkaline
batteries/rechargeable battery
properiy, charge the rechargeabie battery or replace with new
batteries {(^ P. 25—28).
Set up the computer (iep“ P. 14).
Properiy connect the interface
cable or interface card
((ET P. 14).
Consuit your deaier (or contact
Panasonic Service Center at
1 -800-PANA-SYS for users in
continental United States).
Reset the computer or refresh
the device manager (isr’ P.20).
Refer to the “Help” file for
detailed information (a^ P. 7 in
Setup Manual).
Set the terminator to OFF
(¡^ P. 36).
It is recommended to use the
AC power for the computer
(05^ P. 12, 29).
Use the AC adaptor, alkaline
batteries or rechargeable
battery ((^ P. 12, 13, 25-28).
c
w
d'
ta
(D
o Tl
c 2
(D S
3- <D
O 0)
<t> 3
0) &
CL?
□
o
c
O'
to
(Continued)
31
Page 32

Troubieshooting
Trouble
Your computer
does not
recognize the
player, or does
not function
properly.
Transmission
speed of data
slows down.
Possible Cause Solution
When Zip or Jaz is connected,
other software than Windows 95
is used.
When Zip or Jaz is connected,
neither of the AC adaptor, alkaline
batteries nor rechargeable battery
is connected (power from the
computer cannot be used when
Zip or Jaz is connected).
When Zip or Jaz is connected, the
player’s terminator is set to OFF.
When Zip or Jaz is connected, the
same SCSI ID number is used for
Zip/Jaz and the player.
■ For desktop computer with SCSI board user:
Neither of the AC adaptor,
alkaline batteries nor
rechargeable battery is connected
(power from the computer cannot
be used when the SCSI board is
used).
The computer has not been set
up yet.
The computer was turned on
before the player was turned on.
The SCSI cable is not connected
to the board.
The same SCSI ID number(s)
is/are used for the player/SCSI
devtce(s) with the daisy chain
connection.
The player’s terminator is set to
OFF.
Using the player with the alkaline
batteries/rechargeable battery or
the power from the computer.
Use Windows 95 ((sr P. 15).
Use the AC adaptor, alkaline
batteries or rechargeable
battery (0^ P. 13,15, 25-28).
Set the terminator to ON
(ET P.36).
Change the SCSI ID number
(o^ P. 36) or refer to the
manual of Zip or Jaz.
Use the AC adaptor, alkaline
batteries or rechargeable
battery
Set up the computer
((^ P. 16).
Turn off the player and
computer, and turn on the
player first then turn on the
computer (asr P. 20).
Properly connect the SCSI
cable (D^ P. 16).
Use the different SCSI ID
number(s) for the player and
each SCSI device(s)
(B^ P. 16, 36).
Set the terminator to ON
({^ P. 16, 36).
Use the AC adaptor.
((ET P. 13, 25~28).
32
Page 33

Troubleshooting
Trouble Possible Cause
Transmission speed
of data slows down.
A warped CD is used, then
the vibration detection sensor
(G sensor) is activated
slowing down rotation of CD.
The notebook computer has
entered the power
management mode.
The player
(especially disc
spindle), battery
case, rechargeable
battery, AC adaptor
or interface card is
warm.
The optional
rechargeable battery
cannot be charged
AC adaptor is not connected
or the rechargeable battery is
not installed properly.
(charge lamp does
not light).
The optional
rechargeable battery
runs down too soon.
"no disc” message
appears on player’s
The rechargeable battery
was not charged properly or
has reached the end of its life.
CD is placed with the label
side facing down.
display even after
inserting a CD.
Sound skips, or data
can not be read.
CD without (o]Og® or
ÎID§® fT^srk is used.
DMUTAL ftMPW
CD or the lens of the player
may have become dirty.
CD is damaged.
Dust such as a hair lay on
the disc spindle.
Solution
To disable the sensor, press
when “on" is displayed.
The following message is
displayed (G oFF);
on uo
Press “““O again to
reactivate the sensor
((ET P. 37).
Set the CPU speed of the
notebook computer faster in
power management or use the
AC adaptor for the computer.
This is not abnormal. If they
become hot, consult your
dealer.
Connect the AC adaptor or
install the rechargeable battery
properly (03^ P. 13, 27).
Charge the rechargeable
battery until the charge lamp
goes off or replace it
(osr P. 28).
Place the CD with the label
side facing up (lE^ P.17).
Use the CD marked with
[o]B® or [d1Q§S
/ DMHTU.MIOtO
(osr P. 4).
Clean the CD or the lens of the
player
(osr
P. 35).
Replace with another CD.
Clean the disc spindle.
O
c
2
(D
(A
O
O
5‘
(D
33
Page 34

Troubieshooting
Trouble Possible Cause Solution
"no disc” message
appears on player’s
display even after
inserting a CD.
Sound skips, or data
can not be read.
You can not listen to
sound coming from
the PHONES jack of
the player.
CD does not stop
rotating, though
is pressed.
An audio CD is
inserted and the
power is on, but
buttons on the player
do not function.
The player cannnot
be turned off.
S is pressed, but
the power is not
switched to the power
from the computer.
The player or/and CD are
damp or moist, because the
player or/and CD may have
been moved from a cold place
to a warm place.
Headphones are not
connected.
The player’s VOLUME control
is set to “0”.
■ When the computer’s sound
system and the player’s
PHONES jack is connected:
the volume is set to the
lowest level in the “Volume
Control” or “Mute” is
selected on the software
control of the sound device.
Data is being sent from the
computer {POWEFl/BUSY
lamp is blinking).
When the player is connected
to the computer. . q, q
or «x-tO is pressed.
System lockup.
Tried to turn off the player by
using the power switch when
the player is used with the
power from the computer.
System lockup.
'q is pressed when
POWER/BUSY lamp is
blinking or player’s terminator
is set to ON.
Remove the CD from the
player and do not use the
player and CD for about 1
hour.
Connect the headphones to
the PHONES jack firmly
(i^ P. 11, 18,21).
Set the player’s VOLUME
control to a higher level
(0^ P. 11, 18).
Set the volume higher level,
or cancel the "Mute”
selection.
For further information refer
to your sound device manual.
Exit the software you are
using with the player, then
wait until the POWER/BUSY
lamp stops blinking.
When the player is
connected to the computer,
these player’s buttons do not
function (osr P. 12).
Press RESET switch
(ET P. 11).
When the power from the
computer is used, the power
switch does not operate to
turn off the player (cgr P. 29).
Press RESET switch
{o^ P. 11).
Press when
POWER/BUSY lamp is not
blinking or set the player’s
terminator to OFF.
34
Page 35

Maintenance
Player:
Cautions:
•Do not use benzine, thinner, etc.
•Do not use commercial lens cleaner.
ICD;
Clean the terminals with dry cotton
swab or dry cloth about once a month.
Battery
case or
rechargeable
battery
Connection terminal
Player
= 1
0(0
o
o
c
O'
Cautions:
• Do not use solvents such as
benzine, record cleaners or
anti-static spray for records.
•Do not touch the signal side.
35
Page 36

SCSI ID Number and Terminator Setting
■ ses/ ID number:
Each SCSI device connected to your computer can be assigned an individual ID number
{refer to the respective manuals). Be sure that the player’s SCSI ID number is not same as
another SCSI device connected to the computer.
The factory setting of the player’s SCSI ID number is set to 5.
■ Terminator:
The factory setting is OFF.
ON: • When the supplied interface card is used to connect to Zip or Jaz drive.
• When the desktop computer is connected with a SCSI board (not supplied)
{(^ P. 16). If SCSI devices are connected, set their terminators to OFF.
OFF: • When the supplied interface card is used to connect to a computer (sgÿ- P. 14).
(power from the computer can be used).
• When using independently as an audio CD player (os^ P. 18) with the alkaline
batteries or rechargeable battery installed (power consumption can be saved).
Setting
Make sure that the player is off.
Set the SCSI ID number switch (1—3) or Terminator switch (4) ON/OFF by using a pointed
object like a pen (do not use a pencil), and referring to the table below (for SCSI ID
number).
(For SCSI ID number setting)
Example: SCSI ID number=5
Terminator=OFF
36
SCSI ID
number
0 OFF OFF OFF
1 ON OFF OFF
2 OFF ON OFF
3 ON ON OFF
4 OFF OFF ON
5 ON
6
7* ON ON ON
I I: Factory setting
* Do not use “7” for player’s SCSI ID
number, since it is used for the
interface card or SCSI board.
SCSI ID number
switch
1 2
OFF
OFF ON ON
3
ON
Page 37

Specifications
Operating Environment
{under no damp or moist
conditions):
Storage Environment
(Non-condensing);
Dimensions:
Mass {Weight}: Approx. 345 g {0.76 lbs.) (without battery case)
Power Source:
Interface: SCSI-2 (Player), PCMCIA 2.1 (interface card)
SCSI Connector:
Buffer Size:
MPC:
Battery Life*2
[at 20X {68“F}]:
Temperature; 5°C {41°F} to 35°C {95“F}
Humidity: 20% to 85% RH
Temperature; -20°C {-4°F} to 55“C {131“F}
Humidity: 15% to 85% RH
130 (W)x162.8 {D)x24.3 (H) mm {5.12"x6.4r'x0.96")
• AC Adaptor; 100 — 240V, 50/60 Hz
• Six (6) “AA” size aikaline batteries; Battery case is
supplied but batteries are not included
• Power from computer: Uses power from PCMCIA
card slot
• Rechargeable battery (Ni-Cd): Optional KXL-D32
Half-pitch 50-pin
128 KB
MPC level 2, level 3*' (The capability differs depending
on the computer or software.)
• When using Panasonic “AA" size alkaline batteries
or optional rechargeable battery continuously
Audio CD Approx. 3.5 h
CD-ROM
Approx. 3 h
0)
o
CO
Data Transfer Rate*^
(when using AC adaptor*'*):
** When desktop computer is connected and using Windows 3.1, 3.11.
When using the player with the terminator ON, this may become shorter.
*^ The rate may become lower depending on the computer.
Also, if a warped CD, etc. is used, the rate becomes lower automatically to minimize
vibration while the CD is rotating (n^ P. 33).
*^To conserve power, inner speed becomes 2.6X and outer speed becomes 6X when
using with the alkaline batteries, rechargeable battery or power from the computer.
• When connected to desktop computer with SCSI board
1350 KB/s (inner: 9X) — 3000KB/S (outer: 20X)
• When using the interface card
1350 KB/s (inner: 9X) — 2700KB/S (outer: 18X)
37
2.^
Page 38

Specifications
Access Time*'
(The information is based on
• When using AC adaptor
1/S stroke: 130 ms typical
the test results measured by
Panasonic test software):
Power Consumption; • When using with AC adaptor
Approx, low when playing CD-ROM
Approx. 1 W when the player is turned off.
• When using with the power from computer (DC 5 V)
Max 4.4 W when playing CD-ROM
Approx. 0.5 W when the player is turned off.
Compatible CD, CD-ROM
Format:
CD-DA (Audio CD)
CD-ROM (Mode 1 and Mode 2 Form 1)
CD-ROM XA (Mode 2 Form 2)
CD-i*"
VIDEO CD*"
CD Extra
Photo CD*^ (Multisession)
Error Rates:
Soft read errors Less than 10"®
Hard read errors Less than 10"'"
Audio Performance
Phones out (stereo):
S/N More than 80 dB (A Range)
Maximum output ievei 14 mW (EiAJ)
(impedance 16 D)
Interface Card and
Interface Cable:
Power source DC 5 V, Approx. 100 mA
Card type PCMCIA Type II
Card dimensions 54 (W)x85.6 (D)x5 (H) mm
{2.13"x3.3/'x0.20")
SCSI connector Half-pitch 50-pin (pin type)
Cabie iength Approx. 350 mm
(without connector)
Data trasfer rate 7 MB/s (MAX.)
Mass {Weight} Approx. 130 g {0.287 lbs.)
(with cable)
Interface Card
Corresponded Device:
Zip*“'*® and Jaz drive (SCSI model)*®
*' When using the alkaline batteries, optional rechargeable battery or power from the
computer, the access time increases.
*^To piayback CD-i or VIDEO CD, software or hardware MPEG decoding capabiiity is
required in the computer.
*^To playback Photo CD, a commercial playback software is required.
SCSI changer adaptor [D-sub 25 pin - half pitch 50 pin (pin type)] is required.
A commercial SCSI cable is required to connect the computer. Zip or Jaz and the player
(ET P. 15).
38
Page 39

Option / Recommended Products
Option
The following option is available through your local Panasonic authorized parts distributor.
Model No.
KXL-D32 Rechargeable Battery (Ni-Cd)
Model Name
Recommended Products
(for Windows 95, DOS / Windows 3.1,3.11)
To use CD-i or VÌDEO CD:
Common name
MPEG PLAY VIDEO Card
To connect the player to a desktop computer without PCMCIA card slot: o
Common name
SCSI board
REAL Magic Pro {Sigma Designs, Inc.)
AHA-1542, AHA-2940 (Adaptec, Inc.)
Product name (Maker)
Product name (Maker)
O
■a
JD
o
o
o
B
B
3 Ü)
(D 2
0.2.
^0-
1^= §
39
m
Page 40

End-User License Agreement
THIS IS A LEGAL AGREEMENT BETWEEN YOU AND PANASONIC. CAREFULLY
READ ALL THE TERMS AND CONDITIONS OF THIS AGREEMENT PRIOR TO OPEN
ING THE PACKET OF SOFTWARE PROGRAM. OPENING THE PACKET INDICATES
YOUR ACCEPTANCE OF THESE TERMS AND CONDITIONS. If you do not agree to
these terms and conditions, return the unopened packet and the other components of the
Panasonic product to the place of purchase and your money will be refunded. No refunds
will be given for product that have an opened packet or missing components.
1. COPYRIGHT:
Panasonic has the right to license or has been granted to license the enclosed software
program ("SOFTWARE”), developed and copyrighted by Kyushu Matsushita Electric
Co., Ltd. or its licensor (“Lisensor”). You acknowledge that you are receiving only a
LIMITED LICENSE TO USE the SOFTWARE and related documentation, and that you
shall obtain no title, ownership nor any other rights in or to the SOFTWARE and related
documentation, all of which title and rights shall remain with Licensor and Panasonic.
2. LICENSE:
(1) You have the non-exclusive right to use the one copy of the SOFTWARE on a
single computer used by single user. Installation of the SOFTWARE on a network
server for the purpose of distribution to one or more other computers shall not be
granted in this Agreement. (2) You may not copy, reproduce, or permit to be copied or
reproduced, the SOFTWARE or related documentation for any purpose, except that
you may either (a) make a reasonable quantity of copies of the SOFTWARE solely for
backup or archival purposes, or (b) transfer the SOFTWARE to a single hard disk,
provided that you keep the original solely for backup or archival purposes. All other
copies of the SOFTWARE are in violation of this Agreement. (3) You may not rent or
lease the SOFTWARE, but you may transfer your right under this License Agreement
on a permanent basis, provided that you transfer this Agreement, all copies of the
SOFTWARE, all related documentation and your Panasonic product, and the recipient
thereof agrees the terms of this Agreement. (4) You may not reverse engineer,
decompile or disassemble the SOFTWARE, except that in European Union and Euro
pean Free Trade Association, you may have the limited right to reverse engineer,
decompile or disassemble the SOFTWARE solely to the extent specifically permitted
by the terms and conditions of Article 6 of the European Community’s Directive for the
Legal Protection of Computer Programs, OJL 122/42 (17 May 1991). (5) You may not
use, copy, modify, alter, or transfer the SOFTWARE, or any copy thereof, in whole or
in part, except as expressly provided in this Agreement.
____________
3. TERM:
This license is effective until terminated. You may terminate this Agreement at any time
by destroying the SOFTWARE and related documentation and all copies thereof. This
license will also terminate if you fail to comply with any term or condition of this
Agreement. Upon such termination, you agree to destroy all copies of the SOFTWARE
and related documentation.
40
Page 41

End-User License Agreement
4. LIMITED WARRANTY
Within ninety (90) days of your receipt of the SOFTWARE, Panasonic warrants that
the storage media on which the SOFTWARE are furnished is free from defect in
materials and workmanship under normal use, and that it will repair or at its option
replace any defective media at no charge to you, provided that such defective media
is returned to Panasonic within such ninety (90) days period.
5. LIMITATION OF LIABILITY:
EXCEPT AS STATED ABOVE, NEITHER PANASONIC, PANASONIC’S SUPPLIER
MAKES OR PASSES ON TO YOU OR OTHER THIRD PARTY, ANY WARRANTY
OR REPRESENTATION INCLUDING, BUT NOT LIMITED TO, THE IMPLIED WAR
RANTY OF MERCHANTABILITY AND FITNESS FOR A PARTICULAR PURPOSE.
WITHOUT LIMITING THE GENERALITY OF THE FOREGOING, NEITHER
PANASONIC NOR PANASONIC’S SUPPLIER WARRANTS THAT THE SOFTWARE
WILL BE ERROR-FREE OR THAT IT WILL MEET YOUR REQUIREMENTS. NEI
THER PANASONIC NOR PANASONIC’S SUPPLIER SHALL BE LIABLE FOR ANY
DAMAGE SUFFERED BY YOU INCLUDING, BUT NOT LIMITED TO, CONSEQUEN
TIAL, INCIDENTAL SPECIAL OR PUNITIVE DAMAGES. THE ABOVE LIMITATIONS
SHALL APPLY REGARDLESS OF THE FORM OF ACTION WHETHER IN CON
TRACT, TORT (INCLUDING NEGLIGENCE), STRICT PRODUCT LIABILITY OR
OTHERWISE, EVEN IF SUCH PARTY HAS BEEN ADVISED OF THE POSSIBILITY
OF SUCH DAMAGES.
m
3
Q.
41
O
o
3
(A
o
>
(O
o
Q
3
Q
3
PQ
Page 42

Index
AC adaptor
Accessories.......................................6
Alkaline batteries...........................9, 25
Audio CD control software .... 22, 23
For Windows 3.1,3.11/
Windows NT 3.51......................23
For Windows 95/
Windows NT 4.0
Battery
Alkaline "AA” size
Rechargeable (Ni-Cd) ... 9, 27, 28
Battery case
Buttons for playing audio CD
CD-ROM ..............................4, 12, 21
Charging rechargeable battery ... 28
Connection
AC adaptor
Interface cable/card
SCSI cable/SCSI board
Zip/Jaz.........................................15
............................
......................
............................................
............
..........................
.............................
..................................
....................
6, 8, 13
9, 25, 26
25, 26
.........
13—16
..............
22
25
19
13
14
16
End-User License Agreement
Features ............................................4
Forward skip/search button .... 10,19
Inserting a CD
Insertion/Removal of
interface card ...............................24
Interface cable.............................6,14
Interface card (PCMCIA).............6,14
Maintenance...................................35
MODEbutton
Notebook computer........................14
................................
.......................
.........
17
10,12,19
40
13
Daisy chain
DC IN jack
Desktop computer
DIP switch..................................11,36
Disc cover
Display
Display Messages
DOS................................................24
42
....................................
.................................
.....................
.............................
..................................
..........................
16
11,13
14,16
10, 17
10, 12
12
OPEN button
Option........................................27,39
............................
10, 17
Page 43

índex
Part Names
PC POWER
PCMCIA card slot
...................................
..................
11,12, 29, 30
....................
14,24
10
PHONES jack .....................11,18,21
PLAY/PAUSE/PC POWER
button..........................11, 19, 29, 30
Playing audio CD......................18,21
Playing CD-ROM...........................21
POWER/BUSY lamp .....................10
Power from computer
...............
29, 30
Power On..................................18, 20
POWER switch
Precautions
Preparation
README file
.............................
.....................................
....................................
............................
22,23
10
14
Rechargeable battery.....................27
Recommended Products
...............
39
Removing a CD..............................17
Repeat......................................12,19
RESET switch
.........................
11,34
Reverse skip/search button ... 10,19
Terminator
Troubleshooting
..........................
.............................
Using player independently
Using player with computer
VOLUME control........................11,18
7
Windows 3.1,3.11
Windows 95
Windows NT 3.51
Windows NT 4.0
Zip/Jaz
......................................
.....................
.............................
....................
......................
11,16, 36
31
............
............
23,24
22, 24
23, 24
22, 24
15, 32
18
20
SCSI ID number
...........
11,15, 16,36
SCSI interface connector . .11,14---16
Setting SCSI ID number/
Terminator
Setting up computer
Setup disk
Setup Manual
Specifications
STOP button
.....................
11,15,16,36
..................
..................................
.........................
6,14,16
.................................
..................
11,17,19,20
14,16
6,14
37
43
3
Q.
O
X
PD
Page 44

FOR USERS IN CONTINENTAL UNITED STATES ONLY
Technical Support Calls
If you have read this manual and Setup Manual and tried the troubleshooting
procedures, and you are still having difficulty, please contact the store from which the
unit was purchased. Panasonic Communications & Systems Company will repair this
product with new or refurbished parts free of charge for two (2) years from the date of
purchase.
You may also call the technical support telephone number (24 hour, 7 day/week
automated technical support. Live technical support M-F, 9 am - 5 pm EST).
The technical support number is: 1-800-PANA-SYS
(1-800-726-2797)
Software drivers are sometimes updated. You can download the latest driver or new
setup disk via your modem.
Internet: www.PANASONIC.com
BBS: @ 201-863-7845
This product is designed for use only in the country where it was purchased.
Panasonic Computer Peripheral Company
Division of Panasonic Communications & Systems Company
A Unit of Matsushita Electric Corporation of America
Two Panasonic Way, Secaucus, New Jersey 07094
Panasonic Sales Company
Division of Matsushita Electric of Puerto Rico, Inc.
San Gabriel Industrial Park, 65th Infantry Avenue KM. 9.5
Carolina, Puerto Rico 00630
Panasonic Canada Inc.
5770 Ambler Drive, Mississauga, Ontario, L4W 2T3
Matsushita Electric Industrial Co., Ltd.
Central P.O. Box 288, Osaka 530-91, Japan
Printed in Japan
PJQMA0313ZA F0997Z0
©
 Loading...