

Panasonic EB-GD93 User Manual
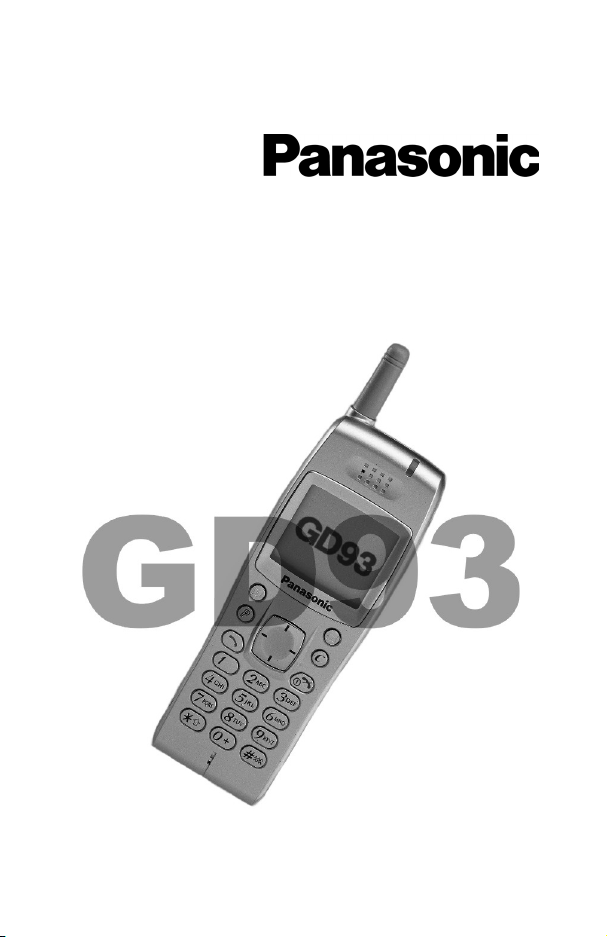
Operating Instructions EB-GD93
Digital Cellular Telephone
Before operating this equipment please read these instructions completely.

Quick Reference
This Quick Reference guide is intended to enable the user to utilize the most basic
features of the phone instantly without having to search through the extra details
which are incorporated into this manual.
Power On/Off
Press and hold
E
Enter Pin Code
Use the keypad to enter the PIN
supplied by your Service Provider,
then press
B
Make a Call
Use the keypad to enter the area
code and telephone number, then
press
D
Correcting an Error
PressConce to erase the
previous character
C
Press and hold
characters entered
to remove all
Redial Last Number
Press
DD
End a Call
PressEto end a call
Answer a Call
Press any key exceptEor
Adjust Ear Volume
Presseduring a call
Access WAP Browser
Press and hold
P
Make Emergency Call
Press
112 D
International Dialling
Press and hold0, useeto
select the appropriate country
code, then press
B
Add Phonebook Entry to SIM
Enter phone number and press
A
. PressB, enter name and
press
B
twice
Dial SIM Phonebook Entry
PressA, then useeto select
the desired number, then press
D
What is My Number ?
Press
B26
of your phone will be displayed
(SIM dependent)
and the number
Set Key Guard
PressBthree times and the keys
g
will be locked to avoid accidental
presses
Disable Key Guard
PressBtwice (when Free is
displayed) to remove the Key
Guard

Contents
Getting Started . . . . . . . . . . . 1
Fitting the SIM . . . . . . . . . 1
Fitting the Battery . . . . . . . . 1
Charging the Battery . . . . . . 2
Getting to Know Your Phone . . 3
Basic Operation. . . . . . . . . . . 6
Switching the Phone On/Off . . 6
Making a Call . . . . . . . . . . 6
Automatic Redial . . . . . . . . 7
Ending a Call . . . . . . . . . . 7
Answering a Call . . . . . . . . 7
Earpiece Volume Control . . . . 7
Locking the Phone . . . . . . . 8
Using the PIN . . . . . . . . . . 8
Setting Vibration Alert. . . . . . 9
Setting Ring and Key Volume . 9
Phonebook. . . . . . . . . . . . . 10
Store a Number . . . . . . . . 10
Browsing Phonebook . . . . . 11
Retrieve a Number . . . . . . 11
Editing Phonebook Entries . . 11
Grouping Phonebook Entries . 12
Using Alert Profiles . . . . . . 13
Personal Dial . . . . . . . . . 13
Hot Key Phone Numbers . . . 14
Service Dial Numbers . . . . . 14
Review the Phonebook . . . . 14
My Numbers . . . . . . . . . . 15
Personalising Your Phone . . . . 16
Add a Start-up Greeting . . . . 16
Displaying Animations . . . . . 16
Changing the Ring Tone . . . 16
Disabling all Tones . . . . . . 18
Setting the Backlight Colour . . 18
Disabling Key Backlight . . . . 18
Disabling Back Case Light . . 18
Using Voice Commands. . . . 18
Selecting Vibration Alert Type . 19
Changing the Language . . . . 19
Restoring the Default Phone
Settings . . . . . . . . . . . . 20
Phone Security . . . . . . . . . . 21
Using Key Guard . . . . . . . 21
Changing the Security Codes . 21
Restricting Calls . . . . . . . . 22
Applications . . . . . . . . . . . . 23
Clock . . . . . . . . . . . . . 23
Calculator . . . . . . . . . . . 25
Currency Convertor . . . . . . 25
Short Text Messages . . . . . . . 27
Setting the Phone for Text
Messages . . . . . . . . . . . 27
Sending a Text Message . . . 27
Receiving Text Messages . . . 28
Message Options . . . . . . . 28
Using Pre-defined Messages . 28
Manage Messages Lists. . . . 29
Message Parameters . . . . . 30
Cell Broadcasts . . . . . . . . 30
Call Information . . . . . . . . . . 32
Recent Numbers . . . . . . . 32
Call Duration. . . . . . . . . . 32
Call Charges. . . . . . . . . . 33
Call Identification . . . . . . . 33
Advanced Operation . . . . . . . 34
Diverting Calls . . . . . . . . . 34
Holding Calls and Call Waiting 34
Call Transfer. . . . . . . . . . 35
Multi-party Calls . . . . . . . . 35
Changing to a New Network. . 37
WAP Browser . . . . . . . . . . . 38
Server Settings . . . . . . . . 38
Activating the Browser. . . . . 38
Navigating Content . . . . . . 39
The Browser Menu . . . . . . 39
Using Bookmarks . . . . . . . 40

Deactivating the Browser . . . 40
Setting the Linger Time . . . . 40
Last Error . . . . . . . . . . . 40
Internet E-mail . . . . . . . . . . . 41
E-mail Setup. . . . . . . . . . 41
Create a New Message . . . . 41
Send/Receive Messages . . . 42
Read Messages . . . . . . . . 42
Store an Address . . . . . . . 43
Add a Signature . . . . . . . . 43
Manage Message Stores . . . 43
Additional Features . . . . . . . . 44
Desktop Handsfree . . . . . . 44
Voice Memo . . . . . . . . . . 44
Dicta Phone . . . . . . . . . . 45
DTMF Tones . . . . . . . . . 46
Note Pad . . . . . . . . . . . 46
Second Clock . . . . . . . . . 47
Accessory Related Features . 47
Text Entry . . . . . . . . . . . . . 48
Menu Structure . . . . . . . . . . 50
Trouble Shooting . . . . . . . . . 51
Important Error Messages. . . 52
Important Information. . . . . . . 54
Safety Considerations . . . . . 54
Care and Maintenance . . . . . . 56
Glossary of Terms. . . . . . . . . 57
Specifications . . . . . . . . . . . 58
Getting Started
Getting Started
Thank you for purchasing this Panasonic digital cellular phone. This phone is
designed to operate on the Global System for Mobile Communications (GSM),
GSM900 or GSM1800. Ensure the battery is fully charged before use.
Before operating this phone please read the “Important Information” section see page 54.
These operating instructions detail use of the equipment contained in the Main Kit.
Some services detailed herein are network dependent or may only be available on a
subscription basis.Some functions areSIM dependent. For more informationcontact
your Service Provider.
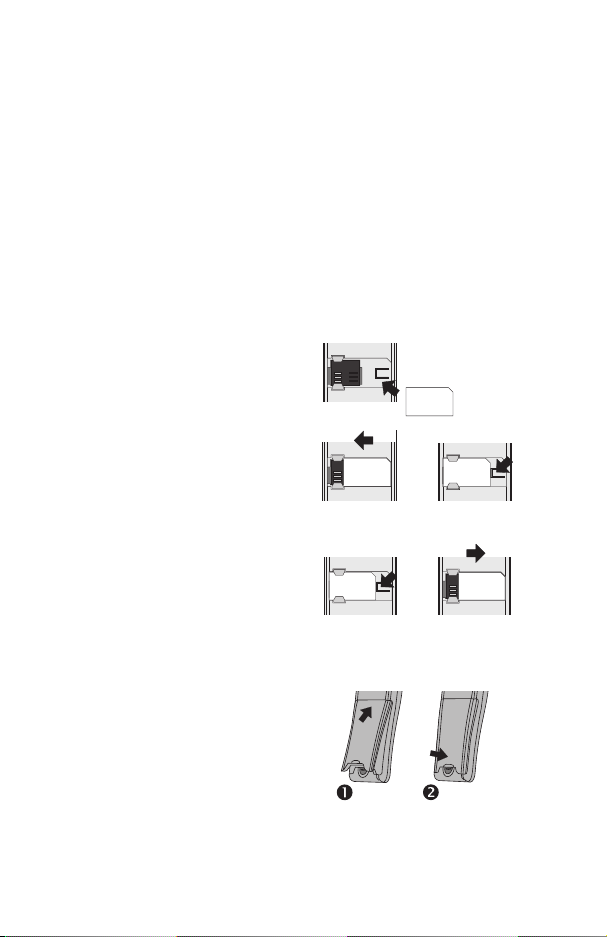
Fitting the SIM
The SIM is inserted into the back of the
phone underneath the battery.
Place the SIM in the recess at the rear
of the phone (1) ensuring the bevelled
corner is positioned in the top right
corner. Slidethe SIM to the left(2) using
light pressureuntil it is located under the
lugs and the SIM retaining clip has
clicked into position (3).
Removing the SIM
Ensure the SIM retaining clip is pressed
down (1) and while holding this down
slide the SIM to the right (2). Once clear
of the lugs the SIM can be lifted out of
the recess.
Fitting the Battery
Fit a fully charged battery pack. If the
battery pack is not fully charged then it
must be charged as described in the
“Charging the Battery” section.
Locate the top of the battery into the
rear of the phone (1). Push the bottom
of the battery into place until it locks into position (2).
1
Getting Started
Removing the Battery
Push the battery release latch down (1).
The base of the battery will raise out of
the recess (2). The battery can now be
removed from the phone (3).
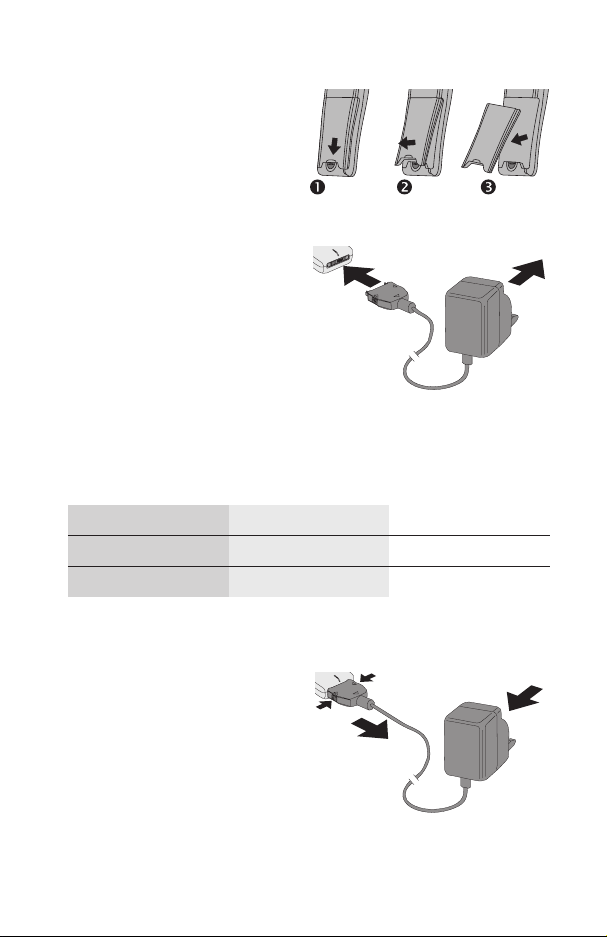
Charging the
Battery
Connecting the AC
Adaptor
The battery pack must be attached to
the phone before the AC Adaptor is
connected. Insert the AC Adaptor plug
into the base of the phone (1).
Note: DO NOT force the connector as
this may damage the phone and/or the
AC Adaptor.
Connect the AC Adaptor to the mains power supply (2). Indicator will light and
charging starts.
Operation of Battery Level Indicator
While charging Charging complete
Telephone on
Telephone off
KH
K
Indicator off
When charging is complete remove the AC Adaptor.
Disconnecting the AC Adaptor
Disconnect the AC Adaptor from the
mains power supply (1).
Squeeze together the two buttons on
the plug of the AC Adaptor (2) and while
maintaining pressure extract the plug
from the base of the phone (3).
2
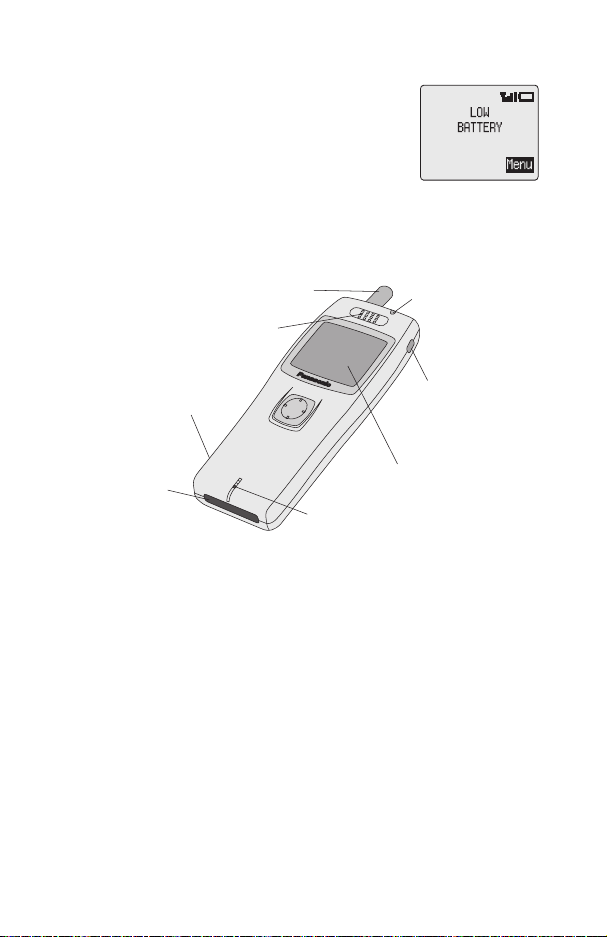
Low Battery Warning
When thebattery power is low awarning tone will sound anda
blinking LOW BATTERY message will be displayed. If this
occurs during conversation finish your call immediately. The
power will be automatically shut off shortly after the warning
tone. Fully charge the battery pack or replace it with a fully
charged one.
Getting to Know Your Phone
Location of Controls
Antenna
Earpiece
Getting Started
Incoming/Charging
Indicator
AB
Earphone/Microphone Socket
External Connector
PC
DE
123
456
789
*0#
Display
Microphone
g
Navigation key – pressing up/down/left/right scrolls through options in the
main area of the display. Pressing left/right scrolls through options in the
option area of the display
B
Select key – selects an option in the option area of the display
A
accesses Phonebook or switches character types
P
provides instant access to one phone number (Personal Dial). Also
provides shortcut to WAP Browser.
D
makes a call or recalls recently dialled phone numbers
C
clears the last digit entered, clears all digits when pressed and held or
returns to the previous display
E
ends a call or switches the phone on/off when pressed and held
:
Records and plays back recorded memos
Digit keys
0to9,*
and#–the#key will switch on and off
vibration alert
Memo Key
3
Getting Started
The Menu System
The menu system provides the means for accessing all the functions which do not
have their own dedicated buttons on the keypad.
The menu functions can be selected using a combination of the Navigation key
and the menu Select keyB.
During a call a restricted menu will be available.
g
Shortcuts
In addition, once you are familiar with the layout of the menu you can use the keypad
to enter the Menu Number to quickly obtain the required function. For example,
B
pressing
for changing the ring tone. Examples in these instructions use the shortcuts to gain
access to the relevant functions or to the sub-menu under which other functions are
located.
to enter the menu and then
52
will take you directly to the menu
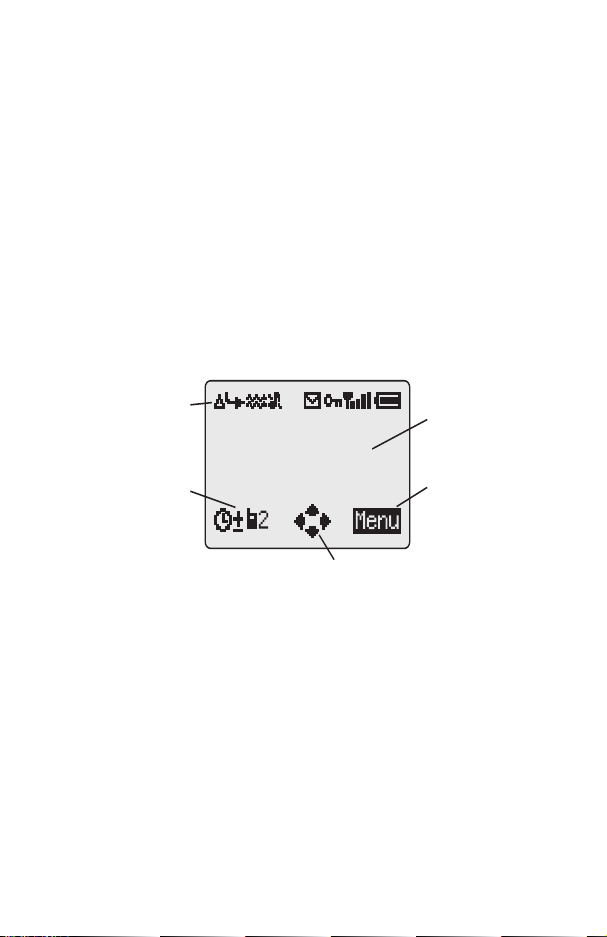
Display Icons
Status Icons
Information Area
Navigation Prompt
Following some operations the display will automatically clear after three seconds or
after pressing any key.
Main Display Area
Option Area
Status Icons
The status icons are displayed according to the currently activated functions. The
Antenna, Signal and Battery icons are always displayed when the handset is
switched on and connected to a network.
Y
lights when you are registered to a non-home network - roaming
t
lights when call divert is enabled
]
lights when vibration alert is enabled
[
lights when all tones or ring volume is off
N
blinks whenan unread message is storedor lights when message area is
full
O
lights when phone lock is enabled
4

Getting Started
S
indicates that it is possible to make emergency calls
T
indicates the received signal strength:\- weak signal,T- strong
signal
H
indicates the battery level:
H
- full,G(blinking) - low battery
Information Area
This area is used to indicate the current top level menu, the sub-menu number, text
entry mode, Phonebook source, Phonebook location number, or the alarm set icon
depending on the current mode of operation.
?
indicates alarm is set
>
indicates current Phonebook entry is sourced from Mobile Phonebook
<
indicates current Phonebook entry is sourced from SIM Phonebook
Navigation Prompt
p
This area indicates the available directions in which the Navigation Key
can be pressed according to the current mode of operation.
Option Area
The Option Area displays the options which can be selected by pressing the Select
B
).
key (
5
Basic Operation
Basic Operation
Switching the Phone On/Off
To switch the phone on or off.
E
Press and hold
A greeting animation will be displayed and then the phone will
go into Idle mode.
Press and hold
Making a Call
Ensure that the phone is switched on, the network operator
logo isdisplayed and thesignal strength meter shows network
coverage is available in the current area.
1
Enter area code and phone number
2
Press
D
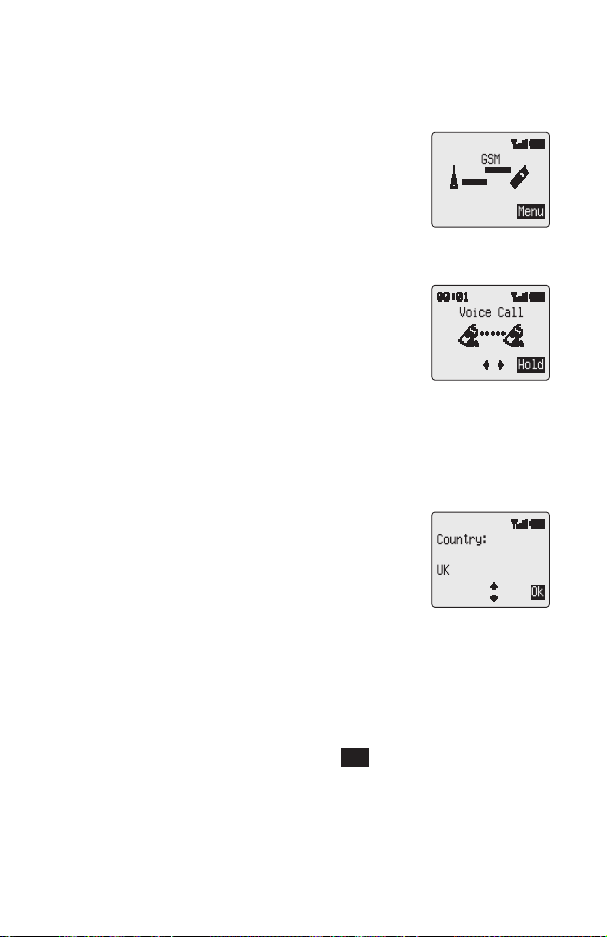
International Dialling
Using theautomatic international access code (+)you will be able todial international
numbers without having to know the code for the international exchange.
If the international number is known then it can be entered in the normal fashion
followed by the area code and phone number.
1
Press and hold0until + is displayed
2
Presseto cycle through the abbreviated international
names and press
3
Enter area code and phone number
4
Press
D
Note: Many countries include an initial “0” in the area code. This should, in most
cases, be left out when dialling international numbers. If you have difficulties making
international calls, contact your Service Provider.
Emergency Calls
To make an emergency call the antenna symbol (
Enter
112 D
to switch power on
E
to switch power off
B
to select the required code
S
) must be present.
or pressBwhen SOS is displayed in theoption area
6
Basic Operation
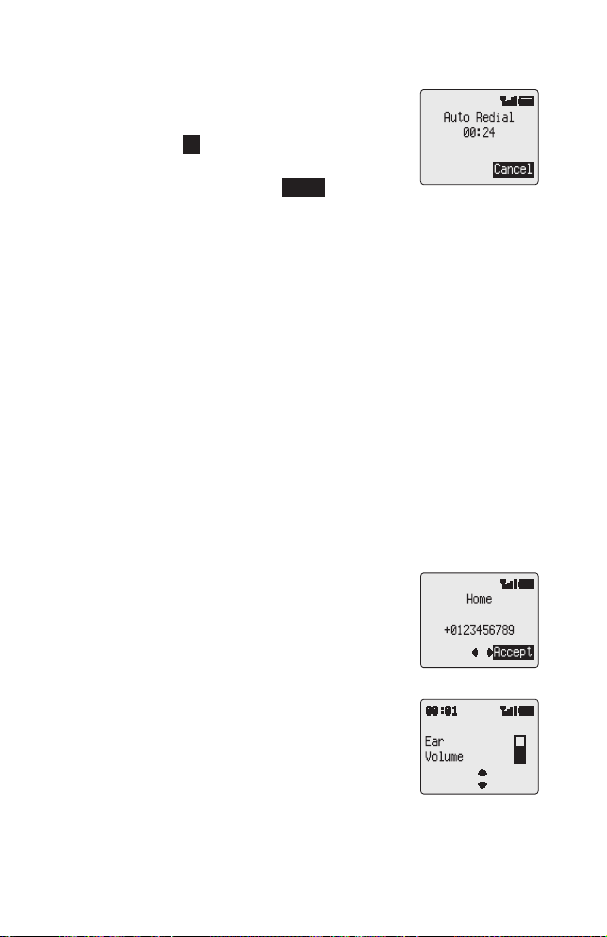
Automatic Redial
When a call is unsuccessful the phone may ask if you want to
redial the phone number again automatically.
PressBwhen Ok is displayed in the option area and
the display will countdown in seconds to the next redial.
To stop redialling, pressBwhen Cancel is displayed in
the option area or press
When a call is connected a beep will be emitted.
If a call is repeatedly unsuccessful you will not be able to automatically redial the
phone number. In this case you must redial the phone number manually.
C
.
Ending a Call
Press
E
Answering a Call
To receive a call the phone must be switched on and the signal strength meter must
be displayed.
Press any key except
PressEto reject the call
If a call is not answered, or is rejected, the number of unanswered calls will be
displayed.
Press any key to clear the display
Caller Identification
This feature allows you to identify incoming calls and accept
or reject them. The caller’s phone number, and name if stored
in Phonebook, will be displayed.
Note: Caller Identification may not always be available.
Eorg
Earpiece Volume Control
The volume level may be adjusted during a call:
a
to decrease the volume
Press
b
to increase the volume
Press
Volume control for Personal Handsfree accessory is adjusted
in the same manner.
7

Basic Operation
Locking the Phone
With the Phone Lock enabled you will be restricted to answer incoming calls and
make emergency calls only. The Phone Lock Code is factory set to “0000”.
1
From Idle mode press
Lock menu
2
Press
B
3
Enter the 4-digit code and press
The phone will be locked and the lock icon (O) will be
displayed.
B81
B
to enter the Phone
Unlocking the Phone
To restore normal operation, enter your Lock Code and pressB. The lock icon will
be removedfrom the display. However, once you turnthe phone off and on again you
will need to re-enter the Lock Code, and when the correct code has been entered Ok
will be displayed. Press
B
.
Disabling Phone Lock
1
From Idle mode press
2
Pressfuntil Disable is displayed in the option area
3
Press
B
4
Enter the Lock Code and press
B8
to enter the Security menu.
B
Using the PIN
The PIN (Personal Identification Number) protects your SIM against unauthorized
use. If you enable the PIN, every time the phone is turned on you will be prompted to
enter the PIN.
The PIN2 controls security for the Fixed Dial Store and Call Charge metering.
Enabling/Disabling the PIN
1
From Idle mode press
2
PressBto enable/disable the PIN
3
Enter PIN number
B83
B
to enter the PIN menu
8

Basic Operation
Setting Vibration Alert
When vibration alert is switched on the phone will vibrate when a call is received.
Switching on vibration alert will silence the ring volume. However, when the ring
volume is adjusted after the vibration alert is switched on, the phone will ring and
vibrate when a call is received.
From Idle mode:
#
Press and hold
on, the phone will vibrate briefly.
to switch on or off. When switched
Setting Ring and Key
Volume
Changing either the ring volume and key volume is done in the same manner. If you
increase thering volume abovemaximum it will set anescalating ring tone.If you turn
the ring volume off, the silent indicator icon (
1
From Idle mode press
2
Useeto select Ring Volume or Key Volume and press
3
Useeto set the volume level and press
B52
[
) will be displayed.
to enter the Tones menu
B
B
9
Phonebook
Phonebook
Phone numbers can be stored in two locations. You can store numbers in the SIM
Phonebook (therefore the number of locations, length of name and number of phone
numbers are SIM dependent). Alternatively you can store phone numbers in the
Mobile Phonebook, this means that if you change the SIM the numbers in the phone
are not lost.
The Mobile Phonebook has the advantage that you can group your phonebook
entries together.
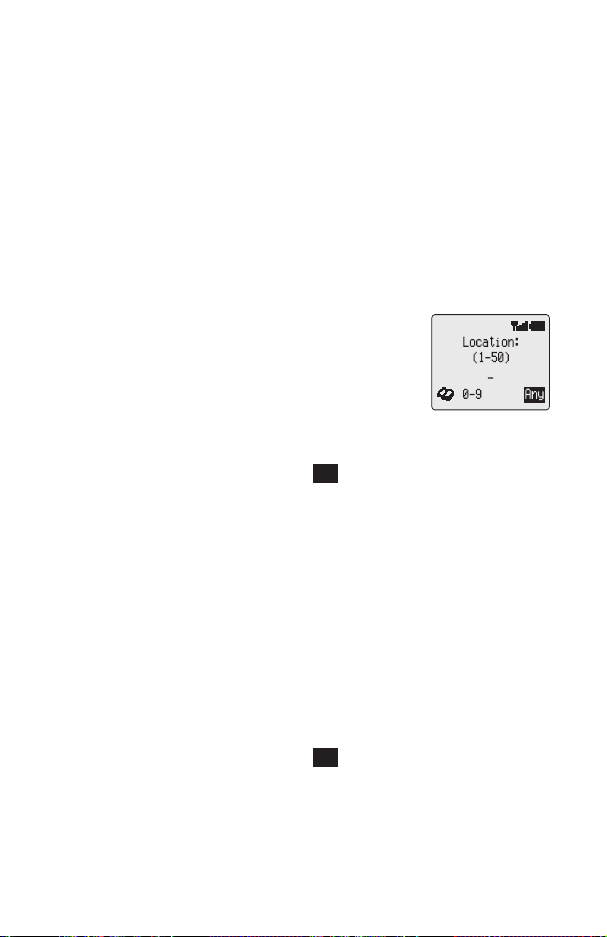
Store a Number
To Store a Number in the SIM Phonebook
1
From Idle mode enter the phone number and press
2
PressBto select the SIM Phonebook
3
Enter the name – see “TextEntry” page 48,and press
4
Confirm phone number and press
5
Enter location number and press
You canchoose not to enter alocation number andthe entry will be placedin the next
available location. Simply pressBwhen Any is displayed in the option area.
B
B
To Store a Number in the Mobile Phonebook
1
From Idle mode enter the phone number and press
2
Useato select the Mobile Phonebook and press
3
Enter the name - see “Text Entry” page 48, and press
4
Confirm phone number and press
If you wish to store an e-mail address with the current number then after confirming
the number press
5
Useeto select a group - see “Grouping Phonebook Entries” page 12 - into
which to place the entry and press
6
Enter location number and press
You canchoose not to enter alocation number andthe entry will be placedin the next
available location. Simply pressBwhen Any is displayed in the option area.
a
, enter the mail address and pressB.
B
B
B
A
a
A
B
a
10

Phonebook
Overwrite Protection
If a location is occupied you will be prompted to confirm that you wish to overwrite the
current information.
B
to overwrite the selected location
Press
C
to choose another location number
Press
Browsing Phonebook
You can search the Phonebook by either Name or Location. The default setting for
browsing isby name. When browsing byname pressing a lettered keywill take you to
the first entry starting with that letter.
1
From Idle mode press
2
Usefto toggle between Names or Loc’ns display mode and press
3
Useeto select the Phonebook you wish to browse and press
B2
to enter the Phonebook menu
B
B
Retrieve a Number
From Idle mode:
1
Press
A
2
Useeto browse through the Phonebook
Once youhave selected a phone number or name,there are a number of actions that
you can perform. To dial the selected number press
Note: ThePhonebook you lastviewed will bethe default whenyou next pressA.To
change the default, use the Phonebook menu to select a particular phonebook.
Speed Dial a Number Stored in SIM Phonebook
1
Enter location number – leading zeros may be left out
2
Press
#
3
Press
D
D
.
Editing Phonebook Entries
You canDetail, View, Recall, Edit, Deleteor Create inthe Phonebook. To access any
of these functions you follow the same procedure. With a phone number or name
displayed:
1
Usefto cycle through Detail, View, Recall, Edit, Delete or Create
2
PressBto select an option
11

Phonebook
Detail
Displays each element of the selected Phonebook entry. Useeto display the
next/previous element of the entry. Each element may be edited - usefuntil Edit is
displayed in the option area and press
B
.
View
Displays an individual name and phone number in the names list.
If an e-mail address is present in the Mobile Phonebook this will be displayed along
with the name and number.
Recall
Displays the phone number, enabling you to either change it or call the number.
Edit
Displays the entry allowing you to make changes as required. PressBto save any
changes.
Delete
Deletes the entry from the Phonebook.
Create
Creates a new entry in the Phonebook
Grouping Phonebook Entries
The ability to group phonebook entries together is an extra function of the Mobile
Phonebook.
Retrieving a Number from a Group
Groups are used to collect together types of Phonebook entries, for example
business and personal. Each group can be suitably titled for quick access to the
entries contained within.
An alert profile can be attributed to groups, or a phone number, thus allowing
incoming calls to be tailored to indicate the type of caller.
1
From Idle mode press
2
Useeto select the group and press
3
Useeto select the entry required and pressBto recall the number.
B24
to enter the Group Settings menu
B
12

Phonebook
Retitling Group Names
1
From Idle mode press
2
Useeto select the group
3
Usefuntil Edit is displayed in the option area and press
4
Clear the current title and re-enter - see “Text Entry” page 48
5
Press
B
B24
to enter the Group Settings menu
B
Using Alert Profiles
Alert Profile enables you to identify callers with a particular ring tone, display picture
and backlight colour, making it easier to distinguish between callers or groups of
callers.
Creating an Alert Profile
1
From Idle mode press
2
PressBto insert a new profile
3
Useeto select Personal or Group and press
4
Recall the phone number / select group from the Phonebook – see “Retrieve a
Number” page 11 and press
5
Press
B
6
Useeto select the ring tone thatyou wish touse for thisprofile and press
7
Useeto select the picture and press
8
Useeto select the backlight colour and press
B23
B
to enter the Alert Profile menu
B
B
B
B
Personal Dial
ThePkey can be defined to recall your favourite phone number in preparation for
initiating a call.
Setting the Personal Dial Number
1
From Idle mode press
2
Enter the name - see “Text Entry” page 48, and press
3
Enter the phone number and press
Using Personal Dial
From Idle mode:
P
to recall the number, then pressDto initiate a call
Press
B28
to enter the Personal Dial menu
a
B
13

Phonebook
Hot Key Phone Numbers
It is possible to dial phone numbers from the Phonebook or Service Dial part of
Phonebook very quickly. Some Hot Key Phone numbers may be reserved by the
Service Provider, for example the first three Hot Key Phone numbers may be linked
to Service Dial (network dependent).
1
Press and hold a Digit key1to
2
Press
D
9
Setting the Hot Key Dial Source
1
From Idle mode press
2
Useeto select SIM Phonebook or Mobile Phonebook and press
B27
to enter the Hot Key Dial menu
B
Service Dial Numbers
Your Service Provider may program some special phone numbers into your SIM
(network dependent). It is not possible to modify the Service Dial numbers.
1
Press and hold
2
Presseto browse through the Service Dial list of phone numbers
The phone number pointed to can only be recalled or dialled.
A
Review the Phonebook
The Review function in the Phonebook menu shows how many locations are
available in the Phonebook.
1
From Idle mode press
2
Useeto select SIM Phonebook or Mobile Phonebook and press
A summary of the selected Phonebook will be displayed.
3
Useeto gain a detailed view of the Phonebook locations. Occupied locations
are shown with “
w
”.
B25
to enter the Review menu
B
14

Phonebook
My Numbers
My Numbers is a convenient part of Phonebook where your voice, fax and data
phone number(s) can be stored and viewed. This function is SIM dependent.
Adding Numbers
1
From Idle mode press
2
Usefuntil Create is displayed in the option area and press
3
Enter the name - see “Text Entry” page 48, and press
4
Enter the phone number and press
5
Enter location number and press
Viewing Stored Numbers
1
From Idle mode press
2
If more than one number is available then useeto cycle through the listed
numbers
B26
B
B26
to enter the My Numbers menu
B
a
B
to enter the My Numbers menu
15
Personalising Your Phone
Personalising Your Phone
Add a Start-up Greeting
A personalised greeting can be programmed for when the phone is switched on.
1
From Idle mode press
2
Use the text entry facility to add your greeting and pressB- see “Text Entry”
page 48
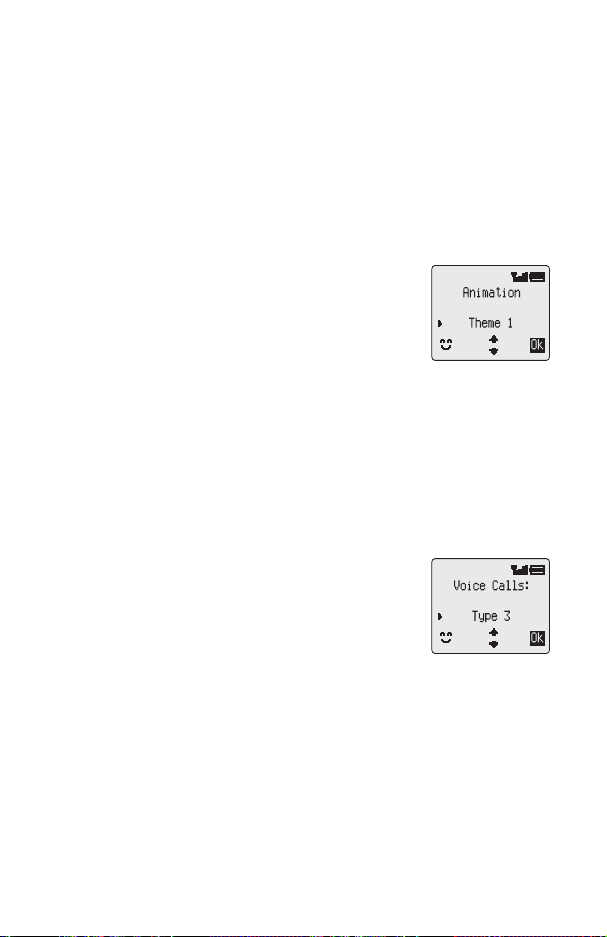
Displaying Animations
Animations can be displayed when thephone is switchedon.
1
From Idle mode press
Animation menu
2
Useeto cycle through the animated themes available
3
PressBto select either the desired theme, or disable
the animation
Changing the Ring Tone
The ring tones of the phone can be changed to one of many pre-defined sounds or to
a voice ringer (a voice recording used as a ring tone).
Each of voice, fax, data and message can have a different ring tone.
Alternatively you can use the Melody Composer to generate your own ring tone.
Setting up a Pre-defined Ring Tone
You can choose from a selection of tones and melodies.
1
From Idle mode press
Ring Type menu
2
Useeto select the appropriate call type to be changed
and press
3
Presseto select the desired ring tone and press
Recording a Voice Ringer
1
From Idle mode press
2
Press1and start speaking into the microphone to record your voice. The
recording will stop automatically after 5 seconds, or before if
3
To playback the recording press
B
B 541
B 544
B 523
B 525
2
to enter the Greeting menu
to enter the
to enter the
B
to enter the Voice Ringer menu
B
is pressed.
16

Personalising Your Phone
Composing a Melody
Up to 3 user-defined melodies can be created.
1
From Idle mode press
2
Useeto cycle through the melodies
3
PressBto edit the chosen melody
Using thefollowing table as reference, enter the notes(from the choice of low,middle
and high), rests, and the durations of each, to generate your composition.
At any time during composing press
Once the composition is complete press
Key
1
2
3
4
5
6
7
8
9
0
*
(duration)
#
(duration)
Editing your Melody
Once the melody has been saved the following operations can be used for re-editing
purposes:
C
to delete the character to the left of the cursor
Press
g
to navigate the cursor around the screen
Use
Use the relevant keys to insert new notes/rests
B 524
1st
press
C C# low C low C# high C high C#
D D# low D low D# high D high D#
Elow EhighE
F F# low F low F# high F high F#
G G# low G low G# high G high G#
A A# low A low A# high A high A#
BlowB
rest
1/8 1/16 1/1 1/2 1/4
1/2 1/1 1/16 1/8 1/4
2nd
press
to enter the Melody Composer menu
A
to play back the current melody.
B
to save it.
3rd
press
4th
press
5th
press
6th
press
17
 Loading...