

Page 1
Digital Copier
Operating Instructions (For Facsimile)
DP-150FX
Options
DA-DS150/UE-403146/DA-SM16B
UE-410045/410046/410047
GETTING TO
KNOW YOUR
MACHINE
INSTALLING
YOUR MACHINE
PROGRAMMING
YOUR MACHINE
BASIC
OPERATIONS
ADVANCED
FEATURES
NETWORK
FEATURES
PRINTOUT
JOURNALS AND
MAINTENANCEAPPENDIX
LISTS
these instructions completely and keep these
operating instructions for future reference.
The digital copier with optionsBefore operating this equipment, please read
English
Page 2

IMPORTANT INFORMATION
When requesting information, supplies or service always refer to the model and serial number of your
machine. The model and serial number plate (Main Name Plate) is located on the machine as shown below.
For your convenience, space is provided below to record information you may need in the future.
Model No.
Serial No.
Date of Purchase
Dealer
Address
Telephone Number
() -
Supplies Telephone Number
() -
Service Telephone Number
() -
Copyright © 2000 by Matsushita Graphic Communication Systems, Inc.
All rights reserved. Unauthorized copying and distribution is a violation of law. Printed in Japan.
The contents of these Operating Instructions are subject to change without notice.
Page 3
Introduction
1
2
3
INSTALLING YOUR MACHINE
The features are as follows.
Digital Copier
This machine allows you to copy paper from Legal
size to Invoice size.
It also allows you to copy a various kind of document
(photo, photo/text, text) with proper resolution.
(Original paper size is from Legal to Invoice)
Facsimile
This machine allows you to use as G 3 plain paper
facsimile machine.
It is also available to use as a telephone by attaching
the handset kit (Option).
Printer
This machine allows you to use as a personal
computer printer with 600 dpi resolution.
Scanner
4
5
■■■■
This Operating Instru ctions is for facsimile.
This machine has 3 unit Operating Instructions, For Copier, For Facsimile and For Extended Function (CD-ROM).
<For Copier> It shows how to use the copier including adding toner, removing paper misfeed.
<For Facs imile > It shows how to use the facsimile including from basic operatio ns to advanced operation s and
troubleshooting.
<For Extended Function>
This machine allows you to use as an image
scanner with 600 dpi resolution.
Application Software
This machine is equipped with some useful
application software suc h as Phone B ook, Machi ne
Setting, Status Monitor and Document Management
System.
These software will make your machine
environment more convenient.
(CD-ROM) It shows how to use the extended functions such as Pr inte r, Scanner, Machine Setting, Status
Monitor and Document Management System.
This CD-ROM gives you a fast and convenient searching system against the troubles.
3
Page 4
INSTALLING YOUR MACHINE
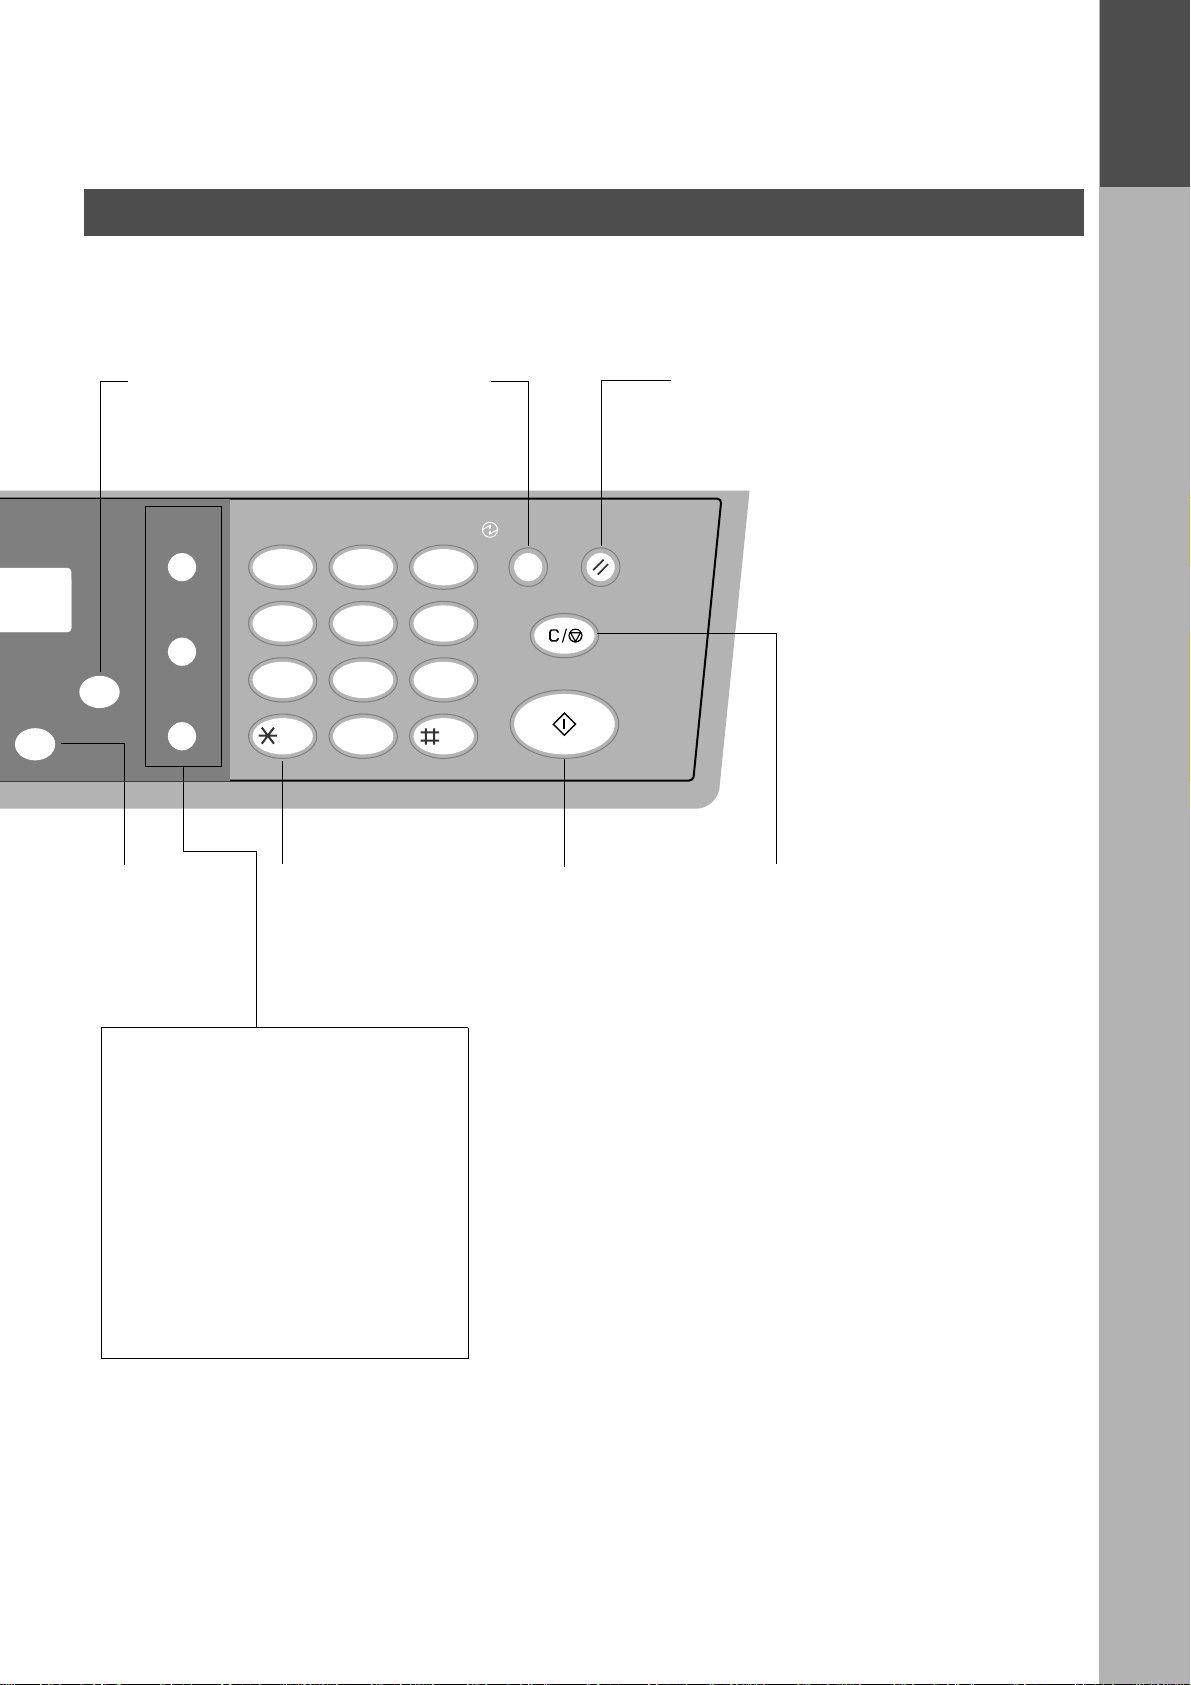
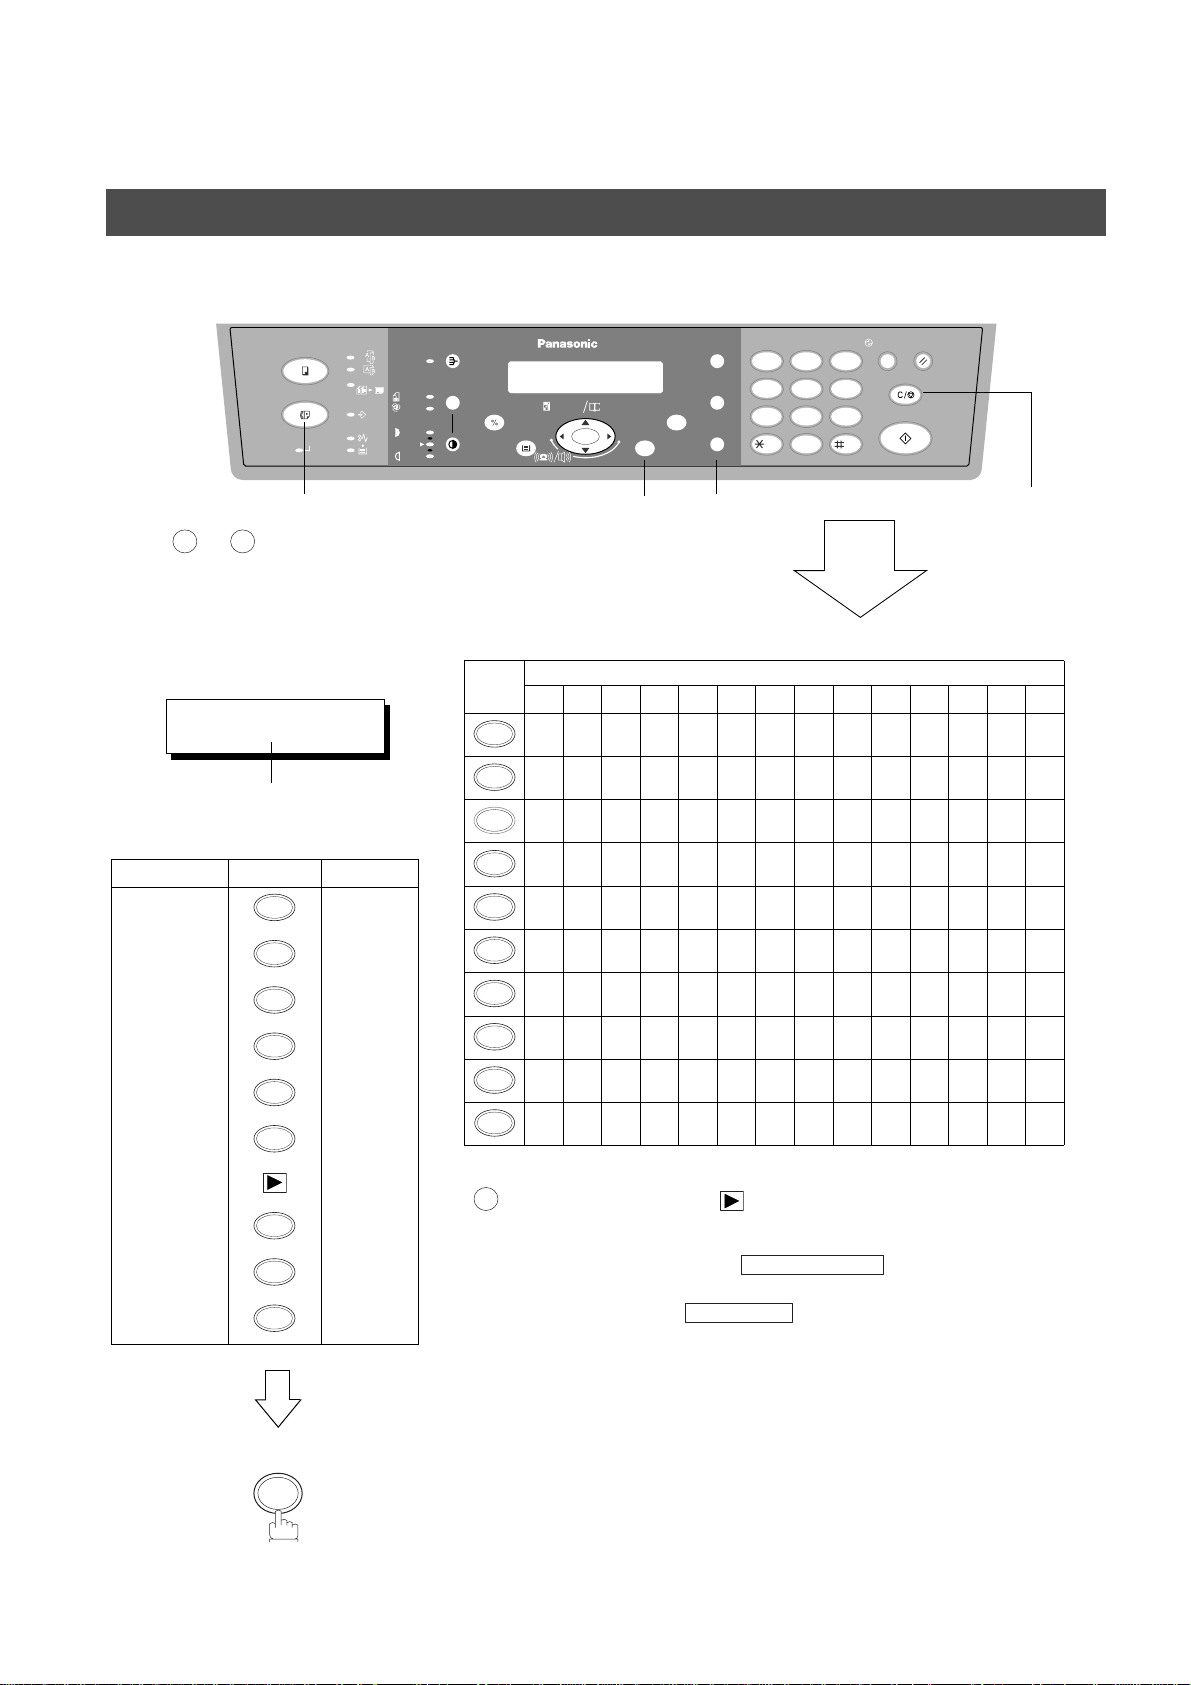
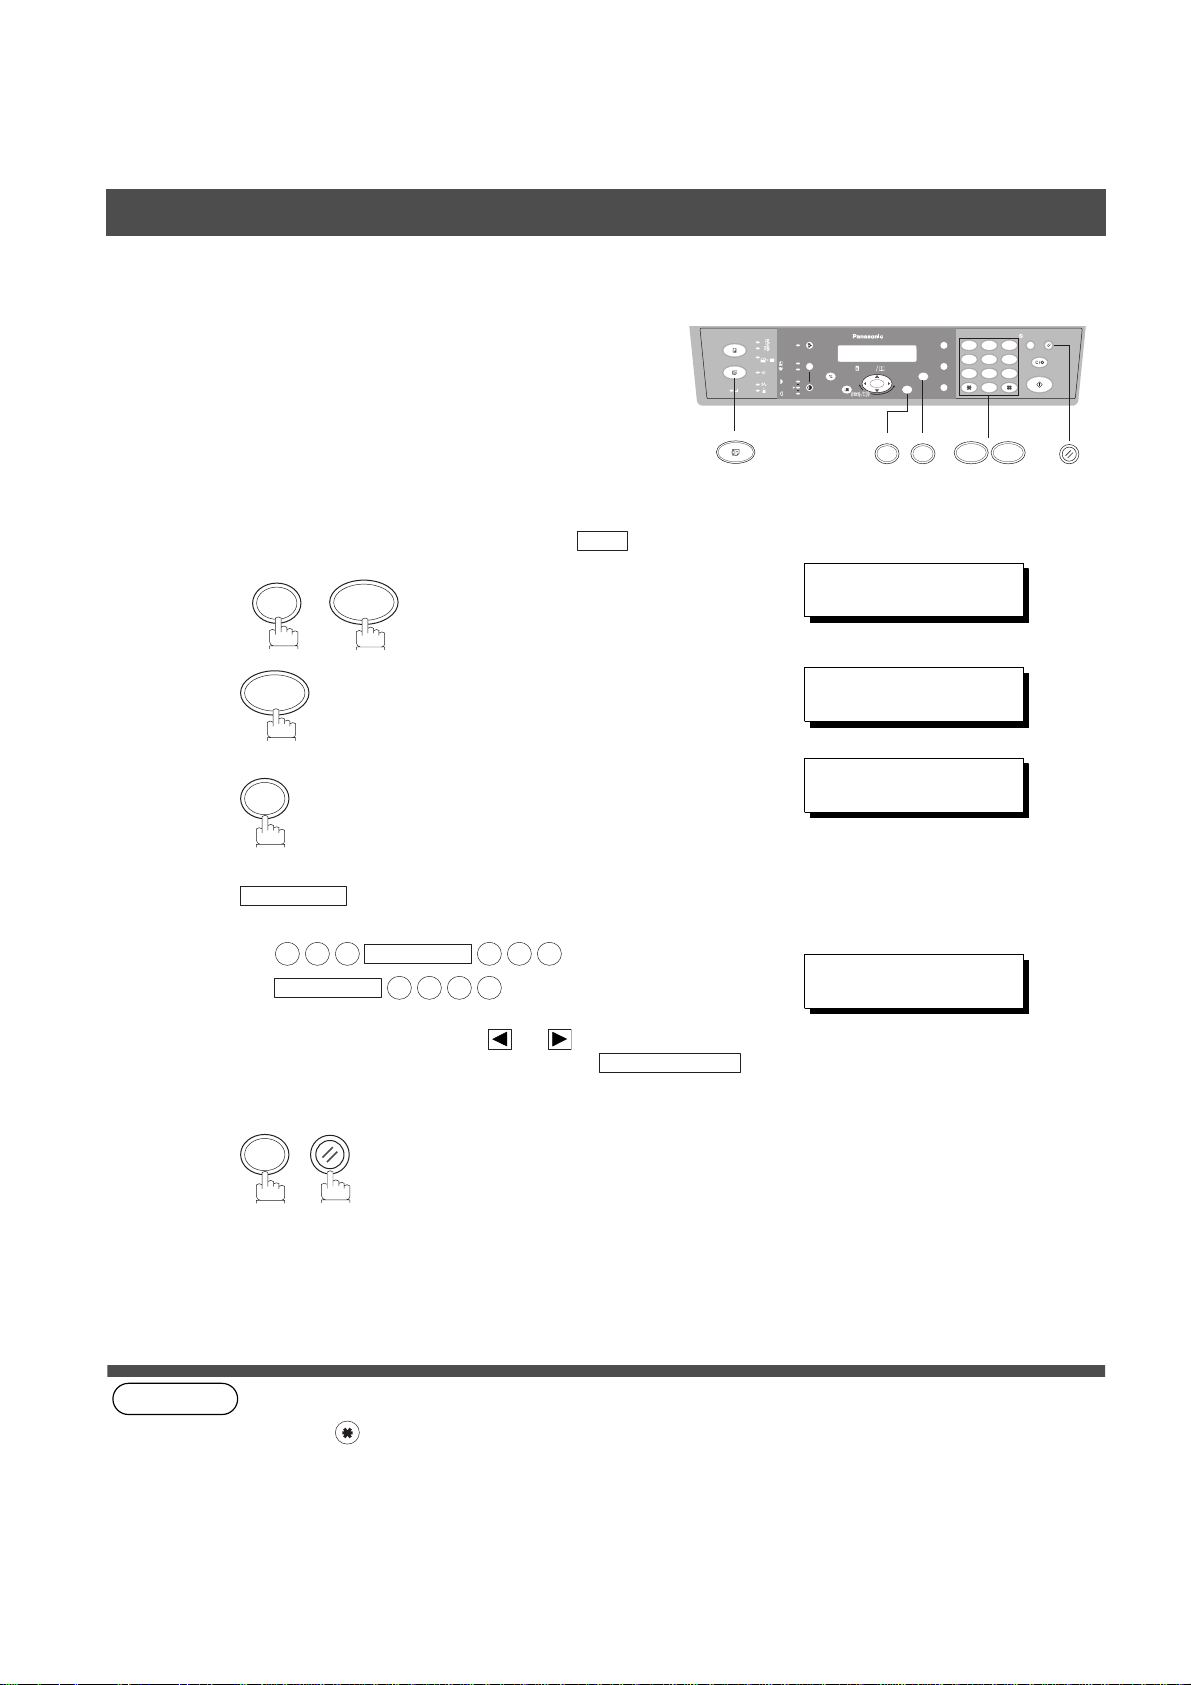
Operation Chart (For Facsimile)
■■■■
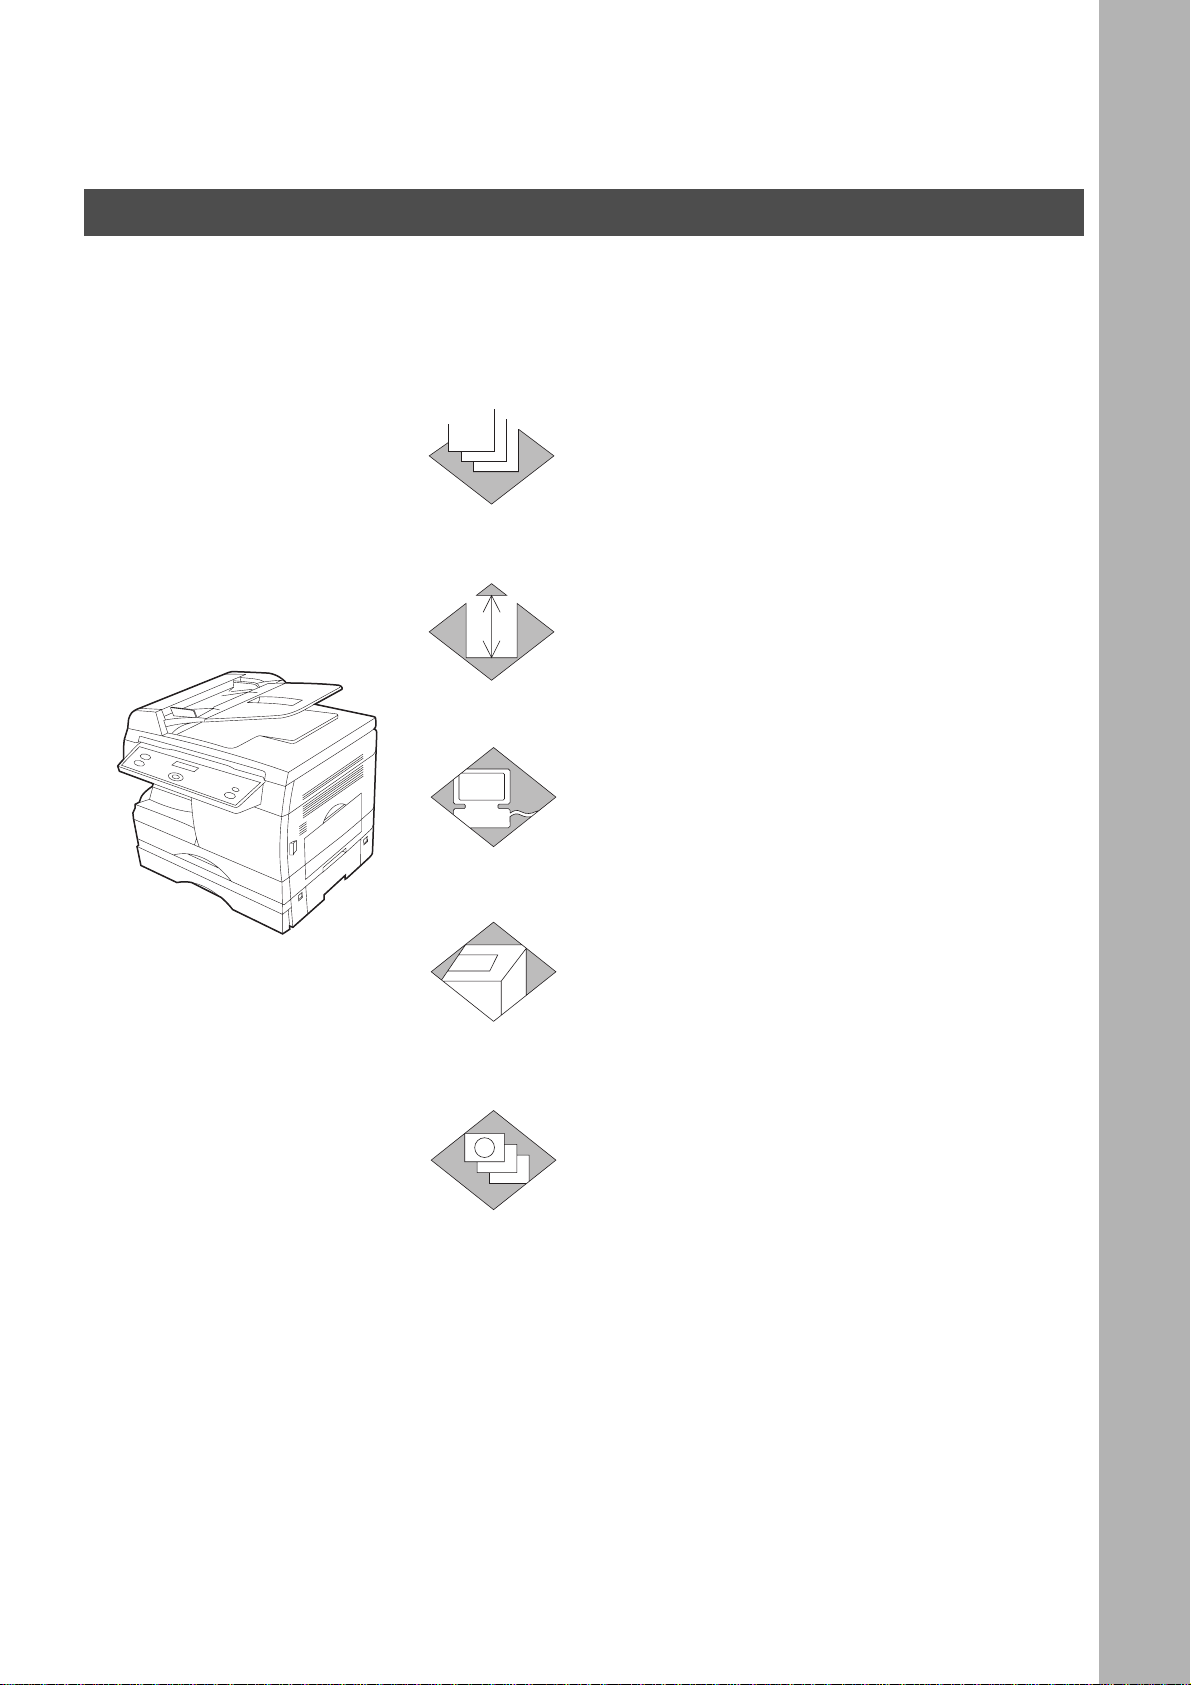
How to Load Document(s)
(1) ADF (2) Platen (Original Glass)
Face Up
Document Guide
Document Guide
Face Down
Place the documents Face Up.
Adjust the document guides to
center the documents on the ADF.
■■■■
Basic Operation
2SIDED
2 SIDED
COPY
2 in 1
FAX
DATA
ON LINE
1
Place
Load Paper
Turn the Power Switch On
■■■■
How to Dial (Manual Number Dialing)
Enter the station number from the keypad.
TEL. NO.
5551234
❚
If you enter an incorrect number, press
CLEAR/STOP
number.
Document(s)
(Max: 36 digits)
and re-enter the correct
Place the document Face Down.
Adjust it to the document guide.
PAUSE/
FLASH/
SUB-ADDR
MONITOR
Keypad
12
GHI JKL MNO
45
PQRS
78
TONE
Message Display
SORT REDIAL
PHOTO
DARKER
LIGHTER
SELECT FUNCTION
AUTO
PAPER TRAY
DP-150FX
ZOOM
DIRECTORY
abc..
(50~200%) SEARCH
+-
SET
EnterSelect Fax
Station(s) START
When the document is set on the Platen
This message appears.
ORIGINAL=LETTER
PRESS START
Press or to select the document
size on the platen.
Then, press to start scanning.
START
ABC DEF
TUV
-/()
0
3
6
WXYZ
9
ENERGY
SAVER
RESET
CLEAR/STOP
START
432
Press
4
SCAN ANOTHER PAGE?
1:YES 2:NO
If you have more than one document,
press and place another document on
the platen, then press . If there
are no other documents, press .
1
START
2
Page 5

Table of Contents
GETTING TO KNOW YOUR MACHINE
Precautions ................................................................................................................................................ 9
Overview .................................................................................................................................................... 12
Selection of Function ................................................................................................................................16
■ For your safety .............................................................................................. 9
■ External View ................................................................................................ 12
■ Control panel ................................................................................................. 14
■ Selecting the Fax Mode or Copy Mode ......................................................... 16
INSTALLING YOUR MACHINE
Setting the Dialing Method (Tone or Pulse) ............................................................................................ 17
Adjusting the Volume ................................................................................................................................18
How To Enter Characters .......................................................................................................................... 20
User Parameters for Fax ........................................................................................................................... 21
■ Setting the Monitor Volume and Ringer Volume ........................................... 18
Setting the Monitor Volume ........................................................................... 18
Setting the Ringer Volume ............................................................................ 19
■ Setting the Date and Time ................. ...... ...... ....... ...... ....... ...... ..................... 21
■ Setting Your LOGO ............................ ...... ...... ............................................... 22
■ Setting Your Character ID ........................ ...... ....... ........................................ 23
■ Setting Your ID Number (Fax Telephone Number) ....................................... 24
PROGRAMMING YOUR MACHINE
Phone Book ............................................................................................................................................... 25
Fax Parameters .......................................................................................................................................... 34
■ Entering the Phone Book .............................................................................. 25
■ Changing the Phone Book ........................................................................... 27
■ Erasing the Phone Book .................... ...................................... ....... ...... ....... . 29
■ Entering Group Dialing .................................................................................. 30
■ Changing Group Dialing ................................................................................ 31
■ Erasing Group Dialing ................................................................................... 33
■ Setting the Fax Parameters ........................................................................... 34
■ Fax Parameter Table ..................................................................................... 35
5
Page 6

Table of Contents
BASIC OPERATIONS
Loading Documents ................................................................................................................................. 39
Basic Transmission Settings ................................................................................................................... 40
Sending Documents ................................................................................................................................. 42
Receiving Documents .............................................................................................................................. 57
■ Document Mode/Contrast/Resolution ........................................................... 40
■ Communication Journal (COMM. JOURNAL) ............................................... 41
■ Memory Transmission ................................................................................... 42
Manual Number Dialing ................................................................................. 44
Phone Book Dialing ....................................................................................... 46
■ Multi-Station Transmission (Broadcasting) ................................................... 48
■ Direct Transmission ...................................................................................... 50
Manual Number Dialing (Direct Transmission) ............................................. 50
Phone Book Dialing (Direct Transmission) ................................................... 52
■ Voice Mode Transmission ............................................................................. 53
Off-Hook Dialing ............................................................................................ 53
On-Hook Dialing ............................................................................................ 54
■ Transmission Reservation ............................................................................. 55
Memory Transmission Reservation (Multi-tasking) ....................................... 55
■ Redialing ....................................................................................................... 56
Automatic Redialing ...................................................................................... 56
Manual Redialing .......................................................................................... 56
■ Reception .............. .................................................... .................................... 57
Automatic Reception ..................................................................................... 57
Manual Reception ......................................................................................... 57
■ Print Reduction .............................................................................................. 58
Selecting the Print Reduction Mode .............................................................. 58
Receiving Oversize Documents .................................................................... 59
■ Substitute Memory Reception ....................................................................... 60
ADVANCED FEATURES
Polling ........................................................................................................................................................ 61
Turnaround Polling ................................................................................................................................... 64
Edit File Mode ............................................................................................................................................ 65
Receive To Memory ................................................................................................................................... 66
■ Setting the Polling Password ........................................................................ 61
■ To Poll Documents from Another Station ..................................................... 62
■ Deleting a File ............................................................................................... 65
■ Setting RCV To Memory Password/Setting RCV to Memory ........................ 66
Setting the RCV To Memory Password ........................................................ 66
Setting RCV To Memory ............................................................................... 67
■ Printing Out Documents ................................................................................ 68
NETWORK FEATURES
Distinctive Ring Detector (DRD) .............................................................................................................. 71
PIN Code Access ...................................................................................................................................... 72
Sub-Addressing ........................................................................................................................................ 75
Selecting the Access Method (Prefix or Suffix) ............................................. 72
Dialing with a PIN Code(See ......................................................................... 73
■ General Description ...................................................................................... 75
■ To set the Sub-Address into a Phone Book Dialing Numbers ...................... 76
■ To send a Document with Sub-Address ........................................................ 77
Using Manual Number Dialing ...................................................................... 78
6
Page 7

PRINTOUT JOURNALS AND LISTS
Table of Contents
Printout Journals and Lists ...................................................................................................................... 79
Journals and Lists .................................................................................................................................... 87
■ Transaction Journal ....................................................................................... 79
■ Communication Journal (COMM. JOURNAL) .............................................. 83
■ Directory Dial List .......................................................................................... 85
■ FAX Parameter List ....................................................................................... 87
MAINTENANCE
Troubleshooting ........................................................................................................................................ 89
■ Information Codes ......................................................................................... 89
If You Have Any of These Problems ............................................................. 92
■ Adding Paper ................. ....... ...... .................................................................. 94
■ Adding Toner ..... ....... ...... ....... ........................................................................ 94
■ Removing Paper Misfeed .............................................................................. 94
■ Cleaning the Document Scanning Area ........................................................ 95
Cleaning the Printer Roller ............................................................................ 96
Checking the Telephone Line ....................................................................... 98
APPENDIX
Specifications ............................................................................................................................................ 99
Options and Supplies ............................................................................................................................... 101
FCC Notice for User in USA ..................................................................................................................... 102
Notice for User in Canada ........................................................................................................................ 104
Glossary ..................................................................................................................................................... 106
ITU-T Image No.1 ....................................................................................................................................... 109
7
Page 8

INSTALLING YOUR MACHINE
Energy Star
The DP-150FX complies with Tier 2 of the Environmental Protection Agency's Energy Star
Program. This voluntary program specifies certain energy consumption and usage standards
for copiers. These copiers will automatically “power down” after a specified period of non-use.
The use of these Energy Star compliant copiers will reduce energy consumption and ultimately
benefit the environment.
The default functions can be adjusted depending on your office requirements. Please see your
authorized Panasonic dealer for more details.
8
Page 9
GETTING TO KNOW YOUR MACHINE
Precautions
For your safety
■■■■ Laser safety
LASER SAFETY
This unit employs a laser. Only qualified service personnel should
attempt to service this device due to possible ey e injury.
CAUTION:
USE OF CONTROLS, ADJUSTMENTS OR PERFORMANCE
PROCEDURES O THER THAN THOSE SPECIFIED HEREIN MAY
RESULT IN HAZARDOUS RADIATION EXPOSURE.
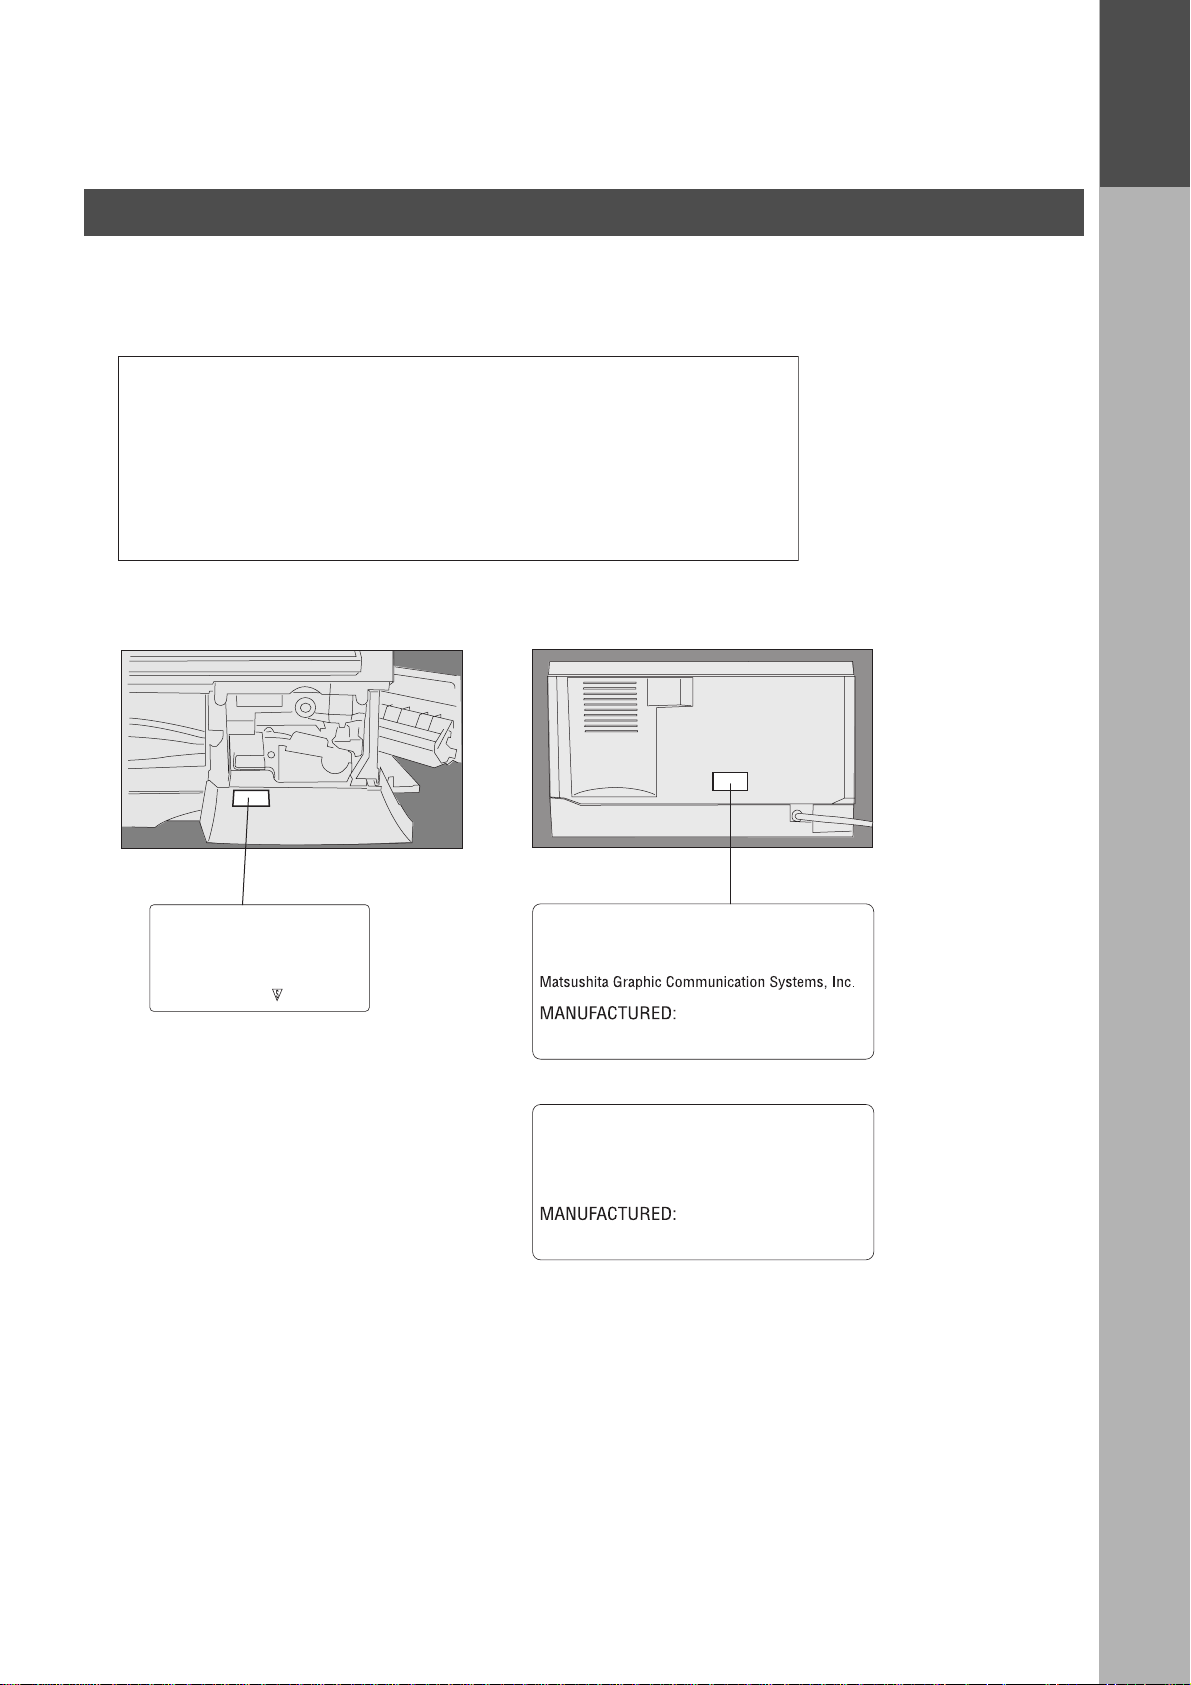
■■■■ Caution Labels
GETTING TO
KNOW YOUR
MACHINE
DANGER-Invisible laser
radiation when open and
interlock defeated.
AVOID DIRECT EXPOSURE
TO BEAM.
FFPTE2479
Product complies with DHHS Rules 21
CFR Subchapter J in effect of date
of manufacture.
Utsunomiya, Tochigi, Japan
Label when manufactured in Japan.
Product complies with DHHS Rules 21
CFR Subchapter J in effect of date
of manufacture.
Matsushita Business Machine Corporation of Philippines
Tayta
y, Rizal, Philippines
Label when manufactured in Philippines.
9
Page 10
GETTING TO KNOW Y OUR MACHINE
Precautions
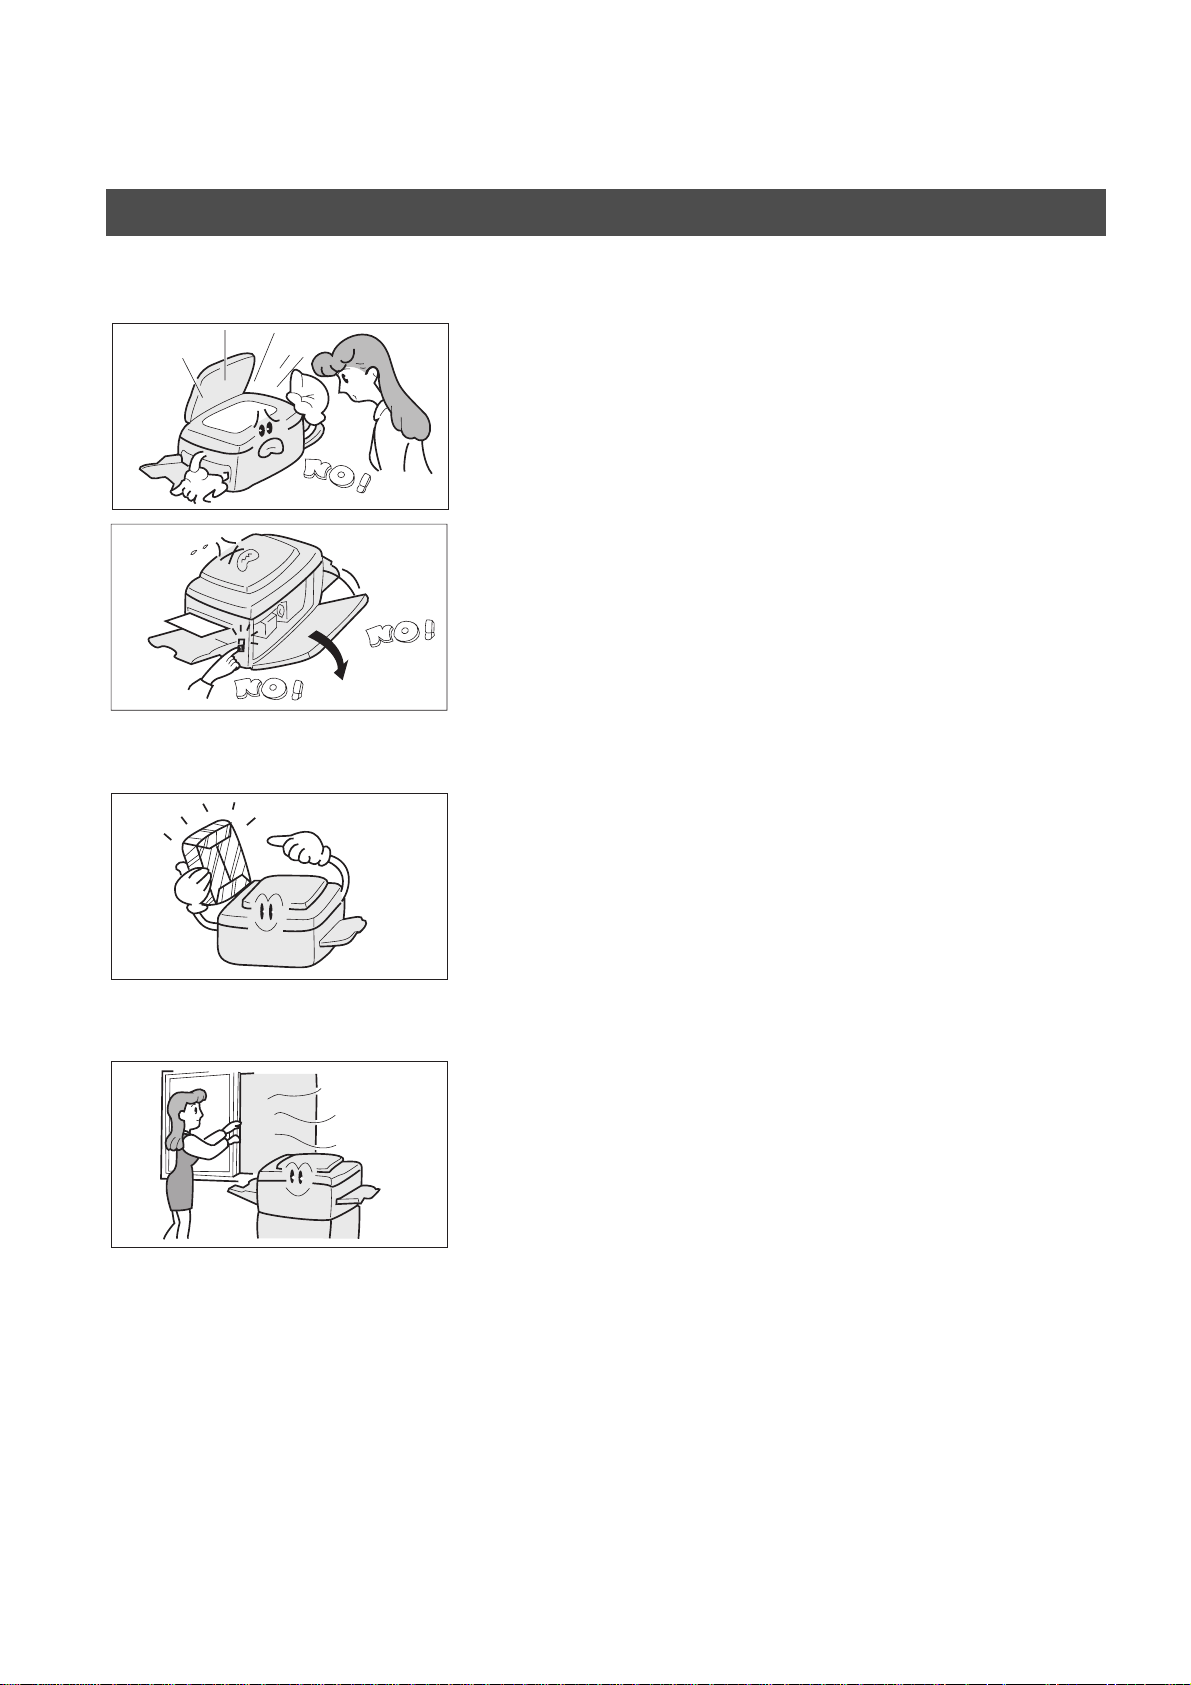
Handing
• Do not look directly at exposure lamp when copying.
• Do not turn the power switch of f or open the front panel
during copying or printing.
• Do not drop paper clips or other metal objects into the
copier.
Toner and Paper
Ventilation
• Store toner, developer and paper in cool areas with low
humidity.
• High quality paper of 16 lbs. - 24 lbs. (15 - 34 lbs. via sheet
bypass) may be used.
• For optimum performance, it is recommended that only
Panasonic Brand supplies be used in the copier.
• The copier should be installed in a well-ventilated area to
minimize the ozone density in the air.
10
Page 11

Precautions
Installation
GETTING TO KNOW YOUR MACHINE
■■■■
The copier should not be installed in areas with the
following conditions:
• Extremely high or low temperature and humidity.
Proper ambient conditions are:
Temperature: 50ºF - 86ºF
Relative humidity: 30% - 80%
• Where temperature and humidity can change rapidly,
causing condensation.
• Direct exposure to sunlight.
• Directly in air conditioning flow.
• In areas of high dust concentration.
• In areas of poor ventilation.
GETTING TO
KNOW YOUR
MACHINE
(see Note 1)
• In areas with chemical fume concentration.
• In areas with extreme vibration.
• With unstable or uneven conditions (floors, etc.).
NOTE
1. The power consumption is 1.0??? kW.
A properly wired (with ground), dedicate d, 15A???, 120V AC outlet is required. Do not use an extension cord.
The main plug on this equipment must be used to disconnect the main power. Please ensure that the socket
outlet is installed near the equipment and shall be easily accessible.
11
Page 12
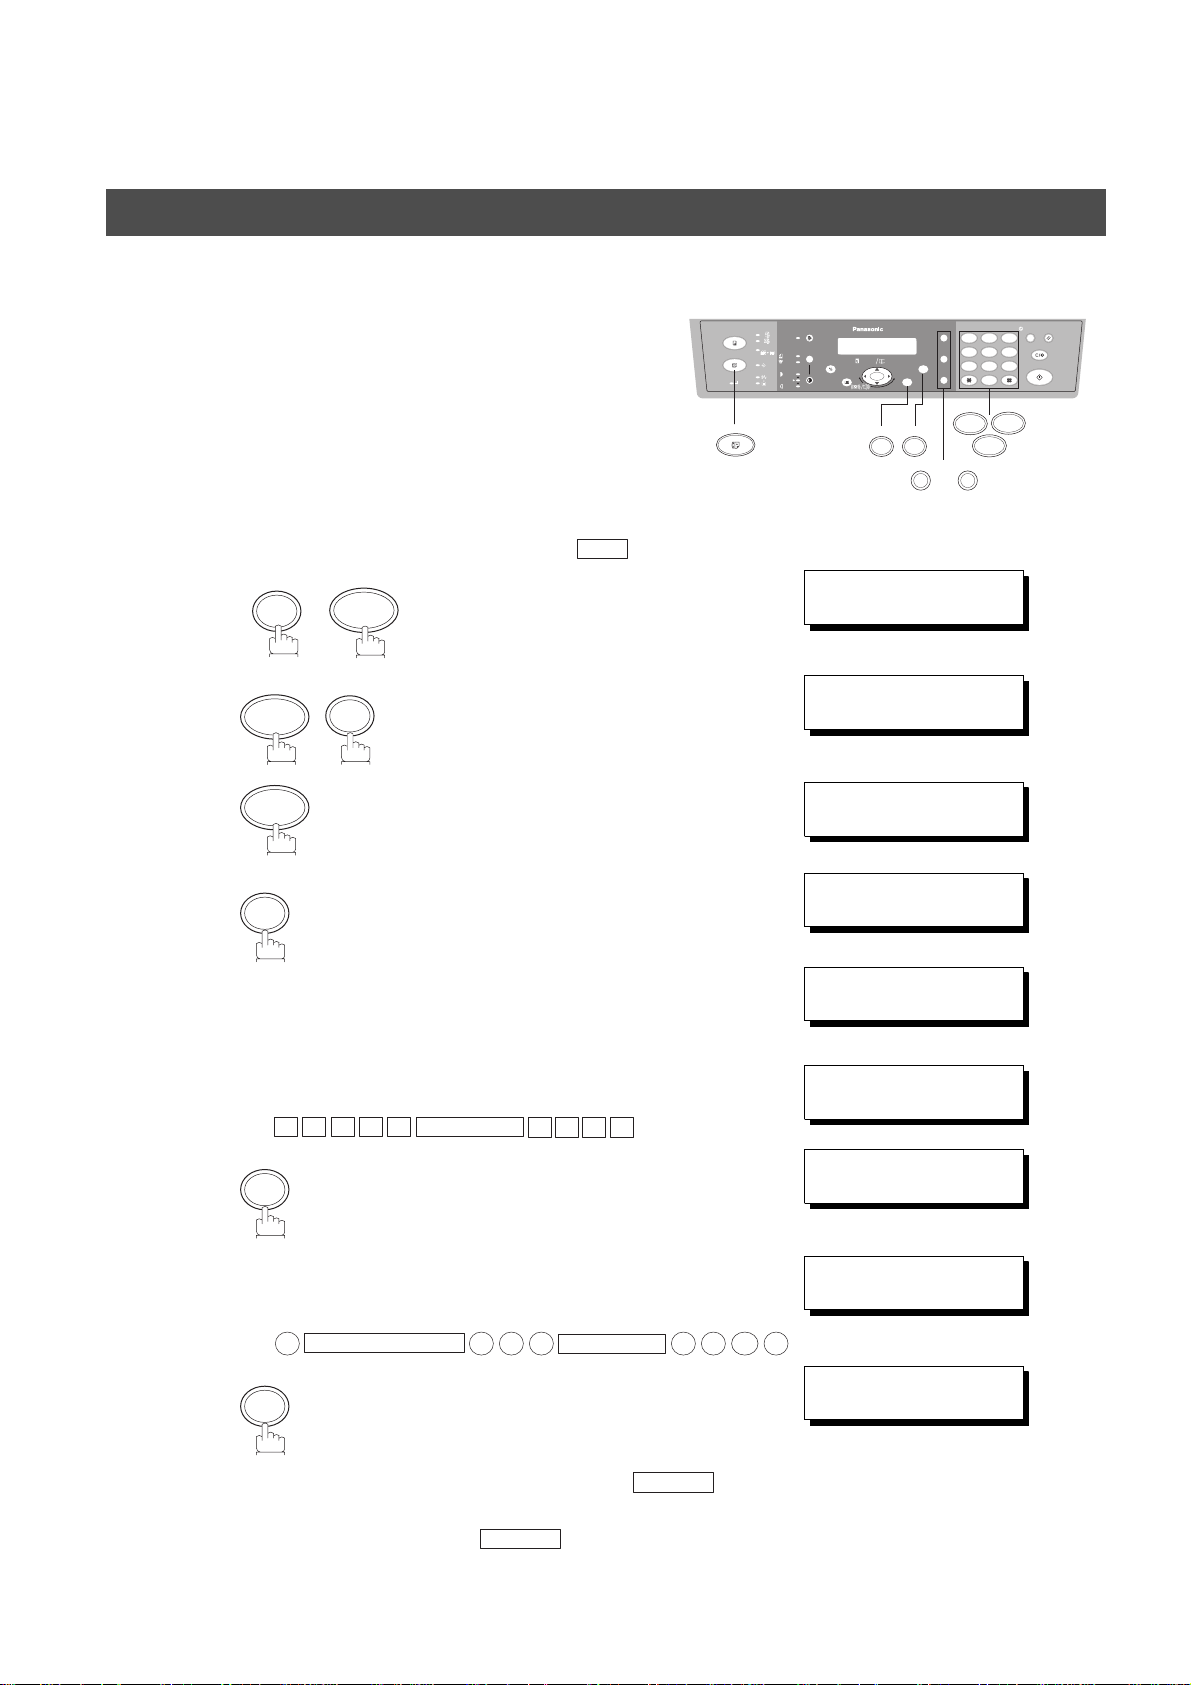
GETTING TO KNOW Y OUR MACHINE
Overview
External View
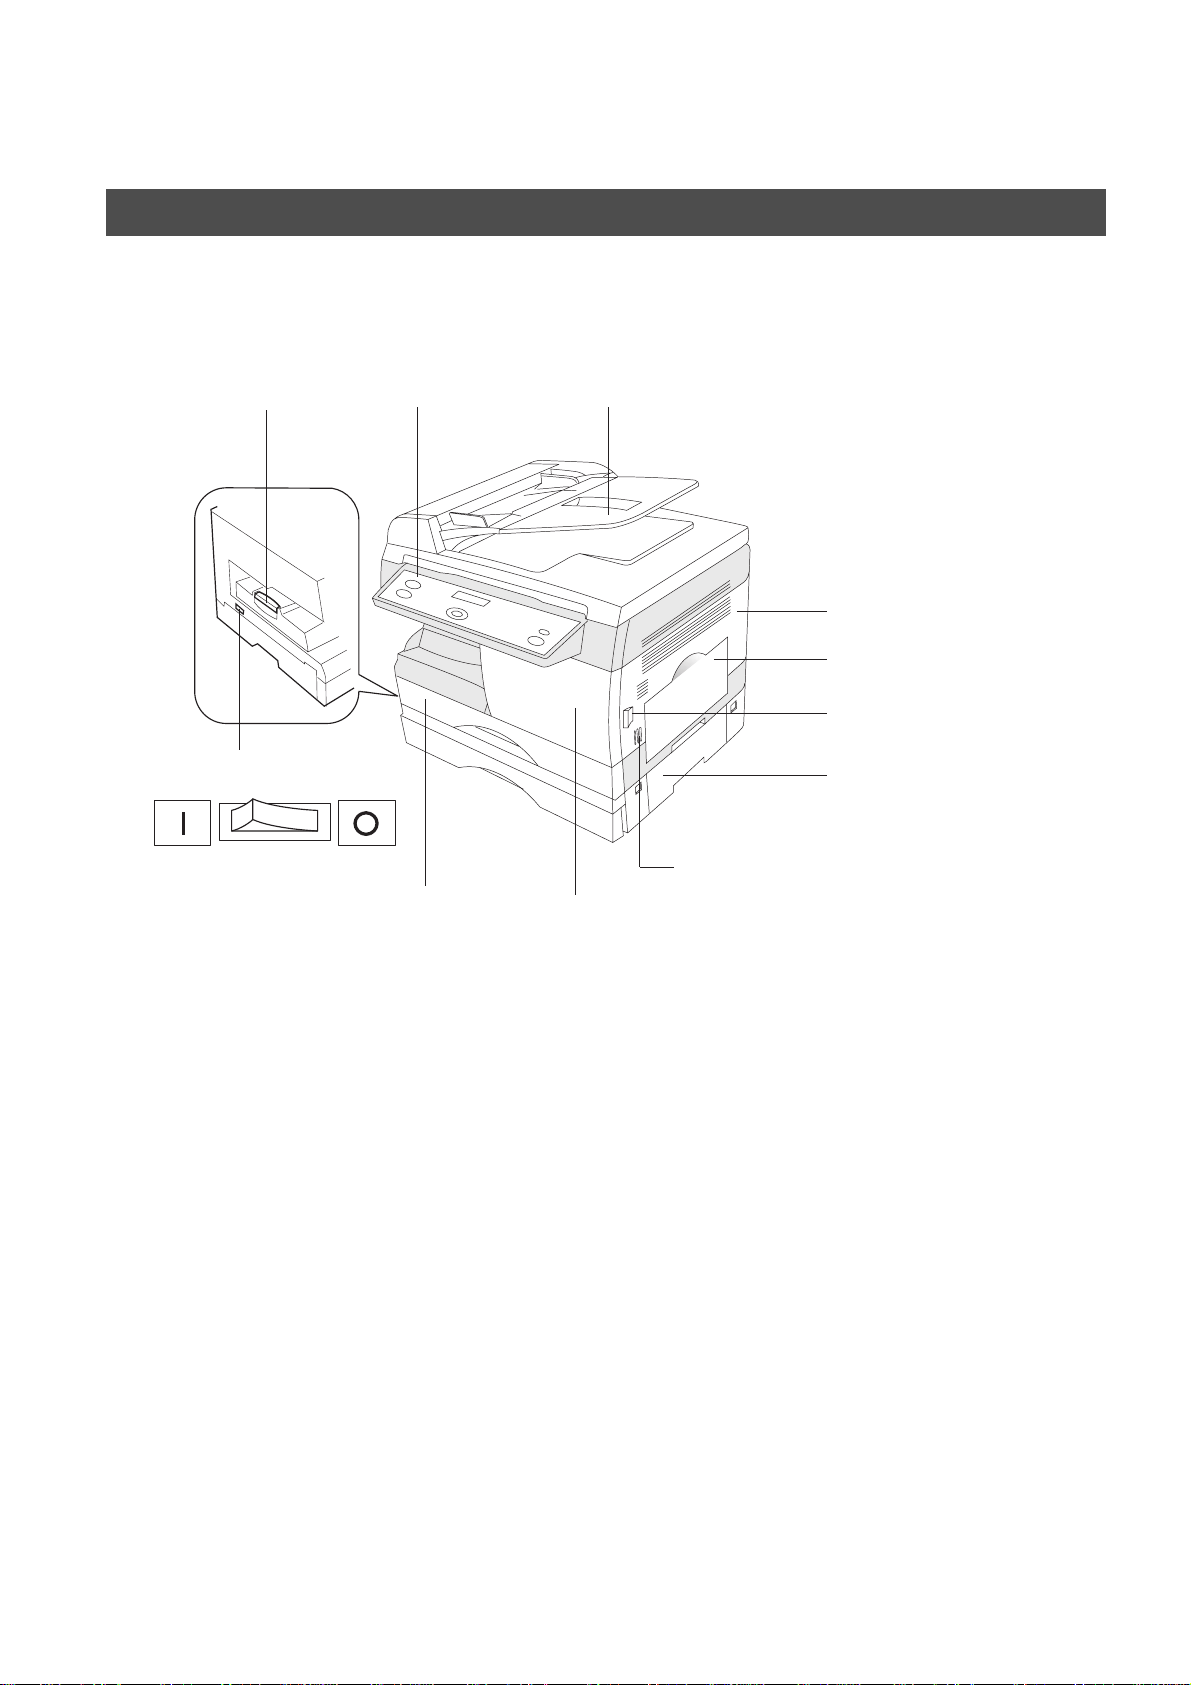
■■■■ Front & Right Side View
Exit T ray Control Panel ADF (Automatic Document Feeder)
Right Cover
Sheet Bypass Tray
Release Button
Power Switch
ON OFF
Paper T ray
2nd Paper Feed Module
(Optional)
Push here when closing Right Cover
Front Cover
12
Page 13
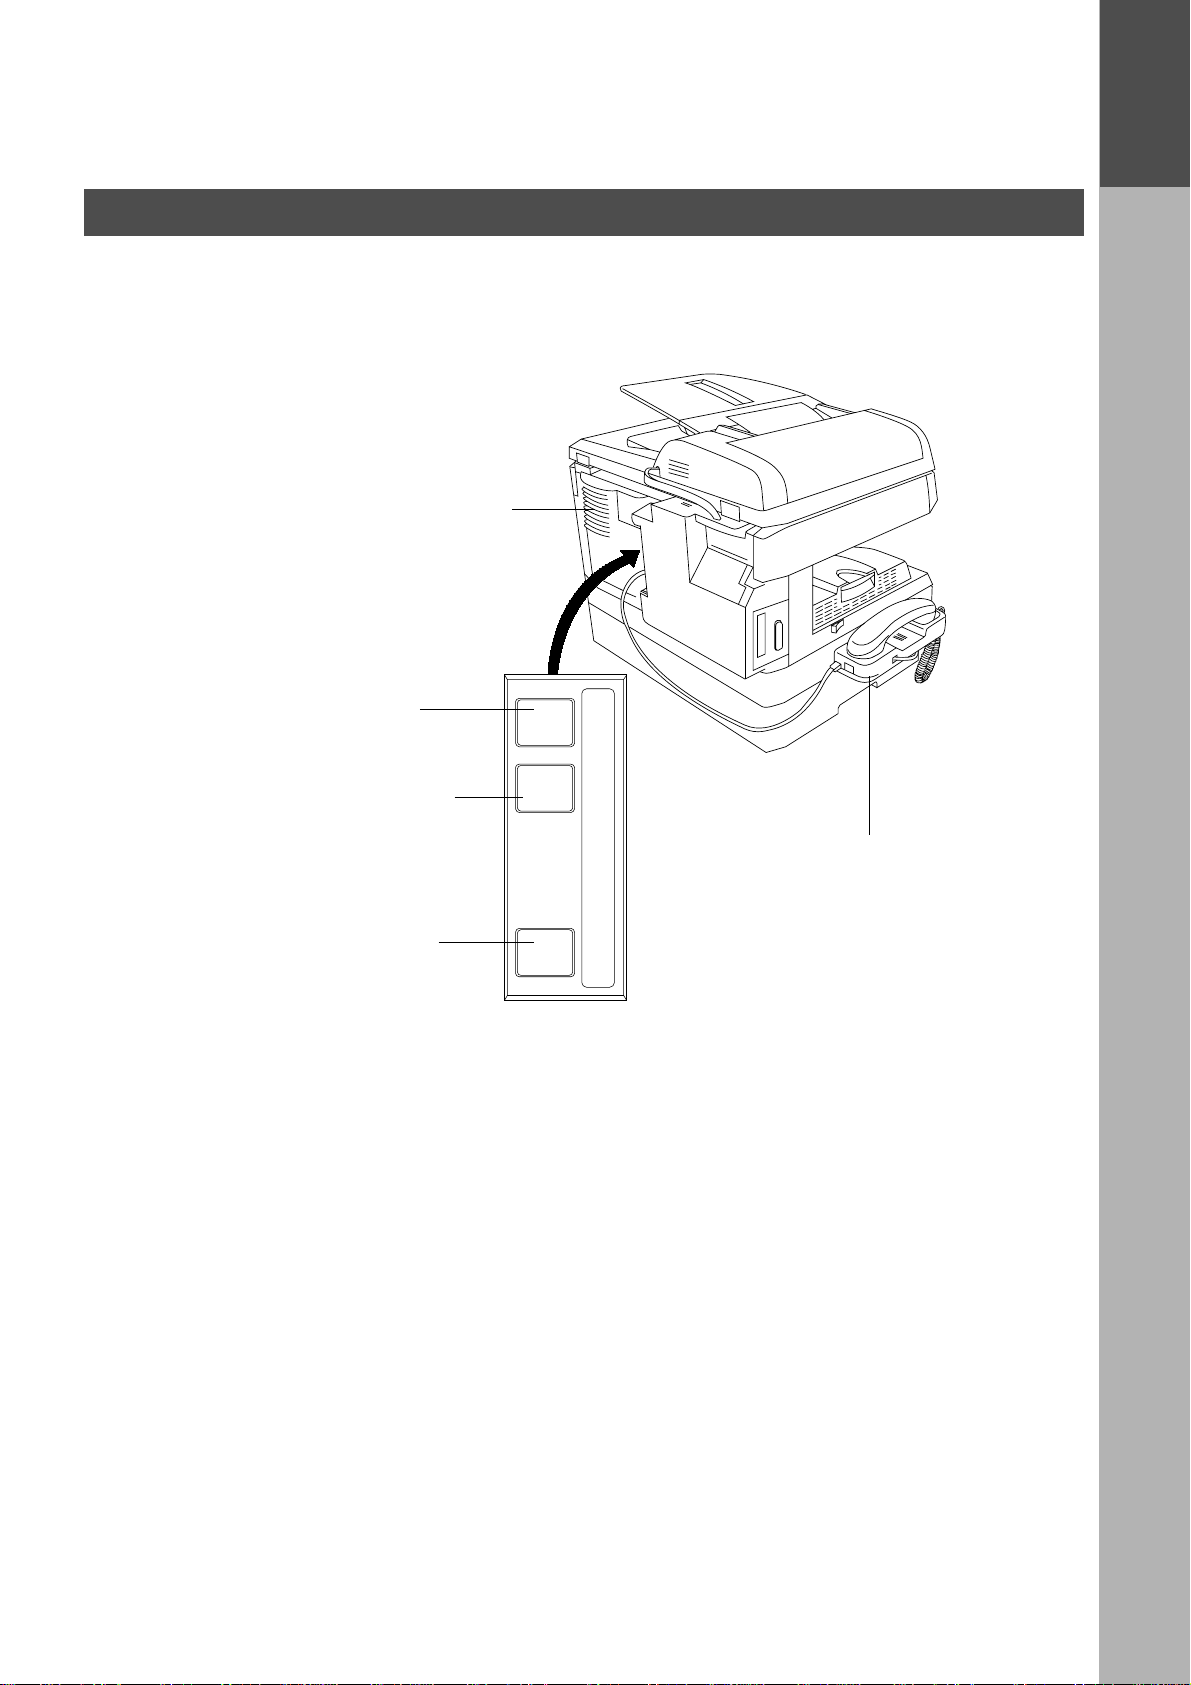
Overview
■■■■ Back & Left Side View
Do not block the ventilation
openings
GETTING TO KNOW YOUR MACHINE
GETTING TO
KNOW YOUR
MACHINE
Telephone Line Jack
External Telephone Jack
Optional Handset Jack
LINE TEL HANDSET
Handset Kit
(Optional)
13
Page 14
GETTING TO KNOW Y OUR MACHINE
E
Overview
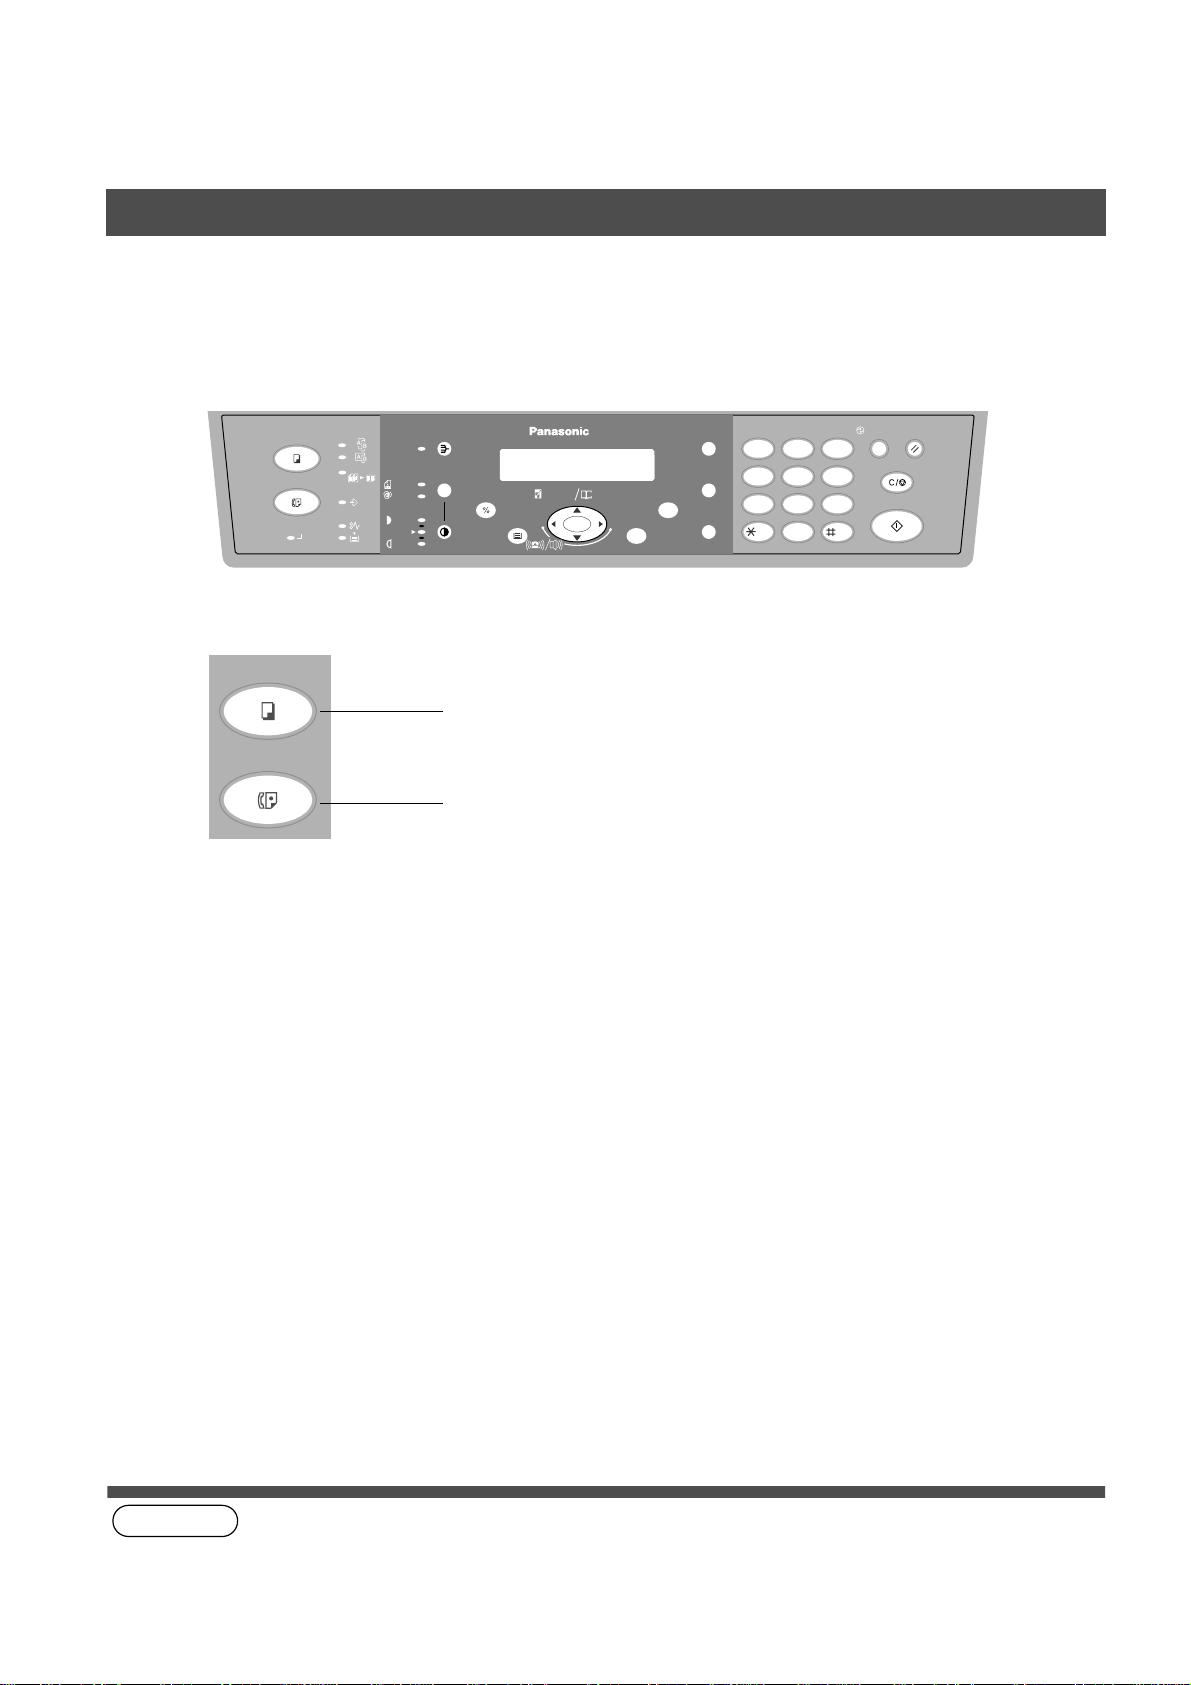
Control panel
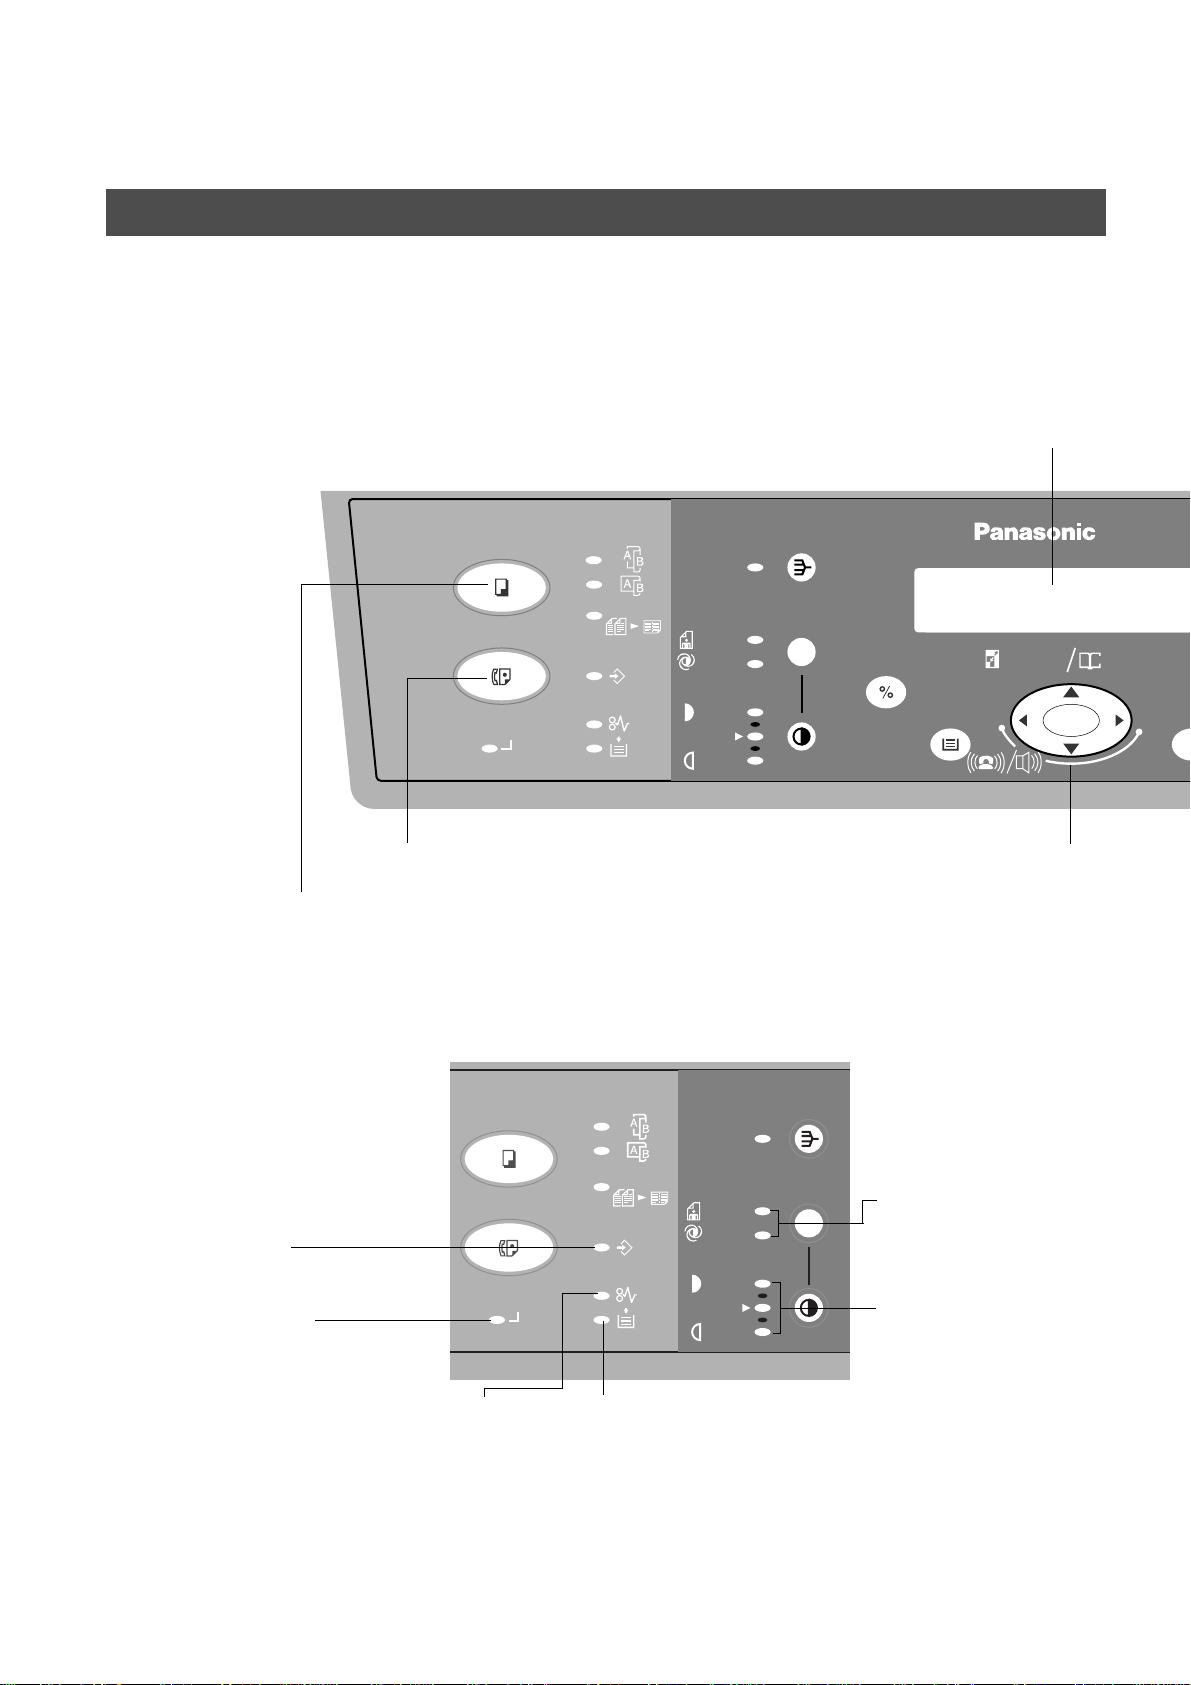
■■■■ Keys and Indicators (For Facsimile)
2SIDED
COPY
FAX
2 SIDED
2 in 1
DATA
PHOTO
AUTO
MESSAGE DISPLAY
• Indicates date and time, or
the current operation.
SORT
SELECT
DP-150FX
ZOOM
(50~200%) SEARCH
DIRECTORY
abc..
COPY
• Used to select the COPY mode.
DATA Indicator
• Lights when the stored data
in memory. (See page XX)
ON LINE Indicator
• Lights when sending
or receiving faxes or
Data.
PAPER MISFEED Indicator
• Lights when the paper misfeeds.
ON LINE
FAX
• Used to select the FAX mode.
DUPLEX
COPY
2 in 1
FAX
DATA
ON LINE
ADD PAPER Indicator
• Lights when no paper.
DARKER
LIGHTER
PHOTO
AUTO
DARK
LIGHT
P APER TRAY
ZOOM/DIRECTORY SEARCH/
VOLUME
• Used to adjust the monitor and
ringer volume.
• Used to search the station
name for Directory Search
Dialing.
SORT
DOCUMENT MODE
• Used to set Photo or
Auto.
(See page 40)
CONTRAST
• Used to set Normal,
Darker or Lighter.
(See page 40)
S
+-
14
Page 15
Overview
GETTING TO KNOW YOUR MACHINE
GETTING TO
KNOW YOUR
MACHINE
FX
ORY
H
SET
FUNCTION
SET
• Used to set
operations.
FUNCTION
• Used to start or
select the function.
PAUSE/
REDIAL
12
FLASH/
SUB-ADDR
MONITOR
45
PQRS
78
TONE
• Used to temporarily
ENERGY SAVER
• Used to switch the
machine into energy
saving mode.
ABC DEF
GHI JKL MNO
TUV
TONE
-/()
0
3
6
9
WXYZ
change the dialing
mode to Tone when
pulse mode is set.
ENERGY
SAVER
CLEAR/STOP
RESET
START
START
• Used to start
operations.
RESET
• Used to reset all
settings to the initial
power-on default.
CLEAR/STOP
• Used to cancel
operations.
PAUSE/REDIAL
• Used to enter a pause when
recording or dialing a telephone
number, or to redial the last dialed
number.
FLASH/SUB-ADDR
• Used to separate the Sub-address
from the telephone number when
dialing, or to acc ess som e f eatur es of
your PBX.
MONITOR
• Used to star t On-H ook Dialing.
15
Page 16
GETTING TO KNOW Y OUR MACHINE
Selection of Function
Selecting the F ax Mode or Copy Mode
You can set the Power on Default Mode to either Fax or Copy Mode.(See page 37)
Factory Standard Setting is Copy Mode.
COPY
FAX
COPY
FAX
ON LINE
2SIDED
2 SIDED
2 in 1
FUNCTION
PAUSE/
FLASH/
SUB-ADDR
MONITOR
ABC DEF
12
GHI JKL MNO
45
PQRS
TUV
78
TONE
-/()
0
SORT REDIAL
PHOTO
AUTO
DATA
DARKER
LIGHTER
SELECT
PAPER TRA Y
DP-150FX
ZOOM
DIRECTORY
abc..
(50~200%) SEARCH
+-
SET
ENERGY
SAVER
3
6
WXYZ
9
RESET
CLEAR/STOP
START
Used to start Copy operation
• The Fax can receive documents while the copy key is lit.
Used to start Fax operation
• You can send document(s) when the fax function is selected.
16
(see Note 1)
NOTE
1. Beep sound indicates unavailable combined operations.
Page 17

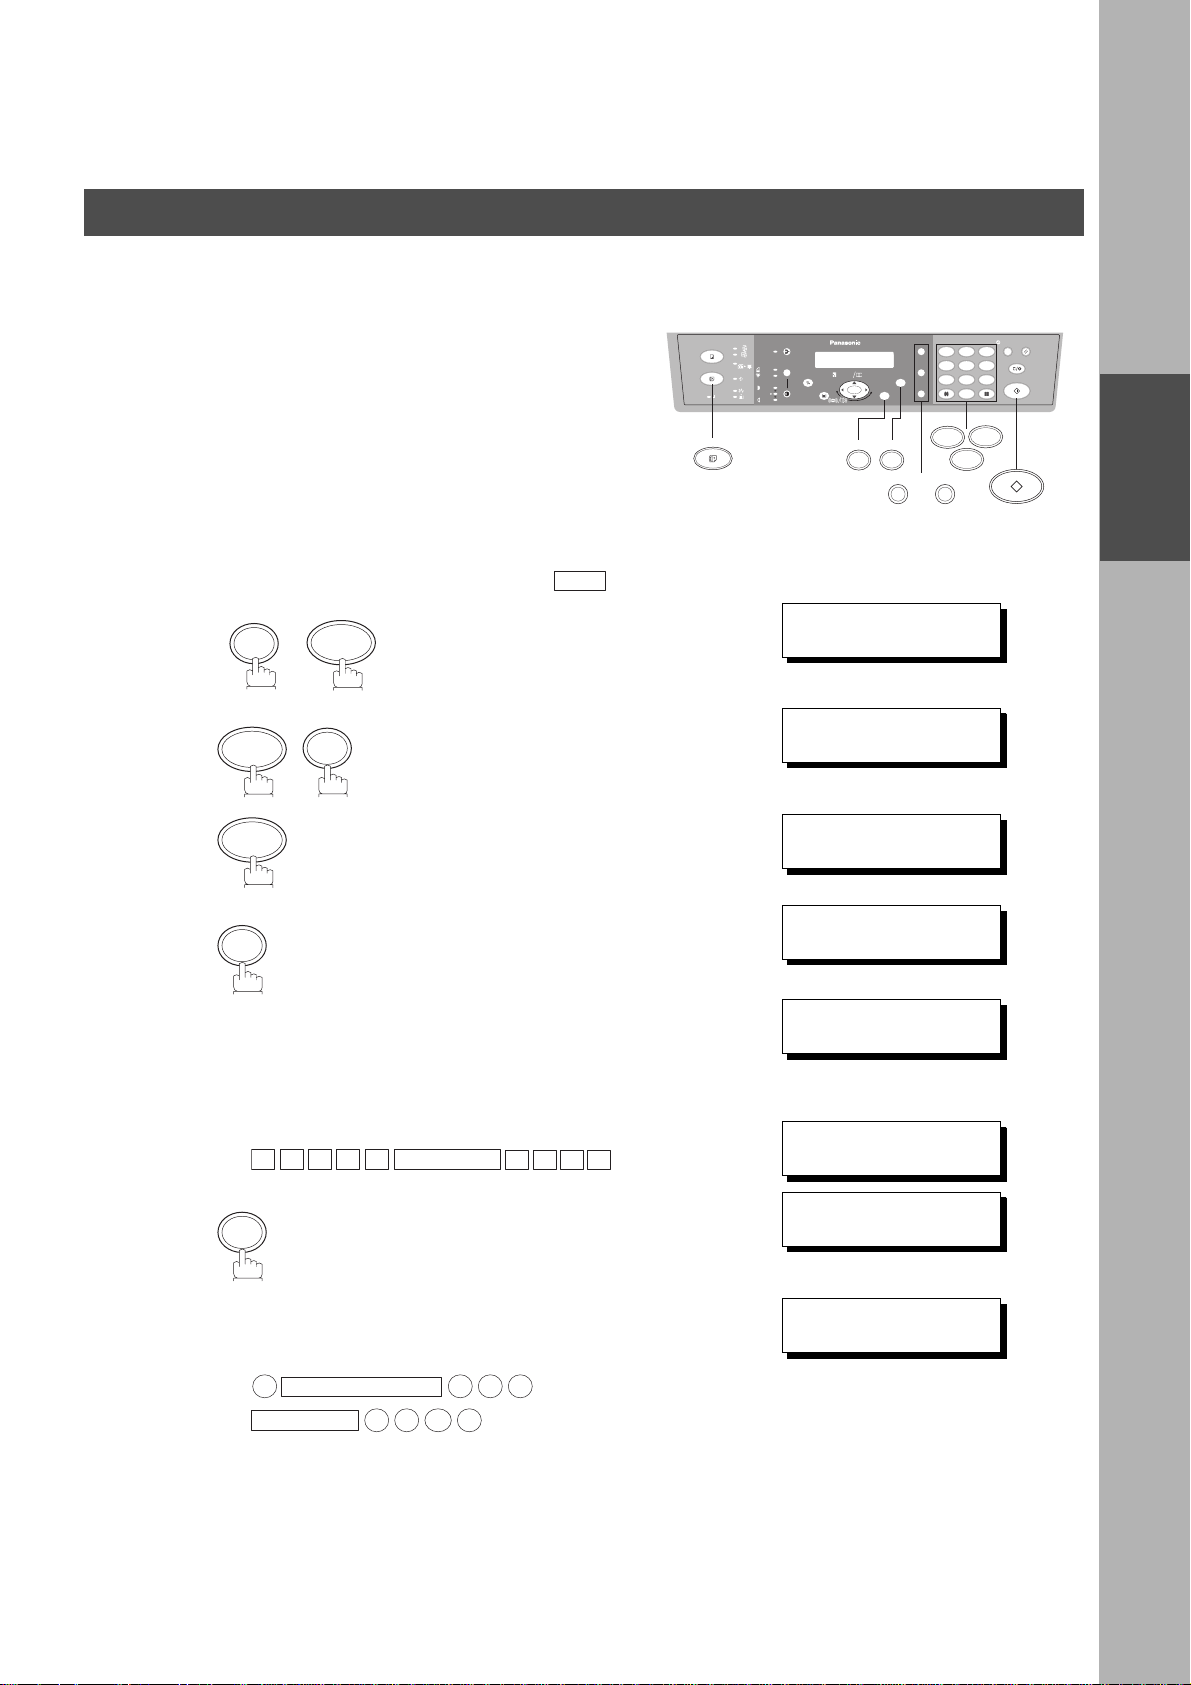
INSTALLING YOUR MACHINE
Setting the Dialing Method (Tone or Pulse)
Your machine can operate with either of two dialing methods
(Tone or Pulse), depending on the type of telephone line you
are connected to. If you need to change the dialing metho d to
Tone or Pulse, follow the procedure below
FUNCTION
1
2
3
4
0 6
7
SET
SET
12
❚
∨ ∧
45
78
0
1 2
abc..
+-
FUNCTION
SET
SET MODE (1-6)
ENTER NO. OR
FAX PARAMETER(02-99)
NO.=
06 DIALING METHOD
2:TONE
3
6
9
7406
INSTALLING
YOUR MACHINE
4
5
or
SET
1
for "PULSE".
2
for "TONE".
RESET
06 DIALING METHOD
1:PULSE
or
06 DIALING METHOD
2:TONE
17
Page 18
INSTALLING YOUR MACHINE
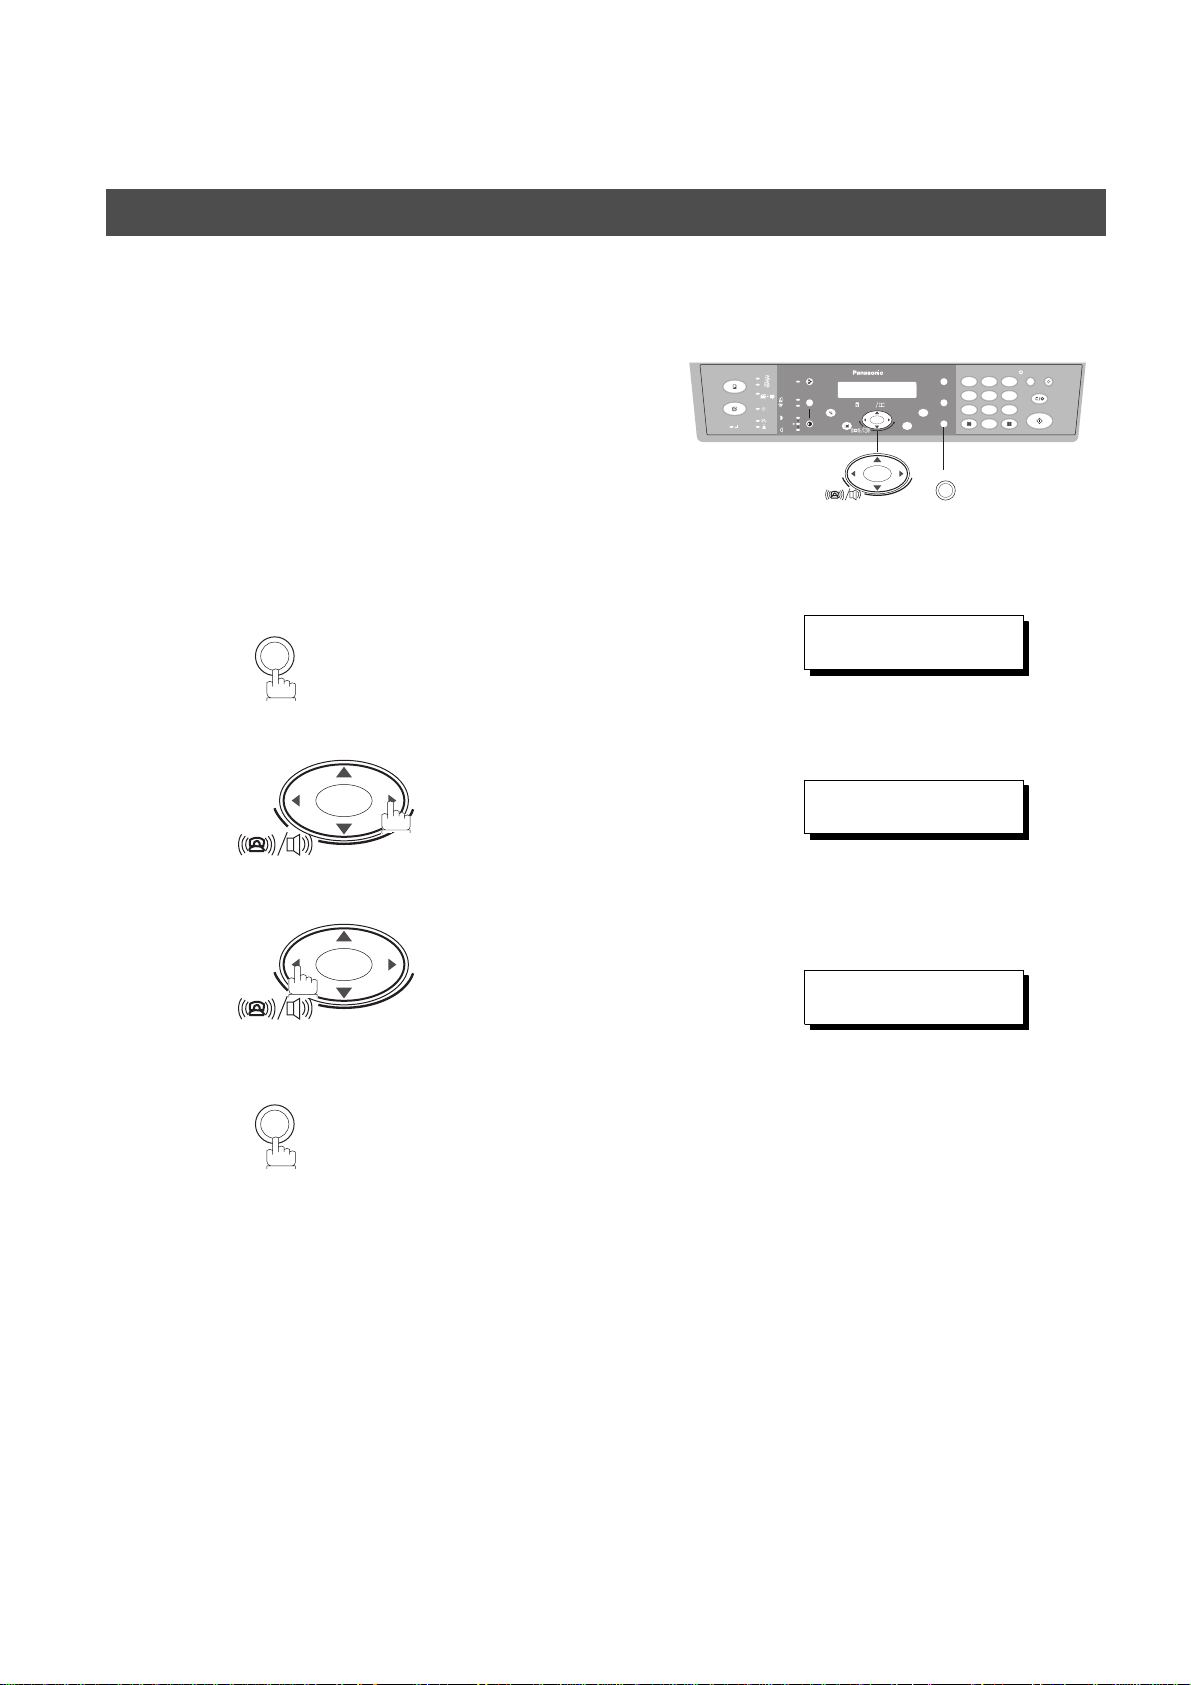
Adjusting the Volume
Setting the Monitor Volume and Ringer Volume
You can adjust the monitor and ring er volume on your machine.
The built-in speaker enables you to hear the dial tone, dialing
signals, and busy tone. The ring er sounds when your machin e
receives a call.
Setting the Monitor Volume
MONITOR
1
You will hear the dial tone through the speaker.
2
or
+-
repeatedly to raise the volume.
12
+-
MONITOR
] HIGH
45
78
abc..
+-
* MONITOR *
❚
MONITOR VOLUME
LOW [
❚❚❚❚❚❚❚
3
6
9
0
3
MONITOR
+-
repeatedly to lower the volume.
MONITOR VOLUME
LOW [ ] HIGH
18
Page 19
Adjusting the Volume
Setting the Ringer Volume
INSTALLING YOUR MACHINE
1
2
(see Note 1)
Standby
or
+-
repeatedly to raise the volume.
+-
repeatedly to lower the volume.
JAN-12-1999 15:00
00%
RINGER VOLUME
(((
RINGER VOLUME
☎
)))
☎
INSTALLING
YOUR MACHINE
NOTE
1. You can also adjust the volume of the ke y t ouc h tone and the volu me of th e b uzz er i n the Fax Parameter No. 10
(KEY/BUZZER VOLUME). (See page 35)
19
Page 20
INSTALLING YOUR MACHINE
How To Enter Characters
You may require to enter characters or symbols for Station Name, Logo, Character ID and so on. To enter them,
follow the steps below.
COPY
FAX
ON LINE
2SIDED
2 SIDED
2 in 1
FUNCTION
PAUSE/
FLASH/
SUB-ADDR
MONITOR
ABC DEF
12
GHI JKL MNO
45
PQRS
TUV
78
TONE
-/()
0
SORT REDIAL
PHOTO
AUTO
DATA
DARKER
LIGHTER
SELECT
PAPER TRA Y
DP-150FX
ZOOM
DIRECTORY
abc..
(50~200%) SEARCH
+-
SET
ENERGY
SAVER
3
6
WXYZ
9
RESET
CLEAR/STOP
START
FAX
• Use to to enter characters
0 9
and symbols. The assignment of
the keypad for characters is shown
below.
Ex:LOGO
LOGO
PANASONIC
❚
Cursor
To enter "PANASONIC"
Character Keypad Time(s)
P1
A1
N2
A1
S4
O3
7
2
6
2
7
6
N1
6
2
SET MONITOR
CLEAR/STOP
Characters and pressing times
1234567891011121314
1
1
2
ABCabc2
3
DEFde f 3
4
GH I gh i 4
5
JKLjk l5
6
MNOmno6
7
PQRSpq r s7
8
TUVt uv8
9
WXYZwxyz9
-/()
0
-/().,’ :;&+=0
• When you use same key to enter a character (Ex: "O" and "N" , You use
for both of them), press to fix the character then enter the next
6
character.
20
I3
C3
4
2
SET
• To delete the character, press
• To enter a space, press
CLEAR/STOP
MONITOR
Page 21
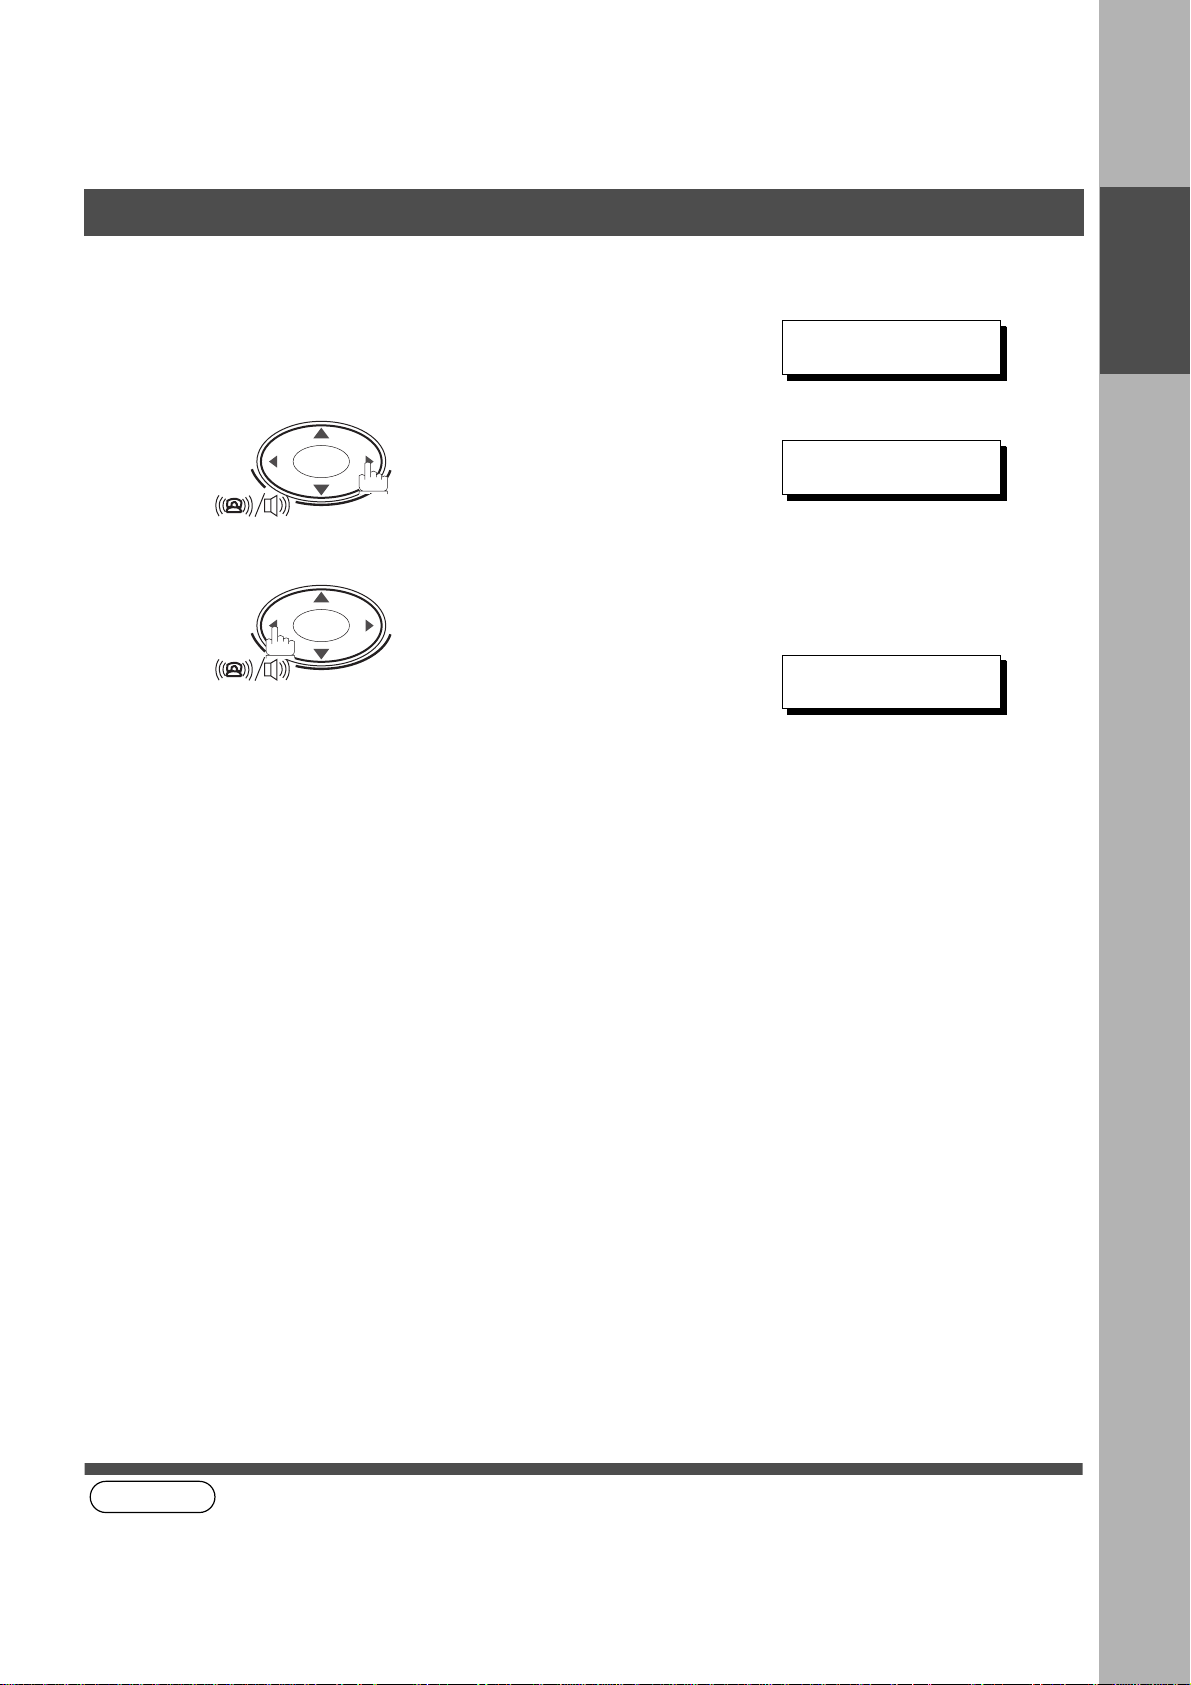
User Parameters for Fax
INSTALLING YOUR MACHINE
Your facsimile machine has several basic settings (User
Parameters) to help you keep records of the documents you
send or receive. For example, the built-in clock keeps the
current date and time, and your LOGO and ID Number help to
identify you when you send or receive documents.
abc..
+-
FAX
FUNCTION
SET
12
45
78
0
3
6
9
71
Setting the Date and Time
At standby the display will show the d ate and time. Once the stan dby display is set, it will automatical ly be
updated.
Make sure that the FAX lamp is ON. If not, press to select the "FAX MODE".
FUNCTION
1
2
1
SET
7
3
FAX
SET MODE (1-6)
ENTER NO. OR
1:USER PARAME TER S?
PRESS SET TO SELECT
DATE & TIME
❚
1-01-1999 00:00
∨ ∧
INSTALLING
YOUR MACHINE
4
5
(see Note 1)
(see Note 2)
NOTE
1. The clock of your machine is equipped with D.S.T.(Daylight Saving Time) system. So, your clock will
2. The current Date & Tim e must be set be cause it is r equired by the Telephone Con sumer Act of 19 91. (For detail s,
Enter the new date and time.
Ex: Month : September
0 9
1 2
2 0 0 0
1 5 0 0
If you make a mistake, use or to move the cursor
over the incorrect number, then overwrite it with a correct
one.
RESET
SET
automatically set the time forward from 2:00 AM to 3:00 AM on the first Sunday of April and set the time back
from 2:00 AM to 1:00 AM on the last Sunday of October.
If your state does not use the D.S.T. system, change the Fax Parameter No. 35 (DAYLIGHT TIME) to "Invalid" .
(See page 36)
see FCC NOTICE at the end of this Operating Instructions)
Date : 12th
Year : 2000
Time : 3:00 PM
DATE & TIME
09-12-2000 15:00
21
Page 22
INSTALLING YOUR MACHINE
User Parameters for Fax
Setting Your LOGO
When you send a documen t, your LOGO a ppear s on t he top o f
the copy printed out at the other station.
The LOGO helps to identify you to someone who recei ves your
document
Make sure that the FAX lamp is ON. If not, press to select the "FAX MODE".
FUNCTION
1
2
1
SET
7
FAX
FAX
3
repeatedly until display shows;
Enter your LOGO (max. 25 characters and digits) by using
4
the keypad (See page 20).
12
∨ ∧
45
78
0
abc..
+-
FUNCTION
SET
SET MODE (1-6)
ENTER NO. OR
1:USER PARAME TER S?
PRESS SET TO SELECT
LOGO
❚
3
6
9
71
5
(see Note 1)
NOTE
1. Your Company Name or your name must be set as your LOGO because it is required by the Telephone
Ex:PANASONIC
RESET
SET
Consumer Act of 1991. (For details, see FCC NOTICE at the end of this Operating Instructions)
LOGO
PANASONIC
❚
22
Page 23
User Parameters for Fax
Setting Your Character ID
INSTALLING YOUR MACHINE
If the remote machine has a Character ID capabilities, when you
are sending or receiving , your Character ID will appear on the
remote machine's display and the remote machine's Character
ID will appear on your display.
FAX
.
Make sure that the FAX lamp is ON. If not, press to select the "FAX MODE".
FUNCTION
1
2
1
SET
7
3
repeatedly until display shows;
FAX
SET MODE (1-6)
ENTER NO. OR
1:USER PARAME TER S?
PRESS SET TO SELECT
CHARACTER ID
❚
12
3
45
abc..
+-
FUNCTION
SET
∨ ∧
78
0
6
9
71
INSTALLING
YOUR MACHINE
20
4
5
Enter your Character ID (max. 16 characters and digits)
by using the keypad (See page 20).
Ex:HEAD OFFICE
RESET
SET
CHARACTER ID
HEAD OFFICE
❚
23
Page 24
INSTALLING YOUR MACHINE
User Parameters for Fax
Setting Your ID Number (Fax Telephone Number)
If the remote machine does not have a Character ID but it
has an ID Number, when sending or receiving, your ID
Number will appear on the remote machine's display and
their ID Number will appear on your display.
We suggest you use your facsimile telephone number as
your ID number. (max. 20 digits)
Make sure that the FAX lamp is ON. If not, press to select the "FAX MODE".
FUNCTION
1
2
1
SET
7
FAX
3
repeatedly until display shows;
Enter your ID (max. 20 digits) by using the keypad and
4
MONITOR
.
FAX
SET MODE (1-6)
ENTER NO. OR
1:USER PARAME TER S?
PRESS SET TO SELECT
ID NO.
❚
12
3
45
abc..
+-
FUNCTION
SET
∨ ∧
78
0
6
9
71
5
(see Note 1)
(see Note 2)
NOTE
1. You may use to enter a "+" character at the beginning of the ID number to indicate the following digit(s) for
2. Your Fax Telephone N umber mus t be s et as your ID Numb er bec ause i t is re quired by the Telep hone C onsu mer
Ex:
2 0 1
MONITOR
If you make a mistake, use or to move the cursor
beyond the incorrect number, press
then re-enter the new number.
RESET
SET
your country code.
Ex :+1 201 555 1212 +1 for U.S.A. country code.
+81 3 111 2345 +81 for Japan country code.
Act of 1991. (For details, see FCC NOTICE at the end of this Operating Instructions)
MONITOR
1 2 1 2
5 5 5
ID NO.
201 555 1212
CLEAR/STOP
❚
24
Page 25
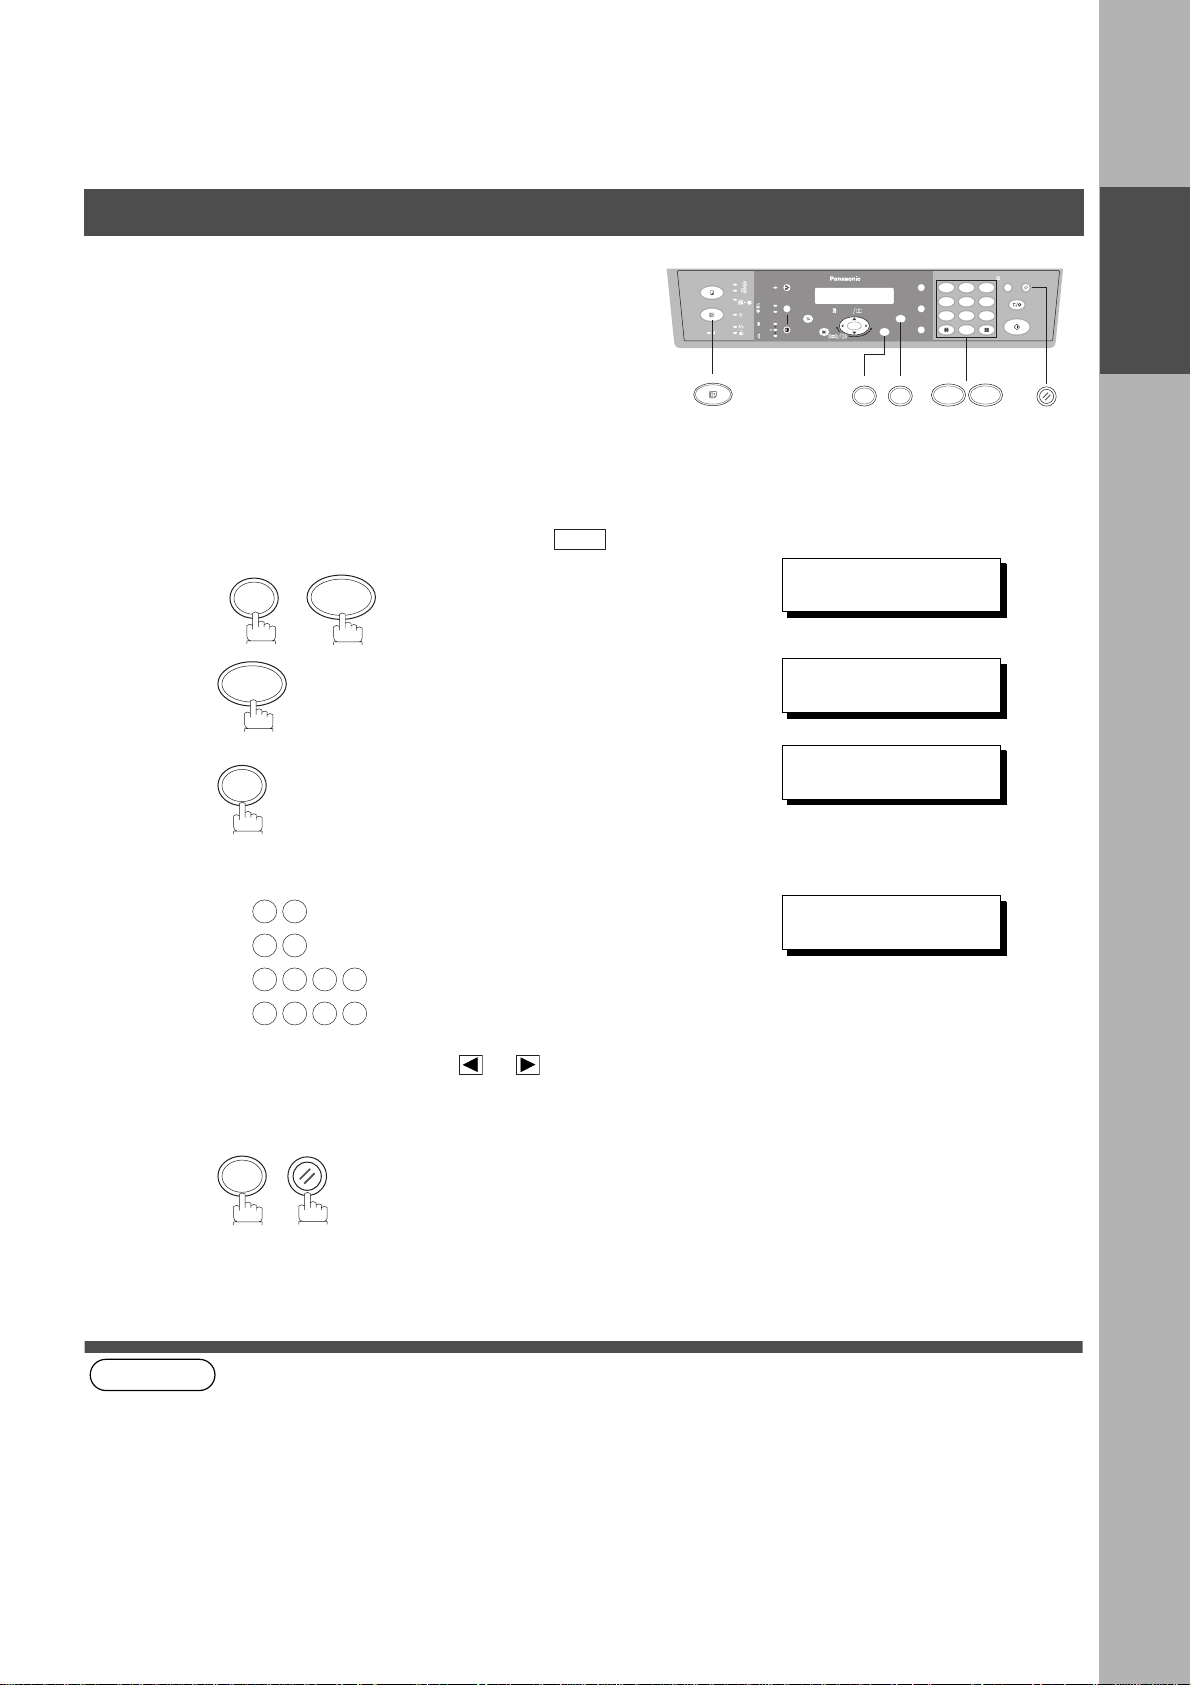
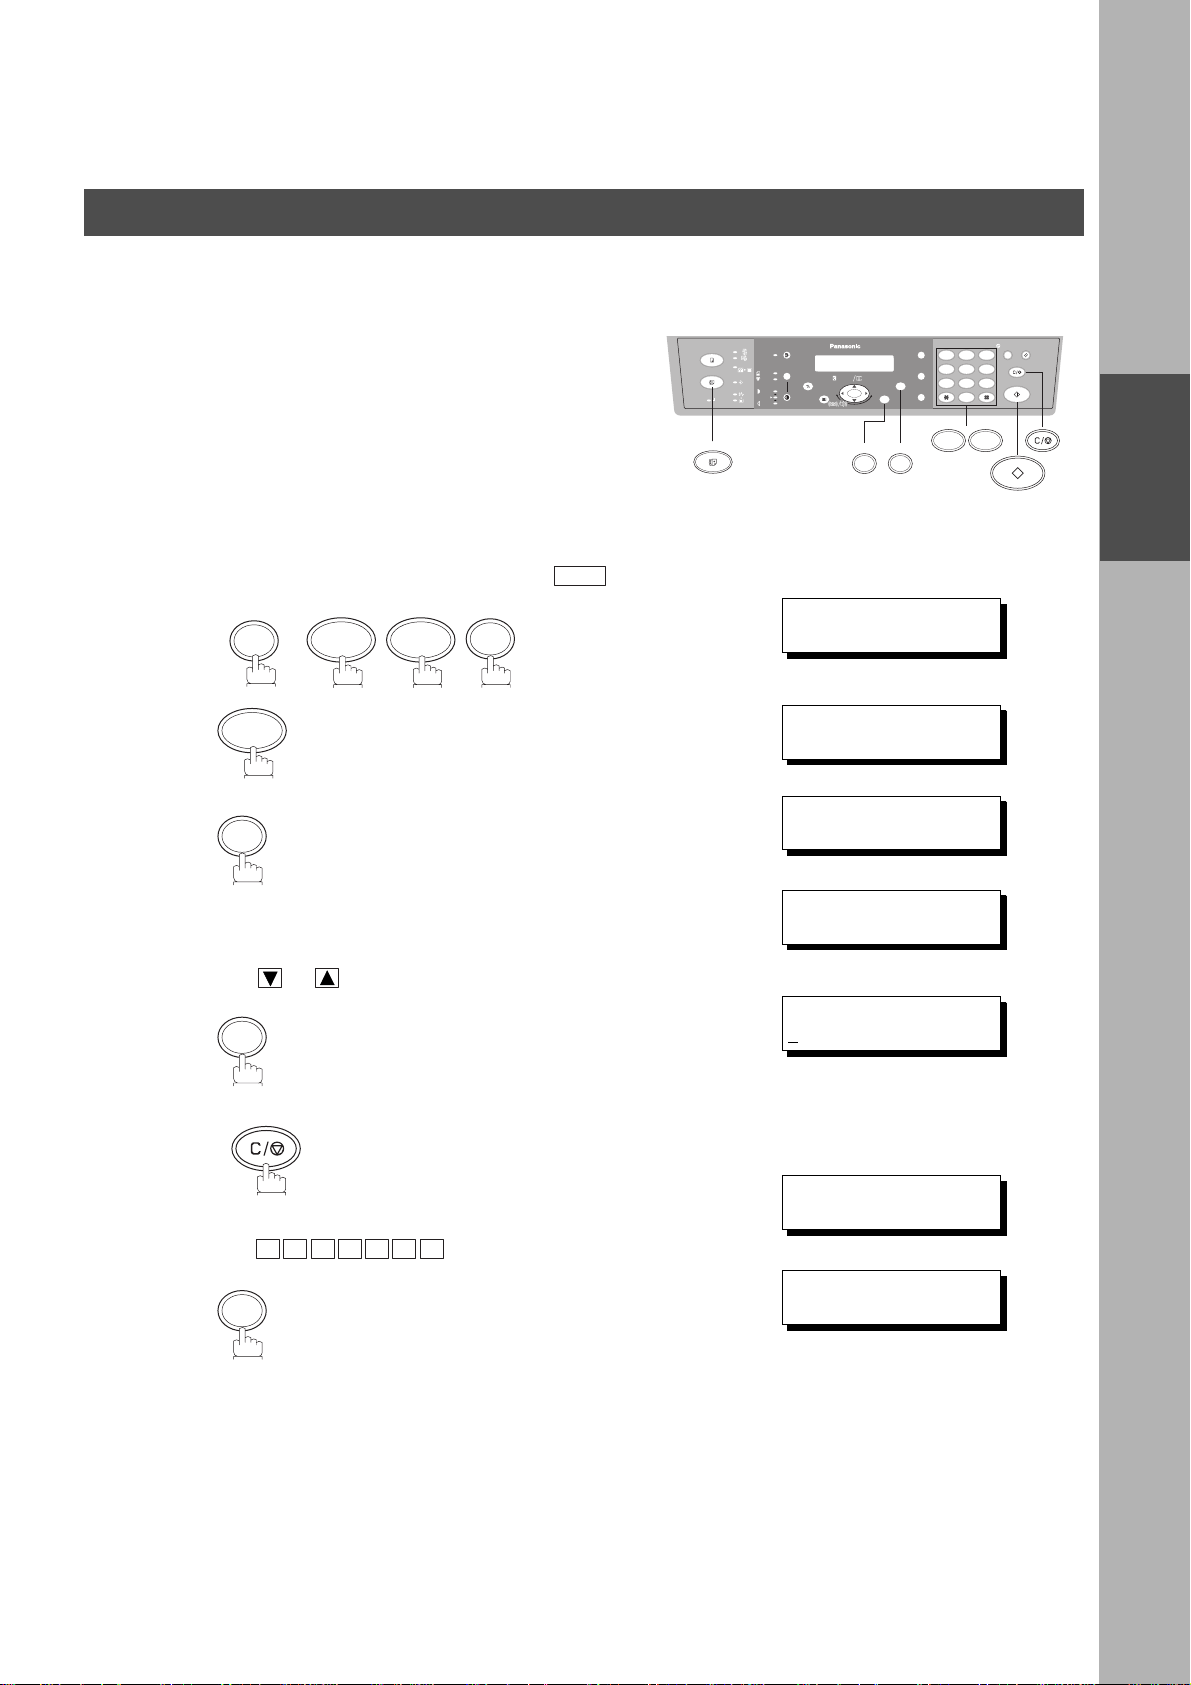
PROGRAMMING YOUR MACHINE
Phone Book
Entering the Phone Book
To use Phone Book , you must first store the te lephone number
using the following procedure.
FAX
Make sure that the FAX lamp is ON. If not, press to select the "FAX MODE".
FUNCTION
1
2
3
2
1
SET
7
SET
4
FAX
SET MODE (1-6)
ENTER NO. OR
DIR. STN. DIAL (1-3)
ENTER NO. OR
1:ADD STATION
PRESS SET TO SELECT
REGISTERED ENTRIES
STN(S):0 GROUP :0
12
3
6
MONITORPAUSE/REDIAL
∨ ∧
∨ ∧
45
78
0
1
7
9
2
PROGRAMMING
YOUR MACHINE
abc..
+-
FUNCTION
SET
5
6
7
Enter the station name from the keypad
(up to 15 characters).(See page 20)
Ex:
Enter the telephone number
(up to 36 digits including pauses and spaces).
Ex:
A L E S
S
SET
PAUSE/REDIAL
9
MONITOR
MONITOR
1 2
5 5 5
3
4
E P TD
↓1.5 sec. later
ENTER NAME
❚
ENTER NAME
SALES DEPT
ENTER TEL. NO.
❚
ENTER TEL. NO.
9-555 1234
❚
❚
25
Page 26

PROGRAMMING YOUR MACHINE
Phone Book
8
START
To record another number, repeat step 4 to 8.
To return to standby, press .
RESET
REGISTERED ENTRIES
STN(S):1 GROUP :0
↓1.5 sec. later
ENTER NAME
❚
26
Page 27
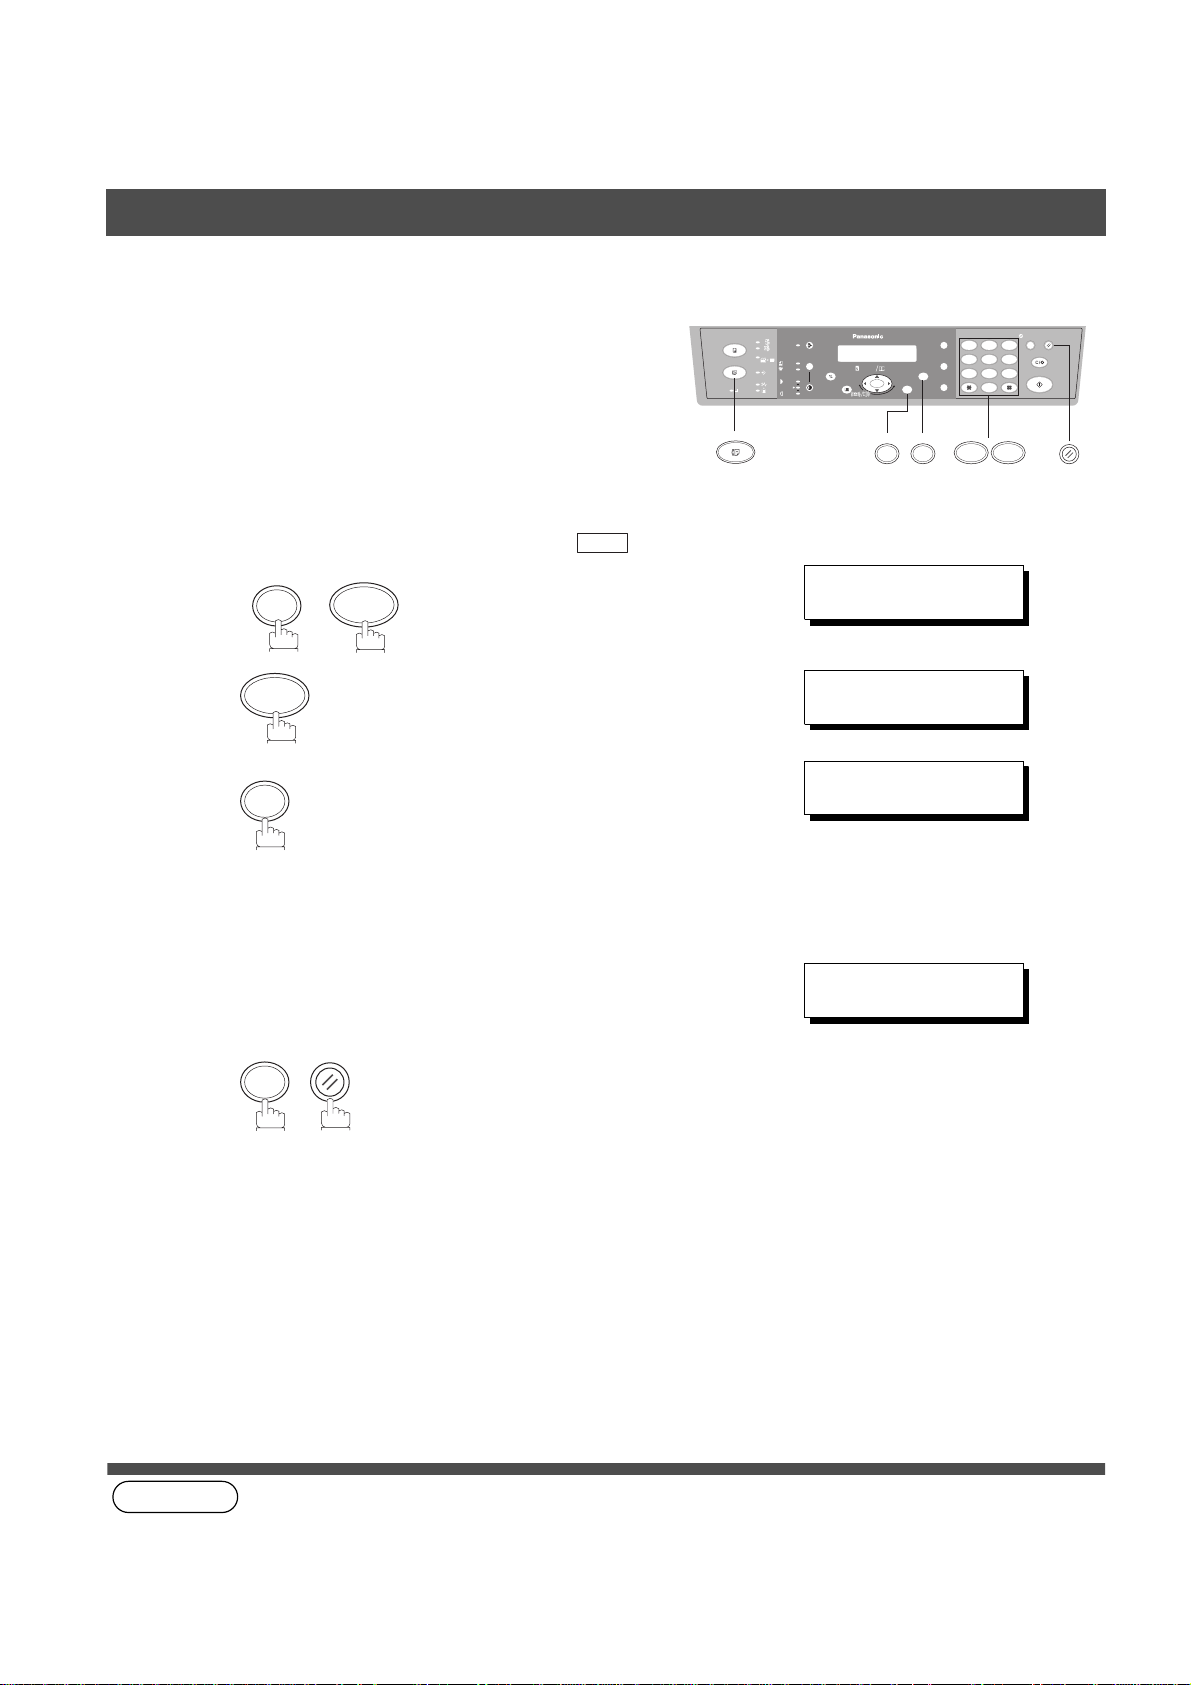
Phone Book
Changing the Phone Book
PROGRAMMING YOUR MACHINE
If you have to change any of the Phone Boo ks, follow the steps
below.
FAX
Make sure that the FAX lamp is ON. If not, press to select the "FAX MODE".
SET
1
2
FUNCTION
7 2
2
SET
3
FAX
DIR. STN. DI AL (1-3)
ENTER NO. OR
2:MODIFY STAT ION
PRESS SET TO SELECT
REGISTERED ENTRIES
STN(S):15 GROUP:3
PRESS
THEN SET TO MEMORY
abc..
+-
FUNCTION
SET
∨ ∧
↓1.5 sec. later
∨ ∧
TO SELECT
12
45
78
0
3
6
9
72
PROGRAMMING
YOUR MACHINE
4
5
6
Use or to search the station you wish to change.
SET
CLEAR/STOP
then enter a new station name. (See Note 1)
Ex:
P A N A F A X
SET
ENTER NAME
ANASONIC
P
ENTER NAME
PANAFAX
ENTER TEL. NO.
9-555 1234
27
Page 28
PROGRAMMING YOUR MACHINE
Phone Book
CLEAR/STOP
7
then enter a new telephone number.
(See Note 1)
ENTER TEL. NO.
9-555-3456
8
(see Note 1)
(see Note 2)
Ex:
To return to standby, press
PAUSE/REDIAL
9
MONITOR
START
3
5
4
5 5 5
6
PANAFAX
9-555 3456
RESET
28
NOTE
1. If you make a mistake, use or to move the cursor beyond the inc orrect numb er, press
then re-enter the new number.
2. If the Phone Book has been used for a communication reservation, the settings cannot be changed or erased
until the communication has finished.
To change or erase the settings, cancel the communication first by Edit File Mode. (See page 65)
CLEAR/STOP
Page 29

Phone Book
Erasing the Phone Book
PROGRAMMING YOUR MACHINE
If you have to erase any of the Phone Book, follow the steps
below.
FAX
FAX
Make sure that the FAX lamp is ON. If not, press to select the "FAX MODE".
SET
1
FUNCTION
7 2
FAX
DIR. STN. DI AL (1- 3)
ENTER NO. OR
2
3
3
SET
3:DELETE STAT ION
PRESS SET TO SELECT
REGISTERED ENTRIES
STN(S):15 GROUP:3
PRESS
THEN SET TO DELETE
abc..
abc..
+-
+-
FUNCTION
FUNCTION
SET
SET
∨ ∧
↓1.5 sec. later
∨ ∧
TO SELECT
12
12
45
45
78
78
0
0
2
2
7
7
3
3
6
6
9
9
3
3
PROGRAMMING
YOUR MACHINE
4
5
(see Note 1)
NOTE
1. If the Phone Book has been used for a communication reservation, the settings cannot be changed or erased
until the communication has finished.
To change or erase the settings, cancel the communication first by Edit File Mode. (See page 65)
Use or to search the station you wish to delete.
SET
SET
To return to standby, press .
RESET
PANAFAX
PRESS SET TO CONFI RM
REGISTERED ENTRIES
STN(S):14 GROUP:3
↓1.5 sec. later
PRESS
THEN SET TO DELETE
3:DELETE STAT ION
PRESS SET TO SELECT
∨ ∧
TO SELECT
(When all stations were
deleted)
29
Page 30
PROGRAMMING YOUR MACHINE
Phone Book
Entering Group Dialing
To set a Group Dialing, follow the steps below.
FAX
Make sure that the FAX lamp is ON. If not, press to select the "FAX MODE".
FUNCTION
1
2
3
3
1
SET
7
SET
FAX
4
12
MONITORPAUSE/REDIAL
∨ ∧
∨ ∧
45
78
0
1
7
abc..
+-
FUNCTION
SET
SET MODE (1-6)
ENTER NO. OR
DIR. GROUP DIAL(1-3)
ENTER NO. OR
1:ADD GROUP
PRESS SET TO SELECT
REGISTERED ENTRIES
STN(S):0 GROUP :0
3
6
9
2
5
6
7
8
Enter the station name using character keys
(up to 15 characters).(See page 20)
Ex:
Enter the telephone number
(up to 36 digits including pauses and spaces).
Ex:
Enter the next telephone number and press .
To record another Group Dialing, repeat step 4 to 8.
To return to standby, press .
A L E S
S
SET
PAUSE/REDIAL
9
SET
MONITOR
5 5 5
RESET
E P TD
MONITOR
1 2
START
↓1.5 sec. later
ENTER NAME
❚
ENTER NAME
SALES DEPT
ENTER TEL. N O. 01/ 01
❚
ENTER TEL. N O. 01/ 01
❚
9-555 1234
3
4
ENTER TEL. N O. 02/ 02
❚
30
Page 31

Phone Book
Changing Group Dialing
PROGRAMMING YOUR MACHINE
If you have to change Group Dialing, follow the steps below.
FAX
Make sure that the FAX lamp is ON. If not, press to select the "FAX MODE".
SET
1
2
FUNCTION
7 3
2
SET
3
FAX
DIR.GROUP DIAL (1-3)
ENTER NO. OR
2:MODIFY GR OU P
PRESS SET TO SELECT
REGISTERED ENTRIES
STN(S):15 GROUP:3
PRESS
THEN SET TO MEMORY
abc..
+-
FUNCTION
SET
∨ ∧
↓1.5 sec. later
∨ ∧
TO SELECT
12
45
78
0
2
7
3
6
9
3
PROGRAMMING
YOUR MACHINE
4
5
6
Use or to search the station you wish to change.
SET
CLEAR/STOP
then enter a new station name. (See Note 1)
Ex:
P A N A F A X
SET
ENTER NAME
P
ANASONIC
ENTER NAME
PANAFAX
ENTER TEL. N O. 01/ 03
555 1234
❚
31
Page 32

PROGRAMMING YOUR MACHINE
Phone Book
CLEAR/STOP
7
8
(see Note 1)
(see Note 2)
then enter a new telephone number.
(See Note 1)
Ex:
9
PAUSE/REDIAL
5 6
START
To return to standby, press
5 5 5
RESET
MONITOR
ENTER TEL.NO.(01/03)
9-555 3456
3
4
32
NOTE
1. If you make a mistake, use or to move the cursor beyond the incorrec t number, press
then re-enter the new number.
2. If the Group Dialing has been used for a communication reservation, the settings cannot be changed or erased
until the communication has finished.
To change or erase the settings, cancel the communication first by Edit File Mode. (See page 65)
CLEAR/STOP
CLEAR
Page 33

Phone Book
Erasing Group Dialing
PROGRAMMING YOUR MACHINE
If you have to erase Group Dialing, follow the steps below.
FAX
Make sure that the FAX lamp is ON. If not, press to select the "FAX MODE".
SET
1
2
FUNCTION
7 3
3
SET
3
FAX
DIR.GROUP DIAL (1-3)
ENTER NO. OR
3:DELETE GROU P
PRESS SET TO SELECT
REGISTERED ENTRIES
STN(S):15 GROUP:3
PRESS
THEN SET TO DELETE
abc..
+-
FUNCTION
SET
∨ ∧
↓1.5 sec. later
∨ ∧
TO SELECT
12
45
78
0
3
3
6
9
7
PROGRAMMING
YOUR MACHINE
4
5
(see Note 1)
NOTE
1. If the Group Dialing has been used for a communication reservation, the settings cannot be changed or erased
until the communication has finished.
To change or erase the settings, cancel the communication first by Edit File Mode. (See page 65)
Use or to search the station you wish to change.
SET
SET
To delete another Group Dialing, repeat step 3 to 5.
PANASONIC <G>
PRESS SET TO CONFI RM
REGISTERED ENTRIES
STN(S):15 GROUP:2
↓1.5 sec. later
PRESS
THEN SET TO DELETE
3:DELETE GROU P
PRESS SET TO SELECT
(When all stations were
deleted)
∨ ∧
TO SELECT
33
Page 34

PROGRAMMING YOUR MACHINE
Fax Parameters
Setting the Fax Parameters
Your facsimile machine has a variety of adjustable Fax
Parameters. These parameters, listed in the Parameter Table,
are preset for you and do not need to be changed. If you do
want to make a change, read the table carefully.
FAX
Make sure that the FAX lamp is ON. If not, press to select the "FAX MODE".
FUNCTION
1
2
3
4
Enter Fax Parameter number from the Parameter Table.
(See pages 35 to 37)
Ex: for RESOLUTION
0 2
SET
7
SET
FAX
4
12
❚
∨ ∧
45
78
0
abc..
+-
FUNCTION
SET
SET MODE (1-6)
ENTER NO. OR
FAX PARAMETER(02-99)
NO.=
FAX PARAMETER(02-99)
NO.=02
02 RESOLUTION
1:STANDARD
3
6
9
74
Enter the new setting value.
5
Ex: for FINE
2
SET
6
To set another parameter, press to
return to step 3 or press to return to standby.
(see Note 1) (see Note 2)
NOTE
1. To scroll the Fax Parameters in Step 2 or 4, press or .
2. To print out a Fax Parameter List, see page 87.
02 RESOLUTION
2:FINE
05 MEMORY
2:ON
CLEAR/STOP
RESET
34
Page 35

Fax Parameters
Fax Parameter Table
PROGRAMMING YOUR MACHINE
No. Parameter
02 RESOLUTION *1 Standard Setting the home position of the RESOLUTION key.
05 MEMORY 1 Off Setting the home position of the MEMORY key.
06 DIALING METHOD 1 Pulse Selecting the dialing method.
07 HEADER PRINT *1 Inside Selecting the printing position of the header.
08 HEADER FORMAT *1 Logo, ID No. Selecting the header format.
10 KEY/BUZZER VOLUME 1 Off Selecting the volume of the Key/Buzzer tone.
12 COMM. JOURNAL 1 Off Selecting the home position of printout mode for COMM. Journal
Setting
Number
2Fine
3S-Fine
*2 On
*2 Tone
2 Outside
3 No print
2From To
*2 Soft
3 Loud
2Always
*3 Inc. only
Setting Comments
Inside : Inside TX copy area.
Outside : Outside TX copy area.
No print : Header is not printed.
Off/Always/INC.
Off : No printout
Always : Always prints out
Inc. only: Printout when communication has failed.
PROGRAMMING
YOUR MACHINE
13 AUTO JOURNAL PRINT 1 Invalid Selecting whether the machine prints the journal automatically
*2 Valid
17 RECEIVE MODE *1 Auto Setting the reception mode to automatic or manual.
2 Manual
22 SUBSTITUTE RCV 1 Invalid Selecting whether the machine receives to memory when
*2 Valid
24 PRINT REDUCTION 1 Fixed Selecting print reduction mode.
*2 Auto
25 REDUCTION RATIO 70 70% Selecting fixed print reduction ratio from 70% to 100%. This
---- ----
100 100%
26 POLLING PASSWORD (----) Setting a 4-digit password for secured polling. (See page 61)
after every 40 transactions.
recording paper runs out, toner runs out or recording paper is
jammed.
Fixed: Reduce received document according to setting of
Parameter No. 25.
Auto: Reduce received document according to the length of
received documents.
parameter functions only when fixed print reduction is selected on
Fax Parameter No. 24.
Continued on the next page.
35
Page 36

PROGRAMMING YOUR MACHINE
Fax Parameters
No. Parameter
34 ENERGY
SAVE
TIMER
35 DAYLIGHT TIME 1 Invalid Selecting whether the clock adjusts for Daylight Saving Time
36 RING PATTERN
DETECT (DRD)
(See Note 2)
37 RCV TO MEMORY
39 PIN CODE ACCESS *1 None Selecting the access method (Prefix or Suffix) to dial a number
52 DIAGNOSTIC
PASSWORD
53 SUB-ADDRESS
PASSWORD
POWER
SAVE
TIMER
AUTO OFF
TIMER
Setting
Number
15 min.To reduce the power consumption in standby, select either Energ y -
*2 15
330
460
590
6 120
7 180
8 240
15 min.
*2 30
360
490
5 180
6 240
*2 Valid
*1 Invalid All ring patterns.
2 Valid Select a ring pattern for automatic answering.
2Suffix
3Prefix
Setting Comments
Saver or Sleep mode and specify the Delay Time (5 to 240
minutes) for the machine to enter into the selected mode.
The Delay Timer setting is only available in the Energy-Saver or
Sleep Modes.
Energy-Saver Mode:Saves energy by consuming less power than
when in standby mode by turning off the fuser
unit after the specified time.
machine enters after the specified time
without actually turning off.
(----)
(----)
(----)
Sleep Mode: This is the lowest power state that the
automatically. The built-in clock will advance 1 hour at 2:00 am on
the first Sunday in April and fallback 1 hour at 2:00 am on the last
Sunday in October.
1: A Standard ring pattern.
2: B Double ring pattern.
3: C Triple ring pattern (Short-Short-Long).
4: D All other triple ring pattern, except the type C
described above.
Enter a 4-digit password used to print out the received document
in memory by using F8-2 (RCV TO MEMORY). When F8-2 is set
to On, this parameter will not be shown on the LCD display. (See
page 66)
with PIN Code. (See page 72)
Setting the password for Remote Diagnostic Mode. Please ask
your Panasonic Authorized Dealer for details.
Setting a 20-digit password for secured sub-address
communication.
Continued on the next page.
36
Page 37

Fax Parameters
PROGRAMMING YOUR MACHINE
No. Parameter
58 LANGUAGE *1 A-English Selecting the language to be shown on the display and reports.
61 FAX/COPY MODE 1 Fax Setting the home position to either FAX or COPY Mode during
99 MEMORY SIZE
(Flash Memory)
Setting
Number
2 C-French
*2 Copy
3 Remain
- - Displays the amount of base and optional memory installed.
Setting Comments
[USA User]
A-English or Spanish
Spanish
[Canada User]
A-English or C-French
standby. The “Remain” setting means continuation of the last
mode used (either FAX or COPY Mode).
(Base Memory + Optional Memor y)
(see Note 1)
(see Note 2)
PROGRAMMING
YOUR MACHINE
NOTE
1. Setting number marked with an asterisk (*) indicates the factory standard setting.
2. This parameter supports an optional telephone service "Distinctive Ring Service" provided by your local
telephone compa ny. It allow s up to 4 dif ferent te lephon e num bers to be ass igned on a s ingle teleph one li ne wi th
a distinctive ring for each telephone number. By selecting the appropriate ring pattern associated with the
telephone number assigned for your fax machine. It can differentiate and answer the incoming call on the fax
number. All other calls on the other telephone numbers will not be answered. This optional service from your
local phone company is also called Custom Ringing, Distinctive Ringing, Ident-a-call, Ident-a-ring, Personalized
Ringing, RingMaster, RingMate, Selective Ringing, Smart Ring or something similar. Check with your local
telephone company on the availability of this service in your area.
37
Page 38

PROGRAMMING YOUR MACHINE
This page is intentionally left blank.
38
Page 39

BASIC OPERATIONS
Loading Documents
(1) ADF (2) Platen (Original Glass)
Face Up
Document Guide
Document Guide
Face Down
Place the documents Face Up.
The documents are fed from the top.
ADF
Document Size: Invoice, Letter, and Legal
Document Quantity: Up to 30 sheets
Paper Weight: 14-28 lbs.
Paper Type: Plain Paper
Documents not suitable for ADF
Wet
Covered with wet ink or paste
Wrinkled, curled or folded paper
Too thick (Ex: cardboard or post card)
Too thin (Ex:onionskin, airmail paper, pages
from some magazines, etc.)
Chemically processed p aper (Ex: pressure-
sensitive paper, carbon-coated
paper, etc.)
Coated (Ex: glossy paper, etc.)
Made of cloth or metal
Stapled or clipped paper
Place the document Face Down.
Adjust it to the document guide.
Platen (Original Glass)
Original Size: Invoice to Legal
Place dry document
Cover transparencies with white paper
Gently raise and lower the Platen
Cover or ADF
Use the Platen for these
kinds of documents or make
a copy first then transmi t the
copy instead.
BASIC
OPERATIONS
Effective Scanning Size
0.20" (5mm)
0.20" (5mm)
The print margin is 0.20 inch (5 mm). Letters within the dark areas
(indicated by the arrows) will no t be printed. Do not wri te letters
within 0.39 inch (10 mm) area from the head or foot of the
document as it may be covered by the Header and Footer
information (Company Name, Date, Logo, etc.).
39
Page 40

BASIC OPERATIONS
Basic Transmission Set tin gs
Document Mode/Contrast/Resolution
You can temporarily change the transmission settings either before or after you place the document on the ADF or
Platen Glass.
After your document has been sent, your machine will automatically return to the preset settings.
Document Mode
• The Document Mode is useful when sending photographs or illustrations. Your machine is preset to
AUTO.
PHOTO
AUTO
Switches by every press
Contrast
• Your machine has five adjustment stages. It is preset to Normal contrast.
DARK
LIGHT
( : Normal) Switches by every press
Resolution
• Your machine is preset to Stan dard resolution , which is sui table for most documents. Use Fine
or Super Fine for detailed documents. To c hange the Resoluti on positio n, change the se tting of
Fax Parameter No.02. (See page 35)
PHOTO
AUTO
Normal Auto Selection Photograph
DARK
LIGHT
Normal Dark Darker Lighter Light
PHOTO
AUTO
PHOTO
AUTO
40
Fax Parameter 02
1: Standard = Normal document(s) (Factory Default)
2: Fine =Detailed document(s) Ex: newspaper
3: Super Fine = Especially detailed document(s)
Page 41

Basic Transmis sion Settings
Communication Journal (COMM. JOURNAL)
BASIC OPERATIONS
A Communication Journal lets you verify if the transmission was
successful. You can select the condition to print out the
Communication Journal as follows.
FAX
When you set COMM. JOURNAL = OFF: a Communication Journal will not be printed out.
When you set COMM. JOURNAL = ON : a Communication Jour nal is pr inte d out aut oma tically
after every communication.
When you set COMM. JOURNAL = INC.: a Communication Jour nal is pr inte d ou t automa tical ly
only if the communication has failed.
Make sure that the FAX lamp is ON. If not, press to select the "FAX MODE".
FUNCTION
1
2
3
1
1
or
8
for “OFF”.
FAX
1:COMM. JOURNAL ?
2:RCV TO MEMORY ?
COMM. JOURNAL=INC
1:OFF 2:ON 3:IN C
COMM. JOURNAL=OFF
1:OFF 2:ON 3:IN C
abc..
+-
FUNCTION
SET
or
12
45
78
0
3
6
9
21
83
BASIC
OPERATIONS
4
(see Note 1)
NOTE
1. To change the preset Comm. Journal condition, change the setting of Fax Parameter No. 12. (See page 35)
or
SET
2
for “ON” (Always print out).
3
for “INCOMPLETE” only.
COMM. JOURNAL=ON
1:OFF 2:ON 3:IN C
or
COMM. JOURNAL=INC
1:OFF 2:ON 3:IN C
41
Page 42

BASIC OPERATIONS
Sending Documents
You can choose either Memory or Direct Transmission.
Use Memory Transmission if:
• You want to send the document to multiple stations.
• You have to retrieve the document immediately.
• You want to take advantage of Dual Operation design.
Use Direct Transmission if:
• The memory is full.
• You want to send the document immediately.
Use Voice Mode Transmit if:
• You want to send the document after talking with the other party.
• You want to send the document after listening to a voice prompting.
Memory Transmission
Your machine quickly stores the document into the machine's memory.
Then, starts to dial the telephone number.
If the transmission fails, your machine will re-transmit the remaining unsuccessful page(s) automatically.
1
Store document
in memory
2
Transmit Receive
A
Destination A
Destination B
3
A
A
42
Page 43

BASIC OPERATIONS
Sending Docu m en ts
(see Note 1)Å@Å@ (see Note 2)Å@Å@ (see Note 3)Å@Å@ (see Note 4) (see Note 5)
NOTE
1. The File Number o f the document being stored is shown at th e u ppe r rig ht
corner of the display while storing the document. It is also printed on the
Communication Journal (COMM. JOURNAL), Transaction Journal and
File List. The percentage of memory used is shown on the lower right
corner of the display after each page is stored.
* STORE * NO.003
PAGES=002 10%
* STORE * COMPLETED
TOTAL PAGES= 005 3 0%
2. If memory overflow occurs while storing documents, the remaining
documents on the ADF will be eje cted. The machine prompts you whet her
to transmit the successfully stored documents or to cancel the
transmission. Press to cancel or press to transmit.
After storing each docum ent, the mach ine checks the availab le memory to
prevent memory overflow and stops storing additional documents if the
stored data approaches a certain percentage* (around 93%).
Then the mach ine dials and se nds the m emory sto red do cume nts fi rst and
continues the transmission of the remaining documents from the ADF
during the same phone call.
If transmitting to multiple stations or if memory overflows while storing a
document, the machine prompts you whether to transmit the successfully
stored documents or to cancel the transmission. Press to cancel or
press to transmit.
See the Specifications on page 100 for the image memory capacity.
If no action is taken within 10 seconds, the machine will start transmitting
the stored documents.
* The percentage varies and its dependent on the type of documents you
are storing, machine settings or whether an optional memory card is
installed.
3. An Information Code will be displayed if the transmission has failed or no
answer at the receiving side after the last automatic redial.
The document stored fo r this trans mis sion will b e era sed f rom the memo ry
automatically and the information code is printed for the transmission on
the Communication Journal (COMM. JOURNAL).
4. To stop the transmission, press .
The displa y shows:
2
COMMUNICATION STOP?
1:YES 2:NO
1 2
1
STOP
OUT OF MEMORY
INFO. CODE =8 70
15 PAGES COMPLETED
DELETE? 1:YES 2:NO
INCOMPLETE
INFO. CODE =X XX
BASIC
OPERATIONS
Press to stop the transmission. The document you stored will be erased automatically.
5. If you would like to print a Communication Journal (COMM. JOURNAL) after stopping a transmission, press
when the display shows:
1
PRINT COMM. JOUR NAL?
1:YES 2:NO
43
1
Page 44

BASIC OPERATIONS
Sending Documents
Manual Number Dialing
To dial the telephone number manually, follow the steps below.
FAX
(see Note 1) (see Note 2) (see Note 3)
Make sure that the FAX lamp is ON. If not, press to select the "FAX MODE".
1
a
Set document(s) face up.
1
b
Place a book or document face down on the
Platen Glass.
Enter a telephone number from the keypad.
FAX
2
Ex:
5 5 5 1 2 3
4
12
abc..
+-
ENTER STATION(S)
THEN PRESS START 00%
SEP-12-2000 15:00
00%
TEL. NO.
5551234
❚
45
78
0
3
6
9
3
START
44
Page 45

Sending Docu m en ts
ADF scanning
BASIC OPERATIONS
All document(s) are stored into memory with a file number.
4
Flatbed scanning
4
Then starts dialing the telephone number immediately.
a
When a document is placed on the P laten Glas s, the d isplay
is as shown to the right.
b
(1) Press or to set the d ocument size on the Platen
Glass and press to store the document.
(2)To store another page into memor y, press to select
"YES".
If you do not wish to store an addition al document, press
START
* STORE * NO.002
PAGES=001 05%
* DIALING * NO.002
5551234
ORIGINAL=LETTER
PRESS START
* STORE * NO.002
PAGES=001 05%
SCAN ANOTHER PAGE?
1:YES 2:NO
1
BASIC
OPERATIONS
to select "NO". (See Note 3)
2
If "YES" is selected, set the document size and press
START
If "NO" is selected, the machine starts to dial the
telephone number.
.
* DIALING * NO.002
5 5 5 1 2 3 4
NOTE
1. If you need a special access number to get an outside line, dial it first then press to enter a pause
(represented by a "-") before dialing the full number.
: 9 PAUSE 5551234
Ex
2. If you are using Pulse dialing and you wish to change to Tone dialing in the middle of dialing, press
TONE
The dialing mode will be changed from Pulse to Tone after dialing the digit "/".
: 9 PAUSE TONE 5551234
Ex
3. If no action is taken within 60 seconds, the machine will start the dialing.
(represented by a "/").
PAUSE
45
Page 46

BASIC OPERATIONS
Sending Documents
Phone Book Dialing
Phone Book dialin g allows you to dial a full telephone number
by searching the station name.
FAX
Make sure that the FAX lamp is ON. If not, press to select the "FAX MODE".
1
a
Set document(s) face up.
1
b
Place a book or document face down on the
Platen Glass.
2
+-
or
FAX
+-
12
abc..
+-
ENTER STATION(S)
THEN PRESS START 00%
SEP-12-2000 15:00
00%
PANASONIC
5551234
45
78
0
+-
3
6
9
3
repeatedly until display shows the station name you want
to send to.
START
46
Page 47

Sending Docu m en ts
ADF scanning
BASIC OPERATIONS
All document(s) are stored into memory with a file number.
4
Flatbed scanning
4
Then starts dialing the telephone number immediately.
a
When a document is placed on the Platen Glass,
the display is as shown to the right.
b
(1) Press or to set the d ocument size on the Platen
Glass and press to store the document.
(2)To store another page into memor y, press to select
"YES".
If you do not wish to store an addition al document, press
START
* STORE * NO.002
PAGES=001 05%
* DIALING * NO.002
PANASONIC
ORIGINAL=LETTER
PRESS START
*STORE* NO.0 02
PAGES=001 05%
BASIC
OPERATIONS
SCAN ANOTHER PAGE?
1:YES 2:NO
1
(see Note 1)
to select "NO". (See Note 1)
2
If "YES" is selected, set the document size and press
START
If "NO" is selected, the machine starts to dial the
telephone number.
.
* DIALING * NO.002
PANASONIC
NOTE
1. If no action is taken within 60 seconds, the machine will start the dialing.
47
Page 48

BASIC OPERATIONS
Sending Documents
Multi-Station Transmission (Bro adcasting)
If you have to send the same document(s) to multiple stations,
you can save time in feeding the document(s) by using memory
transmission. That is, you can store the document(s) into
memory and then send it to the station(s) automatically.
FAX
Make sure that the FAX lamp is ON. If not, press to select the "FAX MODE".
1
a
Set document(s) face up.
1
b
Place a book or document face down on the
Platen Glass.
Dial by any combination of the following methods (Up to
2
10 stations in total):
• Manual Number Dialing, press after each
station is entered
• Phone Book Dialing, press after each station is
entered
(For details, see page 44 to 47.)
SET
FAX
SET
12
abc..
+-
SET
ENTER STATION(S)
THEN PRESS START 00%
SEP-12-2000 15:00
00%
45
78
0
3
6
9
48
3
Ex:
5 5 5 1 2 3
SET
5 5 5 3
If you want to confirm the number of stations you have
entered, press or .
START
4
4
5 6
TEL. NO.
5551234
TEL. NO.
5553456
2 STN(S) ARE SET
ADD MORE OR START
Page 49

Sending Docu m en ts
ADF scanning
BASIC OPERATIONS
All document(s) are stored into memory with a file number.
4
Flatbed scanning
4
Then starts dialing the telephone numbers in sequence.
a
When a document is placed on the Platen Glass,
the display is as shown to the right
b
(1) Press or to set the d ocument size on the Platen
Glass and press to store the document.
START
* STORE * NO.001
PAGES=001 01%
* STORE * COMPLETED
TOTAL PAGE=0 05 25%
* DIALING * NO.001
5551234
ORIGINAL=LETTER
PRESS START
* STORE * NO.002
PAGES =001
SCAN ANOTHER
1:YES 2:NO
BASIC
OPERATIONS
(see Note 1)
(see Note 2)
NOTE
1. You can review the statio ns yo u ente red in step 2 before storing your do cume nt into mem ory by p res sing
2. If no action is taken within 60 seconds, the machine will start the dialing.
(2)To store another page into memor y, press to select
"YES".
If you do not wish to store an addition al document, press
to select "NO". (See Note 2)
2
If "YES" is selected, set the document size and press
START
If "NO" is selected, the machine starts to dial the
telephone number.
or . Press to clear an entered station or group shown on the display if needed.
.
CLEAR/STOP
1
* DIALING * NO.002
5551234
49
Page 50

BASIC OPERATIONS
Sending Documents
Direct Transmission
If your machine's memory is full or you wish to send the
document immediately, use Direct Transmission.
(To use Direct Transmission, you need to set “OFF” into the Fax
Parameter No. 05 (MEMORY) in advance. (See page 35)
FAX
Manual Number Dialing (Direct Transmission)
To dial the telephone number manually, follow the steps below.
Make sure that the FAX lamp is ON. If not, press to select the "FAX MODE".
1
a
Set document(s) face up.
1
b
Place a book or document face down on the
Platen Glass.
FAX
12
abc..
+-
ENTER STATION
SEP-12-2000 15:00
00%
45
78
0
3
6
9
2
3
Enter a telephone number from the keypad.
Ex:
5 5 5 1 2 3
START
Your machine starts to dial the telephone number.
4
PRESS START TO DIAL
5551234
❚
50
Page 51

Sending Docu m en ts
ADF scanning
BASIC OPERATIONS
The machine starts to dial the telephone number.
4
a
Flatbed scanning
When a document is placed on the Platen Glass,
4
(see Note 1) (see Note 2) (see Note 3)
the display is as shown to the right.
b
Press or to set the document size on the Platen
Glass and press to start the dialing.
START
* DIALING *
5551234
ORIGINAL=LETTER
PRESS START
BASIC
OPERATIONS
NOTE
1. If you need a sp ec ial ac c ess n um ber to get an outside line , d ial it first then press to e nte r a
pause (represented by a "-") before dialing the full number.
: 9 PAUSE 5551234
Ex
2. If you are using Pulse dialing and you wish to change to Tone dialing in the middle of dialing, press
TONE
The dialing mode will be changed from Pulse to Tone after dialing the digit "/".
: 9 PAUSE TONE 5551234
Ex
3. To stop the transmission, press .
The display shows:
COMMUNICATION STOP?
1:YES 2:NO
Press to stop the transmission. The Communic ation Journ al will not print ou t regardless of the printout mo de
setting of the Communication Journal.
(represented by a "/").
CLEAR/STOP
1
PAUSE/REDIAL
51
Page 52

BASIC OPERATIONS
Sending Documents
Phone Book Dialing (Direct Transmission)
Phone Book dialin g allows you to dial a full telephone number
by searching the station name.
(To use Direct Transmission, you need to set “OFF” into the Fax
Parameter No. 05 (MEMORY) in advance. (See page 35)
FAX
Make sure that the FAX lamp is ON. If not, press to select the "FAX MODE".
1
a
Set document(s) face up.
1
b
Place a book or document face down on the
Platen Glass.
2
+-
or
FAX
+-
12
abc..
+-
ENTER STATION
SEP-12-2000 15:00
00%
PANASONIC
5551234
45
78
0
+-
3
6
9
repeatedly until display shows the station name you want
to send to.
START
3
The full number (e.g. 5551234) will be dialed.
ADF scanning
The machine starts to dial the telephone number.
4
a
Flatbed scanning
When a document is placed on the Platen Glass,
4
the display is as shown to the right.
b
Press or to set the document size on the Platen
Glass and press to start the dialing.
START
* DIALING *
ORIGINAL=LETTER
PRESS START
* DIALING *
PANASONIC
52
Page 53

Sending Docu m en ts
Voice Mode Transmission
BASIC OPERATIONS
If you wish to send the document after talking with other par ty,
use Voice Mode Transmission. Your machine requires an
optional fax handset or an external telephone.
FAX
Off-Hook Dialing
For Off-Hook Dialing, follow the steps below.
Make sure that the FAX lamp is ON. If not, press to select the "FAX MODE".
FAX
1
Set document(s) face up.
Lift the fax handset or the external telephone and dial the
2
3
telephone number by Manual Number Dialing or Phone
Book Dialing.
Ex:
5 5 5 1 2 3
When you hear the voice of the other party, tell the other
party to prepare to receive a document.
4
12
abc..
+-
ENTER STATION(S)
THEN PRESS START 00%
* PHONE OFF HOOK *
* DIALING *
5551234
ON LINE * XMT *
❚
45
78
0
00%
3
6
9
BASIC
OPERATIONS
Then, when you hear a beep,
START
and hang up the handset.
(see Note 1) (see Note 2)
NOTE
1. To stop the transmission, press .
The display shows:
COMMUNICATION STOP?
1:YES 2:NO
Press to stop the transmission. The Co mmunication Jo urnal will not pri nt out regardless of the printout mode
1
setting of the Communication Journal.
2. Voice Mode Transmission is only available from the ADF.
RESET
CLEAR/STOP
53
Page 54

BASIC OPERATIONS
Sending Documents
On-Hook Dialing
For On-Hook Dialing, follow the steps below.
FAX
Make sure that the FAX lamp is ON. If not, press to select the "FAX MODE".
FAX
1
Set document(s) face up.
MONITOR
2
You will hear dial tone through the monitor speaker.
Dial the telephone number by Manual Number Dialing or
3
Directory Search Dialing.
12
MONITOR
45
78
0
abc..
+-
ENTER STATION(S)
THEN PRESS START 00%
* MONITOR *
❚
* DIALING *
5551234
❚
3
6
9
Ex:
5 5 5 1 2 3
When you hear a beep,
4
(see Note 1) (see Note 2) (see Note 3)
START
NOTE
1. If you need a special a cc es s n umber to get an outsid e l ine , di al it firs t th en pres s to enter a
pause (represented by a "-") before dialing the full number.
: 9 PAUSE 5551234
Ex
2. If you are using Pulse dialing and you wish to change to Tone dialing in the middle of dialing, press
(represented by a "/").
The dialing mode will be changed from Pulse to Tone after dialing the digit "/".
: 9 PAUSE TONE 5551234
Ex
3. Voice Mode Transmission is only available from the ADF.
4
ON LINE * XMT *
PAUSE/REDIAL
TONE
54
Page 55

BASIC OPERATIONS
Sending Docu m en ts
Transmission Reservation
You can reser ve the next transmission into memor y for up to 5
different files while sending a document from memory or
receiving a document.
FAX
abc..
+-
Memory Transmission Reservation (Multi-tasking)
If your machine is on-line busy transmitting fr om memory, receiving or printing received documents, you can
reserve a transmission by the following procedure.
12
45
78
0
3
6
9
Make sure that the FAX lamp is ON. If not, press to select the "FAX MODE".
Your machine is on-line, the ON LINE lamp is blinking or
1
printing received documents.
2
Set document(s) face up.
Dial by any combination of the following methods (10
3
stations in total):
• Manual Number Dialing, press after each
station is entered
• Phone Book Dialing, press after each station
is entered
(For details, see page 44 to 47.)
Ex:
5 5 5 1 2 3
SET
4
FAX
ON LINE * MEM.XMT *
ID:(Identification)
ON LINE * RCV *
ID:(Identification)
ON LINE
PC MODE
* PRINTING *
MEMORY RCV’D DO C
ENTER STATION(S)
THEN PRESS START 00%
SET
TEL. NO.
5551234
BASIC
OPERATIONS
4
(see Note 1)
NOTE
1. To cancel the memory transmission reservation, see page xx.
START
Your machine will store the document(s) into memory.
* STORE * NO.005
PAGES=001 01%
* STORE * COMPLETED
TOTAL PAGES= 005 2 5%
55
Page 56

BASIC OPERATIONS
Sending Documents
Redialing
12
3
45
abc..
+-
78
0
6
9
FAX
Automatic Redialing
If a busy line is detected, the mac hine will redial the number up
to 5 times at 3 minutes inter val. However, if a busy line is not
detected, the machine will redial only one time. During that time,
a message will appear as shown to the right.
A file number is shown in the upper right hand corner of the
display if it is a memory transmission file.
WAIT TO DIAL NO .001
(Telephone number)
Manual Redialing
You can also redial the last dialed number manually by pressing key.
To redial the last dialed number through memory
Make sure that the FAX lamp is ON. If not, press to select the "FAX MODE".
FAX
1
Set document(s) face up.
PAUSE/
2
REDIAL
PAUSE/REDIAL
ENTER STATION(S)
THEN PRESS START 00%
TEL. NO.
5551234
PAUSE/
REDIAL
56
3
(see Note 1)
NOTE
1. While the unit is displaying "WAIT TO DIAL", you can press
START
The document is stored into memory with a file number.
Then dials the last dialed number.
PAUSE/REDIAL
* STORE * NO.002
PAGES=001 01%
* DIALING * NO.002
5551234
to start redialing immediately.
Page 57

Receiving Documents
Reception
BASIC OPERATIONS
Your machine is provided with both automatic and manual
reception modes. The selection of either reception mode is
made with Fax Parameter No. 17 (RECEIVE MODE).
abc..
+-
FAX
12
45
78
0
3
6
9
Automatic Reception
Yo ur machine will receive documents automatically if the Fax Parameter No. 17 (RECEIVE MODE) is set to
“Auto”. (See page 35)
Manual Reception
You may wish to receive documents manually if you use the telephone line in your office primarily as a
personal telephone and occasionally for your facsimile machine.
To receive documents manually, change the Fax Parameter No. 17 (RECEIVE MODE) to “Manual” (See page
35) and the following message will be shown on the display.
To receive documents manually
Make sure that the FAX lamp is ON. If not, press to select the "FAX MODE".
When the telephone rings, lift the handset. (See Note 1)
1
If you hear a beep, the sound tells you that someone
wants to send a document.
Remove any documents from the ADF.
FAX
SEP-12-2000 15:00
RCV MODE=TEL 00%
* PHONE OFF HOOK *
2
BASIC
OPERATIONS
3
4
(see Note 1)
NOTE
1. Your machine requires an optional fax handset or an external telephone connected to the TEL jack on the left
START
Your machine starts receiving the document.
Hang up the telephone.
side of the machine.
ON LINE * RCV *
57
Page 58

BASIC OPERATIONS
Receiving Documents
Print Reduction
This machine ca n use Letter, Legal or A4 size plain paper for recording. So metimes, oversized documents
sent to you by the other parties cannot be printed within a single page. When this occurs, the document will be
divided into separate pages.
This machine is e quipped with a Print Reduction fun ction to solve this problem. You may select the most
appropriate setting from the selections described below.
1.Automatic Reduction
Each page of a received document is first stored in memory. Based on the document length, your machine will
automatically cal culate the suitable reduction ratio (70% to 100%) to print th e entire document on a single
page. If the received documen t is extremely long (over 39% longer tha n the recordi ng paper), the d ocument
will be divided into separate pages and print without reduction.
2. Fixed Reduction
You can pre-deter mine the reduc tion ratio from 7 0% to 100% in 1% step s. The documen t(s) you receive will
be reduced to the fixed ratio regardless of size.
Selecting the Print Reduction Mode
Set Fax Parameters as shown below. (See page 35)
1. To set Automatic Reduction mode.
(1) No. 24 Print Reduction set to “Auto”.
2. To set Fixed Reduction mode.
(1) No. 24 Print Reduction set to “Fixed”.
(2) No. 25 Reduction Ratio set to any number between 70% through 100%. (See Note 1)
Ex: A4 to A4 - 96%
A4 to Letter - 90%
Letter to Letter - 96%
Legal to Letter - 75%
(see Note 1)
58
NOTE
1. If the sending side i s set to pri nt the heade r on t he outsi de of the co py ar ea, mo re reduct ion rat io w ill b e requi red.
Page 59

BASIC OPERATIONS
Receiving Documents
Receiving Oversize Documents
If the received documen t is extremely long (over 39% longer than the recor ding paper), the document w ill be
divided into separate pages. When printing on sepa rate pa ges, the b otto m 0.4 in ( 10 mm) of fir st page wil l be
overlapped on top of the next page.
(see Note 1)
Transmitted Document Received Document
Overlap print.
0.4 in (10 mm)
BASIC
OPERATIONS
The receiving document is divided
into two sheets with overlap printing.
NOTE
1. If the reduction method is set to the Automatic Reduction mode, the document is printed out with no reduction
when printing out separate pages. If the reduction method is set to Fixed Reduction mode, the document is
printed out by the ratio you set in Fax Parameter No. 25.
59
Page 60

BASIC OPERATIONS
Receiving Documents
Substitute Memory Reception (see Note 1) (see Note 2)
If the recording paper r uns out or jams or if the toner run s out during reception, the mac hine automatically
starts receiving documents into its image data memo ry. Stored documents are printed automatically after
replacing the recording paper or the toner cartridge. (See Note 1 and 2)
1
2
When the machine finishes the memory reception and
there is no recording p aper or toner, an Information Code
appears on the display.
Install the recordin g paper (See page xx) or replace th e
toner cartridge (See page xx).
The machine will automatically start printing the
document stored in the memory.
ADD PAPER
TRAY-1:LTR
ADD TONER
* PRINTING *
MEMORY RCV’D DO C
60
NOTE
1. If the memory overflows, the machine will stop receiving and release the communication line.
The document(s) stored in the memory up to that moment will be printed out.
2. If you wish to turn off the substitute reception function, change the setting of Fax Parameter No. 22 to "Invalid".
(See page 35)
Page 61

ADVANCED FEATURES
Polling
Setting the Polling Password
Polling means calling other station(s) to retrieve a document.
The other station must k now in advance that you will call and
must have a document set on the ADF or stored in the memory.
You may need to set a polling password, shared by the othe r
station, to ensu re security.
If the polling password does not match with the polled station, your polling request will be refused
automatically.
(see Note 1) (see Note 2)
To set the polling password, follow the steps below.
Make sure that the FAX lamp is ON. If not, press to select the "FAX MODE".
FUNCTION
1
2
4
7
SET
FAX
FAX
SET MODE (1-6)
ENTER NO. OR
FAX PARAMETER(02-99)
NO.=
abc..
+-
FUNCTION
SET
∨ ∧
❚
12
45
78
0
3
6
9
42
76
ADVANCED
FEATURES
3
4
SET
2 6
Enter a 4-digit polling password.
Ex:
1 2 3 4
RESET
SET
26 POLLING PASSWORD
26 POLLING PASSWORD
1234
❚❚❚❚
5
NOTE
1. Polling might not function with all fax machines. We suggest you attempt a trial polling before you actually poll
important documents.
2. If a password is not set in the polled station, you may poll the other station even though your machine has a
password.
61
Page 62

ADVANCED FEATURES
Polling
To Poll Documents from Another Station
The following procedure lets you poll a document from on e or
multiple stations. Be sure to set the polling password before
polling. (See page 61)
FAX
Make sure that the FAX lamp is ON. If not, press to select the "FAX MODE".
FUNCTION
1
SET
3
FAX
2
Enter a 4-digit polling password. (See Note 2)
3
Ex:
1 1 1 1
12
abc..
+-
FUNCTION
SET
POLLING ?
PRESS SET TO SELECT
POLLING
PASSWORD=1234
POLLING
PASSWORD=1111
45
78
0
3
3
6
9
4
SET
ENTER STATION(S)
THEN PRESS ST AR T
62
Page 63

Polling
5
Dial by any combination of the following methods (Up to
10 stations in total):
• Manual Number Dialing, press after each
station is entered
• Phone Book Dialing, press after each station
is entered
(For details, see page 44 to 47.)
Ex:
5 5 5 1 2 3 4
SET
SET
ADVANCED FEATURES
TEL. NO.
5551234
START
6
(see Note 1) (see Note 2)
* STORE * NO.0 01
ADVANCED
FEATURES
NOTE
1. If you have set the polling password in Fax Parameter No. 26, the password will appear on the display.
You can still change the password temporarily by overwriting it with a new one.
2. You can review the entered stations in step 5 by pressing or key, press to erase the
displayed station or group as needed.
CLEAR/STOP
CLEAR
63
Page 64

ADVANCED FEATURES
Turnaround Polling
This procedure lets you do two operations with one call
automatically. First, your machine will send the documen t(s) to
the station, and then it will poll the same station.
FAX
Make sure that the FAX lamp is ON. If not, press to select the "FAX MODE".
FUNCTION
1
SET
2
FAX
2
Enter a 4-digit polling password.
3
Ex:
1 1 1 1
12
abc..
+-
FUNCTION
SET
2:TURNAROUND POLLING
PRESS SET TO SELECT
TURNAROUND POLLING
PASSOWRD=1234
TURNAROUND POLLING
PASSOWRD=1111
45
78
0
2
3
6
9
4
5
6
SET
Dial by any combination of the following methods (Up to
10 stations in total):
• Manual Number Dialing, press after each
station is entered
• Phone Book Dialing, press after each station
is entered
(For details, see page 44 to 47.)
Ex:
5 5 5 1 2 3 4
START
The machine starts to dial the telephone number.
SET
SET
ENTER STATION(S)
THEN PRESS ST AR T
TEL. NO.
5551234
* STORE * NO.0 01
5551234
❚
64
Page 65

Edit File Mode
Deleting a File
ADVANCED FEATURES
To delete the reserved files in memory, follow the steps below.
(see Note 1) (see Note 2)
FUNCTION
1
SET
9
2
Enter the file number or use or to select the file that
3
you want to delete.
Ex: (See Note 2)
10 0 1
12
3
45
abc..
+-
FAX
9:DELETE FILE ?
PRESS SET TO SELECT
ENTER FILE NO.OR ∨
FILE NO.=
ENTER FILE NO.OR ∨
FILE NO.=001
FUNCTION
SET
❚❚❚
78
0
1 9
6
9
∧
ADVANCED
FEATURES
∧
4
5
SET
1
Enter the next file number you want to delete or press
CLEAR/STOP
to return to standby.
DELETE FILE NO.001?
1:YES 2:NO
* DELETING *
FILE NO.=001
ENTER FILE NO.OR ∨
FILE NO.=
NOTE
1. Your machine cannot delete the file while it is being sent.
2. Enter as the file number and press to delete all files (except the file in progress).
The following message is shown on the display.
DELETE ALL FILE S?
1:YES 2:NO
Press to delete all files.
1
SET
∧
❚❚❚
65
Page 66

ADVANCED FEATURES
Receive To Memory
Setting RCV To Memory Passw ord/Setting RCV to Memory
This feature is used to secure all received documents by storing
them into the memory. To print out the document from memory,
the authorized operator must enter the correct password.
FAX
Setting the RCV To Memory Password
Make sure that the FAX lamp is ON. If not, press to select the "FAX MODE".
FUNCTION
1
2
4
7
SET
FAX
12
∨ ∧
❚
45
78
0
3 4
7
abc..
+-
FUNCTION
SET
SET MODE (1-6)
ENTER NO. OR
FAX PARAMETER(02-99)
NO.=
3
6
9
3
4
5
SET
3 7
Enter a 4-digit RCV to Memory Password.
Ex:
1 2 3 4
RESET
SET
37 RCV TO MEMORY
37 RCV TO MEMORY
1234
❚❚❚❚
66
Page 67

Receive To Memory
Setting RCV To Memory
ADVANCED FEATURES
FUNCTION
1
2
3
2
2
SET
4
(see Note 1) (see Note 2)
1:COMM. JOURNAL ?
8
2:RCV TO MEMORY ?
RCV TO MEMORY=O FF
1:OFF 2:ON 3:PR INT
RCV TO MEMORY=O N
1:OFF 2:ON 3:PR INT
SEP-12-2000 15:00
< RCV TO MEMORY >
ADVANCED
FEATURES
NOTE
1. When the memory overflows, the machine will stop receiving and release the line. The machine will not answer
the next incoming call until there is space available in the memory.
2. We recommend th at o pti ona l f las h m em ory c ard is in sta lle d w h en this fu nc tio n i s u se d. See pag e 100 on Image
Memory Capacity.
67
Page 68

ADVANCED FEATURES
Receive To Memory
Printing Out Documents
12
3
45
abc..
+-
78
0
6
9
FAX
After receiving a document with the Receive To Memory feature, the
following message will appear on the display.
To print the document, follow the steps below. (see Note 1) (see Note 2)
Make sure that the FAX lamp is ON. If not, press to select the "FAX MODE".
FUNCTION
1
2
2
8
FAX
FUNCTION
SET
MESSAGE IN MEMORY
< RCV TO MEMORY >
1:COMM. JOURNAL ?
2:RCV TO MEMORY ?
RCV TO MEMORY=O N
1:OFF 2:ON 3:PR INT
2
3 8
3
4
SET
3
RCV TO MEMORY=P RIN T
1:OFF 2:ON 3:PR INT
INPUT PASSWORD
❚❚❚❚
68
Page 69

Receive To Memory
ADVANCED FEATURES
5
6
Enter the password to print the documents.
(See Note 1)
Ex:
1 2 3 4
SET
Machine will start to print the documents.
INPUT PASSWORD
1234
* PRINTING *
MEMORY RCV’D DO C
NOTE
1. If the password has not been set, your machine will not prompt you to enter the password.
The documents will be printed immediately after pressing in step 4.
2. Once the RCV TO MEMORY feature is set to "On", the password cannot be changed (Fax Parameter No. 37
will not be shown on the LCD display). If you wish to change the password, set RCV TO MEMORY feature to
“Off” first. Then change the password. (See page 66)
SET
ADVANCED
FEATURES
69
Page 70

ADVANCED FEATURES
This page is intentionally left blank.
70
Page 71

NETWORK FEATURE
Distinctive Ring Detector (DRD)
Your machine has a special feature in conjunction with an optional ser vice provided by many local telephone
companies. It can distinguish up to 4 telephone numbers with a corresponding ring pattern identifying each
number. "DRD" lets you provide multiple phone numbers, one for your f ax, b usiness or personal use with only one
single phone line.
Please check with your local telephone company on the availability of this service in your area.
Your machine can be programmed to respond to only 1 of the 4 distinctive ring patterns. To select the
corresponding ring pattern for your fax number, refer to the Fax Parameter Table on page 36.
The following table shows a typical example with 4 telephone numbers on a single phone line.
Telephone No. Usage Distinctive Ring Sound Ring Pattern
555-1111 Business Riiing...............................Riiing................................ Type A, Standard Ring
555-2222 Fax Ring...Ring.......................Ring...Ring........................ Type B, Double Ring
555-3333 Personal Ring...Ring...Riiing............Ring...Ring...Riiing.............
555-4444 Teenager Ring...Riiing...Ring............Ring...Riiing...Ring.............
(see Note 1)
The following illustration shows a typical set up, with your machine set to detect Type B (double ring) ring pattern.
Type C,Triple Ring
(Short-Short-Long)
Type D,Triple Ring
(All other than type C)
At Your Location with
Distinctive Ring Service
Ring..Ring.............Ring..Ring
A person recognizes the call
is for the fax machine by the
double ring pattern sound.
Ring..Ring.............Ring..Ring
The fax machine distinguishes
the call is for the fax by the
double ring pattern and answers
automatically.
Dialing "555-2222"
Fax No. "555-2222"
NETWORK
FEATURE
Ring..Ring.............Ring..Ring
A person recognizes the call
is for the fax machine by the
double ring pattern sound.
NOTE
1."Riiing" means a long ringing sound and "Ring" means a short ringing sound
71
Page 72

NETWORK FEATURE
PIN Code Access
If your PBX requires a PIN (Personal Identification Number)
code to get an outside line, your machine can be set to promp t
the user to enter a PIN code before any dialing.
FAX
Selecting the Access Method (Prefix or Suffix)
Make sure that the FAX lamp is ON. If not, press to select the "FAX MODE".
FUNCTION
1
2
74
7
SET
FAX
12
3
45
abc..
+-
FUNCTION
SET
SET MODE (1-6)
ENTER NO. OR
FAX PARAMETER(02-99)
❚
NO.=
78
∨ ∧
6
9
0
3 42
97
RESET
3
4
5
3 9
2
or
3
SET
for suffix code.
for prefix code.
RESET
SET
39 PIN CODE ACCESS
1:NONE
39 PIN CODE ACCESS
2:SUFFIX
39 PIN CODE ACCESS
3:PREFIX
72
Page 73

PIN Code Access
NETWORK FEATURE
12
3
6
abc..
+-
45
78
0
9
FAX
Dialing with a PIN Code (see Note 1) (see Note 2)
Make sure that the FAX lamp is ON. If not, press to select the "FAX MODE".
1
a
Set document(s) face up.
1
b
Place a book or document face down on the
Platen Glass.
Dial by any combination of the following methods (Up to
2
10 stations in total):
• Manual Number Dialing, press after each
station is entered
• Phone Book Dialing, press after each station is
entered
(For details, see page 44 to 47.)
SET
FAX
SET
(See
(see Note 3)
SET
ENTER STATION(S)
THEN PRESS START 00%
SEP-12-2000 15:00
00%
3
4
Ex:
5 5 5 1 2 3
SET
5 5 5 3
If you want to confirm the number of stations you have
entered, press or .
START
Enter the PIN code.
4
4
5 6
TEL. NO.
5551234
TEL. NO.
5553456
2 STN(S) ARE SET
ADD MORE OR START
ENTER PIN CODE
❚
73
NETWORK
FEATURE
Page 74

NETWORK FEATURE
PIN Code Access
START
5
ADF scanning
All document(s) are stored into memory with a file number.
6
Flatbed scanning
6
Then starts dialing the telephone numbers in sequence.
a
When a document is pla ced on the Pl aten Glass, the dis play
is as shown to the right.
b
(1)P ress or to set the document size on the Platen
Glass and press to store the document.
START
* STORE * NO.001
PAGES=001 01%
* STORE * COMPLETED
TOTAL PAGE=0 05 25%
* DIALING * NO.001
(Station name )
ORIGINAL=LETTER
PRESS START
* STORE * NO.002
PAGES=001 05%
SCAN ANOTHER PAGE?
1:YES 2:NO
74
(2)To store another page into memory, press to select
"YES".
If you do not wish to store an additional doc ument, press
to select "NO". (See Note 3)
2
If "YES" is selected, set the document size and press
START
If "NO" is selected, the machine starts to dial the
telephone number.
NOTE
1. The PIN code is shown as " " on the displa y when dialin g the number.
2. This feature is not available when dialing a number by using Off-Hook or On-Hook Direct Dialing mode.
3. If no action is taken within 60 seconds, the machine will start the dialing.
.
1
* DIALING * NO.002
5 5 5 1 2 3 4
Page 75

NETWORK FEATURE
Sub-Addressing
General Description
The Sub-Addressing func tion allows you to further routi ng or for warding or relaying of document(s) to desired
recipient(s) when use d in com bination with the Networ king version of L aserFax software. This function conforms
to the ITU-T recommendation for T. Routing-Facsimile Routing utilizing the Sub-Address.
Example of a Network
Document with SUB
e.g.
Dial: 2013331234
SUB=004
aaa
Extension Network
PBX
Tel No. Ext. No.
- 1000
- 1001
201-333-1234 1002
aaa
RJ11C
PSTN
Network
bbb
Document with SUB
e.g.
Dial: 2013331234
SUB=003
Automatic Routing Table of LaserFax
SUB Destination
001 John
002 Dave
003 Bob
004 1000
005 1001
006 9-2126667777
LaserFax G3 fax G3 fax
LAN Network
Bob Dave John
bbb
Compatibility with Other Machines
• Sub-Addressing Transmission: DX-1000/DX-2000 or DF-1100/UF-332/333/342/344/550/560/585/595/770/
788/880/885/895 (see Note 2)
• Sub-Addressing Reception: DX-1000,DF-1100/UF-342/344/550/560/585/595/770/788/880 with PC
Interface using the Networking version of LaserFax software.
Sub-Addressing Transmission Methods
You can send a document with Sub-address information to the desired recipient by the following methods.
• By registering the Sub-address information into Directory Search Dialing.
• By specifying the Sub-address information in the Manual Number Dialing Mode.
Setting of Routing, Forwarding or Relaying
You can customize the Automatic Routing to any combination of LAN (Local Area Network), PSTN (Public
Switched Tel ephone Network) or PBX Ex tension with LaserFax Routing Table (please refer to the LaserFax
User Manual).
(see Note 1) (see Note 2)
NETWORK
FEATURE
NOTE
1. LaserFax is a registered trademark of Wordcraft International Ltd.
2. UF-788 with PC Interface Option or the Option ROM installed.
75
Page 76

NETWORK FEATURE
Sub-Addressing
To set the Sub-Address into a Phone Book Dialing Numbers
Make sure that the FAX lamp is ON. If not, press to select the "FAX MODE".
SET
1
2
FUNCTION
7 2
1
SET
3
Enter the station name.
FAX
DIR. STN. DI AL (1- 3)
ENTER NO. OR
1:ADD STATION
PRESS SET TO SELECT
REGISTERED ENTRIES
STN(S):0 GROU P:0
ENTER NAME
❚
4
SET
5
ENTER TEL. NO.
❚
∨ ∧
↓1.5 sec. later
6
(see Note 1)
Enter the telephone number, press then enter
the Sub-Address. (Up to 20 digits)
(Up to 36 digits including telephone number, pauses,
spaces, FLASH and Sub-Address)
Ex:Telephone number = 5551234, Sub-Address =2762
Enter as:
FLASH
START
5 5 5 1 2 3 4
2 7 6 2
RESET
FLASH
ENTER TEL. NO.
5551234s2762
❚
76
NOTE
1. separates the Sub-Address from the Telephone number and is indicated by an "s" in the display.
FLASH
Page 77

Sub-Addressing
To send a Document with Sub-Address
Using Phone Book Dialing
The operation is the same as for normal dialing
NETWORK FEATURE
Make sure that the FAX lamp is ON. If not, press to select the "FAX MODE".
1
Set document(s) face up.
Phone Book Dialing (See page 46)
2
START
3
The document is s tored into memory and your machi ne
starts to dial the number of the station and sends the
document(s) with Sub-Addressing information.
FAX
ENTER STATION(S)
THEN PRESS START 00%
PANASONIC
5551234s2762
* STORE * NO. 001
PAGES=001 01%
77
NETWORK
FEATURE
Page 78

NETWORK FEATURE
Sub-Addressing
Using Manual Number Dialing
Use to separate the Telephone number and the Sub-Address
FLASH
Make sure that the FAX lamp is ON. If not, press to select the "FAX MODE".
1
Set document(s) face up.
Enter the telephone number, press then enter
2
the Sub-Address (up to 20 digits).
(Up to 36 digits including telephone number, pauses,
spaces, FLASH and Sub-address)
Ex: Telephone number = 5551234, Sub-Address=2762
Enter as:
FLASH
START
5 5 5 1 2 3 4
2 7 6 2
3
FAX
FLASH
ENTER STATION(S)
THEN PRESS START 00%
TEL. NO.
5551234s2762
* STORE * NO. 001
PAGES=001 01%
❚
The document is s tored into memory and your machin e
starts to dial the number of the station and sends the
document(s) with Sub-Addressing information.
(see Note 1) (see Note 2) (see Note 3)
NOTE
1. separates the Sub-Address from the Telephone number and is indicated by an "s" in the display.
FLASH
2. Manual Off-Hook or On-Hook Dialing cannot be used with the Sub-Addressing Transmission.
3. The Sub-Address is not transmitted during Manual Redial Mode.
78
Page 79

PRINTOUT JOURNALS AND LISTS
Printout Journ als and Lists
To help you maintain records of the documents you sent and
received, as well as lists of the numbers you record, your
facsimile machine is equipped to print the following journals and
lists: Transaction Journal, Communication Journal, Directory
Dial List and Fax Parameter List.
abc..
+-
FAX
FUNCTION
SET
12
45
78
0
1
2 6
3
6
9
Transaction Journal
The "Journal" is a record of the last 40 transactions (a transaction is recorded each time you send or receive a
document). It is printed out automatically after ever y 40 transactions (See Note 1) or you can print or view it
manually by using the following procedure:
Make sure that the FAX lamp is ON. If not, press to select the "FAX MODE".
FUNCTION
1
6
FAX
PRINT OUT (1-4)
ENTER NO. OR
∨ ∧
2
3
3
a
b
SET
1
1
for printing a Journal
2
for viewing a Journal
JOURNAL
1:PRINT 2:VIEW
* PRINTING *
JOURNAL
JOURNAL VIEW
1:XMT ONLY 2:AL L
PRINTOUT
JOURNALS AND
LISTS
79
Page 80

PRINTOUT JOURNALS AND LISTS
Printout Journals and Lists
Select the viewing mode.
4
to view transmission transactions only
1
to view all transactions
2
Ex:
2
You can view the transactions in the journal by pressing
or . Press to return to standby.
STOP
USE THE ∨ ∧ KEYS TO
SCROLL EACH REC ORD
(see Note 1)
Date & Time
01/12 10:00 OK P01
XMT
☎
Type of Communication
XMT : Transmission
RCV : Reception
POL : Polling
5551234
Received ID,
Recorded name or
the dialed
telephone number
Communication Result
OK : Communication was successful.
P-OK : Reserved transmission was successful
under memory full condition.
BUSY : Line busy
STOP : STOP was pressed.
3-digit Info Code : Communication has failed
(Refer to page 89 for details.)
Number of pages successfully transmitted or received.
Scroll Marker
: Latest transaction
: Oldest transaction
: Only 1 transaction
80
NOTE
1. If you wish to disable the automa tic print out of the Transac tion Journa l, change th e setting of Fax Parameter No.
13 to "Invalid". (See page 35)
Page 81

PRINTOUT JOURNALS AND LISTS
Printout Journals and Lists
Sample Transaction Journal
(1) (2)
***************** -JOURNAL- ************************* DATE SEP-12-2000 ***** TIME 15:00 *********
(3) (4) (5) (6) (7) (8) (9) (10) (11) (12)
NO. COMM. PAGES FILE DURATION X/R IDENTIFICATION DATE TIME DIAGNOSTIC
01 OK 005/005 00:00:22 RPOL SERVICE DEPT. SEP-11 17:35 C0044903C0000
004/004
001
02 OK 003 003 00:01:17 RCV 111 222 333 SEP-11 17:41 C0044903C0000
03 OK 001 004 00:00:31 XMT ACCOUNTING DEPT. SEP-11 17:50 C0044903C0000
04 630 000/005 005 00:00:00 XMT
05 STOP 000 006 00:00:34 XMT
06 OK 001/001 007 00:00:20 XMT
07 408 *003 008 00:02:14 XMT
48 OK 002/002 049 00:00:31 XMT
49 OK 003/003 050 00:01:32 XMT
☎
342345676 SEP-11 17:57 0800420000000
☎
12324567 SEP-11 18:35 0210260200000
☎
44567345 SEP-11 18:44 C8044B03C0000
☎
2345678 SEP-11 18:55 0040440A30080
☎
0245674533 SEP-12 08:35 C8044B03C1000
☎
0353678980 SEP-12 08:57 C8044B03C1000
(13)
-PANASONIC -
************************************ -HEAD OFFICE - ***** - 201 555 1212- *********
(15) (14)
PRINTOUT
JOURNALS AND
LISTS
81
Page 82

PRINTOUT JOURNALS AND LISTS
Printout Journals and Lists
Explanation of contents
(1) Printout date
(2) Printout time
(3) Journal number
(4) Communication result : "OK" indicates that the co mmunication was successful.
"BUSY" indicates that the communication has failed because of busy line.
"STOP" indicates that STOP was pressed during communication.
"M-OK" indicates that the substitute reception message in memory was not
printed out.
"P-OK" indicates that memory overflow or document misfeeding occurred while
storing the documents into memory for transmission but successfully stored
document(s) was sent.
"3-digit Info Code" (See page 89) indicates that the communication has failed.
(5) Number of pages transmitted or
received
(6) File number : 001 to 999 (If the communication is stored into memory, a file number is
(7) Duration of communication
(8) Type of communication : "XMT" means Transmission
(9) Remote station identification : Name : Recorded name in One-Touch or ABBR. Numbers or remote station's
(10)Communication date
(11)Communication Start time
(12)Diagnostic : For service personnel only
(13)Own LOGO : Up to 25 characters
(14)Own ID number : Up to 20 digits
(15)Own Character ID : Up to 16 characters
(16)Type of communication : Transmission or memory transmission
(17)Destination : Telephone number
(18)Received remote station's ID : Character ID or ID number
(19)Resolution: : "STD" means standard resolution
: The 3-digit number is the number of pages successfully transmitted or received.
When the documents are stored into memory, two 3-digit numbers will appear.
The first 3-digit number represents the number of pages successfully
transmitted. The second 3-digit number represents the total number of pages
that were attempted to be transmitted.
Asterisk "*" indicates that the quality of some received copies was poor.
assigned for each communication. )
"RCV" means Reception
"POL" means Polling
"RPOL" means Turnaround Polling
Character ID.
number : Dialed telephone number (PIN code will not be shown)
☎
Number : Remote station's ID number.
"FINE" means fine resolution
"S-FINE" means super fine resolution
82
Page 83

PRINTOUT JOURNALS AND LISTS
Printout Journals and Lists
Communication Journal (COMM. JOURNAL)
The Communication Journal (COMM. JOURNAL) lets you verify whether the transmission or polling was
successful. You may select the printout c ondi tion (Off /Always/ Inc. only) i n Fun cti on 8 -1 o r Fax Parameter No. 12.
Sample COMM. JOURNAL
************** - COMM. JOURNAL - ***************** DATE SEP-12-1999 **** TIME 15:00 *********
(1) (2) (3)
MODE = MEMORY TRANSMISSION START=SEP-12 14:50 END=SEP-12 15:00
FILE NO.= 050 (4)
(5) (6) (7) (8) (9) (10)
STN NO. COMM. ABBR NO. STATION NAME/TEL NO. PAGES DURATION
001 OK <01> SERVICE DEPT. 001/001 00:01:30
002 OK <02> SALES DEPT. 001/001 00:01:25
003 407 <03> ACCOUNTING DEPT. 000/001 00:01:45
004 BUSY
- PANASONIC -
☎
021 111 1234 000/001 00:00:00
************************************* - HEAD OFFICE - ****** - 201 555 1212 - *******
PRINTOUT
JOURNALS AND
LISTS
83
Page 84

PRINTOUT JOURNALS AND LISTS
Printout Journals and Lists
Explanation of contents
(1) Indication of communication
mode
(2) Start time of communication
(3) End time of communication
(4) File number : 001 to 999 (When the communication is stored into memory, a file number is
assigned for each communication. )
(5) Station number : Sequential number of the Stations.
(6) Communication result : "OK" indicates that the co mmunication was successful.
"BUSY" indicates that the communication has failed because of busy line.
"STOP" indicates that STOP was pressed during communication.
"M-OK" indicates that the substitute reception message in memory was not
printed out.
"P-OK" indicates that memory overflow or document misfeeding occurred while
storing the documents into memory for transmission but successfully stored
document(s) was sent.
"3-digit Info Code" (See page 89) indicates that the communication has failed.
In this case, the machin e will print out the at tac hed repo rt with first page of y our
document as shown on the previous page.
(7) Abbreviated number or
(8) Recorded name in direct dialing
number
(9) Number of pages transmitted or
received
(10)Duration of Communication
mark :☎ mark indicates dialed by direct number dial.
☎
: The 3-digit number is the numbe r of pa ges s uc ce ssf ul ly tr an sm itt ed or received.
When the doc uments ar e stored in to memor y, two 3-digit numbers will ap pear.
The first 3-digit number represents the number of pages successfully
transmitted. The second 3-digit number represents the total number of pages
that were attempted to be transmitted.
84
Page 85

Printout Journals and Lists
Directory Dial List
PRINTOUT JOURNALS AND LISTS
12
3
45
abc..
+-
78
0
6
9
FAX
To print a List of the phone book you have stored.
Make sure that the FAX lamp is ON. If not, press to select the "FAX MODE".
FUNCTION
1
6
FAX
PRINT OUT (1-4)
ENTER NO. OR
2:DIR. DIAL LIST ?
PRESS SET TO PRINT
2
2
FUNCTION
SET
2 6
∨ ∧
3
SET
* PRINTING *
DIRECTORY DIAL LIST
85
PRINTOUT
JOURNALS AND
LISTS
Page 86

PRINTOUT JOURNALS AND LISTS
Printout Journals and Lists
Sample Directory Dial List
************** - DIRECTORY DIAL LIST - ***************** DATE SEP-12-1999 **** TIME 15:00 ********
(1) (2)
STATION NAME TELEPHONE NO.
ACCOUNTING DEPT 313 333 3456
ENG. DEPT. 888 555 1234
SALES. DEPT. <G>
[1/2] 121 555 1234
[2/2] 222 666 2345
NO. OF STATIONS = 002 (3)
GROUP = 001 (4)
-PANASONIC -
************************************ -HEAD OFFICE - ***** - 201 555 1212 - *********
Explanation of contents
(1) Station name recorded in the machine : Up to 15 characters
(2) Telephone number recorded in the machine : Up to 36 digits
(3) Number of recorded Phone Books
(4) Number of recorded Group Dialing
86
Page 87

Journals and Lists
FAX Parameter List
PRINTOUT JOURNALS AND LISTS
12
3
45
abc..
+-
78
0
6
9
FAX
To print out a FAX Parameter List:
Make sure that the FAX lamp is ON. If not, press to select the "FAX MODE".
FUNCTION
1
6
FAX
2
4
FUNCTION
SET
PRINT OUT (1-4)
ENTER NO.
4:FAX PARAM. LIST?
PRESS SET TO PRINT
4 6
∨ ∧
3
SET
* PRINTING *
FAX PARAMETER LIST
87
PRINTOUT
JOURNALS AND
LISTS
Page 88

PRINTOUT JOURNALS AND LISTS
Journals and Lists
Sample FAX Parameter List
*************** -FAX PARAMETER LIST- ************** DATE SEP-12-1999 ***** TIME 15:00 ********
(1) (2) (3) (4) (5)
PARAMETER DESCRIPTION SELECTION CURRENT STANDARD
NUMBER SETTING SETTING
02 RESOLUTION (HOME) (1:Standard 2:Fine 3:S-Fine) 2 1
05 MEMORY (HOME) (1:Off 2:On) 2 2
99 MEMORY SIZE (FLASH) (1MB + 4MB) (6)
-PANASONIC -
************************************ -HEAD OFFICE - ***** - 201 555 1212- *********
Explanation of contents
(1) Parameter number
(2) Description : "(HOME)" means home position setting.
(3) Selection
(4) Current setting : "----" indicates code or password is not set. When the code or password is set, it is shown in
parenthesis.
(5) Standard setting : Factory preset standard setting
(6) Memor y sizes : (Base memory + option memory)
88
Page 89

MAINTENANCE
Troubleshooting
Information Codes
When something unusua l occ ur s, the displ ay may show one of the Information Codes li ste d bel ow. These will
help you to identify and correct the problem.
Info.
Code
400 During initial handshake, receiving station did not
respond or communication error occurred.
401 Remote station required a Receiving Password to
receive the document.
Remote station does not have Confidential Mailbox.
402 During initial handshake, communication error
occurred.
403 No polling capability at the remote side. Ask remote side to set "POLLED=ON". --
404/405 During initial handshake, communication error
occurred.
406 Transmission Password does no t match.
Receiving Password does not match.
Received from an unauthorized station in Selective
Reception mode.
407 No confirmation from the receiving station for the
previous pag e sen t.
408/409 Remote side confirmation of previous page is illegible. Wait a few minutes and send again. --
Meaning Action Page
1. Check with the other party.
2. Reload the document and send again.
Check the remote station. --
Reload the document and send again. --
Reload the document and send again. --
Check the password or the telephone number
in One-Touch or Abbreviated station.
Wait a few minutes and send again. --
XX
XX
XX
--
410 Communication aborted by the transmitting side. Check with the other party. -411 Polling password does not match. Check the polling password. 61
412 No data from the transmitting side. Check with the other party. -414 Polling password does not match. Check the polling password. 61
415 Polling transmission error. Check the polling password. 61
416/417
418/419
420/421 Machine goes to receiving mode, but receives no
422/427 Interface is incompatible. Check with the other party. -430/434 Communication error occurred while receiving. Check with the other party. -436/490 Received data has too many errors. Check with the other party. --
Received data has too many errors. Check with the other party. --
1. Remote side misdial.
command from the transmitting side.
2. Check with the other party.
--
MAINTENANCE
89
Page 90

MAINTENANCE
Troubleshooting
Info.
Code
456
• Unit received a confidential document or was
requested to be polled of a confidential
Meaning Action Page
1. Print a File List and check the contents.
2. Wait until unit finishes printing.
document under any of following conditions.
1)Not enough space in memory to receive the
confidential document.
2)Confidential Mailbox is full.
3)While printing received document.
• Unit was requested to relay a document.
492/493
501/502 Communication error occurred using the internal V.34
540/541
543/544
552/553
554/555
Communication error occurred while receiving. Check with the other party. --
494
495 Telephone line disconnected. Check with the other party. --
Check with the other party. --
Modem.
Communication error occurred while transmitting. 1. Reload the document and send again.
542
550 Telephone line disconnected. Check with the other party. --
Communication error occurred while receiving. Check with the other party. --
2. Check with the other party.
XX
--
580 Sub-address transmission to a unit that has no Sub-
Address function.
581 Sub-address Password transmission to a unit that has
no Password Sub-Address function.
601 ADF Door was opened during ADF transmission. Close the ADF Door and send again. XX
623 No document loaded on the ADF. Reload the document and send again. -630 Redial was not successful due to a busy line. Reload the document and send again. -631 During dialing, STOP was pressed. Reload the document and send again. --
634 Redial was not success ful due to no respon se from th e
called station or wrong number dialed.
Note: If busy tone was not detected, the machine will
only redial once.
638 Power failure occurred during the communication. Check the power cord and plug. XX
Check the remote statio n. 75
Check the remote statio n. 75
Check the telephone number and send again. --
90
Page 91

Troubleshooting
MAINTENANCE
Info.
Code
800 - 816
825
870 Memory overflow occurred while storing documents
(see Note 1)
Parameter setting for Confidential Network or Relay
communication is not properly set.
into memory for transmission.
Meaning Action Page
Verify your Confidential Network and Relay
communication parameter settings.
1. Transmit documents without storing into
memory.
2. Install Optional Memory Card.
XX
XX
50
101
NOTE
1. After identifying the proble m and verify ing the recom mended actio n, if the informa tion Codes ke ep reoccurring or
for help on Information Codes that appear on your machine but are not listed above, please contact your local
Panasonic Authorized Dealer.
MAINTENANCE
91
Page 92

MAINTENANCE
Troubleshooting
If You Have Any of These Problems
Mode Symptom Cause / Action page
During Standby
During Transmission
Transmission Copy
Quality
During Reception
The display is blinking The battery is not installed or the battery is completely
Document doesn't
feed/multiple feed
Document jam The information code 031 will appear on the display if the
Does not stamp 1. Check if Stamp LED is lit.
Stamp too light Replace stamp or refill ink. XX
Vertical lines on the
transmitted document
Transmitted document
is blank
No recording paper The information code 010 will appear on the display if the
Recording paper jam The information code 00 1, 002, 003, 0 07 or 008 will appear on
Recording paper
doesn't advance into
machine
Recording paper
doesn't eject after
printing
Recording papers are
not stacked in
sequence. Machine
does not print from the
last page received.
Document auto
reduction doesn't work
Out of toner The information code 041 will appear on the display if the
21
discharged. Install a New battery and reset the clock.
1. Check that your document is free of staples and paper
clips, and that it is not greasy or torn.
2. Check that your document is the right type to send through
a fax machine by consulting the list on "Documents You
Cannot Send". If your document has the characteristics
listed, make a photocopy of your document and send the
copy instead.
3. Check that the document is loaded properly.
4. Adjust the ADF Pressure.
document becomes jammed.
2. Check Fax parameter No. 04 and No. 28 settings.
Check own copy quality. If copy is OK, your machine has no
problem, report to the receiving party that they have a
problem. If copy is NG, clean the Document Scanning Area.
1. Make sure the document is set fa ce down.
2. Check own copy quality. If copy is OK, your machine has
no problem, report to the receiving party that they have a
problem. If copy is NG, clean the Document Scanning
Area.
paper runs out.
the display if the paper gets jammed.
Make sure that there is paper in the Paper Cassette. Follow
the instructions for loading paper.
Check to see if the recording paper is jammed inside of the
machine.
1. Check if Fax Parameter No. 65 is set to valid.
2. If memory becomes full during reception, the machine will
start to print from the 1st page received. We recommend
that optional flash memory card is installed if this symptom
occurs frequently.
Check Print Reduction settings. 58
Toner Cartridge runs out of toner.
39
39
XX
XX
XX
XX,
XX
XX
XX
XX
XX
XX
XX
XX
101
XX
92
Page 93

Troubleshooting
Mode Symptom Cause / Action page
Print Copy Quality
Communication
No Unit Operation
MAINTENANCE
Vertical lines printing
on the received
document
Fuzzy print 1. Make sure you are using the correct paper for the best
Missing dots or lines/
inconsistent darkness
within print
Fading print Your Toner Cartridge may be running out of toner. Replace
Faint print You may need to choose a d iff erent pape r f or the best possib le
Intermittent partial or
total black print.
No dial tone 1. Check the connection of the telephone line.
No auto answer 1. Check the connection of the telephone line.
Cannot transmit or
receive
No unit operation To reset the machine, turn-off the Power Switch for a few
Print out a Journal report (e.g. FUNCTION, 6, 1 , SET and 1)
and check quality to make sure whether your machine has
trouble.
If Journal report quality is OK, your machine has no problem,
report to the sending party that they have a problem.
If copy is NG, replace the Toner Cartridge.
possible print quality.
2. Try reversing the recording paper to the other side.
1. Make sure you are using the correct paper for the best
possible print quality.
2. Replace the Toner Cartridge.
the Toner Cartridge.
print quality.
Your Optional P age Memo ry setting value is set larger th an the
actual DRAM Memory Card installed. Make sure Fax
Parameter 60 is set to the DRAM Memory Card Size.
2. Check the telephone line.
2. Check the Reception mode setting.
3. If the Fax Parameter No. 13 (AUTO JOURNAL PRINT) is
set to "Valid" (default setting) and the machine is printing
the received document from memory, which also happens
to be the 100th transaction, the machine will not auto
answer until the Transaction Journal completes printing.
An information code will be s ho wn on the di splay. Refer to the
information code table to find out the trouble.
seconds then turn it on again.
79
XX
XX
XX
XX
XX
XX
XX
XX
XX
XX
89
XX
93
MAINTENANCE
Page 94

MAINTENANCE
Troubleshooting
Adding Paper
See Operating Instructions (For Copier) P.XX
Adding Toner
See Operating Instructions (For Copier) P.XX
Removing Paper Misfeed
See Operating Instructions (For Copier) P.XX
94
Page 95

MAINTENANCE
Troubleshooting
Cleaning the Document Scanning Area
Care of Copier
• Wipe marks off with cloth and neutral detergent.
• Wipe again with dry cloth.
Care of Scanning Area
If the receiving par ty repor ts that the received documents were black, or contained black lines, tr y making a
copy on your unit to verify.
If the copy is black or has black lines, the Document Scanning Area is probably dirty and must be cleaned.
If document misfeeding occurs frequently, clean the feeding roller.
• Wipe the area gently with soft cloth after wringing it dry.
1
2
Open the Paper Feed cover then
wipe the Paper Feed roller gently.
Paper Feed Roller
Close the Paper Feed cover
securely.
3
4
Open the ADF then wipe the Platen and
the Platen Cover gently.
Platen Cover
Platen
Close the ADF.
(see Note 1)
NOTE
1. Be careful not to scratch the scanning area.
MAINTENANCE
95
Page 96

MAINTENANCE
Troubleshooting
Cleaning the Printer Roller
If you find toner on the back of the recording p aper, the printer
roller in the fuser unit is probably dirty.
To clean the printer roller
SET
1
FUNCTION
7 6
2
1
The machine will print out 3 Cleaning Charts.
Then, return to standby.
<PRINTER ROLLER CLEANING CHART>
HOW TO LOAD THE CLEANING CHARTS
1.OPEN THE PAPER CASSETTE
(If multiple cassette configuration, OPEN THE UPPER PAPER CASSETTE)
2.SET THESE 3 CLEANING CHARTS IN THE CASSETTE FACE DOWN
3.CLOSE THE PAPER CASSETTE
4.PRESS [FUNCTION][7][6][SET][2] TO START CLEANING
5.DISPOSE OF THE CLEANING CHARTS
abc..
+-
FUNCTION
SET
CLEANING CHAR TS
1:PRINT 2:CLEAN
* PRINTING *
CLEANING CHAR TS
12
45
78
0
1 2
6 7
3
6
9
96
*** SET THIS END TOWARDS THE RIGHT, FACE DOWN ***
Page 97

Troubleshooting
Load the Cleaning Charts into the cassette face down.
3
(See Note 1)
MAINTENANCE
4
5
(see Note 1)
FUNCTION
7 6
2
The Machine will feed out the charts and clean the printer
roller.
SET
CLEANING CHAR TS
1:PRINT 2:CLEAN
* CLEANING *
PRINTER ROLLER
NOTE
1. If you have installed the optional cassette(s), load the Cleaning Charts into the upper cassette.
MAINTENANCE
97
Page 98

MAINTENANCE
Troubleshooting
Checking the Telephone Line
When you do not hear a dial tone throug h the telephone connected to the mac hine or when the telephone
does not ring (No automatic receive).
1
2
Unplug the Telephone Line Cable from the
telephone jack that was supplied by the
telephone company.
Plug a different regular telephone into the
same telephone jack.
98
3
Check for dial tone through the handset. If
there is still no di al tone, report it to your local
telephone company.
or
Call from another telephone to thi s number. If
the telephone does no t ring, report it to your
local telephone company.
Page 99

APPENDIX
Specifications
Compatibility ITU-T Group 3
Coding Scheme G3...MH, MR, MMR
(Conforms to ITU-T Recommendations)
Modem Type ITU-T V.34, V.17, V.29, V.27 ter and V.21
Modem Speed G3...2400/4800/7200/9600/12000/144000/16800/19200/
21600/24000/26400/28800/31200/33600 bps
Document Size Legal/Letter/Invoice
Max: 11" x 17" Min: 5.5" x 8.5"(Invoice)
Document Thickness 0.0024" (12 lbs) - 0.0039" (16 lbs)
ADF Capacity
(Automatic Document
Feeder)
Scanni ng M ethod Sheet Feeding with CCD type image sensor
Effective Scanning Width 99 in (252 mm)
Scanner Resolution Horizontal: 203 pels/inch (8 pels/mm) : Standard and Fine
Recording Method Laser/Electrostatic photographic method
Recording Paper Plain Paper
Printer Resolution 600 dpi
Recording Paper size Legal/Letter/Invoice
Effective Recording Size Legal : 8.1" x 13.6" (205.7 x 345.4 mm)
Print Margin
Built-in, Up to 30 pages
Resolution
: 406 pels/inch (16 pels/mm) : Super Fine Resolution
Vertical : 98 lines/inch (3.85 lines/mm) : Standard Resolution
: 196 lines/inch (7.7 lines/mm) : Fine Resolution
: 391 lines/inch (15.4 lines/mm): Super Fine Resolution
Letter : 8.1" x 10.6" (205.7 x 269.2 mm)
Invoice: 5.1" x 8.1" (129.5 x 205.7 mm)
A
5 mm area from each side of paper
A
Specification are subject to change without notice.
(see Note 1)
A:0.20 inch (5mm)
A
A
99
APPENDIX
Page 100

APPENDIX
Specifications
Recording Paper Capacity 250 sheet paper drawer x 1 plus 50 sheet bypass
Directory Search
Dialing Memory Capacity
Image Memory Capacity 60 pages (1MB) ITU-T Image No.1 Chart using Standard Resolution
Power Supply AC 120V ± 10%, 60 Hz ± 5%, 12A
Power Consumption Energy-Saver Mode: Approx. 38 Wh
Dimensions 19.5" (W) x 19.2" (D) x 15.1" (H) (Without tray)
Weight 50 lbs
Operating Environment Temperature: 50 to 90 °F (10 to 30 °C)
FCC Registration Number BTL JPN-35338-FA-E
Ringer Equivalence U.S 2.0B CANADA 0.9
Specification are subject to change without notice.
100 stations (10 group dialings are included. Each group dialing can
register up to 10 stations.)
Each station can register up to 36 digits for each telephone number
(including pauses, spaces, Flash, sub-address and tone) and up to 15
characters for each station name
Auto-Off Mode : Approx. 1.5 Wh
Maximum : Approx. 1.0 kW
Relative Humidity: 20 ~ 90%
[If the Temperature is less than 60°F (20 °C), the Relative
Humidity: 30 ~ 90%]
100
NOTE
1. The left and right print marg in is 0 .22 in (5.5mm ) when pr inting a Lette r or Lega l siz e docu ment wi th 600 d pi from
a PC using the Parallel Port Interface Kit.
 Loading...