

Page 1

Operating pictures
Selecting pictures
1111
2222
Click on the folder containing the
1
1
1 1
picture in the [Folder Bar]
Files in the folder are displayed.
Select the picture by clicking on it
2
2
2 2
A blue frame appears around the
selected picture.
≥On double clicking, selected pictures are
displayed in full screen. (To close, click on
the screen)
Selecting multiple pictures
Select by holding down the [Ctrl] key and
clicking on each desired picture
Selecting a continuous range of
multiple pictures
After selecting the first picture, complete
the selection by holding down the [Shift]
key and clicking on the last picture
Selecting all displayed pictures
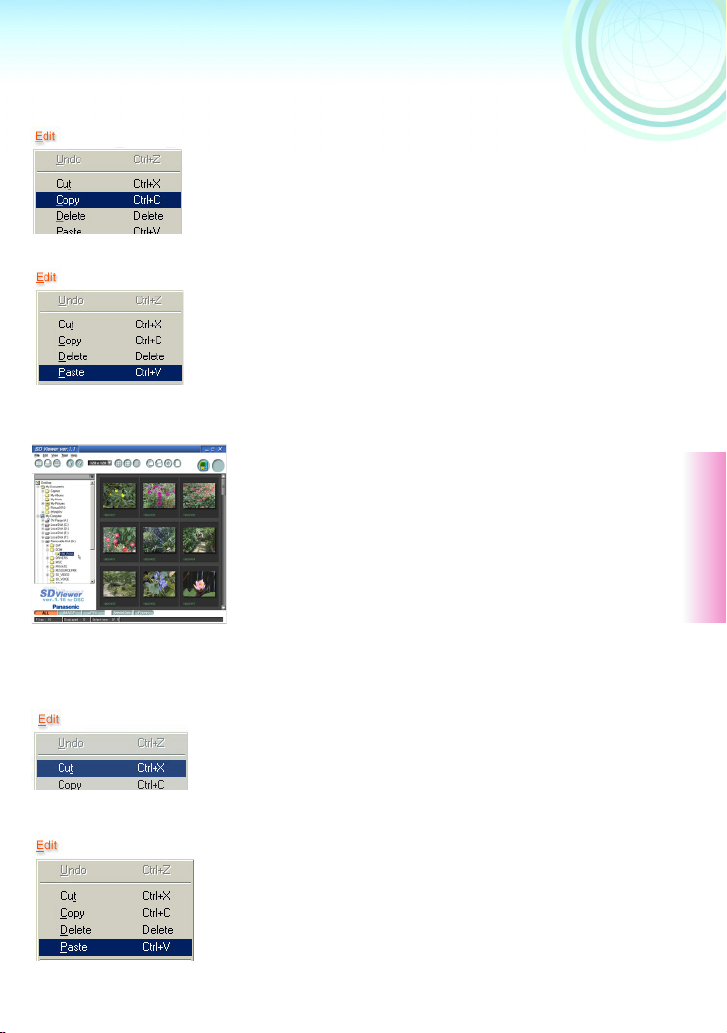
Click on [Edit] >>> [Select All]
Canceling the selection
Click on [Edit] >>> [Deselect All]
Swap selected pictures with pictures
which are not selected
Click on [Edit] >>> [Invert Selection]
18
Making the picture into Wallpaper
Right click on the picture which is to be
1
1
1 1
made into Wallpaper, and Click on [Set
As Wallpaper]
The picture will be displayed on the
desktop.
≥
If the wallpaper is not displayed on the desktop, to
display it click on the desktop and press key [F5].
Page 2
1111
2222
Copying pictures to another
folder
1
1
Select the picture to be copied, and
1 1
click on [Edit] >>> [Copy]
2
2
Select the target folder with the [Folder
2 2
Bar], click on the picture display
section, and click on [Edit] >>> [Paste]
¥It is also possible to drag and drop a picture copy
to the target folder with the [Ctrl] key held down.
Copying an image to the
Memory card
1
1
Select the picture to be copied, and
1 1
drag and drop into the [100_PANA]
folder
The picture is converted to JPEG format
that can be played back on the digital
camera, and copied.
≥The file name is automatically inserted.
Moving pictures to another
folder
1111
2222
1
1
Select the image to be shifted and click
1 1
on [Edit] >>> [Cut]
2
2
Select the target folder with the [Folder
2 2
Bar], click on the picture display
section, and click on [Edit] >>> [Paste]
Once an image is shifted, you cannot return it to its
original location with [Edit] >>> [Undo].
¥You can also move a picture by holding the [Shift]
key down, then dragging and dropping. (If
dragged and dropped to a different drive, the
picture will be copied.)
19
Page 3
Deleting an image
1111
2222
1111
2222
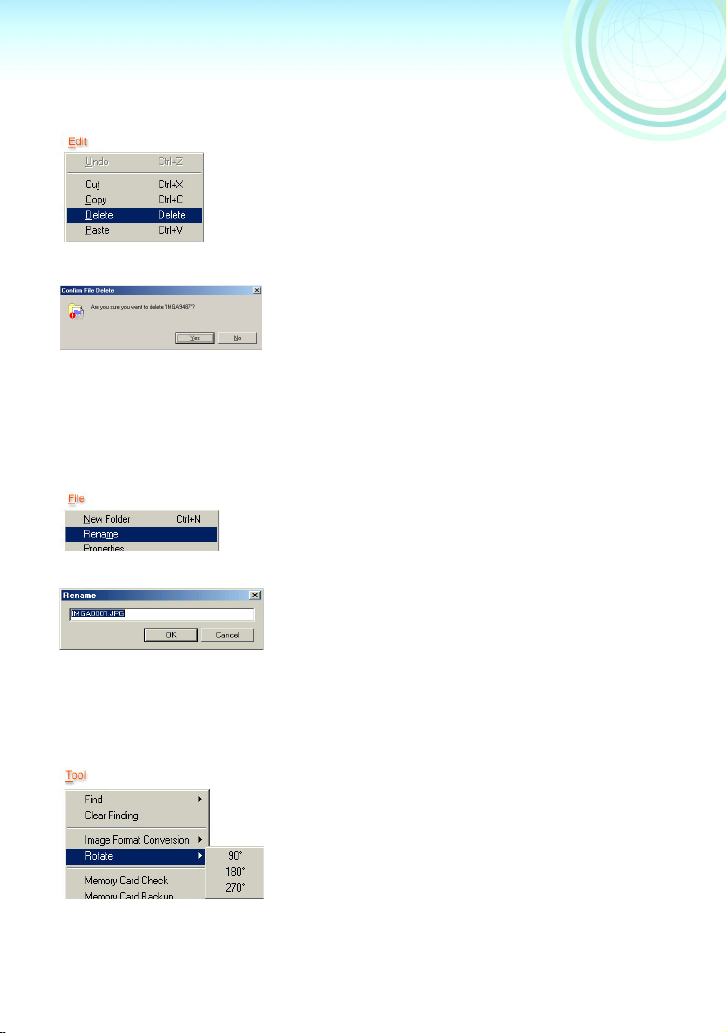
1
1
Select the picture to be deleted, and
1 1
click on [Edit] >>> [Delete]
A confirmation message of file deletion is
displayed.
2
2
Click on [Yes]
2 2
You cannot retrieve a deleted image using [Edit]
>>> [Undo].
¥It is also possible to delete by pressing the
[Delete] key.
Renaming an image
1
1
Select the picture whose name has to
1 1
be changed, and click on [File] >>>
[Rename]
2
2
Enter the name and click on [OK]
2 2
¥It is also possible to right click on the picture and
click on [Rename] from the Context menu. (P32)
¥A picture selected in the picture display section
can also be renamed by clicking on its name.
20
Rotating an image
1
1
Select the picture to be rotated, and
1 1
select the direction of rotation or angle
from [Tool] >>> [Rotate]
¥It is also possible to right click on the picture and
click on [Rotate] from the Context menu. (P32)
Page 4
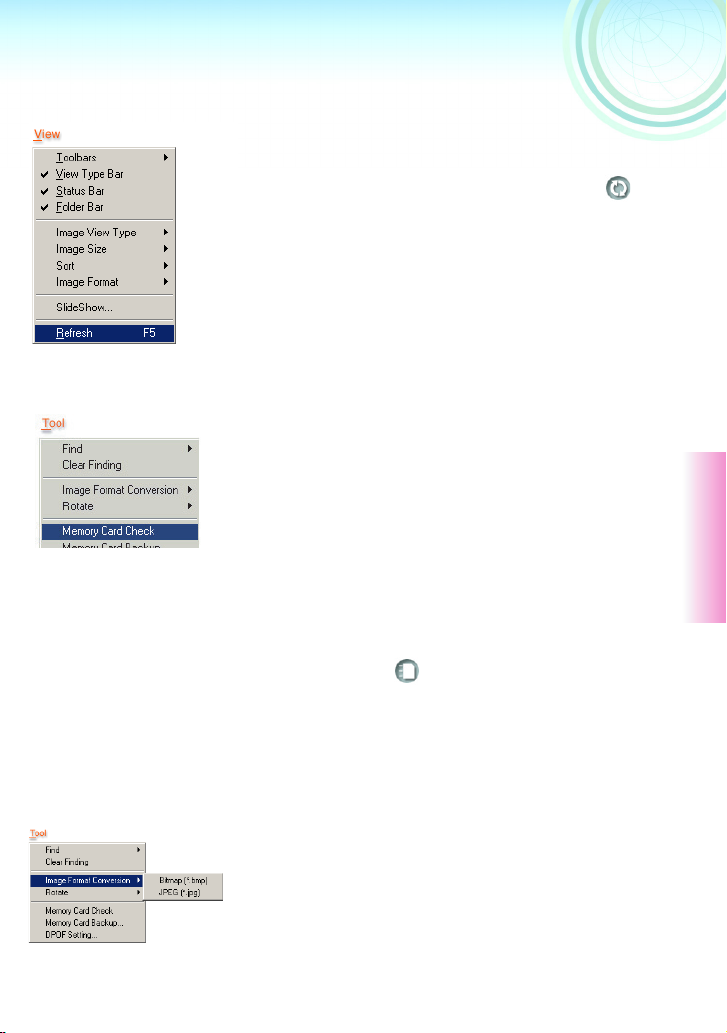
Updating the display contents in the Folder Bar
or the picture display section
1
1
Click on [View] >>> [Refresh]
1 1
¥It is also possible to update by clicking on [ ] on
the toolbar.
Please update the folder display after copying or
moving a picture.
Updating the display of Memory card contents (connection)
1
1
Confirm that the Memory card has been
1 1
properly inserted in the digital camera, and
click on [Tool] >>> [Memory Card Check]
Displays the Memory card contents are
updated. (If 2 or more Memory cards are
read, the next card’s contents are
displayed)
≥If the Memory card has not been inserted,
please load it.
≥For details about how to insert the Memory
card, please refer to the digital camera
operating instructions.
¥It is also possible to update by clicking on [ ] on the toolbar.
After replacing the Memory card, please perform the above operation.
Changing the picture format
Picture formats that can be changed are only for those of BMP and JPEG formats.
1
1
Select the picture whose format is to be
1 1
changed, and select the picture format
from [Tool] >>> [Image Format
Conversion]
Picture format is changed.
≥Multiple pictures can be selected and changed.
BMP format
A common file format for pictures used in Windows.
JPEG format
A data compression format widely used in digital cameras.
21
Page 5

DPOF Setting
Adding print information to the picture
1
1
Select the picture for DPOF set up,
1 1
and click on [Tool] >>> [DPOF
Setting]
≥Multiple pictures can be selected for
DPOF set up.
2
2
After setting up with the [DPOF
2 2
Setting] screen, click on [OK]
The set up details are recorded in the
Memory card.
[File Name]
Select the picture for the DPOF set up.
•Use the [ 4 ] or [ 2 ], [ 1 ] keys to select the picture set up. (Only when
multiple pictures are selected in the picture display section)
•When carrying out print set up with DPOF, if the file name is longer than 8
characters, you may not print in the printer. (P37)
[Print this file?]
By clicking on [Print], you can specify the number of pages to be printed.
•If you do not want to print, click on [Do not print].
[Specify the number of sheets to be printed.]
Use the [ 3 ], [ 4 ] keys to set the number of sheets to be printed. (You can set 1
to 999 sheets.)
•If [Do not print] is selected, you cannot set a number.
•For pictures on a non-compatible Memory card, DPOF set up is not possible.
•The details of DPOF set up are saved in the Memory card [MISC] folder as a
file with the name [AUTPRINT.MRK].
•After set up, the DPOF data saved in the Memory card will be useful with
DPOF compatible printers, etc.
¥If [Apply All] is clicked, the same set up can be applied to all the selected
pictures.
(Setting up DPOF)
ª DPOF is the abbreviation for
Digital Print Order Format, with which the print information, for use with DPOFcompatible systems, can be included on pictures in the Memory card. If files that
are not compatible with DPOF are selected, the DPOF dialog box is not
displayed.
22
Page 6
Searching for pictures
Searching by file name
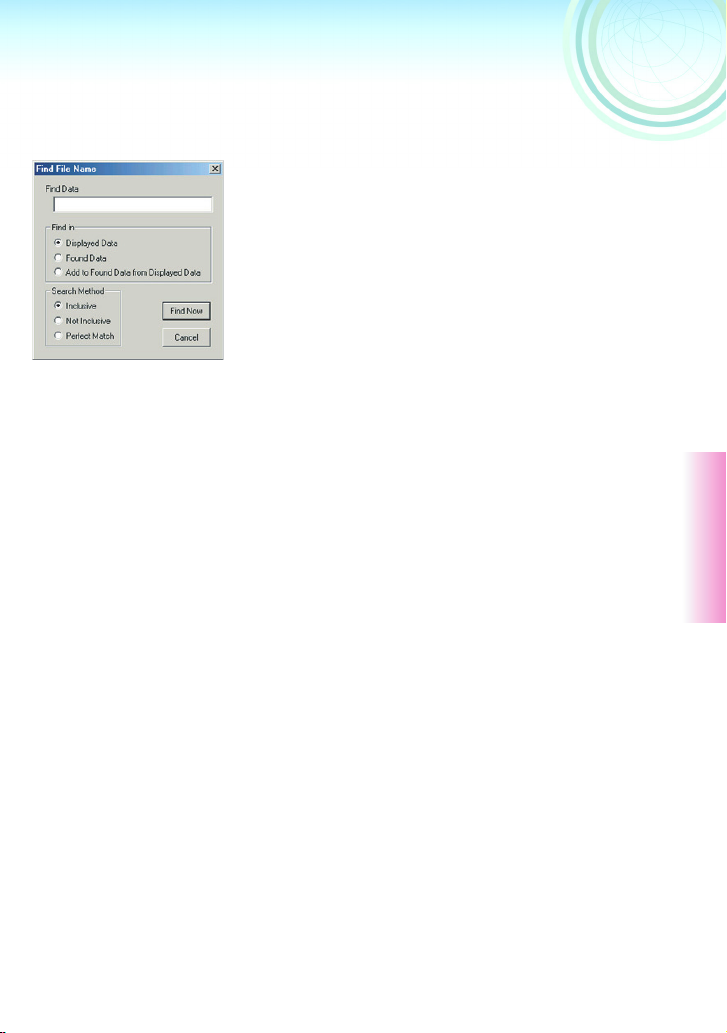
Select the folder containing the file to
1
1
1 1
be found, and click on [Tool] >>> [Find]
>>> [Find by Name]
The Search screen is displayed.
Set up the search conditions, and click
2
2
2 2
on [Find Now]
¥[Find Data]: Enter the file name to be found.
¥[Find in]: The file which is the subject of search is set up.
[Displayed Data]
Find from the currently displayed files
[Found Data]
Further search of the search results
[Add to Found Data from Displayed Data]
Search among the files currently displayed and add to the last search results
¥[Search Method]: Set up the search method.
[Inclusive]
Find those containing the phrase entered with [Find Data]
[Not Inclusive]
Find those that do not contain the phrase entered with [Find Data]
[Perfect Match]
Find those which are an exact match with the phrase entered with [Find Data]
¥If [Tool] >>> [Clear Finding] is selected, the search display is cleared. To
return to the normal display of thumbnail list, select the picture display
type on the [View Type Bar] (P31) at the bottom of the screen.
23
Page 7

Find by Date
Select the folder containing the file to
1
1
1 1
be found, and click on [Tool] >>>
[Find] >>> [Find by Date]
The Search screen is displayed.
Set up the search conditions, and
2
2
2 2
click on [Find Now]
¥[Date Found]: Enter the date of the file to be found.
¥[Find in]: The file which is the subject of search is set up.
[Displayed Data]
Find from the currently displayed files
[Found Data]
Further search of the search results
[Add to Found Data from Displayed Data]
Search among the files currently displayed and add to the last search results.
¥[Search Method]: Set up the search method.
[Within Range]
Find with the date range entered in [Date Found]
[Outside Range]
Find beyond the date range entered in [Date Found]
¥If [Tool] >>> [Clear Finding] is selected, the search display is cleared. To
return to the normal display of thumbnail list, select the picture display
type on the [View Type Bar] (P31) at the bottom of the screen.
24
Page 8

SlideShow
Playback SlideShow
Pictures that can be used with the SlideShow are of BMP, JPEG and TIFF formats.
1111
Click on [View] >>> [SlideShow]
1
1
1 1
[Read Image Setup] screen is displayed.
≥It is also possible to start the SlideShow by
2222
3333
4444
clicking on [
Select the pictures to be included in the
2
2
2 2
SlideShow and click on [OK]
[SlideShow] screen is displayed.
≥If the selected pictures are to be set up as
pictures to be included in the SlideShow, then
please select the pictures in advance.
Click on the seconds for display at the
3
3
3 3
top right of the picture to display the [Set
play time] screen, set up the playback
duration, and click on [OK]
≥The playback duration that can be set up is 0
to 99 seconds.
≥Depending on the picture size displayed, the
display duration may be longer than the set
up time.
≥For details about the set up of [Set play time]
screen, please refer to P26.
] in the Toolbar.
5555
Click on [Config] in the [SlideShow]
4
4
4 4
screen to display the [SlideShow
setting] screen, and after specifying
the required set up, click on [OK]
You will be returned to the [SlideShow] screen.
≥For details about the set up of [SlideShow
setting] screen, please refer to P26.
Click on [Start] in the [SlideShow] screen
5
5
5 5
SlideShow begins.
25
Page 9

¥To close the SlideShow, click on the screen.
¥It is also possible to add the pictures from the picture display section by
dragging and dropping onto the [SlideShow] screen.
¥You can change the order of the pictures in the [SlideShow] screen by
dragging and dropping.
ª Operating slide displays with mouse
On the [SlideShow setting] screen, by checking mark on [Switch by Mouse Click],
you can display slides using the mouse. Press the left mouse button to advance
to the next slide or the right mouse button to return to the previous slide. (If any
key on the keyboard is pressed, the SlideShow will be closed)
ª [Set play time] screen
[Play time]
The playback duration is set up by clicking on
[ 3 ], [ 4 ].
[Apply All]
The playback duration set applies to all pictures.
[Cancel]
Cancels the set up.
ª [SlideShow setting] screen
[Slide Switch Method]
The display interval of the pictures is set up.
[Automatic Switch by Time]: Set up the screen
picture duration with [ 3], [ 4 ]
[Apply All]: When check marked, the picture
display duration applies to all pictures
[Repeat]: When check marked, the SlideShow
display is repeated
[Switch by Mouse Click]: Each picture changes
with a mouse click
[Slide Image Size]
The size of the picture displayed as a slide is set up.
[Original Image Size]: SlideShow displays the original size of the picture
[SD SlideShow Size]: SlideShow displays with size 640 x 480
[Desktop Size]: SlideShow displays with desktop size
[Background Color Setting]
Click on [ 4 ] to select the SlideShow background color.
26
Page 10

SD SlideShow
SD SlideShow is a function by which a SlideShow produced by combining JPEG
format pictures saved in the PC or pictures taken with the digital camera to be
viewed easily on a television by using a digital camera (only compatible types).
¥For details about the method of playback the SD SlideShow, please refer to
the digital camera operating instructions.
Saving the SlideShow
You can only save a set up with JPEG format pictures. Please convert the
picture format to JPEG format. (P21)
After setting up the SlideShow, click on
1
1
1111
2222
1 1
[Save] on the [SlideShow] screen
[Save SlideShow] screen is displayed.
Select the format for saving, and click
2
2
2 2
on [OK]
¥You can only save one SlideShow set up.
ªIf [Save to SD SlideShow] is selected
¥By using a digital camera that is compatible with
the SD SlideShow function, it is possible to begin
to playback of the SlideShow with simple
operations.
A [SLIDE1] folder is created automatically in the
¥
Memory card, and a picture that is resized to a 640
x 480 pixels element suitable for playback on
television is saved in the folder.
¥When the PC is in a status in which it is capable of
writing data to 2 or more Memory cards (card slot
and digital camera etc.), please select the card for
saving.
ªIf [Save to DPOF] is selected
¥Only the playback time and playback order are
saved, and a copy of the picture is not saved.
¥Only the set up of pictures in the Memory card can
be saved.
¥If the file name is longer than 8 characters, it may
not be possible to play it using the digital camera.
(P36)
27
Page 11

ª [SlideShow] screen menu
[File] menu
[Add]
Adding pictures to [SlideShow] screen
[Read SlideShow data]
Reading the SlideShow setup saved in the Memory
card
[Save SlideShow data]
Saving SlideShow setup to Memory card
•[Save] on the [SlideShow] screen works the same as
above, same function.
[Exit]
Closing the [SlideShow] screen
[Edit] menu
[Undo]
Cancels the previous operation
[Cut]
Cut the selected picture
[Delete]
Delete the selected picture
[Paste]
Paste the copied picture or the cut picture
[Config] Menu
Displaying [SlideShow setting] screen
[Help] Menu
Displaying [About SlideShow] screen
28
Page 12

1111
2222
3333
Printing pictures
Printing the picture
Select the picture to be printed and
1
1
1 1
click on [File] >>> [Print Setup]
Set up the printer.
≥The setup varies with the printer used.
Please refer to the printer operating
instructions.
Click on [File] >>> [Print]
2
2
2 2
Print setup screen is displayed.
After required Set up click on [OK]
3
3
3 3
Printing starts.
≥The picture is printed in its original size.
≥It is not the number of sheets set up with
DPOF (P22), but the number set up with the
print set up screen that will be printed.
¥It is also possible to print by clicking on [ ] in
the Toolbar.
29
Page 13

1111
2222
3333
Printing the list of pictures
displayed
(Index-printing)
Display the pictures whose list is to be
1
1
1 1
printed, and click on [File] >>> [Index
Print Preview]
Print preview screen is displayed.
≥By clicking on the [View Type Bar] at the
bottom of the screen, the pictures to be
printed are displayed.
≥When not confirming the print contents on
the preview screen, please click on [File] >>>
[Index Print].
Confirm the preview screen, and click
2
2
2 2
on [Print]
[Print] screen is displayed.
After setting up the paper size, number
3
3
3 3
of sheets, etc., click on [OK]
Printing starts.
≥The set up varies with the printer used.
Please refer to the printer operating
instructions.
¥It is also possible to Index-print by clicking on
[ ] in the Toolbar.
30
ª Index-print preview screen menu
[Print]:Prints the index.
[Next Page]:Displays the next page.
[Prev Page]:Displays the previous page.
[One Page] / [Two Page]:Displays in units of 1
page (or 2 pages).
[Zoom In]:Enlarges the picture display.
[Zoom Out]:Shrinks the picture display.
[Close]:Closes the Index-print preview screen.
Page 14

Display bar
[Toolbars]
You can display the Toolbar by selecting [View] >>> [Toolbars]. It is set to
Display when checkmarked, and Hide if the checkmark is removed.
[Standard Bar]
The file information and picture information for the selected picture are displayed.
1
Prints the selected picture. (P29)
2
Index-prints the displayed thumbnail pictures. (P30)
3
[Help Bar]
Displays the version information of the SD Viewer for DSC.
4
Starts the PDF operating instructions of the SD Viewer for DSC.
5
[View Format Bar]
By clicking on [ 4 ], display size of thumbnail is set up. (P16)
6
Picture is displayed with thumbnail. (P16)
7
Picture is displayed with thumbnail and with file data. (P16)
8
Displays with detailed information. In this format, picture is not displayed. (P16)
9
[Tool Bar]
After setting up the SlideShow, the SlideShow is carried out. (P25)
10
Backs up the data in the Memory card to PC and saves. (P35)
11
After clicking, select the destination for saving.
Refreshes the folder display. (P21)
12
Refreshes the display of Memory card contents (connection), or recognizes another
13
Memory card. (P21)
[Launcher Bar]
On clicking, the selected picture is displayed using the registered application.
The application to be registered is dragged and dropped. With initial setup, Preview
14
Version 1.1E has been set up. It is also possible to register another application.
Drag and drop the icon of the application to be registered.
15
Please register ArcSoft PhotoImpression, etc.
[View Type Bar]
You can select the type of picture to be displayed in the picture display section.
[Status Bar]
Displays information such as the number of files registered, number of displays,
number of pictures currently selected, etc.
31
Page 15

Context menu
ª Picture display section
When the mouse pointer is on the
picture in the picture display section,
right click to display it.
[Rename]
Changes the picture file name. (P20)
[Properties]
Displays the picture information. (P33)
[Cut]
Removes the picture. (P19)
[Copy]
Copies the picture. (P19)
[Delete]
Deletes the picture. (P20)
[Paste]
The picture, which is removed or
copied, is pasted to the specified
location. (P19)
[Image Format Conversion]
Changes the picture format. (P21)
[Rotate]
Rotates the picture. (P20)
[Open]
Opens the picture.
[DPOF Setting]
The DPOF is set up for pictures in the
Memory card. (P22)
[Setup As Wallpaper]
Converts the picture to Wallpaper.
(P18)
ª [Folder Bar]
When the mouse pointer is on the
folder name in the [Folder Bar], right
click to display it.
[New Folder]
Creates a new folder.
[Rename]
Changes the folder name.
[Cut]
Removes the folder.
[Copy]
Copies the folder.
[Delete]
Deletes the folder.
[Paste]
The folder, which is copied or
removed, is pasted.
32
Page 16

Menu
ª [File] menu
[New Folder]
Creates a new folder.
[Rename]
Changes the folder name or the file
name of the picture. If the file name of
the picture in the Memory card is
changed, it may not be recognized by
the digital camera.
[Properties]
Displays the file information and
picture information of the selected
picture.
[Print]
Prints the selected picture. (P29)
[Index Print]
The registered pictures currently
displayed are printed in the form of a
list. (P30)
[Index Print Preview]
Displays the print preview of the index
print. (P30)
[Print Setup]
Set up the printer for printing. (P29,
P30)
[Exit]
Closes the SD Viewer for DSC. (P14)
ª [Edit] menu
[Undo]
Cancels the previous operation.
[Cut]
Removes the selected picture or
folder. (P19)
[Copy]
Copies the selected picture or folder.
(P19)
[Delete]
Deletes selected picture or folder. The
picture next to the deleted picture
moves in. (P20)
[Paste]
The picture or folder, which is
removed or copied, is pasted to the
specified location.(P19)
[Select All]
Selects all of the pictures displayed.
(P18)
[Deselect All]
All the designated selections are
cancelled. (P18)
[Invert Selection]
Swaps the selected pictures with
pictures which are not selected. (P18)
33
Page 17

ª [View] menu
[Toolbars]
Selects the Tool bar to be displayed. Displayed if check mark is present. (P31)
[View Type Bar]
If check mark is included, displays the [View Type Bar]. (P31)
[Status Bar]
If check mark is included, displays the [Status Bar]. (P31)
[Folder Bar]
If check mark is included, displays the [Folder Bar]. (P15)
[Image View Type]
For picture display selection. (P16)
[Image Size]
For picture thumbnail display size selection. (P16)
[Sort]
Rearrange picture according to the selected condition. (P17)
[Image Format]
For selection of the type of picture to be displayed. Only pictures of the selected
type are displayed. (P17)
[SlideShow]
After setting up the SlideShow, the SlideShow is carried out. The transition of
pictures displayed varies with the setup. (P25)
[Refresh]
Updates the display contents of the folder bar and picture display section with
latest information. (P21)
34
Page 18

ª [Tool] menu
[Find]
Searches for the picture. (P23)
[Clear Finding]
Deletes search results. (P23, P24)
[Image Format Conversion]
Changes the picture format. (P21)
[Rotate]
Rotates the picture to left or right by 90 or 180 degrees. (P20)
[Memory Card Check]
Checks whether the Memory card has been inserted, or rechecks the Memory
card contents. After checking, if the Memory card has already been inserted, the
picture in the Memory card is displayed. (P21)
[Memory Card Backup]
The data in the Memory card is backed up and saved in the PC.
[DPOF Setting]
The DPOF is set up for pictures in the Memory card. (P22)
ª [Help] menu
[Operation Manual]
The operating instructions in PDF format is displayed.
Adobe Acrobat Reader 4.0 or higher is required. (P14)
[About SD Viewer Ver.1.1E for DSC]
Version information is displayed.
35
Page 19

Troubleshooting
Q: Memory card cannot be accessed.
A: Format the Memory card using the format function of the digital camera. For
details, refer to the operating instructions of the digital camera used.
Q: A warning message that file is not found appears at the time of
connecting.
A: Insert the OS CD-ROM in the drive. If you don’t have the OS CD-ROM
because, for example, you are using a PC with the OS pre-installed, please
specify the [cabs] folder using the dialog box which searches for the driver
(C:\Windows\options\cabs etc.). The location of [cabs] may vary with the PC.
Q: Even when connected with the USB cable, the PC does not recognize
the digital camera.
A: Click on [Start] >>> [Settings] >>> [Control Panel], and double click on the
[System]. If [Unknown device] is displayed in [Device Manager], disconnect
the USB cable connecting the digital camera, and install the driver again. (P8)
(Q&A)
Caution for Use
¥Do not rotate the pictures using Explorer function of Windows® XP because
the pictures are not displayed on the LCD monitor. It may be impossible to
operate the digital camera.
¥When recording the motion image using the digital camera, the motion image
file (MOV format) and the still picture file (JPEG format) are produced. When
deleting either file, or changing the file name, it is impossible to play back the
image.
¥When using Mac OS, if the drive icon does not appear, restart the PC after
setting to Mac OS basic set using the expansion function manager.
¥When using Mac OS, if the message for formatting the [Untitled] folder
appears, open the File Exchange on the Control Panel and activate the PC
Exchange.
¥Please do not disconnect the USB cable during SD Viewer for DSC is in use.
The software may not function correctly and damage the data being
transmitted.
¥When the status indicator of the digital camera is lit or flashing, please do not
disconnect the USB cable. The software may not function correctly and
damage the data being transmitted. Please refer to the digital camera
operating instructions.
¥When using the USB connection kit, use an AC adaptor as the digital camera
power source. If the battery is disconnected during data transmission, there
will be the risk of damage to the data being transmitted.
¥If you insert a Memory card which is not for use with the digital camera, it may
not be recognized by the SD Viewer for DSC. In such cases, although it is
36
Page 20

possible to properly recognize it by formatting with the digital camera, please
be careful since the data saved in the Memory card will be deleted.
¥If the number of pictures in a folder is large, it may take time displaying the
thumbnail.
¥When displaying folders in which several hundred picture files have been
saved, or creating a SlideShow using several hundred picture files, then,
depending on the operating environment, normal thumbnail display may not
be possible.
¥During SlideShow display, the picture display duration may be longer than the
set up time, depending on the picture size displayed.
¥When carrying out [DPOF Setting] or SlideShow’s [Save to DPOF], pictures
taken with digital camera can be used, usually, without any problem since the
file names are of 8 characters or less. However, when the users modify the file
name, or if files are downloaded, for example from the Internet, before
carrying out [DPOF Setting] or SlideShow’s [Save to DPOF], please ensure
that the file names are 8 characters or less.
¥Since it is not possible to save the [Slide Switch Method], [Repeat], [Slide
Image Size], and [Background Color Setting] set up with the [SlideShow
setting] screen, when reading the previously saved DPOF (SlideShow Setup),
setting follows:
[Slide Switch Method]: Automatifc Switch by Time
[Repeat]: OFF
[Background Color Setting]: BLACK
[Slide Image Size]: Original Image size
¥The SlideShow setup file that can work with the SD Viewer for DSC is only the
[AUTPLAY1.MRK].
¥There are picture folders, DPOF setup folder etc. in the Memory card. Please
do not delete these. It may become impossible to recognize them with the
digital camera, etc.
37
Page 21

A
Matsushita Electric Industrial Co., Ltd.
Web Site:http://www.panasonic.co.jp/global/
 Loading...