


Panasonic CQ-DVR909N User Manual
E
N
G
L
I
S
H
29
E
N
G
L
I
S
H
30
50 51
Setting Up the Sound
Setting Up the Sound
Indicates pressing a button.
Indicates pressing a button
for an extended period of time.
F
/ R
MUTE
SUB TITLE
A
U
D
IO
ANGLE
REPEAT
STOP
PAUSE
PLAY
BAND
R
A
N
D
O
M
S
C
A
N
C
.S
P
C
L
O
C
K
ST/MONO
TITLE /
CHAPTER
P
AG
E
T
R
A
C
K
1
4
7
0
VOLUM
E
M
E
N
U
TITLE
RETURN
CAR DVD PLAYER
SO
U
RC
E
P
O
W
E
R
9
8
5
6
2
3
DISP
G
R
P
S
E
L
Select the setting
menu
Make settings
Notes:
≥ Press [DISP] to complete the setting
procedure. (The unit returns to regular mode.)
≥ The unit completes the setting procedure if no
buttons are pressed for 10 seconds. (The unit
returns to regular mode.)
1
2
(Regular mode)
(➡ Next page)
(➡ Next page)
(➡ Next page)
(➡ page 53)
(➡ page 53)
(➡ page 53)
(➡ page 53)
(➡ page 53)
BASS SEL
LOUD SEL
DOWN MIX SEL
PROLOGIC SEL
TREBLE SEL
BAL // FAD
CENTER VOL
SUB•WFR VOL
AUDIO 01-02
(DVD Audio•Video/dts CD Only)
(Only when ‘‘LS’’ or ‘‘RS’’ dose not light.)
When using the main unit
DISP
(DISPLAY)
1 2
LOUD SEL
DOWN MIX SEL
PROLOGIC SEL
CENTER VOL
SUB•WFR VOL
AUDIO 01-02
;
S•MODE
SOUND•MODE
TUNE
TRACK
XW
65
Press
Press
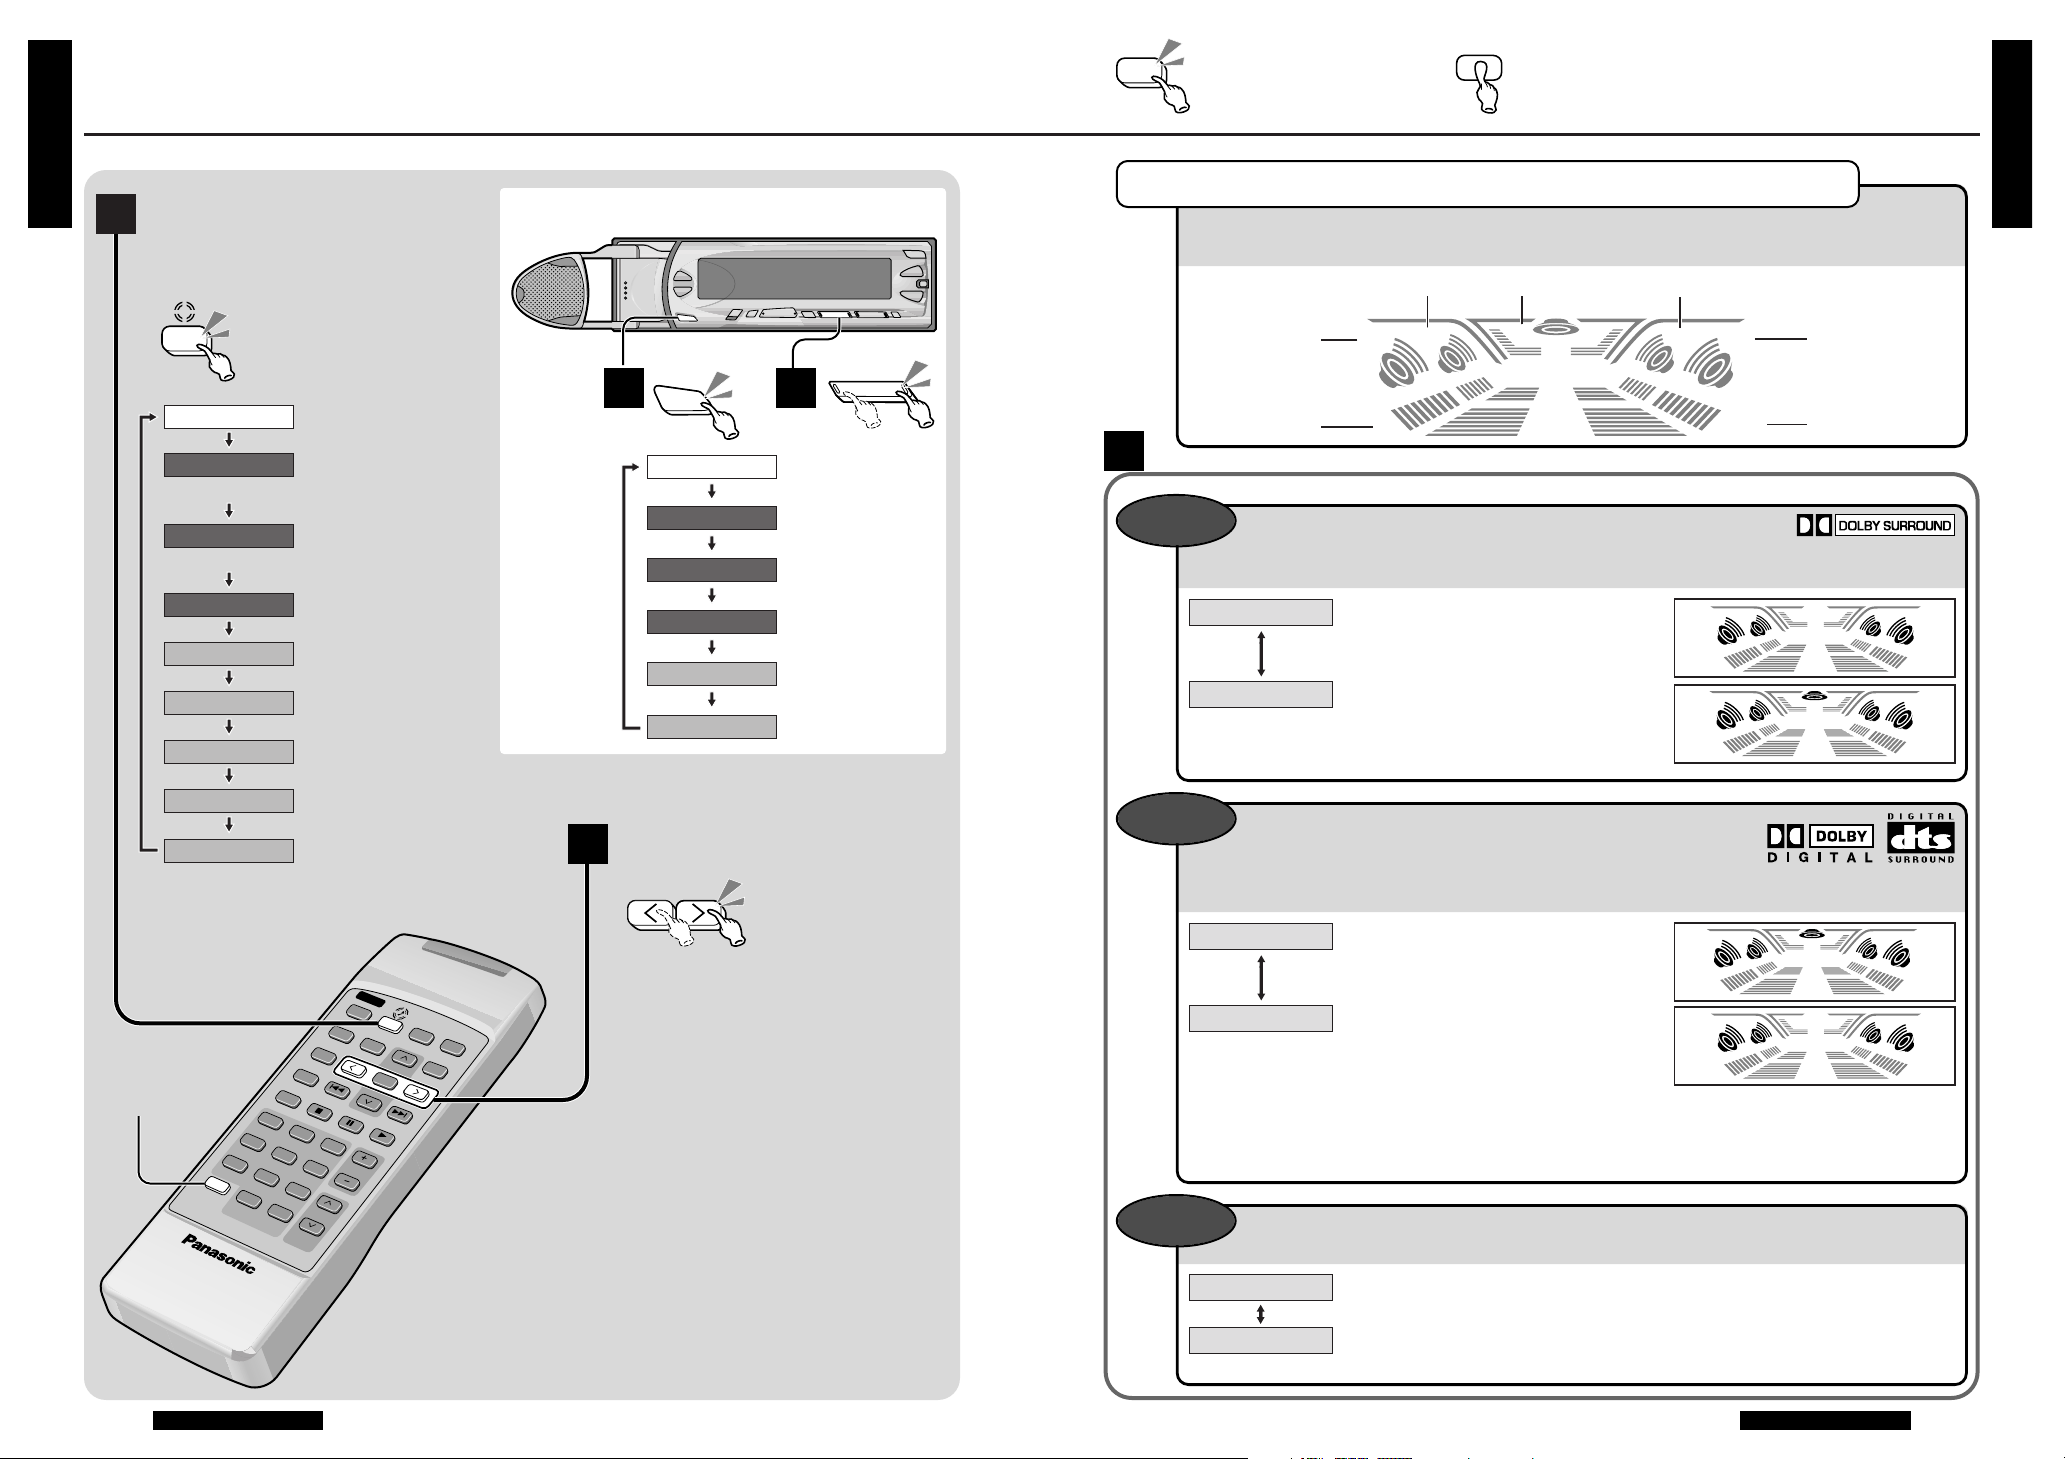
Listening to Surround Sound
2-channel signals from a DVD or a CD can be output in surround sound by using the
center speaker.
Loudness
This function boosts the bass and treble.
Combining the Speaker Output
When listening to Dolby Digital or dts encoded material
(the “Î DIGITAL” or “dts” indicator will light), the signals for each
speaker channel can be combined and output as stereo. (Down mix)
This display lights in accordance with the digital signals that are input for each speaker
channel. (The signal formats that are displayed will vary according to the software.)
LFE
LS
LR
RS
C
S
W
.
Note:
≥ If this setting is changed, the disc will start over from the beginning.
LR
S
W
.
DOWN
MIX SEL
LOUD
SEL
PROLOGIC
SEL
LFE
LS
LR
RS
C
S
W
.
S
Left front
Left surround
Lights when PRO
LOGIC is on.
Center Right front
Right surround
Lights for a signal
at 120 Hz or lower.
Signal Format Display
2-channel stereo playback
(Normal sound)
≥Not output from the center speaker.
Surround playback
≥Surround sound is output by using
the center speaker.
≥“Î PRO LOGIC” lights.
Recorded signal format (Example:
5.1-channel surround playback)
Down mix (2-channel stereo playback)
Use this setting when front speakers
only are connected.
≥The C, LS, and RS signals are
combined with and output through L
and R.
Normal sound
Boosts the bass and treble when playing.
≥“LOUD” lights.
PROLOGIC OFF
PROLOGIC ON
DOWN MIX OFF
DOWN MIX ON
LOUD OFF
LOUD ON
2
LR
S
.
S
W
LS
.
S
W
RS
LFE
C
LR
E
N
G
L
I
S
H
31
E
N
G
L
I
S
H
32
52 53
Setting Up the Sound
Setting Up the Sound
(continued)
(continued)
F
/ R
MUTE
SUB TITLE
A
U
D
IO
ANGLE
REPEAT
STOP
PAUSE
PLAY
BAND
R
A
N
D
O
M
S
C
AN
C
.S
P
C
L
O
C
K
ST/MONO
TITLE /
CHAPTER
PAG
E
T
R
A
C
K
1
4
7
0
VOLUM
E
M
E
N
U
TITLE
RETURN
CAR DVD PLAYER
SO
U
R
C
E
P
O
W
E
R
S
E
L
9
8
5
6
2
3
DISP
GRP
Adjusting the Center Speaker Volume
(Adjustable range: `¶, `10 to _10 dB)
Adjusting the Subwoofer Volume (When Subwoofer is set)
(Adjustable range: `¶, `10 to _10 dB)
Adjusting the Front/Rear/Left/Right Balance
(Adjustable range: 15 for each)
CENTER
VOL
SUB•WFR
VOL
Notes:
≥ Press [DISP] to complete the setting
procedure. (The unit returns to regular mode.)
≥ The unit completes the setting procedure if no
buttons are pressed for 10 seconds. (The unit
returns to regular mode.)
BAL // FAD
Adjusting the Bass
(Adjustable range: `12 to _12 dB)
Adjusting the Treble
(Adjustable range: `12 to _12 dB)
BASS
SEL
["]: Increases the bass.
[#]: Decreases the bass.
TREBLE
SEL
["]: Increases the treble.
[#]: Decreases the treble.
["]: Increases the level.
[#]: Decreases the level.
["]: Increases the level.
[#]: Decreases the level.
[$]: Increases the right side.
[%]: Increases the left side.
["]: Increases the front.
[#]: Increases the rear.
BASS _6 dB
TREBLE _6 dB
B : R 5
< >
F : F 5
B : L 5
< >
F : R 5
B : CNT
< >
F : CNT
CENTER _6 dB
SUB•W _6 dB
Right
Balance
Left
Center
Rear
Fader
Front
Connect a subwoofer (sold separately).
Select the setting
menu
1
;
Make settings
2
Press
Press
Press
or
(➡ page 51)
(Regular mode)
(➡ page 51)
(➡ page 51)
(➡ Next page)
(➡ Next page)
(➡ Next page)
(➡ Next page)
(➡ Next page)
BASS SEL
LOUD SEL
DOWN MIX SEL
PROLOGIC SEL
TREBLE SEL
BAL // FAD
CENTER VOL
SUB•WFR VOL
(DVD Audio•Video/dts CD Only)
AUDIO 01-02
(Only when ‘‘LS’’ or ‘‘RS’’ dose not light.)
DISP
(DISPLAY)
When using the main unit
21
S•MODE
SOUND•MODE
SEL
TUNE
TRACK
XW
65
DISC
XW
XW
P•SET
LOUD SEL
DOWN MIX SEL
PROLOGIC SEL
CENTER VOL
SUB•WFR VOL
AUDIO 01-02
BAL // FAD
TREBLE SEL
BASS SEL
AUDIO 01-02
Note:
≥ Setting “`¶” makes no sounds to output.
Note:
≥ Setting “`¶” makes no sounds to output.
2
E
N
G
L
I
S
H
33
E
N
G
L
I
S
H
34
54 55
Setting Other Functions
Setting Other Functions
Indicates pressing a button.
Indicates pressing a button
for an extended period of time.
F
/ R
MUTE
SUB TITLE
A
U
D
IO
ANGLE
REPEAT
STOP
PAUSE
PLAY
BAND
R
A
N
D
O
M
S
C
A
N
C
.S
P
C
L
O
C
K
ST/MONO
TITLE /
CHAPTER
P
A
G
E
T
R
A
C
K
1
4
7
0
VOLUM
E
M
E
N
U
TITLE
RETURN
CAR DVD PLAYER
SO
UR
CE
PO
W
E
R
S
E
L
9
8
5
6
2
3
DISP
G
R
P
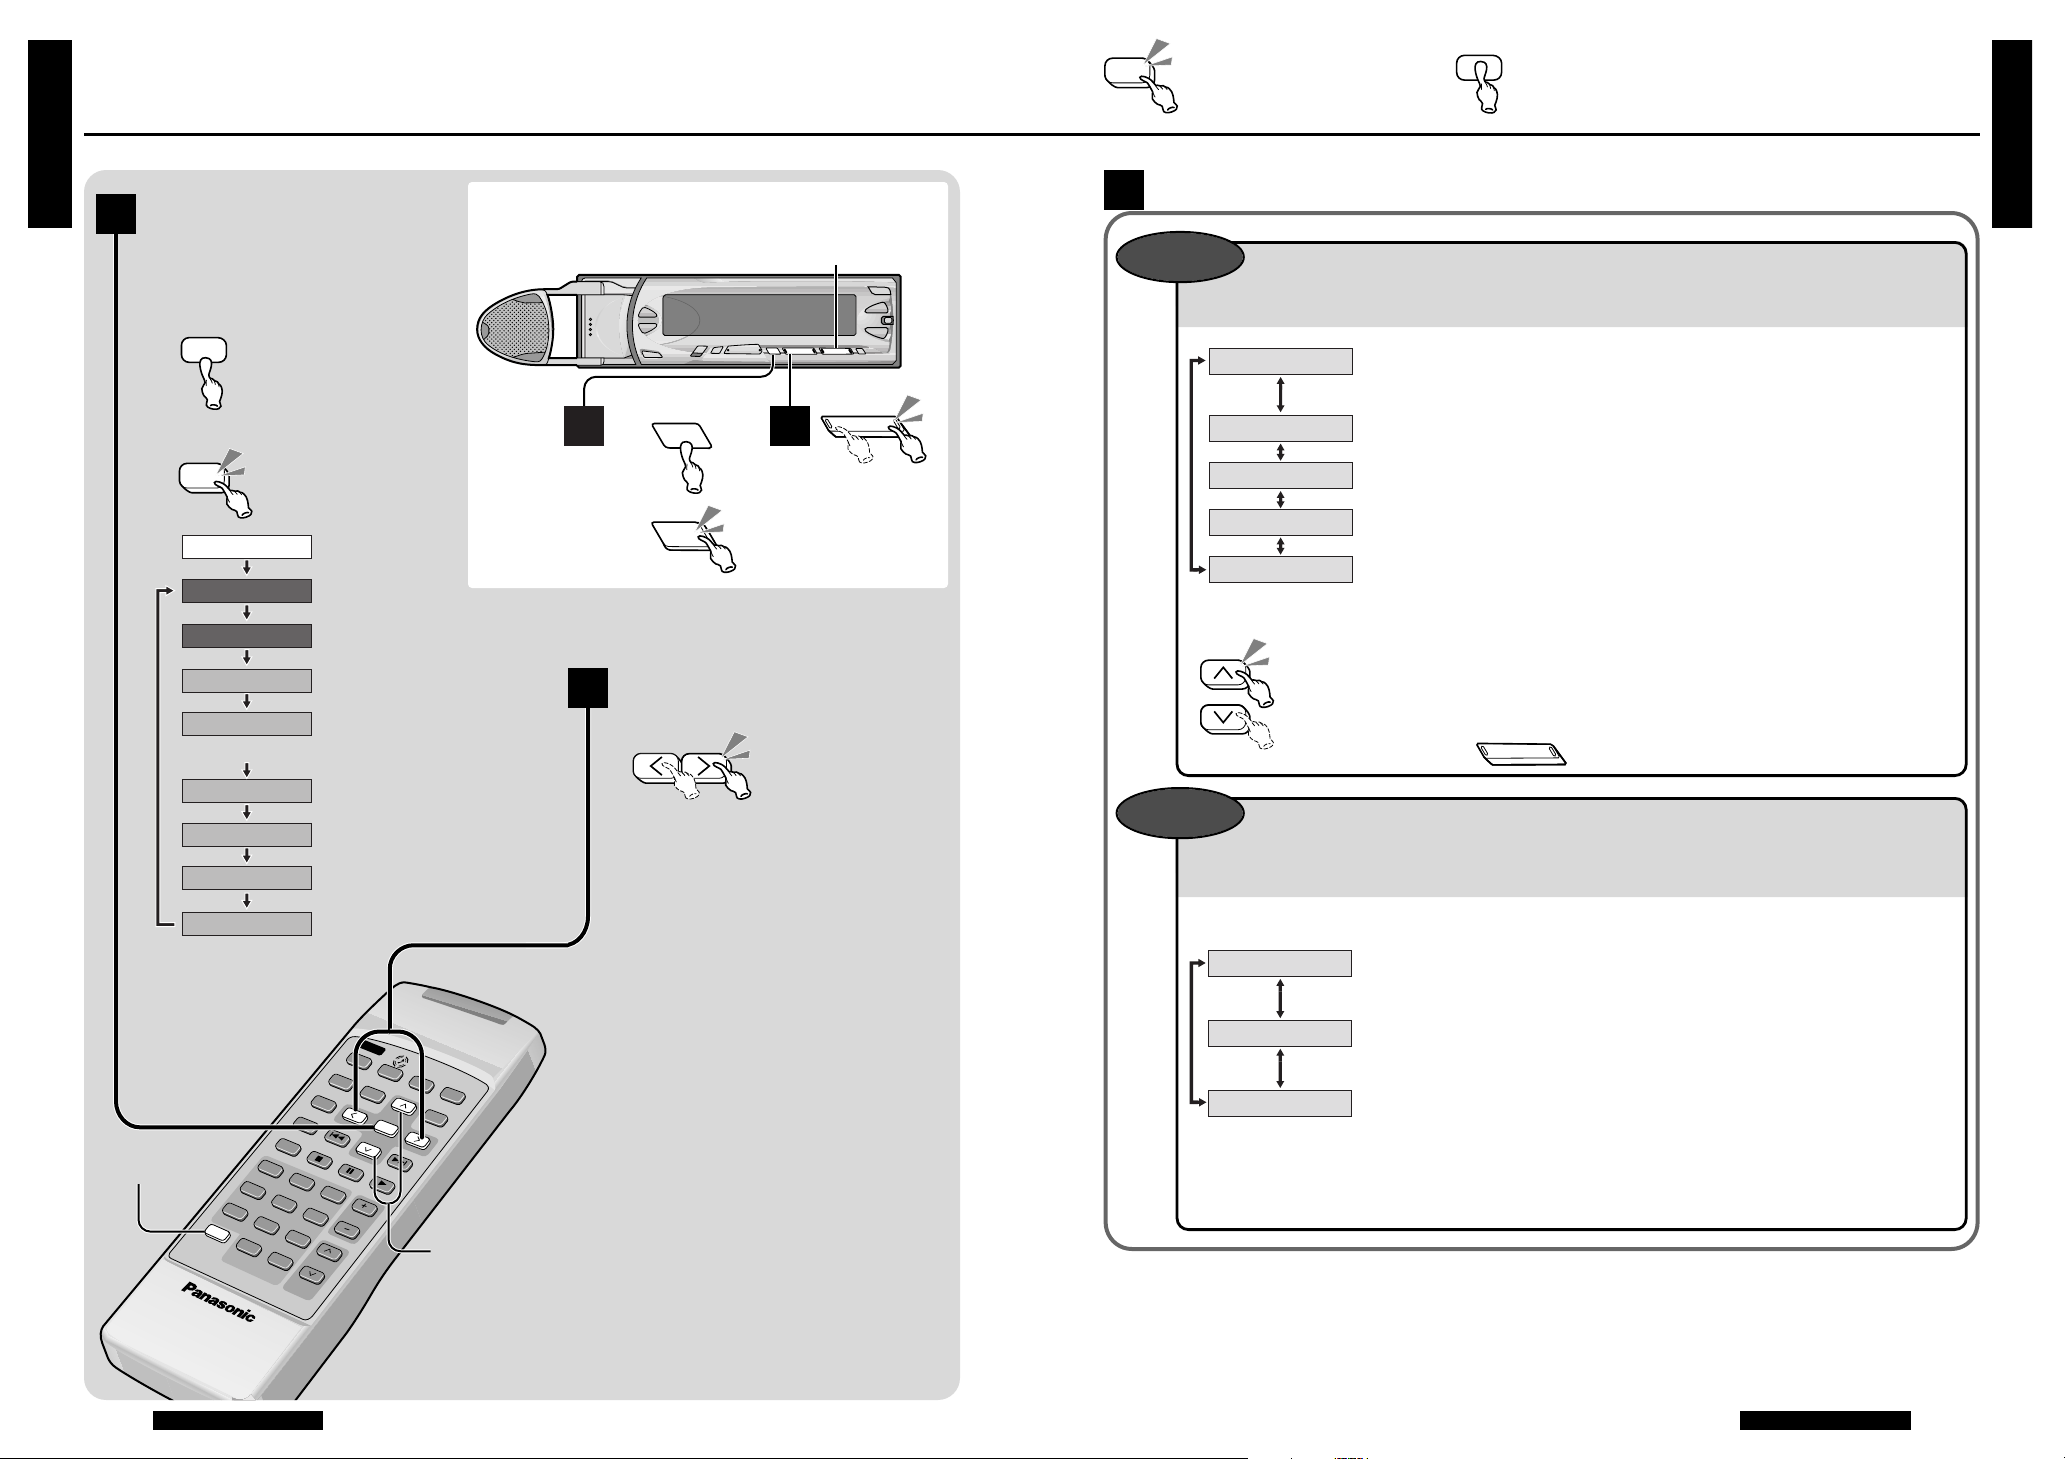
Signal Sound/Signal Beep (The sound of button operation)
You can select to have different signal sounds output from the center speaker whenever
you press a button. You can also set the volume of the signal sound.
Making It Easier to Hear Voice Directions from the Car Navigation System
You can select to have this unit reduce its volume when the car navigation system is
giving voice directions.
Sets the operation sound as <Signal Sound>
(a different sound for each operation).
Sets the operation sound as <Signal Beep 1>.
Decreases the volume of this unit to “0” (silence) when the car navigation
system gives voice directions.
Decreases the volume of this unit by approximately 1/10 when the car
navigation system gives voice directions.
Does not change the volume of this unit when the car navigation system
gives voice directions.
Sets the operation sound as <Signal Beep 2>.
Sets the operation sound as <Signal Beep 3>.
Turns off the operation sound.
SIGNAL
SEL
MUTING
SEL
Adjusting the volume:
(Adjustable range: LEV 1 to LEV 3)
:Increases the volume.
:Decreases the volume.
Note:
≥ A sound is output when the power is turned
on or off only if “SIGNAL SOUND” is set.
Connect a Panasonic car navigation system (CN-DV2000EN, etc.; sold separately).
≥ When the car navigation system gives voice directions, the message “MUTING £££”,
indicating the navi mute setting, is displayed.
Notes:
≥ Press [DISP] to complete the setting
procedure. (The unit returns to regular mode.)
≥ The unit completes the setting procedure if no
buttons are pressed for 10 seconds. (The unit
returns to regular mode.)
1
Make settings
2
DISP
(DISPLAY)
"#
Select the setting
menu
1
Switch to setting mode.
2
Select the setting menu.
SEL
SEL
Press
When using the main unit
1 2
1
2
SEL
SEL
TUNE
TRACK
XW
65
(➡ page 57)
(➡ page 57)
(➡ page 57)
(➡ Next page)
(Regular mode)
(➡ Next page)
(➡ page 57)
TITLE SCROLL
(➡ page 57)
S-LED SEL
(➡ page 57)
ACC SELECT
MUTE KEY SEL
MUTING SEL
SIGNAL SEL
CONTRAST SEL
TILT SELECT
AUDIO 01-02
(CD changer mode only)
SIGNAL SOUND
SIGNAL BEEP 1
SIGNAL BEEP 2
SIGNAL BEEP 3
SIGNAL OFF
MUTING ON
MUTING HALF
MUTING OFF
#DISC"
(Main unit: )
DISC
XW
XW
P•SET
Press
Hold (2 seconds)
Press
2
F
/ R
MUTE
SUB TITLE
A
U
D
IO
ANGLE
REPEAT
STOP
PAUSE
PLAY
BAND
R
A
N
D
O
M
S
C
A
N
C
.S
P
C
L
O
C
K
ST/MONO
TITLE /
CHAPTER
PA
G
E
T
R
A
C
K
1
4
7
0
VOLUM
E
M
E
N
U
TITLE
RETURN
CAR DVD PLAYER
SO
U
RC
E
P
O
W
ER
S
E
L
9
8
5
6
2
3
DISP
GRP
E
N
G
L
I
S
H
35
E
N
G
L
I
S
H
36
56 57
Setting Other Functions
Setting Other Functions
(continued)
(continued)
MUTE Button Setting
You can select how much to lower the volume when [MUTE](ATT) is pressed.
Security Indicator
The security indicator blinks while the removable face plate is removed from this unit.
Using the Panel without Changing the Tilt
TILT
SELECT
MUTE KEY
SEL
S-LED SEL
Notes:
≥ Press [DISP] to complete the setting
procedure. (The unit returns to regular mode.)
≥ The unit completes the setting procedure if no
buttons are pressed for 10 seconds. (The unit
returns to regular mode.)
When [MUTE](ATT) is pressed, the volume goes to “0” (silence). <MUTE>
When [MUTE](ATT) is pressed, the volume is reduced to approximately
1/10 of its original volume. <ATT>
The indicator blinks when the panel is removed.
The panel removal alarm will be active.
The indicator does not blink when the panel is removed.
The panel removal alarm will be non-active.
Permits adjustment of the panel tilt.
Does not permit adjustment of the panel tilt.
Making the Display Easier to See
The display of this unit can be made easier to see by adjusting the display contrast (the
difference between the bright and dark portions). (Adjustable range: Lv1 to 5)
CONTRAST
SEL
[$]: Increases the contrast level.
[%]: Decreases the contrast level.
≥ The higher the level, the greater the contrast.
CONTRAST Lv 3
Select the setting
menu
1
Switch to setting mode.
2
Select the setting menu.
SEL
SEL
DISP
(DISPLAY)
MUTE
Make settings
When using the main unit
21
TUNE
TRACK
XW
65
1
(➡ Next page)
(➡ page 55)
(Regular mode)
(➡ page 55)
(➡ Next page)
S-LED SEL
(➡ Next page)
ACC SELECT
MUTE KEY SEL
MUTING SEL
SIGNAL SEL
(➡ Next page)
CONTRAST SEL
(➡ Next page)
TILT SELECT
AUDIO 01-02
(➡ Next page)
TITLE SCROLL
(CD changer mode only)
MUTE KEY
ATT KEY
S-LED ON
S-LED OFF
TILT ON
TILT OFF
Setting car ACC On/Off
If your car has ACC turn it ON. Otherwise, turn it OFF.
ACC
SELECT
ACC provided.
ACC not provided.
ACC ON
ACC OFF
2
Scrolling the Title Display
The CD changer title display can be made to scroll continuously or be made stationary.
TITLE
SCROLL
The display scrolls continuously.
The display scrolls once and then stops.
Note:
≥ Once scrolling is stopped, the characters can be scrolled across again once. (Re-scroll)
> Press and hold [DISP] for more than 2 seconds.
SCROLL ON
SCROLL OFF
Hold (2 seconds)
Press
Press
2
1
2
SEL
SEL
E
N
G
L
I
S
H
37
E
N
G
L
I
S
H
38
58 59
Useful Functions
Useful Functions
Indicates pressing a button.
Indicates pressing a button
for an extended period of time.
F
/ R
MUTE
SUB TITLE
A
U
D
IO
ANGLE
REPEAT
STOP
PAUSE
PLAY
BAND
R
A
N
D
O
M
S
C
A
N
C
.S
P
C
L
O
C
K
ST/MONO
TITLE /
CHAPTER
PA
G
E
T
R
A
C
K
1
4
7
0
VOLUM
E
M
E
N
U
TITLE
RETURN
CAR DVD PLAYER
SO
UR
CE
P
O
W
E
R
9
8
5
6
2
3
DISP
G
R
P
S
E
L
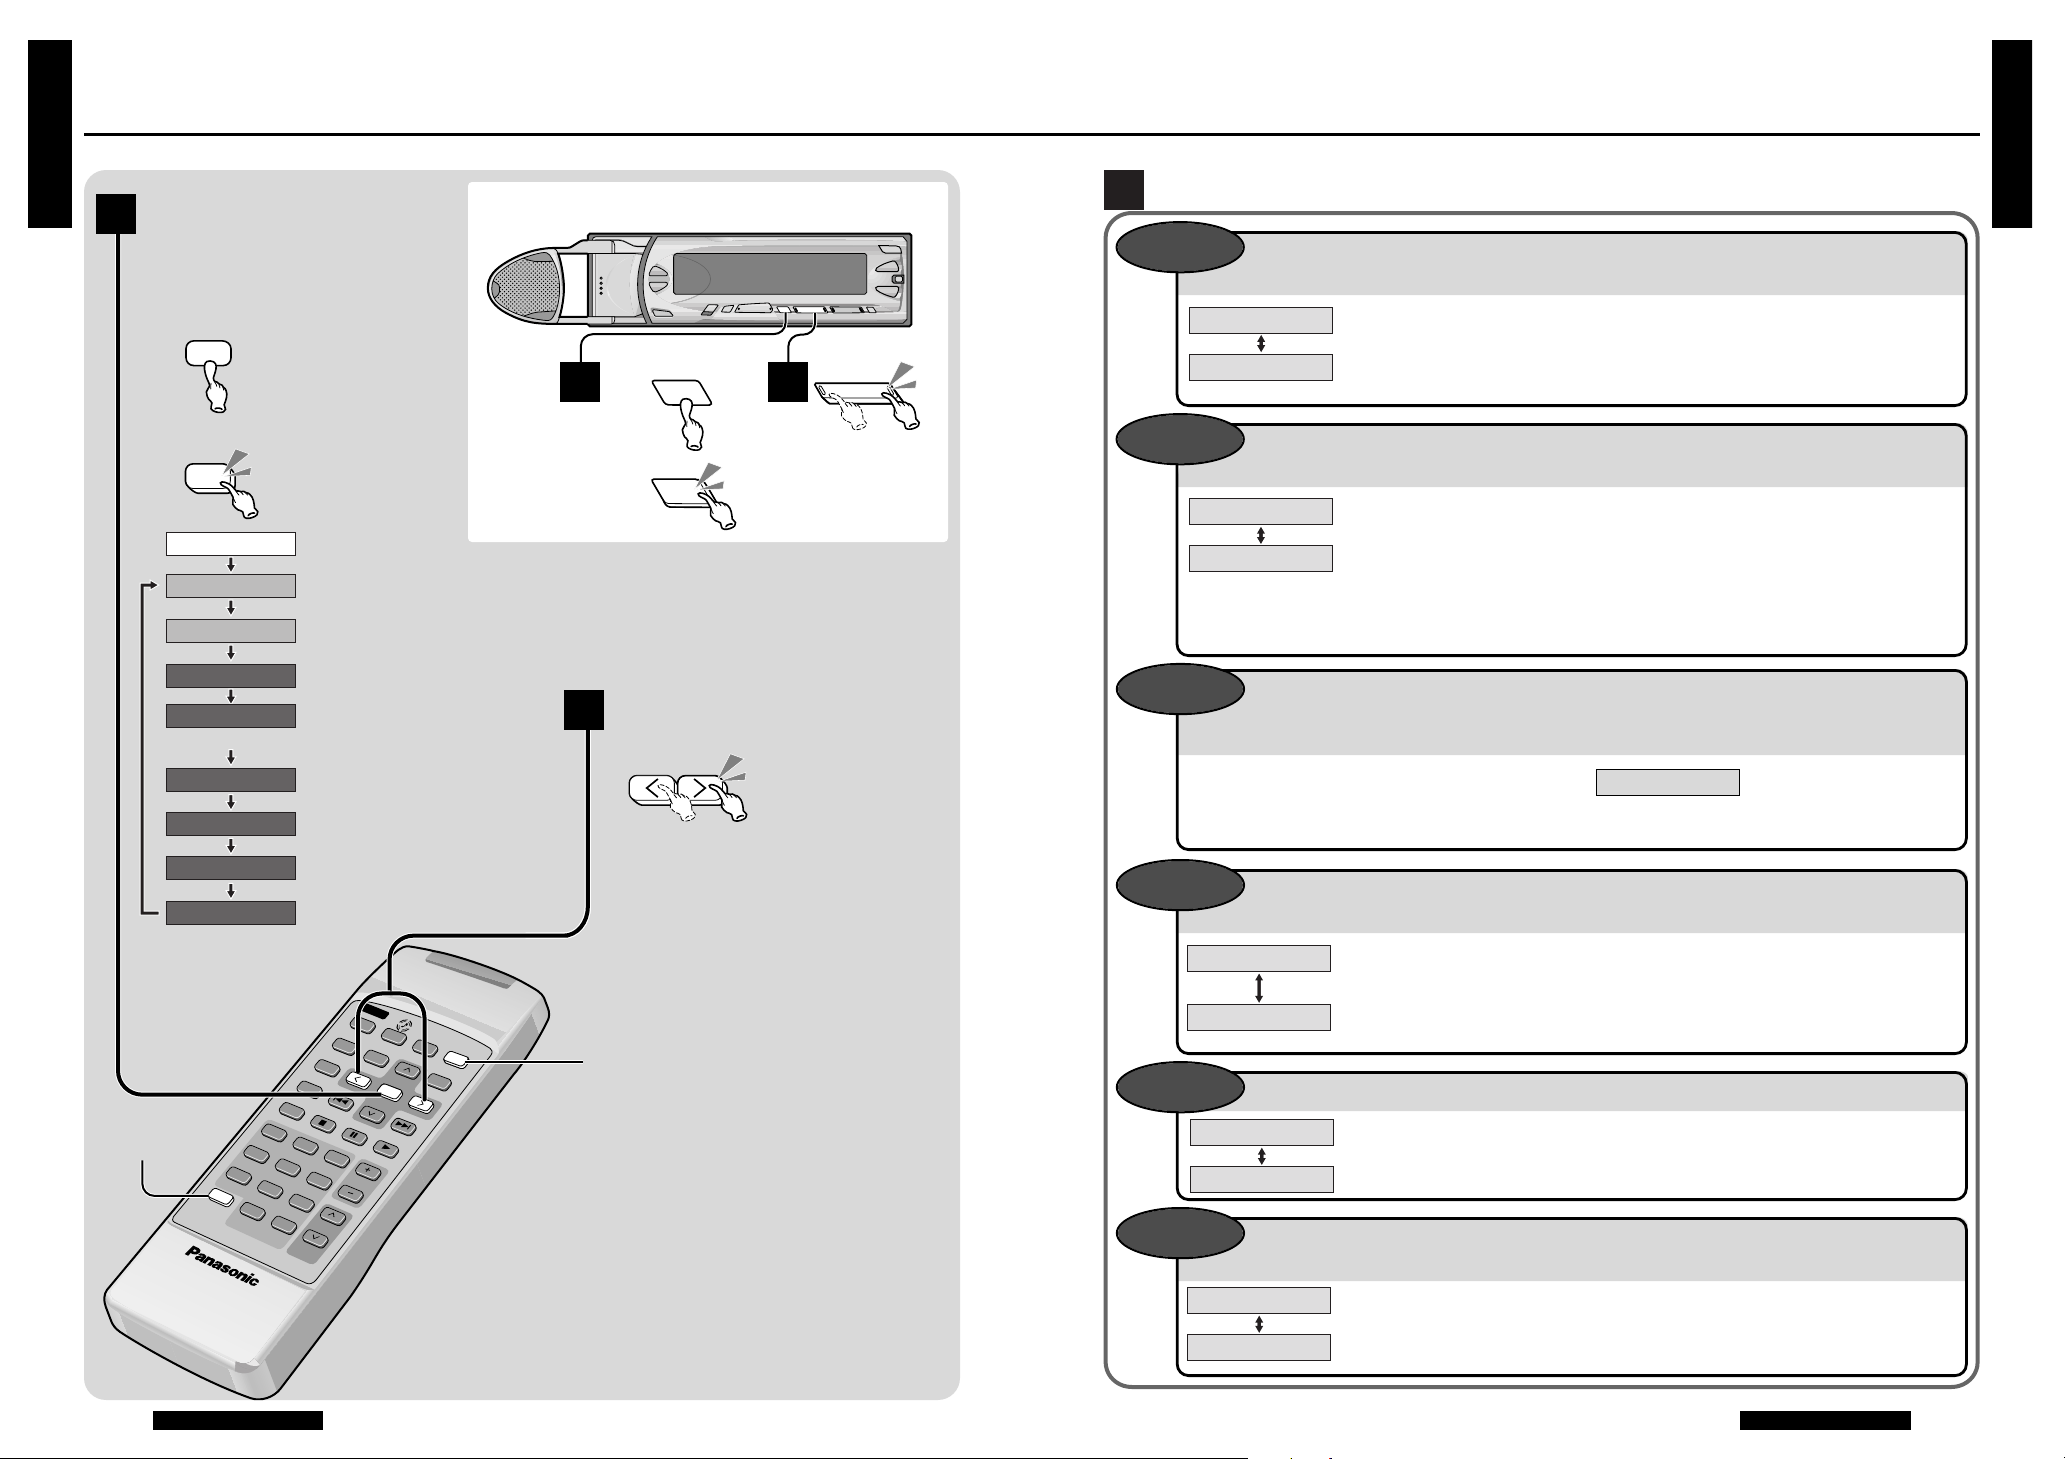
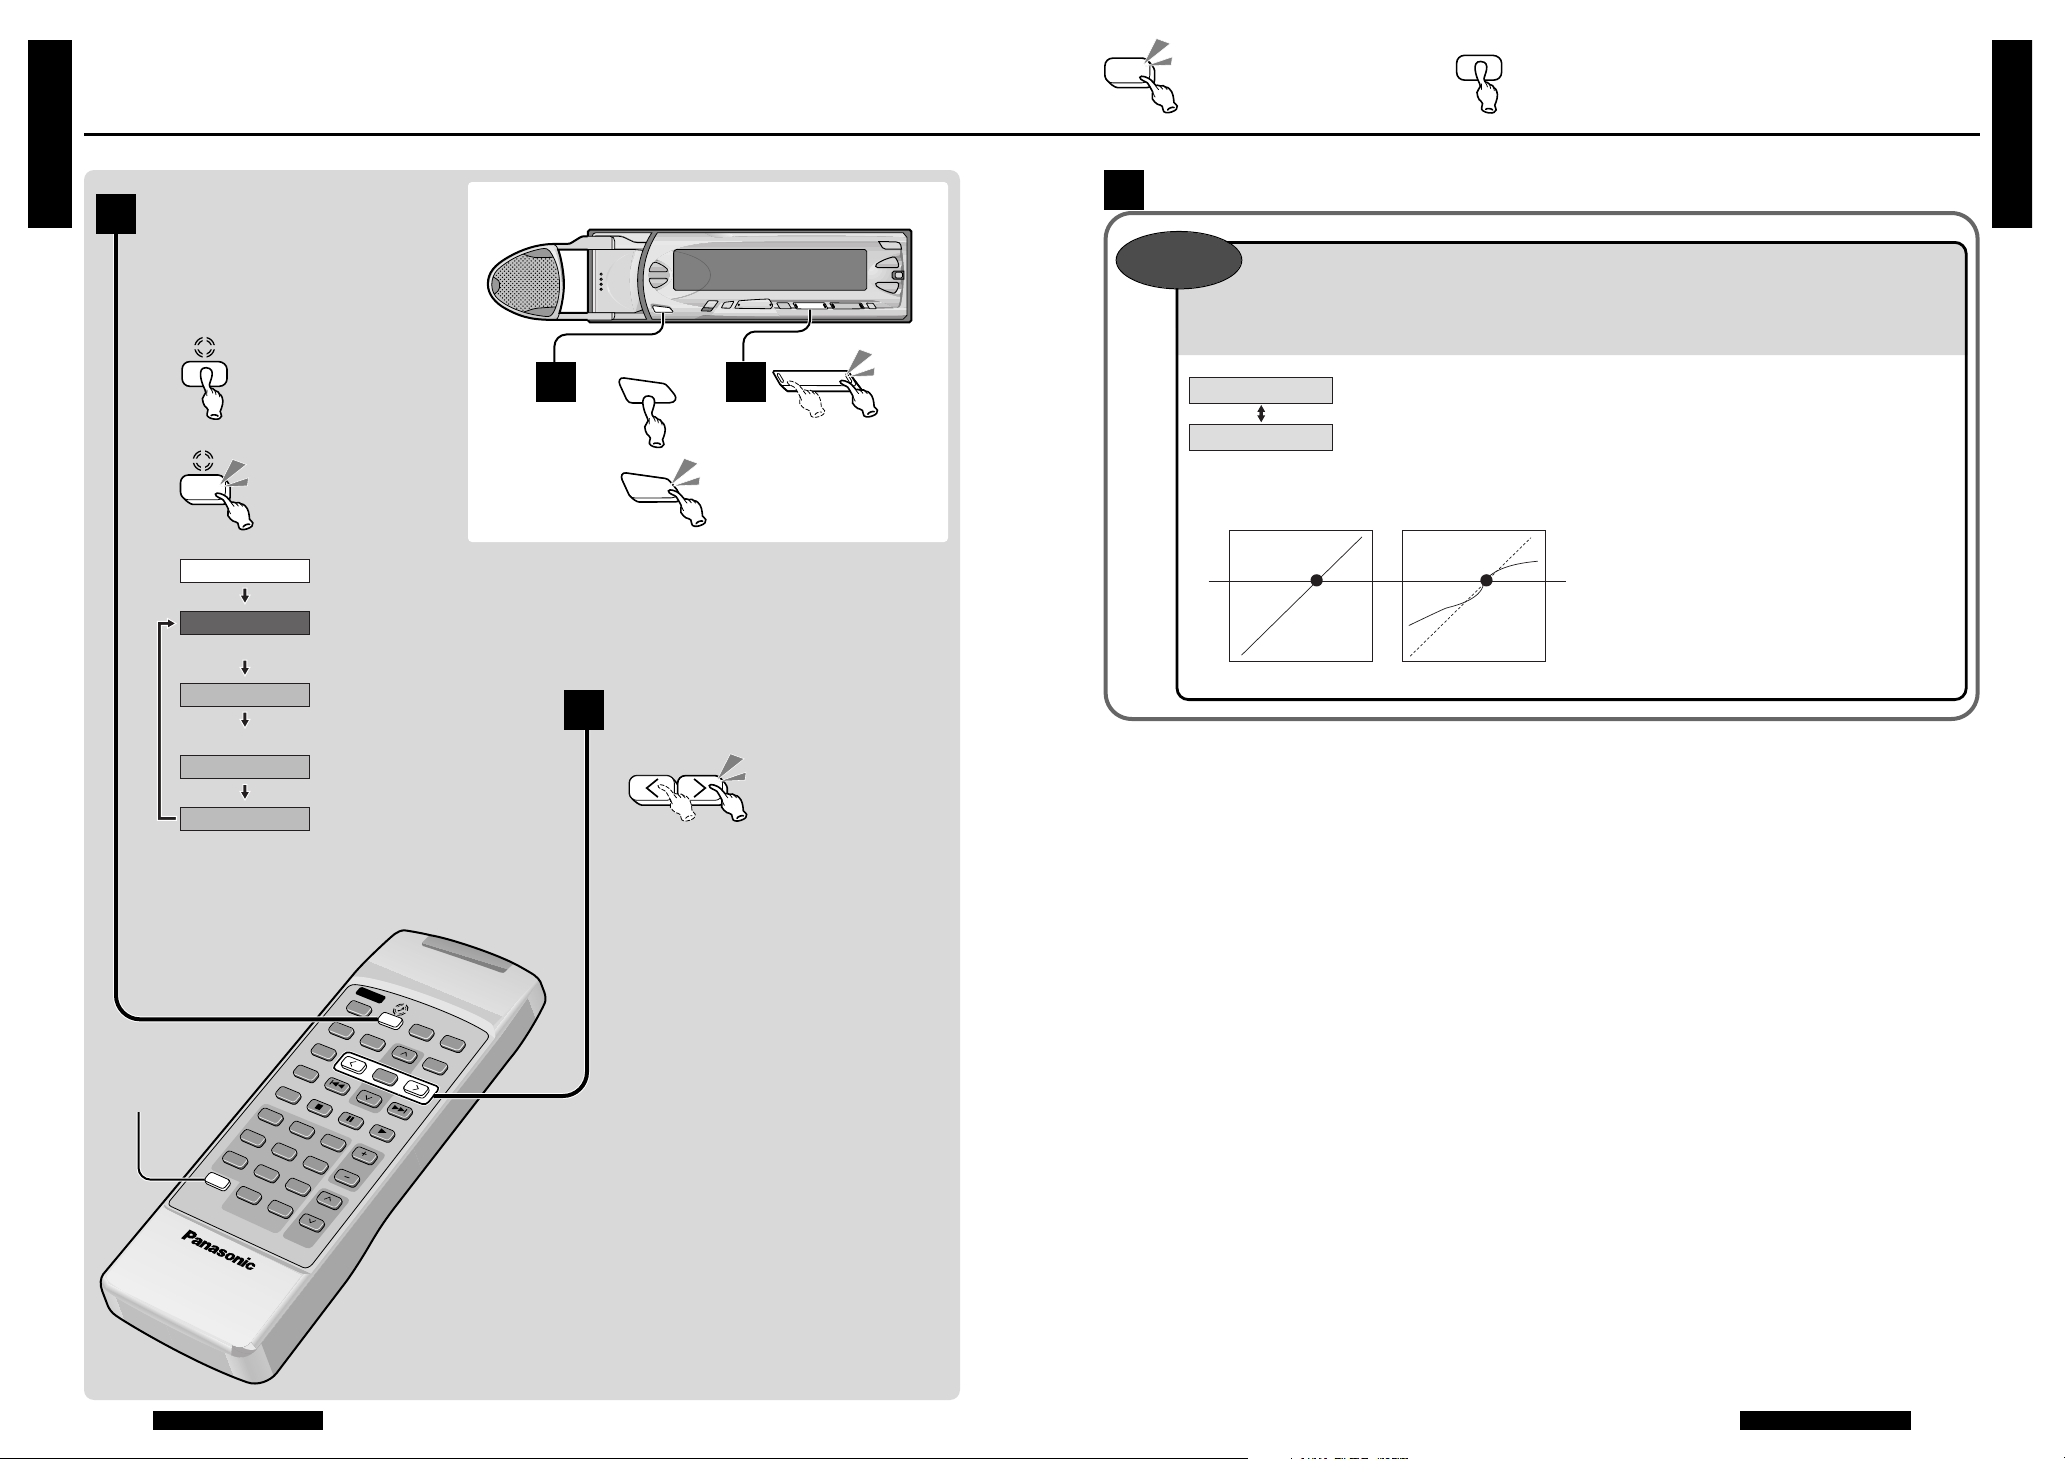
Dynamic Range Compression
By compressing the range of the playback level (the dynamic range), it is possible to
maintain the impact of audio even at low volumes.
This function only works with Dolby Digital encoded material.
DR COMP
SEL
Notes:
≥ Press [DISP] to complete the setting
procedure. (The unit returns to regular mode.)
≥ The unit completes the setting procedure if no
buttons are pressed for 10 seconds. (The unit
returns to regular mode.)
Does not compress the dynamic range.
Compresses the dynamic range.
≥ “DR COMP” lights.
Note:
≥ When it is difficult to hear comparatively
quiet sounds (such as movie dialogue),
setting “DR COMP ON” will make those
sounds easier to hear.
Select the setting
menu
1
Switch to setting mode.
2
Select the setting menu.
DISP
(DISPLAY)
Make settings
When using the main unit
21
TUNE
TRACK
XW
65
2
2
1
;
;
1
2
S•MODE
SOUND•MODE
S•MODE
SOUND•MODE
SP LEVEL SEL
SP TYPE SEL
DR COMP SEL
SP DELAY
(➡ Next page)
(Regular mode)
(➡ page 27)
(➡ page 27)
(➡ page 27)
(Dolby Digital encoded material only)
[Dolby Digital encoded material or when
“PROLOGIC ON” (➡ page 51) is set only]
AUDIO 01-02
(While stopped)
DR COMP OFF
DR COMP ON
Hold (2 seconds)
Press
Press
OFF
High volume
Conversation level
Low volume
ON