

Page 1
Installation Guide
Camera Cover
Model No. BB-HCA1A-B (Smoke)
Indoor Use Only (For Ceiling Installation)
Confirm that the following items
are included.
Included Items
Contact your dealer if you have a problem with the
included items.
❑ Camera Cover
BB-HCA1A-B (Smoke)
..........
1 pc. ❑ Caps
✔
❑ Installation Guide
........................
(this manual)
..............
2 pcs.
1 pc.
Ask the authorized dealer for the installation.
Supported Products (Customer-Provided)
(as of Dec. 2005)
This product is a camera cover for the below cameras
For the latest information, please visit the Panasonic website at
http://panasonic.co.jp/pcc/products/en/netwkcam/.
Compatible Cameras
Model No.:
Additional network camera models may become available for
use with this product.
BB-HCE481A, BB-HCM381A, KX-HCM280A, KX-HCM280
.
Useful Information
Dust on the camera cover affects the camera's image quality.
·
Especially when the camera is zoomed out at the end, it is difficult
to focus on the object due to the dust on the surface of the camera
cover. Remove the dust and wipe the camera cover with a dry cloth.
Note that wiping a dusty camera cover directly may cause scratching.
In BB-HCE481A or BB-HCM381A, setting the automatic focus
·
range to [Normal] prevents the dust from affecting the image quality.
In KX-HCM280A or KX-HCM280, the image quality is improved in
the same way by manually focusing to the far side.
(See the camera's Operating Instructions for the settings.)
The permeability of the camera cover is 36 %. The minimum illumi-
·
nance of the object is 9 lx in normal mode (without the cover: 3 lx),
and 0.27 lx in color night view mode (without the cover: 0.09 lx).
The camera's indicator or Panasonic logo may be reflected into the
·
image depending on the location, the indicator setting or the zoom
magnification.
In certain zoom magnification, using the camera cover may
·
decrease the image quality.
Before using, remove the protective film. During shipment, the pro-
·
tective film should remain attached.
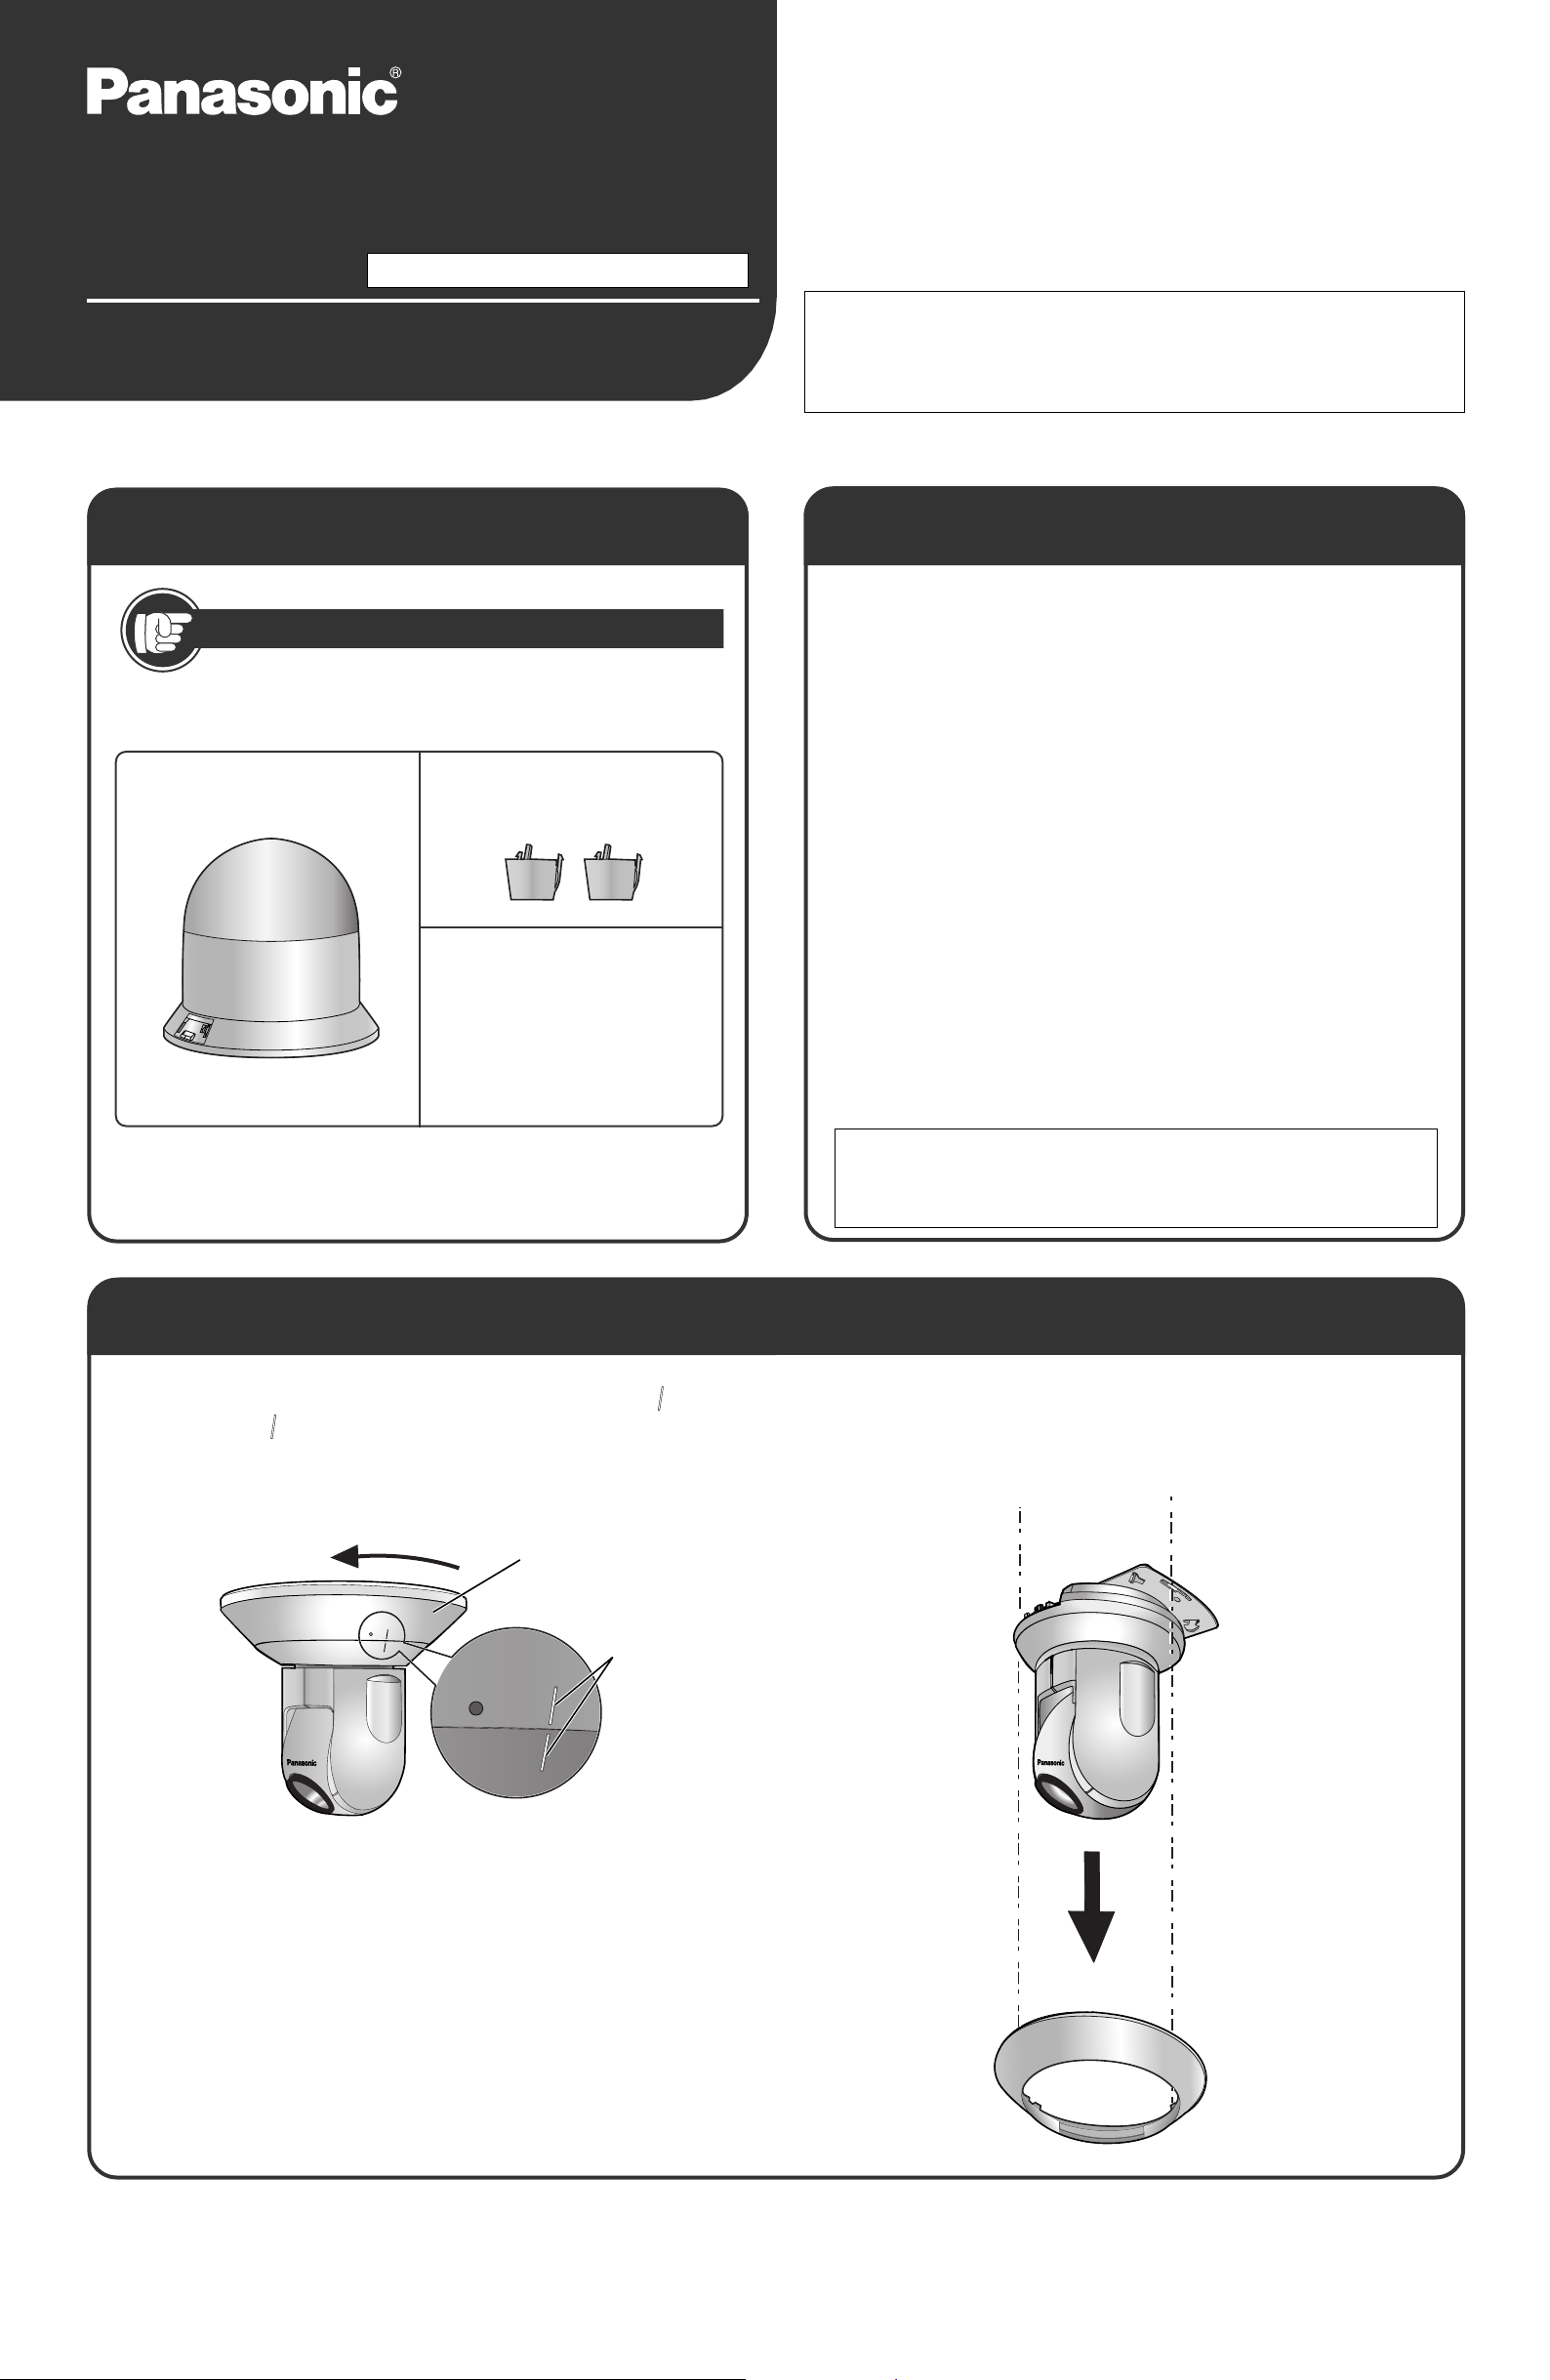
Remove the Ceiling Mounting Cover.
Move the Ceiling Mounting Cover to the left until the " " of it
1
fits to the " " of the main unit.
Ceiling Mounting Cover
Mark
This product is for indoor use only.
Do not install this product outdoors.
Outdoor Installation may cause damage to the device.
Remove the Ceiling Mounting Cover by pulling it down.
2
© 2005 Panasonic Communications Co., Ltd. All Rights Reserved.
PQQX14931ZA
KK1205RM0
Page 2
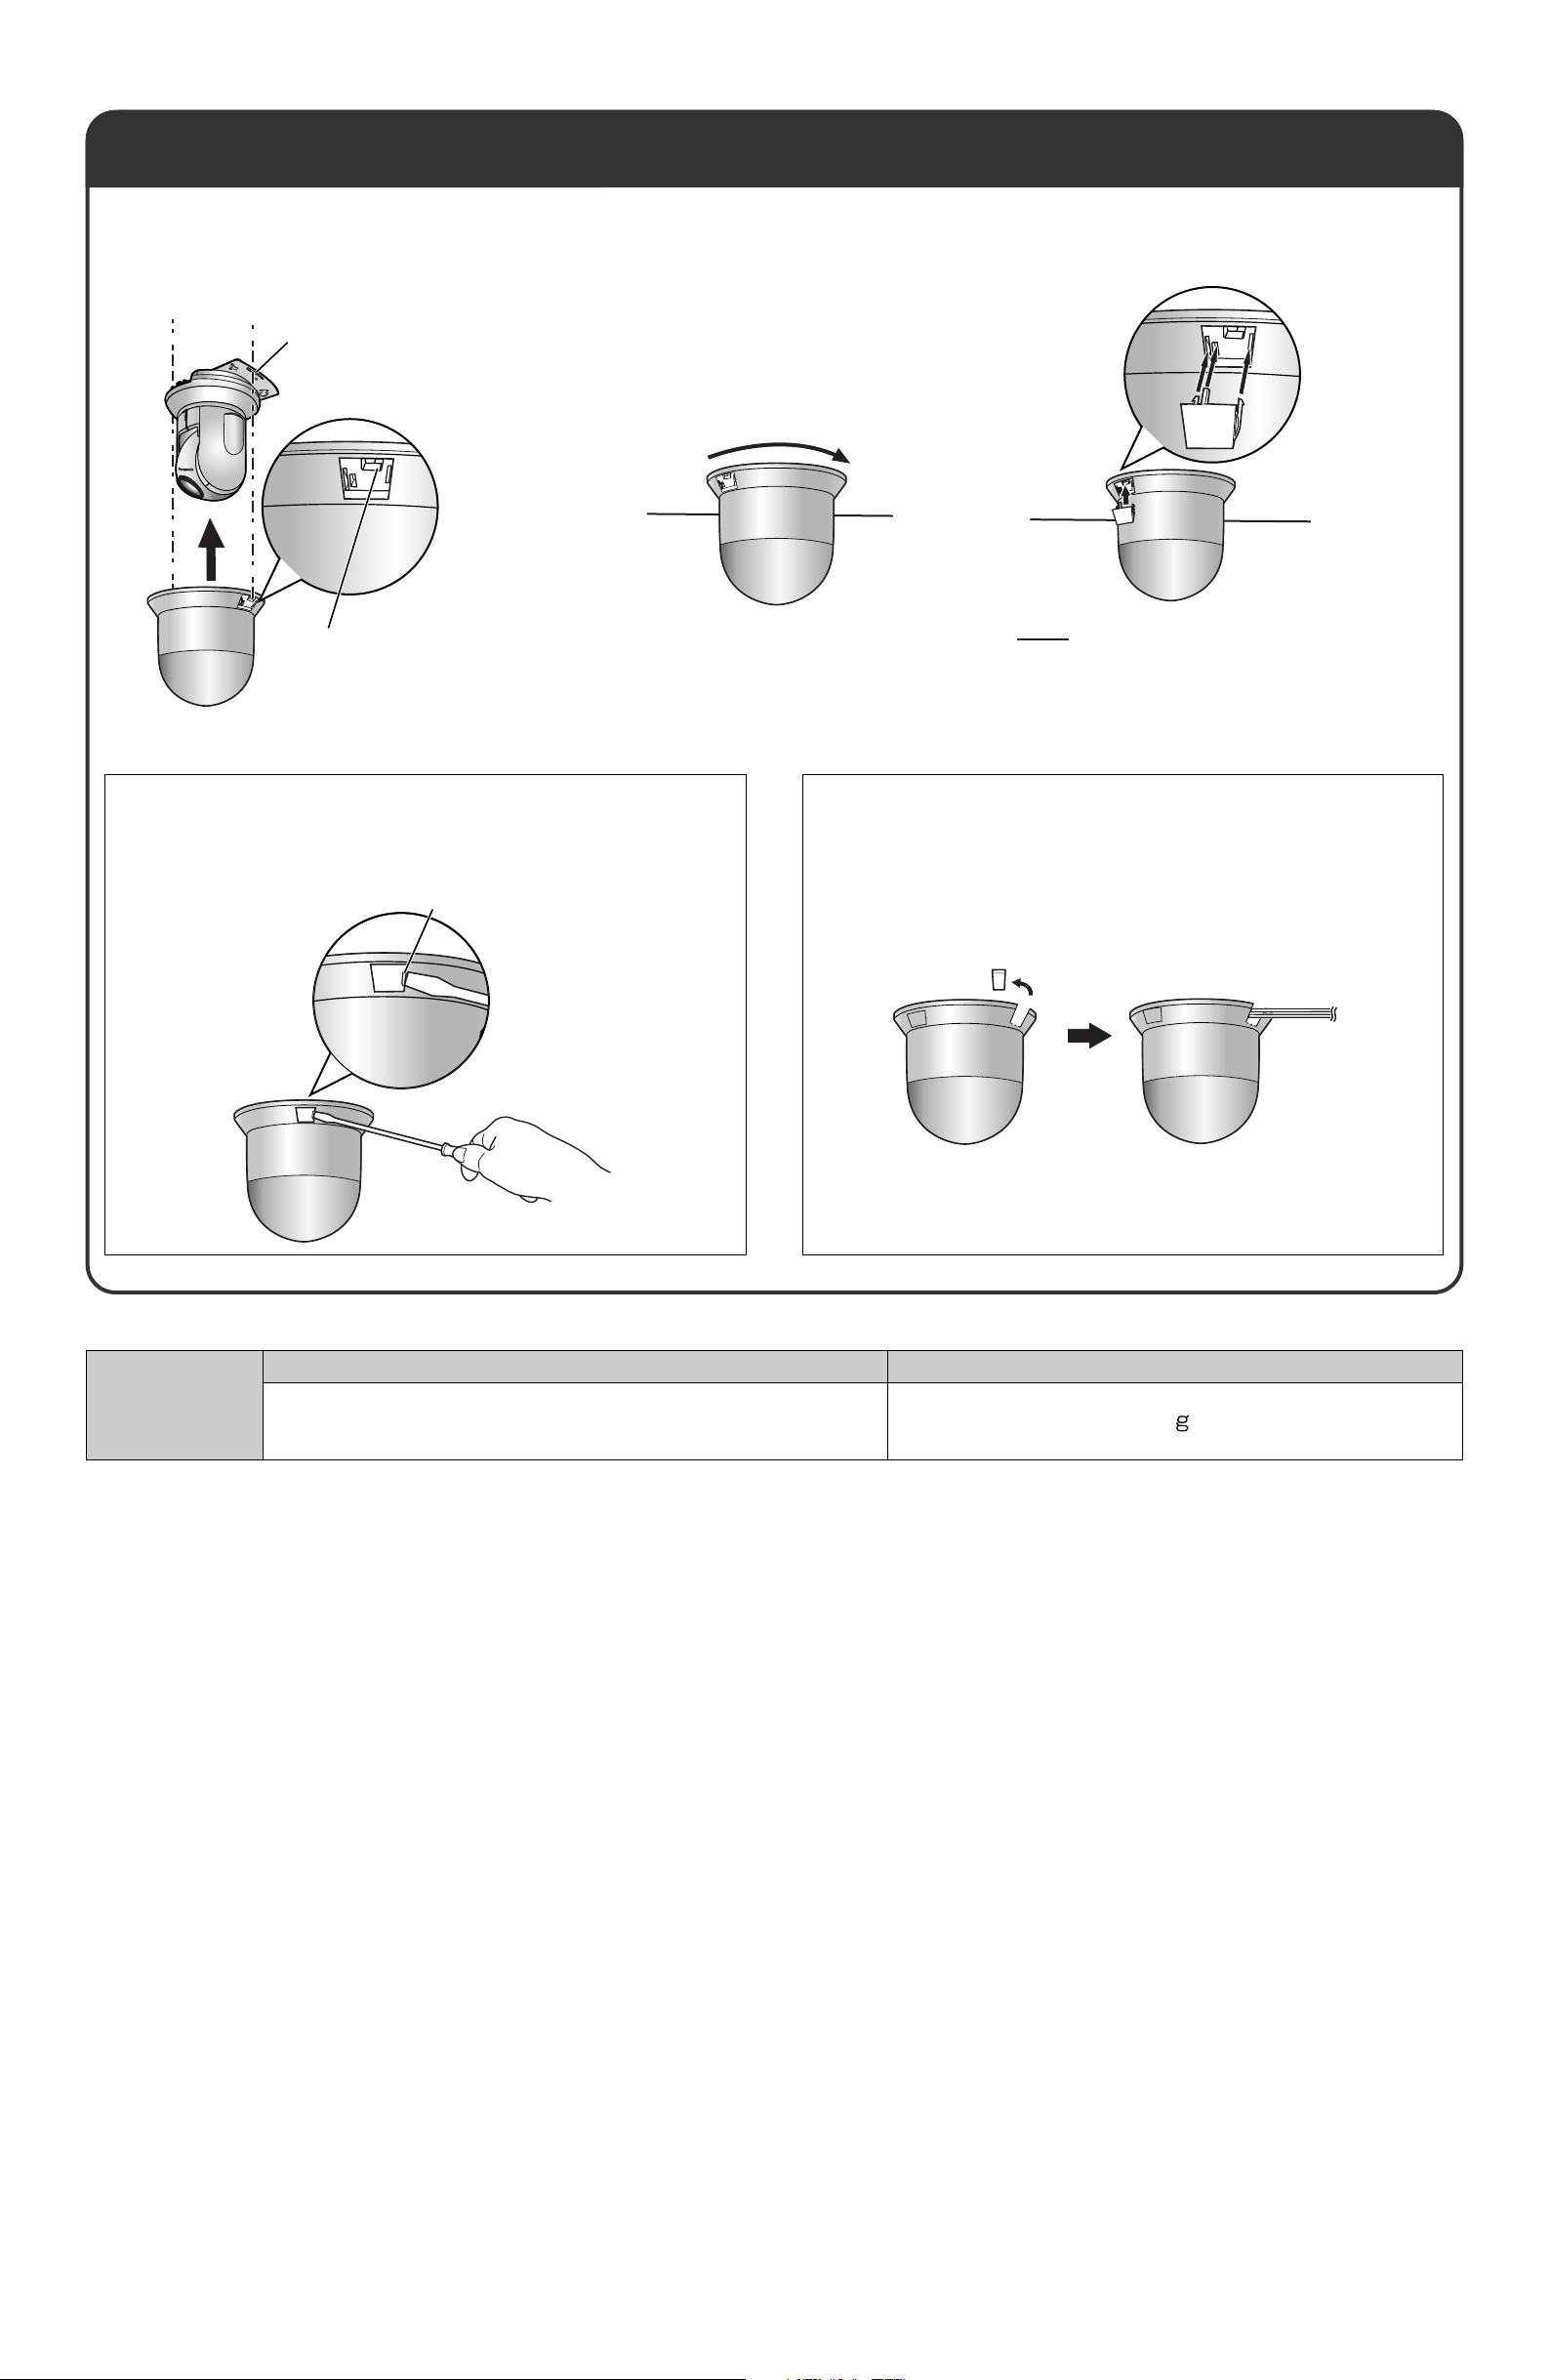
Install the Camera Cover.
Put the camera cover over the main unit
1
and hook the 2 tabs of the camera cover
to each hole in the plate.
Hole
Ta b
Confirm that the 2 tabs are fit to
each hole in the plate by watching
through the openings.
Fasten the camera cover by turning it to
2
the right.
Attach the 2 caps to lock the cover to the
3
mounting bracket of the camera.
Note
After the installation, dust, dirt or insects may
get into the camera cover. Remove them by
regularly removing the camera cover.
■ Removing the Camera Cover
Insert a flat head screw driver into the groove and remove
the caps, this will unlock the camera cover from the mounting
bracket of the camera.
Groove
Dimension (WHD)
■ Wiring Without Making Holes in the Ceiling
Remove the notch from the camera cover and pass the wires
through the hole.
Weight
Specifications
About 169 mm (6 5/8 inches) × 154 mm (6 1/16 inches)
× 169 mm (6 5/8 inches)
About 180 (0.4 lb.)
 Loading...