

Page 1
DIGITAL CAMERA
Advanced
Manual
Thank you for purchasing an Olympus digital camera. Before you start to use your
new camera, please read these instructions carefully to enjoy optimum performance
and a longer service life. Keep this manual in a safe place for future reference.
We recommend that you take test shots to get accustomed to your camera before
taking important photographs.
In the interest of continually improving products, Olympus reserves the right to update
or modify information contained in this manual.
Detailed explanations of all the
functions for getting the most out
of your camera.
Basic Operation
Basic Shooting
Advanced Shooting
Playing Back
Printing
Online Pictures
Camera Settings
Page 2

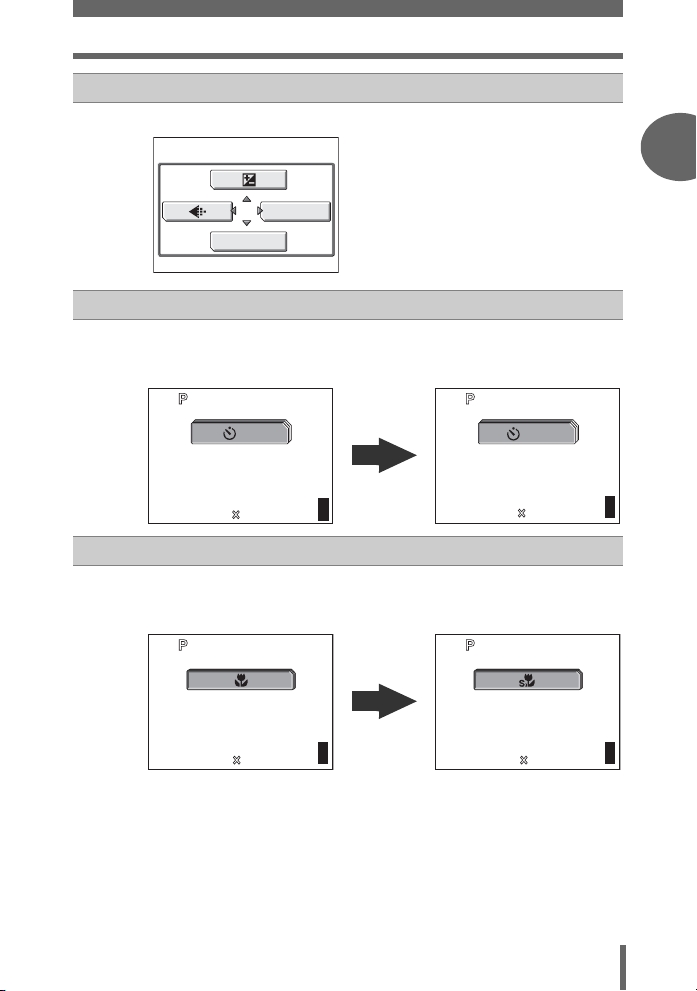
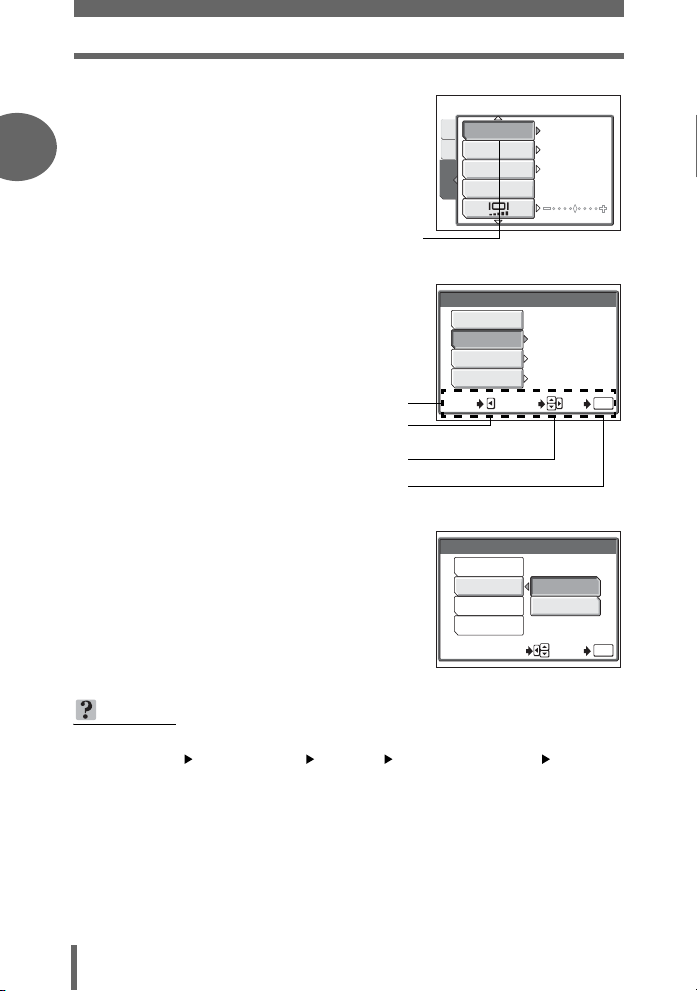
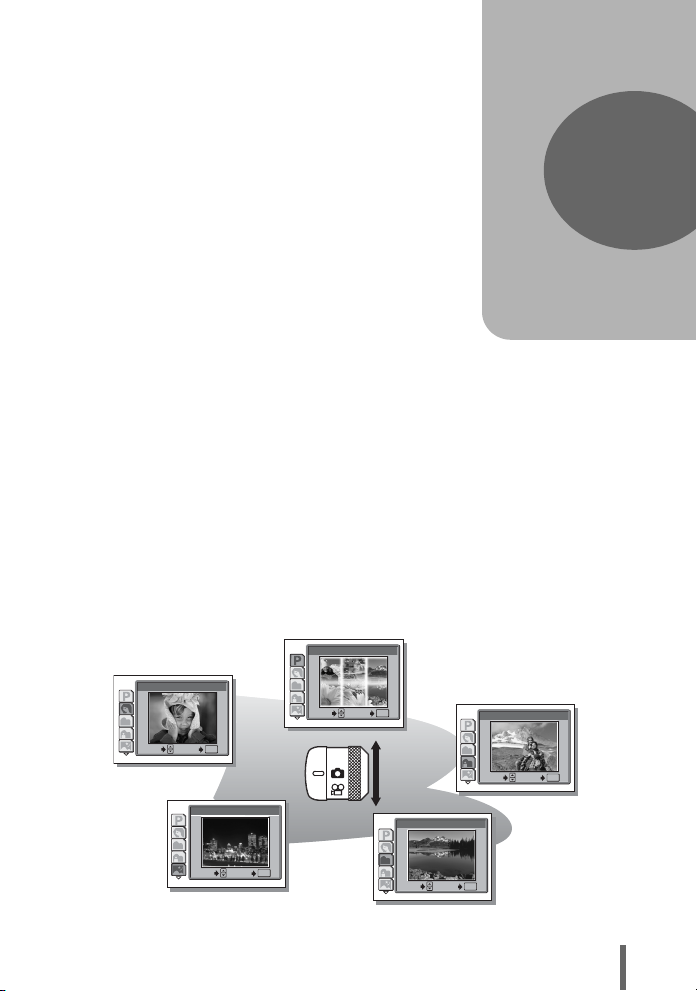
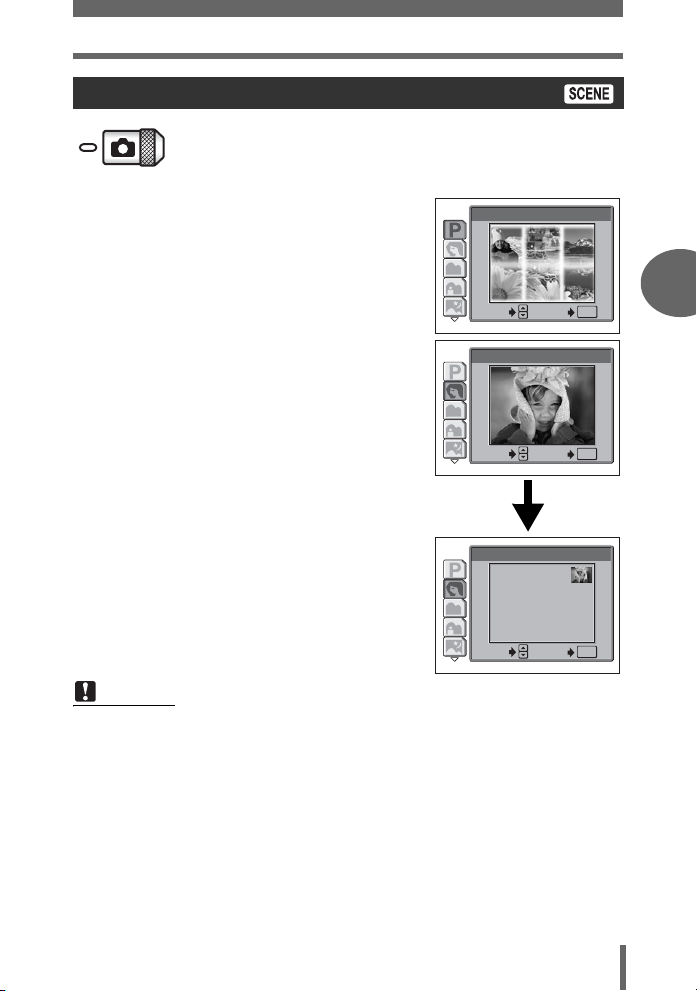
How to use this manual
(Indications used in this manual
A sample page is shown below to explain how to read the instructions in
this manual. Look at it carefully before taking or viewing pictures. See the
reference pages for further details on how to use the buttons or menus.
Set the mode dial to one of these symbols.
g “Mode dial” (P.9)
Select the menus in the
order indicated by.
g“Menus” (P.12)
Procedures differ for album
playback mode.
Available languages vary
depending on the area where
you purchased this camera.
g“Selecting a
language” (P.83)
This sample page is only for your reference. It may differ from the actual page in
this manual.
Note
Important information on factors which may lead to a malfunction or operational
problems. Also warns of operations that should be absolutely avoided.
TIPS
Useful information and hints that will help you get the most out of your camera.
g
Reference pages describing details or associated information.
(Basic and Advanced Manuals
The instruction manual accompanying this camera is divided into two
parts: the Basic Manual and the Advanced Manual (this document).
Basic
Manual
Advanced
Manual
This manual helps you get used to the camera. It gives you easy-tofollow explanations on how to take pictures and view them.
This manual introduces you to the camera’s many functions after you
have mastered the basics. It will help you to use the camera’s
capabilities to take much more creative pictures, with more fun!
2
Page 3

Composition of the manual
You’ll find important points for
getting the most out of your
camera here.
Read this part before taking
pictures.
Explanation of techniques from
basic to advanced, giving you
an understanding of all the
functions related to taking
pictures.
To view, edit and sort the
pictures you have taken.
Settings to make your camera
easier to use.
To print the pictures you have
taken.
To enjoy the pictures you have
taken on a computer. To use
OLYMPUS Master.
Table of Contents
Basic operation
P.4
P.8
Tips before you start
taking pictures
Basic shooting functions
P.17
P.25
Advanced shooting
functions
P.36
Additional shooting
functions P.44
Playback
Settings
Printing pictures
Connecting the camera to
a computer
P.53
P.81
P.92
P.108
1
2
3
4
5
6
7
8
9
Troubleshooting.
For when you want to know the
names of parts, see a list of
menus, or find what you are
looking for.
The title page of each chapter gives a short description of the contents.
Be sure to check it out.
Appendix
Miscellaneous
P.124
P.140
10
11
3
Page 4

Table of Contents
How to use this manual....................................................................... 2
Composition of the manual ................................................................. 3
1 Basic operation - - - - - - - - - - - - - - - - - - - - - - -8
Mode dial............................................................................................. 9
Direct buttons .................................................................................... 10
Menus ............................................................................................... 12
About the menus ......................................................................... 12
How to use the menus ................................................................ 15
2 Tips before you start taking pictures - - - - - -17
Holding the camera ........................................................................... 18
If correct focus cannot be obtained................................................... 19
How to focus (focus lock) ............................................................ 19
Subjects that are difficult to focus on .......................................... 20
Record mode ............................................................................. 21
Still picture record modes............................................................ 21
Movie record modes.................................................................... 22
Number of storable still pictures/remaining recording time ......... 22
To change the record mode........................................................ 24
3 Basic shooting functions- - - - - - - - - - - - - - - 25
Selecting a shooting mode according to the situation....................... 26
Selecting a scene mode .................................................... 29
Zooming in on a distant subject ........................................................ 30
Using the optical zoom................................................................ 30
Using the digital zoom................................................................. 31
Taking close-up pictures (macro/super macro mode) .......... 32
Flash shooting .............................................................................. 34
4 Advanced shooting functions - - - - - - - - - - - 36
AF mode............................................................................................ 37
Metering ............................................................................................ 38
ESP/Spot metering ...................................................... 38
ISO sensitivity ................................................................................... 39
Exposure compensation ............................................................. 40
White balance .......................................................................... 41
Histogram ................................................................................... 42
4
Page 5

Table of Contents
5 Additional shooting functions - - - - - - - - - - -44
Recording movies ....................................................................... 45
Sequential shooting .................................................................. 47
Self-timer shooting ..................................................................... 48
Panorama shooting ........................................................................... 49
Taking two-in-one pictures ................................................................ 51
Recording sound with still pictures ............................................... 52
6 Playback - - - - - - - - - - - - - - - - - - - - - - - - - - -53
Playing back still pictures ........................................................... 54
Selecting the number of pictures .......................................... 55
Calendar display ......................................................................... 55
Slideshow ............................................................................ 56
Picture rotation ...................................................................... 57
Playing back movies ................................................................... 58
Playing back albums ................................................................... 59
Album entry ................................................................................. 60
Album playback ........................................................................... 62
Undo entry................................................................................... 63
Erase album picture .................................................................... 65
Changing the title image ............................................................. 66
Editing still pictures ........................................................................... 67
Soft focus .................................................................................... 68
Fish-eye ...................................................................................... 68
Black and White .......................................................................... 69
Sepia-tone ................................................................................... 69
Resizing ................................................................................ 70
Trimming ............................................................................. 70
Recording sound .......................................................................... 72
Creating an index.............................................................................. 73
Playback on a TV .............................................................................. 74
Video output selection................................................................. 75
Information display ................................................................ 76
Histogram ................................................................................... 77
Protecting pictures ...................................................................... 78
Erasing pictures .................................................................... 78
Single-frame erase ................................................................ 79
All-frame erase .................................................................... 79
Formatting ................................................................................... 80
5
Page 6

Table of Contents
7 Settings- - - - - - - - - - - - - - - - - - - - - - - - - - - - 81
All reset ............................................................................................. 82
Selecting a language .............................................................. 83
Power on setup ................................................................................. 84
Screen setup..................................................................................... 85
Screen color...................................................................................... 86
Playback volume ............................................................................... 86
Beep .......................................................................................... 86
Shutter sound.................................................................................... 87
Rec view............................................................................................ 87
File name .......................................................................................... 88
Pixel mapping.................................................................................... 89
Monitor brightness adjustment .................................................. 90
Setting the date and time .......................................................... 91
8 Printing pictures - - - - - - - - - - - - - - - - - - - - - 92
Direct printing (PictBridge) ................................................................ 93
Using the direct printing function ................................................. 93
Connecting the camera to a printer............................................. 94
Flowchart for printing................................................................... 95
Selecting the print mode ............................................................. 97
Setting the print paper items....................................................... 98
Selecting pictures you want to print ............................................ 98
Setting printing data .................................................................... 99
Trimming ............................................................................. 99
Printing ........................................................................................ 99
Exiting direct printing ................................................................. 100
If an error code is displayed...................................................... 101
Print settings (DPOF) ................................................................ 102
How to make print reservations................................................. 102
Flowchart for setting up the print reservations .......................... 103
Selecting print reservation mode............................................... 104
Selecting the picture to print...................................................... 105
Setting the printing data ............................................................ 105
Completing the print reservation ............................................... 105
Resetting print reservation data ................................................ 106
6
Page 7

Table of Contents
9 Connecting the camera to a computer - - - - 108
Flow................................................................................................. 109
Using OLYMPUS Master ................................................................ 110
What is OLYMPUS Master? ...................................................... 110
Installing OLYMPUS Master ..................................................... 111
Connecting the camera to a computer ............................................ 114
Starting up OLYMPUS Master ........................................................ 116
Displaying camera images on a computer ...................................... 118
Downloading and saving images .............................................. 118
Viewing still pictures and movies .................................................... 120
Printing pictures .............................................................................. 121
To download and save images to a computer without using
OLYMPUS Master............................................................... 123
10 Appendix - - - - - - - - - - - - - - - - - - - - - - - - - 124
Troubleshooting .............................................................................. 125
Error codes................................................................................ 125
Troubleshooting ........................................................................ 126
Camera care ................................................................................... 132
AC adapter (optional) ...................................................................... 133
Safety Precautions .......................................................................... 134
Glossary of terms ............................................................................ 138
11 Miscellaneous - - - - - - - - - - - - - - - - - - - - - 140
Menu list.......................................................................................... 141
List of factory default settings.......................................................... 146
Scene and shooting functions ......................................................... 148
Names of parts ................................................................................ 150
Camera ..................................................................................... 150
Monitor indications .................................................................... 152
Index ............................................................................................... 155
7
Page 8
1 Basic operation
1
Basic operation
Did you ever feel that advanced shooting
and editing functions are only for
professional photographers?
With their experience and skill, they can
make all kinds of fine adjustments to
achieve a variety of effects.
Now you too can achieve such effects
simply by using the buttons on your digital
camera. You can use the advanced
functions available on your camera by
setting the menu items to adjust the amount
of light passing through the aperture or
altering the focusing range.
Just display a menu on the monitor and use
the buttons to choose a setting. Familiarize
yourself with the buttons and menus before
reading the explanations of the various
functions.
ISO
AUTO
64
100
200
400
WB
Movies
MODE MENU
00:0:36360 0:36
ESP/
DRIVE
CAMERA
CARD
DIGITAL ZOOM
SET
AF MODE
Sequential shooting
8
Page 9
Mode dial
This camera features a mode dial for selecting the camera’s mode. The
modes are divided into shooting and playback modes. Select the mode
you want, then press the POWER switch to turn the camera on.
Shooting modes
Set the mode dial to take
pictures or movies.
Playback mode
Set the mode dial to this position to
view individual pictures and movies.
(About the mode dial
Shooting
modes
Playback
mode
In this manual, the following icons indicate the mode dial position for using
shooting mode functions.
K This function allows you to take still pictures.
A
This function allows you to record movies with sound. gP.45
This function allows you to view still pictures and movies. You can
q
also playback pictures from your albums and sound. gP.54, 58
TIPS
• You can change the mode before and after turning the camera on.
Mode dial notation
1
Basic operation
This indicates that the function is used with the mode
dial set to A.
This indicates that the function is used with mode dial
set to K or A.
9
Page 10
Direct buttons
2560 1920
HQ
By using the direct buttons, operating the camera is even easier.
1
h
g
c
d
e
Basic operation
Of button
c
In K mode, Of lets you select the optimum settings for the
shooting conditions for the camera.
according to the situation” (P.26)
1
PROGRAM AUTO
SELECT
Y# (Flash mode) button
d
In K mode,
changes in the following order with each press of the button. g“Flash
shooting” (P.34)
press Y# repeatedly to change the setting. The setting
AUTO
GO
OK
g“Selecting a shooting mode
AUTO (Auto-flash)
f
! (red-eye
reduction flash)
10
HQ
2560 1920
0030
303030
$ (Flash off) # (fill-in flash)
Page 11
e button
HQ
2560
1920
HQ
2560 1920
30
2560 1920
HQ
2560 1920
HQ
e
Pressing
NY (Self-timer) button
f
In shooting modes, press
setting alternates between [
shooting” (P.48)
e displays the top menu. g“Menus” (P.12)
MODE MENU
WB
Direct buttons
NY repeatedly to change the setting. The
Y ON] and [Y OFF]. g“Self-timer
1
Basic operation
Basic operation
g
ON
HQ
HQ
2560 1920
2560 1920
303030
HQ
2560
X& (Macro) button
In shooting modes, press X& repeatedly to change the setting.
The setting switches between [
g“Taking close-up pictures (macro/super macro mode)” (P.32)
HQ
2560 1920
1920
303030
&], [%], and [& OFF].
303030
OFF
0030
30
30
303030
11
Page 12

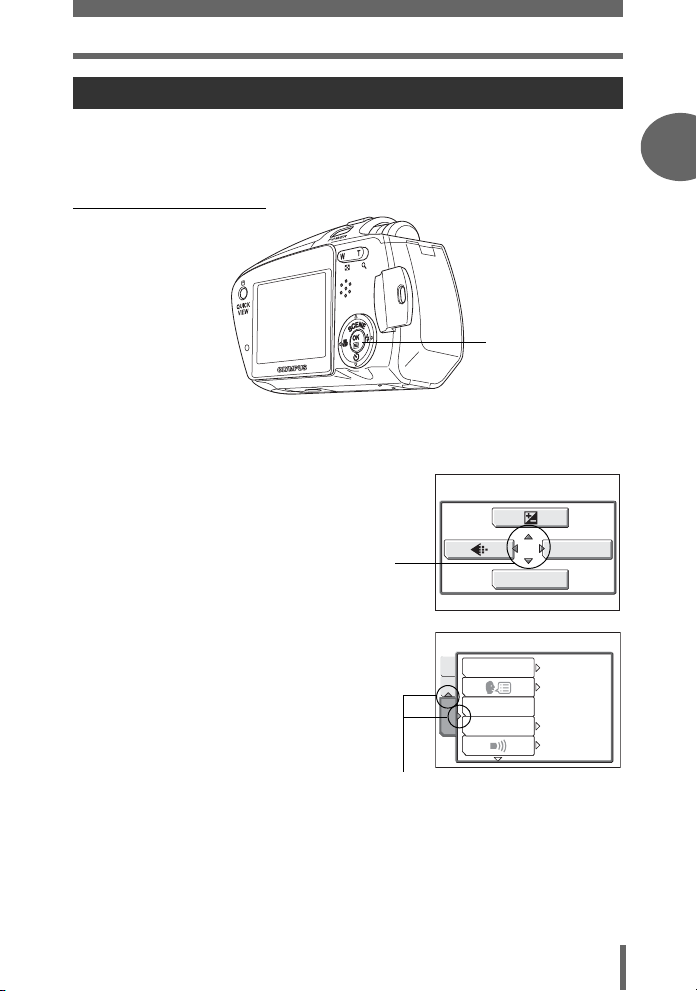
Menus
QUICK VIEW button/- (Album playback) button
h
In shooting modes, pressing the QUICK VIEW button displays the last
picture taken on the monitor. All the functions in normal playback mode
1
are available.
To return to shooting mode for taking the next picture, press the QUICK
VIEW button or press the shutter button halfway.
In playback mode, press the - button to enable album playback mode.
The album selection screen is displayed on the monitor.
g“Playing back albums” (P.59)
To return to normal playback mode, press the - button again.
g“Playback” (P.53)
Basic operation
Menus
Press e to display the menu on the monitor.
About the menus
The menu items that can be used differ depending on the mode.
Top menu
Menus are divided into shortcut menus
and mode menus.
MODE MENU
WB
Shortcut menus
You can go to each setting’s screen directly. The settings are categorized into tabs by
function.
Mode menus
12
Page 13
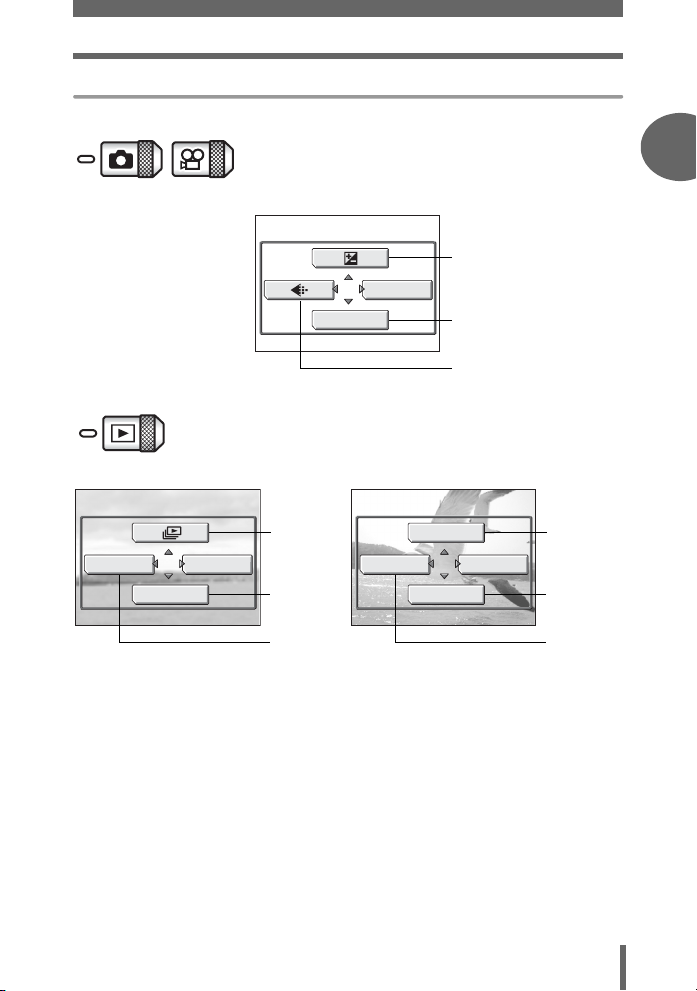
Shortcut menus
Shooting still pictures/movies
MODE MENU
WB
Playback moviesPlayback still pictures
gP.40
gP.41
gP.21
Menus
1
Basic operation
Basic operation
ALBUM ENTRY
ERASE
MODE MENU
gP.56
gP.79
gP.60
MOVIE PLAYBACK
ALBUM ENTRY
ERASE
gP.58
MODE MENU
gP.79
gP.60
13
Page 14
Menus
Mode menus
1
DRIVE
ISO
ESP
AUTO
OFF
SPOT
PLAY tab
EDIT tab
CARD tab
SETUP tab
PLAY
EDIT
CARD
SET
INFO
PLAY tab For setting playback-
related functions.
EDIT tab For editing saved pictures.
CAMERA tab
SETUP tab
Basic operation
CAMERA
tab
CARD tab
ESP/
CAMERA
CARD
DIGITAL ZOOM
SET
AF MODE
For setting shootingrelated functions.
CARD tab For formatting the memory
card.
SETUP tab For setting basic camera
functions and ease of use
features.
CARD tab For formatting cards and
erasing all image data.
SETUP tab For setting basic camera
functions and ease of use
features.
TIPS
•In A mode, the mode menu differs in shooting mode and in playback mode.
For details, see “Menu list” (P.141).
• For details on mode menu items in shooting mode/playback mode, see “Menu
list” (P.141).
OFF
OFF
14
Page 15
Menus
How to use the menus
Use the arrow pad and e to select and set the menu items.
Follow the operation guide on the screen and use the arrow pad to set the items.
How to use the menus is shown below.
Ex: Setting Shutter sound
ONXY buttons
e button
1
Basic operation
Basic operation
1 Press e in K mode.
• The top menu is displayed.
2 Press Y to select [MODE MENU].
This refers to the arrow
pad (ONXY).
3 Press ON to select the [SETUP]
tab, then press Y.
• Refer to the arrows on the screen to
select a setting with the arrow pad.
This refers to the arrow pad
(OY).
Top menu
ALL RESET
CAM
CARD
PW ON SETUP
COLOR
SETUP
MODE MENU
WB
ON
ENGLISH
NORMAL
LOW
15
Page 16
Menus
4 Press ON to select [SHUTTER
SOUND], then press Y.
1
• Refer to the arrows on the screen to
select a setting with the arrow pad.
• Unavailable settings cannot be
selected.
The selected item
appears indented.
SHUTTER SOUND
CAMCARD
REC VIEW
FILE NAME
PIXEL MAPPING
SETUP
ON
RESET
5 Press ON to select [OFF], [1],
Basic operation
[2] or [3] then press Y.
• Follow the operation guide at the bottom
of the screen and use the arrow pad to
select and set a setting.
Operation guide
Press X to cancel.
Press ON to select a setting.
Press Y to move settings.
Press e to make your selection.
6 Press ON and select [LOW] or
[HIGH], then press e.
• Follow the operation guide at the bottom
of the screen and use the arrow pad to
select and set a setting.
•Press e until the menu closes.
SHUTTER SOUND
OFF
1
2
3
CANCEL
SELECT
SHUTTER SOUND
OFF
1
2
3
SELECT GO
TIPS
• In this manual, Steps 1 to 5 of how to use the menus are expressed as follows:
Top menu [MODE MENU] [SETUP] [SHUTTER SOUND]
[OFF] / [1] / [2] / [3]
LOW
LOW
LOW
GO
LOW
HIGH
OK
OK
16
Page 17
2 Tips before you start taking pictures
SHQ
SQ2
Tips before you start
taking pictures
Your pictures are almost guaranteed to
come out well just by setting your camera to
the
P mode and pressing the shutter button.
Occasionally however you may need to
focus on a difficult subject or adjust the
brightness in order to get the picture to
come out how you wanted...
Just knowing which button to press or which
setting to change can help you solve these
problems.
Did you know that by selecting an image
size according to how you are planning on
using the pictures afterwards, you can store
more pictures on the memory card? These
are just some of the hints provided in this
chapter.
Online applications
SQ2
Ideas
Ideas
SQ2
2
Printing
applications
SHQ
SHQ
17
Page 18
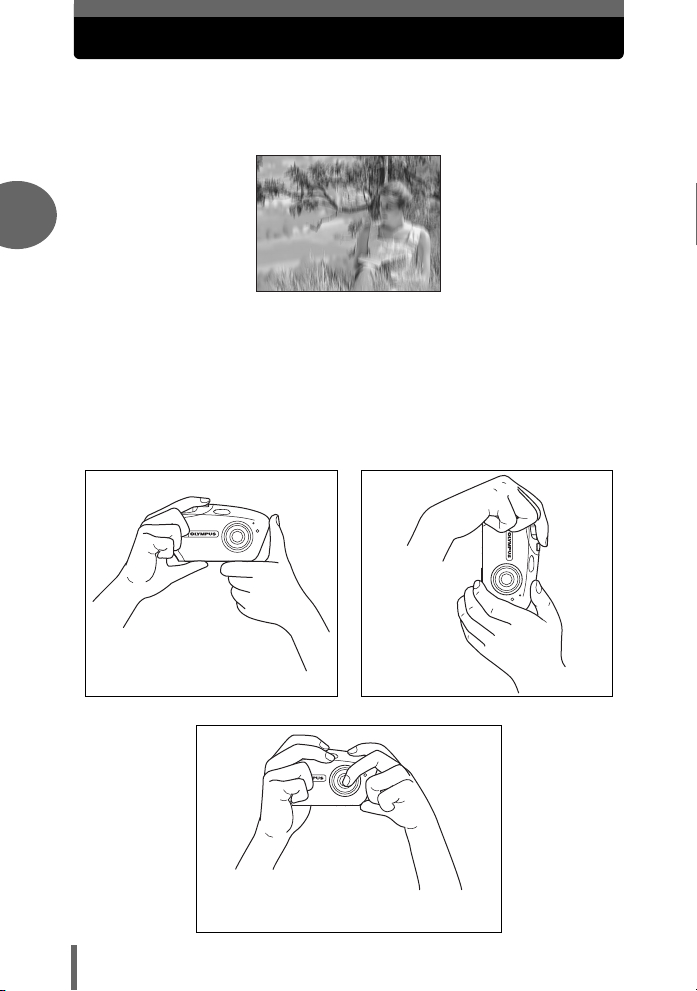
Holding the camera
Sometimes when you look at a picture you have taken, the outline of the
subject is blurred. This is often caused by movement of the camera at the
precise moment that the shutter button is pressed.
2
Picture where subject is not clearly defined
To prevent the camera from moving, hold the camera firmly with both
hands while keeping your elbows at your sides. When taking pictures
with the camera in the vertical position, hold the camera so that the flash
is positioned higher than the lens. Keep your fingers and the strap away
from the lens and flash.
Horizontal grip Vertical grip
Tips before you start taking pictures
18
Incorrect grip
Keep your fingers and the strap away from the
lens, flash and microphone.
Page 19
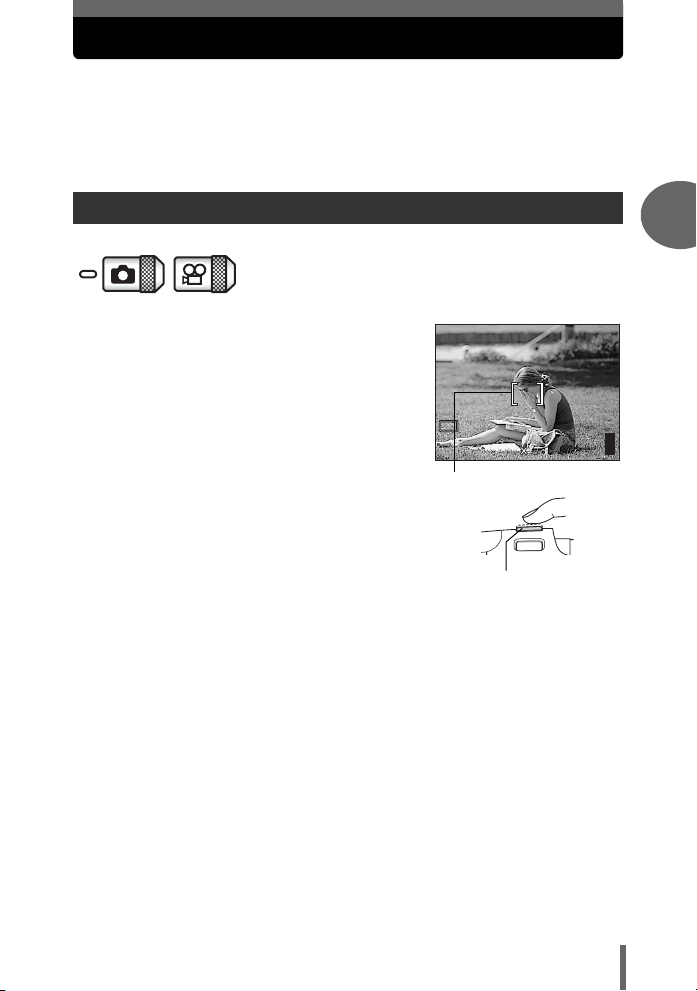
If correct focus cannot be obtained
2560 1920
HQ
The camera automatically detects the focus target in the frame. The level
of contrast is one of the criteria it uses to detect the subject. The camera
may fail to determine subjects with lower contrast than the surroundings or
with an area of extremely strong contrast in the frame. If this happens, the
simplest solution is to use the focus lock.
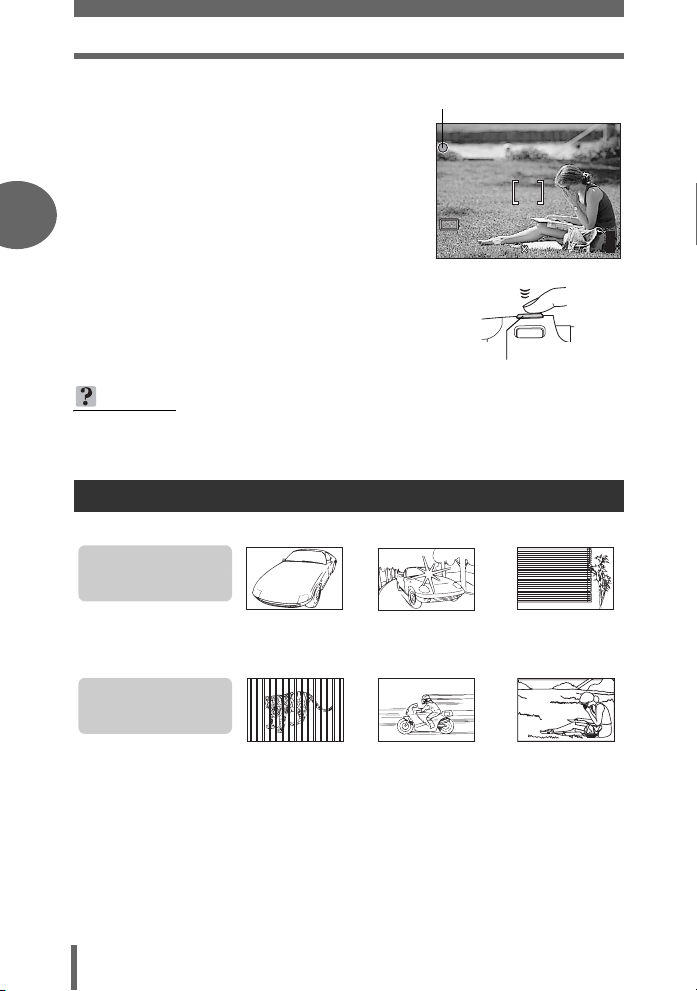
How to focus (focus lock)
1 Position the AF target mark on
the subject you want to focus on.
• When shooting a hard-to-focus subject
or a fast-moving subject, point the
camera at an object about the same
distance away as the subject.
P
HQ
AF target mark
2 Press the shutter button halfway
until the green lamp lights.
• When the focus and exposure are
locked, the green lamp lights.
• When the green lamp blinks:
c You are too close to the subject.
Take the picture at least 50 cm/20"
away from the subject. When the distance from the camera to the
subject is less than 50 cm/20", select the macro mode. g“Taking
close-up pictures (macro/super macro mode)” (P.32)
d The focus and exposure are not locked. Release your finger from the
shutter button, re-position the AF target mark on the subject and press
the shutter button halfway again.
Shutter button
2560 1920
2
Tips before you start taking pictures
303030
19
Page 20
If correct focus cannot be obtained
2560 1920
HQ
3 Keeping the shutter button
Green lamp
pressed halfway, recompose
your shot.
2
HQ
4 Press the shutter button fully.
TIPS
Focus on the subject in the center of the frame.
g“AF mode” (P.37)
Subjects that are difficult to focus on
Under certain types of conditions, the auto focus may not work properly.
Tips before you start taking pictures
The green lamp blinks.
The subject cannot be
brought into focus.
Subject with an
extremely bright area in
the center of the frame
The green lamp lights,
but the subject cannot
be brought into focus.
Subject with
low contrast
P
2560 1920
Shutter button
Subject without
vertical lines
303030
Subjects at
different
distances
If this happens, focus on an object with high contrast at the same distance as the
intended subject (focus lock), recompose your shot and then take the picture. If the
subject has no vertical lines, hold the camera vertically and focus the camera using
the focus lock function by pressing the shutter button halfway, then return the
camera to the horizontal position while keeping the button pressed halfway and take
the picture.
Fast-moving
subject
20
The subject to be
focused on is not in
the center of the frame
Page 21
Record mode
L
You can select a record mode in which to take pictures or shoot movies.
Select the best record mode for your purpose (printing, editing on a
computer, website editing, etc.). For information on the image sizes for
each record mode and the memory capacity of the card, see the table on
P.22.
Still picture record modes
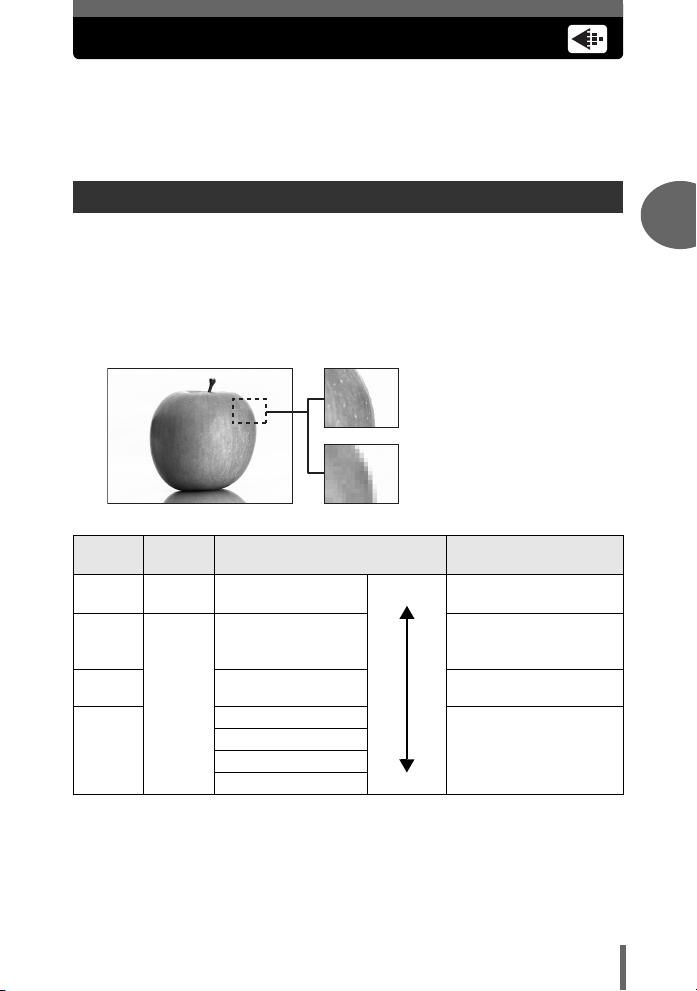
Record mode depicts the image size and compression rate of pictures you wish to
record.
Pictures are made from thousands of dots (pixels). If a picture with relatively few
pixels is enlarged, it looks like a mosaic. A picture with many pixels is denser and
clearer, but requires a larger file size (data size), decreasing the number of pictures
that can be saved on a card. Increasing the compression rate reduces the file size,
but makes the pictures appear grainy.
Picture with high number of pixel
Picture with low number of pixel
2
Tips before you start taking pictures
Record
mode
SHQ Detailed
SQ1 2048 × 1536
SQ2
HQ
Picture
quality
Normal
Image size Usage examples
2560 × 1920
(Low compression)
2560 × 1920
(Hereafter standard
compression)
1600 × 1200
1280 × 960
1024 × 768
640 × 480
arger
Smaller
For making large prints
or editing on a computer.
For printing in postcard
size.
For printing 3" × 5"
prints.
For small prints, posting
on the Internet or
attaching to e-mail.
Image size
The number of pixels (horizontal × vertical) used when saving an image. Save your
pictures in a large image size to get clearer prints.
Compression
Image data is compressed and recorded. The higher the compression, the less clear
the image will be.
21
Page 22
Record mode
HQ
2560
1920
HQ
36
Movie record modes
Movies are recorded in Motion-JPEG format.
Number of storable still pictures/remaining recording time
Still pictures
2
Record
mode
SHQ 2560 × 1920
HQ 2560 × 1920
SQ1 2048 × 1536 19 20
SQ2
Image size
1600 × 1200 23 24
1280 × 9600 35 38
1024 × 7680 52 58
1640 × 4800 76 90
Movies
Tips before you start taking pictures
Record
mode
HQ
SQ
Image size File format
320 × 240 (15 frames/sec.)
160 × 120 (15 frames/sec.)
Com-
pression
Low
com-
pression
Normal
com-
pression
Motion-JPEG
File
format
JPEG
Number of storable
still pictures
Using a 16 MB card
With sound
44
12 13
Remaining recording time
Using a 16 MB card
With sound
41 sec.
1 min. 45 sec.
Without sound
22
2560
HQ
Number of storable
still pictures
1920
303030
HQ
Remaining recording time
00:0:36
0 0:3 6
Page 23

Record mode
TIPS
• When a picture is transferred to a computer, the size of the picture on the
computer screen varies depending on the computer’s monitor setting. For
instance, a picture taken with an image size of 1,024 × 768 fills as the screen
if you set the picture to 1× when the monitor setting is 1,024 × 768. However, if
the monitor setting is over 1,024 × 768 (such as 1,280 × 1,024), the picture only
takes up part of the screen.
Note
• The number of storable still pictures and movie recording times listed in the
table are approximate.
• The number of storable still pictures may change according to the subject or
factors like whether print reservations have been made or not. In certain
instances, the number of remaining pictures does not change even when you
take pictures or erase stored images.
Tips before you start taking pictures2Tips before you start taking pictures
23
Page 24
Record mode
To change the record mode
Top menu [K] g “Menus” (P.12)
2
1 Select a record mode from
[SHQ], [HQ], [SQ1] and [SQ2].
For movies, select a record mode
from [HQ] and [SQ].
SHQ
2560 1920
HQ
2560 1920
SQ1
2048 1536
SQ2
640 480
SELECT GO
For still pictures
HQSQ320 240
160 120
OK
Tips before you start taking pictures
2 If you selected [SQ2], choose an
image size.
3 Press e.
24
SELECT GO
For movies
SQ2
1600 1200
1280 9600
1024 768
0640 480
CANCEL
SELECT
GO
OK
OK
Page 25
3 Basic shooting functions
Basic shooting
functions
A professional photographer adjusts the
exposure to the optimal setting, chooses the
best focusing method and even selects the
type of film according to the subject.
With a digital camera, you don’t need to
learn how to make them. Your camera will
adjust the settings for you! All you have to
do is choose a scene mode, whether you
are taking a landscape, a night scene, a
portrait-style image or whatever, and the
camera will set the best exposure and white
balance.
There’s nothing to it – just press the shutter
button!
1
PROGRAM AUTO
2
PORTRAIT
OK
GO
3
LANDSCAPE
4
LANDSCAPE+PORTRAIT
LANDSCAPE+PORTRAIT
SELECT
SELECT
SELECT
GO
5
SELECT
OK
NIGHT SCENE
3
OK
OK
GO
GO
SELECT
OK
GO
SELECT
OK
GO
25
Page 26

Selecting a shooting mode according to the situation
When you select a scene mode according to the situation or shooting
conditions, the camera automatically selects the optimal settings.
(f mode
P PROGRAM AUTO
All you need to do is press the shutter button. The camera automatically selects the
optimal settings.
B
PORTRAIT
Suitable for taking a portrait-style shot of a person. This mode features an in-focus
3
subject against a blurred background.
F LANDSCAPE
Suitable for taking pictures of landscapes and other outdoor scenes. Both the
foreground and the background are in focus. Since blues and greens are vividly
reproduced in this mode, it is excellent for shooting natural scenery.
D LANDSCAPE + PORTRAIT
Suitable for taking pictures of both your subject and the landscape. The picture is
taken with the background as well as the subject in the foreground in focus. You can
take pictures of your subject against a beautiful sky or landscape.
Basic shooting functions
G NIGHT SCENE
Suitable for shooting pictures in the evening or at night. The camera sets a slower
shutter speed than is used in normal shooting. For example, if you take a picture of a
street at night in
of light. In the Night Scene shooting mode, the true appearance of the street is captured.
P
mode, the lack of brightness will result in a dark picture with only dots
TIPS
• The camera uses slower shutter speeds when set to G. The use of a tripod is
recommended to prevent your pictures from being blurred by camera
movement.
U NIGHT+PORTRAIT
Suitable for shooting both the main subject and background at night.
TIPS
• The camera uses slower shutter speeds when set to U. Be sure to stabilize
the camera by using a tripod.
• The flash fires in the red-eye reduction mode. g“Flash shooting” (P.34)
26
Page 27

Selecting a shooting mode according to the situation
V CUISINE
Lets you take beautiful pictures of food. The saturation, sharpness and contrast
settings are increased to take sharp, vivid pictures of the subject.
O BEACH & SNOW
Suitable for taking pictures at a beach or in snow. Lets you take beautiful pictures of
scenery with sand or snow.
Q SELF PORTRAIT + SELF TIMER
Suitable for taking pictures while traveling. Lets you take pictures of yourself and the
landscape.
P BEHIND GLASS
Suitable for taking pictures of items displayed in a shop’s window or through glass.
TIPS
• The flash cannot be used.
R SELF PORTRAIT
Enables you to take a picture of yourself while holding the camera.
TIPS
• The zoom function is locked at the W position and cannot be changed while in
self portrait mode.
• Spot metering is not available in this mode.
Basic shooting functions3Basic shooting functions
N INDOOR
Suitable for taking pictures of the subject indoors together with the background
scene. The background is reproduced clearly.
TIPS
• Record mode can only be set to SQ2: [1280 × 960], [1024 × 768] and [640 ×
480].
27
Page 28

Selecting a shooting mode according to the situation
W CANDLE
The optimum mode to take a picture of candles preserving the warm light from fire.
TIPS
• The flash cannot be used.
• Record mode can only be set to SQ2: [1280 × 960], [1024 × 768] and
[640 × 480].
S SUNSET
3
Preserves the deep hues seen in sunsets and sunrises.
TIPS
• The flash cannot be used.
X FIREWORKS
Lets you capture the expanding burst of light from fireworks.
TIPS
• The camera uses slower shutter speeds when set to X.
Basic shooting functions
The use of a tripod is recommended to prevent your pictures from being blurred
by camera movement.
28
Page 29
Selecting a shooting mode according to the situation
Selecting a scene mode
1 Press Of.
• The screen for selecting a scene mode
is displayed.
2 Press NO to select a scene
mode and press e.
• After the sample image was displayed,
for what kind of shooting situation is
suitable will be displayed.
1
PROGRAM AUTO
SELECT
2
PORTRAIT
SELECT
2
PORTRAIT
For taking a
portrait-style shot.
SELECT
GO
GO
GO
Note
• Even if you change the record mode or flash mode with a scene mode other
than [PROGRAM AUTO], they will return to the factory default settings when
you change to another scene mode.
OK
OK
OK
Basic shooting functions3Basic shooting functions
29
Page 30
Zooming in on a distant subject
You can zoom in on your subject using the optical zoom and digital zoom.
With the optical zoom, the image is enlarged by using the CCD when the
lens magnification is changed, and the image is formed by all the CCD
pixels. With the digital zoom, the area at the center of the image captured
by the CCD is cropped and enlarged back to size. When you zoom in on
a subject, you are essentially taking a small area of the picture and making
it bigger. Therefore, the greater the magnification with the digital zoom, the
grainier the resulting picture will be.
The following zoom magnifications are available on this camera.
Optical zoom 2× (equivalent to 35 mm to 70 mm on a
3
Optical zoom + digital zoom Max. 8×
Note that camera movement is likely to occur at higher magnifications.
Using the optical zoom
35 mm film camera)
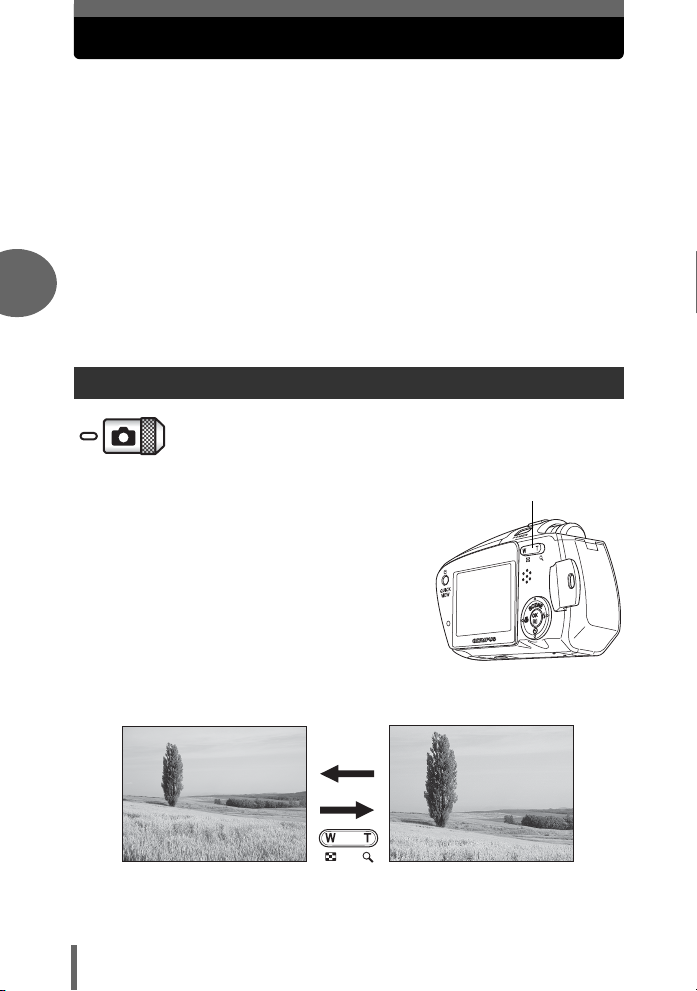
1 Press the zoom button.
Basic shooting functions
Zoom out:
Press the W side of the zoom button
30
Zoom button
Zoom in:
Press the T side of the zoom button
Page 31

Zooming in on a distant subject
2560 1920
HQ
2560 1920
HQ
Using the digital zoom
To use the digital zoom, set [DIGITAL ZOOM] to [ON].
Top menu [MODE MENU] [CAMERA] [DIGITAL ZOOM]
g
“Menus” (P.12)
1 Select [ON] and press e.
2 Press the T side of the zoom
button.
P
HQ
2560 1920
The white area of the zoom indicator
indicates the optical zoom. If the
[DIGITAL ZOOM] is set to [ON], a red
area appears on the zoom indicator.
When you reach the limit of the
optical zoom, the digital zoom is
enabled.
Note
•In A mode, the maximum magnification possible for digital zoom is up to
3 times.
303030
The cursor moves up and
down on the zoom indicator
according to the zoom
magnification.
The cursor turns orange when
inside the digital zoom area.
P
HQ
CAMERA
CARD
SET
2560 1920
ESP/
DRIVE
ISO
DIGITAL ZOOM
AF MODE
Basic shooting functions3Basic shooting functions
OFF
ON
303030
31
Page 32

Taking close-up pictures (macro/super macro mode)
2560 1920
HQ
Set the camera to macro mode when taking subjects up close (20 cm/8"
to 50 cm/20").
& When the optical zoom lever is at the maximum wide position and you are as
close as 20 cm/8" to your subject, you can fill the entire frame with a
20.9 × 15.4 cm (8.2" × 6.0") subject.
% This mode lets you shoot from as close as 8 cm/3.1" to your subject. Subjects
measuring approximately 4.4 × 3.3 cm (1.7" × 1.3") can be captured on the
monitor. In the % mode, normal shooting is also possible, but the position of
the zoom is fixed automatically and cannot be adjusted.
3
&
Basic shooting functions
1 Select [&] or [%] by repeatedly
pressing X&.
• If no operation is performed for about 2
seconds, the macro or super macro
mode is set and the mode selection
screen is automatically exited.
2 Press the shutter button fully to take the picture.
32
%
HQ
2560 1920
303030
Page 33

Taking close-up pictures (macro/super macro mode)
TIPS
The subject appears in shadow when the super macro mode is used.
→ If the center of the frame (within the AF target mark) is metered when you
are close to the subject and you shoot with the optimal exposure, the picture
will come out correctly. g“ESP/Spot metering” (P.38)
Note
• If you take pictures of your subject at a distance of more than 50 cm (20") in the
macro mode, the camera will take longer than usual to focus.
• If you take pictures of your subject at a distance of more than 20 cm (7.9") in
the super macro mode, the camera will take longer than usual to focus.
• If you use the flash in macro shooting, shadows may be noticeable and the
appropriate exposure may not be obtained.
• During super macro shooting, the zoom and flash are not available.
Basic shooting functions3Basic shooting functions
33
Page 34

Flash shooting
Select the flash mode best suited to the light conditions and the effect you
want to achieve. You can also adjust the amount of light emitted using the
flash intensity control.
Flash working range
W (max.): Approx. 0.2 m to 3.0 m (0.7 ft. to 9.8 ft.)
T (max.): Approx. 0.2 m to 2.2 m (0.7 ft. to 7.2 ft.)
Auto-flash (No indication)
The flash fires automatically in low light or backlight conditions.
Red-eye reduction flash (!)
The light from the flash may make the
3
subject’s eyes appear red in the picture.
The red-eye reduction flash mode
reduces this phenomenon by emitting
pre-flashes before firing the regular flash.
Note
• After the pre-flashes, it takes about 1 second before the shutter is released.
Hold the camera firmly to avoid camera movement.
• Effectiveness may be limited if the subject is not looking directly at the preflashes, or if the shooting range is too far. Individual physical characteristics
may also limit effectiveness.
The subject’s eyes appear red.
Basic shooting functions
Fill-in flash (#)
The flash fires regardless of the available
light. This mode is useful for eliminating
shadows on the subject’s face (such as
shadows from tree leaves), in a backlight
situation, or for correcting the color shift
produced by artificial lighting (especially
fluorescent light).
Note
• The fill-in flash may not have the desired effect under excessively bright light.
Flash off ($)
The flash does not fire even in low light conditions. Use this mode in situations where flash
photography is not desired or is prohibited. You can also use this mode when you want to
shoot a natural-looking twilight or night scene.
Note
• Since a slow shutter speed is automatically selected in low light situations when
in the flash off mode, the use of a tripod is recommended to prevent your
pictures from being blurred by camera movement.
34
Page 35

Flash shooting
2560 1920
HQ
HQ
2560
1920
2560
1920
for link
1 Change the flash mode by repeatedly pressing Y#.
• The flash settings change in the order of
the arrows.
• If no operation is performed for about 2
seconds, the flash mode is set and the mode
selection screen is automatically exited.
2 Press the shutter button halfway.
• In conditions where the flash will fire, #
lights (flash stand-by).
HQ
# mark
AUTO
AUTO
2560 1920
3 Press the shutter button fully to
take the picture.
0030
Basic shooting functions3Basic shooting functions
303030
2560
2560
HQ
TIPS
The # (flash charge) indication blinks.
→ The flash is charging. Wait until # turns off.
Note
• The flash does not fire in the following situations:
During super macro shooting and panorama shooting.
• The flash may not give you the optimum result in macro mode with the zoom
set to wide-angle (W). Check the resulting picture on the monitor.
1920
1920
303030
35
Page 36

4 Advanced shooting functions
SELECTGOGO
OK
Advanced
shooting functions
4
Letting the camera select the optimal settings
is simple and easy, but if you want, you can
be a lot more creative. Now that you have
mastered basic operation, you can start
enjoying your camera’s more advanced
functions. You can adjust the shooting
conditions manually and try out different
effects. For example, if it is evening, you can
add a touch of color to the night sky. By
setting the white balance to
light), you can give the dark sky a blue tone.
Adjusting a single function can produce
amazing results. Try various settings and
discover all sorts of new possibilities.
1
ESP/
DRIVE
CAMERA
ISO
CARD
DIGITAL ZOOM
SET
AF MODE
(tungsten
ESP
36
SELECT
SELECT GO
WB
AUTO
OK
OK
Page 37

AF mode
This function allows you to select the focus range of your subject.
iESP Focus selection is based on the entire picture on the screen. Even when
SPOT Focus selection is based on the subject within the AF target mark.
Top menu [MODE MENU] [CAMERA] [AF MODE]
the subject is not in the center of the screen, focusing is possible.
Subject suitable for [iESP]
focus mode
Subject suitable for [SPOT]
focus mode
g“Menus” (P.12)
1 Select [iESP] or [SPOT] and
press e.
ESP/
DRIVE
CAMERA
ISO
CARD
DIGITAL ZOOM
SET
AF MODE
iESP
SPOT
4
Advanced shooting functions
37
Page 38

Metering
There are two ways of measuring the brightness of a subject.
ESP Meters the center of the subject and the surrounding area separately.
n Exposure is determined by metering within the AF target area. In this
ESP/Spot metering
mode, a subject can be shot with optimal exposure regardless of the
background light.
Top menu [MODE MENU] [CAMERA] [ESP/5]
4
1
Select [ESP] or [n] and press e.
Advanced shooting functions
g“Menus” (P.12)
ESP/
DRIVE
CAMERA
ISO
CARD
DIGITAL ZOOM
SET
AF MODE
ESP
38
Page 39

ISO sensitivity
The higher the ISO value, the greater the camera’s light sensitivity and the
better its ability to shoot in low light conditions. However, higher values
also introduce electrical noise into the resulting image, which may give it a
grainy appearance.
AUTO Sensitivity is automatically adjusted according to the light
64/100/200/400 With a lower ISO setting, you can shoot clear, sharp images
conditions and the subject brightness.
in daylight. With a higher ISO setting, you can use faster
shutter speeds with the same amount of light.
Top menu [MODE MENU] [CAMERA] [ISO]
g“Menus” (P.12)
1 Select [AUTO], [64], [100], [200]
or [400] and press e.
ESP/
DRIVE
CAMERA
ISO
CARD
DIGITAL ZOOM
SET
AF MODE
Note
• ISO settings are based on the sensitivity of normal camera film. The scale is
approximate.
• When [ISO] is set to [AUTO] and you are shooting in dark conditions without a
flash, the shutter speed is reduced. In this case, the sensitivity is automatically
increased to avoid the risk of camera movement.
• If the subject is too far away for the flash illumination to reach when
to [AUTO], the sensitivity is automatically increased.
AUTO
64
100
200
400
[ISO]
is set
4
Advanced shooting functions
39
Page 40

Exposure compensation
SELECT
GO
OK
This function allows you to make fine changes to the exposure setting. You
can adjust the exposure in the range of ±2.0 EV in 1/3 EV steps. When the
setting is changed, you can check the result on the monitor.
Top menu [F] g“Menus” (P.12)
1 Press ON to adjust the
exposure and press e.
• Adjust toward +: Press O to adjust up
• Adjust toward –: Press N to adjust up
4
TIPS
• Often bright subjects (such as snow) will turn out darker than their natural
Advanced shooting functions
colors. Adjusting toward + makes these subjects closer to their real shades. For
the same reason, adjust toward – when shooting dark subjects.
• In some situations, you may get better results when the exposure that the
camera sets is compensated (adjusted) manually.
to +2.0 EV in 1/3 EV
steps.
to -2.0 EV in 1/3 EV
steps.
0.0
SELECT
SELECT GO
GO
OK
OK
Note
• If the flash is used, the image brightness (exposure) may differ from the
intended brightness.
• Exposure compensation cannot correct the image if the surroundings of the
subject are extremely bright or dark.
40
Page 41

White balance
SELECT
GO
OK
Color reproduction differs depending on the light conditions. For instance,
when daylight, the setting sun or tungsten lighting are reflected on white
paper, the shade of white produced will be slightly different for each. By
setting the WB (white balance), you can achieve more natural-looking
colors.
AUTO Automatically adjusts the white balance for any light source.
5: Suitable for shooting on a sunny day.
3: Suitable for shooting on a cloudy day.
1: Suitable for shooting under a tungsten light.
w: Suitable for shooting under a daylight fluorescent lamp. This type of lamp
is used mainly in homes.
x: Suitable for shooting under a neutral white fluorescent lamp.This type of
lamp is generally used in desk lamps, etc.
y: Suitable for shooting under a cool white fluorescent lamp.
This type of lamp is generally used in offices, etc.
Top menu [WB] g“Menus” (P.12)
4
Advanced shooting functions
1 Select a white balance setting
and press e.
TIPS
• You can also preview different color tones by trying the different [WB] settings
under the actual light source and checking the result on the monitor.
• Set the white balance to [5] or [3] to capture a sunrise or sunset with
beautiful reddish tones.
Note
• The white balance feature may not be effective under some special light
sources, such situations where multiple lights are used.
• After setting a white balance other than [AUTO], play back the picture and
check the colors on the monitor.
• When the flash is fired with a white balance setting other than [AUTO], colors
may appear different in the resulting picture from the colors you see on the
monitor.
WB
AUTO
SELECT
SELECT GO
GO
OK
OK
41
Page 42

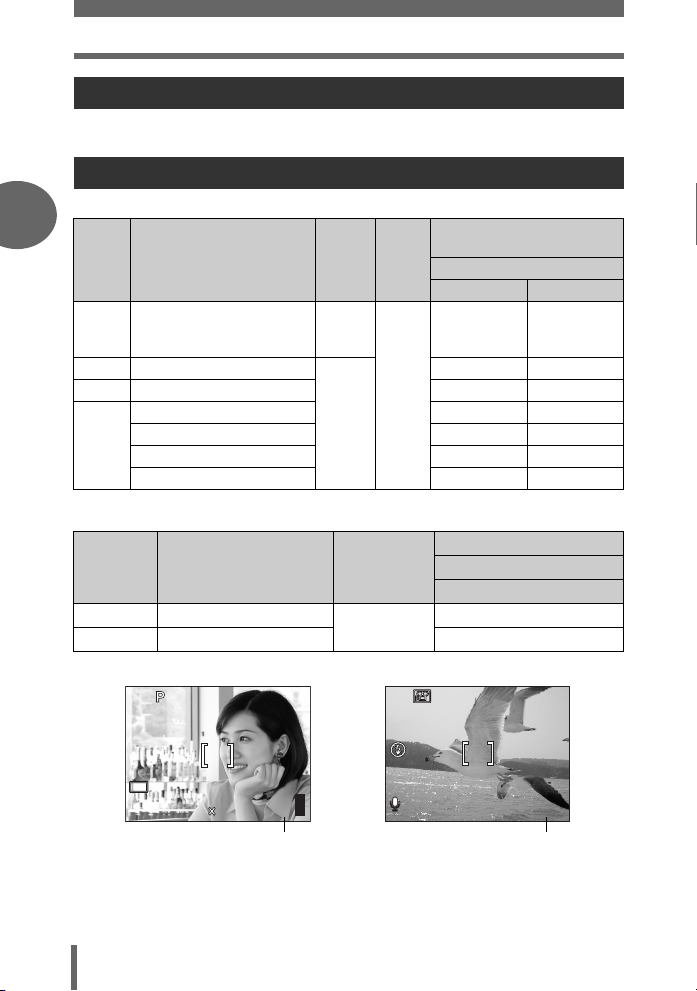
Histogram
HQ
HQ
When shooting still pictures, you can display a histogram showing the
brightness and contrast of your subject in the monitor.
Displaying the brightness and contrast of your subject enables fine
adjustment of the exposure.
OFF Hides the histogram.
ON Displays the histogram for every picture.
When [ON] is selected in P mode
Bright picture
P
4
AF target mark
HQ
Dark picture
P
Advanced shooting functions
HQ
The part indicated in green in the histogram shows the luminance distribution
within the AF target mark.
303030
If the peak fills too much of the frame, the image will
appear mostly white.
AF target mark
303030
If the peak fills too much of the frame, the image will
appear mostly black.
42
Page 43

Histogram
Top menu [MODE MENU] [CAMERA] [u] [OFF] / [ON]
g“Menus” (P.12)
Note
• The histogram is not displayed in the following situations even if [ON] is
selected.
During panorama shooting or two-in-one picture shooting.
• The histogram displayed during shooting may differ from the histogram
displayed during playback.
4
Advanced shooting functions
43
Page 44

5 Additional shooting functions
Additional
shooting functions
5
At a sporting event…
Use movie mode to capture the atmosphere
by recording the cheers and applause along
with the action. Or use sequential shooting
mode to take a succession of shots of a goal
and pick out the best ones later.
In the country or at a tourist spot…
Use panorama mode to capture a beautiful
mountain range or impressive building.
At a party or family gathering…
Use the self-timer to take group photos at
school reunions or birthday parties.
44
Page 45

Recording movies
HQ
36
36
This function allows you to record movies. The sound is automatically
recorded with the movie.
Although the camera maintains the correct exposure during movie
recording even if your subject moves, the focus and zoom will be locked
so it will be out of focus if the distance to the subject is changed.
1 Decide the composition of the
picture.
• The available recording time on the card
that you are using is displayed on the
monitor.
• You can use the zoom button to enlarge
your subject.
HQ
Remaining recording time
00:0:36
0 0:3 6
2 Press the shutter button fully to
start recording.
• During movie recording, A lights red.
00:0:36
0 0:3 6
3 Press the shutter button again to stop recording.
• When the remaining recording time has been used up, recording stops
automatically.
• When there is space available in the card memory, the remaining recording
time is displayed, and the camera is ready to shoot.
TIPS
To use the zoom during movie recording
→ During movie recording, optical zoom is not available. To use the zoom, set
[DIGITAL ZOOM] to [ON]. g“Using the digital zoom” (P.31)
5
Additional shooting functions
45
Page 46

Recording movies
Note
• Depending on the card, the remaining recording time may drop rapidly during
recording. Try using the card again after formatting it with your camera.
g“Formatting” (P.80)
•In A mode, the flash cannot be used.
• The sound quality deteriorates temporarily if water gets on the microphone or
speaker. It returns to normal when the water has evaporated.
Notes for recording long movies
• Recording will continue until the card is full unless stopped by pressing the
shutter button.
• If a single movie recording uses up all of the card’s memory, create space on
the card by erasing the movie or downloading it to a computer.
5
Additional shooting functions
46
Page 47

Sequential shooting
This function allows you to take a succession of still pictures (4 pictures in
[HQ] mode) by keeping the shutter button pressed.
As you can choose the best picture from a series of sequential shots, you
are recommended to use this mode when photographing a moving
subject.
o Shoots 1 frame at a time when the shutter button is pressed. (Normal,
j Shoots a succession of still pictures by keeping the shutter button
single-frame shooting mode)
pressed. The focus, exposure and white balance are locked at the first
frame.
Top menu [MODE MENU] [CAMERA] [DRIVE]
g“Menus” (P.12)
1 Select [j] and press e.
2 Take the picture.
• Press the shutter button fully and keep it
pressed. The camera will take pictures
in sequence until you release the button.
Note
• Sequential shooting ([j]) is not available in the following situations.
During panorama shooting or two-in-one picture shooting.
When G, U, W, S, or X is selected for the scene mode.
• If the battery power is low and the battery check blinks during sequential
shooting, shooting stops and the camera starts saving the pictures you have
taken. Whether or not all of the shots are saved depends on how much battery
power remains.
•[!] is not available when [j] is set. If you select [j] when [!] is set, the
flash setting automatically switches to [AUTO].
ESP/
DRIVE
CAMERA
ISO
CARD
DIGITAL ZOOM
SET
AF MODE
5
Additional shooting functions
47
Page 48

Self-timer shooting
HQ
2560
1920
This function lets you take pictures using the self-timer. Fix the camera
securely on a tripod for self-timer shooting. This function is useful for taking
pictures when you want to be included in the photograph.
1 Select [Y ON] by repeatedly pressing NY.
• If no operation is performed for about 2
seconds, the self-timer mode is set and
the mode selection screen is
automatically exited.
HQ
2560
ON
1920
2 Press the shutter button fully to
5
Additional shooting functions
take the picture.
• Pressing the shutter button halfway
locks the focus and exposure.
• The self-timer lamp lights for
approximately 10 seconds, then starts
blinking. After blinking for approximately
2 seconds, the picture is taken.
• To stop shooting while in A mode,
press the shutter button fully again.
• To cancel the self-timer, press
• The self-timer mode is automatically canceled after one shot.
NY.
Self-timer lamp
Note
• Do not operate the self-timer while standing directly in front of the camera lens.
The focus and exposure will not be able to lock.
303030
303030
48
Page 49

Panorama shooting
You can take advantage of panorama shooting with Olympus cards (xDPicture Card). Panorama shooting lets you connect pictures with
overlapping edges into a single panoramic picture, using the OLYMPUS
Master software.
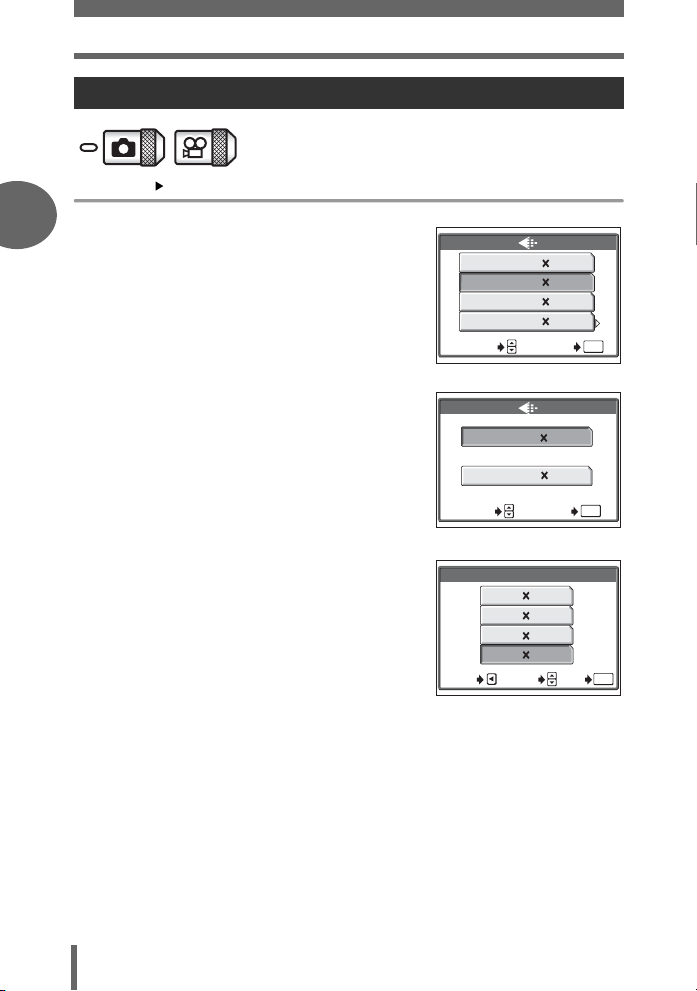
Top menu [MODE MENU] [CAMERA] [PANORAMA]
1 Use the arrow pad to choose at
which edge you want to connect
the pictures.
Y : The next picture is connected at the
right edge.
X : The next picture is connected at the
left edge.
O : The next picture is connected at the
top.
N : The next picture is connected at the
bottom.
Connects pictures from
Connects pictures from
g“Menus” (P.12)
left to right
bottom to top
5
Additional shooting functions
49
Page 50

Panorama shooting
2 Make sure that the edges of the pictures overlap, then take
the pictures.
• The focus, exposure and white balance are set by the first picture. Do not
select an extremely bright subject (such as the sun) for the first picture.
• You cannot adjust the zoom after the first picture.
• Panorama shooting is possible for up to 10 pictures.
• When you have taken 10 pictures, a
warning mark (g) appears.
5
The part of the previous picture where it will be joined to the next picture does not
remain in the frame on the edge of the screen. You have to remember what the
part in the frame looked like and take the next picture so it overlaps. Compose your
shots so that the right edge of the previous picture overlaps with the left edge of
the next picture if you are connecting pictures from left to right (or vice versa if you
are connecting pictures from right to left).
3 Press e to exit panorama shooting.
Note
Additional shooting functions
• The panorama mode is only available with Olympus cards.
• During panorama shooting, the flash and sequential shooting modes are not
available.
• The camera itself cannot connect panorama pictures. The OLYMPUS Master
software is necessary to connect the pictures.
50
Page 51

Taking two-in-one pictures
2560 1920
HQ
HQ
2560 1920
This function allows you to combine two
pictures taken in succession and store
them as a single picture. This way you can
enjoy having two subjects in one.
Picture during playback
Top menu [MODE MENU] [CAMERA] [2 IN 1] g“Menus” (P.12)
1 Take the first shot.
• The subject will be positioned on the left
in the combined picture.
HQ
2560 1920
303030
303030
1st
2 Take the second shot.
• The subject will be positioned on the
right in the combined picture.
• Once the second picture is taken, the
monitor automatically returns to the top
menu.
HQ
2560 1920
2nd
303030
303030
5
Additional shooting functions
TIPS
• To cancel shooting in two-in-one picture mode before taking the first or second
picture, press e. The first picture taken is not stored.
51
Page 52

Recording sound with still pictures
Sound can be recorded when taking still pictures. Recording starts about
0.5 seconds after the shutter is released and lasts about 4 seconds.
When this function is enabled, sound is recorded automatically every time
you take a picture.
Top menu [MODE MENU] [CAMERA] [R] g“Menus” (P.12)
1 Select [ON] and press e.
PANORAMA
CAMERA
2 IN 1
CARD
SET
2 When recording starts, aim the
5
Additional shooting functions
camera microphone at the
source of the sound you want to
record.
microphone
TIPS
• H appears when still pictures with sound are played back. During playback,
sound is output from the speaker. The volume can be adjusted. g“Playback
volume” (P.86)
• Sound can be added later to still pictures. Recorded sound can also be re-
recorded. g“Recording sound” (P.72)
Note
• If the microphone is farther than 1 m (3.3 ft.) from the subject, sound may not
be recorded properly.
• Pictures cannot be taken during sound recording.
• Sound recording is not available in the following cases:
When [DRIVE] is set to sequential shooting ([j]), or during panorama
shooting or two-in-one shooting.
• Sound recording may also pick up camera noises, such as button operations,
shutter movement, etc.
• Sound recording may not be available if there is insufficient space in the card
memory.
OFF
ON
52
Page 53

6Playback
Playback
With film-type cameras, you cannot view the
pictures you have taken until the film has
been developed. Results can be
disappointing when you develop blurred
images or pictures in which subjects had
their eyes closed. Maybe you took several
pictures of the same scene because you
weren’t sure whether they would come out
or not. That’s no way to record important
memories!
With a digital camera, you can review your
pictures immediately.
Just play the picture back as soon as you’ve
taken it. If you don’t like what you see, erase
and take it again. So don’t be afraid of
pictures not coming out well – just keep on
pressing that shutter button!
6
YES!NO!
53
Page 54

Playing back still pictures
100
0009
30 15
30
4.0
• The monitor turns on and displays the last picture taken.
1 Use the arrow pad to play back other pictures.
Y : Displays the next picture.
X : Displays the previous picture.
O : Jumps to the picture 10 frames back.
N : Jumps to the picture 10 frames ahead.
2 Press T or W on the zoom button.
• This allows you to enlarge the picture (close-up playback) or display an
index of pictures (index display).
Press T to return to
single-frame display
6
Playback
1
4
7
Index display
• During index display, use the
arrow pad to select the desired
picture.
• You can select the number of
pictures to be displayed.
g“Selecting the number of
pictures” (P.55)
54
100
-
0009
’0505. . 0404.
WTTW
2
3
5
6
8
9
30 15
Press W to return to
single-frame display
:
30
9
4.0
Close-up playback
• Press T to enlarge the
picture up to a maximum
of 8×.
• By using the arrow pad
during close-up playback,
you can scroll to different
portions of the picture.
• Pictures cannot be stored
in an enlarged state.
• Close-up playback is not
available for movies.
Page 55

Playing back still pictures
TIPS
• You can use this function in shooting mode by pressing the QUICK VIEW
button.
• The shooting information on the monitor disappears after 3 seconds.
Note
• If the camera is not used for over 3 minutes, the camera enters the sleep mode
and the monitor turns off.
Selecting the number of pictures
This function lets you select the number of pictures in an index display from 4, 9, 16
and 25.
Top menu [MODE MENU] [SETUP] [G] [4] / [9] / [16] / [25]
g“Menus” (P.12)
Calendar display
This function lets you display images stored on the card by specifying the date on a
calendar format. If several pictures were taken on the same date, the first picture
taken on that date is displayed.
1 Press the W (G) side of the zoom button twice.
• During the index display, press the W (G) side of the zoom button once.
• The calendar display screen is displayed.
55
6
Playback
Page 56

Playing back still pictures
1110101212
19
26
28
25
1110101212
19
22
31
26
28
25
1110101212
19
26
28
25
1011111212131314141515
19
20
22
29
28
2
Use the arrow pad to select a date.
X : Moves to the previous date when a
picture was taken.
Y : Moves to the next date when a picture
was taken.
O :
Moves to the last date in the previous
month when a picture was taken.
N : Moves to the first date in the next
20052Sun Mon Tue Wed Thu Fri Sat
30 31 21 3 4
6 7 8 9 11
13131414151516161717181819
20202121222223232424252526
272728
6789
month when a picture was taken.
• Pressing the T side of the zoom button
once during calendar display switches to single-frame playback.
Ex.: When February 25 is selected
20051Sun Mon Tue Wed Thu Fri Sat
26 27 28 29 30 31
2 3 4 5 6 7 8
9 10
16161717181819
2323242425252626272729
3030313112345
212122
20
28
20052Sun Mon Tue Wed Thu Fri Sat
1
30 31 21 3 4
6 7 8 9 11
13131414151516161717181819
20202121222223232424252526
272728
6789
10 11 12
20053Sun Mon Tue Wed Thu Fri Sat
5
25
5 3312
27 28 21 3 4
6 7 8 9 11
13131414151516161717181819
2020212122
272728
3456
• Press X. Moves to February 23.
6
• Press Y. Moves to
• Press O. Moves to January 29.
February 27.
• Press N. Moves to March 12.
Note
• Months in which no pictures were taken are not displayed.
Playback
• If you did not set the date and time on the camera or change the date with the
provided OLYMPUS Master, the pictures may not be displayed on the correct
date.
23232424252526
2929303031
25
10 11 12
25
6
7
8 9
5
5 3312
5
2 1
Slideshow
This function displays still pictures stored in the card one after another. You can select
from four different transition effects. Only the first frame of each movie is displayed.
NORMAL : Displays the pictures stored on the card one at a time.
FADER : Displays the pictures by gradually fading out the previous picture and
SLIDE : Displays the pictures by sliding the next picture over the previous picture
WINDOW : Displays the pictures by gradually enlarging the next picture from the top
Select a still picture and display the top menu.
56
fading in the next picture.
alternately from the top and bottom.
left of the screen.
Page 57

Playing back still pictures
Top menu [m] g“Menus” (P.12)
1 Select [NORMAL], [FADER],
[SLIDE] or [WINDOW], and press
e.
• The slideshow starts.
2 Press e.
• The slideshow ends and the first frame
is displayed.
• The slideshow will not stop until you
cancel it by pressing e.
Picture rotation
Pictures taken with the camera held vertically are displayed horizontally. This
function lets you turn such pictures 90° clockwise or counterclockwise so that they
are displayed vertically.
Top menu [MODE MENU] [PLAY] [y] [+90°] / [0°] / [-90°]
• For album playback mode: Top menu [ALBUM MENU] [y]
[+90°] / [0°] / [-90°]
NORMAL
FADER
SLIDE
WINDOW
SELECT GO
g“Menus” (P.12)
OK
6
Playback
Note
• The following pictures cannot be rotated.
Movies, protected pictures and pictures that have been edited on a
computer.
• New picture orientations are saved even when the power is turned off.
57
Page 58

Playing back movies
SELECT
GO
OK
100
0015
HQ
02/00
30
30 15
30
03/00
30
This function lets you play back movies. You can fast forward the movie or
play it back one frame at a time.
Select an image with A and display the top menu.
Top menu [MOVIE PLAYBACK] g“Menus” (P.12)
• The movie is played back. When playback
ends, the camera automatically returns to the
beginning of the movie and displays the
[MOVIE PLAYBACK] menu.
• To play the movie again, select [RESTART].
To return to playback mode, select [EXIT].
(
Operations during movie playback
Pressing ON lets you adjust the sound volume
during playback.
O : Increases the volume.
N : Reduces the volume.
Y : Each time you press the button, the
playback speed changes in the following
order: 2×; 20×; and back to 1×.
X : Plays the movie in reverse. Each time you
6
press the button, the playback speed
changes in the following order: 2×; 20×;
and back to 1×.
e : Pauses the movie and lets you play it back
Playback
frame by frame.
(Frame by frame playback
O : Displays the first frame of the movie.
N : Displays the last frame of the movie.
Y : Displays the next frame. The movie can be
played continuously by holding the button
down.
X : Displays the previous frame. The movie
can be played continuously in reverse by
holding the button down.
e : Displays the [MOVIE PLAYBACK] menu.
MOVIE PLAYBACK
RESTART
EXIT
SELECT
SELECT GO
100
-
0015
’0505. . 0404.
0000:
//
Playing time/
total recording time
0000:
//
GO
30 15
02/00
03/00
OK
OK
HQ
:
30
:
30
:
30
//
Note
• The lamp on the camera blinks red while the camera is reading the movie from
the card. Reading of movies may take some time. Do not open the battery
compartment/connector cover while the lamp on the camera is blinking red.
58
Doing so may damage the data on the card and render the card unusable.
Page 59

Playing back albums
You can organize your pictures by arranging them into albums on the card.
There are 12 albums. Each album can have 200 pictures. Using the
OLYMPUS Master software in the provided CD-ROM, you can transfer the
images from your computer to the album in the card.
Press the - button in playback mode to
- button
enable album playback mode.
Album playback notation
The following icons indicate that the function is used in album playback mode.
-
(Menus in album playback mode
Press e in album playback mode to display the album mode top menu.
• Menus in album playback mode are set by using the arrow pad and e in the same
way as in shooting and playback modes. g“How to use the menus” (P.15)
Top menu
Still pictures
UNDO ENTRY
ERASE
gP.56
ALBUM MENU
gP.65
Movies
MOVIE PLAYBACK
UNDO ENTRY
ERASE
gP.58
ALBUM MENU
gP.65
Playback6Playback
gP.63
gP.63
59
Page 60

Playing back albums
Album menu
ALBUM MENU
SEL. ALBUM
SELECT TITLE IMAGE
OFF
Functions available in the album menu
Function
SEL. ALBUM P.63 < P.102
0 P.78 VOLUME P.86
y P.57 s P.90
SELECT TITLE IMAGE P.66 VIDEO OUT P.75
Ref.
page
Function
Album entry
6
This function is for entering still pictures or movies into an album.
Top menu [ALBUM ENTRY] g“Menus” (P.12)
Playback
Ref.
page
1 Select the method of album
entry.
SEL. IMAGE Select the picture one by
SET CALENDAR
SET ALL Select from still pictures only, movies only, or protected
one and enter them.
Select the date on the
calendar screen and
enter the picture in the
same day into one
album.
pictures only. The pictures of that type are entered into one
album.
ALBUM ENTRY
SEL. IMAGE
SET CALENDAR
SET ALL
CANCEL
SELECT GO
60
OK
Page 61

Playing back albums
7
8
3
4
10
2
3
4
6
7
8
10
SELECT
GO
1110101212
19
26
28
25
2 Press XY to select the album to
enter the pictures in and then
press e.
(Entering selected pictures
11 223
55 667
9910
SELECT GO
3 Press XY to select the picture
you want to enter and press
• To select the picture by single-frame
playback, press the T side of the zoom
button.
•The R mark will appear on the
selected picture.
• To cancel the selection, press O again.
• If you want to enter other pictures,
repeat Step 3.
O.
112
556
9910
SELECT
SELECT GO
4 After you completed the selection, press e.
5 Select [YES] and press e.
(Entering into the calendar
3 Press ONXY to select the date
that has the picture you want to
20052Sun Mon Tue Wed Thu Fri Sat
enter and press e.
4 Select [YES] and press e.
SEL. ALBUM
34
78
10 111111 121212
SEL. IMAGE
23
67
10 111111 121212
30 31 21 3 4
6 7 8 9 11
13131414151516161717181819
20202121222223232424252526
272728
6789
OKOKOK
34
78
OKOKOK
GO
25
10 11 12
4
8
4
8
6
Playback
5
5 3312
61
Page 62

Playing back albums
OK
2
3
4
6
7
8
10
SELECT
GO
10
12
(
)
(Entering collectively
3 Select [PHOTO], [MOVIE] or
[0] and press e.
4 Select [YES] and press e.
SELECT GO
Note
• If you do formatting/erasing all, the picture entered in the album will also be
cleared.
• You cannot enter one picture into several albums.
• With entering into the calendar, the picture taken on the same day will be
entered on the same day in the calendar.
• If you enter more than 200 pictures with [SET CALENDAR] or [SET ALL], the
pictures will be entered up to 200 in chronological order.
Album playback
6
This function plays back only pictures in albums.
Playback
1 Press the - button.
• The [SEL. ALBUM] screen is displayed.
2 Press XY to select the album
you want to playback and press
e.
• If no pictures are in the album, you can
not view the album.
Title image
first frame in the album
SEL. ALBUM
112
11
578
5
556
55
99 111111
9910
910 12
9
SELECT
SELECT GO
SET ALL
PHOTO
MOVIE
0
23
34
33
22
7
77
66
67
78
10
10 111111 121212
10
10
GO
OK
OK
OKOKOK
4
44
8
88
8
12
12
12
62
Page 63

Playing back albums
OK
3 Use the arrow pad to playback
other pictures.
Y : Displays the next picture.
X : Displays the previous picture.
O : Jumps to the picture 10 frames back.
N : Jumps to the picture 10 frames
ahead.
• To display the detailed information on
the picture, press the T side of the zoom button.
4 Press the - button.
• The camera returns to normal playback mode.
TIPS
• To switch to another album during playback, on the top menu select [ALBUM
MENU] [SEL. ALBUM] and select the album that you wish to view.
Undo entry
To remove a picture from an album you can use the undo entry function. By using
the undo entry function you will remove the picture from the album but the picture will
remain on the card.
In album playback mode, select the album that has the pictures you want to erase,
and display the top menu.
6
Playback
-
Top menu [UNDO ENTRY] g“Menus” (P.12)
1 Select the method of undoing
entry.
SEL. IMAGE Allows you to select
individual pictures to
remove from the album.
UNDO ALL Allows you to remove all
the pictures within the
album at one time.
UNDO ENTRY
SEL. IMAGE
UNDO ALL
CANCEL
SELECT GO
OK
OK
63
Page 64

Playing back albums
OK
2
3
4
6
7
8
10
SELECT
GO
OK
(Undo entry selected pictures
2 Select [SEL. IMAGE] and press
e.
3 Press XY to select the picture
you want to undo entry and press
O.
• To select the picture by single-frame
playback, press the T side of the zoom
button.
•The R mark will appear on the
selected picture.
• To cancel the selection, press O again.
• If you want to undo entry other pictures,
6
repeat Step 3.
UNDO ENTRY
SEL. IMAGE
UNDO ALL
CANCEL
SELECT GO
SEL. IMAGE
112
23
556
67
10 111111 121212
9910
SELECT
SELECT GO
4 When you have selected the picture(s) to undo entry, press
e.
5 Select [YES] and press e.
Playback
(Undo all
2 Select [UNDO ALL] and
press e.
3 Select [YES] and press e.
UNDO ENTRY
SEL. IMAGE
UNDO ALL
CANCEL
SELECT GO
OK
OK
34
4
78
8
OKOKOK
GO
OK
OK
64
Page 65

Playing back albums
OK
OK
Erase album picture
Erases a picture from an album. Erasing in this way is different from the undo entry
function. By erasing the picture with this function the picture will be completely
erased from the card.
Select the album that have the pictures you want to erase and display the top menu.
Note
• You cannot erase protected pictures. Cancel protection before erasing such
pictures.
• Once erased, pictures cannot be restored. Check each picture before erasing
to avoid accidentally erasing pictures you want to keep. g“Protecting
pictures” (P.78)
-
Top menu [ERASE] g“Menus” (P.12)
1 Select the method of erasing you
want to use.
SEL. IMAGE Allows you to select
ALL ERASE Allows you to erase all
individual pictures to be
erased.
the pictures within the
album all at once.
(Erase selected pictures
2 Select [SEL. IMAGE] and press
e.
ERASE
SEL. IMAGE
ALL ERASE
CANCEL
SELECT GO
ERASE
SEL. IMAGE
ALL ERASE
CANCEL
SELECT GO
OK
OK
OK
OK
6
Playback
65
Page 66

Playing back albums
2
3
4
6
7
8
10
SELECT
GO
OK
3 Press XY to select the picture
you want to erase and press O.
• To select the picture by single-frame
playback, press the T side of the zoom
button.
•The R mark will appear on the
selected picture.
• To cancel the selection, press O again.
• If you want to erase other pictures,
repeat Step 3.
SEL. IMAGE
112
23
556
67
10 111111 121212
9910
SELECT
SELECT GO
4 When you have selected the picture(s) to erase, press e.
5 Select [YES] and press e.
(Erase all
2 Select [ALL ERASE] and
press e.
3 Select [YES] and press e.
6
Playback
Changing the title image
You can change the title image (first image in the album) displayed on the album
selection screen.
Select the album that you want to change and display the top menu.
ERASE
SEL. IMAGE
ALL ERASE
CANCEL
SELECT GO
34
4
78
8
OKOKOK
GO
OK
OK
-
Top menu [ALBUM MENU] [SELECT TITLE IMAGE]
66
g“Menus” (P.12)
Page 67

Editing still pictures
100
0010
HQ
30 15
30
10
1 Press XY to select the picture
for the title image and press e.
100
-
0010
HQ
2 Select [OK] and press e.
’0505. . 0404.
30 15
:
30
10
Editing still pictures
This function lets you edit still pictures and store them as new pictures. The
following editing operations are available.
SOFT FOCUS This function enables you to add soft focus effects to the
FISHEYE This function enables you to add fish-eye view effects to the
BLACK & WHITE
SEPIA This function enables you to convert selected pictures into
Q This function enables you to change the image size of selected
P Crops part of a picture and saves it as a new file.
selected pictures and store them as new pictures.
By using soft focus effects, you can change your picture to a
vignette picture to give a fantastic atmosphere.
selected pictures and store them as new pictures.
When the fish-eye view mode is selected, the picture is
transformed into a spherical picture.
This function enables you to convert selected pictures into black
and white pictures and store them as new pictures.
sepia-tone pictures and store them as new pictures.
pictures and store them as new pictures. This is useful when you
want to reduce the volume of picture data, such as when posting
pictures on the Internet or attaching them to e-mail.
Select the still picture that you want to edit and display the top menu.
6
Playback
67
Page 68

Editing still pictures
SELECTGOGO
OK
CANCEL
SELECTGOGO
OK
CANCEL
Soft focus
Top menu [MODE MENU] [EDIT] [SOFT FOCUS] g“Menus” (P.12)
1 Select [SOFT FOCUS] and
press e.
• The [BUSY] bar appears and after the
image is saved, the camera returns to
the playback mode.
• The soft focused picture is stored as a
separate picture from the original.
• To cancel soft focusing, select
[CANCEL] and press e.
• Creating soft focus pictures is not
possible in the following cases.
Movies or when there is insufficient memory space on the card.
CANCEL
CANCEL
SOFT FOCUS
SOFT FOCUS
CANCEL
SELECT
SELECT
Fish-eye
6
Top menu [MODE MENU] [EDIT] [FISHEYE] g“Menus” (P.12)
Playback
1 Select [FISHEYE] and
press e.
• The [BUSY] bar appears and after the
image is saved, the camera returns to
the playback mode.
• The fish-eye picture is stored as a
separate picture from the original.
• To cancel fish-eye, select [CANCEL]
and press e.
• Creating fish-eye pictures is not
possible in the following cases.
Movies or when there is insufficient memory space on the card.
CANCEL
CANCEL
FISHEYE
FISHEYE
CANCEL
SELECT
SELECT
GO
GO
OK
OK
OK
OK
68
Page 69

Black and White
SELECTGOGO
OK
CANCEL
SELECTGOGO
OK
CANCEL
Editing still pictures
Top menu [MODE MENU] [EDIT] [BLACK & WHITE]
g“Menus” (P.12)
1 Select [BLACK & WHITE] and
press e.
• The [BUSY] bar appears and after the
image is saved, the camera returns to
the playback mode.
• The black and white picture is stored as
a separate picture from the original.
• To cancel black and white, select
[CANCEL] and press e.
• Creating black and white pictures is not
possible in the following cases.
Movies or when there is insufficient memory space on the card.
BLACK & WHITE
BLACK & WHITE
CANCEL
CANCEL
CANCEL
SELECT
SELECT
GO
OK
OK
Sepia-tone
Top menu [MODE MENU] [EDIT] [SEPIA] g“Menus” (P.12)
1 Select [SEPIA] and press e.
• The [BUSY] bar appears and after the
image is saved, the camera returns to
the playback mode.
• The sepia-tone picture is stored as a
separate picture from the original.
• To cancel sepia-tone, select [CANCEL]
and press e.
• Creating sepia-tone pictures is not possible in the following cases.
Movies or when there is insufficient memory space on the card.
CANCEL
CANCEL
SEPIA
SEPIA
CANCEL
SELECT
SELECT
GO
OK
OK
6
Playback
69
Page 70

Editing still pictures
SELECTGOGO
OK
CANCEL
SELECTGOGO
OK
CANCEL
Resizing
Top menu [MODE MENU] [EDIT] [Q] g“Menus” (P.12)
1 Select an image size and
press e.
• The [BUSY] bar appears and after the
image is saved, the camera returns to
the playback mode.
• The resized picture is stored as a
separate picture from the original.
• To cancel resizing, select [CANCEL]
and press e.
• Resizing is not available in the following cases.
Movies, pictures that have been edited on a computer, when there is
insufficient memory space on the card, or pictures taken with another
camera.
• If the image size of the selected picture is 640 × 480, you cannot select
[640 × 480].
6
Trimming
Playback
Top menu [MODE MENU] [EDIT] [P] g“Menus” (P.12)
640 480
320 240
CANCEL
CANCEL
CANCEL SELECT
SELECT
GO
OK
OK
1 Select [P] and press e.
70
CANCEL
CANCEL
CANCEL SELECT
SELECT
GO
OK
OK
Page 71

2 Use the arrow pad and zoom
OK
OK
SELECT
GO
button to decide the trimming
position and size.
•Press ONXY to move the trimming
frame.
• Press the W side or T side of the zoom
button to select the trimming size.
3 Press e.
4 Select [OK] and press e.
• The [BUSY] bar appears and after the
image is saved, the camera returns to
the playback mode.
• The trimmed picture is stored as a
separate picture from the original.
• If you want to trim the picture again,
select [RESET] and press e. Repeat
the procedure from Step 2.
• To cancel the trimming function, select
[CANCEL] and press e.
Editing still pictures
OK
RESET
CANCEL
SELECT
SELECT
GOGOGO
GOGOGO
GO
GO
OKOK
OKOK
OKOK
OKOK
OKOKOK
6
Playback
Note
• Trimming is not available in the following cases.
Movies, insufficient memory space on the card, or the image size of the
selected picture is 640 × 480.
• If a trimmed picture is printed out, it may appear grainy.
71
Page 72

Recording sound
Sound can be added to a still picture that you have already taken. (This is
known as “after-recording”.) You can also re-record over the sound that
has already been recorded. Total recording time per picture is
approximately 4 seconds. Select the still picture to which you want to add
sound.
Top menu [MODE MENU] [PLAY] [R] g“Menus” (P.12)
1 Press Y to display [START].
PLAY
EDIT
CARD
INFO
SET
2 Aim the camera microphone
toward the sound you want to
record and press e to start
recording.
6
• The [BUSY] bar is displayed during
recording.
Microphone
START
Playback
Note
• If the microphone is farther than 1 m (3.3 ft.) from the subject, sound may not
be recorded properly.
• If you re-record the sound, the original sound is erased.
• You may not be able to record sound when there is insufficient card memory
(the [CARD FULL] message is displayed).
• Sound recording may pick up camera noises, such as button operation or
shutter movement.
• Once sound is added to a picture, it is not possible to erase only the sound. In
this case, make a re-recording with silence.
72
Page 73

Creating an index
SELECT
GO
9 frames extracted from a movie are displayed as an index and stored on
the card as a still picture.
Select a picture with A and display the top menu.
Top menu [MODE MENU] [EDIT] [INDEX] g“Menus” (P.12)
1 Select [INDEX] and press e.
• The [BUSY] bar appears and after the 9
frames extracted from the movie appear
as an index display, the camera returns
to the playback mode. The index is
stored as a new picture.
• To cancel the editing function, select
[CANCEL] and press e.
SELECT
SELECT
INDEX
INDEX
CANCEL
GO
GO
TIPS
• The index is stored as a still picture in a different record mode from the original
movie.
Record mode when the movie was shot
HQ SQ2 (1,024 × 768 pixels)
SQ SQ2 (640 × 480 pixels)
Record mode when stored as an index
Note
• The interval between the frames that are automatically extracted varies
depending on the length of the movie.
• An index consists of 9 frames.
• You cannot create an index if there is insufficient memory space on the card.
OKOKOK
Playback6Playback
73
Page 74

Playback on a TV
Use the AV cable provided with the camera to play back recorded images
on your TV. You can play back both still pictures and movies on your TV.
1
Make sure that the TV and camera are turned off. Connect the
multi-connector on the camera to the video input terminal on
the TV using the AV cable provided with the camera.
Connect to the TV’s video input
(yellow) and audio input (white)
terminals.
Battery compartment/
Connector cover
AV cable (provided)
Multi-connector
2 Turn the TV on and set it to the video input mode.
6
• For details of switching to video input, refer to your TV’s instruction manual.
3 Press the POWER switch to turn the camera on.
• The last picture taken is displayed on the TV. Use the arrow pad to select
the picture you want to display.
Playback
TIPS
• You are recommended to use the optional AC adapter to play back pictures on
a TV.
• The close-up playback, index display and slideshow functions can also be used
on a TV screen.
Note
• Make sure that the camera’s video output signal type is the same as the TV’s
video signal type. g“Video output selection” (P.75)
• The camera’s monitor turns off automatically when the AV cable is connected
to the camera.
• Be sure to use the AV cable provided to connect the camera to the TV.
• The picture may appear off-center on the TV screen.
74
Page 75

Playback on a TV
Video output selection
You can select [NTSC] or [PAL] according to your TV’s video signal type. When
playing back pictures while connected to a TV in a foreign country, be sure to set the
[VIDEO OUT] setting accordingly. Change the video signal type before connecting
the AV cable. If you select the wrong video signal type, you will not be able to play
back the recorded pictures properly on the TV.
Top menu [MODE MENU] [SETUP] [VIDEO OUT] [NTSC] / [PAL]
g“Menus” (P.12)
• For album playback mode: Top menu [ALBUM MENU] [VIDEO OUT]
[NTSC] / [PAL]
TIPS
• TV video signal types & main regions
Check the video signal type before connecting the camera to the TV.
NTSC North America, Taiwan, Korea, Japan
PAL European countries, China, other Asian countries
The default setting differs according to the region where you purchase the
camera.
6
Playback
75
Page 76

Information display
30 15
30
100
0030
HQ
30
+2.0
ISO
400
2560
1920
SIZE : :
100
0030
HQ
30 15
30
30
This function lets you display detailed shooting information on the monitor
for approx. 3 seconds in the playback mode. For details of the information
displayed, see “Monitor indications” (P.152).
Top menu [MODE MENU] [PLAY] [INFO] [OFF] / [ON]
g“Menus” (P.12)
0030
2560
1010
ISO
30 15
1920
+2.0
400
HQ
:
30
30
100
-
0030
’0505. . 0404.
100
-
SIZE
’0505. . 0404.
When [INFO] is on When [INFO] is off
Note
• If the picture has been taken with a different camera, setting [INFO] to on in q
6
mode only displays the date and time, frame number and battery check
indication.
• If [u] is set, the histogram is displayed regardless of whether
on
or off.
Playback
1010
30 15
:
[INFO]
HQ
30
30
is set to
76
Page 77

Histogram
30 15
30
HQ
30
+2.0
ISO
100
When viewing still pictures, you can display a histogram showing the
luminance distribution.
The histogram display can be set separately for shooting mode and
playback mode. g“Histogram” (P.42)
Top menu [MODE MENU] [PLAY] [u] [OFF] / [ON]
g“Menus” (P.12)
30 15
ISO
:
30
’0505. . 0404.
Histogram display
Note
• The histogram displayed during shooting may differ from the histogram
displayed during playback.
• The histogram may not appear when you play back pictures shot on another
camera.
HQ
+2.0
100
30
Playback6Playback
77
Page 78

Protecting pictures
You are recommended to protect important pictures to avoid accidentally
erasing them. Protected pictures cannot be erased but they are all erased
by formatting.
Select the picture that you want to protect and display the top menu.
Top menu [MODE MENU] [PLAY] [0] [OFF] / [ON]
• For album playback mode: Top menu [ALBUM MENU] [0] [OFF] / [ON]
• To cancel protection, select [OFF] and press
e.
g“Menus” (P.12)
Displayed when a
picture is protected.
6
Erasing pictures
This function erases recorded pictures. Pictures can be erased either one
Playback
at a time or all the pictures on the card.
Note
• You cannot erase protected pictures. Cancel protection before erasing such
pictures.
• Once erased, pictures cannot be restored. Check each picture before erasing
to avoid accidentally erasing pictures you want to keep. g“Protecting
pictures” (P.78)
78
Page 79

Erasing pictures
SELECT
GO
OK
Single-frame erase
Select the picture that you want to erase and display the top menu.
Top menu [ERASE] g“Menus” (P.12)
1 Select [YES] and press e.
• The picture is erased and the menu is
exited.
• To cancel single-frame erase, select
[NO] and press e.
SELECT
SELECT GO
All-frame erase
This function erases all the pictures on the card.
Top menu [MODE MENU] [CARD] [ALL ERASE]
1 Select [YES] and press e.
• All the pictures are erased.
SELECT
ERASE
YES
NO
OK
OK
GO
g“Menus” (P.12)
ALL ERASE
CAUTION ERASING ALL
YES
NO
OK
GO
6
Playback
79
Page 80

Formatting
This function lets you format the memory card. Formatting prepares cards
to receive data. Before using non-OLYMPUS cards or cards which have
been formatted on a computer, you must format them with this camera.
All existing data, including protected pictures, are erased when the
card is formatted. Make sure that you save or transfer important data
to a computer before formatting the card.
Top menu [MODE MENU] [CARD] [FORMAT] g“Menus” (P.12)
1 Select [YES] and press e.
• The [BUSY] bar is displayed while the
card is formatted.
Note
6
• Do not do any of the following during formatting as such actions may damage
the card.
Open the battery compartment/connector cover, remove the battery, or
connect or disconnect the AC adapter (regardless of whether there is a
Playback
battery in the camera or not).
CAUTION ERASING ALL
SELECT
FORMAT
YES
NO
GO
OK
80
Page 81

7 Settings
Settings
One of the key features of a digital camera
is that you can view the pictures you have
taken immediately.
But that isn’t all. Another advantage is that
you can customize the camera to your own
personal taste.
For example, you can set the startup screen
so that one of the pictures you have taken is
displayed when you turn the camera on.
That’s originality for you!
And if you lend the camera to friends from
abroad, you can select the appropriate
language for on-screen display.
Making use of these functions will make
such a difference to how much fun you get
out of your camera. Why not try them out?
7
START
Which language?
Use shutter sound?
Use the beep sound?
All reset?
Use screen setup?
Now you have your very own customized camera!
What monitor brightness?
GOAL
Power on setup
Adjusting the volume
81
Page 82

All reset
This function lets you choose whether or not to save the current camera
settings after the power is turned off. The settings affected by [ALL
RESET] are listed as below.
The [ALL RESET] setting ([ON]/[OFF]) applies to all the modes. If [ALL
RESET] is set to [OFF] in one shooting mode, this setting applies to all the
other modes, both shooting and playback.
ON All settings are returned to the factory default settings after the power is
OFF The settings made before the power is turned off are saved.
Top menu [MODE MENU] [SETUP] [ALL RESET] [OFF] / [ON]
turned off. (factory default setting)
Ex: With [ALL RESET] to [ON], even if you set [
on the camera again, it will return to [HQ] as default setting.
However, each setting will return to the factory default setting with a scene
mode other than [PROGRAM AUTO].
K] to [SQ1], after you turn
g“Menus” (P.12)
Note
• The settings in the [SETUP] tab in the [MODE MENU] ([ALL RESET], [W],
[8] etc.) are saved even when [ALL RESET] is set to [ON].
(Functions that return to default settings when [ALL
RESET] is set [ON].
7
Function
Settings
Flash mode AUTO P.34 AF MODE SPOT P.37
&, %& OFF P.32 R (still pictures) OFF P.52
ESP/
5 ESP P.38 u (K mode) OFF P.42
DRIVE o P.47 F 0.0 P.40
ISO AUTO P.39 K HQ P.21
DIGITAL
ZOOM
Factory
default
setting
OFF
Ref.
page
P.31
Function
WB AUTO
Factory
default
setting
Ref.
page
P.41
82
Page 83

Selecting a language
You can select a language for on-screen display. Available language vary
depending on the area where you purchased this camera.
Top menu [MODE MENU] [SETUP] [W] g“Menus” (P.12)
1 Select a language and press e.
ENGLISH
FRANCAIS
ESPAÑOL
PORTUGUES
SELECT GO
TIPS
• You can add other languages to your camera with the provided OLYMPUS
Master software. For details, refer to the help.
OK
7
Settings
83
Page 84

Power on setup
You can select a picture and/or sound volume to be displayed/output when
the power is turned on. You can also register your favorite picture and
display it on the screen. g“Screen setup” (P.85)
Top menu [MODE MENU] [SETUP] [PW ON SETUP]
1 Select [OFF], [1], [2], [3] for
[SCREEN], then press X.
OFF No picture is displayed.
1/2 A preset picture is displayed.
3 Your registered pictu re is displayed.
If there is no registered picture,
nothing is displayed.
2 Select [OFF], [LOW] or [HIGH] for
[VOLUME], then press X.
OFF No startup sound is output.
LOW/HIGH Startup sound is output.
3 Press e.
7
Note
• [VOLUME] cannot be set when [SCREEN] is set to [OFF].
Settings
g“Menus” (P.12)
PW ON SETUP
SCREEN
VOLUME
SELECT GO
PW ON SETUP
SCREEN
VOLUME
SELECT GO
OFF
1
2
3
OFF
LOW
HIGH
OK
OK
84
Page 85

Screen setup
You can register your favorite picture for display when the power is turned
on. Register a picture from the pictures saved on the card and use [PW ON
SETUP] to display it on the startup screen.
g“Power on setup” (P.84)
Top menu [MODE MENU] [SETUP] [SCREEN SETUP]
• If a picture is already registered, the [IMAGE
EXISTING] screen is displayed asking if you
want to cancel the currently registered picture
and register a new one. To register a new
picture, select [RESET] and press e. If you
select [KEEP], the screen returns to the menu.
g“Menus” (P.12)
SCREEN SETUP
IMAGE EXISTING
RESET
KEEP
CANCEL
SELECT
GO
1 Select the picture you want to register and press e.
2 Select [OK] and press e.
• The picture is registered and the screen
returns to the menu.
TIPS
• The screen is registered as [3] of the [PW ON SETUP].
Note
• You cannot register a picture or movie frame that cannot be played back on this
camera.
SCREEN SETUP
SET AS PW ON SCREEN
OK
CANCEL
CANCEL
SELECT
GO
OK
OK
7
Settings
85
Page 86

Screen color
You can select the screen color displayed on the monitor from 4 patterns.
Top menu [MODE MENU] [SETUP] [COLOR]
[NORMAL] / [BROWN] / [BLUE] / [BLACK] g“Menus” (P.12)
Playback volume
You can adjust the sound volume of still pictures or playback volume of
movies.
Top menu [MODE MENU] [SETUP] [VOLUME]
[OFF] / [LOW] / [HIGH] g“Menus” (P.12)
• For album playback mode: Top menu [ALBUM MENU] [VOLUME]
[OFF] / [LOW] / [HIGH]
Beep
7
You can adjust the volume of the camera’s sound. Choose from [HIGH] or
[LOW]. You can turn the sound off completely by setting [OFF].
Settings
Top menu [MODE MENU] [SETUP] [8]
[OFF] / [LOW] / [HIGH] g“Menus” (P.12)
86
Page 87

Shutter sound
You can choose from 3 different sounds for the shutter button. You can
also set the volume of the sound to [LOW] or [HIGH]. You can turn the
sound off completely by setting [OFF].
Top menu [MODE MENU] [SETUP] [SHUTTER SOUND]
1 Select [OFF], [1], [2] or [3]. If you
selected [1], [2] or [3] select
[LOW] or [HIGH] and press e.
g“Menus” (P.12)
SHUTTER SOUND
OFF
1
2
3
SELECT GO
LOW
HIGH
OK
Rec view
You can choose whether or not to display the picture you have just taken
on the monitor.
ON The picture being recorded to the card is displayed. This is useful for making
a brief check of the picture you have just taken. Pressing the shutter button
halfway during Rec View lets you resume shooting immediately.
OFF The picture being recorded to the card is not displayed. This is useful when
you want to prepare for your next shot while the previous picture is being
recorded.
Top menu [MODE MENU] [SETUP] [REC VIEW] [OFF] / [ON]
g“Menus” (P.12)
7
Settings
Note
• Rec view is not available in sequential shooting mode.
87
Page 88

File name
The camera automatically creates file names and folder names for images
to be stored in. Files can be numbered from 0001 to 9999 and folders can
be numbered from 100 to 999. Examples are shown below.
File nameFolder name
\DCIM\***OLYMP\Pmdd****.jpg
Folder No.
(100 – 999)
Month: Jan. – Sep. = 1 – 9, Oct. = A, Nov. = B, Dec. = C
There are two settings from which you can choose: [RESET] or [AUTO]. Choose the
one that is best for you when transferring images to a computer.
RESET The file number and folder number are reset every time a new card is
inserted in the camera. The folder number returns to No. 100 and the file
number returns to No. 0001. This method is useful when grouping files
on separate cards.
AUTO Even if a new card is inserted, the folder number and file number are
retained from the previous card, so the same file number is not used on
different cards. This helps you to manage multiple cards. This method is
useful when you want to manage all your files with sequential numbers.
7
Top menu [MODE MENU] [SETUP] [FILE NAME] [RESET] / [AUTO]
Month (1 – C)
Day (01 – 31)
File No.
(0001 – 9999)
g“Menus” (P.12)
Settings
Note
• When the File No. reaches 9999, the file number returns to 0001 and the folder
number changes.
• When both the Folder and File No. reach their respective maximum number
(999/9999), the number of storable pictures becomes 0 even if the card is not
full. No more pictures can be taken. Replace the card with a new one.
88
Page 89

Pixel mapping
The pixel mapping feature allows the camera to check and adjust the CCD
and image processing functions. It is not necessary to operate this function
frequently. Approximately once a year is recommended. Wait at least one
minute after taking or viewing pictures to allow the pixel mapping function
to perform properly.
Top menu [MODE MENU] [SETUP] [PIXEL MAPPING]
g“Menus” (P.12)
1 Press Y to display [START] and
press e.
• The [BUSY] bar is displayed during pixel
mapping. When pixel mapping is
finished, the screen returns to the mode
menu.
Note
• If you turn the camera off during pixel mapping, start again from the beginning.
SHUTTER SOUND
CAM
REC VIEW
CARD
FILE NAME
PIXEL MAPPING
SETUP
START
7
Settings
89
Page 90

Monitor brightness adjustment
SELECT
GO
This function lets you adjust the brightness of the monitor to make it easier
to see the image.
Top menu [MODE MENU] [SETUP] [s] g“Menus” (P.12)
• For album playback mode: Top menu [ALBUM MENU] [s]
1 Adjust the brightness while
looking in the monitor, and when
you have set the desired level,
press e.
•Pressing O brightens the monitor, and
pressing N darkens it.
7
SELECT
SELECT
GO
GO
OKOKOK
Settings
90
Page 91

Setting the date and time
This function lets you set the date and time. The date and time is saved
with each image, and is used in the file name.
Top menu [MODE MENU] [SETUP] [X] g“Menus” (P.12)
1 Select one of the following date
formats: [Y-M-D] (Year/Month/
Day), [M-D-Y] (Month/Day/Year),
[D-M-Y] (Day/Month/Year), and
press Y.
• Move to the year setting.
• The following steps show the procedure
used when the date and time settings
are set to [Y-M-D].
SELECT
.
SET
.
01 01
:
00 00
GO
2005
YMD
OK
2 Press ON to set the year, then
press Y to move to the month
setting.
• To move back to the previous setting,
press X.
• The first two digits of the year are fixed.
3 Repeat this procedure until the
date and time are completely set.
• The time is displayed in the 24-hour
format. Consequently, 2 p.m. is displayed as 14:00.
SELECT
2005
SET
.
01 01
00 00
GO
.
:
OK
7
Settings
4 Press e.
• For a more accurate setting, press e when the time signal hits 00 seconds.
Note
• The date and time settings will be returned to the factory default settings if the
camera is left without the battery for approximately 1 day. The settings will be
canceled more quickly if the battery was only loaded in the camera for a short
time before being removed. Before taking important pictures, check that the
date and time settings are correct.
• If the date and time setting is canceled, a warning is displayed on the monitor
the next time the camera is turned on. g“Error codes” (P.125)
91
Page 92

8 Printing pictures
8
Select the pictures
you want to print
at the store
Printing pictures
You can print out the pictures you have
taken either at a photo shop or at home on
your own printer.
If you go to a photo shop, it is a good idea to
store the print reservation data on the card
first. This lets you select the pictures you
want to print and decide how many prints
you want.
If you print the pictures at home, you can
either connect the camera directly to the
printer or you can connect the camera to a
computer, download the pictures, and print
from the computer.
Printing at the store
Use the camera to
select the pictures
you want to print
92
Printing at home
Print
reservation
DirectPrint
Page 93

Direct printing (PictBridge)
Using the direct printing function
By connecting the camera to a PictBridge-compatible printer with the USB cable, you
can print out recorded pictures directly. With the camera connected to the printer,
select the pictures you want to print and the number of prints on the camera’s
monitor. It is also possible to print out pictures using the print reservation data.
g“Print settings (DPOF)” (P.102)
To find out if your printer is compatible with PictBridge, refer to the printer’s
instruction manual.
What is PictBridge?… It is the standard for connecting digital cameras and printers
of different manufacturers and printing out pictures directly.
STANDARD… All printers that support PictBridge have standard print settings. If
[STANDARD] is selected on the settings screens (P.97 to P.99), images are printed
according to these settings. Refer to the printer’s instruction manual for its standard
settings or contact the printer manufacturer.
TIPS
• For details of printing paper types, ink cassettes, etc., refer to the printer’s
instruction manual.
Note
• You are recommended to use the optional AC adapter when printing pictures.
If you use the battery, make sure that it has enough power. If the camera stops
operating while communicating with the printer, the printer may malfunction or
image data may be lost.
• The camera will not enter sleep mode when connected to the USB cable.
• Movies cannot be printed.
8
Printing pictures
93
Page 94

Direct printing (PictBridge)
Connecting the camera to a printer
Use the USB cable provided to connect the camera to a PictBridge-compatible
printer.
1 Turn the printer on and plug the
USB cable into the printer’s USB
port.
• For details of how to turn the printer on
and the position of the USB port, refer to
the printer’s instruction manual.
2 Plug the USB cable into the
camera’s multi-connector.
• The monitor turns on and the selection
screen for the USB connection is
displayed.
Battery compartment/
connector cover
Multi-connector
3 Select [PRINT] and press e.
• After [ONE MOMENT] screen appears,
the camera and the printer will be
connected.
8
Note
• If [PC] is selected, screen will not change to next screen. Remove the USB
cable and repeat the procedure from step 1 again.
• If [EXIT] is selected, the camera is not recognized by the printer and turns off.
SELECT GO
USB
P C
PRINT
EXIT
OK
4 Select [ALL IMAGES] or [SEL. ALBUM] and press e.
ALL IMAGES Select from all pictures in the card and print.
SEL. ALBUM Select the picture from the album entry and print.
Printing pictures
94
If you selected [SEL. ALBUM], you cannot select [PRINT
ORDER] in the [PRINT MODE SELECT] screen.
Page 95

Direct printing (PictBridge)
5 If you selected [SEL. ALBUM] in Step 4, select the album that
have the picture to print and press e.
TIPS
• Operate the print setting following the camera’s monitor. Go to “Flowchart for
printing”.
Flowchart for printing
When you have connected the camera to a printer successfully, you can apply print
reservation to selected pictures or you can print a currently displayed picture. Follow
the operation guide on the camera’s monitor.
Press
XYON
to select the item you want.
PRINT MODE SELECT
PRINT
ALL PRINT
MULTI PRINT
ALL INDEX
SELECT
EXIT
Select the print mode.
GO
Follow the operation guide display ed
OK
here.
PRINT MODE SELECT
PRINT
ALL PRINT
MULTI PRINT
ALL INDEX
SELECT
EXIT
Select the print paper setting.
PRINTPAPER
SIZE
STANDARD
CANCEL
SELECT
OK
GO
BORDERLESS
STANDARD
OK
GO
You can print selected pictures
one by one or you can print
multiple pictures on a single
sheet of paper. gP.97
You can select the print paper
setting according to your printer
and you can select whether to
print pictures with a blank frame
or not.
95
8
Printing pictures
Page 96

Direct printing (PictBridge)
100
0030
PRINT
MORE
SELECT
SINGLE PRINT
GO
OK
SET
SELECT
100
0030
PRINT
MORE
SELECT
CANCEL
Select the picture you want to print.
100
-
SELECT
SELECT
SINGLE PRINT
SINGLE PRINT
PRINT
PRINT
MORE
MORE
Set the printing data.
Display the picture you want to
print. You can print the cu rrently
displayed picture at once or you
can make the print reservation
0030
and select the other pictures at
OKOKOK
same time.
Print pictures.
8
Printing pictures
DATE
FILE NAME
SELECT
SELECT
SELECT
SELECT
CANCEL
CANCEL
PRINT INFO
1
WITHOUT
WITHOUT
SET
SET
100
PRINT
PRINT
MORE
MORE
GO
GO
-
Set the number of prints, and
select whether to print the date
and time information or file
name on the pictures. You can
also trim the picture and save it
for printing.
OK
OK
Print the pictures with print
reservation.
0030
OKOKOK
96
Page 97

Direct printing (PictBridge)
Selecting the print mode
Select the type of printing (print mode). You can print pictures one by one or multiple
pictures on a single sheet of paper.
Press ON to select the item you want.
Prints all the pictures
stored in the card and
makes one print for each
picture.
Prints an index of all the
pictures stored in the card.
Example of [ALL INDEX]
PRINT MODE SELECT screen
PRINT MODE SELECT
PRINT
ALL PRINT
MULTI PRINT
ALL INDEX
SELECT
EXIT
PRINT MODE SELECT
PRINT ORDER
SELECT
EXIT
OK
GO
Makes split print with a picture
inset in each split-plane.
Example of [MULTI PRINT]
OK
GO
Prints selected pictures.
8
Printing pictures
Prints according to the
print reservation you
made. If there is no
picture with print
reservation, this is not
available. gP.102
Print modes and settings
The available print modes and settings such as paper size vary depending
on the type of printer. For details, refer to the instructions manual for your
printer.
97
Page 98

Direct printing (PictBridge)
100
0030
PRINT
MORE
SELECT
SINGLE PRINT
Setting the print paper items
This setting varies depending on the type of printer you use. If only the printer’s
standard setting is available, you cannot change the setting.
PRINTPAPER
SIZE
STANDARD
CANCEL
SIZE Sets the paper size that the printer supports.
BORDERLESS Selects whether the picture is printed on the entire page or inside a blank
PICS/SHEET Select the number of print same picture on one page. Displayed when
BORDERLESS
STANDARD
SELECT
frame.
you have selected [MULTI PRINT].
GO
OK
PRINTPAPER
SIZE
STANDARD
SELECT
PICS/SHEET
16
GO
Selecting pictures you want to print
Select pictures you want to print. The selected pictures can be printed later (singleframe reservation) or the picture you are displaying can be printed right away.
PRINT (e)
Prints the currently displayed picture. If there is a
picture that [SINGLE PRINT] reservation has
been already applied to, only the picture with
reservation will be printed.
SINGLE PRINT (O)
Applies print reservation to the currently displayed
picture. Press XY to select other pictures if you
want to apply reservation for further pictures.
MORE (N)
Sets whether you print the number of prints and
other data of the currently displayed picture.
g“Setting printing data” (P.99)
8
SELECT
SELECT
SINGLE PRINT
SINGLE PRINT
100
PRINT
PRINT
-
MORE
MORE
0030
OKOKOK
OK
Printing pictures
98
Page 99

Direct printing (PictBridge)
GO
OK
SET
SELECT
OK
Setting printing data
Select whether to print printing data such as the date and time or file name on the
picture when printing.
<× Sets the number of prints.
DATE Prints the date and time recorded on
FILE NAME Prints the file name recorded on the
P Crops part of the picture and enlarges
the picture.
picture.
the uncropped section for printing.
DATE
FILE NAME
SELECT
SELECT
PRINT INFO
1
WITHOUT
WITHOUT
SET
SET
GO
GO
OK
OK
Trimming
You can crop part of a picture and print the uncropped section as a full picture. If the
trimmed picture is small, enlarging it may result in graininess when printing it.
Press ONXY to move the trimming frame.
GOGOGO
OKOK
OKOK
Press the W side or T side of the zoom button to
select the trimming size.
Printing
CANCEL
PRINT
OK
CANCEL
SELECT
GO
OK
Print when you have set the pictures for printing and
printing data.
OK Transfers images you print to the printer.
CANCEL Cancel printing. All print reservation
data will be lost. If you want to keep the
print reservation data and make other
settings, press X. This returns you to
the previous setting.
99
8
Printing pictures
Page 100

Direct printing (PictBridge)
To stop and cancel printing, press e.
CONTINUE Continues printing.
CANCEL Cancels printing. All print reservation
data will be lost.
SELECT
PRINT
CONTINUE
CANCEL
GO
OK
Exiting direct printing
When you have finished printing, disconnect the camera from the printer.
1 In the [PRINT MODE SELECT]
screen, select
• [REMOVE USB CABLE] is displayed.
2
Remove the USB cable from the
camera.
3 Remove the USB cable from the
8
printer.
X.
EXIT
PRINT MODE SELECT
PRINT
ALL PRINT
MULTI PRINT
ALL INDEX
SELECT
GO
OK
Printing pictures
100
 Loading...