

Olympus BX3-SSU Instructions Manual

INSTRUCTIONS
BX3-SSU
SCANNING STAGE WITH ULTRASONIC
This instruction manual is for the Olympus Scanning Stage with Ultrasonic Model BX3-SSU.
To ensure the safety, obtain optimum performance and to familiarize yourself fully with the use of
the scanning stage with ultrasonic, we recommend that you study this manual thoroughly before
operating the microscope. In addition, be also sure to read the instruction manual for the BX63
microscope on which the scanning stage with ultrasonic is installed.
Retain this instruction manual in an easily accessible place near the work desk for future reference.
A X 7 9 3 4
In accordance with European Directive 2002/96/EC on Waste Electrical and Electronic Equipment,
this symbol indicates that the product must not be disposed of as unsorted municipal waste, but
should be collected separately.
Refer to your local Olympus distributor in EU for return and/or collection systems available in your
country.
NOTE:
This equipment has been tested and found to comply with the limits for a Class A digital device,
pursuant to Part 15 of the FCC Rules. These limits are designed to provide reasonable protection
against harmful interference when the equipment is operated in a commercial environment. This
equipment generates, uses, and can radiate radio frequency energy and, if not installed and used in
accordance with the instruction manual, may cause harmful interference to radio communications.
Operation of this equipment in a residential area is likely to cause harmful interference in which case
the user will be required to correct the interference at his own expense.
FCC WARNING:
Changes or modifications not expressly approved by the party responsible for compliance
could void the user's authority to operate the equipment.
Compliance
This device complies with the requirements of both directive
2004/108/EC
concerning electromagnetic
compatibility and directive
2006/95/EC
concerning low voltage. The CE marking indicates compliance
with the above directives.
IEC61326-1 defines two categories according to the location for use.
Class A: Equipment suitable for use in establishments other than domestic, and those directly con-
nected to a low voltage power supply network which supplies buildings used for domestic
purposes.
Class B: Equipment for use in domestic establishments, and in establishments directly connected to a
low voltage power supply network which supplies buildings used for domestic purposes.
This system is applied Class A. Some interference may occur if this system is used in domestic location.

BX3-SSU
CONTENTS
IMPORTANT -- Be sure to read this section for safe use of the equipment. --
1,2
3
4,5
6
1 MODULE NOMENCLATURE
2 CONTROLS
3 OPERATION OF SCANNING STAGE WITH ULTRASONIC
1 Turning the Power ON
2 Moving the Stage
1 Stage Center Plate IX-CP50/IX2-GCP
3 Replacing the Fuses
2 Stage Clips IX-SCL
4 OPTIONAL ACCESSORIES
7
n
PROPER SELECTION OF THE POWER SUPPLY CORD
............................................................
13 ,14
5 SPECIFICATIONS
6 TROUBLESHOOTING GUIDE
7 ASSEMBLY
8
9
10-12
1
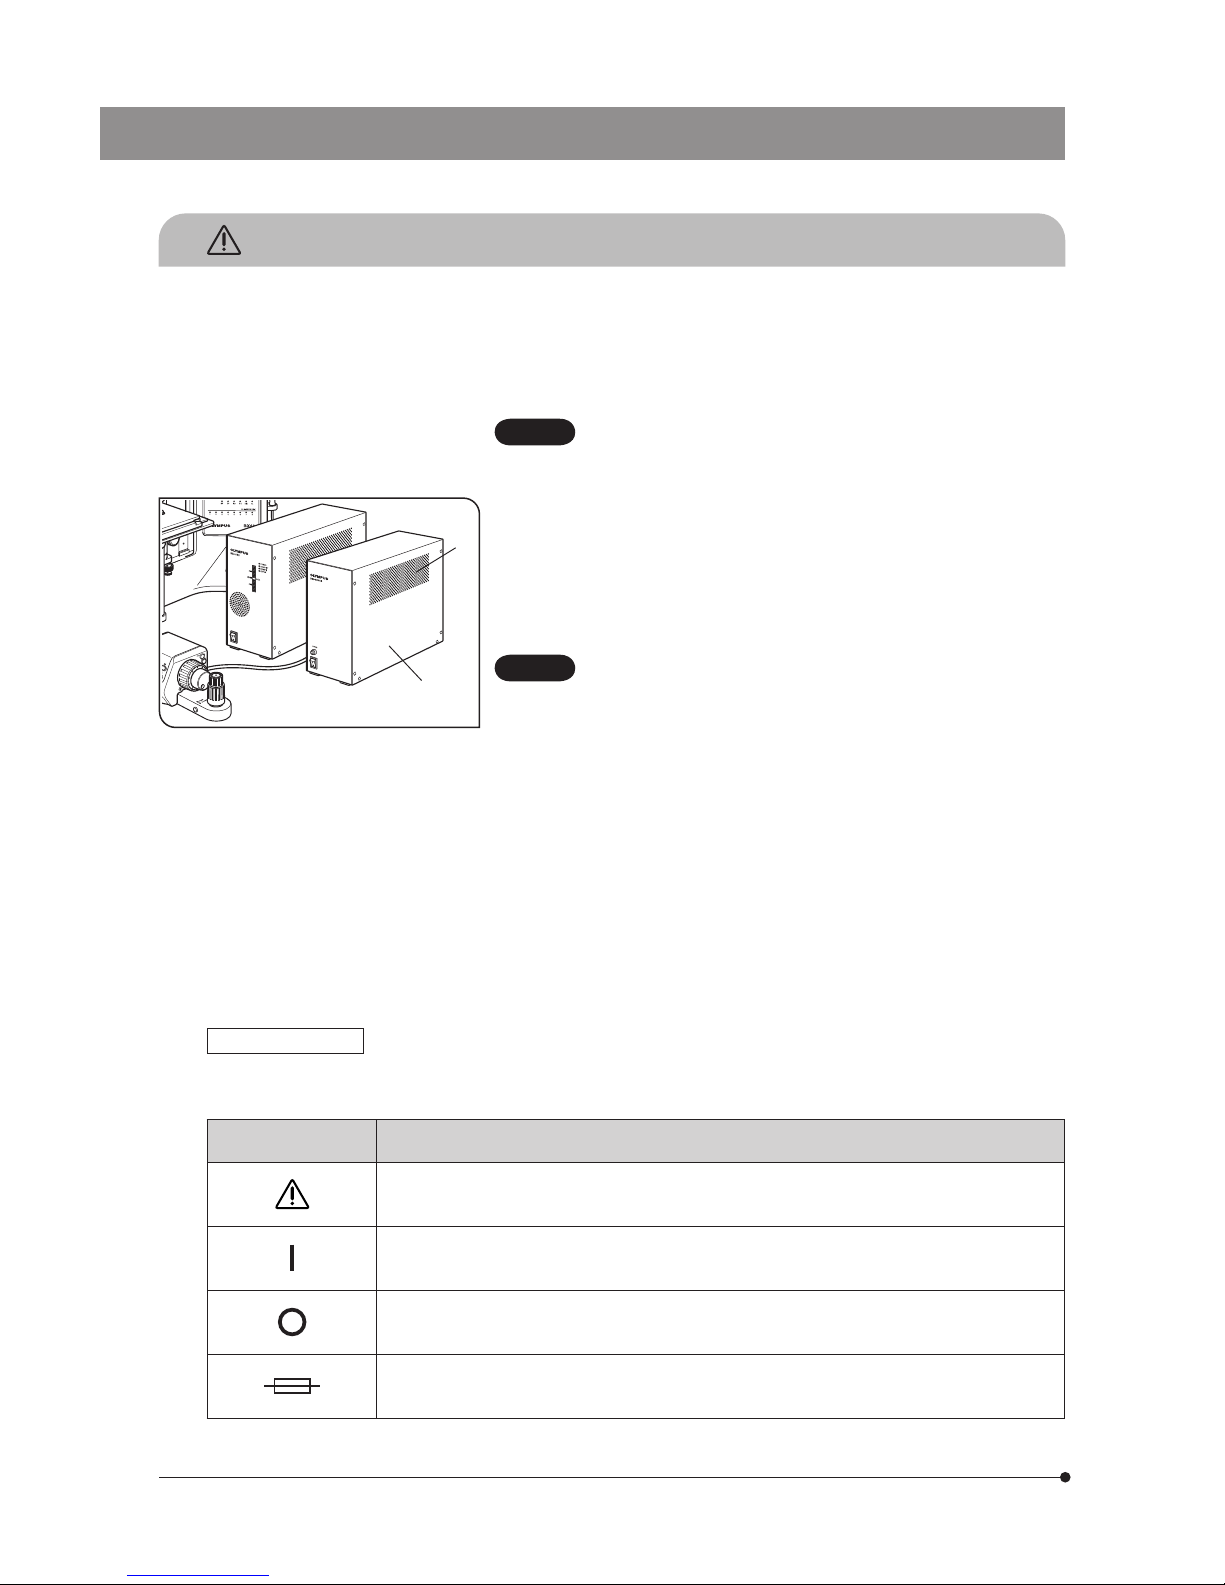
SAFETY PRECAUTIONS
(Fig. 1)
IMPORTANT
} This manual pertains only to the information related to the scanning stage
with ultrasonic and associated modules.
Before using this instrument together with the BX63 microscope and
associated modules, make sure that you have carefully read their manuals
and understand how the system should be operated together.
To ensure the performance, we recommend that you have your
Olympus representative assemble and adjust the scanning
stage with ultrasonic.
1. Install the microscope on a level (inclination less than ±2°) surface on a
sturdy table or bench.
2. To prevent obstruction of the air vents 2 on both sides of the control box
@ for BX3-SSU, always install it longitudinally and make sure to leave at
least 10 cm of free spaces around them.
Also, to prevent malfunction or electric shock, do not allow a wire or thin
object to enter the air vents.
When installing the BX3-CBH and the control box for BX3-SSU
side by side, always install the BX3-CBH on the left to enable
effective heat radiation.
3. Always use the power cord provided by Olympus. If no power cord is
provided, please select the proper power cord by referring to the section
“PROPER SELECTION OF THE POWER SUPPLY CORD” at the end of this
instruction manual. If the proper power cord is not used, product safety
performance cannot be warranted.
4. Always ensure that the grounding terminal of the instrument and that of
the wall outlet are properly connected. If the equipment is not grounded,
Olympus can no longer warrant the electrical safety performance of the
equipment.
5. The power cord can be used to shut down the power supply in case of
emergency. To make this possible, place the power cord plug in an easily
accessible location.
Fig. 1
1
2
CAUTION
CAUTION
Safety Symbols
The following symbols are found on this system. Study the meaning of the symbols and always use the equipment in
the safest possible manner.
Symbol Explanation
Indicates a non-specific general hazard. Follow the description given after this symbol or in
instruction manual.
Indicates that the main switch is ON.
Indicates that the main switch is OFF.
Indicates a potential fire hazard; when replacing fuses, be sure replacement fuses are of the
specified rating.

32
BX3-SSU
3
1 Getting Ready
1. The scanning stage with ultrasonic is a precision instrument. Handle it with care and avoid subjecting it to sudden or
severe impact.
2. When the scanning stage with ultrasonic needs to be packaged for forwarding to a remote location, it should be clamped
using clamping hardware. Please contact Olympus (to obtain advice).
3. Do not use the instrument where it is subjected to direct sunlight, high temperature and humidity, dust or vibrations.
Also avoid using it in the following places.
(1) Near an air intake or outlet of an air conditioning facility, etc.
(2) Place subject to important vibrations or changes in temperature.
(3) Near a source (including equipment not manufactured by Olympus) of abnormal noise.
(4) Place subject to direct sunlight.
(5) Place exposed to excessive dust or high temperature/humidity.
(6) Near a flammable substance (gasoline, lacquer thinner, alcohol, etc.).
4. Leave certain slack to the stage cable so that they are not over-tensioned when the stage is moved.
5. Do not touch this stage unless it needs to be stopped urgently. it should not be touched except for emergency stop
purpose in order to prevent the position information from being deviated. If this happens, turn the stage off then on
again.
Also note that the stage movement may become temporarily unsmooth after it has been moved by hand.
6. Whenever emergency stop is necessary during motorized movement, the stage can be stopped by holding it by hand.
7. Before replacing the fuse, be sure to set the main switch of the control box to “
” (OFF) and unplug the power cord for
safety.
2 Maintenance and Storage
1. To clean the parts, simply wipe them with a clean cloth. If a part is extremely dirty, do not use organic solvents but use a
soft cloth slightly moistened with a diluted neutral detergent.
2. Do not disassemble any part of the microscope except for the parts that are specified to be disassembled in this manual,
as this could result in malfunction or reduced performance.
3. Before disposing of this product, be sure to follow the regulations and rules of your local government.
3 Caution
If the instrument is used in a manner not specified by this manual, the safety of the user may be imperiled. In addition,
the equipment may also be damaged. Always use the equipment as outlined in this instruction manual.
The following symbols are used to set off text in this instruction manual.
: Indicates a potentially hazardous situation which, if not avoided, may result in minor
or moderate injury or damage to the equipment or furniture in the surroundings. This
symbol is also used to warn against risky actions.
} : Indicates commentary (for ease of operation and maintenance).
CAUTION
3
1
1
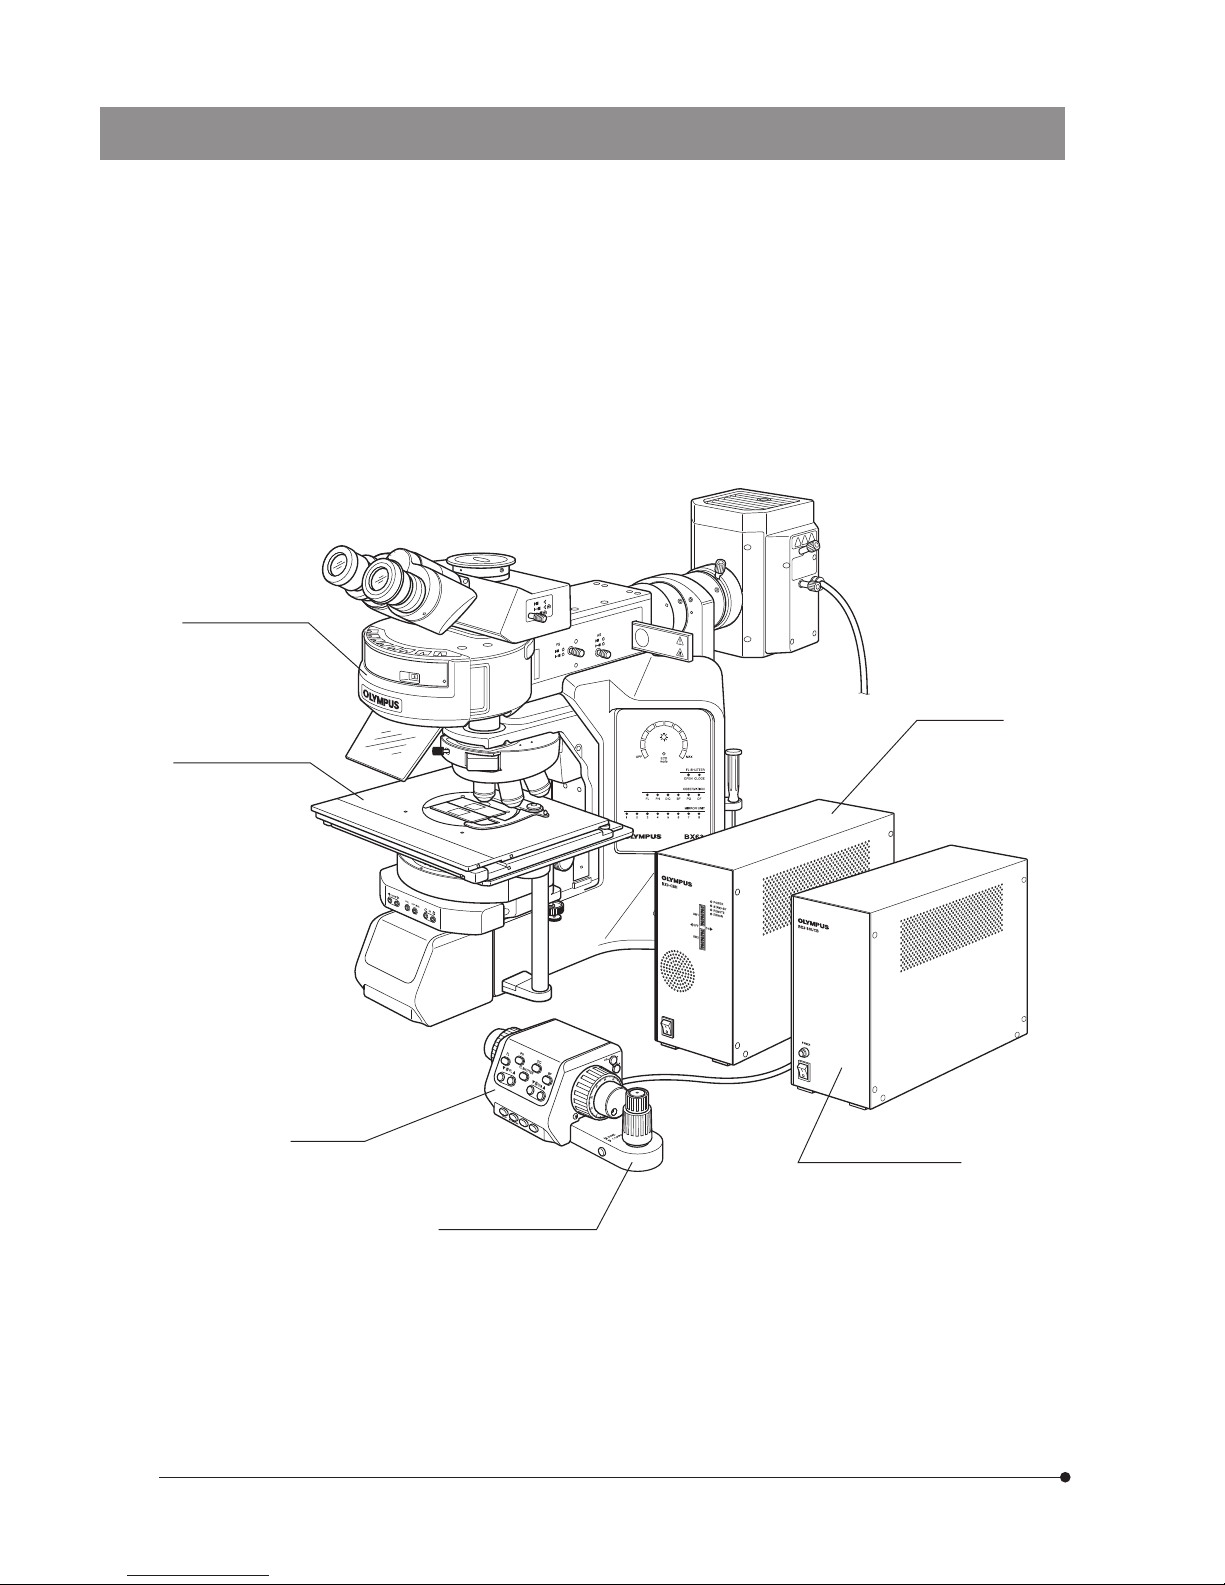
MODULE NOMENCLATURE
} To ensure the performance, we recommend that you have your Olympus representative assemble and adjust the scanning
stage with ultrasonic.
The modules marked * are not part of the scanning stage with ultrasonic product.
The control of the scanning stage with ultrasonic is possible from the U-MCZ controller, the touch-panel controller provided with
the BX63.
Microscope frame*
BX63F
Scanning stage with
ultrasonic
BX3-SSU
Control box*
BX3-CBH
Controller*
U-MCZ
XY controller
Provided with BX3-SSU.
Control box
Provided with BX3-SSU.
 Loading...