

Oliver BM-42 Service Manual

Walker, Michigan, U.S.A. 49534-7564
USER’S OPERATING AND INSTRUCTION MANUAL
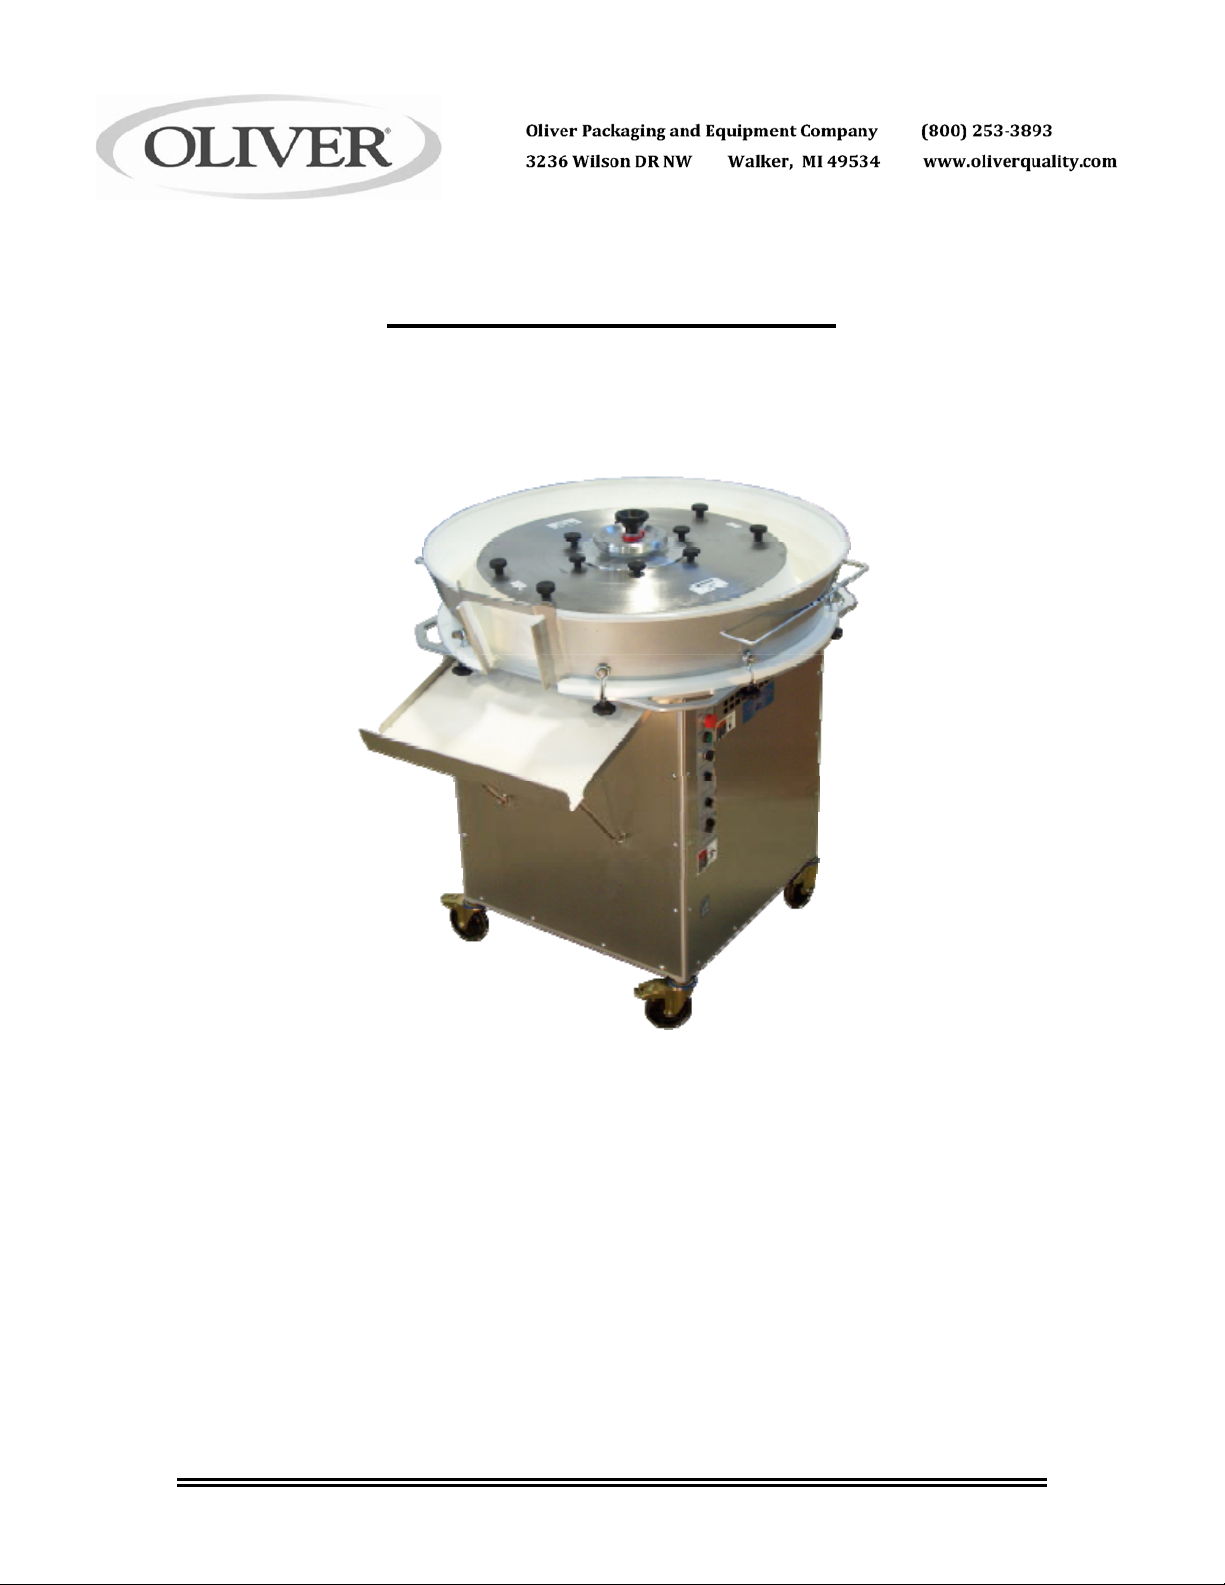
BM-42
BOULE MOULDER
0601S20000-CVR
OPERATOR’S MANUAL
SAFETY INSTRUCTIONS
MAINTENANCE & TROUBLE SHOOTING
GEARMOTOR MAINTENANCE INSTRUCTIONS
WARRANTY & PARTS DIAGRAMS & WARRANTY
BM42 BOULE MOULDER
0601S20001 0-1

ATTENTION
ALLOPERATORS
DO NOT INSTALL, OPERATE OR DO MAINTENANCE OF THIS EQUIPMENT WITHOUT READING THE MANUAL.
PROTECT YOURSELF AND OTHERS BY OBSERVING ALL SAFETY INFORMATION AND PROCEDURES.FAILURE TO
COMPLYWITHINSTRUCTIONSCOULDRESULTININJURIESAND
/ORPROPERTYDAMAGES.
SAFETYDEPENDSONYOU!
Trademark(s)ownedbyBloemhofIndustriesLtd.
TollFree1‐800‐253‐3893
OliverPackagingandEquipmentCo
3236WilsonDrNW,Walker,MI49534
0601S20001 0-2

Thank you for purchasing the Bloemhof BM42 Boule Moulder. We invite you to read the
instructions in order to obtain maximum performance, safety, and satisfaction from this
outstanding unit.
The Bloemhof BM42 Boule Moulder is specifically developed to handle the most difficult dough
with up to 15% protein flour as well as traditional artisan breads. The advanced hand moulding
action produces a superior oven jump and a seamless finish.
Our Boule Moulder eliminates the tedious task of hand moulding of medium to large rounds and
with the infinite control settings, all types of dough can be moulded to your complete satisfaction.
Weight range for this machine is from 7 ounce to 4 pounds and up to 1,000 Boules of 36 oz. can
be made in one hour.
The Bloemhof BM42 Boule Moulder features:
Variable speed cone rotation
Variable speed kneading action
Adjustable stroke settings
Heavy duty motor and drive system
Sanitary construction
It should be noted that this machine controls and works the dough pieces through rotation,
kneading, stroke and a time interval. Separate electronic controls and gear motors have been
incorporated for cone rotation and for cone kneading. Cone stroke can also be quickly varied by
adjusting the stroke adjustment knob. This versatility gives you complete control on how much or
how little you work your dough for consistent quality results.
The FDA approved surfaces are clean, durable and will not absorb oils or dough ingredients. A
full scraper system prevents dough buildup and makes cleaning simple.
The Bloemhof BM42 Boule Moulder will be a welcome addition to your shop, since it was
designed to reduce the labor intensive and tedious moulding operations and produce the finest
quality products.
The instructions are in general because of personal preference with regards to dough
consistency, bread types and most important, formulae.
0601S20001 0-3

IMPORTANT
U
NCRATING
This machine was carefully manufactured, tested and crated prior to shipment. When
unpacking this machine, carefully inspect for any shipping damage. Make sure any bolts
or parts that may have loosened during transit are tightened before proceeding.
1. Carefully uncrate the Boule Moulder using claw hammer.
2. This unit weighs 850 pounds and is top heavy, thus care must be taken when removing from
pallet.
3. Discard all shrink wrap & packing materials. Ensure that there are no loose parts, nails,
wood or other foreign material in or underneath cone and tub.
4. Check cone hold down knobs and make sure they are securely fastened.
5. Read operating instructions before attempting to use this machine.
6. DO NOT change the cord end to any other voltage or phase rating.
Serious damage to motors and controls will result which is not covered by warranty!
SAFETY INSTRUCTIONS
WARNING!
DO NOT INSTALL OPERATE OR MAINTAIN THIS EQUIPMENT WITHOUT READING AND UNDERSTANDING THIS
MANUAL
SAFETY DEPENDS ON YOU!
WARNING!
ELECTRICAL SHOCK CAN KILL
Install equipment in accordance with the all national and local electrical codes.
Improper connection of the equipment grounding conductor and line voltage can
result in a risk of electrical shock and / or damage to equipment, (such damages are
not covered by warranty).
Consult with a qualified electrician and / or service person to ensure that the outlet is
properly grounded. Only a qualified electrician can modify the electrical cord and / or
plug-in provided.
Disconnect machine from electrical supply source before performing any and all
maintenance.
0601S20001 0-4

GENERAL SAFETY INSTRUCTIONS
1. R
EAD the Operators Manual carefully. Be thoroughly familiar with the controls and the
proper use of the equipment.
2. O
NLY PERSONS well acquainted with these rules for safe operation should be allowed to
use this machine.
3. Do not wear loose clothing, scarves, or neckties. These items may become caught in
moving parts and result in personal injury.
4. V
ISUALLY inspect machine prior to starting motor. Ensure all safety guards, covers and
devices are in position and in good condition. Keep hands, hair, clothing and tools away
from rollers, V-belts, conveyor belts and all other moving parts when starting, operating or
repairing equipment. Do not disconnect Safety Bar or render it inoperable by tying or
taping it in a fixed position.
5. D
ISCONNECT machine from power supply before performing servicing, maintenance, or
cleaning. In some cases it may be necessary to remove safety guards to perform
required maintenance. Immediately replace guards before placing the machine into
service.
6. T
URN OFF machine control before unplugging. Do not unplug machine and do not attempt
to move the machine by pulling cord.
7. D
O NOT operate machine when children are present and disconnect power supply when
unattended.
8. S
TAY ALERT! Watch what you are doing and use common sense. Do not use the machine
when you are tired, distracted or under the influence of drugs, alcohol or heavy
medication.
0601S20001 0-5
GENERAL INSTRUCTIONS
You should become familiar with the major components of your new Bloemhof Boule Moulder as
we will make reference to them throughout this manual.
WARNING
B
EFORE STARTING, REMOVE DOUGH PIECES, FOREIGN OBJECTS, AND HANDS FROM WORKING AREAS.
DURING OPERATIONS, KEEP FINGERS AND HANDS AWAY FROM THE PINCH POINTS BETWEEN THE TUB AND
CONE
.
I
F MACHINE STOPS DURING OPERATIONS, UN-PLUG UNIT AND WAIT 5 MINUTES
FOR THE ELECTRONIC CONTROLS TO RESET.
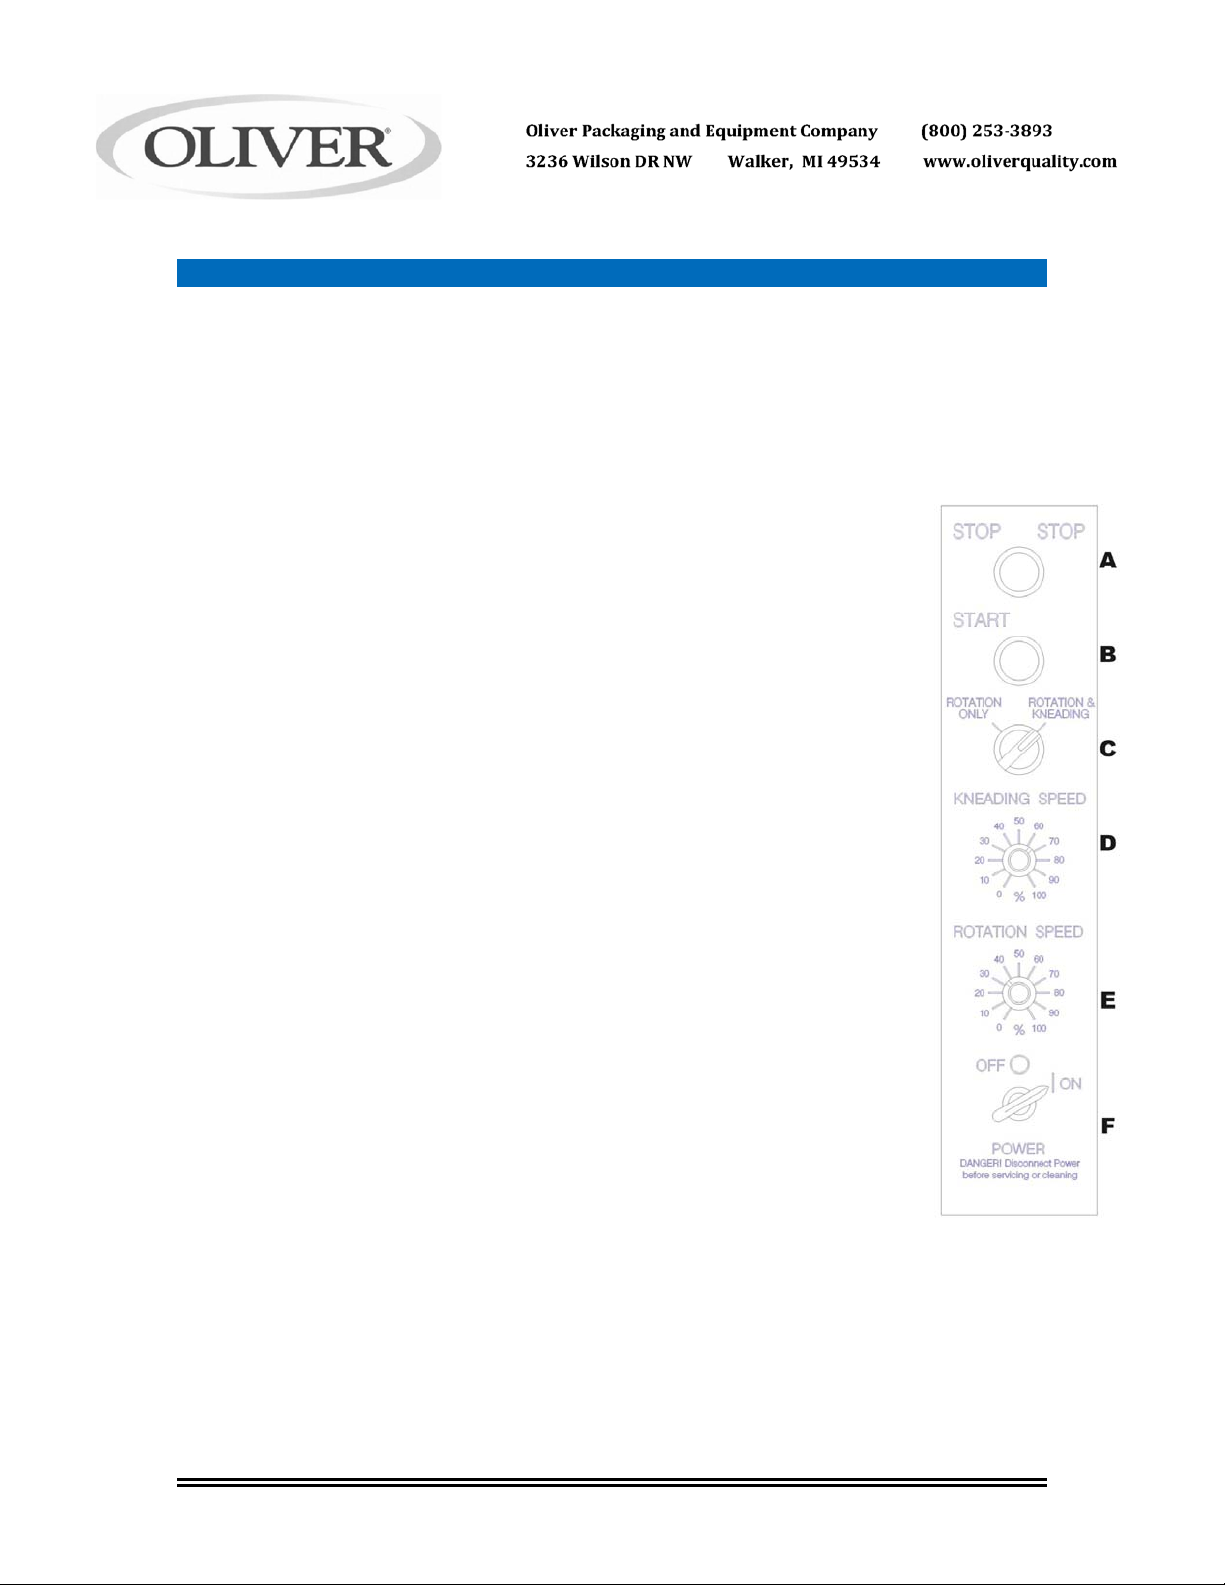
1. C
ONTROL PANEL
The Control Panel controls all the motor functions and is located by the catch
tray.
A. STOP - Stops all motors, twist knob to reset.
B. START - Starts rotations and kneading motors.
C. SELECTOR SWITCH - Turn “counter clockwise” energizes rotation motor
only. Turn “clockwise”, energizes rotation and kneading motors.
D. KNEADING SPEED - Controls the rate the cone kneads or squeezes the
dough piece. Adjustment of this control allows from 35 to 150 hits per minute.
E. ROTATION SPEED - Controls the movement of the dough piece around the
tub and dough ball shape. Adjustment of this control allows from 3 to 12
revolutions per minute.
F. POWER - Disconnects main power from controls. Use this switch to
disconnect machine from supply circuit before performing cleaning,
maintenance or servicing electrical circuits. Shut off Power switch before
unplugging cord from supply.
NOTE
If the selector switch “C” is changed from “rotation only” to “rotation
and kneading” while the cone is rotating, the START selector button “B”
must be pushed to energize the kneading motor.
WARNING
T
URN OFF MAIN POWER SWITCH AND UNPLUG MACHINE FROM POWER SOURCE
BEFORE MAKING ADJUSTMENTS, CLEANING AND/OR MAINTENANCE.
2. C
ONE
The cone moulds the dough pieces against the tub surfaces. Both tub and cone are
covered with a durable FDA approved material.
CONE REMOVAL
a. Turn off Main Power Switch and unplug machine from power source.
0601S20001 0-6

b. Remove six cone hold down knobs. Carefully lift cone from machine. Two people are
required to lift cone.
c. Place cone on a clean smooth surface. Do not drop cone or place on floor as the scraper
edge could get damaged.
d. Clean tub area and cone thoroughly of any old dough and flour. Inspect scraper edge on
cone. Use a plastic scraper and damp cloth to clean cone and scraper edge. DO NOT
IMMERSE CONE IN WATER OR PLACE IN PAN WASHER
.
WARNING!
D
O NOT DROP CONE ONTO TABLE OR FLOOR AS SEVERE SCRAPER DAMAGE COULD RESULT.
ONE INSTALLATION
C
a. Clean any foreign material from top hold down plate.
b. Position cone on top of hold down plate on machine and rotate cone until holes from hold
down plate line up with holes in cone. Two people required to install cone.
c. Install hold down knobs and tighten securely.
WARNING!
MAKE SURE THAT THE CONE KNOBS, WHICH HOLD THE CONE IN POSITION, ARE SECURELY
FASTENED AT ALL TIMES
.
3. CONE SCRAPER
The cone scraper prevents dough from squeezing under the cone and also cleans
the tub bottom. The underside of the scraper must be kept clean to prevent foreign
particles from embedding in the plastic scraper and damaging the tub bottom. Clean
with a plastic scraper only do not use a metal scraper or any another sharp
object.
4. TUB
The tub forms the outer moulding surface. Dough loading is on the right side of the
tub exit. Clean the tub daily with a plastic scraper. Clean with a plastic scraper
only do not use a metal scraper or any another sharp object.
T
UB REMOVAL (SEE PAGE 13 FOR DIAGRAM)
a. Turn off “Main Power Switch” and unplug machine from power source.
b. Remove con e from ma chine.
c. Loosen and remove 8 tub hold down knobs. Remove eye bolts from machine.
d. Carefully remove tub from machi ne. Two people required to remove tub.
UB INSTALLATION
T
a. Clean any foreign material from the top of the machine before positioning tub. Care must
be taken to remove debris from the cone slot.
b. Using two people, carefully position tub on the machine making sure to install the tub the
same way it was removed. The exit end of the tub should be over the catch tray.
c. Line up the slots for the hold down knobs and position hold down eye bolts on each cone
pin.
0601S20001 0-7

d. All 8 knobs should be tightened in sequence. In other words, start at the catch tray end
and work around the cone tightening each knob slightly. Once completed, repeat
procedure starting at the first knob by the catch tray and tighten securely. Do not use a
wrench for this procedure.
5. C
ONE KNOBS
There are six cone knobs that hold the cone in position. Before starting the Boule
Moulder, quickly check to make sure all knobs are securely fastened. A knocking
sound may emanate from the machine if the cone knobs are not secure.
6. STROKE CLAMP KNOB
The stroke clamp knob secures the setting of the stroke adjustment. Before starting Boule
Moulder, make sure that this knob, which is located at the very top of the cone, is securely
fastened. Hand tighten only.
7. STROKE ADJUSTMENT WHEEL
The stroke setting is the range the cone will swing from side to side. This setting will
determine how intense the dough piece is being squeezed in-between the tub and
the cone. This setting will be determined by the formulation, weight range and
tightness required of the product being moulded.
To make this adjustment, loosen the stroke clamp knob on the top of the machine,
and adjust the wheel to a higher or lower number. The higher the number, the larger
the stroke and more intense the squeeze in-between the tub and cone.
8. CATCH PLATE
The catch tray is hinged and can be positioned in the loading position by lifting the
catch tray and positioning the holding bar underneath the catch tray. The catch tray
can be positioned in the storage position by lifting the catch tray and lowering the
holding bar.
9. LOCKING CASTERS
The locking casters are provided to stabilize the Boule Moulder during operations.
Place the unit on a level surface then press the black brake mechanism down on all
four casters. NOTE: Before moving the machine to a new location, make sure
all casters are unlocked.
10. FOOT PADS (When supplied)
When machines are supplied with foot pads, make sure the machine is level
before starting machine. Adjust foot pads as required.
0601S20001 0-8
 Loading...