

Oliver 1508-NLG Installation Manual

Grand Rapids, Michigan, U.S.A. 49504-5298
USER’S OPERATING AND INSTRUCTION MANUAL
MODEL 1508-NLG
SELF-ACTUATING TRAY LIDDER
1508S20000CV2

1508-NLG SELF-ACTUATING LIDDER
INDEX
SAFETY INSTRUCTIONS........................................................................................... 1508S20002
SET UP........................................................................................................................ 1508S20003
OPERATING PROCEDURE......................................................................................... 1508S20004
ADJUSTMENTS........................................................................................................... 1508S20005
TECHNICAL SPECIFICATIONS................................................................................... 1508S20006
CLEANING................................................................................................................... 1508S20007
TROUBLE SHOOTING................................................................................................. 1508S20012-1
PUSHER ADJUSTMENTS............................................................................................ 1508S20012-2
ASSEMBLIES
BASE ASSEMBLY................................................................................................... 1508S20008
HEATER PLATTEN ASSEMBLY ........................................................................... 1508S20009
MANIFOLD ASSEMBLY......................................................................................... 1508S20010
FINAL ASSEMBLY.................................................................................................. 1508S20011
MACHINE EXCHANGE PROGRAM............................................................................. GEN 050819
WARRANTY.................................................................................................................. GEN 040225
WARRANTY PROCEDURE.......................................................................................... GEN 040226
RETURNED PARTS POLICY....................................................................................... GEN 040227
12/23/97 1508S20001
1508-NLG SELF-ACTUATING LIDDER
SAFETY
Various safety devices and methods of guarding have been provided on this machine. It is essential,
however, that machine operators and maintenance personnel observe the following safety
precautions. Improper installation or operation of this equipment may cause injury to personnel or
damage to equipment.
• Before operating the Self-Actuating Lidder read through this manual. Never allow an untrained
person to operate this machine.
WARNING
• WARNING PINCH POINT: Keep hands out of machine. Always be sure the machine has been
unplugged from power and air before cleaning or servicing.
CAUTION
• CAUTION HOT: The heater cover and upper platen are very HOT! Caution must be used to
protect yourself and others.
• In addition to these general safety instructions, follow the specific instructions given through out
this manual.
12/17/97 1508S20002
1508-NLG SELF-ACTUATING LIDDER
SET UP
1. Unpack and carefully remove the Self-Actuating Lidder. Check for completeness of your order
and that none of the items have been damaged during shipment.
2. Screw the four rubber feet in to place on the bottom of the machine.
3. Place the Self-Actuating Lidder in a suitable location that provides adequate working space. The
location must be sturdy, level, and capable of holding 50 lbs. per machine.
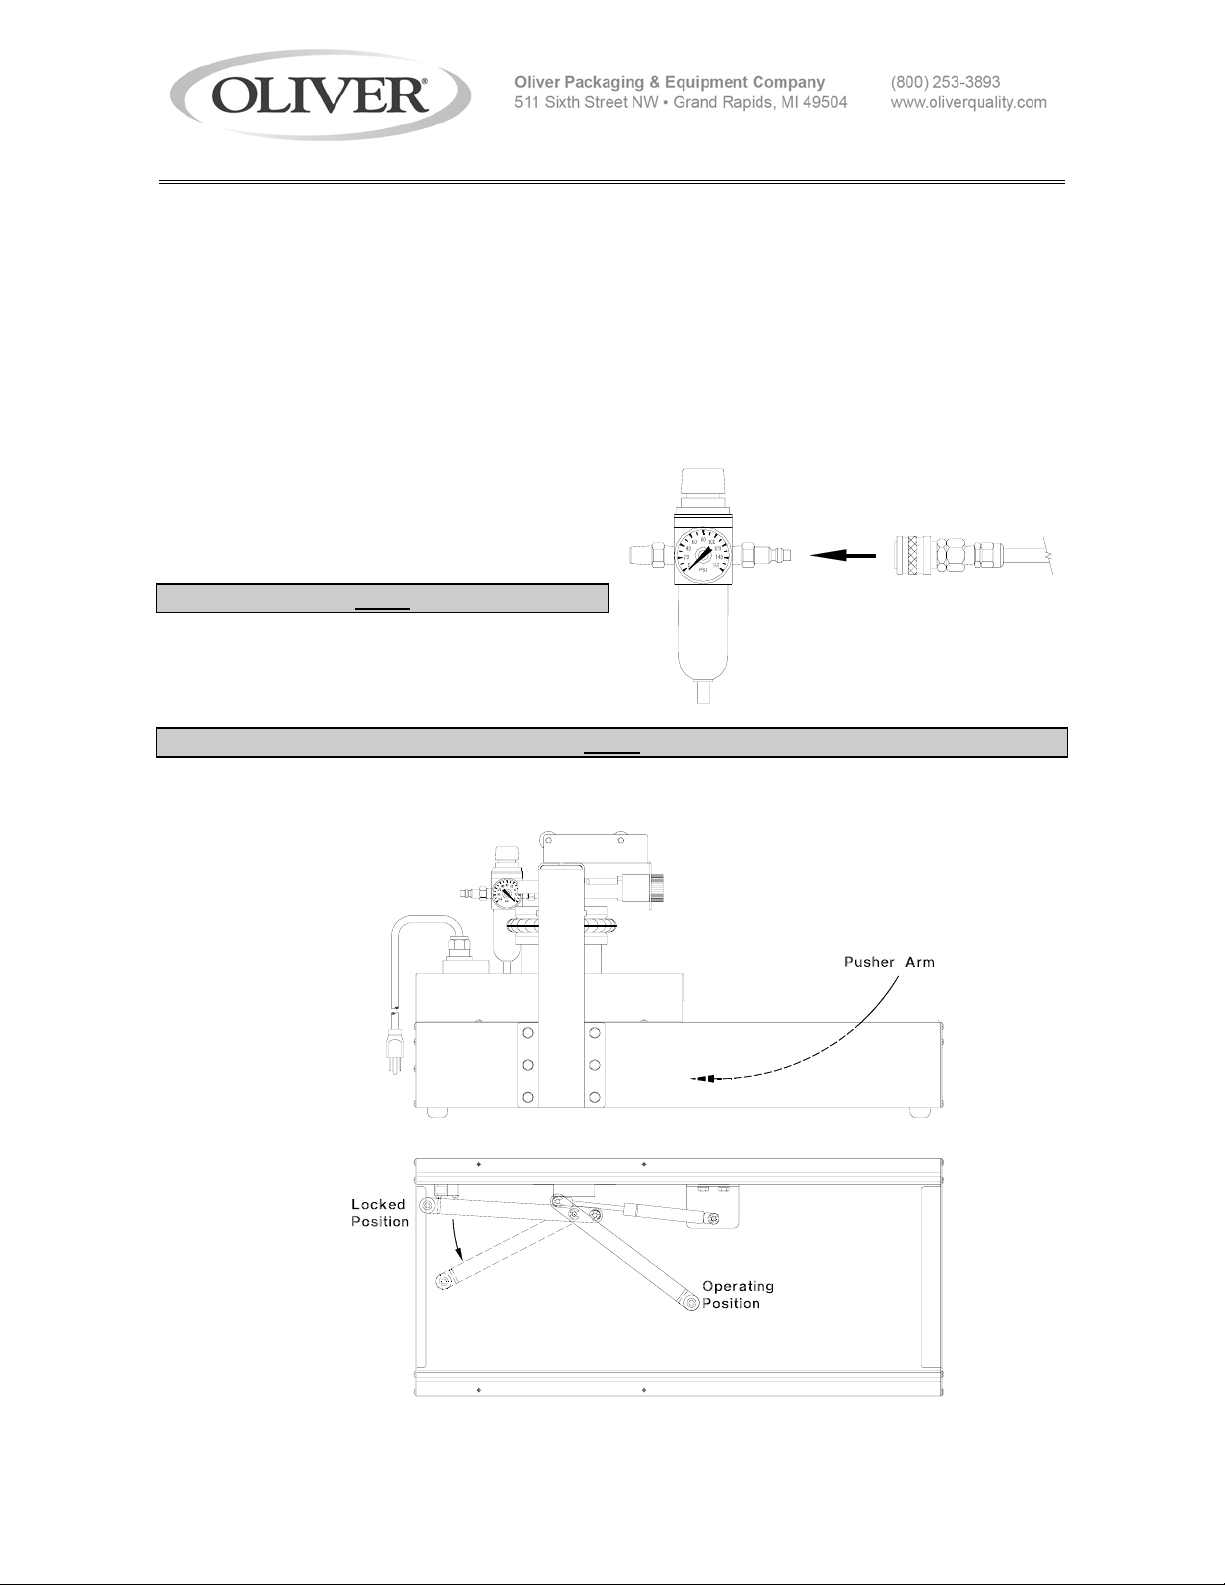
4. Use the quick detachable coupler to
connect air pressure to the filter/regulator. The
Self- Actuating Lidder requires a minimum of
0.1 CFM at 90 PSI.
NOTE
• DO NOT USE AN OILER OR LUBRICATOR
WITH THIS MACHINE.
NOTE
• DO NOT CONNECT TO AIR PRESSURE ABOVE 140 PSI.
5. Pull the ejector bar to its operating position as shown.
11/9/09 1508S20003-1
1508-NLG SELF-ACTUATING LIDDER
6. SET UP (continued)
6. Plug the power cord into a grounded electrical outlet. The Self-Actuating Lidder requires single
phase 110 VAC, 60 Hertz with 10 ampere (minimum) circuit breaker protection.
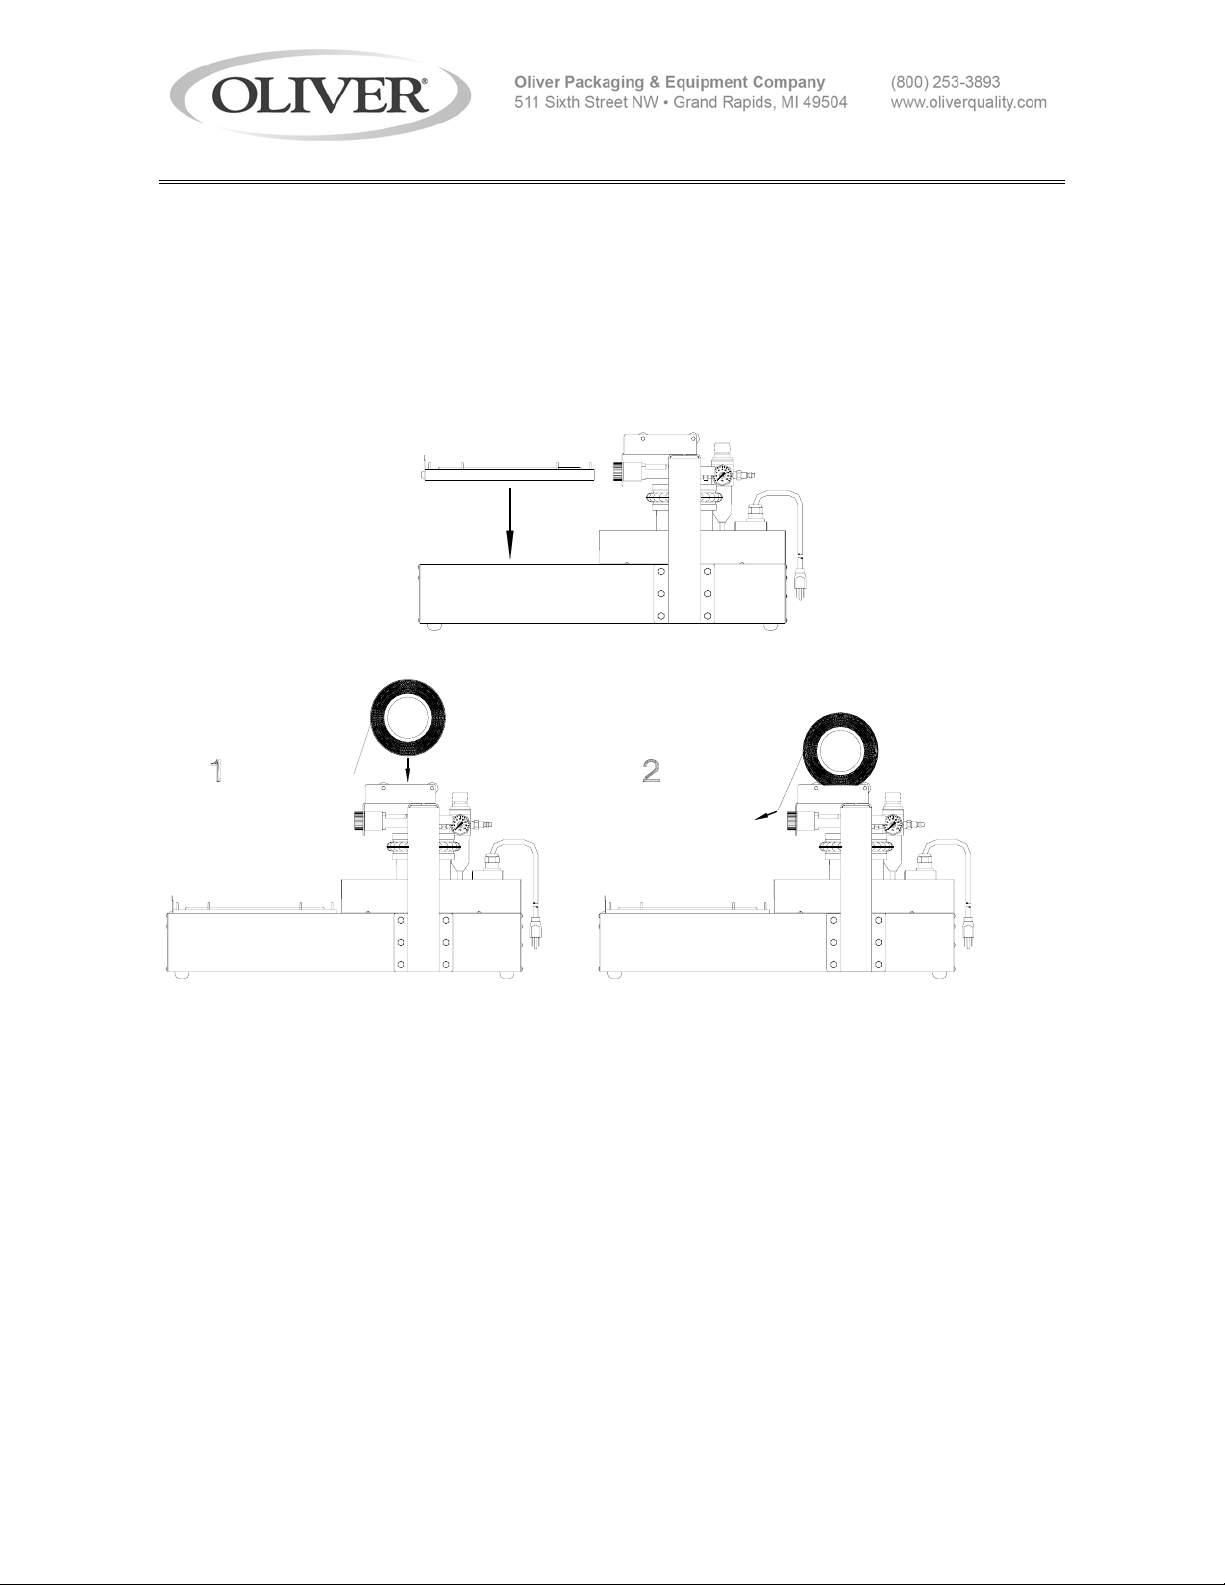
7. Install the tray carrier:
8. Load lid dispenser:
11/9/09 1508S20003-2
1508-NLG SELF-ACTUATING LIDDER
OPERATING PROCEDURE
1. To turn the machine on plug in the power
cord. Wait 40 minutes to allow the heated upper
platen to reach temperature.
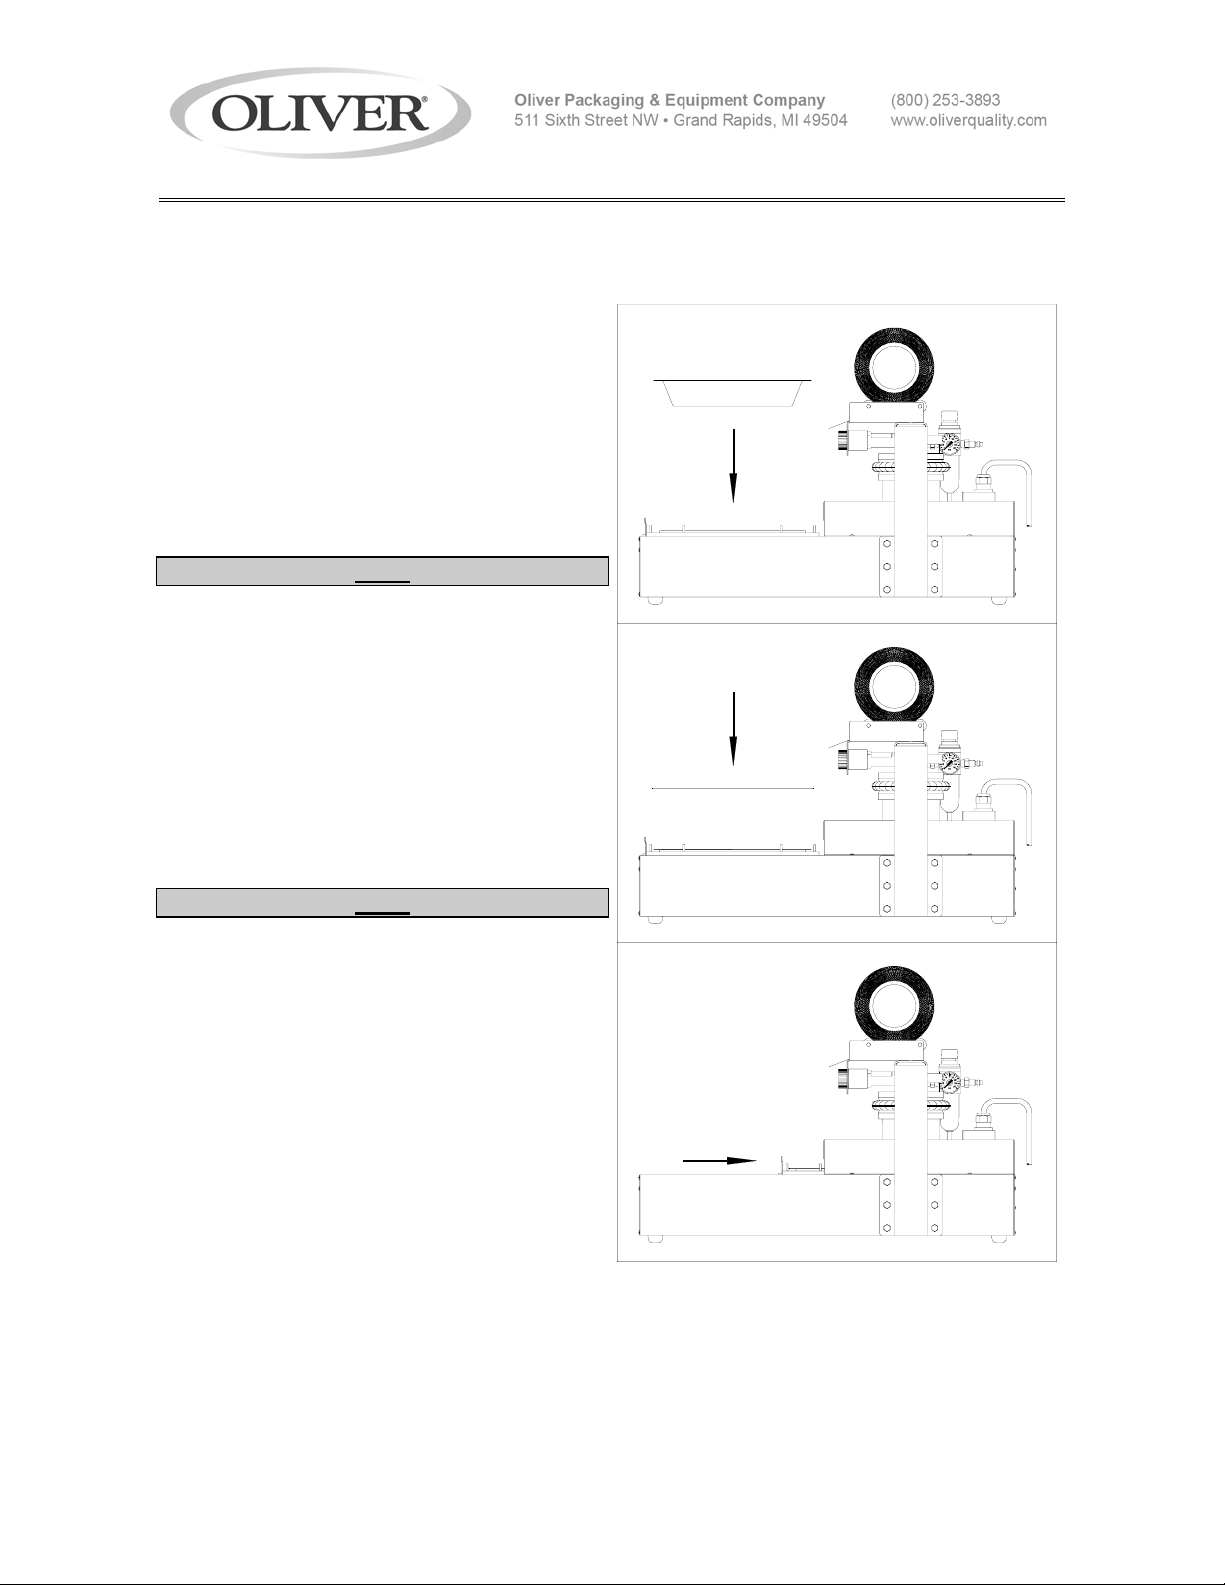
2. Place a tray in the tray carrier.
3. Position a single lid on the tray. Use the
retractable pins on the tray carrier to center
the lids over the tray. Be sure the adhesive
side of the lid is down.
NOTE
• The adhesive side of the lid can be
determined by pinching a fold and rubbing the
lid material against itself. Test both sides of the
lid. The rough or tacky side of the lid will be the
adhesive side.
4. Push the tray carrier into the Self-Actuating
Lidder until it stops. This will cycle the heated
upper platen down, applying pressure on the
film and tray flanges. As the heated upper
platen lifts back to the open position, the tray
carrier will automatically reopen.
NOTE
• Actuating machine with no tray or lid a in
place may cause the tray carrier to stick closed.
5. To remove the lidded tray push up on the
bottom of the tray with your hand and lift from
tray carrier.
12/17/97 1508S20004
 Loading...