


 Loading...
Grand Rapids, Michigan, U.S.A. 49504-5298
USER’S OPERATING AND INSTRUCTION MANUAL
MODEL 1308
HAND OPERATED PACKAGING SYSTEM
01308S20000CV

INDEX
INTRODUCTION AND DESCRIPTION……………………………….. PG. 1-2 SAFETY..............................................……………………..………….. PG. 1-3
MACHINE COMPONENTS……………………………………………...PG. 1-4 SET UP........................................................................................…...PG. 1-5
OPERATING PROCEDURE.............................................................. |
PG. 1-6 |
ADJUSTMENT AND QUALITY CHECKS……………………...………PG. 1-8 |
|
TECHNICAL SPECIFICATIONS........................................................ |
PG. 1-9 |
CLEANING AND MAINTENANCE....................…..............…............ PG. 1-10 TROUBLE SHOOTING......................................…......................…... PG. 1-13 MACHINE PARTS LISTS..……………………………………………….PG. 1-14 4 & 6 oz. CUP CHANGE OVER GUIDE..………………………………PG. 2-1
MACHINE EXCHANGE PROGRAM……………GEN 050815
WARRANTY...................................................... |
GEN 050816 |
WARRANTY PROCEDURE........…...................GEN 050817 |
|
RETURNED PARTS POLICY............................ |
GEN 050818 |
8/12/05 |
1308S20001 |
|
1-1 |
INTRODUCTION AND DESCRIPTION
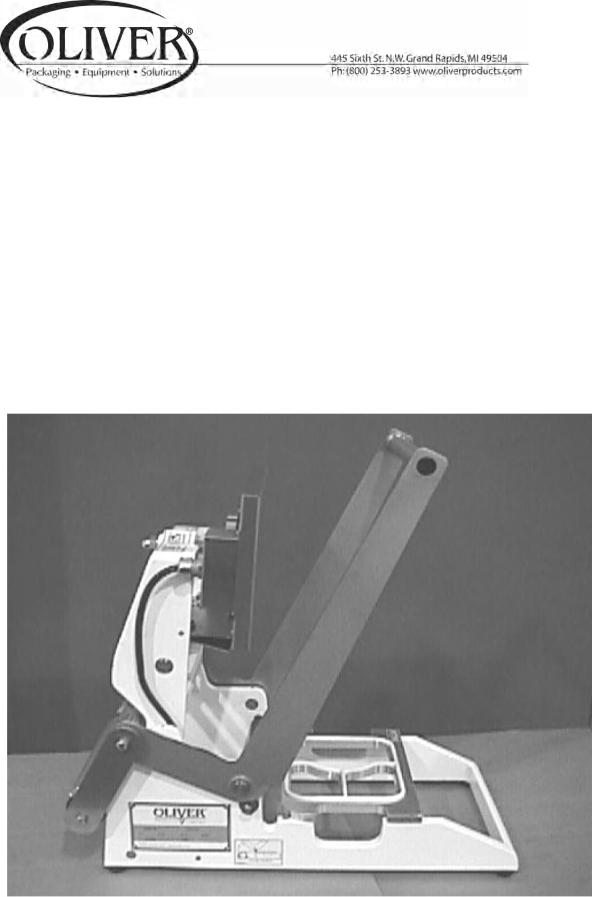
The OLIVER Model 1308 Lidder has been designed and manufactured to provide a machine of very high quality, yet with a cost effective approach to producing film lidded trays. The machine can be operated wherever a 115. V.A.C. outlet is available and requires only a small amount of table space. The machine is manually operated which eliminates downtime associated with more complex pieces of equipment. Frequent starts and stops or interrupted flow of product to the machine have no impact on the operation of the machine.
The machine basically consists of a film feed system, a heated platen, a tray holder and a film cutter unit. These are all packaged together in a rugged cast frame to give the operator an ergonomic workstation with the utmost simplicity of operation.
8/12/05 |
1308S20001 |
|
1-2 |

SAFETY
Various safety devices and methods of guarding have been provided on this machine. It is essential, however, that machine operators and maintenance personnel observe the following safety precautions. Improper installation or operation of this equipment may cause injury to personnel or damage to equipment.
• Before operating the OLIVER Model 1308 Lidder read through this manual. Never allow an untrained person to operate this machine.
WARNING
• WARNING PINCH POINT: Keep hands out of machine. Always be sure the machine has been unplugged from power before cleaning or servicing.
CAUTION
• CAUTION HOT: The heater cover and upper platen are very HOT! Caution must be used to protect yourself and others.
• In addition to these general safety instructions, follow the specific instructions given through out this manual.
8/12/05 |
1308S20001 |
|
1-3 |
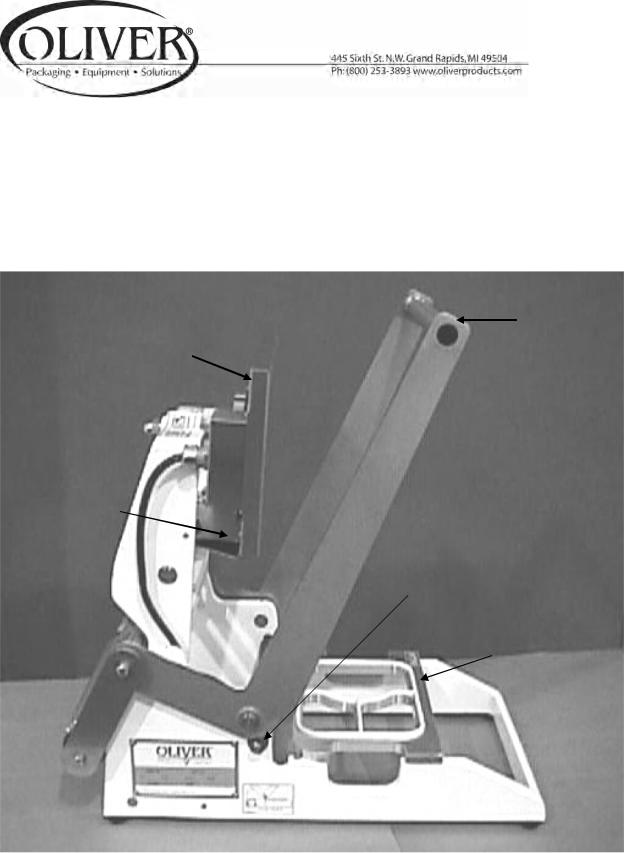
MACHINE COMPONENTS
Before proceeding further, take a moment to familiarize yourself with the identification of the machine components as shown in the illustration below.
Operating
Handle
Heater Platen
Cutter Unit
Film Hold Down Roll
Tray Holder
Film Support
Stand
8/12/05 |
1308S20001 |
|
1-4 |

SET UP
1.Unpack and carefully remove the Model 1308 Lidder. Check for completeness of your order and that none of the items have been damaged during shipment.
2.Place the Model 1308 Lidder in a suitable location that provides adequate working space. The location must be sturdy, level, and capable of holding 60 lbs. per machine.
3.Remove all packaging materials and shipping restraints such as plastic ties and tape.
4.Raise the handle to the uppermost position.
5.Plug the power cord into a 115-volt outlet and avoid the use of extension cords.
6.Once the machine is plugged in it will automatically begin to heat up to the operating temperature. The heat up time is 20 to 30 minutes depending on ambient conditions.
8/12/05 |
1308S20001 |
|
1-5 |
OPERATING PROCEDURE
1.To turn the machine on plug in the power cord. Wait 20 to 30 minutes to allow the heated platen to reach temperature.
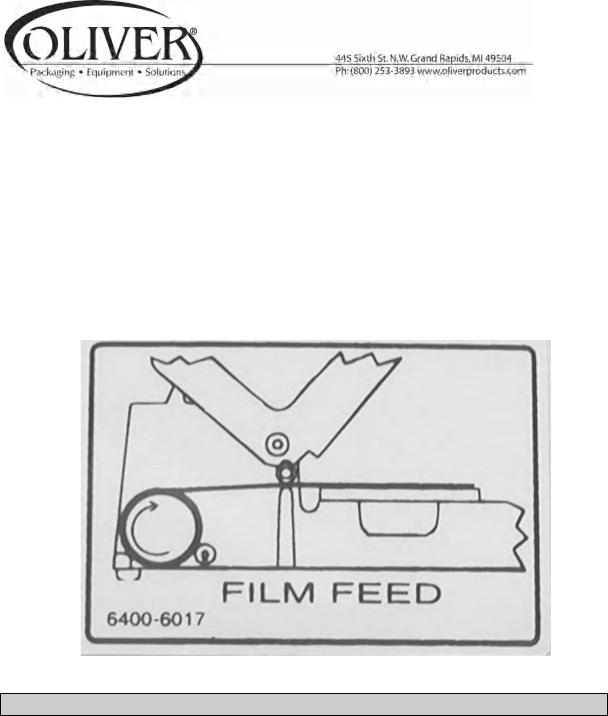
2.Load a roll of film onto the film support stand as shown on the “FILM FEED” diagram located on the side of the machine. Make certain that the film is positioned between the film side guides and that the side guides are properly located to center the film roll in the machine. The side guides can be adjusted by sliding them on the tube.
NOTE
• The adhesive side of the film can be determined by pinching a fold and rubbing the lid material against itself. Test both sides of the lid. The rough or tacky side of the lid will be the adhesive side. The film supplied by Oliver Products Company is wound with the adhesive side toward the inside of the roll. If the film is loaded in accordance with the “FILM FEED” diagram it will be positioned properly for applying the adhesive side of the film to the flange of the tray. If the film is loaded improperly it can cause the adhesive side to come in contact with the surface of the heated platen and the film will stick to the heated platen. If this happens, it can result in the need for cleaning the platen.
8/12/05 |
1308S20001 |
|
1-6 |

3.Place a tray in the tray holder. Take care to avoid spilling food product on the flange of the tray. Contamination of the flange can result in poor heat seals.
4.Pull the film forward until the film overhangs the tray flange by approximately
¼”. Be sure the adhesive side of the film is down (see NOTE above).
5.Pull the operating handle of machine down until it will not move any further and then immediately return it to the up position. Holding the handle down longer will result in stronger seals. The amount of time you hold the handle in the down position is the “seal time”. If the seals become too strong, they can be difficult to open or it may result in shredding or tearing of the film when the lid is pulled off of the tray. You should periodically check for proper seals to make sure that everything is functioning properly.
6.To remove the lidded tray reach under and push it up with one hand so you can grasp it from the top with the other hand and lift it out of the tray holder.
7.At the end of the day, unplug the machine from the wall outlet. This is the only way to turn the machine off.
NOTE
•IT IS NOT RECOMMENDED TO LEAVE THE MACHINE PLUGGED IN WHEN IT IS GOING TO BE OUT OF OPERATION FOR AN EXTENDED PERIOD OF TIME.
8/12/05 |
1308S20001 |
|
1-7 |
Loading...