

Oki ML 320, ML 321 ACCESSORY INSTRUCTION GUIDE
Quick Start
Overview
There are four parts to the installation
1 Physical Setup
Take the printer out of the box, set it up, and verify it operates
2 Local Printer Installation
Installing your printer as a local printer
3 Network Installation
Installing your printer as a network printer
4 Product Registration
The network configuration is covered in the OkiLAN 6120e
Network Print Server User’s Guide.
Customizing the Installation
This document tells you how to perform a typical installation,
using the default settings of the printer.
These default settings do not need to be adjusted as part of a
standard installation. However, you may need to adjust settings
to fit your requirements.
Some settings you may need to adjust as part of your installation
are:
• Top of Form (TOF)
• Paper Path
• Printhead Gap
To adjust these settings, refer to the appropriate subsection of
“Using Your Printer” in the Printer User’s Guide.
User’s Guides
The Printer User’s Guide and the OkiLAN 6120e User’s Guide
are provided as Adobe Acrobat files on the CD shipped with your
printer. You can view the files using Adobe Acrobat Reader. If
you do not have Adobe Acrobat Reader, it is also provided on the
CD or you may download it from the Adobe web site,
www.adobe.com.
Top of Form (TOF)
If you turn the platen knob when the printer is turned on,
you will cause the Top of Form to mis-align. Always turn
!
the printer off before turning the platen knob!
The factory default setting for the Top of Form (where the
printing should begin) is one inch down from the top of
!
the page.
Your software may print the first line of print above or
below where TOF is set. You may need to adjust the TOF
!
to meet your software’s needs. Use the procedures in the
Printer User’s Guide, “Using Your Printer, Top of Form,
Forms Tear-Off Status (ON or OFF).”
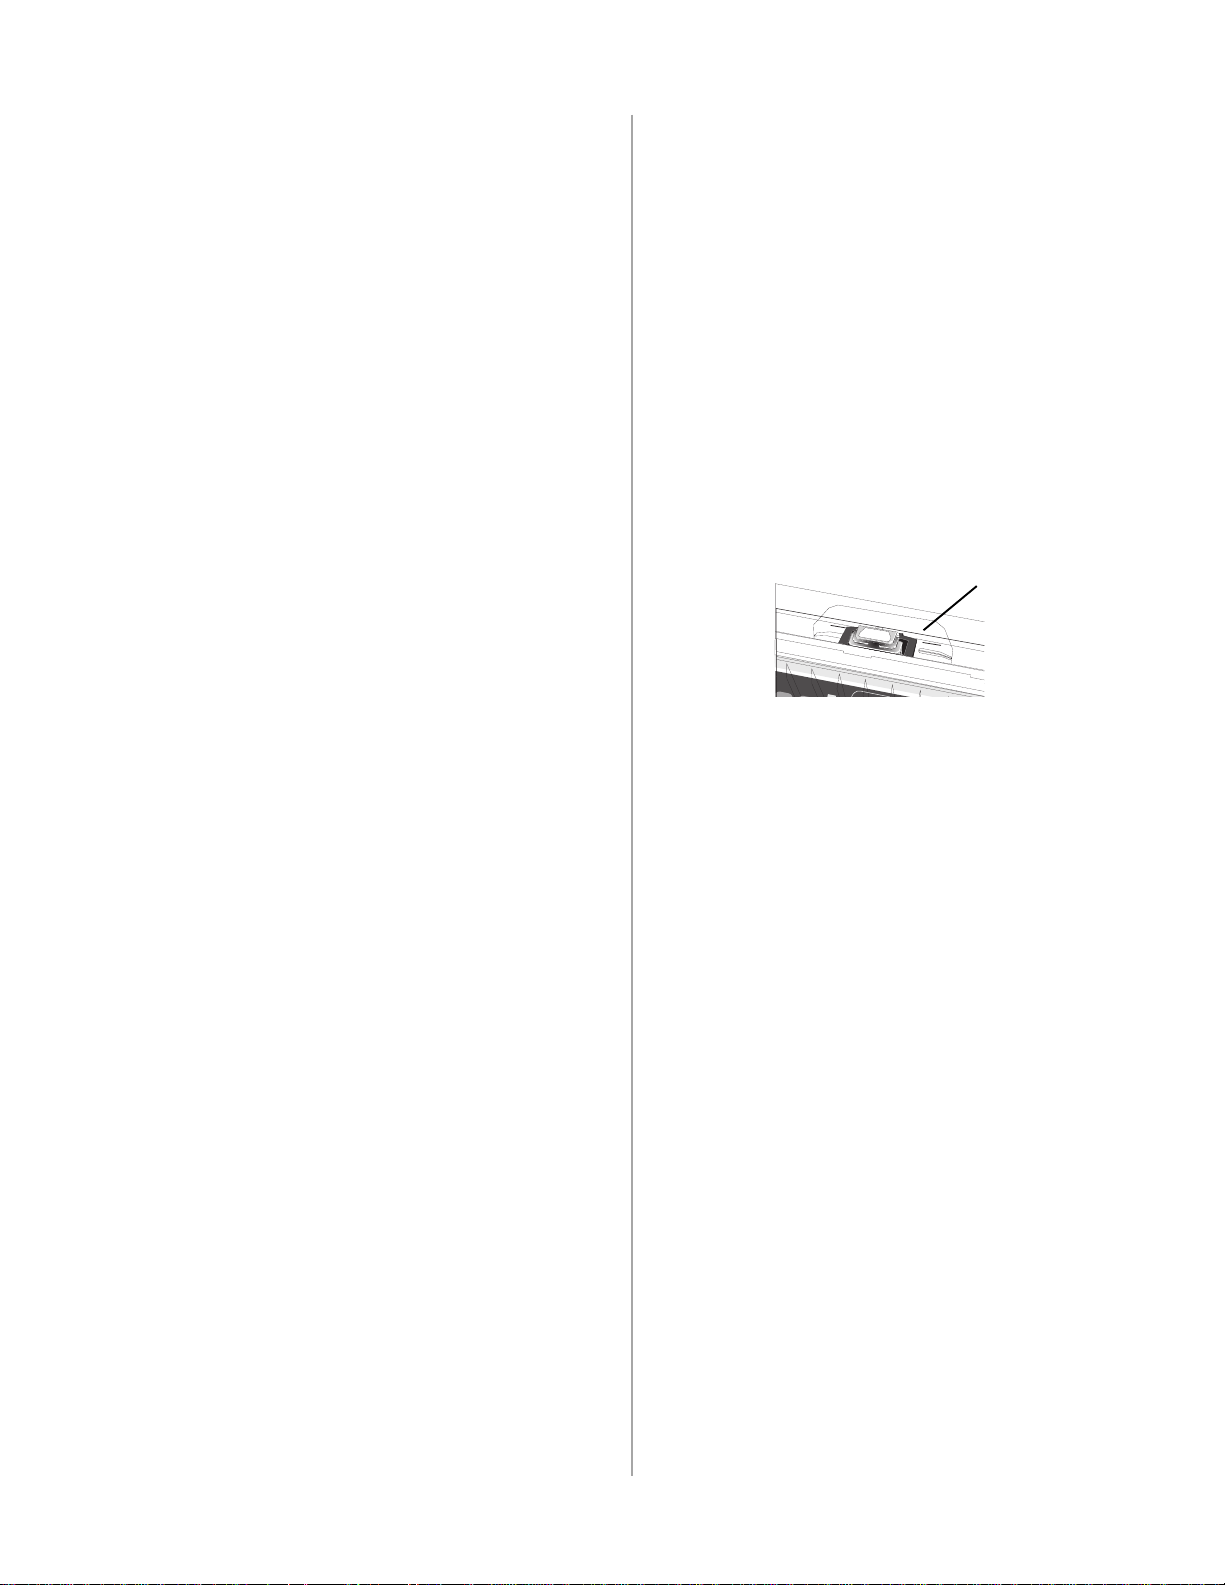
The first line prints at the red line of the plastic paper
shield (1) on the printhead.
!
32t-18.eps
M
P
The Top of Form and Forms Tear-Off settings of your printer
interact.
How you set the Top of Form depends on the status of the Forms
Tear-Off menu setting.
If Forms Tear-Off is activated (set to ON), set the Top of Form
using the Printer User’s Guide, “Using Your Printer, Setting Top
of Form, Forms Tear-Off ON (Step A).”
If Forms Tear-Off is NOT activated (set to OFF), set the Top of
Form using the Printer User’s Guide, “Using Your Printer,
Setting Top of Form, Forms Tear-Off OFF (Step B).”
1
Documentation is also available via Oki Data’s web site,
www.okidata.com.
Microline 320/321 Turbo/n
P/N 58349401
1 Physical Setup
1 Unpack your machine.
Keep your packing materials and carton in case you ever
need to ship or transport the unit.
!
2 Remove the shipping restraints and tape.
32T-17.eps, 32T-16.eps, 32T-07A.eps and arrows.eps
L
SEL
SEL
MENU
LF
SHIFT
FF/
EXIT
Micro Fe
LOAD
ed
D
own
POWER
TEAR
Mic
ro Fee
d
PRINT QUALITY
Up
GROUP
ALARM
PARK
ITEM
QUIET
HSD
SET
UTL
TOF
MENU
NLQ
PRINT
SSD
CHARACTER PITCH
10
12
17
15
20
PROP
F
FF/LOAD
c
ro Fee
d
own
TEAR
Mi
cr
o
Feed
PRINT QUALITY
U
p
PARK
UP
ITEM S
QUIET
HSD
ET
UTL
TOF
MENU
NLQ
PRINT
SSD
CHARACTER PITCH
10
12
17
15
20
PROP
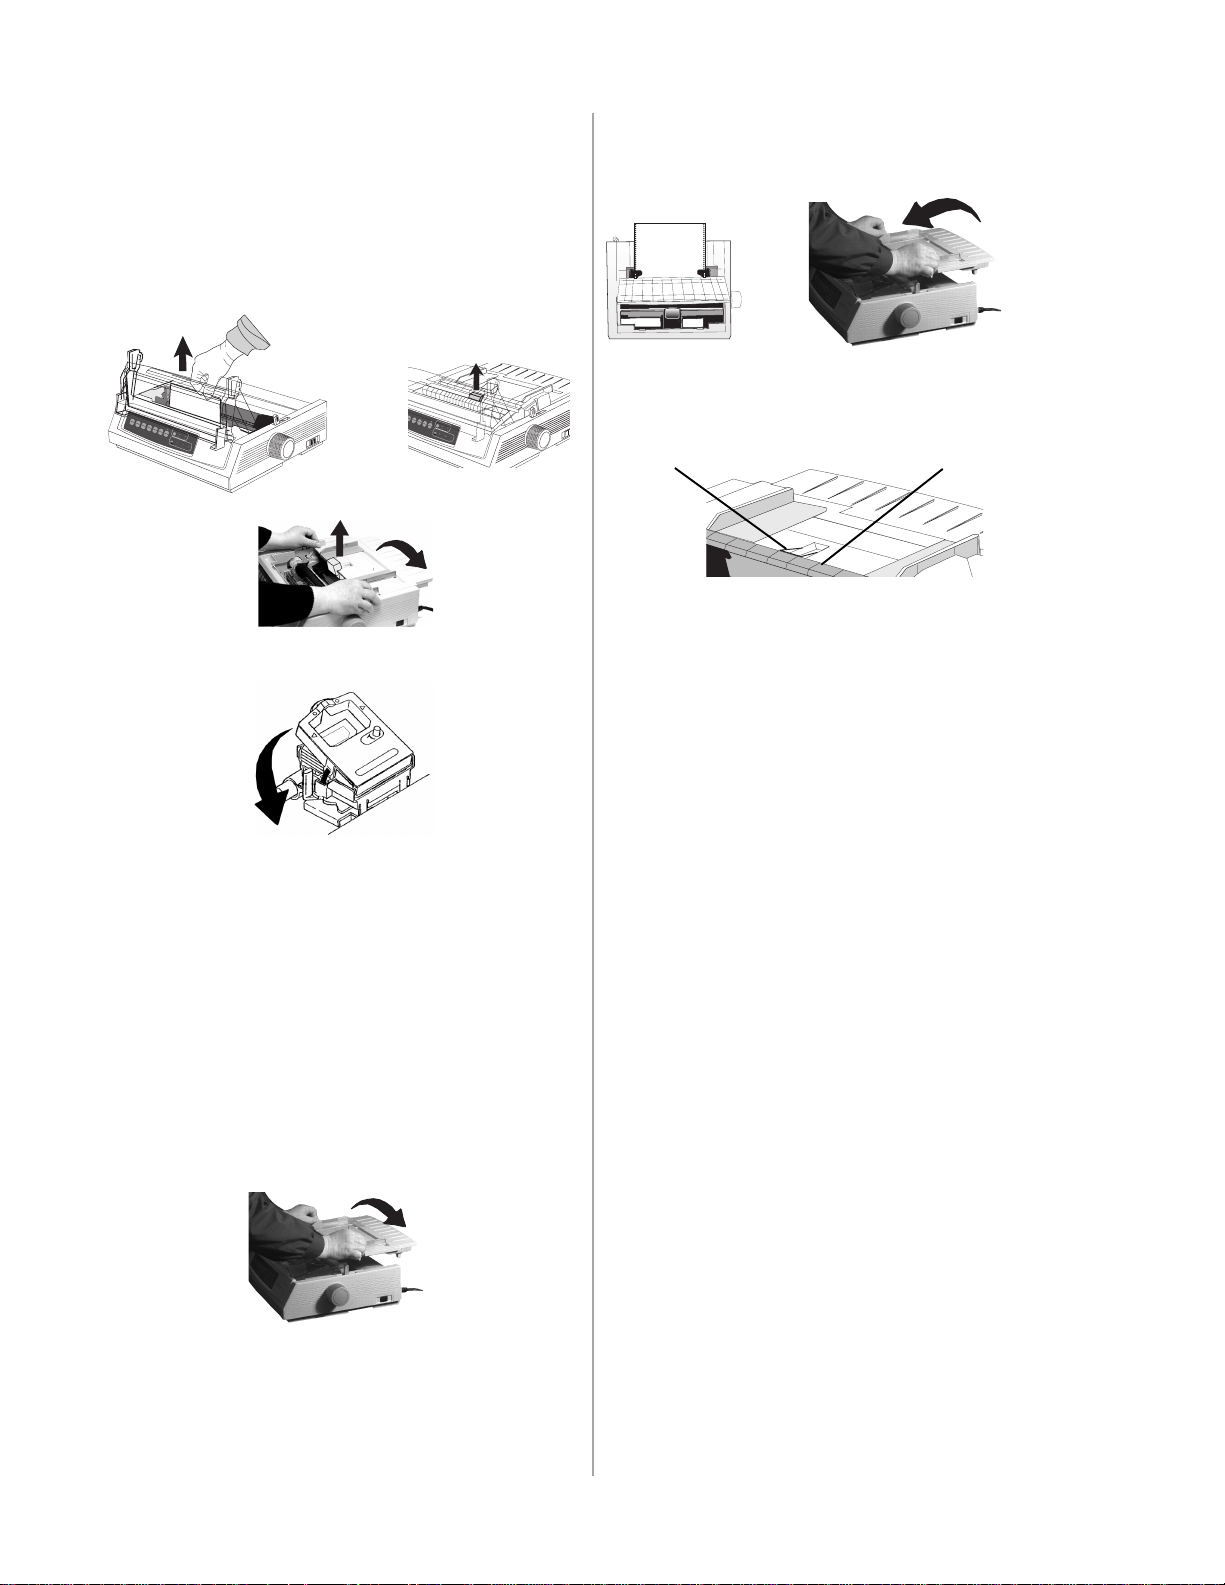
3 Install the ribbon.
2 Load the paper on the tractors. Install the paper separator.
32T-29.eps and 32T-23A.eps
3 Place the wire guide (1) on the pull-up roller assembly (2).
Then, press FF/LOAD.
1
32T-31.eps
2
Testing the Printer
Run the Font Sample Test to make sure your printer is operating
properly.
Wide Carriage Model
!
Microline 321 Turbo/n
4 Install any accessories you purchased. Refer to the
instructions provided with each accessory.
5 Connect to the power outlet.
Paper Loading
To load single sheets, see your Printer User’s Guide,
“Installation, Paper Loading.”
!
To load bottom-feed paper, see the instructions provided
with the pull/push tractors.
To load rear-feed, continuous-forms paper:
1 Grasp the tabs and lift off the paper separator.
32T-23A.eps
If you are using 8.5 inch paper to run the test, make sure
the paper width selection in the printer menu is set to 8.5
inches. Otherwise, printing on the platen may damage the
printer. Refer to the Printer User’s Guide, “Using Your
Printer, Menu Mode, Explanations of Menu Items.”
To run the test:
• Turn the printer off, then press and hold the LF key while
turning the printer back on.
To stop the test before it is finished:
• Press SEL.
2
 Loading...