

Page 1

Security Guide
security
Page 2

P
REFACE
Every effort has been made to ensure that the information in this document is complete,
accurate, and up-to-date. The manufacturer assumes no responsibility for the results of
errors beyond its control. The manufacturer also cannot guarantee that changes in software
and equipment made by other manufacturers and referred to in this guide will not affect
the applicability of the information in it. Mention of software products manufactured by
other companies does not necessarily constitute endorsement by the manufacturer.
While all reasonable efforts have been made to make this document as accurate and helpful
as possible, we make no warranty of any kind, expressed or implied, as to the accuracy or
completeness of the information contained herein.
Copyright © 2009 Oki Europe Ltd. All rights reserved.
Oki is a registered trademark of Oki Electric Industry Company, Ltd.
Oki Printing Solutions is a registered trademark of Oki Data Corporation.
Microsoft, MS-DOS and Windows are registered trademarks of Microsoft Corporation.
Apple, Macintosh, Mac and Mac OS are registered trademarks of Apple Computer.
Other product names and brand names are registered trademarks or trademarks of their
proprietors.
Preface > 2
Page 3

C
ONTENTS
Preface . . . . . . . . . . . . . . . . . . . . . . . . . . . . . . . . . . . . . . . . . . . . . . . . . . .2
Contents . . . . . . . . . . . . . . . . . . . . . . . . . . . . . . . . . . . . . . . . . . . . . . . . . .3
Notes, cautions and warnings . . . . . . . . . . . . . . . . . . . . . . . . . . . . . . . . . .4
Document security . . . . . . . . . . . . . . . . . . . . . . . . . . . . . . . . . . . . . . . . . .5
Glossary. . . . . . . . . . . . . . . . . . . . . . . . . . . . . . . . . . . . . . . . . . . . . . . . . . .5
Setting the security. . . . . . . . . . . . . . . . . . . . . . . . . . . . . . . . . . . . . . . . . . 6
Accessing the web page . . . . . . . . . . . . . . . . . . . . . . . . . . . . . . . . . . . . . 6
Adjusting the security settings . . . . . . . . . . . . . . . . . . . . . . . . . . . . . . . . 7
Protocol on/off . . . . . . . . . . . . . . . . . . . . . . . . . . . . . . . . . . . . . . . . . 9
Panel lockout . . . . . . . . . . . . . . . . . . . . . . . . . . . . . . . . . . . . . . . . . .10
IP filtering . . . . . . . . . . . . . . . . . . . . . . . . . . . . . . . . . . . . . . . . . . . .11
MAC address filtering . . . . . . . . . . . . . . . . . . . . . . . . . . . . . . . . . . . . .12
SSL/TLS . . . . . . . . . . . . . . . . . . . . . . . . . . . . . . . . . . . . . . . . . . . . . .13
Password configuration . . . . . . . . . . . . . . . . . . . . . . . . . . . . . . . . . . .14
Using the printer security features . . . . . . . . . . . . . . . . . . . . . . . . . . . . .15
Secure printing . . . . . . . . . . . . . . . . . . . . . . . . . . . . . . . . . . . . . . . . . . .15
Sending the document . . . . . . . . . . . . . . . . . . . . . . . . . . . . . . . . . . . .16
Printing the document . . . . . . . . . . . . . . . . . . . . . . . . . . . . . . . . . . . .17
Deleting a secure print document . . . . . . . . . . . . . . . . . . . . . . . . . . . .18
Store to hard disk . . . . . . . . . . . . . . . . . . . . . . . . . . . . . . . . . . . . . . . . .19
Sending the document . . . . . . . . . . . . . . . . . . . . . . . . . . . . . . . . . . . .19
Printing the document . . . . . . . . . . . . . . . . . . . . . . . . . . . . . . . . . . . .19
Deleting a stored document . . . . . . . . . . . . . . . . . . . . . . . . . . . . . . . .19
Encrypted secure printing. . . . . . . . . . . . . . . . . . . . . . . . . . . . . . . . . . . .20
Sending the document . . . . . . . . . . . . . . . . . . . . . . . . . . . . . . . . . . . .20
Printing the document . . . . . . . . . . . . . . . . . . . . . . . . . . . . . . . . . . . .21
Contents > 3
Page 4

N
OTES, CAUTIONS AND WARNINGS
NOTE
A note provides additional information to supplement the main text.
CAUTION!
A caution provides additional information which, if ignored, may
result in equipment malfunction or damage.
WARNING!
A warning provides additional information which, if ignored, may
result in a risk of personal injury.
Specifications subject to change without notice. All trademarks acknowledged.
Notes, cautions and warnings > 4
Page 5

D
OCUMENT SECURITY
Document security can be breached in many ways. Some are obvious and can be remedied
quite easily;
> Unattended documents left in a printer’s output tray. Even one connected “one-to-
one” with a computer.
> Worse still, unattended documents left in a networked printer’s output tray, for all to
see!
> Personnel possessing confidential documents off-site.
Other security risks may not be so obvious.
As printers and multi-function products become more sophisticated so must the security
measures to ensure your valuable data is kept secure.
If left unprotected, access to records can be achieved via a networked machine. On-board
hard disk drives (HDDs) may contain confidential data such as PIN numbers, personnel
names and IP addresses as well as raw text.
Your machine has a number of valuable features which, when enabled, reduce the risk of
security breaches.
The following chapters guide you through the initial set up and also explain how you use
the secure printing features.
G
LOSSARY
IP Internet Protocol
HDD Hard Disk Drive
MAC Address Media Access Control Address
PIN Personal Identification Number
SSL Secure Sockets Layer
TLS Transport Layer Security
Document security > 5
Page 6
S
ETTING THE SECURITY
Although, in most cases, it is possible to program your machine via the operator panel, the
most effective way is via the web page.
NOTE
Example screenshots are used throughout this manual and as such may not
represent the screens displayed for your machine. Some of the features shown
on the example screenshots may not be available on your machine.
A
CCESSING THE WEB PAGE
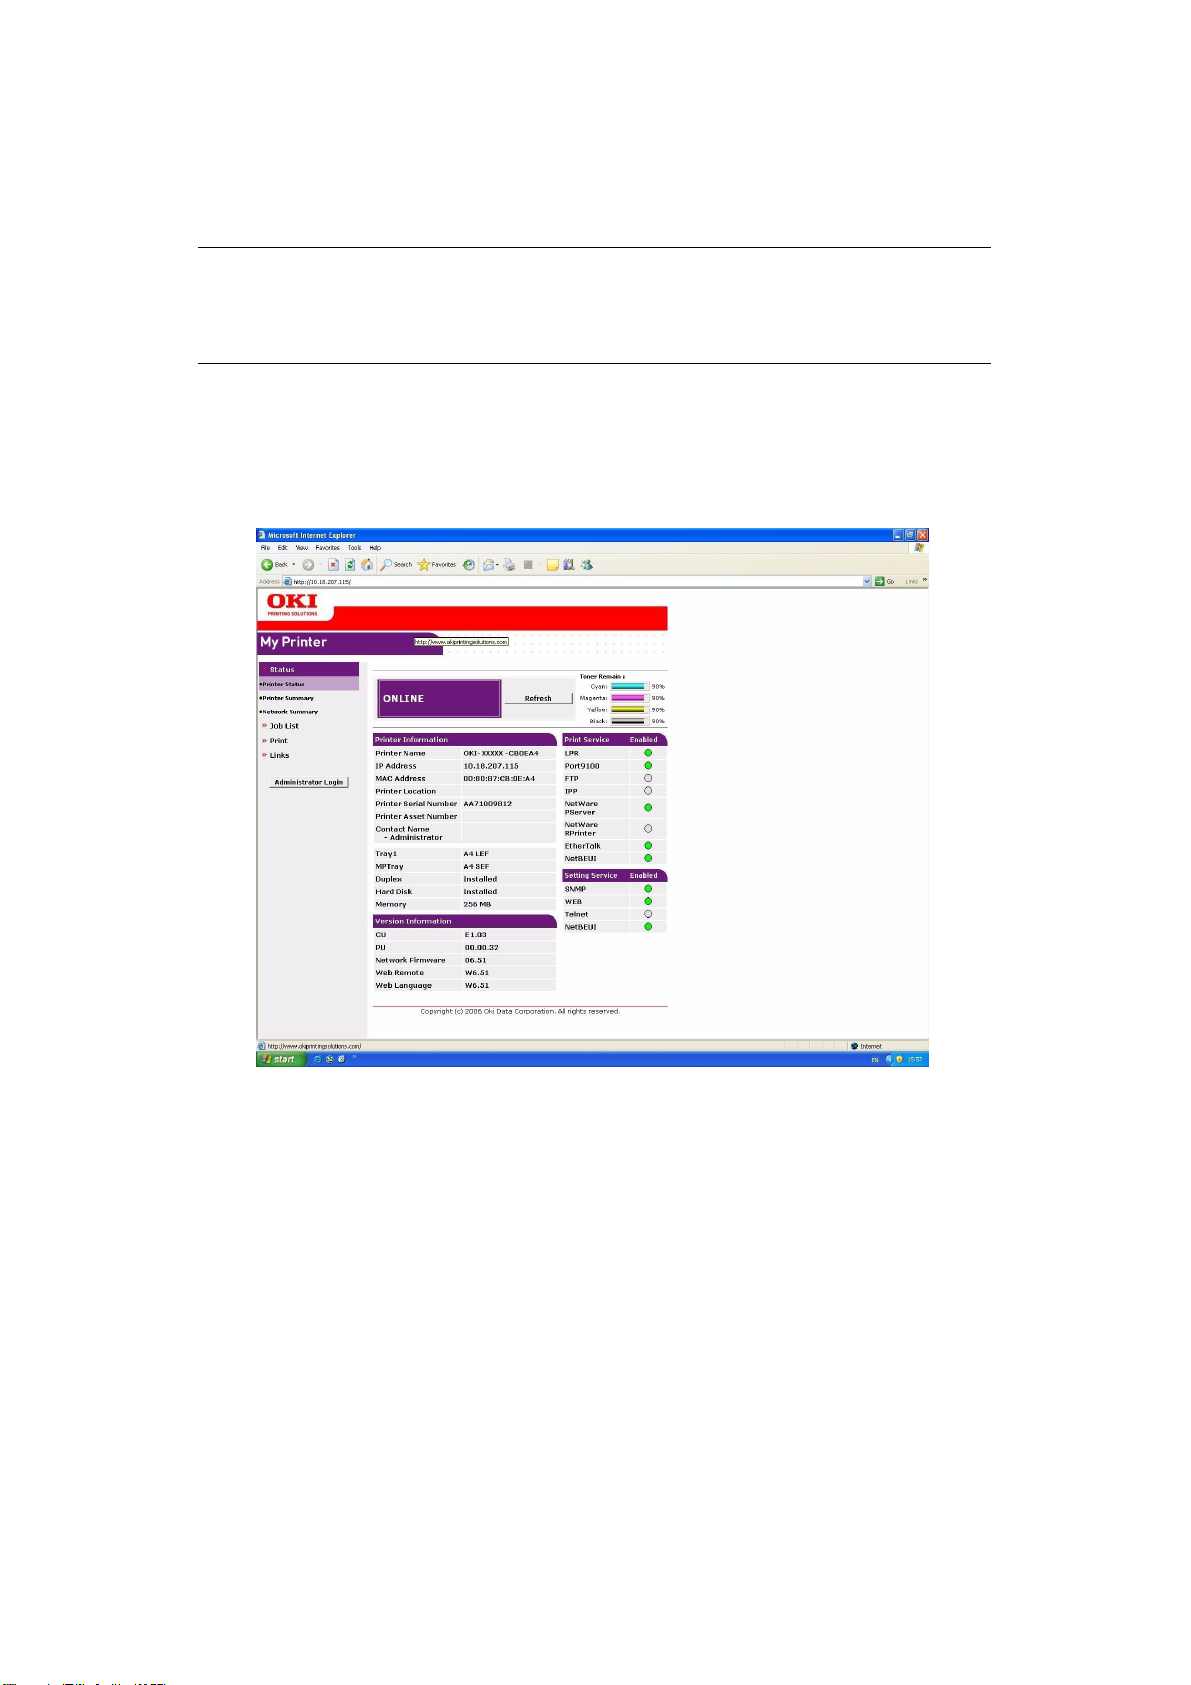
Type the IP address of the machine in the URL field of your browser and then press Enter.
The machine web page appears. For example:
http://10.18.207.15
Setting the security > 6
Page 7
A
DJUSTING THE SECURITY SETTINGS
You must log on as the administrator to adjust the security settings.
NOTE
The Administrative Settings are blocked by a password. Refer to your user
documentation for the factory default settings.
It is recommended that the system administrator creates a new password,
refer to “Password configuration” on page 14.
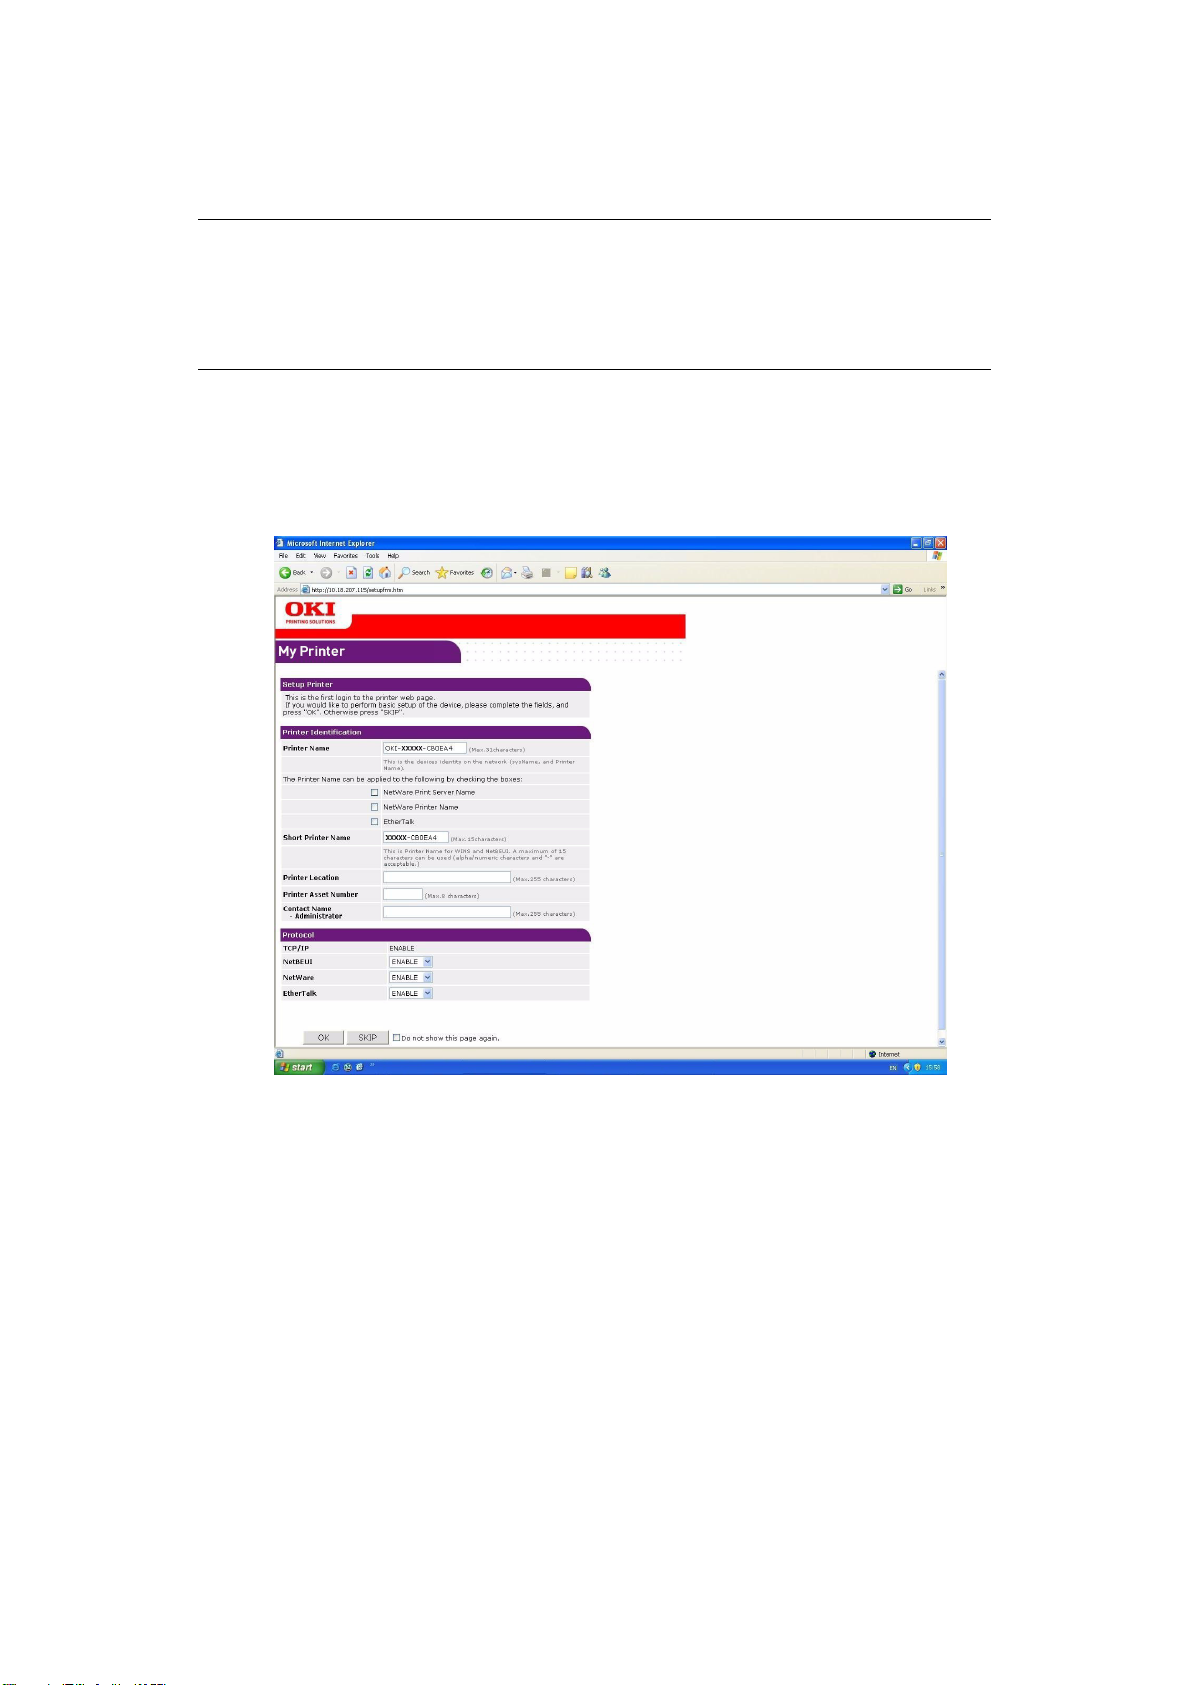
1. Click Administrator Login.
2. Enter the correct user name and password.
3. Click Login.
The initial administration entry screen is displayed.
Setting the security > 7
Page 8

4. Click Skip to navigate to the main menu page.
5. From the left hand menu select Security.
Refer to the following chapters for instructions on how to set your security preferences.
NOTE
High level instructions are given, for more details refer to the information on
screen.
Setting the security > 8
Page 9
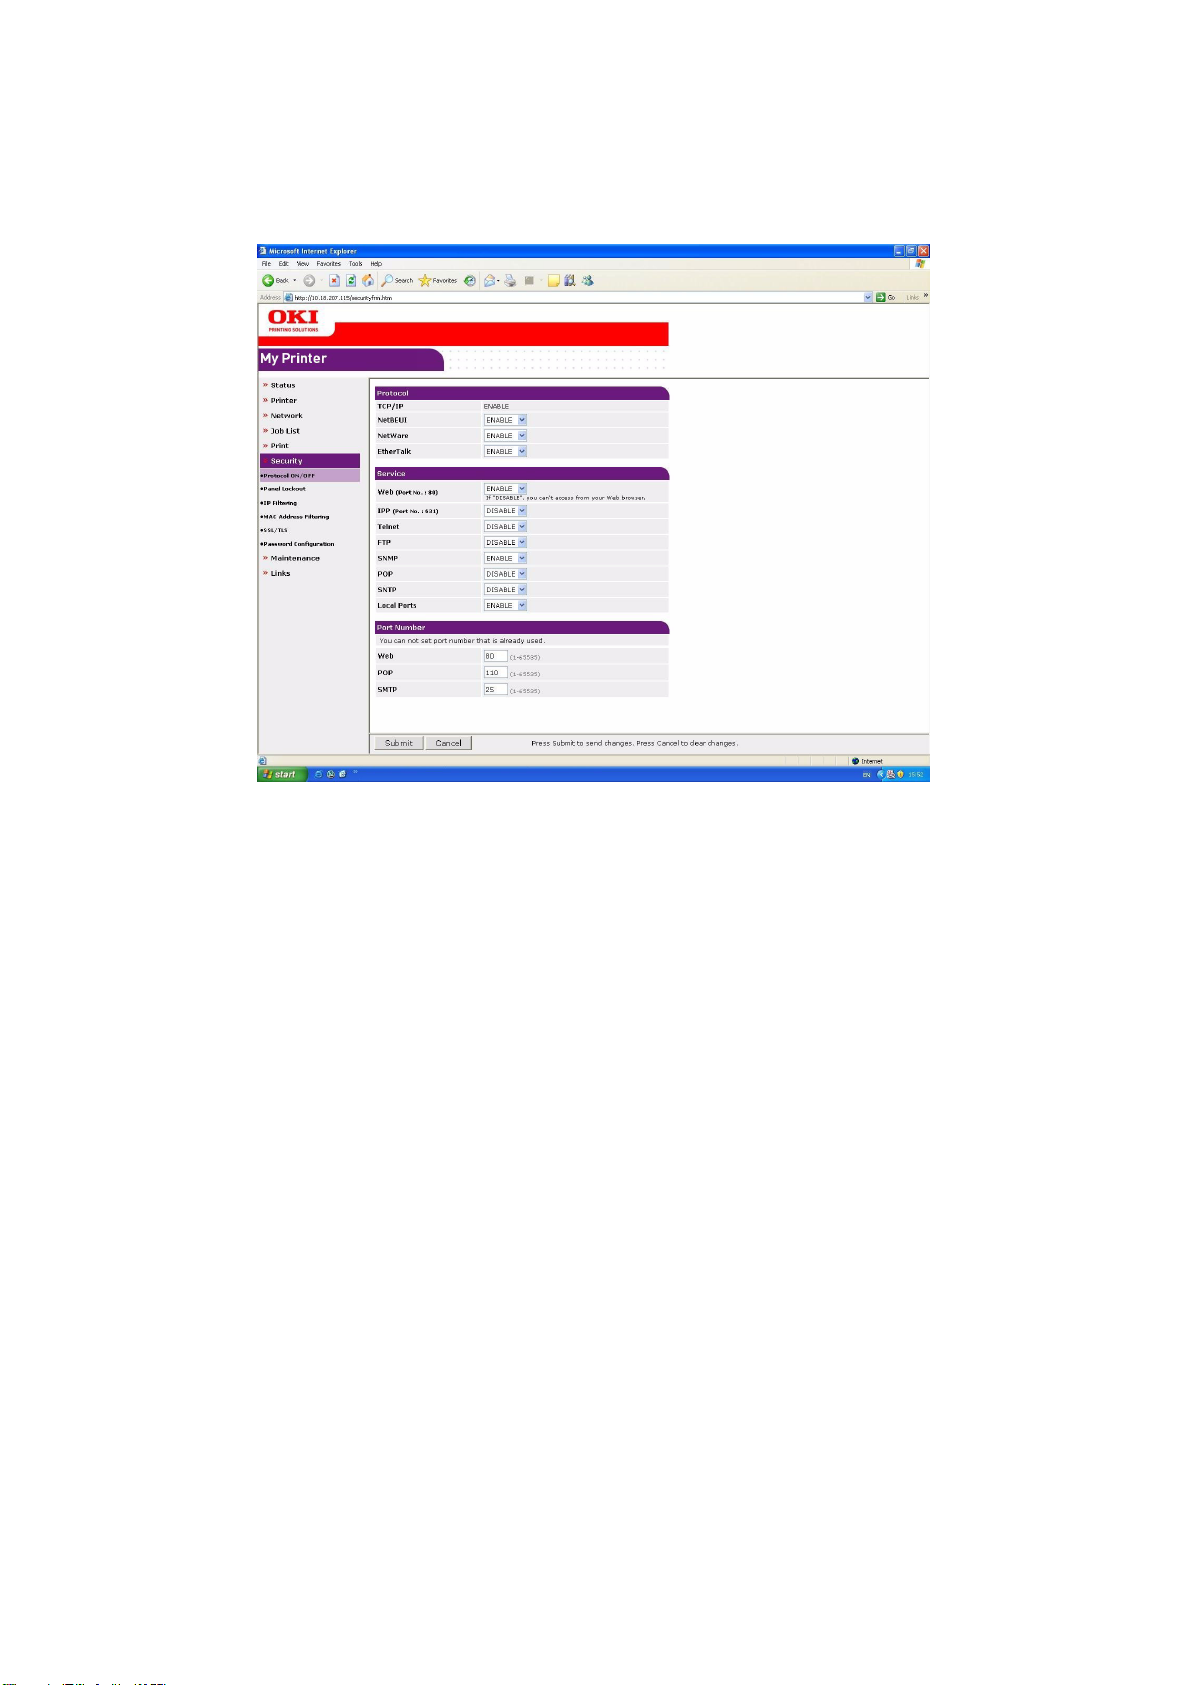
P
ROTOCOL ON/OFF
To set up the security protocol:
1. From the left hand panel select Protocol ON/OFF.
2. From the drop down menus select ENABLE / DISABLE as appropriate.
3. Input the port numbers as appropriate.
4. Click Submit to save the changes or Cancel to exit.
Setting the security > 9
Page 10

P
ANEL LOCKOUT
To activate the lockout facility on the printer control panel:
1. From the left hand panel select Panel Lockout.
2. From the drop down menu select LOCK.
3. Click Submit to save the changes or Cancel to exit.
Setting the security > 10
Page 11

IP
FILTERING
To enable IP filtering:
1. From the left hand panel select IP Filtering.
2. From the drop down menu select ENABLE.
3. Input the range of host IP addresses and set permissions in the main table.
4. Click Submit to save the changes or Cancel to exit.
Setting the security > 11
Page 12

MAC
ADDRESS FILTERING
To enable MAC address filtering:
1. From the left hand panel select MAC Address Filtering.
2. From the drop down menu select ENABLE.
3. From the second drop down menu select ACCEPT.
4. Input the MAC addresses in the main table.
5. Click Submit to save the changes or Cancel to exit.
Setting the security > 12
Page 13

SSL/TLS
To enable SSL/TLS encryption:
1. From the left hand panel select SSL/TLS.
2. From the drop down menu select ENABLE.
NOTE
Click icon for an explanation of the options available.
3. Click the Cipher Level Setting link.
4. Select the level setting from the drop down menu options:
> Strong
> Standard
> Weak
5. Click OK to confirm.
6. Select the required option from Step 2: Create a Certificate.
NOTE
Click icon for an explanation of the options available.
7. Input the required information into the main table.
8. If required, update the following information:
> Key Exchange Method
> Key Size
9. Click OK to save the changes or Cancel to exit.
Setting the security > 13
Page 14

P
ASSWORD CONFIGURATION
To change the administrator password:
1. From the left hand panel select Password Configuration.
2. Enter your new password.
3. Enter your new password again to confirm.
NOTE
Maximum 15 characters.
4. Click Submit to save the changes or Cancel to exit.
Setting the security > 14
Page 15

U
SING THE PRINTER SECURITY FEATURES
NOTE
Example screenshots are used throughout this manual and as such may not
represent the screens displayed for your machine. Some of the features shown
on the example screenshots may not be available on your machine.
S
ECURE PRINTING
Secure printing allows you to print confidential documents on machines that are shared
with other users in a network environment.
The document does not print until a PIN (Personal Identification Number) is entered
through the control panel. You must go to the machine and enter the PIN.
This feature requires the hard disk drive option to be fitted to your machine and enabled in
the printer driver.
If there is not enough hard disk space for the spooled data, a “Disk Full” message displays,
and only one copy prints.
NOTE
1. The secure printing feature may not be available from within some PC
applications.
2. The secure printing feature is not supported in the Mac environment.
If your application software has a collate print option, turn it off otherwise secure printing
will not work.
There are three parts in secure printing:
> “Sending the document” on page 16
> “Printing the document” on page 17
> “Deleting a secure print document” on page 18
NOTE
The menu buttons on your machine’s control panel vary depending on the
model.
For illustration purposes we will demonstrate the Printing and Deleting
procedures using the +/- and Enter buttons; your machine may have Up/
Down and Return arrow buttons instead however the procedure is identical.
If your machine has a touch screen and numerical keypad buttons, the
principle is basically the same; press the Print button to access the print
menu options. There are on-screen instructions to guide you through the
process.
Using the printer security features > 15
Page 16

S
ENDING THE DOCUMENT
1. If using the PCL driver, in the Setup tab choose any saved driver settings you wish
to use.
2. In the driver’s Job Options tab, click Secure Print.
The Job PIN (Personal Identification Number) window opens.
Printing Preferences
3. If the PIN window does not open, click the PIN button.
4. In the Job PIN window, enter a name for this print job.
The name may be up to 16 alpha-numeric characters. If you have more than one print
job stored on the machine when you come to print, you will need a distinctive name
to distinguish each of your print jobs.
5. If you would like a prompt at the machine for the job name, click the Request…
check box below the name entry.
6. Enter a number from 0000 to 9999 in the PIN box.
Your PIN must be unique on this machine. Each user should be allocated a PIN by the
system administrator.
7. Click OK to accept your changes.
8. Click OK to close the Printer Properties window.
9. Print your document.
The print job will be sent to the machine, but will not print at this time.
Using the printer security features > 16
Page 17

P
RINTING THE DOCUMENT
NOTE
The menu buttons on your machine’s control panel will vary depending on the
model.
For illustration purposes we will demonstrate the following procedure using
the +/- and Enter buttons; your machine may have Up/Down and Return
arrow buttons instead however the procedure is identical.
If your machine has a touch screen and numerical keypad buttons, the
principle is basically the same; press the Print button to access the print
menu options. There are on-screen instructions to guide you through the
process.
Your secure print job is printed using the control panel on the front of the machine.
1. When the machine is idle, use the +/- buttons to select the PRINT JOB menu, then
press ENTER.
2. Select ENCRYPTED/STORED JOB.
3. Use the +/- buttons to enter your PIN. Press ENTER after each digit.
4. If necessary, use the +/- buttons to highlight the PRINT option.
5. Press ENTER to confirm you wish to print the document.
6. Use the +/- buttons to select the number of collated copies you require.
7. Press ENTER to print your document.
NOTE
It is also possible to print and delete secure documents remotely from your PC
using the Storage Device Manager utility.
Using the printer security features > 17
Page 18

D
ELETING A SECURE PRINT DOCUMENT
NOTE
The menu buttons on your machine’s control panel will vary depending on the
model.
For illustration purposes we will demonstrate the following procedure using
the +/- and Enter buttons; your machine may have Up/Down and Return
arrow buttons instead however the procedure is identical.
If your machine has a touch screen and numerical keypad buttons, the
principle is basically the same; press the Print button to access the print
menu options. There are on-screen instructions to guide you through the
process.
If you change your mind about printing a secure document, you can delete it from the
machine’s hard disk without printing it first.
1. Follow steps 1 to 3 in the above procedure for printing the document.
2. Use the +/- buttons to highlight the DELETE option and press ENTER.
3. If necessary, use the +/- buttons to highlight the YES choice, and press ENTER to
confirm the deletion.
Your document is deleted from the machine’s hard disk without printing.
NOTE
It is also possible to print and delete secure documents remotely from your PC
using the Storage Device Manager utility.
Using the printer security features > 18
Page 19

S
TORE TO HARD DISK
This feature allows print jobs to be created on the PC and stored on the machine’s hard disk
for printing on demand. This is good for forms, generic memos, letterhead, stationery, etc.
If you use this feature for standard forms, for example, you can walk up to the machine at
any time and print off your forms without having to re-send them from the PC.
This feature works in exactly the same way as the secure printing feature described earlier
in this chapter, and is available only in the Windows PostScript and PCL drivers. The
difference with job spooling is that the document is not automatically deleted from the
machine’s hard disk after printing. It remains there for future use until you delete it from
the Printer Control Panel or from your PC with the Storage Device Manager utility.
NOTE
If this choice does not appear in the driver screens, or if it is greyed out, check
to ensure that the hard disk is enabled in the printer driver.
Like the secure printing feature, there are three activities in job spooling:
> Sending the document
> Printing the document
> Deleting a stored document
S
ENDING THE DOCUMENT
Follow the same procedures as described in the section “Sending the document” on page 16
for sending a secure document, except that on the Job Options tab in step 2, click Store
to HDD.
Printing Preferences
P
RINTING THE DOCUMENT
Follow the same procedures as described in “Printing the document” on page 17 for printing
a secure document. In this case the document will not be deleted from the hard disk after
it has been printed.
D
ELETING A STORED DOCUMENT
Follow the procedure as described in “Deleting a secure print document” on page 18 for
deleting a secure print document.
Like secure print documents, any other documents stored on the machine’s hard disk can
also be deleted remotely from the PC using the Storage Device Manager utility.
Using the printer security features > 19
Page 20

E
NCRYPTED SECURE PRINTING
Security over the network is an increasing concern for some organisations. Encrypted
secure printing allows you to send, store and print confidential documents on machines that
are shared with other users in a network environment.
Encrypting your documents before sending them to your machine will prevent unauthorised
personnel accessing confidential or sensitive information.
Print jobs are encrypted immediately before transmission to the machine, where they are
stored in an encrypted format on the hard disk drive. The documents will remain stored
and unprinted until an authorised user authenticates the print job; decryption only happens
when the job is actually printing.
This feature requires the hard disk drive to be installed in your machine and enabled in the
printer driver.
NOTE
1. The secure printing feature may not be available from within some PC
applications.
2. The secure printing feature is not supported in the Mac environment.
If your application software has a collate print option, turn it off otherwise encrypted
printing may not work.
As deletion is automatic, there are only two activities in encrypted secure printing:
> Sending the document
> Printing the document
S
ENDING THE DOCUMENT
1. If using the PCL driver, in the Setup tab choose any saved driver settings you wish
to use.
2. In the driver’s Job Options tab, click Encrypted Secure Print.
The Encrypted Secure Print window opens.
Printing Preferences
3. In the Encrypted Secure Print window, enter a Password for this print job:
The password must be between 4 and 12 alpha-numeric characters. Numbers 1 to 9
and letters a to z are all valid.
4. If you would like a prompt at the machine for the job password, click the Always
ask for password checkbox below the password entry.
Using the printer security features > 20
Page 21

5. Select the required erase option for your print job:
> No overwrite: simply erases a print job without over writing the job with data.
This erase method poses a risk as the print job can be reconstructed.
> Zero out once: erases a print job after over writing it with data once. This erase
method is safer than the “No overwrite” option. However it still poses a risk of the
print job being reconstructed.
> Multiple Random Overwrites: erases a print job after overwriting it with data
three times. This is the safest method of erasing a print job. However it takes
longer to complete the job.
6. Select the Auto Erase Time-out period.
Specify a period of time (hours:minutes) during which the print job is stored in the
machine’s HDD. When this period expires, the print job is automatically erased from
the HDD.
7. Click OK to accept your changes.
8. Click OK to close the Printer Properties window.
9. Print your document.
P
RINTING THE DOCUMENT
Follow the same procedures as described in the section “Printing the document” on page 17
for printing a secure document.
In this case you will enter your password, and the document will be erased from the hard
disk depending on the options you specified in Sending the document, step 5
required erase option for your print job:” on page 21 when sending the document to print.
“Select the
Using the printer security features > 21
Page 22

Oki Europe Limited
Blays House
Wick Road
Egham
Surrey TW20 0HJ
United Kingdom
Tel: +44 (0) 208 219 2190
Fax: +44 (0) 208 219 2199
www.okiprintingsolutions.com
07087001 iss.3
 Loading...