

Page 1
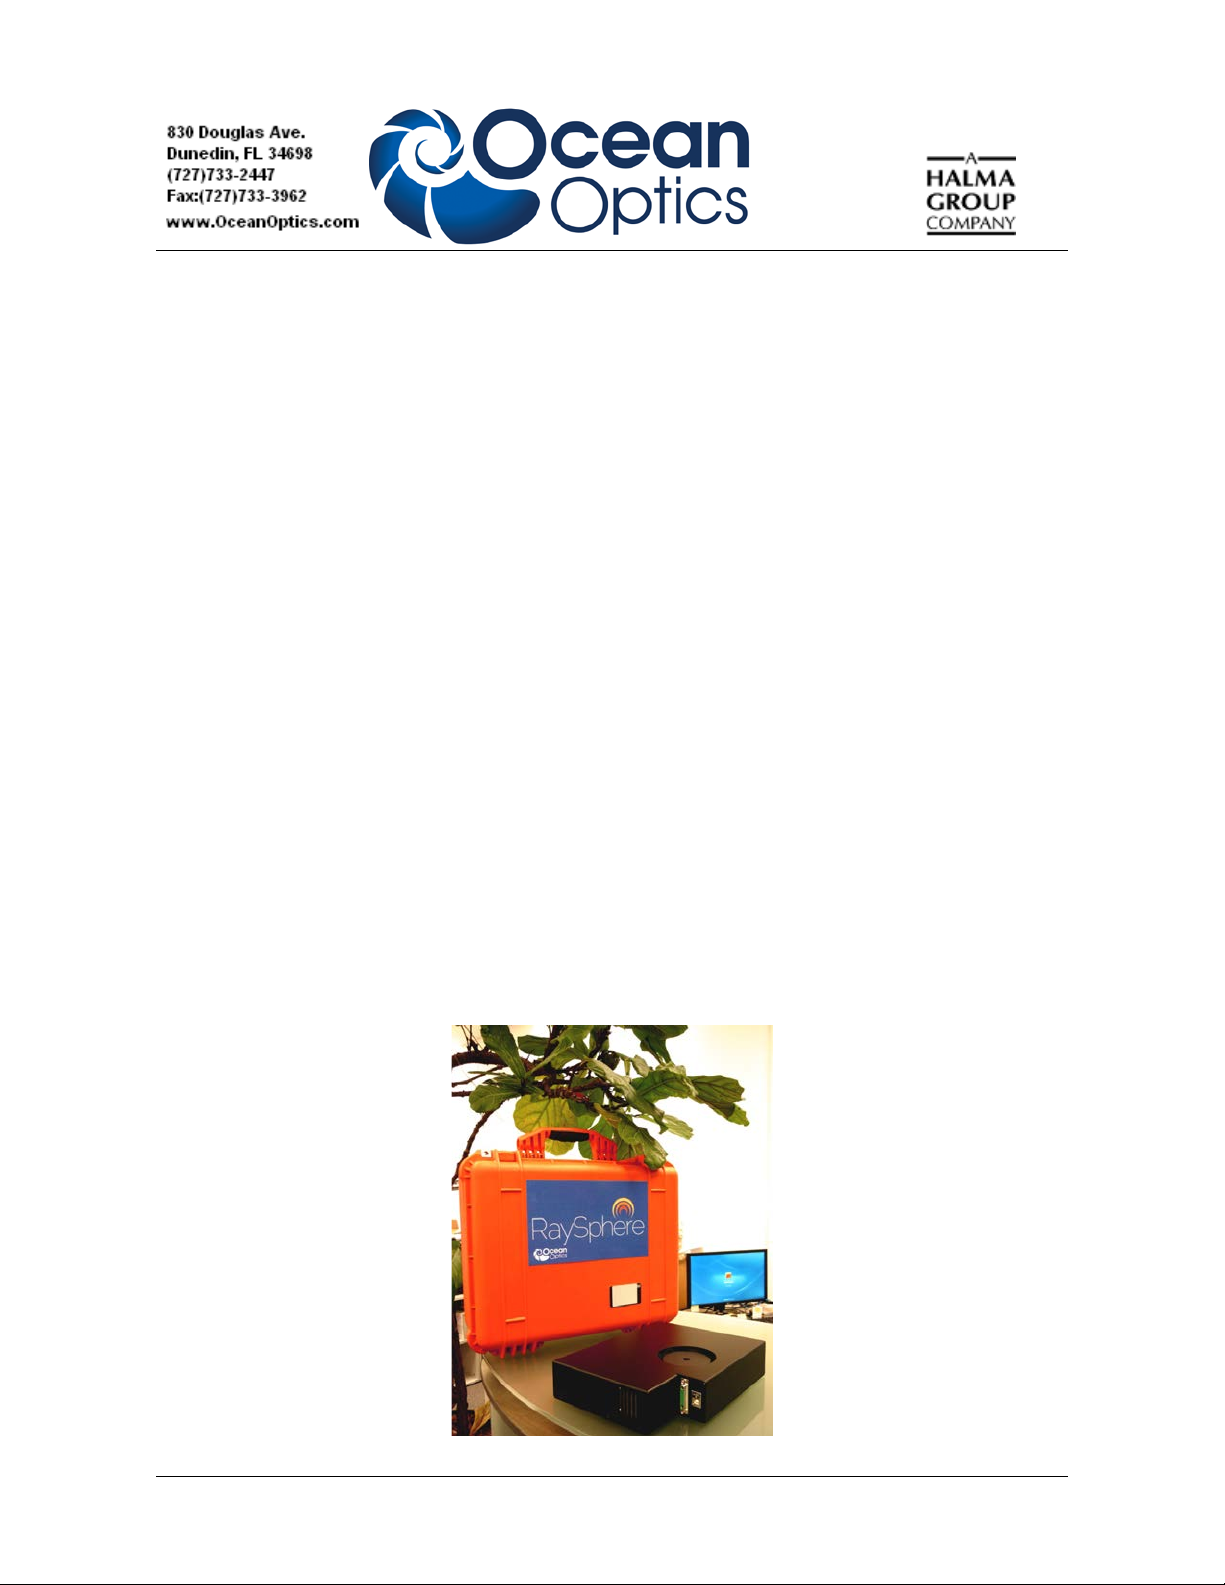
RaySphere and RaySphere 1700
Solar Analysis System
Quick Start Instructions
Description
RaySphere is a calibrated high-performance measurement device. It is designed for testing the spectral
distribution of all types of Solar Simulators and for validating the simulator for the spectral match test
in accordance with the international standard IEC 90604-9: Solar Simulator Performance
Requirements.
The RaySphere series of products consists of RaySphere and RaySphere 1700. They provide the
following features:
• Intuitive graphical interface
• Graphical and table display of classification results by wavelength bin
• Output of actual spectra in mW/cm
• Output of actual measurement and triggering timing with +/-44 µs resolution
• Printable classification report
2
/nm
RAYSPHERE-1700-01-201304 1
Page 2
RaySphere and RaySphere 1700 Instructions
RaySphere contains one QE65000 spectrometer, while RaySphere 1700 contains two spectrometers
(QE65000 and NIRQuest512), a trigger unit to control the measurement procedure and a hub. The
trigger sources can be a flash from the solar simulator, an electrical trigger pulse (high level with +5 V
or +24 V), or a measurement can be generated manually at any time.
RaySphere software allows full control during the testing and generates a test report with the
classification of the simulator.
This document provides you with information for testing a solar simulator with your RaySphere or
RaySphere 1700 product. Detailed information for the RaySphere and RaySphere 1700 are provided
in the RaySphere Solar Analysis System Installation and Operation Manual.
Parts Included
The RaySphere package consists of the following items:
• Pelican case: The transport box for the complete RaySphere System
• RaySphere main body
• Power Supply
• Four Power Cables, one each for USA, Europe, UK, and Australia
• Power Supply Connection Cable SubD-type, 3-meter length
• USB cable (USB-CBL-1): Connects RaySphere to a computer’s USB port (3-meter length)
• RaySphere CD: Contains RaySphere software and calibration files and manuals
• Software and Technical Resources CD: Contains software, operating instructions, and
product information for all Ocean Optic s softwa re, spe ctrometers, and spectroscop ic
accessories. You need Adobe Acrobat Reader version 6.0 or higher to view these files (version
7.0 is included on the CD). Documentation is also available on our website at
http://www.oceanoptics.com/technical/operatinginstructions.asp.
• Passwords: For any Ocean Optics software that you have purchased. Passwords are located
on the back of the Software and Technical Resources CD jacket.
• Calibration documents
Important Safety Notices
1. Read the instructions first to avoid any damages.
2. Store your RaySphere system at above -10 °C and below 50 °C to avoid any damages.
3. This is a calibrated measurement device. Handle the system with care. The calibration
precision may be lost if any dust or other pollutant enters the integrating sphere. When the
system is not in use, store it with a dust protector. When removing the dust protector, be sure
to keep pollutants from entering the integrating sphere aperture.
4. Recalibration is recomm ended after one year of use, or sooner if the measurements do not
seem to be accurate. More frequent recalibration may be needed of the RaySphere has
suffered any heavy shocks or is being used in a dusty environment.
5. The RaySphere is heavy. Take care to keep it from falling.
2 RAYSPHERE-1700-01-201304
Page 3

RaySphere and RaySphere 1700 Instructions
6. If the seal on the screws is broken, then the calibration is no longer valid.
7. Do not cover vents.
8. Do not cover the holes at the top of the RaySphere’s main body.
9. To ship the RaySphere, pack it in the Pelican case, which is optimized for transport. Hand
carrying the RaySphere is recommended for all traveling.
10. Contact your Ocean Optics regional headquarters for questions about RaySphere.
11. Be sure to follow all safety instructions for your solar simulator.
Installing Software
Caution
Install the software BEFORE connecting the spectrometer to your PC. The
SpectraSuite software ins talls the dr ive rs requi red for sp ect ro meter in sta llat i on.
If you do not install SpectraSuite first, the system will not properly recognize the
spectrometer.
RaySphere includes special software for operating your RaySphere system. This software is located on
the RaySphere CD. The installation instructions are included below.
In addition, if you have purchased and are using SpectraSuite, follow the instructions in the
SpectraSuite Spectrometer Operating Software Installation and Operation Manual for software
installation instructions.
Caution
Do not run SpectraSuite and RaySphere software at the same time on the
computer.
► Procedure
To install RaySphere software from the RaySphere CD,
1. Close all other applications running on the computer.
2. Load the RaySphere CD. The CD contains the calibration data, fundamental settings and the
software for operating the RaySphere on a 32-bit or 64-bit computer.
3. Select the Setup CD folder.
4. Select the installation file for either a 32- or 64-bit system. The setup process begins and the
following screen appears:
RAYSPHERE-1700-01-201304 3
Page 4

RaySphere and RaySphere 1700 Instructions
5. Click the Install button. Then follow the prompts in the installation wizard.
Note
If the following screen appears during the installation , se le ct Repair:
6. Click Close when the installation is completed. It is not necessary to restart your computer.
4 RAYSPHERE-1700-01-201304
Page 5

RaySphere and RaySphere 1700 Instructions
Assembling RaySphere
Follow the steps below to set up your RaySphere for u se. It is recommended to perform 3 spectrum
recordings (and to excite 3 flashes) within 5 minutes and to use the data from the last flash for the
validation and certificate.
►
Procedure
1. Connect the power cable to the power supply.
2. Connect the RaySphere unit to the power supply with the SubD cable.
3. Switch on the power supply.
4. Connect the RaySphere to your computer using a USB cable.
Caution
Be sure to switch on the power supply before connecting the RaySphere to your
computer.
Your RaySphere is now ready to use after 20 minutes of warm-up time.
Using RaySphere with a Flash Solar Sim ulator
► Procedure
1. Place the assembled RaySphere main body close to the test plane so that its aperture is
centered in the middle of the test plane.
2. If you are using an electrical trigger signal, select the correct input level for trigger signal at
the power supply, and apply the signal cable to the BNC-connector on the power supply.
3. Make sure that the RaySphere software has been installed on the computer you intend to use.
4. Switch on the RaySphere power supply.
Caution
Always be sure to switch on the power supply before connecting the RaySphere
to your computer.
5. Connect RaySphere via USB cable with your computer.
6. Start the RaySphere software.
7. Press Load Config (
) on the System tab to load your solar simulator configuration file.
8. Wait 20 minutes for RaySphere to rea ch the thermal equilibrium. Measure the dark spectrum
again.
RAYSPHERE-1700-01-201304 5
Page 6
RaySphere and RaySphere 1700 Instructions
9. Press QE65000 ( ) and NIR ( ) in the Spectrometer tab. Use the opening dialog box
for recording a dark spectrum measurement.
10. Press Start (
11. Generate 5 single flashes with maximum speed of 1 Hz within 3 minutes. RaySphere records
the data.
12. Select Save All (
the name of the file. The test report is generated automatically.
) in the software interface.
) in the RaySphere software. Include the serial number of the flasher in
Using RaySphere with a Continuous Solar Simulator
► Procedure
1. Switch on the solar simulator.
3. Make sure that the RaySphere software has been installed on the computer you intend to use.
4. Switch on the RaySphere power supply.
Caution
Always be sure to switch on the power supply before connecting RaySphere to
your computer.
5. Connect RaySphere via USB cable with your computer.
6. Start the RaySphere software.
7. Wait 20 minutes for RaySphere to reach thermal equilibrium.
8. Press Load Config (
9. Cover the RaySphere aperture (you can use the dust protector). Take a dark spectrum
measurement by pressing QE65000 (
10. Uncover the RaySphere aperture.
11. Place the assembled RaySphere main body close to the test plane so that its aperture is
centered in the middle of the test plane.
12. Press Sample (
records the data.
13. Select Save All (
the name of the file. The test report is generated automatically.
) on the System tab to load your solar simulator configuration file.
) and NIR ( ) in the Spectrometer tab.
) in the RaySphere software interface 5 times each second. The RaySphere
) in the RaySphere software. Include the serial number of the flasher in
6 RAYSPHERE-1700-01-201304
Page 7

RaySphere and RaySphere 1700 Instructions
Validating the Test Results
Check the following to be sure that you are collecting valid data:
The RaySphere was allowed to warm up for at least 20 minutes before starting the test.
No error or warning messages were received when the calibration file was loaded.
The spectra recording was during the stable flash time phase. Check that all marks for
Start and End of Recording in the Photocurrent graph are at a stable flash time.
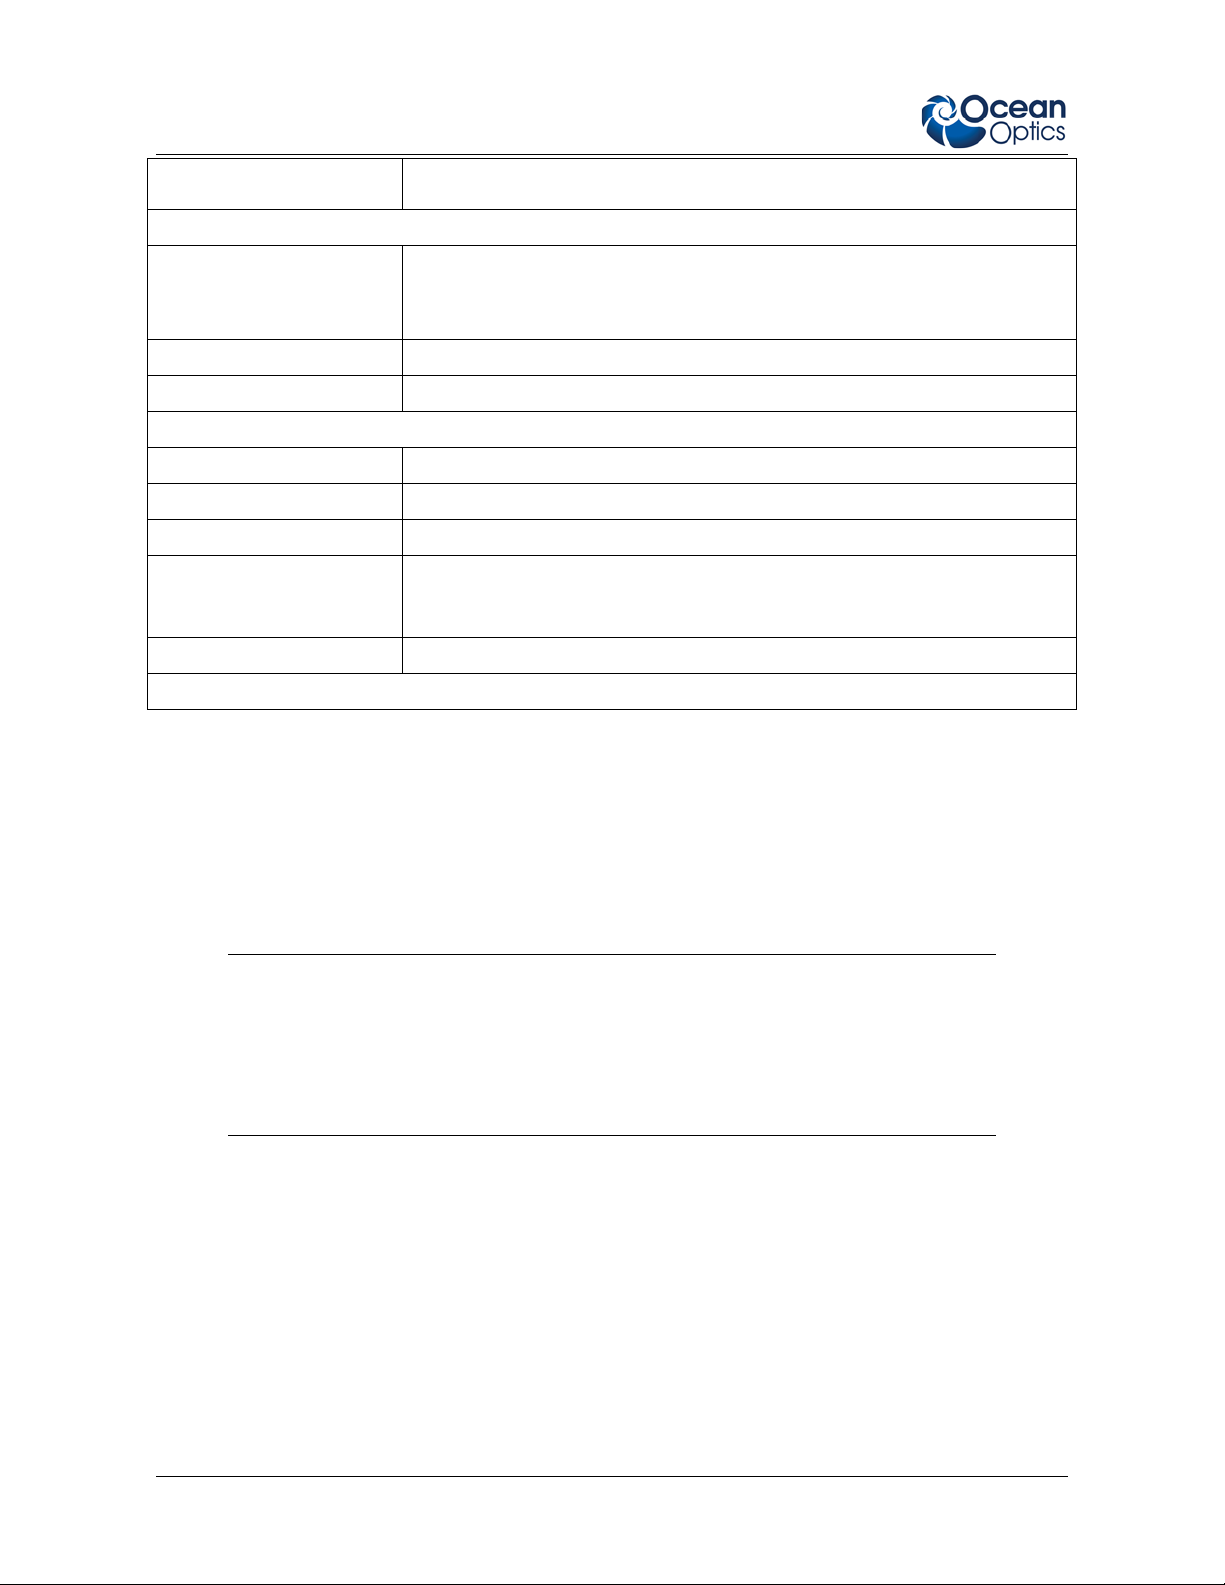
Specifications
Specification Value
Electrical:
Input voltages 90 – 164 VAC
Input frequency 47 – 63 Hz
Power 75 W
Overvoltage protection 110 – 130% of main output
Fuse M1.6 A
Trigger connection BNC connector
Connector: SMA 905
Optical:
Optical input power 150 W to 2000 W
Wavelength range*:
RaySphere
RaySphere 1700
Optical Trigger:
Trigger delay 0 – 160 ms
Time resolution 0.87 µs
Jitter 150 ns
Internal time resolution 2.54 µs
Electrical Trigger:
Electrical trigger type High lev el
High lev el 5 V or 24 V (selected at the power supply. Galvanically isolated input.)
350 – 1100 nm
300 nm – 1700 nm
Minimum high time 100 ns
Connector BNC
RAYSPHERE-1700-01-201304 7
Page 8
RaySphere and RaySphere 1700 Instructions
Specification Value
Delays and Timing:
Fixed internal dela y*:
NIRQuest
QE65000
Internal delay Selectable in 500 ns increments. Maximum 65500 steps.
External delay 0 – 168 ms
General:
Operating temperature 15 °C – 33 °C
Storage temperature -10 °C – 45 °C
Dimensions (l x w x h) 30.7 cm x 23.5 cm x 6.6 cm
Weight
RaySphere
RaySphere 1700
USB Cable No longer than 5 m
*See the specific spectrometer manuals for more details
1030 µs
768 µs
4.2 kg (main body)
5.7 kg (main body)
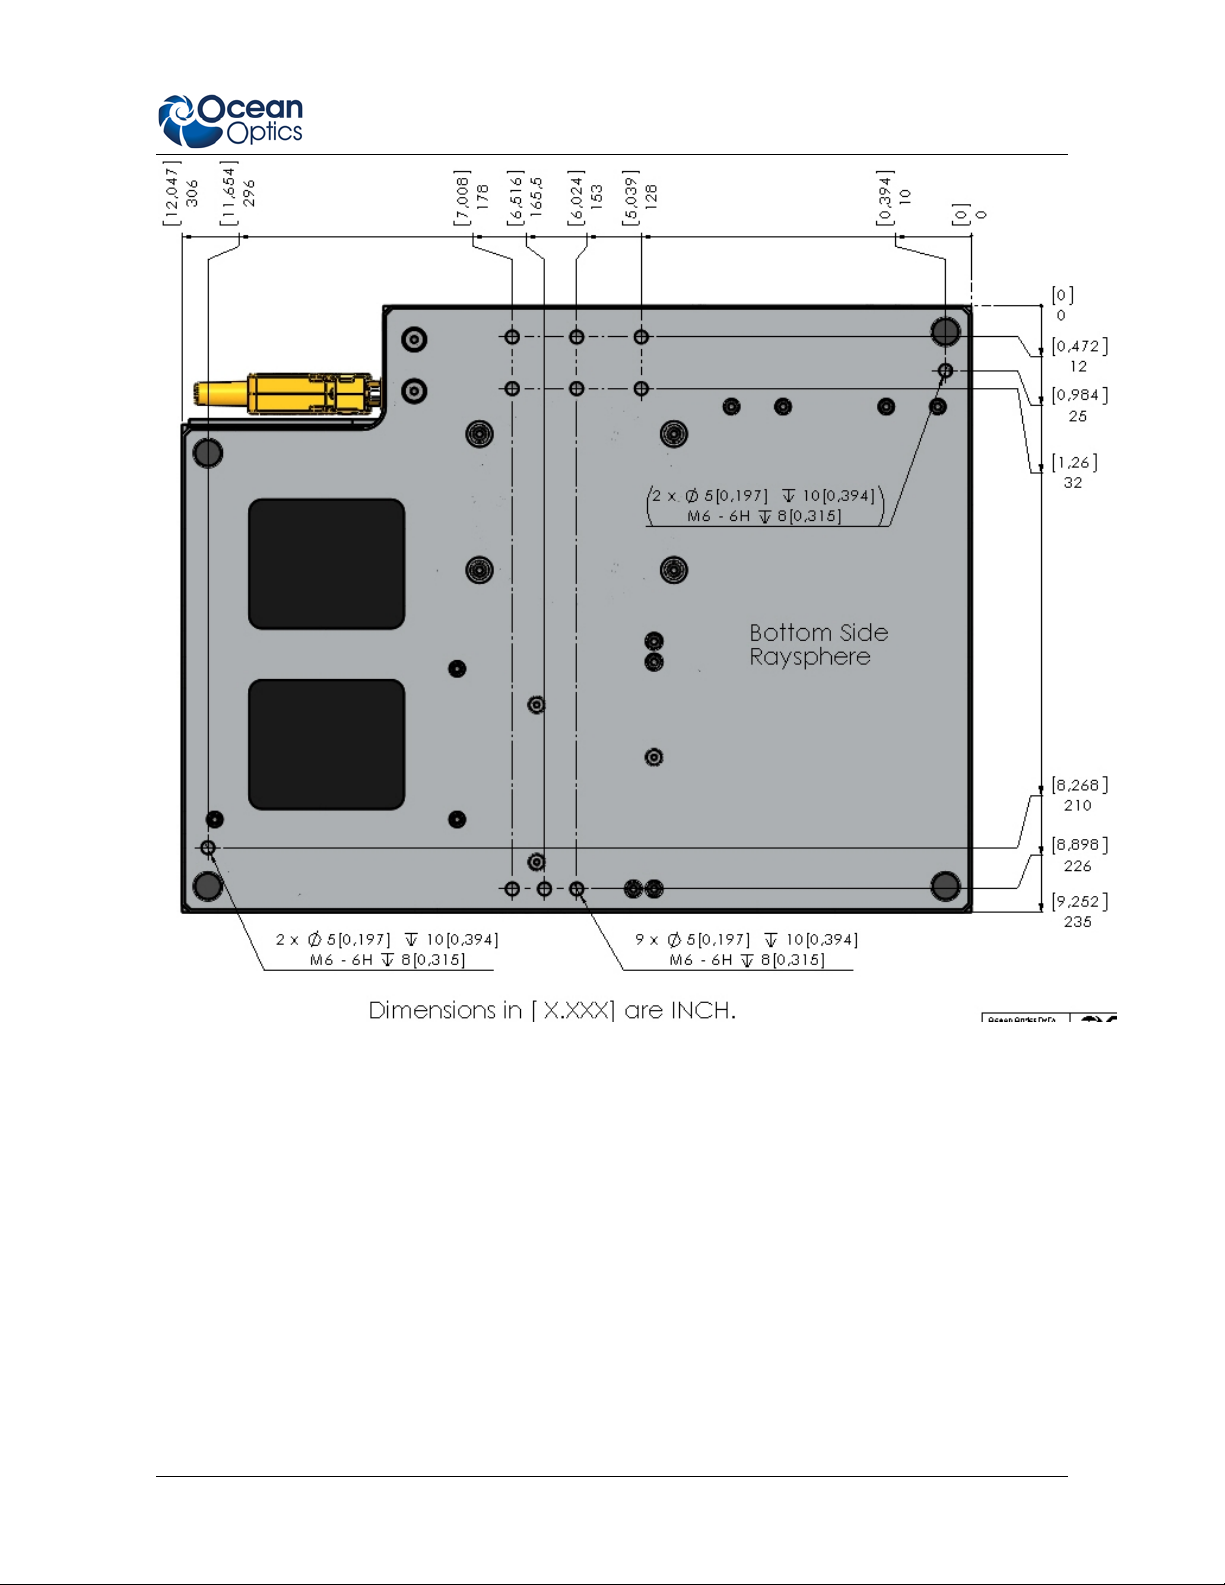
Mounting Options for RaySphere Main Body and Mechnical Diagram
The technical drawing shows the back side of the RaySphere main body. The system can be mounted
at the indicated M6 rods only.
WARNINGS
Do not bend the system for tight mounting!
Mounting on uneven surfaces may bend the RaySphere system. This may cause
increased measurement un cert ain ties.
8 RAYSPHERE-1700-01-201304
Page 9
RaySphere and RaySphere 1700 Instructions
RAYSPHERE-1700-01-201304 9
Page 10

RaySphere and RaySphere 1700 Instructions
10 RAYSPHERE-1700-01-201304
 Loading...