


INSTALLATION &
SERVICE INSTRUCTIONS
P1PV / P1PVCD Series Coolers

Contents:
•Technical Specification
•Pre-Delivery Inspection
•Filter Installation
•Cooler Installation
•General Troubleshooting Guidelines
•Cleaning and Sanitizing Instructions
|
|
|
|
Technical Specification |
|
|
||
Product Dimensions: |
|
|
|
|
|
|||
|
• |
Height: |
|
1,110 mm (43.7 in) |
|
|
||
|
• |
Width: |
|
320 mm (12.6 in) |
|
|
||
|
• |
Depth: |
|
345 mm (13.6 in) |
|
|
||
|
• |
Net Weight: |
|
23 kg (51 lbs) |
|
|
||
Filter Compartment: |
|
|
|
|
|
|||
|
• |
Height: |
|
560 mm (22 in) |
|
|
||
|
• |
Width: |
|
260 mm (10.2 in) |
|
|
||
|
• |
Depth: |
|
120 mm (4.7 in) |
|
|
||
Electrical Specification: |
|
|
|
|
|
|||
|
|
|
|
|
|
|
|
|
Model |
|
P1PVKY |
|
P1PVK |
P1PVHSY |
P1PVHS |
P1PVHSKY |
P1PVHSK |
|
P1PVCDKY |
|
P1PVCDK |
P1PVCDHSY |
P1PVCDHS |
P1PVCDHSKY |
P1PVCDHSK |
|
|
|
|
||||||
Voltage |
220/240V, 50Hz |
|
115V, 60Hz |
220/240V, 50Hz |
115V, 60Hz |
220/240V, 50Hz |
115V, 60Hz |
|
Current |
|
0.8 A |
|
1.2 A |
3.1 A |
5.5 A |
3.1 A |
5.5 A |
Power |
|
100 Watts |
|
180 Watts |
620 Watts |
700 Watts |
620 Watts |
700 Watts |
Wiring Diagram:
P1PV / P1PVCD Series
Installation & Service Instructions
General Information:
•The P1PV & P1PVCD Series coolers are designed for connection to a supply of potable water. The cooler should not be connected to water supplies of unknown bacterial quality or those that are not already fit for human consumption. The machine should only be connected to a potable drinking water supply.
•This unit is suitable for indoor use in domestic, commercial & industrial locations. They should not be sited in locations where they may be subjected to rain or snow.
Cooling System:
•The P1PV & P1PVCD Series coolers use the OASIS Pressure Vessel Direct Chill (PVDC) cooling tank system. The cooling tank is manufactured from 304 Stainless Steel which is noncorrosive and inert.
•The cold water temperature is preset at the factory at approximately 7°C (45°F) – the water temperature is controlled by a thermostat that is located on the back of the unit. Cold water temperatures may be adjusted via a slotted screw on the body of the control (can be accessed through the hole in the metal panel in the filter compartment). Turning this screw in the clockwise direction will make the water colder (and vice versa).
Ambient Water Circuit:
•The water in the ambient water circuit is not cooled - the temperature of the water will be the same as the temperature of the water that comes out of the building water supply and the ambient room temperature. The ambient water should be flushed after long periods of non use.
Hot Water System:
•The P1PV & P1PVCD Series coolers use a two-piece hot tank to aid in cleaning out scale. The hot tank is manufactured from 304 Stainless Steel which is non-corrosive and inert.
•The hot water temperature is preset at the factory at approximately 88°C (190°F) – the water temperature is controlled by a thermostat that is located on the hot tank. Hot water temperatures may be adjusted via a slotted screw on the body of the control (can be accessed through the hole in the metal panel in the filter compartment). Turning this screw in the clockwise direction will make the water hotter (and vice versa).
Compressor:
•The compressor uses the hydrofluorocarbon refrigerant R134a which is a non-Ozone depleting substance with a Global Warming Potential of 1,300. The
compressor is controlled by an electromechanical thermostat that controls the temperature of the water in the direct chill unit.
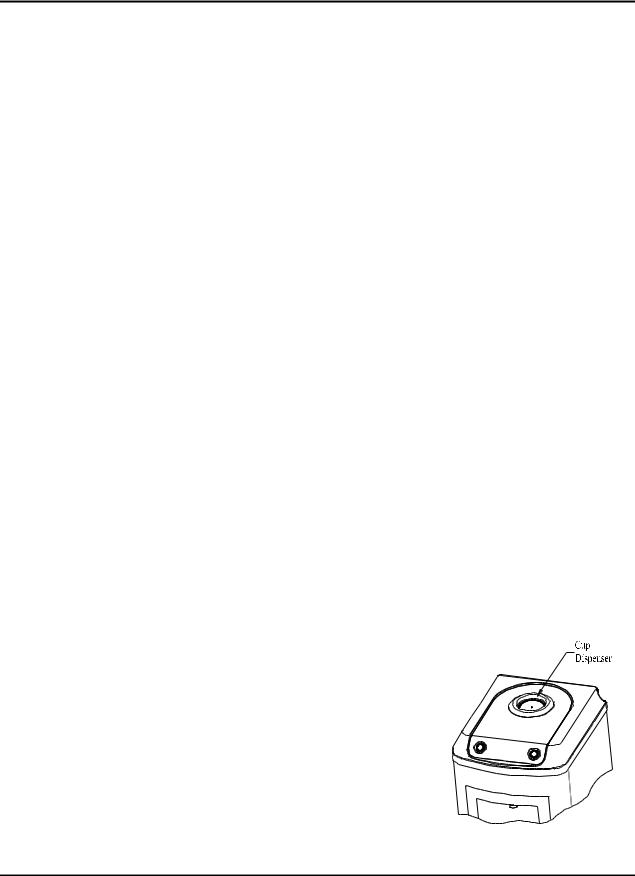
Cup Dispenser:
• The P1PVCD Series contains an integrated cup dispenser built into the top of the cooler. This is the only difference between the P1PV Series and the P1PVCD Series.
030099-347 Rev. 2 |
pg 3 of 16 |
© Copyright 2007 OASIS Corporation |

P1PV / P1PVCD Series
Installation & Service Instructions
Self-Drain Drip Tray:
•The drip tray supplied with the P1PV coolers is fitted with a self-drain facility. To put the selfdrain facility into service, follow the instructions listed below:
o Remove the drip tray from the cooler o Remove the grille from the drip tray
o Using a 8mm (5/16”) diameter drill, drill a hole through the bottom of the drip tray stem o Fit a flexible hose of 10mm (or 3/8”) inner diameter onto the stem
o Route the hose through the partition to the rear of the unit – you can run this hose directly to a main water drain or connect it to a storage vessel that will need to be emptied at regular intervals
Water Pipe and Fittings:
•All water connection fittings are made by the John Guest Company and are approved to NSF standards 51 and 61. The machine is connected to the water supply by a ¼” female bulkhead fitting.
•The entire internal water circuit and all the components which come in contact with water are food grade NSF / WRAS approved
Mounting Feet
•The unit is supplied with 4 mounting feet (packed inside the filter compartment). These can be used to level the cooler on uneven surfaces. To install the feet, simply screw them into the 4 threaded holes in the metal base of the cooler
Water Valves:
•Control of water dispensing is achieved by means of mains AC electrical solenoid valves. Three valves are used – two for cold water and one for ambient or hot water (depending on model). The valves remain open when the customer pushes the dispense button for a drink
Panels:
•All external molded panels are made from ABS plastic. The material used is UV resistant and meets all CE and UL requirements for fire safety. All metal panels are made from galvanized steel which is then painted. The galvanized coating provides increased resistance to rust and corrosion.
030099-347 Rev. 2 |
pg 4 of 16 |
© Copyright 2007 OASIS Corporation |
P1PV / P1PVCD Series
Installation & Service Instructions
Spare Parts:
•Tri Palm International supplies spare parts for all of its watercoolers. For European service, please check the OASIS web-site at www.oasis.ie for full illustrated parts breakdowns that give full details of all replacement parts. For service from the United States, refer to the Tri Palm International web-site www.tripalmint.com
Pre-Delivery Inspection:
1.Examine the packaging for signs of damage – report any damage to the carrier.
2.Remove the carton from the cooler – cut the strapping tape and lift the carton from the cooler. Store the carton and corner posts for repacking the cooler prior to shipping it to the customer.
3.Remove the shipping bag from the cooler
4.Carry out a general inspection of the cooler, ensuring that :
a)There are no marks or physical damage to the cooler
b)All accessories are present
c)All wires and electrical connections are in place at the back of the cooler
d)All tubes and water connections are in place
e)That the cooler is clean and dust free
5.Install your filtration system (see relevant section in this manual)
6.Flush out the water cooler
a)Connect the water supply to the bulkhead fitting at the rear of the unit
b)Make sure the hot tank switch is off, if applicable, then connect the unit to a power supply
c)Caution: The unit is now live and suitable safety precautions should be taken
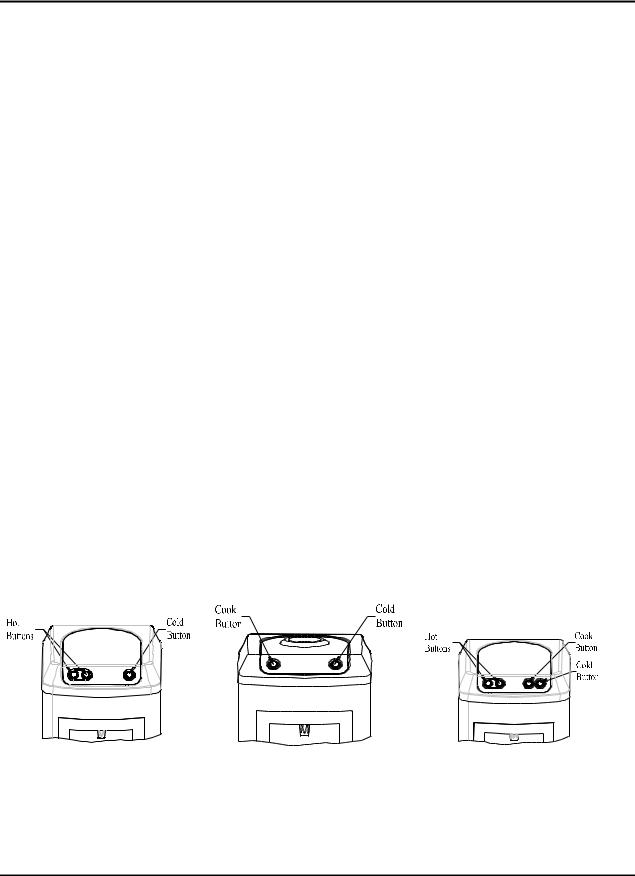
d)For models with hot tanks, the two buttons on the front left of the cooler face must be pressed at the same time to dispense hot water. Press the dispensing button for hot water and keep the button depressed until the water from the outlet runs clear – note that it will take some time to bleed all of the air from the hot tank.
e)If your model is a Cook N’ Cold model, press and keep the button depressed for ambient temperature water until the water from the outlet runs clear.
030099-347 Rev. 2 |
pg 5 of 16 |
© Copyright 2007 OASIS Corporation |
 Loading...