


Nokia 2660 Flip
사용자 가이드
Issue 2022-09-11 ko

Nokia 2660 Flip 사용자 가이드
차례
1 사용자 가이드 정보 4
2 Get started 5
Keys and parts . . . . . . . . . . . . . . . . . . . . . . . . . . . . . . . . . . . . . . . . . . 5
Set up and switch on your phone . . . . . . . . . . . . . . . . . . . . . . . . . . . . . . . . 6
Charge your phone . . . . . . . . . . . . . . . . . . . . . . . . . . . . . . . . . . . . . . . 9
Keypad . . . . . . . . . . . . . . . . . . . . . . . . . . . . . . . . . . . . . . . . . . . . . . 9
3 Calls, contacts, and messages 11
Calls . . . . . . . . . . . . . . . . . . . . . . . . . . . . . . . . . . . . . . . . . . . . . . . . 11
Contacts . . . . . . . . . . . . . . . . . . . . . . . . . . . . . . . . . . . . . . . . . . . . . 11
Send messages . . . . . . . . . . . . . . . . . . . . . . . . . . . . . . . . . . . . . . . . . 12
4 휴대전화 맞춤 설정 13
Change tones . . . . . . . . . . . . . . . . . . . . . . . . . . . . . . . . . . . . . . . . . . . 13
Change the look of your home screen . . . . . . . . . . . . . . . . . . . . . . . . . . . . . 13
Accessibility . . . . . . . . . . . . . . . . . . . . . . . . . . . . . . . . . . . . . . . . . . . 13
5 카메라 15
Photos and videos . . . . . . . . . . . . . . . . . . . . . . . . . . . . . . . . . . . . . . . . 15
6 Bluetooth 16
Bluetooth® connections . . . . . . . . . . . . . . . . . . . . . . . . . . . . . . . . . . . . 16
7 Clock, calendar, and calculator 17
Alarm clock . . . . . . . . . . . . . . . . . . . . . . . . . . . . . . . . . . . . . . . . . . . . 17
Calendar . . . . . . . . . . . . . . . . . . . . . . . . . . . . . . . . . . . . . . . . . . . . . 17
Calculator . . . . . . . . . . . . . . . . . . . . . . . . . . . . . . . . . . . . . . . . . . . . . 17
8 Empty your phone 18
Restore factory settings . . . . . . . . . . . . . . . . . . . . . . . . . . . . . . . . . . . . 18
© 2022 HMD Global Oy. All rights reserved. 2

Nokia 2660 Flip 사용자 가이드
9 제품 및 안전 정보 19
For your safety . . . . . . . . . . . . . . . . . . . . . . . . . . . . . . . . . . . . . . . . . . 19
긴급 전화 . . . . . . . . . . . . . . . . . . . . . . . . . . . . . . . . . . . . . . . . . . . . . 21
기기 관리 . . . . . . . . . . . . . . . . . . . . . . . . . . . . . . . . . . . . . . . . . . . . . 22
재활용 . . . . . . . . . . . . . . . . . . . . . . . . . . . . . . . . . . . . . . . . . . . . . . . 22
WEEE 마크 . . . . . . . . . . . . . . . . . . . . . . . . . . . . . . . . . . . . . . . . . . . . . 23
Battery and charger information . . . . . . . . . . . . . . . . . . . . . . . . . . . . . . . . 23
어린이 . . . . . . . . . . . . . . . . . . . . . . . . . . . . . . . . . . . . . . . . . . . . . . . 24
의료 기기 . . . . . . . . . . . . . . . . . . . . . . . . . . . . . . . . . . . . . . . . . . . . . 24
삽입형 의료 기기 . . . . . . . . . . . . . . . . . . . . . . . . . . . . . . . . . . . . . . . . . 25
청력 . . . . . . . . . . . . . . . . . . . . . . . . . . . . . . . . . . . . . . . . . . . . . . . . 25
Protect your device from harmful content . . . . . . . . . . . . . . . . . . . . . . . . . . 25
차량 . . . . . . . . . . . . . . . . . . . . . . . . . . . . . . . . . . . . . . . . . . . . . . . . 25
폭발할 수 있는 환경 . . . . . . . . . . . . . . . . . . . . . . . . . . . . . . . . . . . . . . . . 26
Certification information (SAR) . . . . . . . . . . . . . . . . . . . . . . . . . . . . . . . . 26
디지털 권한 관리 소개 . . . . . . . . . . . . . . . . . . . . . . . . . . . . . . . . . . . . . . 27
Copyrights and other notices . . . . . . . . . . . . . . . . . . . . . . . . . . . . . . . . . . 27
© 2022 HMD Global Oy. All rights reserved. 3

Nokia 2660 Flip 사용자 가이드
1 사용자 가이드 정보
중 요 : 기 기 를 사 용 하 기 전 에 사 용 자 가 이 드 인 쇄 본 의 ’ 안 전 을 위 해’ 와 ’ 제 품 안 전’ 정 보 또 는
www.nokia.com/support 에서 기기 및 배 터 리 의 안 전한 사용 에 대 한 중 요한 정보 를 확 인 하시 기 바
랍니다. 새 기기를 사 용 하는 방법은 사용자 가이드 인쇄본을 참조 하 십 시오.
© 2022 HMD Global Oy. All rights reserved. 4
Nokia 2660 Flip 사용자 가이드
2 Get started
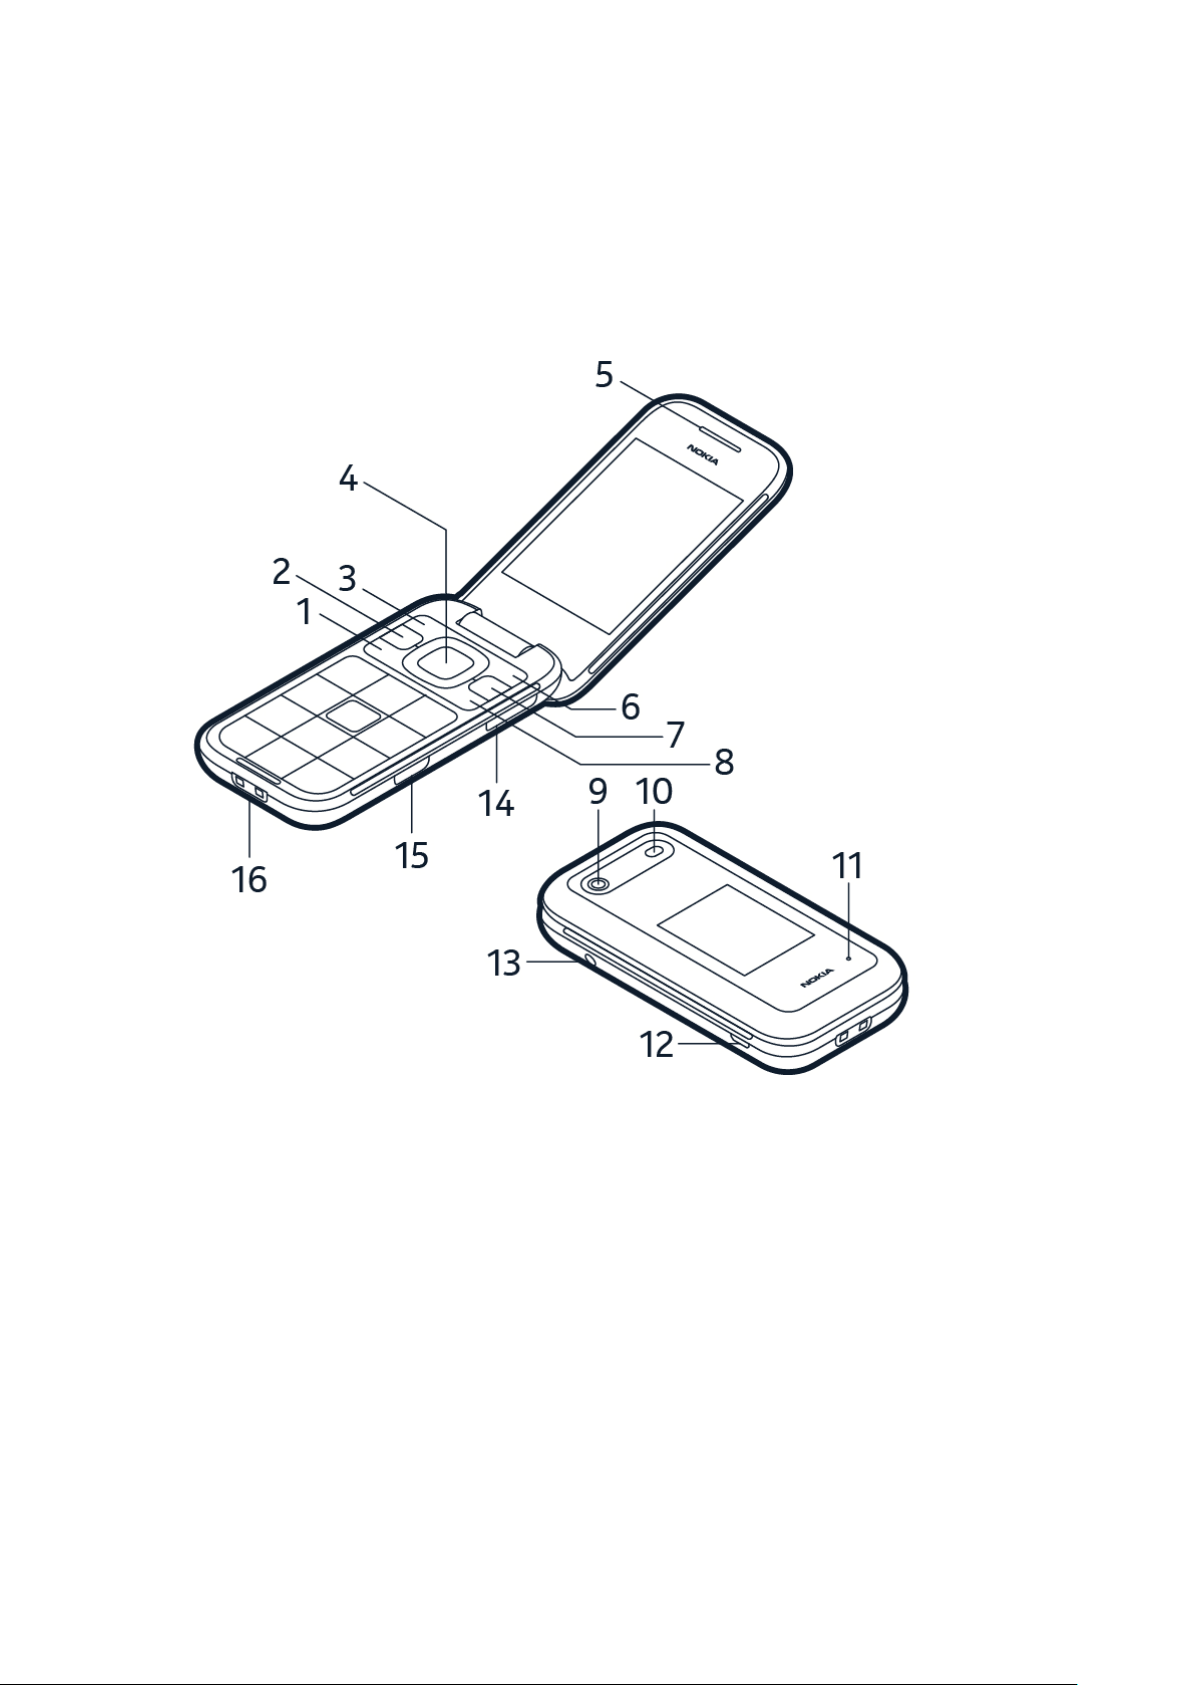
KEYS AND PARTS
Your phone
This user guide applies to the following models: TA-1469, TA-1474, TA-1480, TA-1478, TA-
1491.
1. Call key
2. Shortcut key
3. Left selection key
4. Scroll key
5. Earpiece
6. Right selection key
7. Back key
8. Power/End key
© 2022 HMD Global Oy. All rights reserved. 5
9. Camera
10 . Flash
11 . Microphone
12 . USB connector
13 . Headset connector
14 . Volume keys
15 . SOS call key
16 . Charging cradle connector
Nokia 2660 Flip 사용자 가이드
Do not connect to products that create an output signal, as this may damage the device. Do
not connect any voltage source to the audio connector. If you connect an external device
or headset, other than those approved for use with this device, to the audio connector, pay
special attention to volume levels. Parts of the device are magnetic. Metallic materials may be
attracted to the device. Do not place credit cards or other magnetic storage media near the
device, because info stored on them may be erased.
Some of the accessories mentioned in this user guide, such as charger, headset, or data cable,
may be sold separately.
Note: You can set the phone to ask for a security code to protect your privacy and personal
data. Select Menu > Settings > Security > Keyguard > Security code and enter a code.
Note, however, that you need to remember the code, as HMD Global is not able to open or
bypass it.
SET UP AND SWITCH ON YOUR PHONE
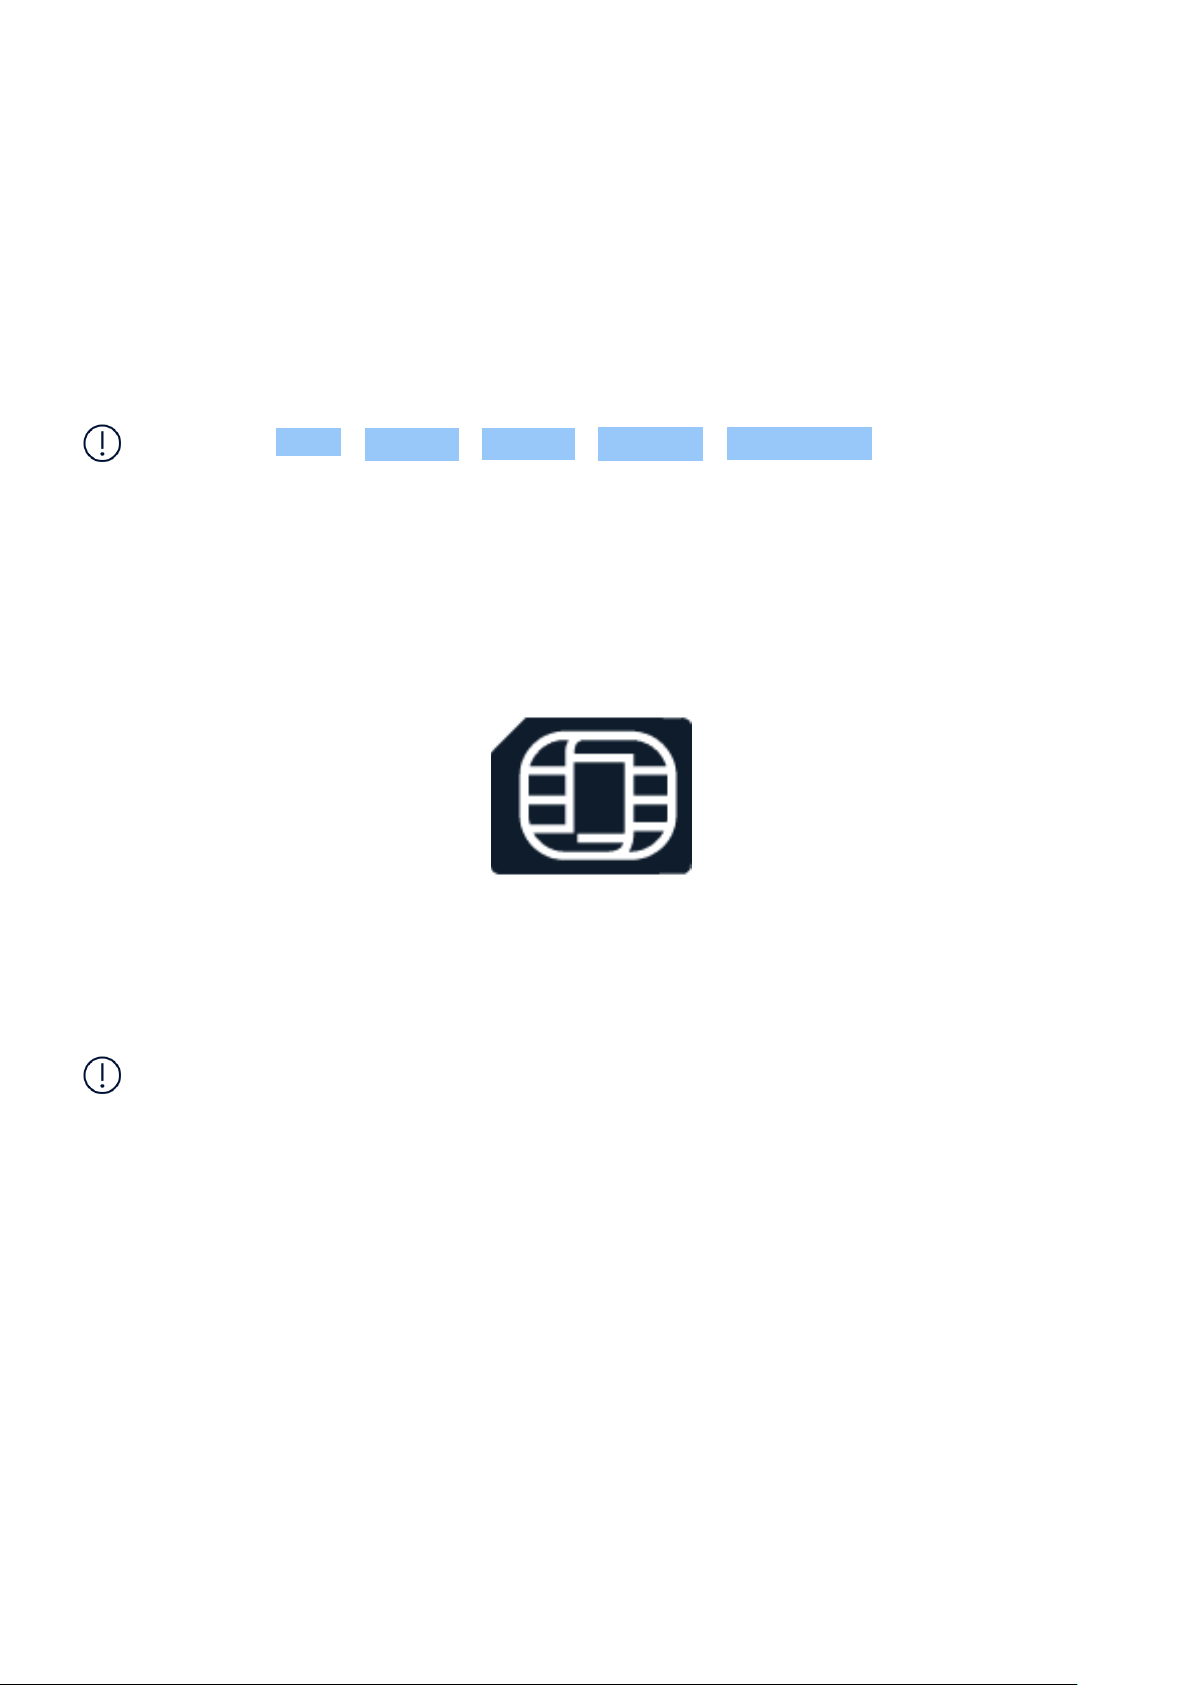
Nano-SIM
Important: This device is designed to be used with a nano-SIM card (see figure) only. Use of
incompatible SIM cards may damage the card or the device, and may corrupt data stored on
the card.
참고: 커버 를 분 리 할 때 에는 먼 저 기 기 전 원을 끄 고 충 전기 및 기 타 기 기 를 분 리하 십 시오. 커버를 갈
아 끼 우는 동 안 에 는 전 자 부품을 건드리지 마십시오. 항상 모 든 커버 를 부착한 상태로 기기를 저 장하
고 사 용 하십시오.
© 2022 HMD Global Oy. All rights reserved. 6
Nokia 2660 Flip 사용자 가이드
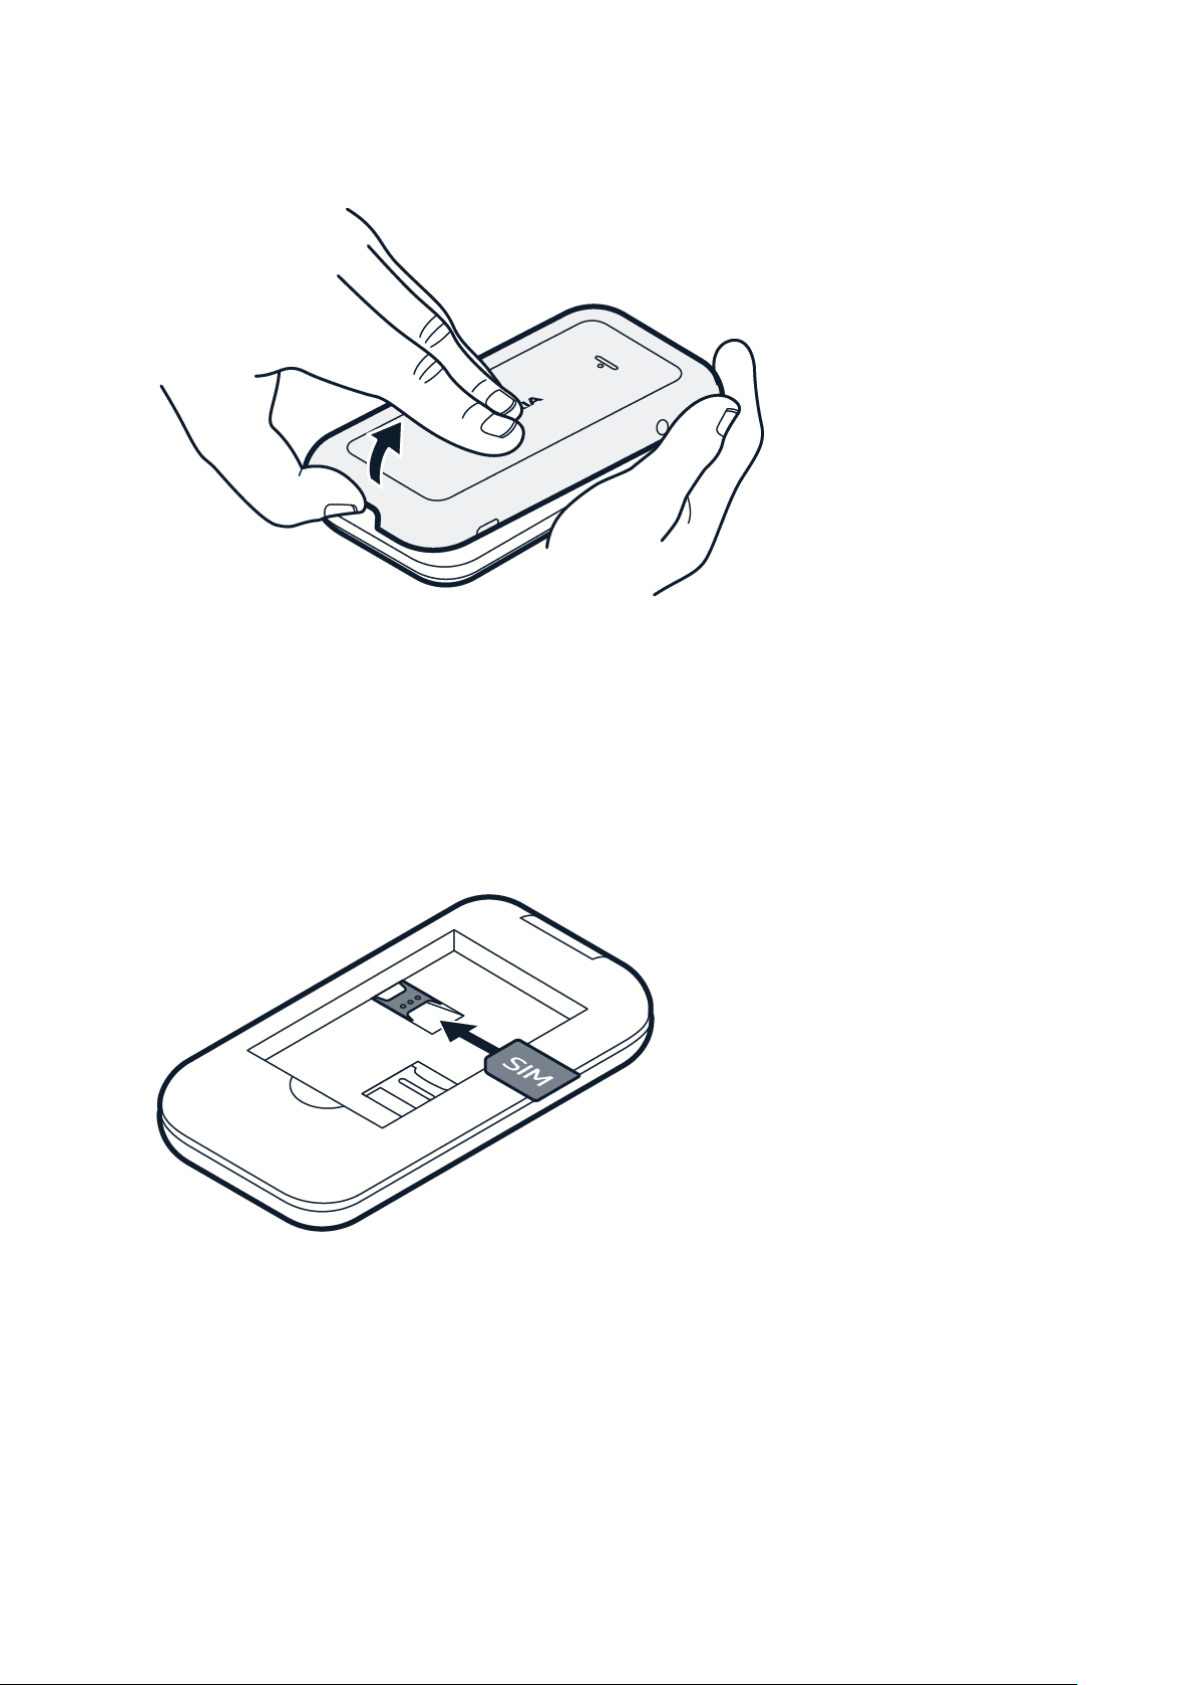
Open the back cover
1. Put your fingernail in the small slot at the top of the phone, lift and remove the cover.
2. If the battery is in the phone, lift it out.
Insert the SIM card
Slide the SIM card in the SIM card slot with the contact area face down.
© 2022 HMD Global Oy. All rights reserved. 7
Nokia 2660 Flip 사용자 가이드
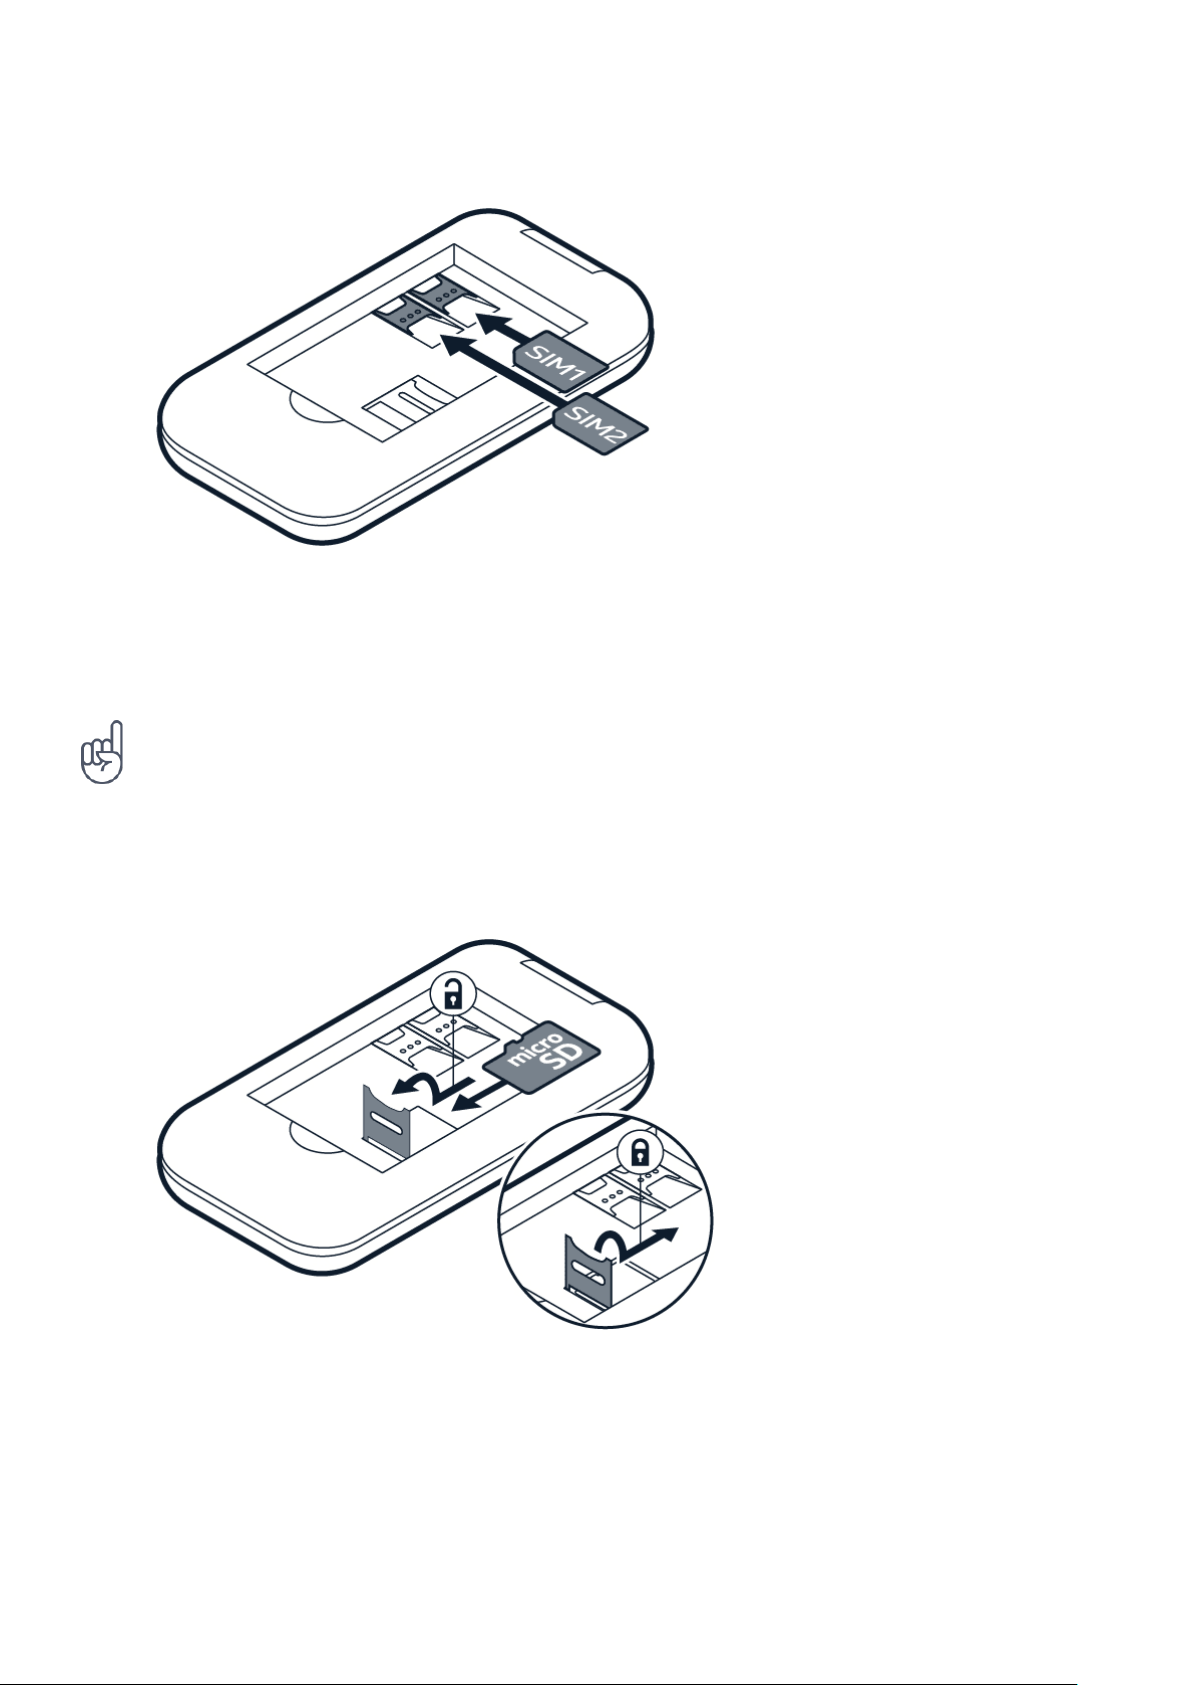
Insert the second SIM
If you have a dual-SIM phone, slide your SIM card in the SIM1 slot and the second SIM in the
SIM2 slot. Both SIM cards are available at the same time when the device is not being used, but
while one SIM card is active, for example, making a call, the other may be unavailable.
Tip: To find out if your phone can use 2 SIM cards, see the label on the sales box. If there are
2 IMEI codes on the label, you have a dual-SIM phone.
Insert the memory card
1. Slide the memory card holder down and
open it up.
2. Place the memory card in the slot.
3. Close down the holder and slide it up to
lock it in place.
4. Put back the battery.
5. Put back the back cover.
© 2022 HMD Global Oy. All rights reserved. 8

Nokia 2660 Flip 사용자 가이드
Tip: Use a fast, up to 32 GB microSD memory card from a well-known manufacturer.
Switch on your phone
Press and hold .
CHARGE YOUR PHONE
Your battery has been partially charged at the factory, but you may need to recharge it before
you can use your phone.
Charge the battery
1. Plug the charger into a wall outlet.
2. Connect the charger to the phone. When done, unplug the charger from the phone, then
from the wall outlet.
If the battery is completely discharged, it may take several minutes before the charging
indicator is displayed.
Tip: You can use USB charging when a wall outlet is not available. The efficiency of USB
charging power varies significantly, and it may take a long time for charging to start and
the device to start functioning.
KEYPAD
Use the phone keys
• To see the apps and features of your phone, on the home screen, select Menu .
• To go to an app or feature, press the scroll key up, down, left, or right. To open the app or
feature, press the scroll key.
• To go back to the home screen, press the end key.
• To change the volume of your phone during a call or when listening to the radio, press the
volume keys.
Lock the keypad
To lock the keys, close the fold. To unlock the keys, press the scroll key and select Unlock >
* .
© 2022 HMD Global Oy. All rights reserved. 9
 Loading...