

Page 1
Camera Control Pro 2 Reference Manual
Overview
This section describes the structure of this manual, outlines the main functions of Camera Control Pro 2, and gives the system requirements and installation instructions.
Using Camera Control Pro 2
This section describes how to use Camera Control Pro 2.
Appendices
This section lists preferences and describes how to uninstall the software.
Important Information on the Product Key
The product key may be found on the CD-ROM case. Do not lose this key. It is required when
installing or upgrading this software and can not be replaced if lost.
xxxxx–xxx–xxxx–xxxx–xxxx–xxxx
Product key
SB7I01(B1)
6MS541B1-01
Page 2

Overview
Overview
Using Camera Control Pro Appendices
Introduction 3
About This Manual 6
System Requirements
Windows 7
Macintosh 8
Installing Camera Control Pro 9
Windows 10
Macintosh 16
Getting Started
Starting and Exiting Camera Control Pro 21
Getting Help 28
Software Updates 29
Click a page number to view.
Return to fi rst page
Camera Control Pro 2
2
Page 3

Overview
Using Camera Control Pro Appendices
Introduction 1/3
This man u al has been written to help you take advantage of the many features included in Camera Control Pro 2. Be sure to read this manual thoroughly, and to keep
it handy when using Camera Control Pro 2.
Conventions
This manual assumes basic knowledge of cameras and Windows or Finder operations. Refer to the
documentation provided with your computer or camera for more information. Where the Windows
and Macintosh versions of the program use diff ering commands, the Windows menu name is listed
fi rst, followed by the Macintosh menu name in square brackets. Where multiple menu items or folders
are selected in sequence, the menu items are separated by a “>”.
Throughout this manual, Windows Vista Home Basic, Home Premium, Business, Enterprise, and Ultimate 32-bit editions are referred to as “Windows Vista.” Windows XP Professional and Windows
XP Home Edition are referred to as “Windows XP.” Windows 2000 Professional is referred to as “Windows 2000.” D1, D1X, and D1H cameras are referred to as “D1-series cameras,” D2Xs, D2X, D2Hs, and
D2H cameras as “D2-series cameras,” D70s and D70 cameras as “D70-series cameras,” and D40 and
D40X cameras as “D40-series cameras.” Except where necessary to distinguish it from older versions
of Camera Control Pro, Camera Control Pro 2 is referred to as “Camera Control Pro.”
Illustrations
This manual is for use with both Windows and Macintosh. While the majority of the illustrations
come from Windows Vista Ultimate, save where otherwise noted the operations described are the
same in other operating systems. Depending on the operating system used, the dialogs and menus
may diff er from slightly from those shown here. Some illustrations are composites.
Printing This Manual
To print this manual, select Print from the File menu in Adobe Reader. This manual is A5 size, allowing facing pages to be printed on a single sheet of A4 paper (to print facing pages, start printing
from an even-numbered page).
Installing/Uninstalling Camera Control Pro 2
Use an account with administrator privileges to install or uninstall Camera Control Pro 2.
Return to fi rst page
Camera Control Pro 2
3
Page 4

Overview
Using Camera Control Pro Appendices
Introduction 2/3
Camera Control Pro
Changes made to settings in the Camera Control Pro window only apply to pho to graphs taken after
the changes are made, not to photographs that have already been taken. Camera Control Pro can
not be used to modify existing photographs.
The controls in the Camera Control Pro window vary with the type of camera connected. More
information on camera settings may be found in the documentation provided with your camera.
Illustrations
Save where otherwise noted, the illustrations in this section show the dialogs displayed when the
D3 is connected.
Camera Control Pro 2 for D100 Cameras (Macintosh)
Before using Camera Control Pro with a D100 digital camera under Mac OS X, confi rm that the
camera fi rmware is version 2.00 or later. Users of earlier versions will need to upgrade the camera
fi rmware before using Camera Control Pro. Contact a Nikon-authorized service representative for
information on fi rmware upgrades.
Return to fi rst page
Camera Control Pro 2
4
Page 5
Overview Using Camera Control Pro Appendices
here
Overview
Introduction 3/3
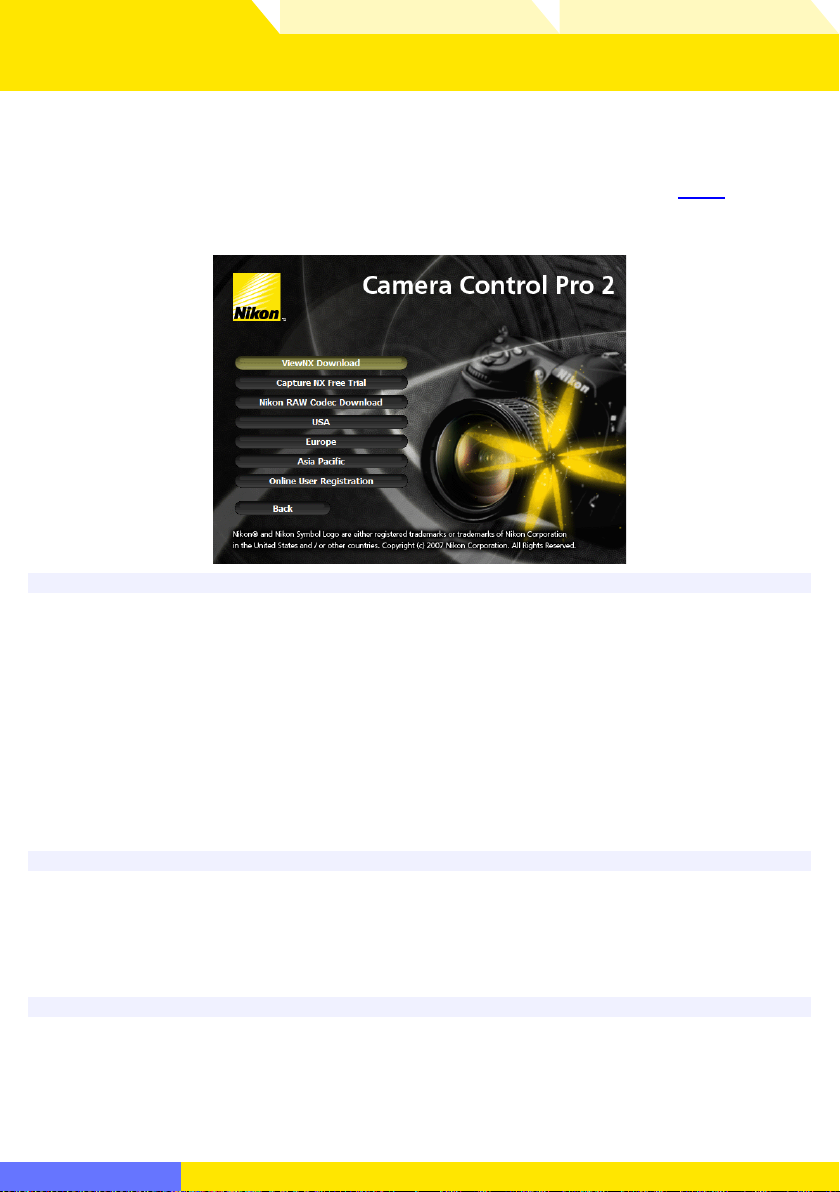
Customer Support and Registration
To link to a Nikon customer support website, click Link to Nikon in the Camera
Control Pro 2 installer window and click the link for your region. Click
information.
Notices
• No part of the manuals included with this product may be reproduced, transmitted, transcribed,
stored in a retrieval system, or translated into any language in any form, by any means, without
Nikon’s prior written permission.
• Nikon reserves the right to change the specifi cations of the hardware and software described in
these manuals at any time and without prior notice.
• Nikon will not be held liable for any damages resulting from the use of this product.
• While every eff ort has been made to ensure that the information in these manuals is accurate and
complete, we would appreciate it were you to bring any errors or omissions to the attention of
the Nikon representative in your area (address provided separately).
here for more
Note
The copying or reproduction of copyrighted creative works such as books, music, paintings, woodcut prints, maps, drawings, movies, and photographs is governed by national and international
copyright laws. Do not use the camera for the purposes of making illegal copies or to infringe copyright laws. Do not use in venues where photography or recording is prohibited.
Trademark Information
Microsoft, Windows, and Windows Vista are registered trademarks of Microsoft Corporation. Adobe Reader and Acrobat are registered trademarks of Adobe Systems, Inc. Macintosh, Mac OS, and
QuickTime are registered trademarks of Apple Computer, Inc. All other trade names mentioned in
this manual or the other documentation provided with your Nikon product are trademarks or registered trademarks of their respective holders.
Return to fi rst page
Camera Control Pro 2
5
Page 6
Overview
Blue underlined text
Using Camera Control Pro Appendices
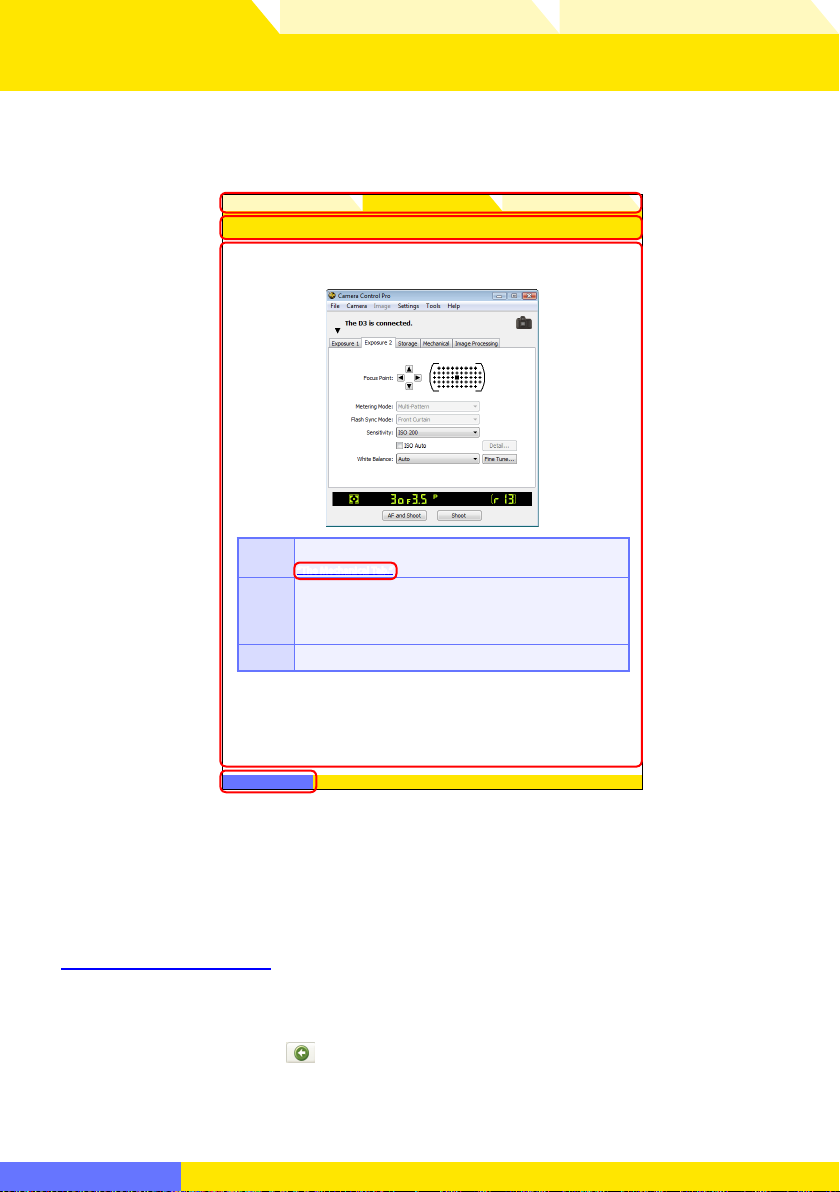
About This Manual
How to Use This Manual
The pages of this manual are structured as shown here:
0WFSWJFX "QQFOEJDFT
$BNFSB$POUSPMT
5IF&YQPTVSF5BC
5IFGPMMPXJOHTFUUJOHTDBOCFBEKVTUFEGSPNUIF&YQPTVSFUBC
6TJOH$BNFSB$POUSPM1SP
5IFGPDVT QPJOUBOE GPDVTBSFB DBOCF TFMFDUFE VTJOHUIF BSSPXCVUUPOT TFFUIF
'PDVT1PJOU
DBNFSBNBOVBMGPS EFUBJMT'PSJOGPSNBUJPO PO"'BSFBNPEFBOEGPDVTNPEFTFF
'PDVT"SFB
3FUVSOUPmSTUQBHF
i5IF.FDIBOJDBM5BCw
5IFNFUFSJOH NPEF DBOCF TFMFDUFEG SPNUIJT NFOV%% TFSJFT% %
%%TFSJFT%BOE%TFSJFTPOMZ.FUFSJOHNPEFEFGBVMUTUP UIFPQUJPO
.FUFSJOH
TFMFDUFEXJUIUIF DBNFSB*G B%TFSJFTPS%DBNFSBJTDPOOFDUFEUI FDVSSFOU
.PEF
NFUFSJOHNPEFXJMMCF TIPXOCVUDIBOHFTDBOPOMZC FNBEFVTJOHDBNFSBDPO
USPMT4FFUIFDBNFSBNBOVBMGPSEFUBJMT
'MBTI4ZOD
5IJTPQUJPODPOUSPMT UIFDBNFSBnBTI TZODNPEF4FF UIFDBNFSB NBOVBMGPSEF
.PEF
UBJMT
$BNFSB$POUSPM1SP
Click here to go to the beginning of each of the three chapters. The chapter you
are currently viewing is displayed in a darker color.
Page title
Description
Blue underlined text indicates a link to another part of this manual or the World
Wide Web. Click the text to follow the link (note that a web browser and an Internet connection are required to link to the World Wide Web). To return to the
previous topic, click the
Click here to return to the fi rst page.
Return to fi rst page
button in Adobe Reader.
Camera Control Pro 2
6
Page 7

Overview
www.europe-nikon.com/support
www.nikon-asia.com
www.nikonusa.com
http://nikonimaging.com/
Using Camera Control Pro Appendices
System Requirements Windows
Before installing Camera Control Pro, be sure that your system meets the following
requirements:
CPU Intel Celeron, Pentium 4, or Intel Core series processor with a clock speed
of 1 GHz or faster recommended
OS Preinstalled versions of Windows Vista (32-bit Home Basic/Home Premi-
um/Business/Enterprise/Ultimate editions), Windows XP (Home Edition/
Professional), Windows 2000 Professional
Hard-disk space 50 MB required for installation, with an additional 1 GB of free disk space
available when Camera Control Pro is running
RAM • Windows Vista: 512 MB (768 MB or more recommended)
• Other versions of Windows: 256 MB (768 MB or more recommended)
Video resolution 1,024 × 768 pixels or more with 24-bit color (True Color) or higher
Interface
Supported cameras D3, D2-series, D1-series ‡, D300, D200, D100, D80, D70-series, D50, and D40-
Miscellaneous • CD-ROM drive required for installation
* Connect the camera directly to the computer. The camera may not function as expected when
connected via a hub, extension cable, or keyboard.
† See the website below for the latest information on boards that have been tested and approved
for use.
‡ D1-series cameras not supported under Windows Vista.
*
USB: Only built-in USB ports supported
IEEE 1394: OHCI-compliant IEEE 1394 interface board or card required
series cameras
• Internet connection required for Nikon Message Center
†
Check the support information at the website below for the latest on compatible
cameras and operating systems.
Europe ,Africa:
Asia, Oceania, Middle East:
U.S.A.:
www.europe-nikon.com/support
www.nikon-asia.com
www.nikonusa.com
Additional information may be available from the Nikon representative in your area.
Visit
http://nikonimaging.com/ for contact information.
Return to fi rst page
Camera Control Pro 2
7
Page 8

Overview
www.europe-nikon.com/support
www.nikon-asia.com
www.nikonusa.com
http://nikonimaging.com/
Using Camera Control Pro Appendices
System Requirements Macintosh
Before installing Camera Control Pro, be sure that your system meets the following
requirements:
CPU PowerPC G4 or G5 model, Intel Core, or Intel Xeon with a clock speed of
1 GHz or faster recommended
OS Mac OS X version 10.3.9 or 10.4.10
Hard-disk space 100 MB required for installation, with an additional 1 GB of free disk space
available when Camera Control Pro is running
RAM 256 MB (768 MB or more recommended)
Video resolution 1,024 × 768 pixels or more with 24-bit color (millions of colors) or higher
Interface
Supported cameras D3, D2-series, D1-series †, D300, D200, D100, D80, D70-series, D50, and D40-
Miscellaneous • CD-ROM drive required for installation
* Connect the camera directly to the computer. The camera may not function as expected when
connected via a hub, extension cable, or keyboard.
† D1-series cameras not supported on computers with Intel CPUs running Mac OS X version
10. 3.9.
*
USB: Only built-in USB ports supported
FireWire: Only built-in FireWire ports supported
series cameras
• Internet connection required for Nikon Message Center
Check the support information at the website below for the latest on compatible
cameras and operating systems.
Europe ,Africa:
Asia, Oceania, Middle East:
U.S.A.:
www.europe-nikon.com/support
www.nikon-asia.com
www.nikonusa.com
Additional information may be available from the Nikon representative in your area.
Visit
http://nikonimaging.com/ for contact information.
Return to fi rst page
Camera Control Pro 2
8
Page 9

Overview
sysystem requirements
Using Camera Control Pro Appendices
Installing Camera Control Pro
Before installing Camera Control Pro:
• Confi rm that the computer satisfi es the
Pro.
• Exit any other applications that may be running, including anti-virus software.
Follow the links below to view installation instructions for your operating system:
Windows Macintosh
stem requirements for Camera Control
Existing Versions of Camera Control Pro
If an earlier version of Camera Control Pro is installed, uninstall the existing version before installing
Camera Control Pro 2. If an existing copy of Camera Control Pro 2 is detected during installation, a
notifi cation will be displayed. Follow the on-screen instructions.
Return to fi rst page
Camera Control Pro 2
9
Page 10
Overview
Using Camera Control Pro Appendices
Installing Camera Control Pro Windows 1/6
Use an account with administrator privileges when installing Camera Control Pro.
Camera Control Pro 2 Install Options
To display install options for Camera Control Pro:
Insert the installer CD in a CD-ROM drive.
1
Windows Vista
An AutoPlay dialog will be displayed; click Run Welcome.exe. A “User Ac-
count Control” dialog will be displayed; click Allow.
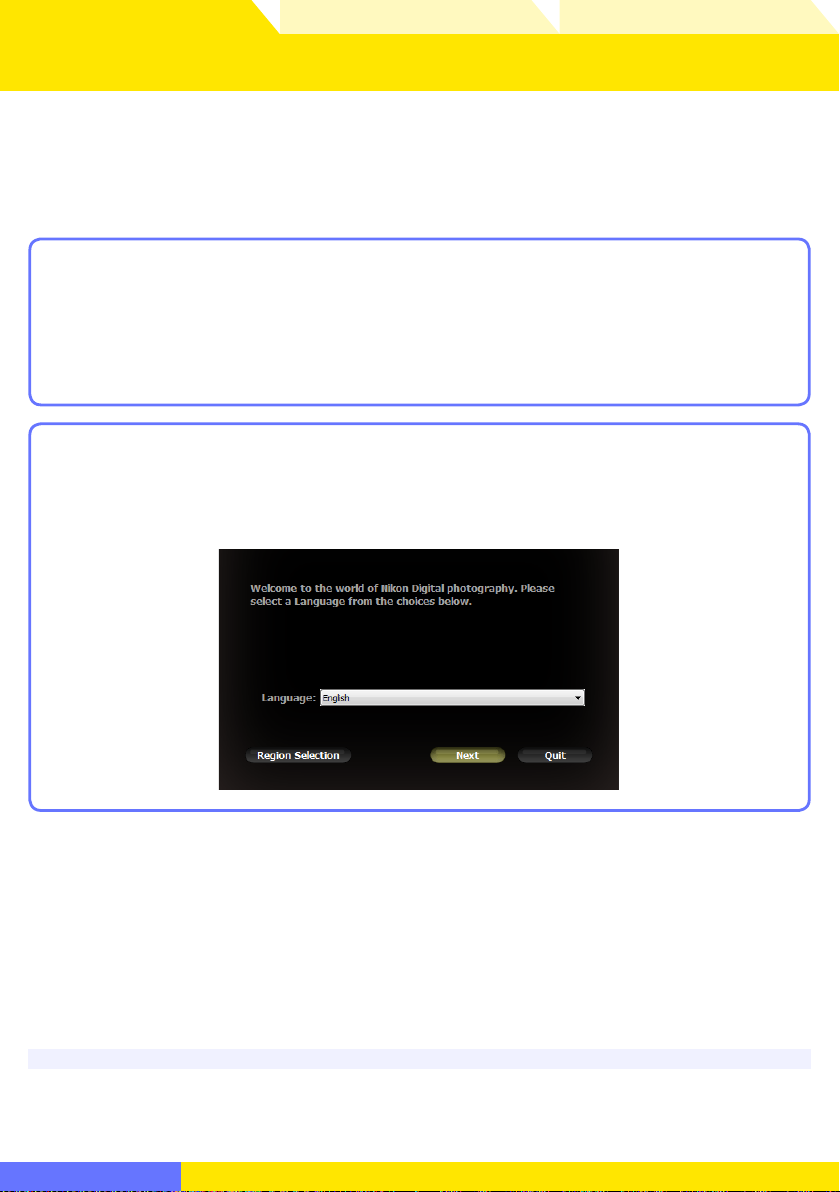
A language-selection dialog will be displayed; select a language and click
2
Next. If the desired language is not available, click Region Selection to
choose a diff erent region and then choose the desired language .
If the Language Selection Dialog Is Not Displayed
To display the language selection dialog, select Computer or My Computer from the Start menu
(Windows Vista or Wind ows XP) or double-click the My Computer icon on the desktop (Windows 2000)
and double-click the CD-ROM (Camera Control Pro) icon in the My Computer window.
Return to fi rst page
Camera Control Pro 2
10
Page 11
Overview
Uninstalling
Camera Control Pro
Using Camera Control Pro Appendices
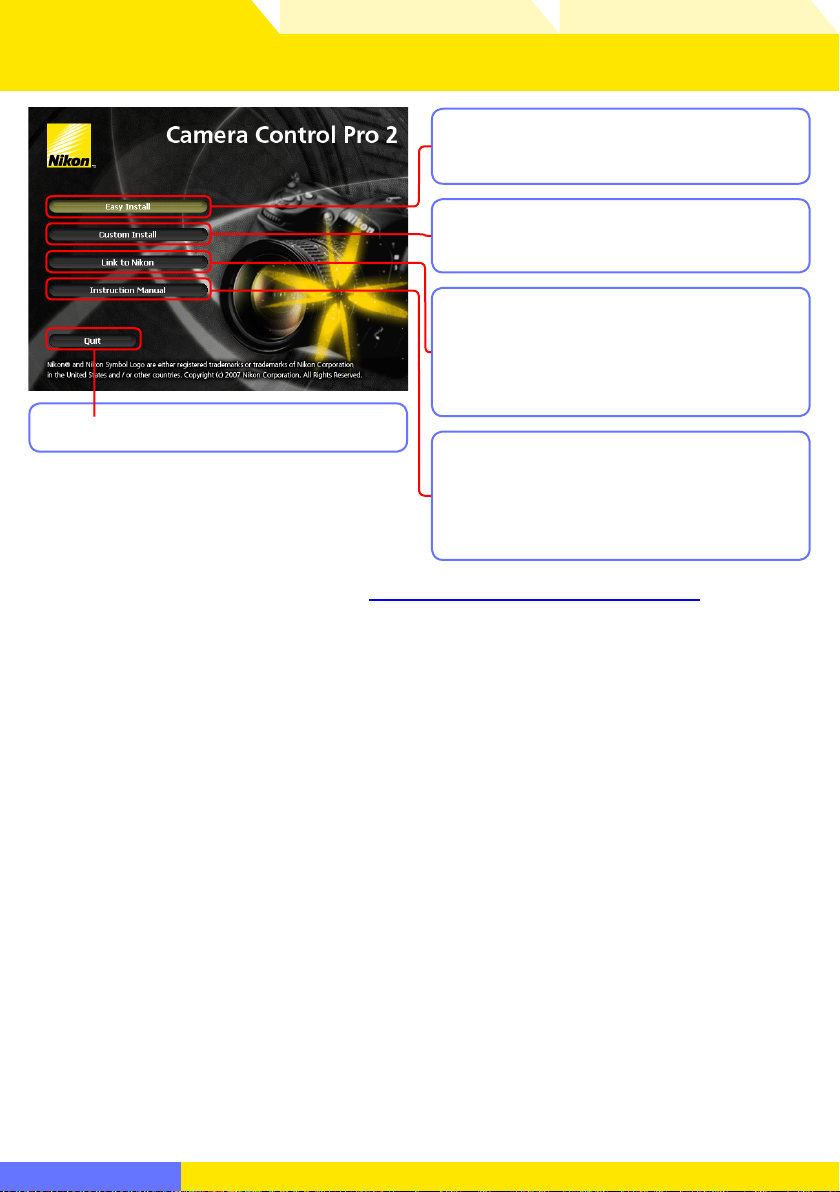
Installing Camera Control Pro Windows 2/6
Easy Install: Install the minimum software
needed to run Camera Control Pro.
Custom Install: Install selected software
(not displayed in Windows Vista).
Link to Nikon: Download ViewNX or trial
versions of Nikon software or visit Nikon
technical support websites (Internet connection required).
Quit: Close this dialog.
Instruction Manual: Open the “Manuals”
folder, which contains software instruction
manuals. Double-click INDEX.pdf to view
a region selection screen.
To uninstall Camera Control Pro, see
Uninstalling
Camera Control Pro.
Return to fi rst page
Camera Control Pro 2
11
Page 12
Overview
Using Camera Control Pro Appendices
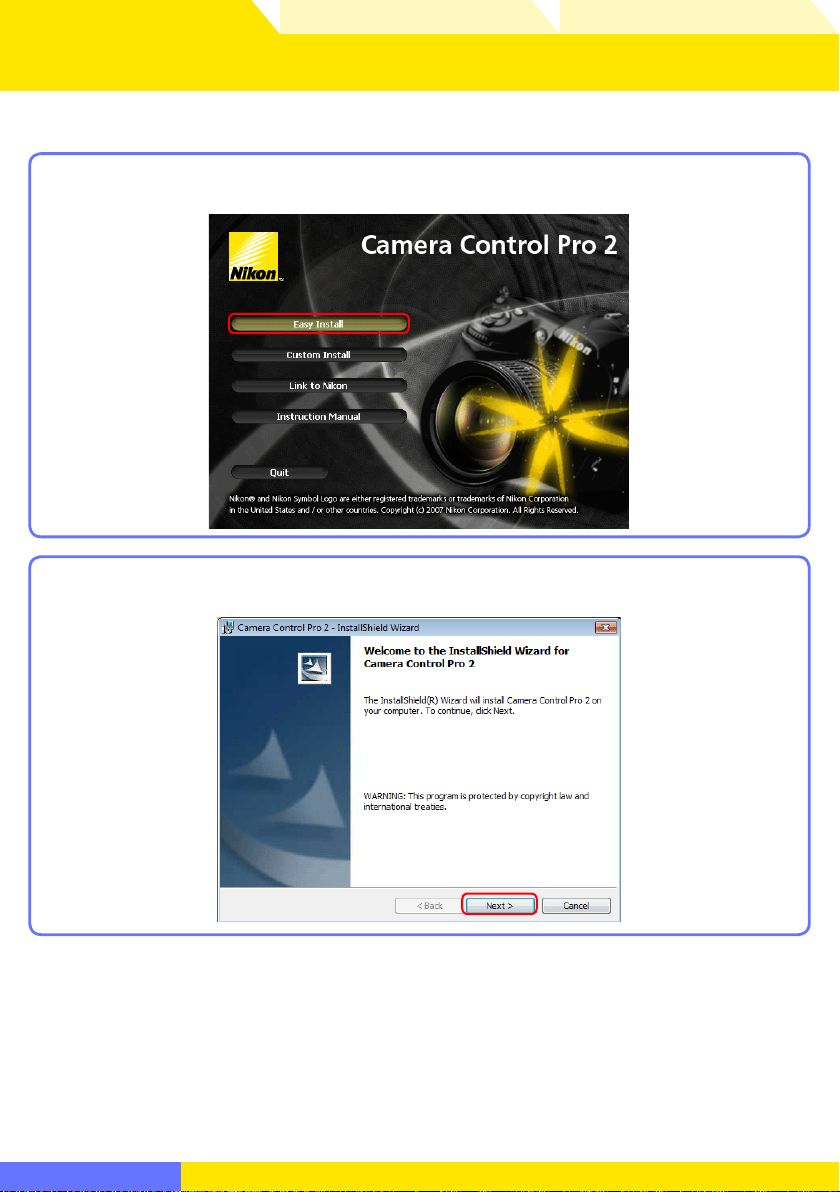
Installing Camera Control Pro Windows 3/6
Follow the steps below to install Camera Control Pro:
Click Easy Install.
1
Click Next.
2
Return to fi rst page
Camera Control Pro 2
12
Page 13

Overview
Using Camera Control Pro Appendices
Installing Camera Control Pro Windows 4/6
After reading the license agreement (), select I accept the terms of the
3
license agreement () and click Next () to proceed with installation.
A “ReadMe” fi le will be displayed. Take a moment to read this fi le, which may
contain information that could not be included in this manual, and then click
Next.
Personalize your copy of Camera Control Pro () and click Next ().
4
Return to fi rst page
Camera Control Pro 2
13
Page 14
Overview
Using Camera Control Pro Appendices
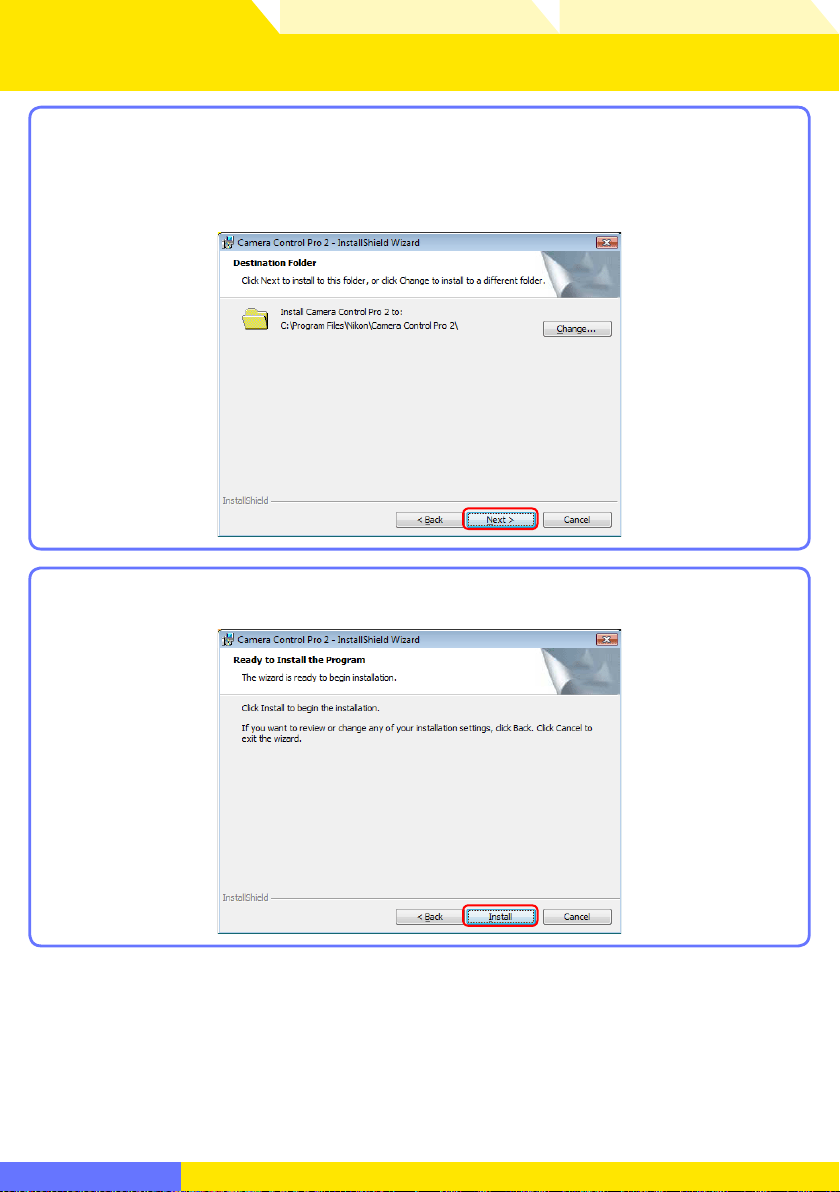
Installing Camera Control Pro Windows 5/6
The destination folder for Camera Control Pro will be displayed under “Install
5
Camera Control Pro to.” Click Next to install Camera Control Pro to this folder,
or click Change… to select another destination.
Click Install.
6
Return to fi rst page
Camera Control Pro 2
14
Page 15
Overview
Using Camera Control Pro Appendices
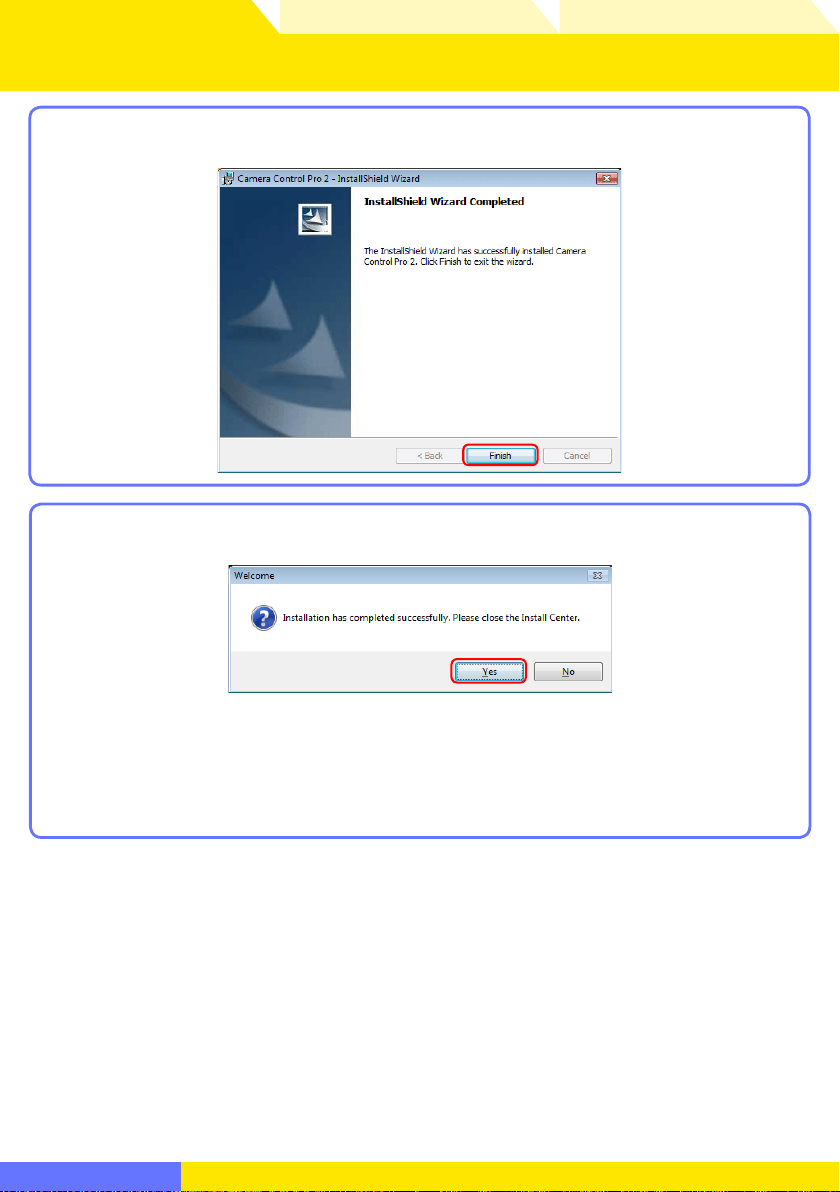
Installing Camera Control Pro Windows 6/6
Click Finish.
7
Click Ye s and remove the installer CD from the CD-ROM drive.
8
If a dialog is displayed directing you to restart the computer, follow the onscreen instructions.
This completes installation of Camera Control Pro.
Return to fi rst page
Camera Control Pro 2
15
Page 16
Overview
Using Camera Control Pro Appendices
Installing Camera Control Pro Macintosh 1/5
Use an account with administrator privileges when installing Camera Control Pro.
Camera Control Pro 2 Install Options
To display install options for Camera Control Pro:
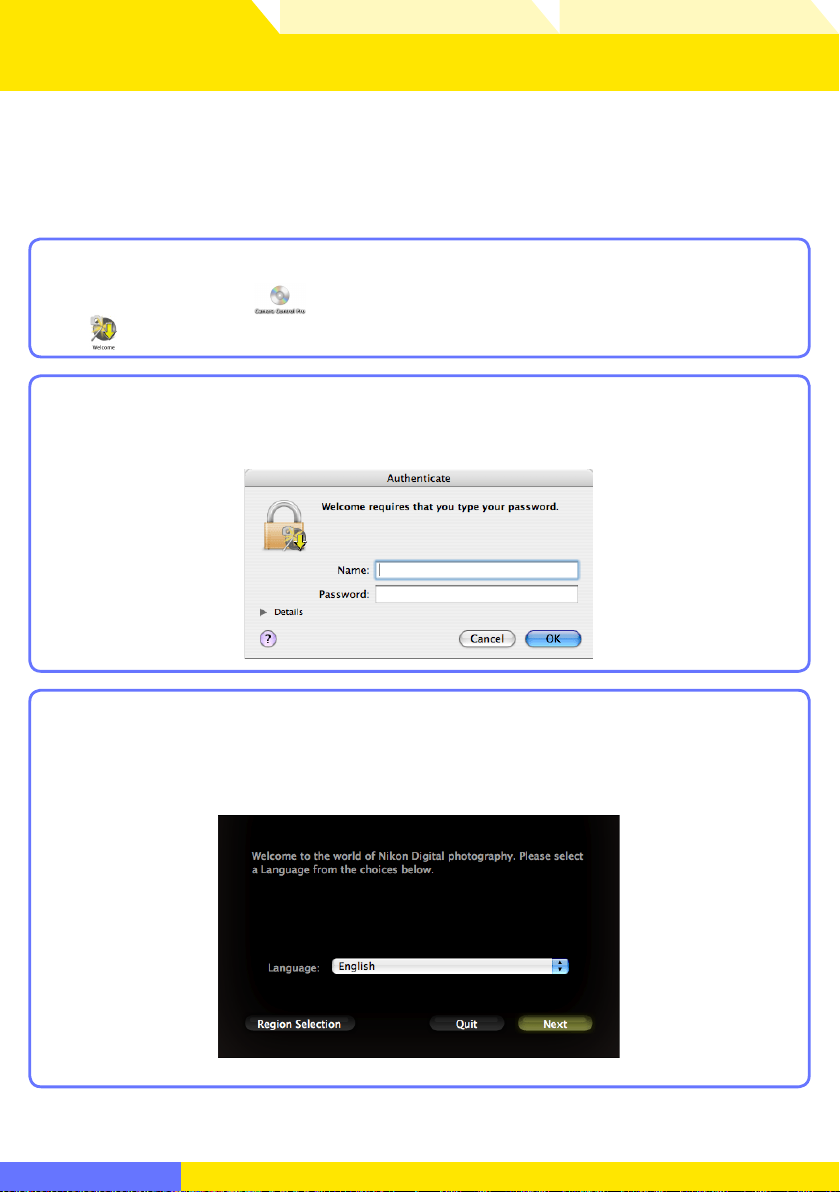
Insert the installer CD in a CD-ROM drive. Double-click the Camera Control
1
Pro CD-ROM icon (
(
) icon.
The following dialog will be displayed; enter an administrator name and
2
password and click OK.
) on the desktop and then double click the Welcome
A language-selection dialog will be displayed; select a language and click
3
Next. If the desired language is not available, click Region Selection to
choose a diff erent region and then choose the desired language.
Return to fi rst page
Camera Control Pro 2
16
Page 17
Overview
Uninstalling
Camera Control Pro
Using Camera Control Pro Appendices
Installing Camera Control Pro Macintosh 2/5
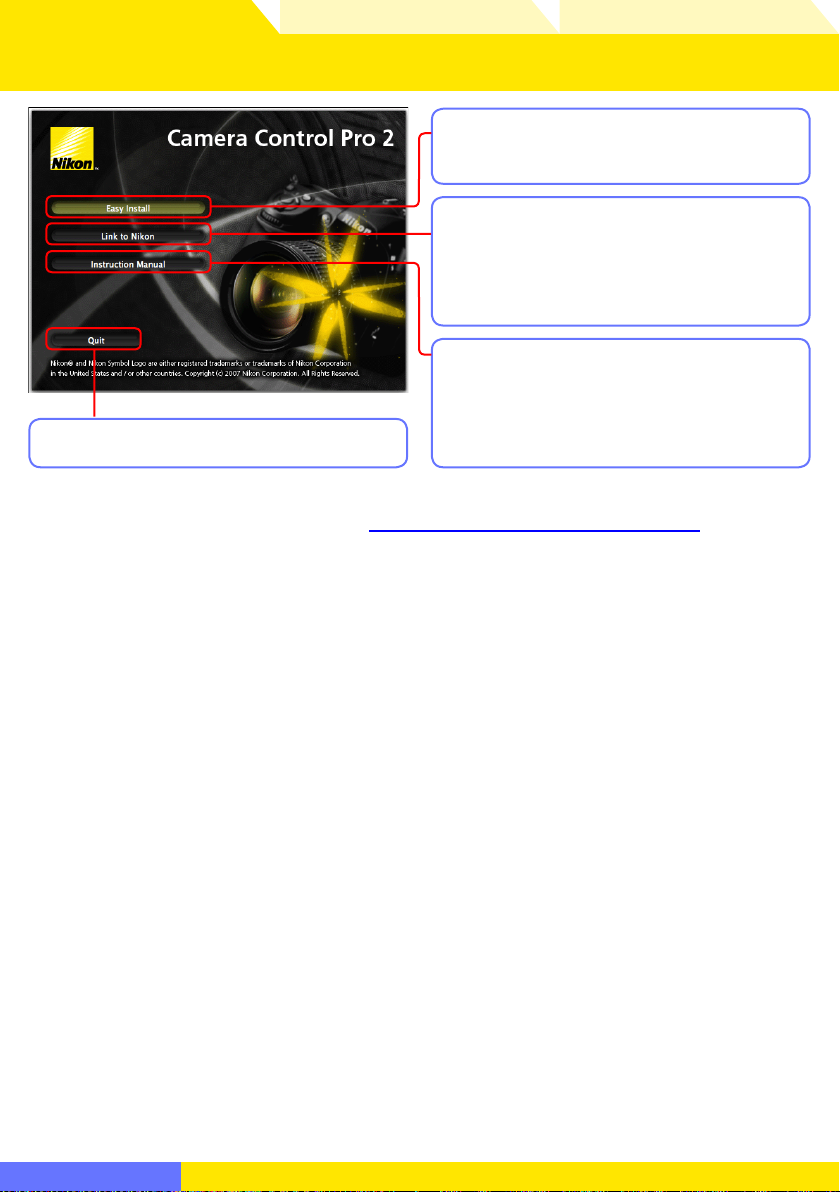
Easy Install: Install the minimum software
needed to run Camera Control Pro.
Link to Nikon: Download ViewNX or trial
versions of Nikon software or visit Nikon
technical support websites (Internet connection required).
Instruction Manual: Open the “Manuals”
folder, which contains software instruction
manuals. Double-click INDEX.pdf to view
Quit: Close this dialog.
a region selection screen.
To uninstall Camera Control Pro, see
Uninstalling
Camera Control Pro.
Return to fi rst page
Camera Control Pro 2
17
Page 18
Overview
Using Camera Control Pro Appendices
Installing Camera Control Pro Macintosh 3/5
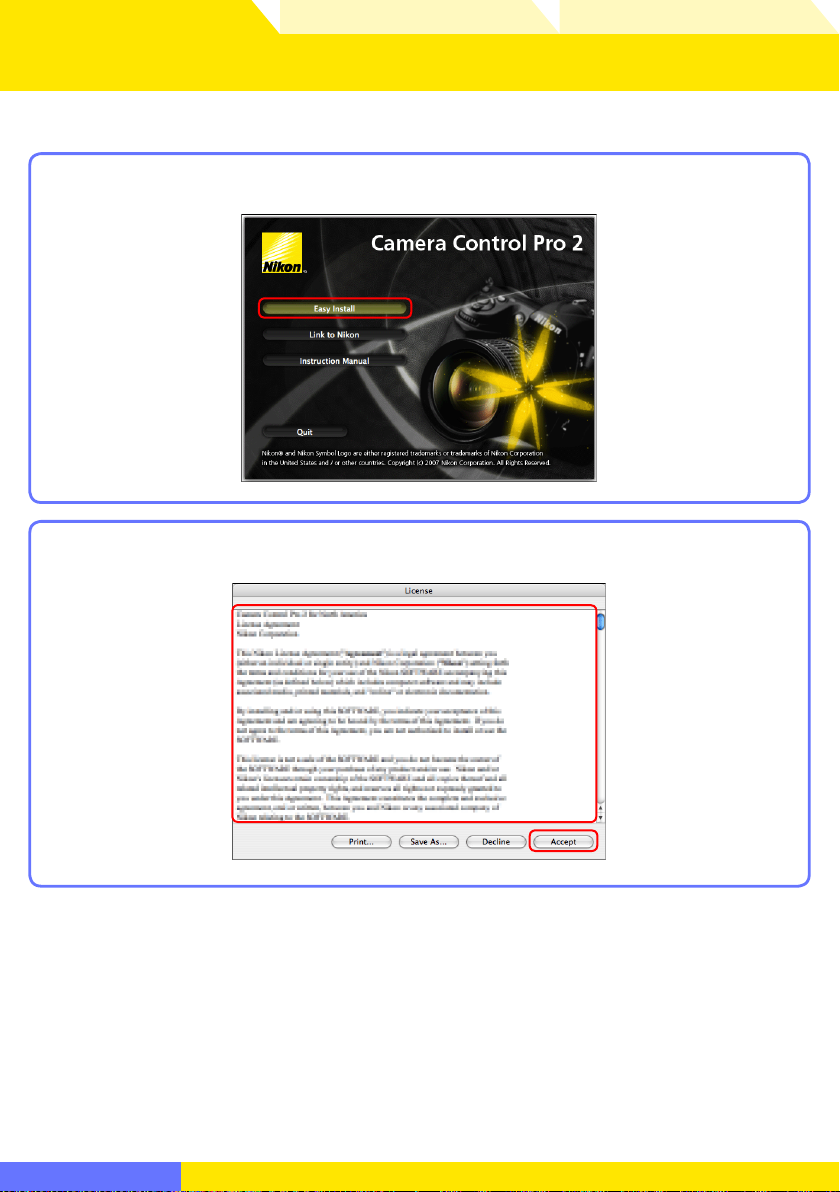
Follow the steps below to install Camera Control Pro:
Click Easy Install.
1
After reading the license agreement (), click Accept ().
2
Return to fi rst page
Camera Control Pro 2
18
Page 19
Overview
Using Camera Control Pro Appendices
Installing Camera Control Pro Macintosh 4/5
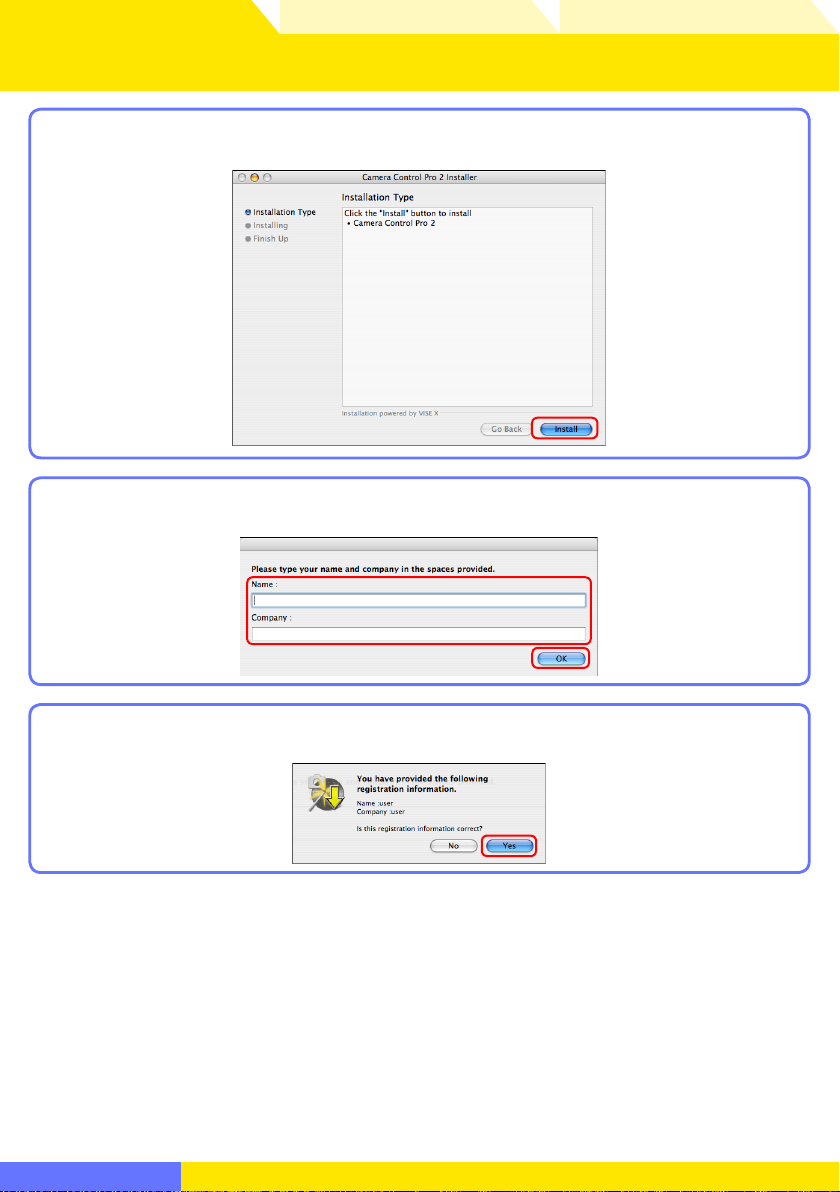
Click Install.
3
Personalize your copy of Camera Control Pro () and click OK ().
4
Click Yes.
5
Return to fi rst page
Camera Control Pro 2
19
Page 20
Overview
Using Camera Control Pro Appendices
Installing Camera Control Pro Macintosh 5/5
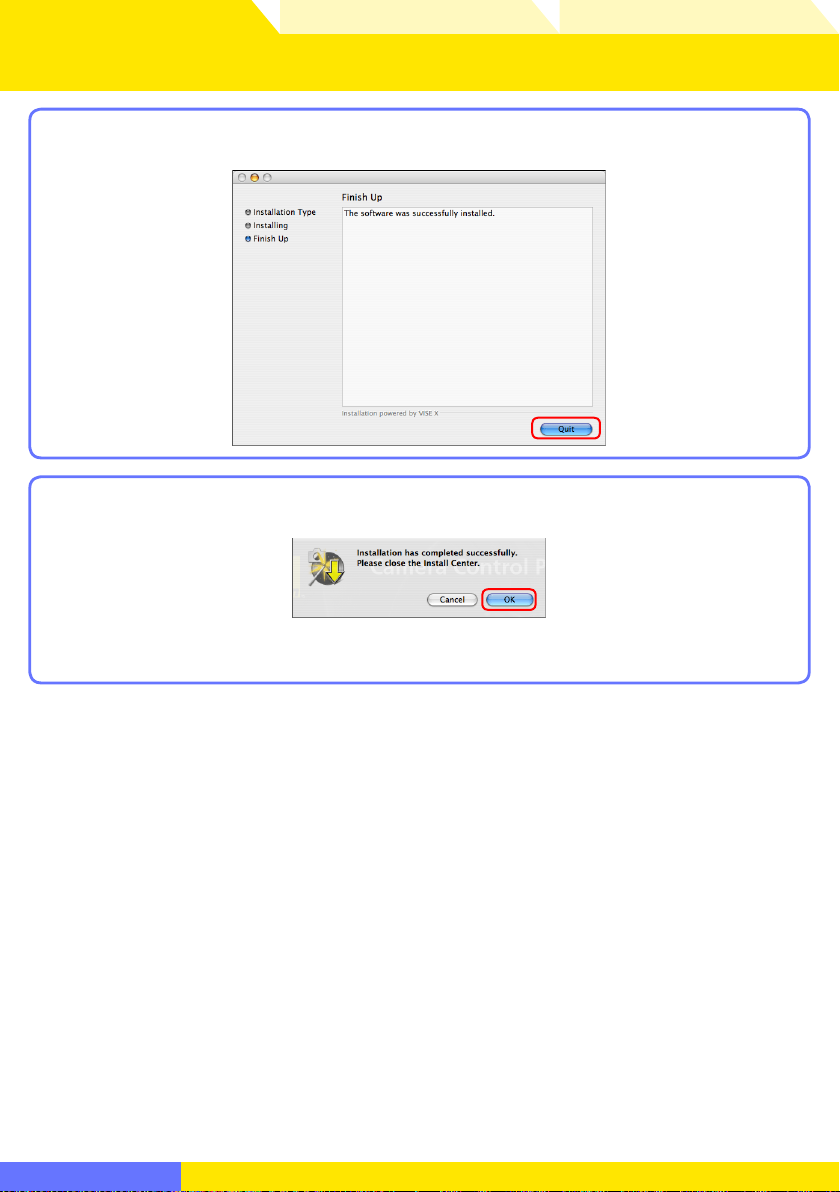
Click Quit.
6
Click OK and remove the installer CD from the CD-ROM drive.
7
This completes installation of Camera Control Pro.
Return to fi rst page
Camera Control Pro 2
20
Page 21

Overview
Using Camera Control Pro Appendices
Starting and Exiting Camera Control Pro 1/7
Starting Camera Control Pro
Turn the camera off and use the interface cable to connect the camera to the
1
computer as described in the camera manual. If you are using a D1-series
camera, choose “PC” as the operating mode. If you are using a D100, choose
P, S, A, or M mode. Users of D3, D2-series, D300, and D200 cameras can select
any mode other than M-
any shooting mode.
UP (mirror up). Other cameras can be connected in
LANs
See the wireless transmitter user’s manual for information on controlling cameras connected to local area networks (LANs) using WT-2, WT-3, or WT-4 wireless transmitters.
USB
When using the D100 under Windows 2000, log in to an administrator account and set the camera
USB option to Mass Storage; otherwise, set the camera USB option to PTP. When using other
cameras equipped with a USB interface, set the camera USB option to PTP or MTP/PTP. D1-series
cameras do not support USB.
Return to fi rst page
Camera Control Pro 2
21
Page 22

Overview
Using Camera Control Pro Appendices
Starting and Exiting Camera Control Pro 2/7
Turn the camera on. If Nikon Transfer or PictureProject Transfer starts, click
2
the close button.
USB Connection to Windows Vista/XP Computers
When a camera with USB interface is connected to a Windows XP computer, an AutoPlay dialog may
be displayed.
Select the Camera Control Pro option to start Camera Control Pro.
Return to fi rst page
Camera Control Pro 2
22
Page 23
Overview
product key
Using Camera Control Pro Appendices
Starting and Exiting Camera Control Pro 3/7
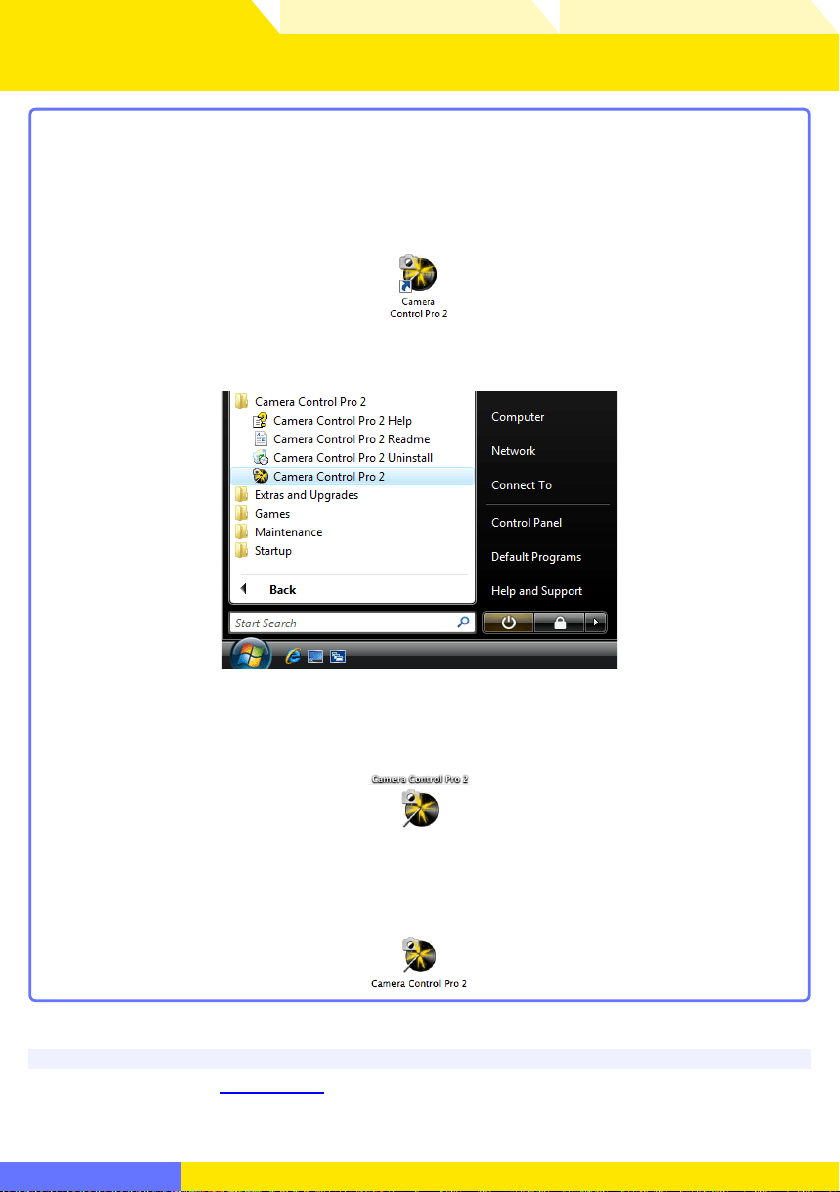
Start Camera Control Pro.
3
Windows
Method 1: Double-click the Camera Control Pro 2 shortcut on the desktop.
Method 2: Click Start and select Camera Control Pro 2 in the program list.
Macintosh
Method 1: Click the Camera Control Pro 2 icon in the Dock (if available).
Method 2: Open the “Nikon Software/Camera Control Pro 2” folder in the “Ap-
plications” folder and double-click the Camera Control Pro 2 icon.
Product Key
If prompted to supply a
Be sure not to lose the key or the key for any existing versions of Camera Control Pro, as they may be
required when re-installing or upgrading the product.
Return to fi rst page
product key, enter the key found on the product packaging and click OK.
Camera Control Pro 2
23
Page 24
Overview
Using Camera Control Pro Appendices
Starting and Exiting Camera Control Pro 4/7
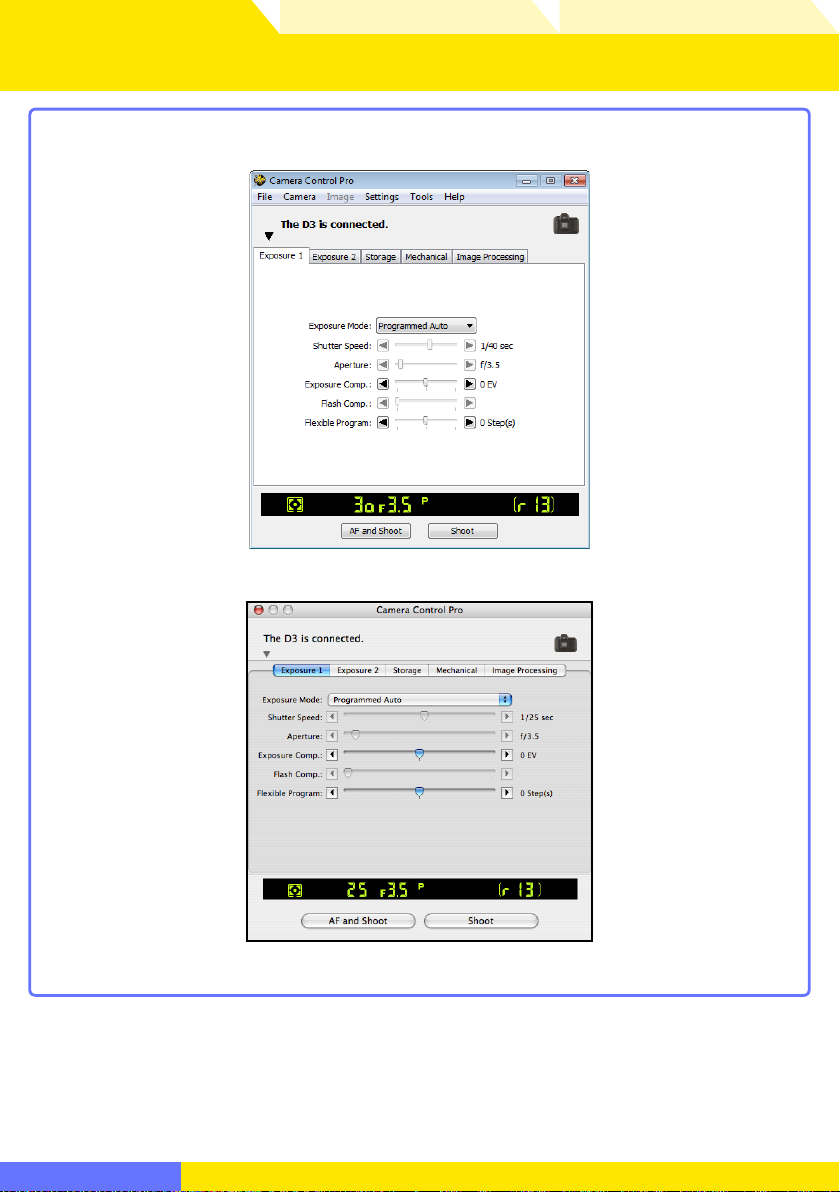
The Camera Control Pro window will be displayed.
4
Windows
Return to fi rst page
Macintosh
Camera Control Pro 2
24
Page 25
Overview
product key
Using Camera Control Pro Appendices
Starting and Exiting Camera Control Pro 5/7
Product Key
If prompted to supply a
Users of the trial version will see a dialog listing the time remaining in the thirty-day trial period; click
Tri al to use the trial version or Buy (if available) to visit a website where you can purchase a product
key (Internet connection required). Be sure not to lose the key, as it may be required when re-installing or upgrading the product.
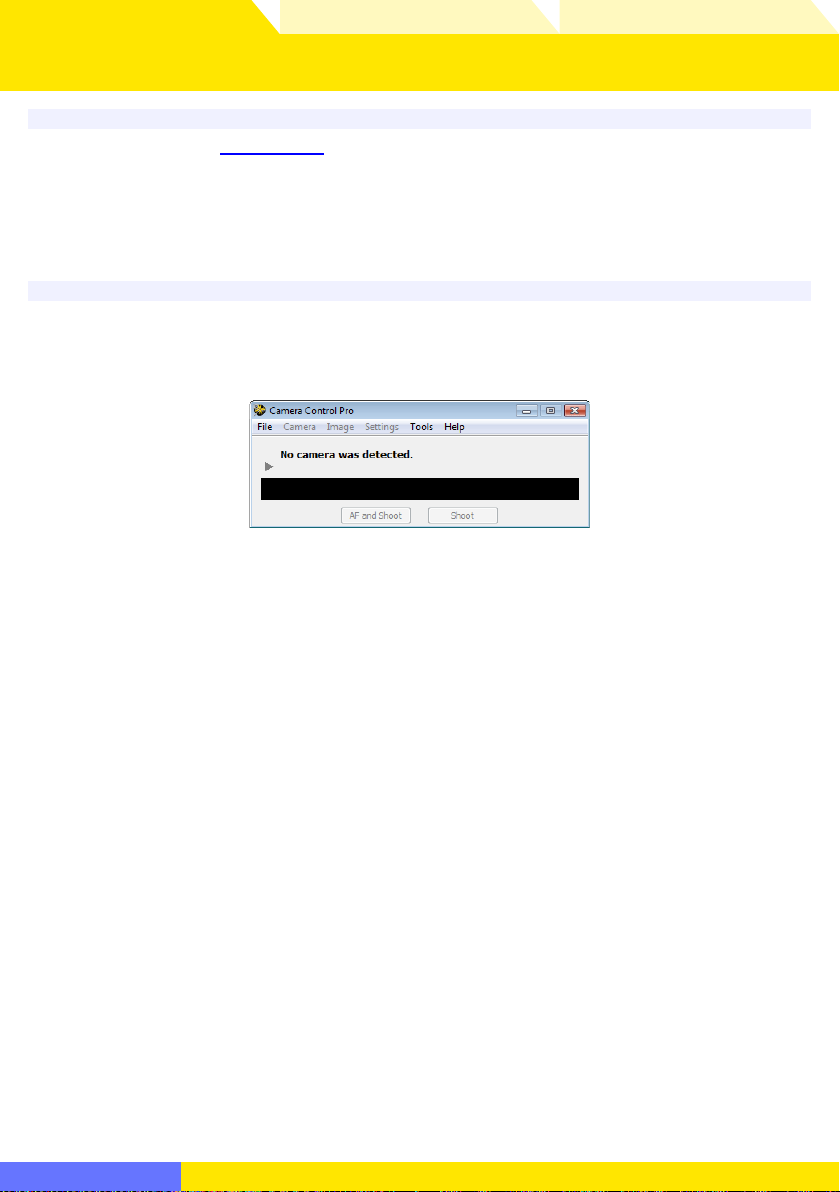
No Camera Connected
Most features of Camera Control Pro are only available when a camera is connected and turned on.
If no camera is detected, the message shown below will be displayed. Connect the camera and
turn it on.
product key, enter the key found on the product packaging and click OK.
Return to fi rst page
Camera Control Pro 2
25
Page 26
Overview
Using Camera Control Pro Appendices
Starting and Exiting Camera Control Pro 6/7
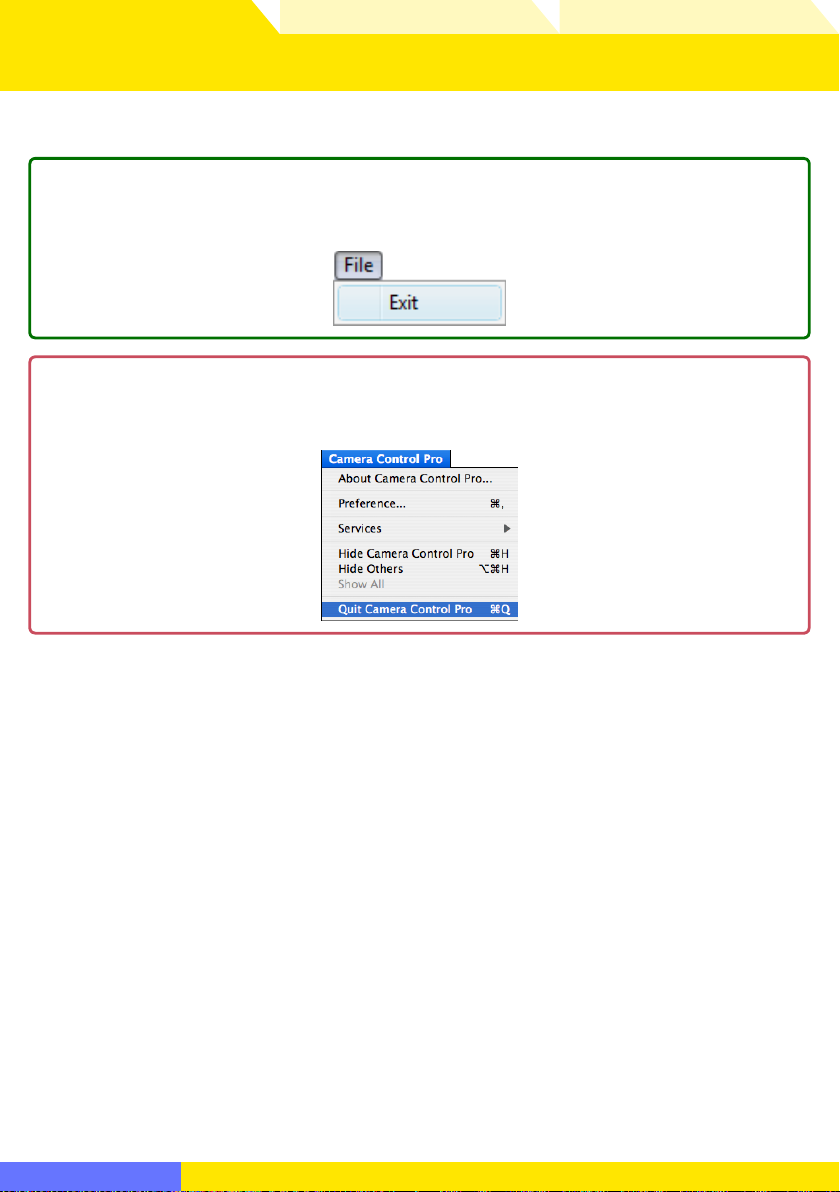
Exiting Camera Control Pro
Windows
Select Exit from the File menu.
Macintosh
Select Quit Camera Control Pro from the application menu.
Return to fi rst page
Camera Control Pro 2
26
Page 27

Overview
Using Camera Control Pro Appendices
Starting and Exiting Camera Control Pro 7/7
Disconnecting the Camera
To disconnect the camera:
• USB (PTP or MTP/PTP)/IEEE 1394 (FireWire): Turn the camera off and disconnect the
interface cable.
• USB (Mass Storage): When using a D100 camera under Windows 2000 with the cam-
era USB option set to Mass Storage, click the “Unplug or Eject Hardware” icon
in the taskbar and select Stop USB Mass Storage Device from the menu that
appears, then turn the camera off and disconnect the interface cable.
Return to fi rst page
Camera Control Pro 2
27
Page 28

Overview
Using Camera Control Pro Appendices
Getting Help
To view help on Camera Control Pro, select Camera Control Pro Help from the
Help menu.
MacintoshWindows
Return to fi rst page
Camera Control Pro 2
28
Page 29

Overview
Using Camera Control Pro Appendices
Software Updates
Camera Control Pro is equipped with an automatic update function known as Nikon
Message Center. Nikon Message Center checks for updates to a variety of Nikon
digital products, including Camera Control Pro. If the computer is connected to the
Internet, Nikon Message Center will automatically check for updates when Camera
Control Pro starts. You can also check for updates by selecting Check for Software
Updates… from the Help menu. If an update is available, an update dialog will be
displayed.
Downloading Updates
An Internet connection is required to download updates. The user bears all applicable fees charged
by the phone company or Internet service provider.
Dial-up Connections
When using a dial-up connection, be aware that the connection is not automatically terminated
when download is complete. Be sure to terminate the connection manually.
Privacy
Information provided by the user as part of this service will not be given to third parties without the
user’s permission.
Return to fi rst page
Camera Control Pro 2
29
Page 30

Overview Appendices
Using Camera Control Pro
Using Camera Control Pro
Screen Layout 31
Capturing Photographs to Disk 33
Viewing Captured Photographs 39
Time Lapse Photography 42
Live View 46
The Camera Control Pro Window 50
Camera Controls 54
Saving and Loading Camera Control Settings 72
The Camera Menu 73
Custom Settings 77
Return to fi rst page
Camera Control Pro 2
30
Page 31

Overview Appendices
Connection status
Camera
controls
Simulated LCD panel
Shoot buttons
Using Camera Control Pro
Screen Layout 1/2
Camera Control Pro screen layout is described below using the D3 as an example.
Windows
Menu bar
Connection status: Shows the status and name of any cameras connected.
/ : View or hide camera controls. Camera controls can also be displayed or
hidden by selecting Show/Hide Camera Control Panels in the Too ls menu.
Camera control tabs: Click to view the associated camera controls.
Camera
Simulated LCD panel: Performs the same function as the in for ma tion display in
controls
the camera viewfi nder.
Shoot buttons: Click these buttons to take pictures.
Return to fi rst page
Camera Control Pro 2
31
Page 32

Overview Appendices
Connection status
Camera
controls
Simulated LCD panel
Shoot buttons
Using Camera Control Pro
Screen Layout 2/2
Macintosh
Menu bar
Connection status: Shows the status and name of any cameras connected.
/ : View or hide camera controls. Camera controls can also be displayed or
hidden by selecting Show/Hide Camera Control Panels in the Too ls menu.
Camera control tabs: Click to view the associated camera controls.
Camera
Simulated LCD panel: Performs the same function as the in for ma tion display in
controls
the camera viewfi nder.
Shoot buttons: Click these buttons to take pictures.
Return to fi rst page
Camera Control Pro 2
32
Page 33

Overview Appendices
Using Camera Control Pro
Capturing Photographs to Disk 1/6
If Camera Control Pro is running when a supported camera connected, pictures
taken with the camera will be stored on your computer hard disk, not the camera
memory card.
Start Camera Control Pro.
1
Select Download Options… in the Tools menu to display download op-
2
tions.
Return to fi rst page
Camera Control Pro 2
33
Page 34

Overview Appendices
Step 3 continues on the next page
Using Camera Control Pro
Capturing Photographs to Disk 2/6
Adjust capture options:
3
Folder for images downloaded from the camera
Select the folder to which photographs will be down load ed as they are taken.
Next fi le name to be used
Shows how images download to the computer will be named. To change
how fi les are named, click Edit.... The dialog shown at below will be dis-
played. Using the sample fi le name as a guide, enter a prefi x and suffi x and
choose the starting number and number of digits for automatic fi le numbering. You can also use the shooting date and time in the fi le name.
Step 3 continues on the next page
File Naming Conventions
Windows: File names may not contain quotes or any of the following characters: “\” “/” “:” “*” “?” “<“ “>”
and “|”. Periods (“.”) may not appear at the beginning or the end of fi le names.
Macintosh: The maximum length for Macintosh fi le names is thirty-one characters. Colons (“:”) are
not allowed.
Extensions: Extensions are assigned automatically. The following extensions are used: “.JPG” (JPEG
images), “.TIF” (TIFF images), “.NEF” (NEF/RAW images), and “.NDF” (Image Dust Off reference data).
Return to fi rst page
Camera Control Pro 2
34
Page 35

Overview Appendices
viewer window
Step 3 continues on the next page
Using Camera Control Pro
Capturing Photographs to Disk 3/6
When a new image is received from camera
Choose the application that will be used to display captured photographs
after they are saved to disk.
• Do nothing: Photographs are not displayed after being saved to the computer hard disk.
• Show it with Viewer: Photographs are displayed in the
• Show it with ViewNX (available only if ViewNX is installed): ViewNX starts automatically and displays the captured images. See ViewNX help for details.
Use the latest version of ViewNX.
• Send it to Capture NX watched folder (available only if Capture NX is installed
and the “Watched folder” is selected): If CaptureNX (available separately) is
running, photographs will be saved in the folder currently selected as the
“Watched folder” (be sure that Capture NX supports the camera; see the
Capture NX manual for details). Capture NX will automatically process the
pictures according to the batch settings in Capture NX.
viewer window.
Return to fi rst page
Camera Control Pro 2
Step 3 continues on the next page
35
Page 36

Overview Appendices
Using Camera Control Pro
Capturing Photographs to Disk 4/6
Attach IPTC Information
Check this option to add IPTC information to captured images and enable
the Copy Shooting Data to IPTC Caption option.
IPTC Information…
Click ing this button displays a dialog where you can se lect the IPTC information, including key words and captions, that will be added to im ag es as they
are cap tured.
Copy Shooting Data to IPTC Caption
Check this option to copy shooting data to the caption fi eld of images as
they are captured.
Embed ICC Profi le
Select this option to embed an ICC profi le according to the camera Color
Space settings. The ICC profi le is embedded in JPEG and TIFF images as they
are captured.
Image Authentication
The Attach IPTC Information and Embed ICC Profi le options do not apply to photographs
taken with Image Authentication on. Image authentication information is not embedded in TIFF
photographs when capturing images using the Camera Control Pro.
* Image Authentication supported from camera fi rmware version 2.00.
Return to fi rst page
D3 D2Xs D300 D2X
Camera Control Pro 2
*
D2Hs
*
D200
*
36
36
Page 37

Overview Appendices
Using Camera Control Pro
Capturing Photographs to Disk 5/6
After adjusting options as described in Step 3, click OK to exit the dialog
4
and apply settings to sub se quent photographs. Note that if On or Automatic (the default setting) is selected for the auto image rotation option in
the camera setup menu, D3, D2-series, D300, D200, D80, D70-series, D50, and
D40-series cameras will detect camera orientation and automatically embed
this information in photographs (note that in continuous mode, the orientation for the fi rst image in each burst applies to all images in the series, even
if camera orientation is changed during shooting). If Off is selected, camera
orientation will not be recorded. To add information on picture orientation
during download, open the Image menu and selecting Rotate all down-
loaded images by 90 degrees CCW to mark pictures as being rotated 90 °
to the right, or Rotate all downloaded images by 90 degrees CW to
mark pictures as being rotated 90 ° to the left.
Image Authentication
The “Rotate all downloaded images…” options do not apply to photographs taken with Image Authentication on. Image authentication information is not embedded in TIFF photographs when capturing images using the Camera Control Pro.
* Image Authentication supported from camera fi rmware version 2.00.
Return to fi rst page
D3 D2Xs D300 D2X
Camera Control Pro 2
*
D2Hs
*
D200
*
37
Page 38

Overview Appendices
Using Camera Control Pro
Capturing Photographs to Disk 6/6
Take pictures using the camera shutter-release button or the AF and Shoot
5
or Shoot but tons in the Camera Control Pro window. The Status dialog
shown below will be displayed.
Close button
Tri an gle
To display a histogram of the current image, click the triangle at the bottom
of the Status dialog.
If the Show highlights over option is checked, any areas of the preview image with a bright ness over the value entered in the neighboring text box will
be indicated by a fl ash ing border. To display histograms (graphs showing
the distribution of pixels of diff erent brightnesses in the image) for the red
(R), green (G), and blue (B) chan nels, put a check in the corresponding box.
Click Close to close the Status dialog.
6
Return to fi rst page
Camera Control Pro 2
38
Page 39

Overview Appendices
When a new image is received from camera
““Download Options” dialog
Using Camera Control Pro
Viewing Captured Photographs 1/3
If Show it with Viewer is selected for
in the
Download Options” dialog, pictures will automatically be displayed in the
When a new image is received from camera
“Viewer” window after capture. The “Viewer” window can also be started by selecting
Show Viewer from the Too ls menu. The most recent image in the folder selected
for Folder for images downloaded from the camera in the “Download Options”
dialog will be displayed.
Title bar
Too l bar
Thumbnail area
Image area
The Title Bar
The title bar contains the following items:
Item Description
The fi le name of the image currently displayed in the image area. If the image
was recorded at an image quality of NEF (RAW)+JPEG, both extensions will be
displayed (e.g., “Img0001.jpg/nef”).
Click to minimize the “Viewer” window.
Click to maximize the “Viewer” window.
Click to close the “Viewer” window.
Return to fi rst page
Camera Control Pro 2
39
Page 40

Overview Appendices
Using Camera Control Pro
Viewing Captured Photographs 2/3
The Toolbar
The toolbar contains the following items:
Item Name Description
Back
Next
Thumbnail slider
Thumbnail View or hide the thumbnail area.
Show focus point
Fit to screen Fit image to viewing area (maximum zoom ratio is 100%).
100 % View image at 100%.
50% View image at 50%.
Delete
Click this button or press the left arrow on the keyboard to
select the next image to the left in the thumbnail area.
Click this button or press the right arrow on the keyboard to
select the next image to the right in the thumbnail area.
Choose the size of the thumbnails displayed in the thumbnail
area.
Display focus point or focus area used when taking picture.
Focus area is displayed in red.
Click this button or press the Delete key on the keyboard
(Macintosh users press command+delete) to delete the current
image.
Show Focus Point
Focus point (focus area) display is only available with photographs taken with Nikon digital SLR
cameras. It will not be displayed in photographs taken with a non-CPU lens, manual focus, or when
focus areas not displayed in the viewfi nder.
Return to fi rst page
Camera Control Pro 2
40
Page 41

Overview Appendices
Folder for images downloaded from
the camera
When a new image is received from camera
Using Camera Control Pro
Viewing Captured Photographs 3/3
The Thumbnail Area
Lists the images in the folder selected for
the camera in the “Download Options” dialog, sorted by date of modifi cation with
the most recent images on the right.
The Image Area
Shows the image currently selected in the thumbnail list. If Show it with Viewer is
selected for
When a new image is received from camera in the “Download Op-
tions” dialog, the most recent picture will automatically be displayed in the image
area after capture.
Folder for images downloaded from
The D3 and D300 Buff er
If Show it with Viewer is selected for When a new image is received from camera in the
“Download Options” dialog, the images in the camera buff er will be displayed on the right of the
thumbnail area before being downloaded to the computer. To preview an image in the image area,
select it in the thumbnail list (no fi le name will appear in the title bar). Images deleted from the buffer will not be downloaded to the computer.
Return to fi rst page
Camera Control Pro 2
41
Page 42

Overview Appendices
Using Camera Control Pro
Time Lapse Photography 1/4
Using Camera Control Pro, you can take a series of photographs automatically at a
time interval you select.
Select Time Lapse Photography… from the Camera menu. The Time
1
Lapse Pho tog ra phy dialog will be displayed.
Return to fi rst page
Camera Control Pro 2
42
Page 43

Overview Appendices
Using Camera Control Pro
Time Lapse Photography 2/4
Before shooting starts, adjust the following settings:
2
Autofocus before each shot
If this option is checked, the camera will perform an autofocus operation before each shot. If the selected focus mode is AF-A (D80, D50, and D40-series
cameras) or single-servo AF, an autofocus operation will be performed even
when the check box is off .
Keep shooting until cancelled
If this option is checked, the camera will continue to take photographs until
you click Stop Shooting in the Time Lapse Photography dialog.
Auto bracketing
D3 D2 series D300 D200 D80 D70 series D50
Select this option to perform exposure, fl ash, or
white balance bracketing during shooting. To
change bracketing options, click Set BKT.... The
dialog shown at right will be displayed.
AE/WB/Flash
Bracketing
Change Factor when
Exposure Mode is set
to Manual
D3 D2 series
D300 D200
Bracketing Type /
Bracketing Step /
Bracketing Order /
Exposure Mode
Choose the type of bracketing performed.
Choose how bracketing is performed in manual exposure mode.
Choose the bracketing program, exposure or white balance increment,
bracketing order, and exposure
mode. Bracketing type and bracketing order are not available with
the D50.
D3/D2 series/D300/D200
D80/D70 series/D50
Return to fi rst page
Camera Control Pro 2
43
Page 44

Overview Appendices
When a new
image is received from camera
“Dow
nload Op-
tions” dia
log
for 15 minutes
Using Camera Control Pro
Time Lapse Photography 3/4
Use the Shots box to choose a number of shots from 2 to 9,999. This option
3
is not available when Keep shooting until cancelled is selected.
The delay between shots can be set to any value between 00:00:01 (one
4
second) and 99:59:59 (ninety-nine hours, fi fty-nine minutes, and fi fty-nine
seconds).
Click Start. If Send it to Capture NX watched folder is selected for
5
When a new
tions” dia
in Capture NX (available separately; see the Capture NX manual for details).
Capture NX will automatically process the pictures according to the batch
settings in Capture NX.
image is received from camera in the
log, photographs will be saved to the “watched” folder selected
“Dow
nload Op-
Time Interval Settings
If the delay is shorter than the time required to record each photograph, the actual interval be tween
photographs will be longer than that specifi ed in the “Time Lapse Photography” dialog.
Auto Off
When the camera is operated on battery power and
Camera Control Pro is running, keep camera awake” in the General tab of the Preferences dialog,
choose a delay of fi fteen minutes or less. When taking photographs at longer intervals, use an AC
adapter (available separately) to power the camera.
During Time-Lapse Photography
No operations can be performed in the “Camera Control Pro” window until the “Time Lapse Photography” dialog is closed.
Return to fi rst page
D1 series
for 15 minutes has been selected for “While
Camera Control Pro 2
44
Page 45

Overview Appendices
Using Camera Control Pro
Time Lapse Photography 4/4
Follow the progress of time lapse photography in the progress dialog.
6
Click Stop Shooting to end time lapse photography at any time. If a number of shots was specifi ed in the “Time Lapse Photography” dialog, shooting
will end when the specifi ed number of shots has been taken.
Once the spec i fi ed number of shots has been taken, the Stop Shooting
7
button will change to Shooting Complete. Click Shoot ing Com plete to
exit the “Time Lapse Pho tog ra phy” di a log.
Error Logs
If an error occurs during shooting, an error log will be displayed; click OK to close the log and return
to the Camera Control Pro window.
The Time Lapse Photography Dialog
If you make a mistake in entering settings in the “Time Lapse Photography” dialog, a warning will be
displayed. Return to the “Time Lapse Photography” dialog and adjust settings as directed.
Hard Disk Full
A warning will appear when space is no longer available on the destination disk for photographs
taken using time lapse photography. Use the information in the warning to reduce the number of
photographs or change the destination drive.
Return to fi rst page
Camera Control Pro 2
45
Page 46

Overview Appendices
Using Camera Control Pro
Live View 1/4
When a camera that supports live view is connected, Live View (Hand-Held) and
Live View (Tripod) options are available in the Camera menu. Selecting either
of these options opens the “Live View” window. Camera controls can not be used
while the “Live View” window is displayed; the “Live View” window will close automatically if the camera is disconnected.
Live View (Hand-Held)
The following window is displayed when Live View (Hand-held) is selected in the
Camera menu.
Image area
Return to fi rst page
Camera Control Pro 2
Focus point
Navigation area
46
Page 47

Overview Appendices
Using Camera Control Pro
Live View 2/4
The image area shows the view through the camera lens, updated in real time, with
the current focus point superimposed. The other controls in the “Live View (Handheld)” window are described below:
Item Description
Start/Stop
Live View
Focus Point Click the arrows to move the focus point.
Count Down
Start AF Focus the camera using normal (phase-detection) AF.
Shoot Take a picture.
Exit Close the “Live View (Hand-held)” window.
Magnifi cation
Ratio
Click to start or stop live view.
To prevent damage to the its internal circuits, the camera will automatically end
live view if the temperature inside the camera becomes too high. The count-down
timer shows the time remaining until live view ends.
Zoom the view in the image area in or out. The navigation area shows the portion
of the image currently displayed in the image area.
Return to fi rst page
Camera Control Pro 2
47
Page 48

Overview Appendices
Using Camera Control Pro
Live View 3/4
Live View (Tripod)
The following window is displayed when Live View (Tripod) is selected in the
Camera menu.
Image area
Focus point for contrastdetect AF
Return to fi rst page
Camera Control Pro 2
Navigation area
48
Page 49

Overview Appendices
Using Camera Control Pro
Live View 4/4
The image area shows the view through the camera lens, updated in real time, with
the focus point for contrast-detect AF superimposed. Click anywhere in the image
area to move the focus point to that spot. The other controls in the “Live View (Tripod)” window are described below:
Item Description
Start/Stop
Live View
Count Down
Magnifi cation
Ratio
Adjust Focus
Start/Stop AF
Shoot Take a picture.
Exit Close the “Live View (Tripod)” window.
Click to start or stop live view.
To prevent damage to the its internal circuits, the camera will automatically end
live view if the temperature inside the camera becomes too high. The count-down
timer shows the time remaining until live view ends.
Zoom the view in the image area in or out. The navigation area shows the portion
of the image currently displayed in the image area.
Click these buttons to adjust focus by the amount selected with the Focus Step
slider. Click + to move the focal point away from the camera, – to bring it toward
the camera.
Click Start AF to initiate contrast-detect autofocus. The button will change to Stop
AF; click again to end autofocus. The Adjust Focus buttons and Focus Step slider
are not available while autofocus is in progress.
Return to fi rst page
Camera Control Pro 2
49
Page 50

Overview Appendices
Camera Controls
Using Camera Control Pro
The Camera Control Pro Window 1/4
The Camera Control Pro window shows current camera settings, which may be
viewed by clicking the fi ve page selection tabs. Camera settings can be altered
using the controls in each tab as in “
window are described below.
Connection Status
This area shows the following information about the camera currently connected:
• Camera name
• Camera orientation
D40 series
: If On or Automatic is selected for the auto image rotation option in the
D3
camera setup menu, camera orientation will be indicated by an icon as shown
below. No icon will be displayed if Off is selected.
D2 series D300
Camera Controls.” The other settings in this
Connection status
D200
D80 D70 series D50
Return to fi rst page
Horizontal Rotated 9 0 ° c ounterclo ckwiseRotated 9 0 ° c lockwis e
Camera Control Pro 2
50
Page 51

Overview Appendices
Using Camera Control Pro
The Camera Control Pro Window 2/4
The
Click this button to view or hide camera controls.
/
Button
Simulated LCD Panel
This panel shows the information displayed in the camera’s viewfi nder, with the ex cep tion of camera errors. Clicking on an indicator in the panel opens the Camera
Control Pro window to the tab that controls the selected option, where ad just ments
can be made.
The amount of memory remaining in the camera memory buff er is displayed at the
right edge of the simulated LCD panel (this information is not displayed when a D1series or D100 camera is connected). This information is updated at regular intervals,
but temporary discrepancies may exist between the display and the actual amount
of memory remaining in the buff er.
Return to fi rst page
Camera Control Pro 2
51
Page 52

Overview Appendices
Using Camera Control Pro
The Camera Control Pro Window 3/4
Shoot Buttons
Click either of these buttons to take a photograph at current settings. If a D3, D2-series, D300, D200, D80, D70-series, D50, or D40-series camera is connected, photos can
be taken in continuous shooting mode; in this case, the AF and Shoot and Shoot
buttons will instead be labeled AF and Start and Start. Continuous shooting with
D1-series and D100 cameras can only be performed with shutter-release button on
the camera body; the shooting buttons in the “Camera Control Pro” dialog can only
be used to take pictures one at a time.
AF and Shoot /
AF and Start
Shoot / Start
The Function Dial
The D100 can only be used to take photographs when the func tion dial is set to P, S, A, or M . At other
settings, the shoot buttons in the “Camera Control Pro” dialog will be disabled and the simulated
LCD panel will not be displayed.
When this button is clicked, the camera will perform an autofocus operation
and then re lease the shut ter to take a pho to graph.
Click this button to take a photograph. If the selected focus mode is AF-A (D80,
D50, and D40 series cameras) or single-servo AF, an autofocus operation will be
performed before the shut ter is released.
D100
Return to fi rst page
Camera Control Pro 2
52
Page 53

Overview Appendices
Enable
controls
on camera body
Using Camera Control Pro
The Camera Control Pro Window 4/4
Camera Settings That Can Not Be Adjusted from Camera Control Pro
The following operations can only be performed using the controls on the camera body:
Operation Camera
Burst photography (continuous shooting mode)
Continuous servo autofocus All supported models
Pressing the shutter-release button halfway to
check focus
Autofocus-only operation
Status not displayed
(use AF and Shoot to perform autofocus)
Manual aperture adjustment using the lens aper-
ture ring
Reactivating the camera after it has entered sleep
mode
Depth-of-fi eld preview All supported models
Auto bracketing
Compression options for NEF (RAW) images
Operation assigned to FUNC./Fn button
Remote (D80, D70 series, D50, and D40 series only)
and self-timer mode selection
Focus mode selection using camera focus-mode
selector
Metering
Exposure mode (can be adjusted if
controls
Status displayed
D80, D70 series, D50, or D40 series is connected)
on camera body is not selected when
Enable
Shooting mode
Shutter-speed lock
Aperture lock
Autoexposure lock All supported models
Flash compensation
M-up (mirror up) mode selection
Selection of second center focus area group (group
dynamic-AF)
D80 D50D70 series D40 series
D1 series D100
All supported models
All supported models
D3 D2 series D1 series
D300
D1 series D100
D3 D300D2 series D200
D3 D300D2 series D200
D200
D1 series
D100
All supported models
D1 series D100
D100 D80 D70 series
D50
D40 series
D100
D3 D2 series D1 series
D3 D2 series D1 series
D3 D1 seriesD2 series D300
D3 D300D2 series D200
D2 series D200
Return to fi rst page
Camera Control Pro 2
53
Page 54

Overview Appendices
Enable controls on the
camera body
Using Camera Control Pro
Camera Controls 1/18
Camera controls are described below using the D3 as an example:
The Exposure 1 Tab
The fol low ing settings can be adjusted from the Exposure 1 tab:
Choose an exposure mode. If a D100 is connected, or if
Exposure
Mode
Shutter
Speed
Aperture
camera body is checked when a D80, D70-series, D50, or D40-series camera is con-
nected, it will show the current exposure mode but the mode itself must be selected using the camera function dial. See the camera manual for details.
Shutter speed can only be adjusted in Man u al and Speed Priority modes, when it
can be set to values between the max i mum and min i mum val ues supported by the
camera. Use high shut ter speeds to freeze mo tion, low shut ter speeds to suggest
mo tion by blur ring moving objects.
Aperture can only be adjusted in Manual and Aperture Pri or i ty modes, when it
can be set to values between maximum and min i mum ap er ture (small apertures
have high f-num bers, wide ap er tures low f-numbers; the ac tu al ap er tures available
depend on the lens used). Ap er ture can not be controlled from Camera Control Pro
when Custom Setting 22 has been set to allow aperture to be ad just ed manually
using the lens aperture ring (D1-series only).
Return to fi rst page
Camera Control Pro 2
Enable controls on the
54
Page 55

Overview Appendices
Using Camera Control Pro
Camera Controls 2/18
The Exposure 1 Tab
Exposure compensation is useful when shooting subjects contain-
Exposure
Comp.
Flash Comp.
D300
D80
Flexible
Program
D100D200
D50D70 series
D40 series
ing sharp lighting con trasts, or on other occasions when you want
to modify the exposure value determined by the cam era. Exposure compensation is available in all exposure modes.
This option is used to adjust the level of the camera’s built-in
Speedlight.
Flexible program can only be used in Program Mode, when it allows you to choose from pre de ter mined combinations of shutter
speed and aperture appropriate to current lighting conditions.
The Function Dial
The D100 can only be used to take photographs when the function dial is set to P, S, A, or M. At
other settings, the controls in the Exposure 1 tab will be disabled.
Bulb
At a shutter speed of Bulb, the shutter remains open while the shutter release button is held down.
Use the camera shut ter-release button to take photos at this setting. Clicking either of the shoot
buttons will display an error message.
Return to fi rst page
D100
Camera Control Pro 2
55
Page 56

Overview Appendices
“The Mechanical Tab.”
Using Camera Control Pro
Camera Controls 3/18
The Exposure 2 Tab
The following settings can be adjusted from the Exposure 2 tab.
Focus Point
Focus Area
Metering
Mode
Flash Sync
Mode
The focus point and focus area can be selected using the arrow buttons; see the
camera manual for details. For information on AF-area mode and focus mode, see
“The Mechanical Tab.”
The metering mode can be selected from this menu (D3, D2 series, D300, D200,
D80, D70 series, D50, and D40 series only). Metering mode defaults to the option
selected with the camera. If a D1-series or D100 camera is connected, the current
metering mode will be shown, but changes can only be made using camera controls. See the camera manual for details.
This option controls the camera fl ash sync mode. See the camera manual for details.
Return to fi rst page
Camera Control Pro 2
56
Page 57

Overview Appendices
Using Camera Control Pro
Camera Controls 4/18
The Exposure 2 Tab
ISO sensitivity can be raised when taking photographs in low light
ISO Sensitivity
Auto
ISO Sensitivity Auto Control
D3
D200
D70 series D40 series
D50
D300D2 series
D80D100
White Balance
Fine Tune…
D3
D300
D80 D40 series
D70 series
D1 seriesD2 series
D100D200
conditions. See the user’s manual provided with your camera for
details.
When this option is checked, the camera will adjust ISO sensitivity
au to mat i cal ly. If this option is selected when a D3 or D300 camera is connected, the maximum sensitivity and minimum shutter
speed can be set by clicking the Details… button.
White balance is used to ensure that colors which appear white
when viewed directly are white in the fi nal photograph. It can also
be used to produce an intentionally unbalanced rendering of a
scene. If Fluorescent is selected when a D3 or D300 is connected,
a menu of bulb types will be displayed. If Choose color temp. is
selected when a D3, D2-series, D300, or D200 camera is connected,
a menu of color temperatures will be displayed. See the camera
manual for details.
Click Fine Tune… to make fi n e adjust ments to white balance. Fine
tuning is not available with Choose color temp. (D2 series and
D200 only) or preset white balance. If a D3 or D300 is connected,
white balance can be fi ne-tuned on the Green-Magenta and Blue-
Amber axes as described in the camera manual; to restore default
settings, click Reset.
Return to fi rst page
D2 series/D1 series/D200/
D100/D80/D70 series/
D40 series
Camera Control Pro 2
D3/D300
57
Page 58

Overview Appendices
Using Camera Control Pro
Camera Controls 5/18
The Exposure 2 Tab
This fi eld lists the comments for
all white balance presets. Clicking
Edit… when Preset is selected
for white balance displays the
dialog shown at right, where the
comments for each of the white balance presets can be edited.
Click OK to copy the comments to the camera. Comments can
be up to thirty-six characters long and contain letters, numbers,
quotes, apostrophes, spaces, and any of the following characters:
“,” “.” “!” “?” “#” “$” “%” “&” “(” “)” “[” “]” “{” “}” “*” “+” “-” “/” “:” “;” “<” “=”
“>” “_” and “@”.
Comment
D3 D2 series
D300
D200
Return to fi rst page
Camera Control Pro 2
58
Page 59

Overview Appendices
Using Camera Control Pro
Camera Controls 6/18
The Storage Tab
The following settings can be adjusted from the Stor age tab:
Data Format
D1 series
Color
Image area
D3
Return to fi rst page
Choose from the fi le types supported by the camera (see the camera manual for details). This set ting determines pix el bit depth and
fi le size. If an option that includes JPEG is selected, the compression ratio can be selected from the JPEG quality menu and other
compression options (D3, D2 series, D300, and D200 only) from the
JPEG compression menu. Note that JPEG quality is fi xed at
Basic when RAW (12-bit) + JPEG (8-bit) is selected with D70-
series, D50, and D40-series cameras.
Choose from Color and Black & White. Black & White is not
available when RAW is selected for Data Format.
If Auto DX crop is selected, the camera will select DX format automatically when a DX lens is attached. If this option is not selected,
the format can be selected from the menu.
Camera Control Pro 2
59
Page 60

Overview Appendices
Using Camera Control Pro
Camera Controls 7/18
The Storage Tab
Image Size Choose image size. See the camera manual for details.
NEF RAW Compression
NEF (RAW) recording
D3 D1XD2 series
D1H
High-speed crop
D200D300
D3 D2 series
Choose bit depth (D3 and D300 only) and compression settings for NEF (RAW) images. These options are only available
when an option that includes NEF (RAW) is selected Data
Format.
Select this option to enable high-speed crop. See the camera
manual for details.
Return to fi rst page
Camera Control Pro 2
60
Page 61

Overview Appendices
Enable controls on the camera body
Enable controls on the camera body
Using Camera Control Pro
Camera Controls 8/18
The Mechanical Tab
The fol low ing settings can be ad just ed from the Me chan i cal tab:
Sets the shooting mode for D1-series cameras connected in PC mode to Single
or Continuous. Changes to this setting also apply to Custom Setting 30. The
shooting mode for D80, D70-series, D50, or D40 series cameras can be selected
from Single and Continuous. Unless
checked in the connection status area, the shooting mode for D3, D2-series, D300,
and D200 cameras can be selected from Single, Continuous low speed, and
Release Mode
Shoot ing Mode
Continuous high speed. If Continuous is selected for D80, D70-series, D50, or
D40 series cameras or if Continuous low speed or Continuous high speed is
selected for D3, D2-series, D300, or D200 cameras, the AF and Shoot and Shoot
buttons will instead be labeled AF and Start and Start and the maximum number of shots that can be taken in a single burst can be entered in the Shots text
box (see below). If
camera is connected, the current shooting mode will be shown, but changes can
only be made using camera controls. See the camera manual for details.
Return to fi rst page
Enable controls on the camera body is
Enable controls on the camera body is checked or a D100
Camera Control Pro 2
61
Page 62

Overview Appendices
Time Lapse Photography
Enable controls on the camera body
Using Camera Control Pro
Camera Controls 9/18
The Mechanical Tab
Use the arrows to choose the maximum number of shots that can be taken
Shots
D3 D2 series
D300 D200
D80 D70 series
D50 D40 series
Auto Bracketing
D3 D2 series
D300 D200
D80 D70 series
D50
in a single burst in continuous mode, or enter a value directly in the text
box. The maximum permitted value varies with the current image-quality setting; the value chosen should not, however, exceed the capacity of
the camera memory buff er as shown at the right edge of the LCD display.
Values larger than the capacity of the camera memory buff er will be shown
in red. This setting only applies when the camera is connected, and diff ers
from the maximum selected in the Custom Settings menu.
Select this option to perform exposure, fl ash, or white balance bracketing
during shooting. See “
Time Lapse Photography” for details.
AF-Area Mode
Fo cus Mode
Choose the AF-area mode. If
checked (D3, D2 series, D300, and D200 only), the current AF-area mode will
be shown, but changes can only be made using camera controls. See the
camera manual for details.
Choose the focus mode for D80, D50, or D40-series cameras (see the camera
manual for details). The focus mode for other cameras is displayed but can
not be changed from Camera Control Pro.
Enable controls on the camera body is
Return to fi rst page
Camera Control Pro 2
62
Page 63

Overview Appendices
Using Camera Control Pro
Camera Controls 10 /18
The Mechanical Tab
Displays the focal length and maximum ap er ture of the lens currently attached to the cam era. De pend ing on the lens type, some in for ma tion may
Lens
Edit…
D3 D2 series
D300
Main Battery Level
Clock Battery Level
D200
D1 series
not be displayed. If the lens focal length or maximum aperture have been
specifi ed manually, an asterisk will appear next to these values. If a D3 or
D300 is connected with a non-CPU lens attached, lens data can be selected.
This button is only available when a nonCPU lens is mounted on the camera. Clicking Edit… displays the dialog shown at right,
where the lens focal length and maximum
aperture can be entered. Click OK to copy
the values to the camera.
Displays the level of the main camera battery. Green indicates that the battery has enough charge for continued operation. Yellow indicates that battery level is low; ready a fully charged spare battery pack. Red indicates that
the battery is exhausted, and that no further pho to graphs can be taken until
the battery pack has been replaced. You may not be able to control the
camera from Camera Control Pro when the battery is exhausted. Replace
with a fully charged spare battery pack or use an AC adapter (available separately).
Displays the level of the camera clock battery. Should this display turn yellow or red, have the clock battery replaced by an authorized Nikon service
representative (a fee is charged for this service).
Self-Timer and Remote Modes
When a D3, D2-series, D300, D200, D100, D80, D70-series, D50, or D40-series camera is set to selftimer mode, or when a D80, D70-series, D50, or D40-series camera is set to delayed remote or quickresponse remote mode, the Mechanical tab will show a shooting mode of Single, and any photographs taken with the Camera Control Pro shoot but tons will be taken in single-frame mode with no
shutter-release delay. To take pictures in self-timer or remote mode, use the shutter-release button
on the camera or remote control.
Live View
When the camera release mode dial is set to Lv, the Mechanical tab will show a shooting mode of
Single, and any photographs taken with the Camera Control Pro shoot buttons will be taken in
single-frame mode. To take pictures in live view mode, use the live view options in the Camera
menu.
Return to fi rst page
D3 D300
Camera Control Pro 2
63
Page 64

Overview Appendices
Enable
controls on the
camera body
Using Camera Control Pro
Camera Controls 11 / 18
Continuous Mode (All Models Except
The amount of memory remaining in the camera memory buff er is displayed at the right edge of
the simulated LCD panel. This information is updated at regular intervals, but temporary discrepancies may exist between the display and the actual amount of memory remaining in the buff er.
Non-CPU Lenses
The following restrictions apply to Camera Control Pro when a non-CPU lens is mounted on the
camera (the operations listed can still be performed using the controls on the camera body; see the
camera manual for details):
D3 D2 series
D300
With lens data No data
Exposure
Mode
Shutter Speed Can only be adjusted in manual exposure mode.
Aperture Shown with asterisk. Aperture shown as “f/--”. Can not be adjusted.
AF and Shoot Can not be used.
Shoot Can be used. Can be used.*
* Warning will be displayed in exposure modes other than M.
Can be selected from Aperture-prior-
ity auto and Manual.
D200
D1 series D100
D1 series D100 D50
)
Can not be adjusted. Mode selected with camera
displayed. Photos
can only be taken
in mode M.
D80 D70 series
D40 series
Can only be adjusted if
controls on the
camera body is not
checked. O therwise
same as D100.
Enable
Return to fi rst page
Camera Control Pro 2
64
Page 65

Overview Appendices
modify the selected Picture Control
Select, rename, or delete custom Picture Controls
Using Camera Control Pro
Camera Controls 12 /18
The Image Processing Tab (D3/D300)
The following settings can be adjusted from the Image Pro cess ing tab:
Picture Control
Manage Picture Control
Color space Choose a color space. See the camera manual for details.
Active D-lighting Choose active D-lighting options. See the camera manual for details.
Long exposure Noise
Reduction
High ISO NR
Nikon Picture Controls
Picture Controls provided by Nikon are known as “Nikon Picture Controls.” They include the Picture
Controls provided with the camera and optional Picture Controls available for download from Nikon
websites. See the camera manual for details.
Return to fi rst page
Choose a Picture Control (see the camera manual for details), or click
Edit… to
Select, rename, or delete custom Picture Controls.
Select this option to reduce noise at slow shutter speeds. See the camera
manual for details.
Choose a noise reduction option for high ISO sensitivities. See the camera
manual for details.
modify the selected Picture Control.
Camera Control Pro 2
65
Page 66

Overview Appendices
manually e
dit the tone
curve
acti
ve D-lig
hting
Using Camera Control Pro
Camera Controls 13 /18
Editing Picture Controls
Clicking Edit… in the Image Processing tab displays options for the selected Picture
Control (monochrome controls are shown at right, other controls at left).
Quick adjust
(Non-monochrome only)
Manual
(Non-monochrome only)
Sharpening
User Custom Curve
Contrast/Brightness/Saturation
Hue (Non-monochrome only) Use the slider to adjust hue.
Filter e ff ects (monochrome only) Choose a fi lter eff ect. See the camera manual for details.
Ton ing (monochrome only)
Return to fi rst page
Select this option and drag the slider to the left or right to reduce or exaggerate the eff ect of the selected Picture Control.
Select this option to make separate adjustments to the settings
listed below.
Select the Auto checkbox to adjust sharpening automatically, or
choose a value with the slider.
Select this option and click Edit… to
curve for the selected Picture Control. Note that changes can
only be saved using Save as a new Custom Picture Control.
Select the radio button and adjust the sliders (saturation is not
available with monochrome controls). Select the Auto checkboxes for automatic contrast or saturation. Contrast and brightness can not be adjusted when
Choose a monochrome tint. Tint can be adjusted with the slider.
acti
manually e
ve D-lig
hting is on.
Camera Control Pro 2
dit the tone
66
Page 67

Overview Appendices
Using Camera Control Pro
Camera Controls 14 /18
Editing Picture Controls
Click this button to save settings as a new custom Picture Control. The following
dialog will be displayed; name the new control and click Save.
Save as a new
Custom Picture
Control
OK Save changes and exit.
Reset
Cancel Exit without saving changes.
Undo any changes to the selected Picture Control. Custom Picture Controls are
reset to the values in eff ect when the Picture Control was fi rst created.
Return to fi rst page
Camera Control Pro 2
67
Page 68

Overview Appendices
Using Camera Control Pro
Camera Controls 15 /18
The “Custom Picture Control” Dialog
Clicking Manage Picture Control… in the Image Processing tab displays the dialog shown below.
Custom Picture Control Select a custom Picture Control.
Rename the selected custom Picture Control. The following dialog will be
displayed; rename the control and click OK.
Rename…
Delete… Delete the selected custom Picture Control.
Close Close the “Custom Picture Control” dialog.
Return to fi rst page
Camera Control Pro 2
68
Page 69

Overview Appendices
Using Camera Control Pro
Camera Controls 16 /18
The “Edit Camera Curves” Dialog
Clicking Edit… when User Custom Curve is selected in the Picture Control settings dialog displays the dialog shown below.
The controls in the Edit Camera Curves win dow are similar to those used to edit tone
curves in Adobe Photoshop and other imaging software, except in the following
respects: (1) only the master channel, not individual RGB channels, may be edited; (2)
there is a limit of 20 spline points; (3) the midpoint may not be edited; and (4) a userdefi ned sample image can be se lect ed by clicking Sample Image… (the sample
image must be an NEF (RAW) image created with a supported Nikon digital camera).
Any chang es to curves are refl ected in the sample image. To copy the edited curve
to the Picture Control, click OK.
The upper left section of the Edit Camera Curves window contains Load… and
Save… but tons. Click Load… to load previously stored curves created with Camera
Control Pro, Nikon Capture (available separately), or Capture NX (available separately;
settings must include “Levels and Tone Curves” data). Look for fi les with the “.ntc”,
“.ncv”, or “.set” ex ten sion.
The Save… button opens the “Save As” dialog, where you can save the current
curve.
Return to fi rst page
Camera Control Pro 2
69
Page 70

Overview Appendices
“Edit
Camera Curves
“ dialog
Using Camera Control Pro
Camera Controls 17/ 18
The Image Processing Tab (Other Cameras)
The following settings can be adjusted from the Image Pro cess ing tab:
Image Optimize
D200 D80 D70 series
D50
Sharpening
Tone Co mp
Filter Eff ects
Color space
D2X D200D2Xs
D80
Return to fi rst page
D40 series
Choose the type of image optimization performed. See the cam era man u al for details.
Choose how much the camera sharp ens outlines. See the camera
manual for details.
Adjust contrast. See the cam era man u al for details. Selecting
“Custom“ or “Custom 1–3 “ (D2Xs only) and clicking Edit will display
“Edit
Camera Curves
Choose a fi lter eff ect for black-and-white photographs. This option is only available when Black-and-white (Custom) is select-
ed for Image Optimize.
Choose a color space. See the cam era man u al for details.
Camera Control Pro 2
“ dialog.
70
Page 71

Overview Appendices
Using Camera Control Pro
Camera Controls 18 /18
The Image Processing Tab
Color Mode
D2 series
D200
D70 series D40 series
D50
D1HD1X
D80D100
Saturation
D200 D80 D70 series
D50
D40 series
Hue Adjustment
D2 series
D200
D70 series D40 series
D50
D1HD1X
D80D100
Long Exposure Noise Reduction
D2 series D100D200
D80
D50D70 series
High ISO Noise Reduction
D2X D2Xs D2Hs
D200
Noise reduction
D80
D40 series
Choose a col or mode. See the camera manual for de tails. With
the D1, colors are op ti mized for the NTSC col or space, regardless
of the op tion chosen.
Adjust color saturation. See the camera manual for details.
Modify hue while leaving brightness and chro ma un aff ect ed.
Adjustments can be made in the range –9 ° to 9 °, with 0 ° rep re sent ing the original hues as recorded by the camera (in D1-series
cam er as, –9 ° is equiv a lent to a camera hue setting of 0, 0 ° to a
setting of 3, and 9 ° to a setting of 6).
Select this option to reduce noise at slow shutter speeds. See the
camera manual for details.
Choose a noise reduction option for high ISO sensitivities. See the
camera manual for details.
Select this option to reduce noise at slow shutter speeds and high
ISO sensitivities. See the camera manual for details.
Return to fi rst page
Camera Control Pro 2
71
Page 72

Overview Appendices
Using Camera Control Pro
Saving and Loading Camera Control Settings
The Camera Control Pro option in the Set tings menu is used to save Camera Control Pro set tings and to load and apply previously saved settings.
Select this item to load camera settings previously saved us ing Save Control Set-
tings… (see be low). A dialog will be dis played where you can navigate to the drive
Load Control
Settings…
Save Control
Settings…
(vol ume) and di rec to ry con tain ing the desired set tings fi le (only fi les with the extension “.ncc” will be dis played; choose settings created with the camera currently connected). The settings in the Cam era Con trol Pro window will in stant ly re vert to the
saved settings. Bracketing settings are not aff ected.
Select this item to save the settings in the Camera Control Pro window to a named
fi le. These settings can later be recalled using Load Control Settings…. Choos ing
Save Control Settings… displays a di a log where you can choose a des ti na tion and
fi le name for current camera settings. Camera Control Pro set tings are saved with the
ex ten sion “.ncc”. Note that bracketing settings, non-CPU lens settings, and changes
to settings for the current Picture Control are not saved.
Return to fi rst page
Camera Control Pro 2
72
Page 73

Overview Appendices
Custom Settings dialog
Using Camera Control Pro
The Camera Menu 1/4
The Camera menu contains the following options:
Custom Settings…
Selecting this option opens the
ad just ed.
Set Date and Time…
Selecting this op tion opens the dialog shown at right, where you
can set the cam era’s clock calendar to the current date and time.
To view the cur rent time and date set tings, click Use Current
Date/Time. Click Set to set the clock cal en dar to the time and
date shown.
Custom Settings dialog, where camera Custom Set tings can be
Return to fi rst page
Camera Control Pro 2
73
Page 74

Overview Appendices
Using Camera Control Pro
The Camera Menu 2/4
Edit Camera Curves… (all cameras except
This op tion is used to create a custom tone com pen sa tion curve and down load it to the cam era,
where it applies when “Cus tom” is se lect ed for the camera tone compensation option.
The controls in the Edit Camera Curves win dow are similar to those used to edit tone curves
in Adobe Photoshop and other imaging software, except in the following respects: (1) only the
master channel, not individual RGB channels, may be edited; (2) there is a limit of 20 spline points;
(3) the midpoint may not be edited; (4) a user-defi ned sample image can be se lect ed by clicking
Sample Image… (the sample image must be a RAW image created with a supported camera).
Any chang es to curves are refl ected in the sample image. In the case of the D2Xs, up to three
curves can be edited using the Select the Curve for Edit menu. To copy the edited curve to
the camera, click OK.
D3 D300
)
The upper left section of the Edit Camera Curves window contains Load… and Save… but tons.
Click Load… to load previously stored curves created with Camera Control Pro, Nikon Capture
(available separately), or Capture NX (available separately; settings must include “Levels and Tone
Curves” data). Look for fi les with the “.ntc”, “.ncv”, or “.set” ex ten sion.
The Save… button opens the “Save As” dialog, where you can save the current curve.
Return to fi rst page
Camera Control Pro 2
74
Page 75

Overview Appendices
Using Camera Control Pro
The Camera Menu 3/4
Measure White Balance…
Use this op tion to measure preset white balance. If the cam era
cur rent ly con nect ed sup ports multiple values for preset white
bal ance, the set ting that will be used to store the mea sured
val ue can be cho sen from the pop-up menu at the top of the
dialog. Adjust camera set tings as de scribed in the sec tion on
preset white balance in the camera user’s man u al and click OK
to measure a value for white bal ance.
Dust Off Ref Photo
Choose this option to take a reference photo for the Image Dust
Off option in Capture NX (available separately) and other Nikon
software. The dialog shown at right will be displayed. With the
camera lens ten centimeters (four inches) from a featureless
white object, frame the object so that it fi lls the viewfi nder and
click OK to record an Image Dust Off reference photo. See the
camera manual for details.
Edit Image Comment…
Selecting this option displays the dialog shown at right, where
you can enter a com ment or title for subsequent pho to graphs.
If the camera cur rent ly con nect ed is in the D1-se ries, enter a title
of thir ty-eight char ac ters or less and click OK. The title will be
used for all sub se quent pho to graphs taken while the camera is
con nect ed. When any other cam era is con nect ed, the title is
stored in the cam era as an im age com ment of thirty-six char ac ters or less which is ap pend ed to pho to graphs only when the
Attach comment to images box is checked.
D3 D300D2 series D200
D50D80 D40 seriesD70 series
D2Xs (dialogs for other cameras may
diff er)
D2Xs (dialogs for other cameras may
diff er)
Choosing a Mode
The Measure White Balance… option is only available in P, S, A, and M modes.
Return to fi rst page
D100 D70 series D40 seriesD50D80
Camera Control Pro 2
75
Page 76

Overview Appendices
Time Lapse Photography
“Live View (Hand-held)”
dialog
ime Lapse Photography” dialog
“Live View (Tripod)”
dialog
Using Camera Control Pro
The Camera Menu 4/4
Select Shooting Settings Bank…
Selecting this option dis plays the dialog shown at right, where
you can choose the shooting menu bank in which chang es to
settings will be stored while the camera is con trolled from Camera Control Pro. See the camera manual for details.
The D3, D2 series, D300, and D200 allow a descriptive comment
to be added to the name of each shooting menu bank. Clicking
Edit… displays the dialog shown at right, where the comments
for each bank can be edited. Click OK to copy the comments
to the camera. Comments can be up to twenty characters long
and contain letters, numbers, quotes, apostrophes, spaces, and
any of the following characters: “,” “.” “!” “?” “#” “$” “%” “&” “(” “)” “[”
“]” “{” “}” “*” “+” “-” “/” “:” “;” “<” “=” “>” “_” and “@”.
Set Bracketing Mode
Selecting this option displays the BKT Mode dialog. See “
Time Lapse Photography…
Selecting this option opens the “T“T
Live View (Hand-held)…
Selecting this option opens the
Live View (Tripod)…
Selecting this option opens the
Enable controls on the camera body (all cameras except
Check this option to enable camera controls, allowing settings to be adjusted and photographs
taken directly from the camera. If this option is not checked, only the power switch and AF-area
mode selector can be used.
D3 D300 D70 seriesD200D2 series D50D80
D3 D300
D3 D300 D100D200D2 series
ime Lapse Photography” dialog.
D3 D300
“Live View (Hand-held)”
“Live View (Tripod)”
D100
D3/D2 series/D300/D200
Edit Comment dialog
Time Lapse Photography” for details.
dialog.
dialog.
D1 series D100
)
Return to fi rst page
Camera Control Pro 2
76
Page 77

Overview Appendices
Using Camera Control Pro
Custom Settings 1/4
Most of the custom settings stored in camera memory can be viewed and adjusted
from the Custom Settings window in Camera Control Pro. For more information on
Cus tom Set tings, see the doc u men ta tion pro vid ed with your camera.
Select Cus tom Settings… from the Camera menu. The Custom Settings
1
dialog for the current camera will be displayed.
Changes to Custom Settings
Changes made to settings in the Custom Settings dialog are stored in the camera, not on the computer hard disk. This means that changing settings in the Custom Settings dialog has the same
eff ect as chang ing Custom Settings using camera controls.
Return to fi rst page
Camera Control Pro 2
77
Page 78

Overview Appendices
Using Camera Control Pro
Custom Settings 2/4
Choose a Custom Settings bank (Custom Settings set) from the pop-up
2
menu at the top right corner or the Cus tom Settings dialog (see the camera
manual for details).
After making any changes to Custom Settings, click OK to save changes in
3
the camera Custom Settings bank and exit the Custom Settings dialog.
Custom Settings
Custom Settings can not be saved to a separate fi le. Clicking the Reset button resets all Custom
Settings to their default values.
Settings That Can Not Be Adjusted from the Custom Settings Window
The Custom Settings listed below can not be adjusted in the Custom Settings window.
• Mirror lock-up for CCD cleaning (D1-series Custom Setting 8) /Cleaning mirror up (D100 setup
menu): can only be ad just ed from the camera
• RAW (NEF) image save (D1-series Custom Setting 28): if this option is set to “0” (off ) when Camera
Control Pro is started, a message will be displayed. Clicking OK in this dialog sets Custom Setting
28 to “1” (uncompressed RAW image save enabled). Custom Setting 28 can only be returned to “0”
from the camera.
• ISO Auto (D100 Custom Setting 3) /ISO Boost (D1-series Custom Setting 31): can be ad just ed from
the Exposure 2 tab of the Camera Control Pro window.
• PC Shooting Mode (D1-series Custom Setting 30): this option is adjusted from the Me chan i cal tab
of the Camera Control Pro window.
• Tone Compensation (D1-series Custom Setting 24) /Color Mode (D1X/D1H Custom Setting 32) /
Hue Ad just ment (D1X/D1H Custom Setting 33) /Noise Reduction (D100 Custom Setting 4): can be
adjusted from the Processing tab of the Camera Control Pro window.
Return to fi rst page
Camera Control Pro 2
78
Page 79

Overview Appendices
Using Camera Control Pro
Custom Settings 3/4
Custom Settings for D1-Series and D100 Cameras
Custom Settings for D1-series and D100 cameras are divided among three tabs: Page
1, Page 2, and Page 3. See the camera manual for details.
Custom Settings for D70-Series and D50 Cameras
Custom Settings for the D70 series and D50 are divided among three tabs: Basic,
Advanced 1, and Advanced 2. See the camera manual for details.
Custom Settings for D80 Cameras
Custom Settings for the D80 are divided among four tabs: Basic, Advanced 1,
Advanced 2, and Advanced 3. See the camera manual for details.
Return to fi rst page
Camera Control Pro 2
79
Page 80

Overview Appendices
Using Camera Control Pro
Custom Settings 4/4
Custom Settings for D3, D2-Series, D300, and D200 Cameras
Custom Settings in each bank are divided into six groups. The group can be chosen
from the group menu or by clicking the Next and Prev. buttons.
Group menu
Prev./ Next
buttons
A descriptive comment can be added to the name of each Custom Settings bank.
Clicking Edit… displays an “Edit Custom Settings Comment” dialog, where the comments for each bank can be edited. Click OK to copy the comments to the camera. Comments can be up to twenty characters long and contain letters, numbers,
quotes, apostrophes, spaces, and any of the following characters: “,” “.” “!” “?” “#” “$”
“%” “&” “(” “)” “[” “]” “{” “}” “*” “+” “-” “/” “:” “;” “<” “=” “>” “_” and “@”.
Return to fi rst page
Camera Control Pro 2
80
Page 81

Overview Using Camera Control Pro
Appendices
Camera Control Pro Preferences 82
The General Tab 83
The Color Management Tab Windows 84
The Color Management Tab Macintosh 86
Uninstalling Camera Control Pro
RGB Color Space Profi les 90
Device Registration 92
Customer Support 105
Appendices
Windows 88
Macintosh 89
Windows XP 93
Windows 2000 97
Return to fi rst page
Camera Control Pro 2
81
Page 82

Overview Using Camera Control Pro
General
Color Management
Appendices
Camera Control Pro Preferences 1/6
To view the Preferences (Options) dialog for Camera Control Pro, select Options…
from the Tools menu (Windows) or select Preferences… from the application menu
(Macintosh).
Windows Macintosh
The Pref er enc es dialog contains
General and
Color Management tabs.
Return to fi rst page
Camera Control Pro 2
82
Page 83

Overview Using Camera Control Pro
Appendices
Camera Control Pro Preferences 2/6
The General Tab
The General tab contains the following items:
Choose how long the exposure meters remain on when the cam era is operated on
battery power.
While
Camera
Control Pro
is running,
keep camera
awake
Folder for
temporary
data/
Volume for
temporary
data
and pow ered on with Camera Control Pro running, and takes pre ce dence over the
auto meter off option cho sen using camera Custom Set tings. D1-series cameras
powered by an AC adapter and all other supported camera models will stay awake
indefi nitely, regardless of the setting chosen here.
Specify the folder or volume in which tem po rary data, such as image cache data,
will be stored.
directory, while the default vol ume for the Macintosh is the start-up disk. To choose
a diff erent folder in the Windows version of the program, click the Browse… button
and navigate to the de sired location. In the Macintosh version, a new volume can be
chosen from the pop-up menu.
Return to fi rst page
This set ting only takes eff ect when a D1-series camera is con nect ed
for 15 min utes (D1-series only): The exposure meters turn off automatically if no
operations are performed for 15 minutes.
Always: The exposure meters remain on indefi nitely.
the drain on the battery.
The default folder for Windows is the “TEMP” folder in the Windows
Camera Control Pro 2
Note that this will increase
83
Page 84

Overview Using Camera Control Pro
Appendices
Camera Control Pro Preferences 3/6
The Color Management Tab (Windows)
The Color Management tab is where you spec i fy the color management profi les
used for displaying im ag es on your monitor and for ed it ing and saving RGB images.
Change Display
Profi le
Default RGB
color space
Return to fi rst page
To choose a display profi le, click Change Display Profi le….
“Display Properties” dialog will be displayed; open the Settings tab and click
Advanced… to open the display adapter properties dialog.
profi le, open the Color Management tab and click Add.
The output color-space profi le used when work ing with RGB images is displayed
here. Click Browse… to choose a new default RGB profi le. If Use this instead
of an em bed ded profi le when opening fi les is checked, this RGB color space
profi le will be used for all images. If it is not checked, the profi le embedded in
each image will be used.
Camera Control Pro 2
The Windows
To select a display
84
Page 85

Overview Using Camera Control Pro
RGB Color-Space Profi les
Appendices
Camera Control Pro Preferences 4/6
Multiple Displays
In a multiple display environment, choose a single profi le suited to all displays.
Default Display Profi le
The default Windows display profi le is “NKMonitor_win.icm.“ This profi le is equivalent to sRGB.
Supported Color Profi les
See “
RGB Color-Space Profi les” for a list of the RGB color-space profi les supplied with Camera
Control Pro.
The Color Management Tab
Changes to settings in the Color Management tab also apply to ViewNX, Nikon Capture (available
separately), Nikon View, and PictureProject. They are not refl ected in Capture NX (available separately).
Return to fi rst page
Camera Control Pro 2
85
Page 86

Overview Using Camera Control Pro
Appendices
Camera Control Pro Preferences 5/6
The Color Management Tab (Macintosh)
The Macintosh version displays the following options.
ColorSync
Default
Profi les for
Documents
Device
Profi les
Lists the ICC color-space profi le used to display images.
Default RGB color space: Choose the output color-space profi le used when working
with RGB images.
fi les is checked, this RGB color space profi le will be used for all images. If it is not
checked, the profi le embedded in each image will be used.
Lists the default color-space profi les for monitors.
Change Display Profi le…: If this button is displayed, you can click it to open the Displays section of the System Pref er enc es dialog. Open the Color panel (Mac OS X) to
choose a display profi le.
Return to fi rst page
If Use this instead of an embedded profi le when opening
Camera Control Pro 2
86
Page 87

Overview Using Camera Control Pro
RGB Color-Space Profi les
Appendices
Camera Control Pro Preferences 6/6
Input Profi les
If an input profi le is selected for the default RGB color space, images will be displayed in the sRGB
color space.
Supported Color Profi les
See “
RGB Color-Space Profi les” for a list of the RGB color-space profi les supplied with Camera
Control Pro.
The Color Management Tab
Changes to the display profi le apply system wide. Changes to other settings in the Color Management tab apply to ViewNX but are not refl ected in Capture NX, Nikon Capture (available separately),
Nikon View, and PictureProject.
Multiple Displays
Camera Control Pro will identify and list the profi les for all monitors in an extended desktop display,
allowing you to choose a separate profi le for each monitor.
Return to fi rst page
Camera Control Pro 2
87
Page 88

Overview Using Camera Control Pro
Appendices
Uninstalling Camera Control Pro Windows
Use an account with administrator privileges to perform the uninstall.
Click Start and select Camera Control Pro 2 > Camera Control Pro 2
1
Uninstall from the program list.
Click Yes to begin removing Camera Control Pro and all of its components.
2
If the uninstaller encounters read-only fi les or components shared by anoth-
3
er application, a confi rmation dialog will be displayed.
displayed carefully before deciding what to do with the aff ected components.
Click Finish. Restart the computer if so directed.
Read the information
4
Return to fi rst page
Camera Control Pro 2
88
Page 89

Overview Using Camera Control Pro
Appendices
Uninstalling Camera Control Pro Macintosh
Use an account with administrator privileges to perform the uninstall.
Open the “Applications : Nikon Software : Camera Control Pro 2” folder and
1
double-click the Camera Control Pro 2 Uninstaller icon.
Enter the administrator name and password and click OK.
2
Click Yes.
3
Click Quit to exit the uninstaller once Camera Control Pro has been re-
4
moved.
Return to fi rst page
Camera Control Pro 2
89
Page 90

Overview Using Camera Control Pro
Appendices
RGB Color Space Profi les 1/2
Profi les with a Gamma Value of 1.8
Profi le Windows Macintosh Description
This profi le is used in desk-top publishing applications and in
Apple
RGB
ColorMatch
RGB
NKApple.icm
NKCMatch.
icm
Nikon
Apple RGB
4.0.0.3000
Nikon Color-
Match RGB
4.0.0.3000
Profi les with a Gamma Value of 2.2
Profi le Windows Macintosh Description
sRGB NKsRGB.icm
Bruce
NKBruce.icm
RGB
NTSC
(1953)
NKNTSC.icm
Nikon sRGB
4.0.0.3001
Nikon
Bruce RGB
4.0.0.3000
NTSC (1953)
4.0.0.3000
Adobe Photoshop versions 4.0 or earlier, and is the typical RGB
profi le for Macintosh monitors.
in Adobe Photoshop is “Apple RGB.” This profi le is suitable for
working with images dis played on the Macintosh.
The ColorMatch profi le is native to Radius PressView monitors. It
has a wider gamut than Apple RGB, with a particularly wide area
devoted to the reproduction of blues.
setting in Adobe Photoshop is “Color Match RGB.”
This RGB profi le is used in the majority of Windows monitors. It
closely resembles the RGB commonly used in color television,
and is also used in the digital television broadcasting sys tem that
is on its way to becoming the industry standard in the United
States of America. Software and hardware man u fac tur ers use it
as a default color profi le and guarantee op er a tion when it used.
It is also on its way to becoming the standard for images on the
web. This profi le is suited to users who plan to use their digital
images “as is,” without editing or print ing them. It however suffers from the drawback of a narrow gamut with a limited area
available for reproducing blues. The corresponding RGB setting
in Adobe Photoshop 5.0 and 5.5 is “sRGB,” the corresponding
setting in Adobe Photoshop 6.0 “sRGB IWC61966-2.1.”
This color profi le attempts to expand on the ColorMatch RGB
gamut by defi ning the chro ma tic i ty for G as lying between the
values for G in the Adobe RGB and ColorMatch color-space profi l e s . It was proposed by Bruce Fraser, who claims that it includes
most of the colors in the SWOP CMYK gamut. The R and B used
in the Bruce RGB and Adobe RGB color-space profi les match.
This is the color space for video defi ned by the National Television Standards Committee (NTSC) in 1953 and used in early
color televisions. This color space is also used in some Far-East
newspaper and printing organizations. The corresponding RGB
setting in Adobe Photoshop is “NTSC (1953).”
The corresponding RGB setting
The cor re spond ing RGB
Return to fi rst page
Camera Control Pro 2
90
Page 91

Overview Using Camera Control Pro
Appendices
RGB Color Space Profi les 2/2
Profi le Windows Macintosh Description
Adobe
RGB
(1998 )
CIE
RGB
Adobe
Wide
RGB
NKAdobe.
icm
NKCIE.icm
NKWide.icm
Nikon Adobe
RGB (1998)
4.0.0.3000
Nikon
CIE RGB
4.0.0.3000
Nikon
Adobe-
Wide RGB
4.0.0.3000
A color-space profi le defi ned in Adobe Photoshop 5.0.
wider gamut than sRGB and includes the colors found in most
CMYK gamuts, making it suitable for users involved in desktop
publishing.
shop 5.0 is “SMPTE-240M,” the corresponding setting in Adobe
Photoshop 5.5 or later “Adobe RGB (1998).”
A video color-space profi le established by the Commission Inter-
nationale de l’Éclairage (CIE). While it boasts a fairly wide gamut,
it suff ers from the drawback that the area devoted to the reproduction of cyan is relatively small. The corresponding RGB
setting in Adobe Photoshop is “CIE RGB.”
This color-space profi le, designed by Adobe, incorporates most
of the visible colors. This however has the consequence that
most of the colors it can express can not be reproduced on
standard monitors and printers. The corresponding RGB setting
in Adobe Photoshop 5.0 or later is “Adobe Wide RGB.”
The cor re spond ing RGB setting in Adobe Photo-
It has a
Return to fi rst page
Camera Control Pro 2
91
Page 92

Overview Using Camera Control Pro
Appendices
Device Registration
If D1-series cameras are not recognized by the computer to which Camera Control
Pro is installed, the camera or IEEE 1394 (FireWire) board may not be correctly registered with the Windows Device Manager.
with the Device Manager, click on the links below.
To check whether a device is registered
Windows XP
Professional/Home Edition
Windows 2000 Professional
Opening the Device Manager
Devices are registered with the Windows Device Manager.
• Windows XP : Select Control Panel from the Start menu to open the “Control Panel” window, then
click Performance and Maintenance icon to open the Performance and Maintenance control panel. Click the System icon to open the System Properties window. Open the “Hardware
tab” and click Device Manager.
• Windows 2000: Right-click the My Computer icon on the desktop and select Properties from
the menu that appears.
Device Manager button.
Return to fi rst page
In the “System Properties” dialog, open the “Hardware” tab and click the
Camera Control Pro 2
To open the Device Manager:
92
Page 93

Overview Using Camera Control Pro
Open the Device Manager
Appendices
Device Registration Windows XP 1/4
Registering the IEEE 1394 Interface Board
Confi rm that the OHCI-compliant IEEE 1394 interface board or card has been correctly registered with the system.
Open the Device Manager. If the camera has been correctly registered
1
with the system, the controller for your camera should appear under “1394
Bus Controller.”
If “IEEE 1394 Bus host controllers” is not listed in the Device Manager, or if the
IEEE 1394 interface board or card is listed as an unknown or miscellaneous
device or is preceded by a red or yellow warning icon, follow the instructions
in the manual provided with the board to ensure that the drivers are properly
installed.
Install the driver for D1-series cameras from the Camera Control Pro CD, then
2
connect the camera to the computer using an IEEE 1394 cable and turn the
camera on.
Logging On
Log on as the “Computer Administrator” when registering the camera.
Before Connecting the Camera
Be sure to install Camera Control Pro before connecting the camera to the computer.
Return to fi rst page
The camera will be registered automatically.
Camera Control Pro 2
93
Page 94

Overview Using Camera Control Pro
Open the Device Manager
reinstall the device drivers
Appendices
Device Registration Windows XP 2/4
Registering the Device Driver
Follow the instructions below to check that the camera has been correctly registered with the system.
Open the Device Manager and confi rm that “Nikon 1394 Protocol Device”
1
and the camera is listed.
If the camera is listed under “Other devices,”
If “Nikon 1394 Protocol Device” is not listed in the Device Manager and the
camera does not appear under “Other devices,” disconnect the camera and
restart the computer.
ed.
Double-click the listing for the camera that appears under “Other devices.”
2
Click the “General” tab and confi rm that “This device is working properly” appears under “Device status.”
Tro ub les ho otin g
If “1394 Bus host Controller” is listed in the Device Manager but the entry for the Nikon D1 (D1X/D1H)
does not appear, check the following:
• Is the camera on?
• Is the battery fully charged? If you are using an AC adapter (available separately), is it properly
connected?
• Is the mode dial set to “PC”?
• Is the IEEE 1394 cable properly connected?
Reconnect the camera after the computer has restart-
reinstall the device drivers.
Return to fi rst page
Camera Control Pro 2
94
Page 95

Overview Using Camera Control Pro
Appendices
Device Registration Windows XP 3/4
Reinstalling the Device Driver
If the camera is listed under “Other devices,” reinstall the device drivers as instructed
below.
Double-click the listing for the camera that appears under “Other devices.”
1
Open the “General” tab and click Reinstall Driver….
2
Select No, not this time and click Next.
3
Return to fi rst page
Camera Control Pro 2
95
Page 96

Overview Using Camera Control Pro
Appendices
Device Registration Windows XP 4/4
Pressing the shift key to prevent the language-selection dialog from opening
4
automatically, insert the Camera Control Pro CD (if the language-selection
dialog appears, click Quit).
click Next.
Click Finish.
Select Install the software automatically and
5
Confi rm that “This device is working properly” appears under “Device status”
6
in the “General” tab of the camera “Nikon Digital Camera D1 Series Properties” dialog.
Return to fi rst page
Camera Control Pro 2
96
Page 97

Overview Using Camera Control Pro
you will need to
update the
camera drivers
Open the Device Manager
Appendices
Device Registration Windows 2000 1/8
Registering the IEEE 1394 Interface Board
Confi rm that your OHCI-compliant IEEE 1394 interface board or card has been correctly registered with the system.
Open the Device Manager. If the camera has been correctly registered
1
with the system, the controller for your camera should appear under “1394
Bus host Controller.”
If “1394 Bus host Controller” is not listed in the Device Manager, or if the IEEE
1394 interface board or card is listed as an unknown or miscellaneous device
or is preceded by a red or yellow warning icon, follow the instructions in
the manual provided with the board to ensure that the drivers are properly
installed.
Install the driver for D1-series cameras from the Camera Control Pro CD, then
2
connect the camera to the computer using an IEEE 1394 cable and turn the
camera on.
Logging On
Log on as the “Administrator” when registering the camera.
Updating Drivers for the D1
If you are already using the D1 with Nikon View DX or Nikon Capture,
camera drivers.
Before Connecting the Camera
Be sure to install Camera Control Pro before connecting the camera to the computer.
Return to fi rst page
The camera will be registered automatically.
Camera Control Pro 2
you will need to
update the
97
Page 98

Overview Using Camera Control Pro
Open the Device Manager
reinstall the device drivers
Appendices
Device Registration Windows 2000 2/8
Registering the Device Driver
Follow the instructions below to check that the camera has been correctly registered with the system.
Open the Device Manager and confi rm that “Nikon 1394 Protocol Device”
1
and the camera are listed.
If the camera is listed under “Other devices,”
If “Nikon 1394 Protocol Device” is not listed in the Device Manager and the
camera does not appear under “Other devices,” disconnect the camera and
restart the computer.
ed.
Double-click the listing for the camera that appears under “Other devices.”
2
Click the “General” tab and confi rm that “This device is working properly” appears under “Device status.”
Tro ub les ho otin g
If “1394 Bus host Controller” is listed in the Device Manager but the entry for the Nikon D1 (D1X/D1H)
does not appear, check the following:
• Is the camera on?
• Is the battery fully charged? If you are using an AC adapter (available separately), is it properly
connected?
• Is the mode dial set to “PC”?
• Is the IEEE 1394 cable properly connected?
Reconnect the camera after the computer has restart-
reinstall the device drivers.
Return to fi rst page
Camera Control Pro 2
98
Page 99

Overview Using Camera Control Pro
Appendices
Device Registration Windows 2000 3/8
Reinstalling the Device Driver
If the camera is listed under “Other devices,” reinstall the device drivers as instructed
below.
Double-click the listing for the camera that appears under “Other devices.”
1
Open the “General” tab and click Reinstall Driver.
2
Click Next.
3
Return to fi rst page
Camera Control Pro 2
99
Page 100

Overview Using Camera Control Pro
Appendices
Device Registration Windows 2000 4/8
Select the search option and click Next.
4
Pressing the shift key to prevent the language-selection dialog from open-
5
ing, insert the Camera Control Pro CD (if the language-selection dialog appears, click Quit).
Select CD-ROM drives and click Next.
Click Next.
6
If the message “Windows was unable to fi nd a suitable driver for this device” is
displayed, the CD was not correctly inserted or the correct search location was
not selected.
the search location is correct.
Return to fi rst page
Click Back to return to the dialog shown in Step 5 and confi rm that
Camera Control Pro 2
100
 Loading...