

Page 1
Nikon
Autofocus Speedlight
INSTRUCTION MANUAL
Page 2

iT
FOREWORD
NOMENCLATURE
BASIC OPERATION
Installing Batteries................................................
Attaching Flash Unit to Camera Accessory Shoe
Adjusting Flash Head
Programmed TTL Auto Flash Shooting
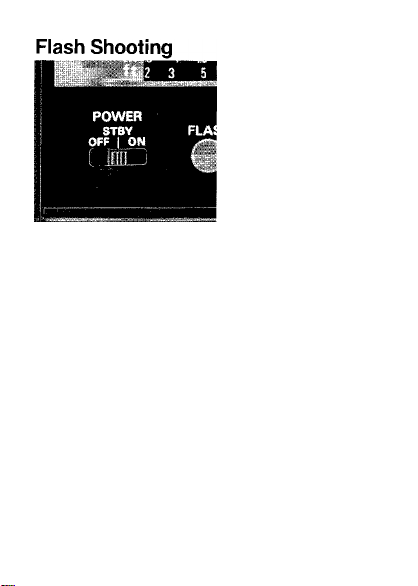
Flash Shooting......................................................
AUTOFOCUS FLASH PHOTOGRAPHY
(with Nikon F-501/N2020 or F-401/N4004) . . ..
SETTING CAMERA SHUTTER SPEED
DETERMINING APERTURE..............................
TTL Mode
A Mode (for Non-TTL Automatic Flash
M Mode (tor Manual Flash Exposure Control) ...
Guide Number
SETTING POWER SWITCH
STBY (STANDBY) Position
ON Position...........................................................
OFF Position.........................................................
READY-LIGHT INDICATIONS...........................
Ready-Light Warning Functions
..............................................
........................................
.....................................
...........................................
(with Nikon F-501/N2020, F-401/N4004 or
F-301/N2000).....................................................
(tor TTL Automatic Flash Exposure Control)....
Exposure Control)
..............................................
......................................................
.............................
..................................
...........................
..................
CONTENTS^
.... 3
. 4-6
.... 7
10-11
12-13
14-16
.... 17
18-32
18-22
23-27
28-31
...32
... 33
... 33
... 33
... 33
34-35
...35
SYNCHRO-SUNLIGHT FILL-IN
7-13
FLASH PHOTOGRAPHY......................................... 36-38
In TTL Mode................................................................37
In A Mode....................................................................37
In M Mode...................................................................38
DIFFUSING THE LIGHT........................................... 39-41
Bounce Flash Photography Procedure
Using A Ditfuser
SYNCHRONIZATION WITH MOTOR-DRIVEN
CAMERA
MULTIPLE FLASH EXPOSURES..................................... 42
MULTIPLE FLASH PHOTOGRAPHY
TTL Multiple Flash Photography
Manual Multiple Flash Photography
AVOIDING “RED EYE”...................................................46
CLOSE-UP FLASH PHOTOGRAPHY IN TTL MODE .... 47
TIPS ON SPEEDLIGHT CARE.................................... 48-49
ABOUT BATTERIES....................................................... 50
ACCESSORIES
Sync Cords SC-11 and SC-15................................... 51
TTL Remote Cord SC-17........................................... 51
TTL Multi-Flash Adapter AS-10
TTL Multi-Flash Sync Cords SC-18 and SC-19
Flash Unit Couplers AS-4 and AS-7
DC Unit SD-7............................................................. 52
SPECIFICATIONS
.........................................................
.................
......................................................................
.........................
............................
...........................
..........................................................
.................................
..........................
.....................................................
40-41
43-46
51-52
..........
53-55
41
42
43-45
46
51
52
52
Page 3
Nikon
Für Besitzer einer Nikon F4/F4s und F-801
Das SB-20 ermöglicht matrix-gesteuerten Aufheliblitz und Aufheilbiitz
mit mittenbetonter Messung zusätziich zur normalen TTL-Blitzautomatik und Blitzautomatik ohne TTL. Matrix-gesteuerter Aufheiiblitz
erzeugt eine ausgewogene Kombination von Umgebungsiicht und
Biitzbeieuchtung, die natüriich wirkt. Detaiis werden besser
herausgestelit—ohne daß dadurch die korrekte Belichtung für den
Hintergrund verlorengeht.
Für nähere Einzeiheiten lesen Sie bitte auch die Bedienungsanieitung
zu Ihrer Kamera.
Die möglichen Biitzbetriebsarten für die einzelnen Kombinationen von
Kamera und SB-20 entnehmen Sie bitte der Tabeile weiter unten.
F4/F4s-fSB-20
Sucher
Viseur
Objektive \
Objectifs
Matrix
Matriciel
AF Nikkore/AI-P-Nikkore
AF Nikkor/Nikkor Al-P
AF-Telekonverter/
AF-Nikkore für Nikon F3AF/
Al-Nikkore (inkl. Al-S)
AF Convertisseur/
AF Nikkor pour F3AF/
Nikkor Al (et Al-S)
Sonstige Objektive
Autres objectifs
Mittenbetont
Centrée
Spot
Spot
Matrix
Matriciel
Mittenbetont
Centrée
Spot
Spot
Matrix
Matriciel
Mittenbetont
Centrée
Spot
Spot
@ Matrix-gesteuerter Aufhellblitz
O Aufhellblitz mit mittenbetonter Messung
A Konventionelle TTL-Blitztotografie
* Das Blitzen erfolgt automatisch in Betriebsart A.
Die Blende manuell wählen.
• Bei Verwendung der Sucher DW-20 und DW-21 ist das TTLVerbindungskabel SC-24 erforderlich.
F-801/N8008+SB-20
Objektive Meßsystem —^
^ _Jylode d’exposition
Objectifs Mode de mesure^\
AF-Nikkore/
Al-P-Nikkore
AF Nikkor/
Nikkor AFP
Sonstige Objektive«
Autres objectifs»
Beiichtungsart
Matrix
Matriciel
Mittenbetont
Centrée
Matrix
Matriciel
Mittenbetont
Centrée
Pd
PPhS A
@
O O O
O* O* O*
O*
Zur Beachtung:
1. Bei Verwendung der AF-Illuminator-LED des SB-20 mit einem AFNikkor-Objektiv läßt sich mit Brennweiten von 25 bis 105mm
arbeiten. Dieser Bereich verschiebt sich bei Verwendung des AFTelekonverters TC-16A nach 15 bis 58mm. Der Fokussierbereich
liegt bei etwa 1 bis 8 Metern (mit AF-Nikkor 50mm f/1,8, bei
Normaltemperaturen, für ein normales Aufnahmeobjekt mit 35%
Reflexionsgrad).
2. Für indirekfes Blifzen die Kamera auf Belichfungsbetriebsart A oder
M einstellen und eine der größeren Blenden wählen.
3. Bei manueller Blitzkontrolle die Kamera auf Belichfungsbefriebsart
A oder M einstellen und die Blende von Hand wählen.
Multi-Meß-Sucher DP-20
Viseur multi-mesure DP-20
P
s
Ph
@
@ @
O O O
A A A A
O* O* O
A A A A A
A A A A - - - - - - - -
A A
A A A
(ô)
@
O»
O
Pour les utilisateurs des appareils
Nikon F4/F4S, F-801/N8008*
Le fiash SB-20 à mise au point automatique Nikon permet d’effectuer
les prises en mesure matricielie et centrée en plus des contrôles de
l'exposition avec fiash aufomafique TTL et non TTL. Le flash en
mesure matricielle permet de créer un effet naturel et esthétique en
remplissant les ombres marquées et en mettant en valeur les détails
du sujet—sans perdre l’exposition correcte de l’arrière-plan.
Pour les détails, lisez attentivement le mode d’emploi du SB-20 et celui
de l’appareil.
Référez-vous aux tableaux ci-après pour les modes de flash utilisables
pour chaque combinaison appareil/SB-20.
*La Nikon N8008 est vendue exclusivement aux Etats-Unis.
6-fach-Vergrößerungssucher
AE-Sportsucher DA-20
Viseur action AE DA-20
A M
@
A A A A A
P
_s
Ph
A
- - - - - - - -
A
O O
A A A A A A A
A
- - - - - -
A
O* O* O
A A A A A A
A M
O
A A A A A A
@ Dosage auto flash/lumière ambiante par mesure matricielle
O Atténuation des ombres par flash en mesure centrée
A Flash standard TTL
* Le mode d’exposition passe automatiquements sur “A”.
Sélectionnez manuellement l’ouverture.
• La carte de télécommande TTL SC-24 est nécessaire lorsque l’on
utilise le DW-20 ou DW-21.
@ Matrix-gesteuerter Aufhellblitz
О Aufhellblitz mit mittenbetonter Messung
А Konventionelle TTL-Blitzfotografie
M
* Das Blitzen erfolgt automatisch in Betriebsart A. Die Blende
manuell wählen.
• Dazu gehören AF-Telekonverter, Al-Nikkore (einschließlich Al-S),
A
A
das Balgengerät PB-6, Automatik-Zwischenringe usw.
@ Dosage auto flash/lumière ambianfe par mesure mafricielle
О Atfénuation des ombres par flash en mesure centrée
A Flash standard TTL
* Le mode d’exposition passe automatiquement sur “A”.
A
Sélectionnez manuellement l’ouverture.
• Comprend les convertisseurs AF, les objectifs Nikkor de type Al (y
A
compris Al-S), le soufflet PB-6, les bagues-rallonge automatique, etc.
Notes:
1. Lorsque l’on utilise l’illuminateur d’assistance AF du SB-20 avec des
objectifs AF Nikkor, la distance focale va de 24 à 105mm. Cette
plage passe à 15-58mm si l’on utilise un Téléconvertisseur AF
TC-16A. La plage de mise au point est d’environ à 8 mètres (avec le
Nikkor AF de 50mm f/1,8 à températures normales, pour un sujet
standard et 35% de réflectance.
2. Pour les prises de vue en flash par réflexion, réglez le mode
d’exposition de l’appareil sur A ou M, et sélectionner une des
ouvertures les plus larges.
3. Lorsque le SB-20 est utilisé avec le contrôle de l’exposition en flash
manuel, régler le mode d’exposition de l'appareil sur A ou M et
sélectionner manuellement l’ouverture de l’objectif.
DW-21 /Lichtschachtsucher
DW-20
Amplificateur 6X DW-21/
Viseur de poitrine DW-20
P
Ph
A
- -
A
- - - -
A
-
A M
s
- -
- -
- - -
A A A
A
A
Page 4
Nikon
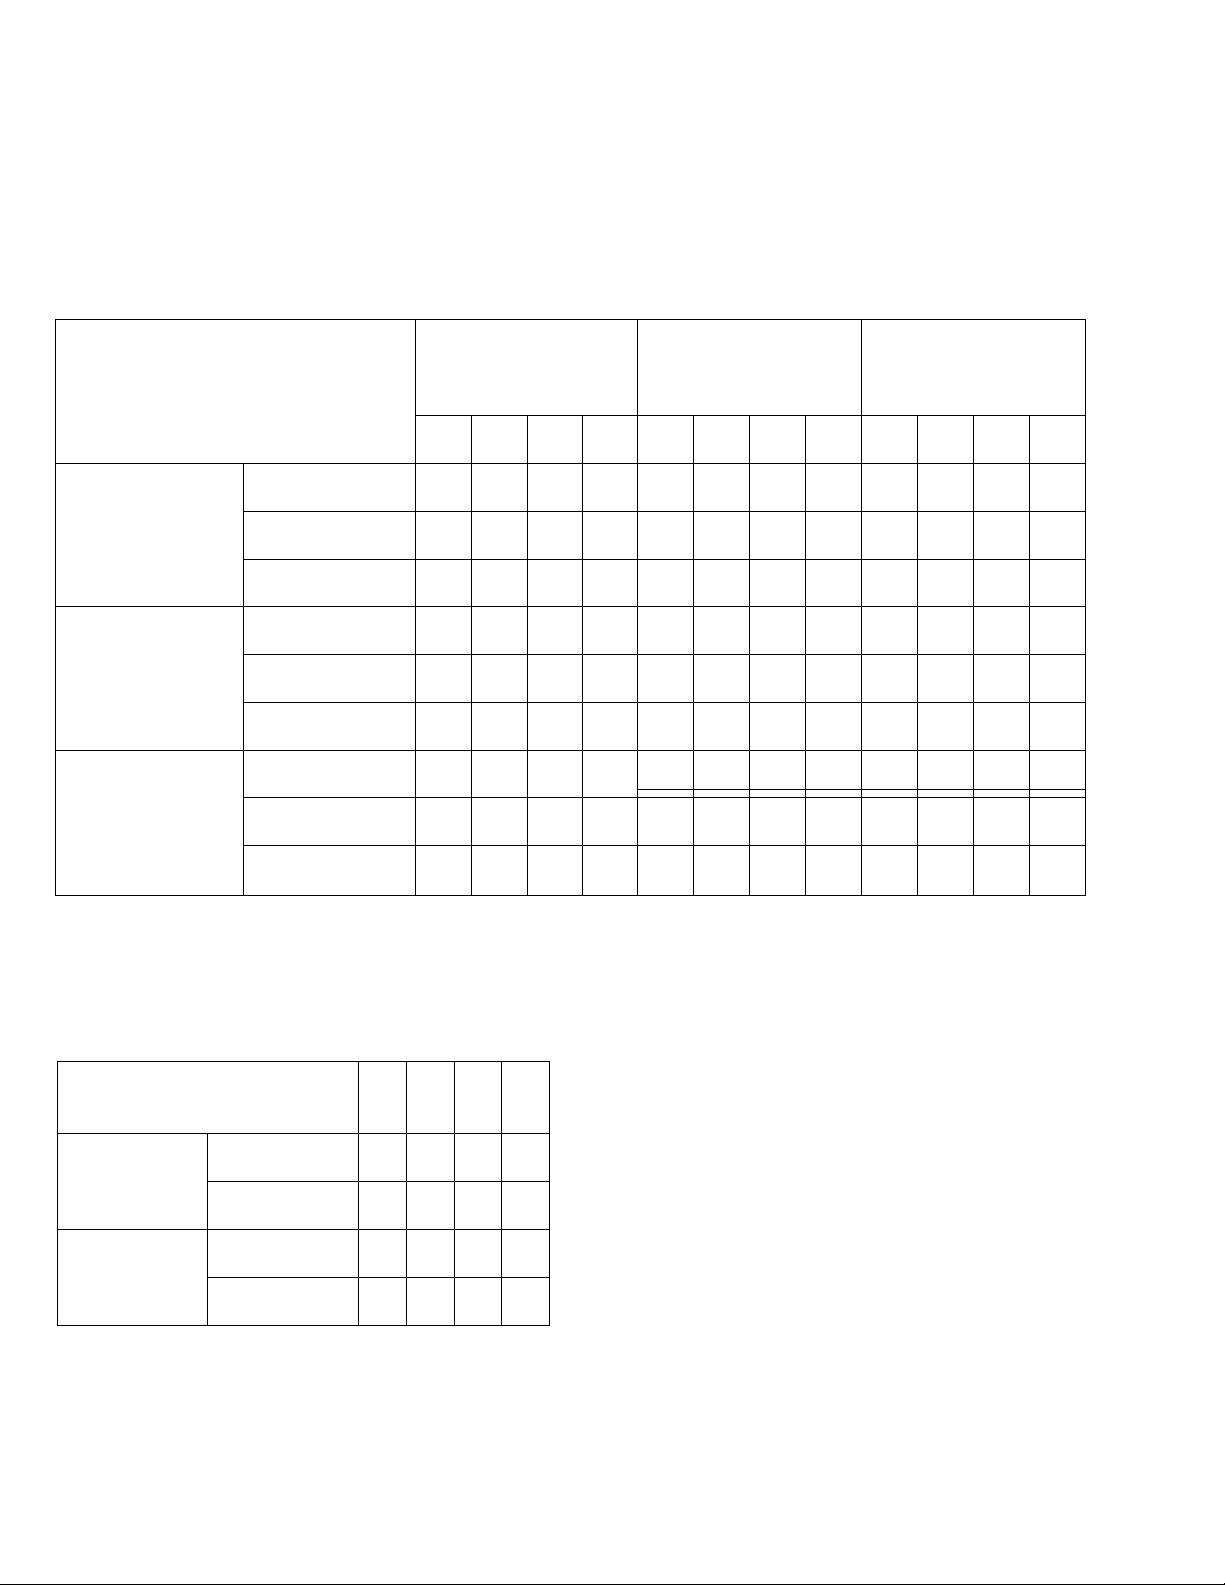
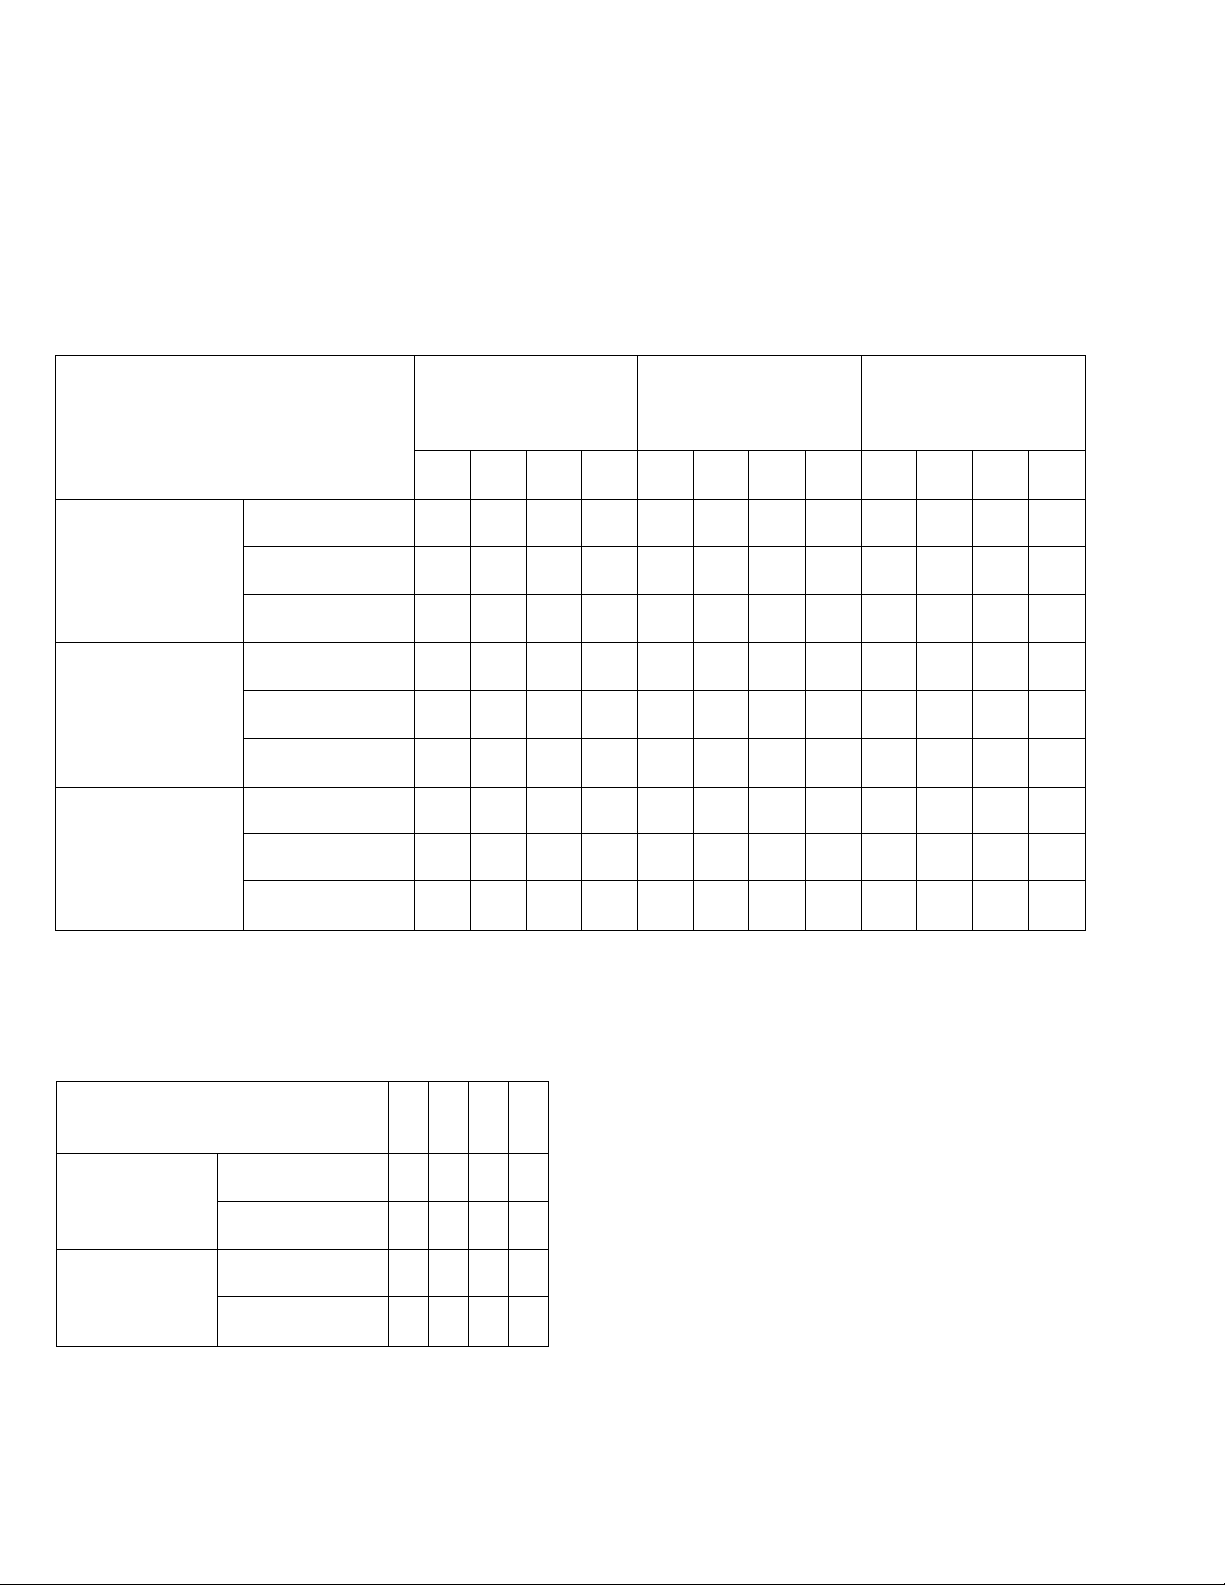
For Nikon F4/F4S, F-801/N8008*
camera users
The Nikon Autofocus Speedlight SB-20 makes it possible to perform
Matrix Balanced Fill-Flash and Center-Weighted Fill-Flash in addition
to standard TTL Automatic Flash Exposure Control and Non-TTL
Automatic Flash Exposure Control. Matrix Balanced Fill-Flash creates
a pleasing, natural effect by filling in harsh shadows and bringing out
subject detail—without losing the correct background exposure.
For details, be sure to read the SB-20 instruction manual and your
camera instruction manual.
Refer to the tables below for usable flash modes in each camera/
SB-20 combination.
*The Nikon N8008 is sold exclusively in the U.S.A.
F4/F4S+SB-20
Viewfinder
Visor
Lenses
Objetivos
Matrix
AF Nikkor lenses/
Al-P-type Nikkor lenses
Objetivos Nikkor AF/
Objetivos Nikkor tipo Al-P
AF Teleconverter/AF Nikkor
lenses for Nikon F3AF/
Al-type Nikkor lenses
(including Al-S)
Teleconvertidor AF/Objeti-
vos Nikkor AF para Nikon
F3AF/Objetivos Nikkor
tipo Al (incluido al Al-S)
Other lenses
Otros objetivos
Por matriz
Center-Weighted
Calculado para el centro
Spot
Puntual
Matrix
Por matriz
Center-Weighted
Calculado para el centro
Spot
Puntual
Matrix
Por matriz
Center-Weighted
Calculado para el centro
Spot
Puntual
® Matrix Balanced Fill-Flash
O Center-Weighted Fill-Flash
A Standard TTL flash
* Exposure mode automatically shifts to A.
Select aperture manually.
• TTL Remote Cord SC-24 is required when using DW-20 or DW-21.
F-801/N8008-I-SB-20
Lenses Metering systerñ ^ ^
Objetivos Sistema de medición^\^
AF Nikkor lenses/AI-P-
type Nikkor lenses
Objetivos Nikkor AF/
Objetivos Nikkor tipo
Al-P
Other lenses*
Otros objetivos»
^ ^ ——___Modode exposición
Exposure mode
Matrix
Por matriz
Center-Weighted
Calculado para el centro
Matrix
Por matriz
Center-Weighted
Calculado para el centro
Notes:
When using the SB-20’s AF illuminator with AF Nikkor lenses, the
1
focal length is from 24 to 105mm. This range shifts to 15 to 58mm
when using AF Teleconverter TC-16A. The focusing range is approx.
1 to 8 meters (with AF Nikkor 50mm f/1.8 at normal temperatures,
for a standard subject with 35% reflectance).
For bounce flash photography, set the camera's exposure mode to
A or M and select one of the larger apertures.
When the SB-20 is used in Manual Flash Exposure Control, set the
camera’s exposure mode to A or M and manually select lens aperture.
Multi-Meter Finder DP-20
Telémetro del fechador múltiple
DP-20
P
s
Ph
@
@
o o
o
A A
@* @*
o»
o* o
A A A
A A
A A A
A A A A
A
Pd
pPhS A M
@ @ @
O O
O
O* o* o*
o* o* o
Para los usuarios de las cámaras F4/F4s,
F-801/N8008*
El Speedlight de autoenfoque SB-20 de Nikon le permite efectuar flash
de relleno equilibrado por matriz y flash de relleno equilibrado al
centro además del control de exposición de flash automático TTL
estándar y el control de exposición de flash automático no TTL. El
flash de relleno equilibrado por matriz crea un efecto placentero y
natural llenando las sombras bruscas y resaltando los detalles del
sujeto—y sin perder la correcta exposición del fondo.
Para los detalles, asegúrese de leer el manual de instrucciones del
SB-20 y el manual de instrucciones de su cámara.
Refiérase a las tablas que se indican a continuación para los modos
de flash utilizables en cada combinación de cámara/SB-20.
*La Nikon N8008 se vende exclusivament en Estados Unidos de
América.
Waist-Level Finder DW-20/6X
AE Action Finder DA-20
Visor de acción AE DA-20
A M
@ A
A A A A
@
A A
p
Ph
- - - - - -
A
O
A
- -
o»
A
A A A A
- - -
A A A A
A M
s
o o
A A A A A
- - - . -
o* o
A A A A
@ Elash de iluminación equilibrada por matriz
O Flash de iluminación equilibrada al centro
A Flash estándar TTL
* El modo de exposición cambia automáticamente a A.
Seleccione la apertura manualmente.
• Al usar el DW-20 ó DW-21 se require del cordón remote TTL
SC-24.
@ Matrix Balanced Fill-Flash
O Center-Weighted Fill-Flash
A Standard TTL flash
* Exposure mode automatically shifts to A. Select aperture manually.
• Includes AF Teleconverters, Al-type Nikkor lenses (including Al-S),
A
A
Bellows Focusing Attachment PB-6, Auto Extension Rings, etc.
@ Elash de iluminación equilibrada por matriz
O Flash de iluminación equilibrada al centro
A Flash estándar TTL
* El modo de exposición cambia automáticamente a A. Seleccione la
A
A
apertura manualmente.
• Incluye teleconvertidores AF, lentes Nikkor de tipo Al (incluyendo
Al-S), fuelle de enfoque PB-6, anillos de extensión automática, etc.
Notas:
1. Al usar el iluminador AF de la SB-20 con los lentes Nikkor AF, la
distancia focal es de 24 a 105mm. Este rango cambia de 15 a
58mm cuando se usa el Convertidor AF TC-16A. El rango de
enfoque es de aproximadamente 1 a 8 metros (Con AF de Nikkor
de 50mm f/1,8 a temperaturas normales, para un sujeto estándar
con un 35% de reflectancia).
2. Para fotografía de flash de salto, ajuste el modo de exposición de
la cámara en A o M y seleccione una de las aperturas mayores.
3. Cuando el SB-20 se utiliza para control de exposición de flash
manual, ajuste el modo de exposición de la cámara a A o M y
seleccione manualmente la apertura del diafragma.
Fligh-Magnification Finder DW-21
Visor de pantalla en la parte
superior DW-20/Visor de alta
ampliación 6X DW-21
p
Ph
A
- - - -
A
- -
A A A A A
- - - - -
A
-
s A
- -
- -
- -
- - -
A A A
M
A
Page 5

FOREWORD=
Thank you for purchasing the Nikon Auto
focus Speedlight SB-20. We hope the SB-20
will make photography a much bigger part
of your life. Get to know your SB-20, but
before using it, be sure to read both your
camera instruction manual and this man
ual. Nikon cannot be held responsible for
malfunctions resulting from use of the
SB-20 other than as specified in this man
ual, or from use of the SB-20 with a camera
made by a manufacturer other than Nikon.
---------------
Page 6

For Nikon F-401/N4004 camera users
Read the following instructions carefully when using the
SB-20 with F-401/N4004 camera.
1. Nikon F-401/N4004 camera is designed for use with
AF Nikkor lenses, except AF-Nikkor 80mm f/2.8,
200mm f/3.5 IF-ED and Autofocus Converter TC-16/
TC-16A.
For most photos in this manual, aperture is set by
rotating the lens aperture ring. With the F-401/N4004,
however, aperture is set using camera’s aperture dial.
Do not forget to set and lock the lens at its smallest
aperture.
For limited use of non-AF Nikkor lenses, see the
F-401/N4004 instruction manual.
2. Most of the explanations in this manual dealing with
Programmed TTL Auto Flash, TTL Auto Flash, etc.,
apply to shooting dark subjects. Flowever, by setting
the F-401/N4004 to program, aperture-priority or
shutter-priority auto exposure mode, with the SB-20
set to TTL, automatic balanced fill-flash is possible in
situations where fill-flash is effective, even with a
bright subject. For details, see the F-401/N4004 in
struction manual. (In manual exposure mode, ordi
nary TTL fill-flash is possible.)
Page 7
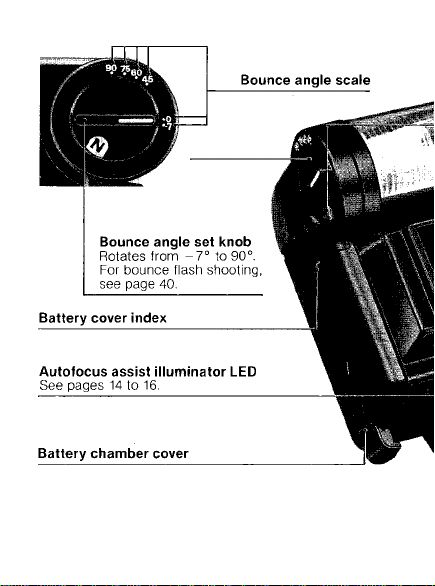
NOMENCLATURE
Mounting foot
Page 8
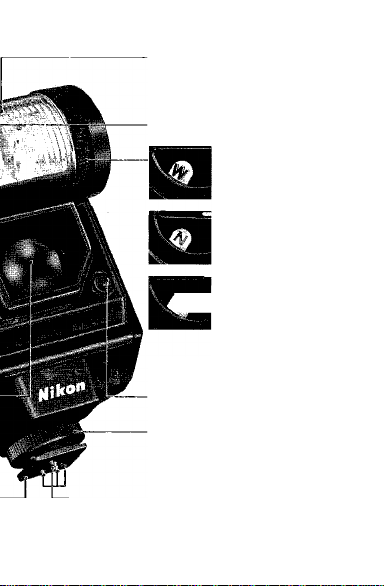
Flash head
Zoom indicator window
Zoom set ring
Light sensor lor non-TTL auto
flash operation
Mounting foot lock nut
Hot-shoe contacts
W (wide) for lenses
28mm or longer
N (normal) for
lenses 35mm or
longer
T (lelephofo) for
' longer
lenses 85mm or
Page 9
Reflector slot
For bounce flash (see page 41).
Sync/multiple flash terminal
For (1) off-camera operation with
a sync cord and (2) multiple flash
photography in manual flash
operation (page 46)
External power source terminal
Accepts power cord from Nikon DC
Page 10
Aperture selection/shooting
distance range panel
See pages 18 to 31.
Before using the SB-20,
peel off the protective
paper covering the panel.
Page 11
Light output index windows
Used in M mode
Aperture index window
Used in A mode
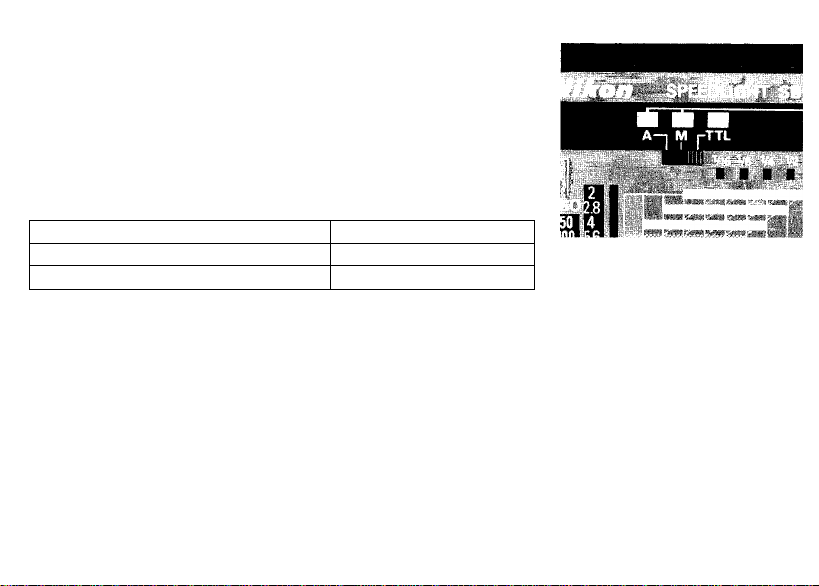
Flash mode indicators
Flash mode selector
.... u TTI mode—for
piuyiaiiiiiiyj 1 ||_
Film speed scale window
Film speed index
Film speed knob
Flash shooting distance range
indicators
The patterned bar (fourth bar from
the top) shows programmed TTL
auto flash information.
Distance scale window
Distance scale selector
Power switch
See page 33.
Open-flash button
For (l) test firing in A mode, (2) multiple
flash exposures (page 42) and (3) to turn on
SB-20 after it is automatically turned off
(page 33).
READY BOUNCE
■ ■
TTL auto flash
operation
■
M mode—for
KBFVnìB
Aperluie index knob/iight output
selector knob
Used in A and M modes
Bounce set indicator
Lights up when flash head is rotated.
Ready-light
See page 34.
manual flash
operation.
Page 12
BASIC OPERATION
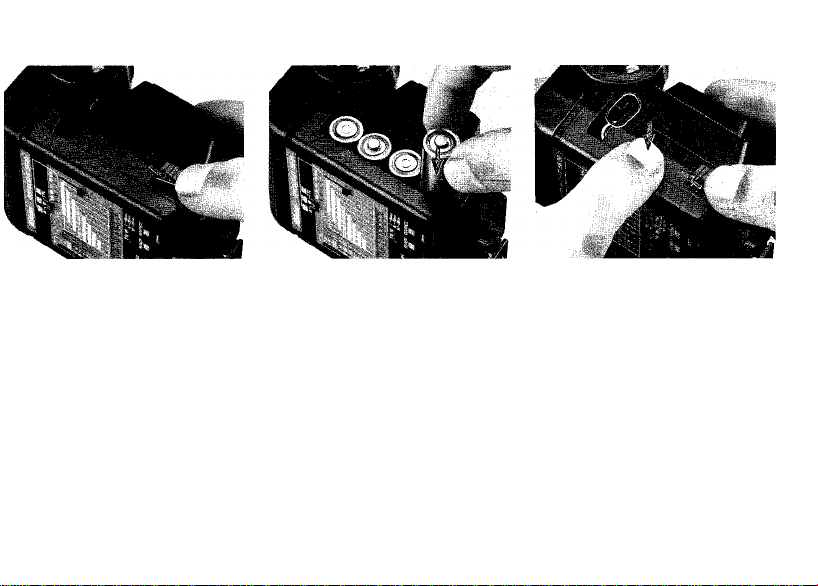
Installing Batteries
Remove battery chamber
' cover.
2 Load four 1.5 V AA-type
' penlight aikalinemanganese batteries or 1.2 V
NiCd batteries into the
battery chamber.
For battery information, see page
50.
3 To reattach battery
' chamber cover, align front
edge of the cover with
battery cover index on the
flash unit, then push cover
down and siide as far as it
goes.
Page 13
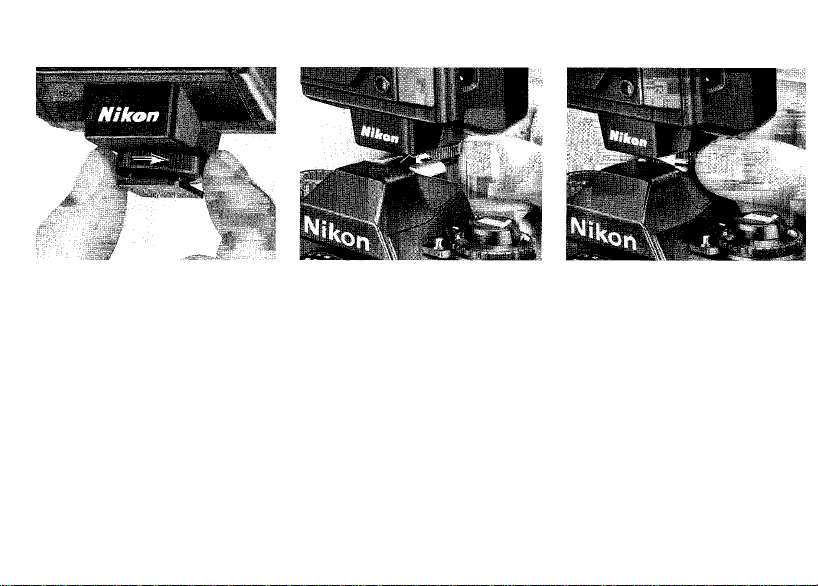
Attaching Flash Unit to Camera Accessory Shoe
^ Turn the mounting foot
' lock nut clockwise as far
as it goes.
With Nikon F3-series cameras with DE-2 or
DE-3 finder: Attach Flash Unit Coupler AS-4 or
AS-7 to camera's accessory shoe before
mounting the SB-20. The SB-20 cannot be
mounted on F3-series camera with the other
finders.
' forward into the camera’s
accessory shoe as far as it
goes.
Slide mounting foot
0_ Tighten lock nut firmly.
Page 14
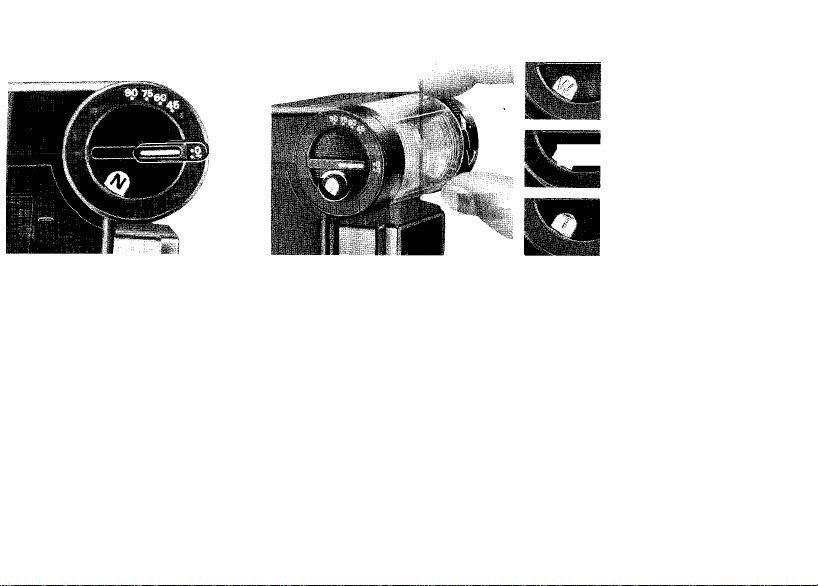
Adjusting Flash Head
W(Wide)
For 28mm or longer lenses
N (Normal)
For 35mm or longer lenses
T (Telephoto)
For 85mm or longer lenses
Make sure bounce angle
' set knob is set at 0°.
Rotate zoom set ring until desired zoom setting appears in
' the window.
Make sure zoom set ring is properly set at its click-stop position.
Page 15
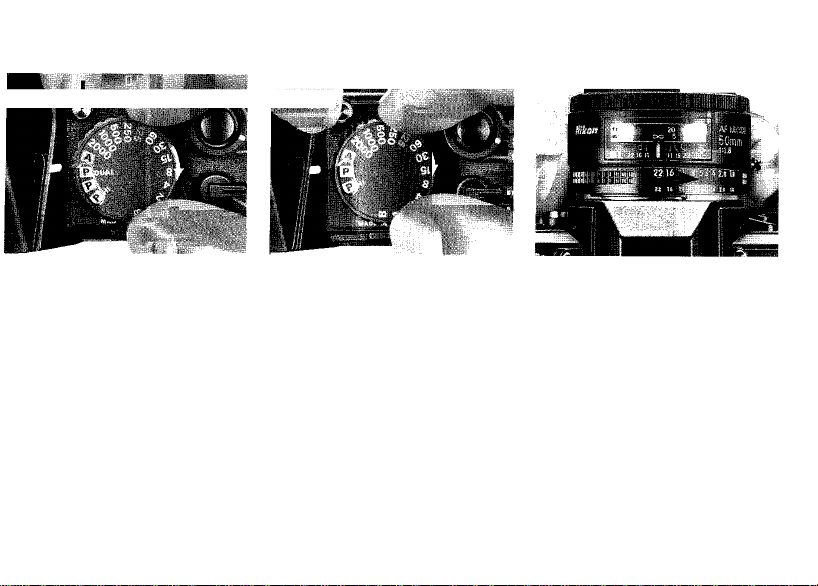
Programmed TTL Auto Flash Shooting (with Nikon F-501/N2020, F-401/N4004 or
F-301/N2000) -----
Steps 9 through 11 provide instructions for program
med TTL auto flash shooting with the Nikon F-501/
N2020*, F-401/N4004** or F-301/N2000* camera.-
For other flash exposure operations (TTL auto, non-TTL
auto and manual flash exposure operations) see “SET
TING CAMERA SHUTTER SPEED” on page 17 and
"DETERMINING APERTURE," pages 18 to 32.
* The Nikon N2020 and N2000 are sold exclusively in the
U.SA. and Canadian markets.
’"'The Nikon N4004 is sold exclusively in the U.S.A. market.
For programmed TTL automatic flash opera
tion, note the following:
• Use Al-S type lenses only. With Nikon F-401/
N4004, use only AF-Nikkor lenses, except
AF-Nikkor 80mm f/2.8, 200mm f/3.5 IF-ED
and Autofocus Converter TC-16/TC-16A.
• For autofocus operation, set the Nikon
F-501/N2020’s focus mode selector to S for
Single Servo Autofocus mode, or set the
Nikon F-401 /N4004 to A for autofocus mode.
For details, see pages 14 to 16.
10
-
' '
.........
Q Set the SB-20’s flash mode selector to
TTL.
For the flash shooting range in programmed TTL auto
matic operation, see table on page 21.
The shooting distance range panel at the back of the
SB-20 also helps you to see the flash shooting range.
To read a proper distance range, set the film speed
knob and distance scale selector (see page 19.) A pat
terned bar among the flash shooting distance range
indicators shows the shooting distance range in pro
grammed TTL auto operation.
Page 16
With F-501/N2020
With F-301/N2000
s
-|Q Set camera to a programmed exposure mode (P DUAL, P
■ or P HI for F-501/N2020; P or P HI for F-301/N2000).
With the Nikon F-401/N4004, set the camera to either program auto
(aperture dial to S, shutter speed dial to A) or shutter-priority auto (aper
ture dial to S, shutter speed dial to desired speed) exposure mode.
Set lens to minimum
’ aperture (largest
f-number).
With AF Nikkor lenses, lock lens
aperture at minimum setting. (See
the lens instruction manual).
With the Nikon F-401/N4004, this
procedure is unnecessary because
the lens is always locked at the
smallest aperture.
11
Page 17
____
41
TTL mode is selected
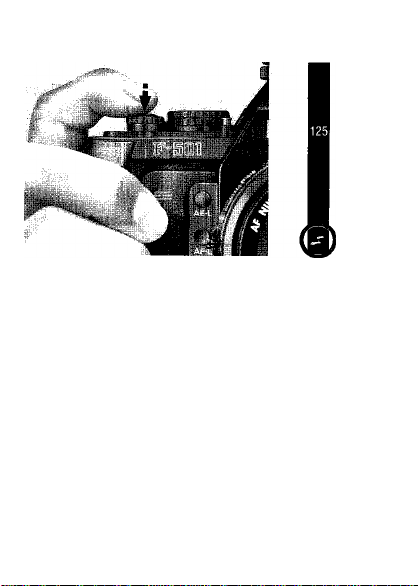
12. Set power switch to STBY (standby
‘ position) to turn on SB-20.
LED indicating seiected fiash mode immediately lights
up.
12
Page 18
13. Lightly press shutter release button and
' viewfinder ready-light comes on to
indicate flash is ready to fire.
For blinking ready-light warnings, see
page 35.
Page 19

14. Fully depress shutter
' release button to take
picture.
Unless viewfinder ready-light blinks
after the shot, your flash exposure
will be perfecf; if it does blink, pic
ture may be underexposed—
move closer to subject.
Do not fire flash toward or
near the eyes; it may dam
age the retina.
■|5_ Turn off the SB-20.
13
Page 20
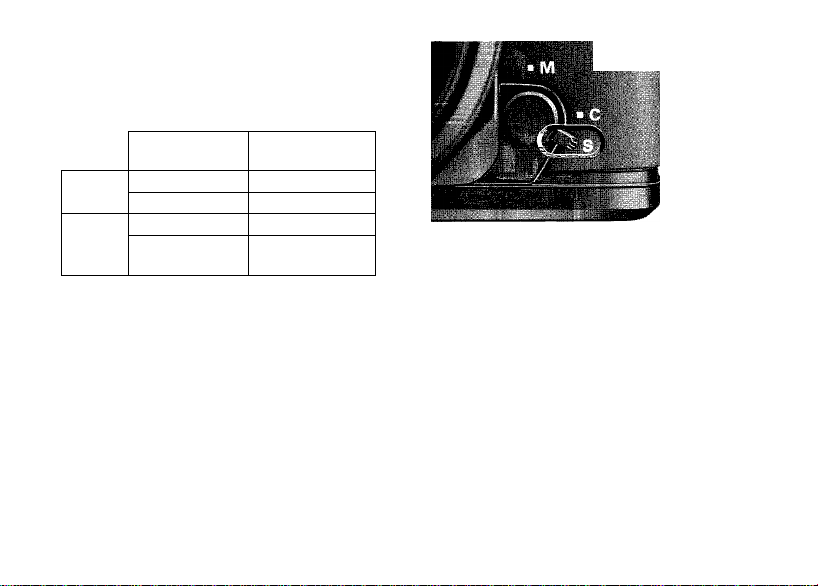
AUTOFOCUS FLASH PHOTOGRAPHY (with Nikon F-501/N2020 or F-401/
In programmed TTL autofocus flash photog
raphy, use film with a film speed specified in
the table below for greater depth of field:
Lens maximum
aperture
Lens
only
F-501/
N2020
with
TC-16A
14
f/2.8 or faster
Slower than f/2.8
f/1.4 or f/1.2
f/1.8,f/2, f/2.5or
f/2.8
Film speed
ISO 50 or faster
ISO 100 or higher
ISO 50 or higher
ISO 100 or higher
. N4004)
•\ _ Set the Nikon F-501/N2020’s focus mode
' selector to S for Single Servo Autofocus
mode, or set the F-401/N4004 to A for auto
focus mode.
Continuous Servo Autofocus cannot be used for auto
focus flash photography.
Page 21
2. Set aperture.
With Nikon F-401/N4004, use camera’s aperture
dial. Don’t forget to lock lens at minimum position.
For programmed TTL operation, set to smallest lens
aperture (largest f-number) and lock the lens aperture.
(For details, see the lens instruction manual).
Page 22
For other flash operations, set as follows:
Lens
only
F-501/
N2020
with
TC-16A
Lens maximum
aperture
f/2.8 or faster
Slower than f/2.8
f/1.4or f/1.2
f/1.8, f/2, f/2.5orf/2,8
Aperture setting
f/2.8 or larger f-number
(f/2,8, f/4, f/5.6, etc.)
f/5.6 or larger f-number
(f/5.6, f/8,f/11, etc.)
f/2 or larger f-number
(f/2, f/2.8, f/4, etc.)
f/4 or larger Lnumber
(f/4, f/5.6, f/8, etc.)
15
Page 23
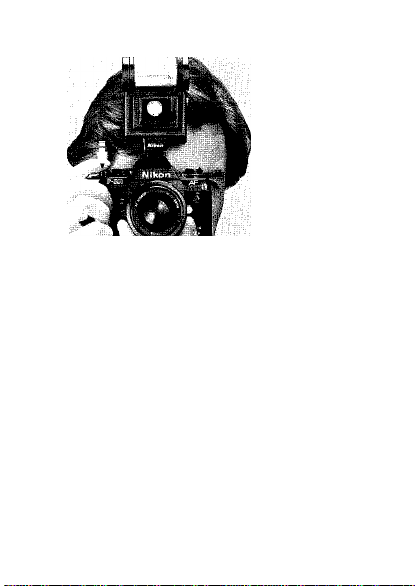
3 Lightly press camera shutter release
■ button.
When ready-light comes on but ambient light is insuffi
cient for autofocus operation, AF illuminator fires to
start autofocus operation.
If ambient light is sufficient, the AF illuminator does not
fire.
16
Page 24
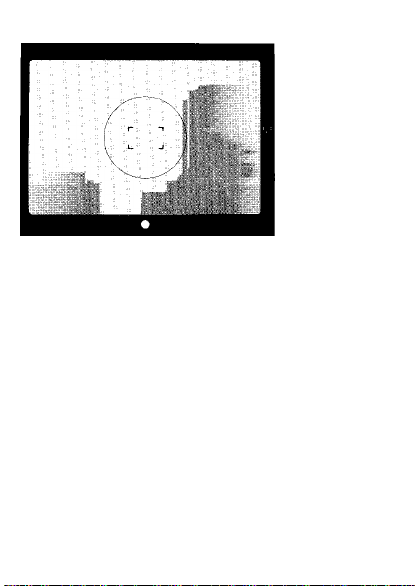
^ Confirm whether the green in-focus
' indicator LED iights up, then fuliy depress
the shutter reiease button.
If focus-not-possible indicator LED (x) remains lit
when using the Nikon F-501/N2020, or if focus indi
cator LED (•) blinks with Nikon F-401/N4004, auto
focus fiash photography is impossibie. Focus manuaiiy
on the ciear matte fieid.
Page 25

SETTING CAMERA SHUTTER SPEED
Set camera’s shutter speed, referring to the table
below.
Nikon camera
F-501/N2020*
F-301/N2000*
F-401/N4004 1/100 or slower
FA
FE2 1/250 or slower
FG
F3-series
(via AS-4 or AS-7
coupler)
FM2 1/250 or slower
FG-20 1/90 or slower
"In TTL mode, programmed TTL auto flash operation will be performed with the Al-S type lens and F-501/N2020 or F-301/N2000 set at programmed
auto exposure mode.
'Improper tor programmed TTL auto flash operation and TTL auto flash operation.
Synchronization
speed (sec.)
1/125 or slower
1/250 or slower
1/90 or slower
1/80 or slower
Camera setting
P DUAL (F-501/N2020 only), P, PHI
A, 1/2000~ 1/250sec.
1/I25~1sec. and B
Shutter dial Aperture dial
A S
A 1.4-32 —
1/2000- 1/125sec. S
1/60-1sec. S
1/2000-1/125sec. 1.4-32
1/60- Isec. and B 1.4-32
All shutter speed settings except
M250 and B in P, S and A modes
1/4000- l/500sec. in M mode
1/250-Isec. in M mode
M250 and B in P, S, A and M
modes**
A, 1/4000-1/500 sec.
1/250-8sec.
M250 and B‘*
P, A, 1/1000-1/125sec.
1/60- Isec
M90 and B**
A
1/2000-1/125 sec.
l/50-8sec. X, Band!
1/250- Isec. and B
A, (C , 1/1000-1/125sec.
1/60~lsec., M90and B
Running shutter
As shown.in the table, automatic sync speed setting is
available with most Nikon cameras.
speed (sec.)
1/125 125 lights up
1/125
125 lights up and LED lor proper non-flash shutter speed blinks
LED tor manually set shutter speed lights up and LED for proper non-flash shutter
as set
speed blinks: no indication at B
1/100
as set
1/100 —
as set —
1/250
LCD shows 250
1/250 LCD shows M250
as set
LCD shows manually set shutter speed
as set No indication
1/250
as set
as set —
1/90 Two LEDs representing 1/90sec. light up
as set
LED for manually set shutter speed lights up
as set
No indication
1/80 LCD shows 80
1/80 LCD shows M80
as set
LCD shows manually set shutter speed. no indication at B or T
as set -
1/90 —
as set -
Viewfinder shutter speed indication
—
-
—
-
—
17
Page 26
DETERMINING APERTURE
----------------------------------------
TTL Mode
(for TTL Automatic Flash Exposure Control)
TTL mode is for exclusive use with Nikon F-501/N2020, F-401/N4004,
F-301/N2000, FA, FE2, and FG cameras only.
For TTL auto flash operation with the Nikon F-501/N2020, F-401/N4004,
or F-301/N2000, be sure to set the camera to aperture priority auto or
manual exposure mode.
For correct exposure in TTL mode, use film with a film speed specified in
the table below:
Camera
F-501/N2020 and F-301/N2000
F-401/N4004, FA, FE2 and FG
To determine aperture with the SB-20’s aperture selection/shooting dis
tance range panel for TTL auto flash operation, read the following :
(For programmed TTL auto flash operation, see pages 10 to 11.)
18
Film speed
ISO 25 to 1000
ISO 25 to 400
i Set SB-20’s mode selector
' ■ to TTL.
Page 27
2 Align film speed in use with the film
' speed index.
For intermediate film speeds, use figure nearest the
film speed in use. With ISO 32 film, for example, set to
ISO 25. With film speeds not listed on the scale, be
sure subjects are sufficiently within the shooting dis
tance range indicated on the back of the SB-20.
3 To read proper shooting distance range,
' set distance scaie seiector to letter shown
in zoom indicator window.
19
Page 28

Select and set aperture.
' The aperture scale window shows usable apertures. (Depending on
film speed in use, all usable apertures may not be shown in the aperture
scale window; for usable apertures, see table on next page.)
For example, with the film speed index at ISO 100, you can select any
aperture from f/2 to f/22. With the zoom set ring at N, selecting f/4 lets you
take pictures of subjects 1m to 7.5m (approx. 3.3ft. to 25ft.) away.
With Nikon F-401/N4004, use camera’s aperture dial.
20
Next, turn on flash unit and take
shot in the same manner shown in
“BASIC OPERATION,” steps 12 to
15.
Page 29

Usable apertures/shooting distance range in TTL mode
ISO film speed
1000* 800* 400 200 100 50
2.8 + ‘/3
4 + 1/3
5.6+ 1/3
8 + 1/3
11 +1/3 11
Q.
O
16 + 1/3
22 + 1/3 22
2.8 2
4 2.8 2
5.6 4 2.8 2
8 5.6 4 2.8 2
16 11 8 5.6 4
— —
— —
—
8 5.6
16 11 8 5.6 4
22
16
22 16 11 8
—
— — — —
'For Nikon F-501/N2020 and F-301/N2000 only.
I I = Program med TTL auto flash information.
— — —
—
4
2.8 2
11
22
— —
—
2.8
8 5.6
16 11
25
—
—
With zoom set
at W
2.8-20
(9.2-66)
2.0-15
(6.6-49)
1.4-11
(4.6-36)
1.0-7.8
(3.3-25)
0.7-5.5
(2.3-18)
0.6-3.9
(2.0-13)
0.6-2.7
(2.0-8.9)
0.6-1.9
(2.0-6.2)
0.6-1.4
(2.0-4.6)
0.6-1.0
(2.0-3.3)
Shooting distance range
With zoom set
at N
3.8-20
(12-66)
2.7-20
(8.9-66)
1.9-15
(6.2-49)
1.3-10
(4.3-33)
1.0-7.5
(3.3-25)
0.7-5.3
(2.3-17)
0.6-3.7
(2.0-12)
0.6-2.6
(2.0-8.5)
0.6-1.9
(2.0-6.2)
0.6-1.3
(2.0-4.3)
Unit: m (ft)
With zoom set
alT
4.5-20
(15-66)
3.2-20
(10-66)
2.3-18
(7.5-59)
1.6-12
(5.2-39)
1.2-9.0
(3.9-30)
0.8-6.3
(2.6-21)
0.6-4.5
(2.0-15)
0.6-3.2
(2.0-10)
0.6-2.2
(2.0-7.2)
0.6-1.5
(2.0-5.0)
21
Page 30

Exposure compensation in TTL mode
With a dark subject (with low reflectivity) or one that is
light in tone (having high reflectivity), over- or under
exposure may occur. To prevent this, compensate
exposure by rotating camera's exposure compensation
dial. With the FG, push the exposure compensation
button. (For details, see camera instruction manual.)
The shooting distance range for TTL automatic flash
operation varies with the amount of exposure compen
sation. For compensated distance range, see table at
right, then reset film speed setting on the back of
SB-20.
For example, wifh ISO 100 film and camera's exposure
compensation dial set at -t-2, read 25 on the table and
reset the SB-20'S film speed index to 25.
With the zoom set ring at N and an aperture of f/4, the
flash shooting distance range—which is 1m to 7.5m at
22
Page 31

ISO 100—shifts to 0.6 m to 3.7 m at ISO 25.
The Nikon F-401/N4004 has no exposure compensa
tion diai, and compensates exposure with automatic
baianced fili-flash.
Exposure compen-
Film speed in use
25
50
100 25 50
200
400 100 200
800V1000*
•for Nikon F-501/N2020 and F-30UN2000 only.
I' Not possible: make the necessary compensation in
the non-TTL automatic mode (see the following) or
shoot on manual.
value
+ 2 + 1 0 - 1 -2
25 50 100 200
50 100 200 400 800*
200 400 800*
25 50 100
200
100
400 800*
400
Page 32

A Mode (for Non-TTL Automatic Flash Exposure Control)
Use the SB-20 on A mode for automatic operation with
Nikon cameras other than Nikon F-501/N2020, F-401/
N4004*, F-301/N2000, FA, FE2, and FG.
The following procedure lets you select aperture with
the SB-20’s aperture selection/shooting distance range
panel tor non-TTL auto flash operation.
* Non-TTL automatic operation is not possible when
Nikon F-40f/N4004 is set to either program or shutterpriority auto exposure mode.
Page 33

A-I М rTTL
ПТ Г
■ Il I
.11
_ Set SB-20’s mode selector to A.
23
Page 34

2_ Align film speed in use with film speed
' index.
For intermediate fiim speeds, use the tigure nearest
the film speed in use. With ISO 32 film, for example, set
to ISO 25. With film speeds not listed on the scale, be
sure subjects are sufficiently within the shooting dis
tance range indicated on the back of the SB-20.
24
3_ To read proper shooting distance range,
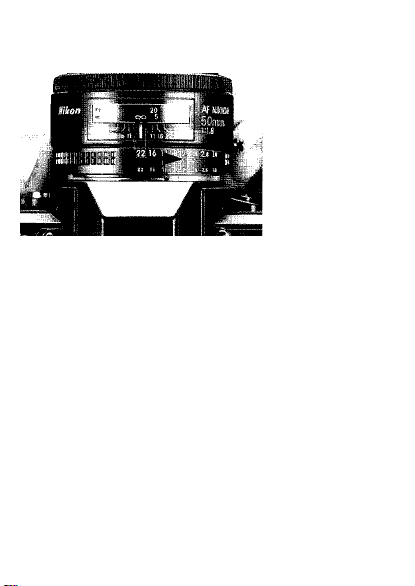
' set distance scale selector to letter shown
in zoom indicator window.
Page 35

4, Select appropriate aperture and set aperture index knob.
The aperture index window shows usable apertures. With the film
speed index at ISO 100, for example, you can select any aperture from f/2
to f/8.
With the zoom set ring at N, if you select f/4, you can take pictures of sub
jects 1m to 7.5m (approx. 3.3ft. to 25ft.) away.
25
Page 36

5, Set your chosen aperture.
With Nikon F-401/N4004, use camera’s aperture
diai.
26
Page 37

Next, turn on flash unit and take shot in the same
manner shown in “BASIC OPERATION,” steps 12 to 15.
Page 38

Usable apertures/shooting distance range in
A mode unit; m (ft)
ISO film speed
1600 800 400 200
8 5.6 4 2,8 2 1.4
11 8 5.6 4 2.8 2 1.4
o
11 8 5.6 4
16
«5
22
16
32 22 16 11 8 5.6 4
11
8 5.642.8
100 50 25
Zoom set
1.4-11
-
(4.6-36)
1,0~7.8
(3.3-26)
0.7-5.5
2
2.8
(2,3-18)
0.6-3.9
(2.0-13)
0.6-2,7
(2.0-8.9)
Shooting distance range
Zoom set
at N
1.9-15
(6.2-49)
1.3-10
(4.3-33)
1-7.5
(3.3-25)
0.7-5.3
(2.3-17)
0.6-3.7
(2.0-12)
Zoom set
2,3-18
(7.5-59)
1.6-12
(5.2-39)
1.2-9
(3.9-30)
0.8-6.3
(2.6-21)
0.6-4.5
(2.0-15)
at W
atT
Page 39

Exposure compensation in A mode
With a dark background (one with low reflectivity) or
one that is light in tone (having high reflectivity), overor underexposure may occur. To prevent this, compen
sate exposure by stopping down or opening aperture.
With a dark background, stop down the aperture 1/2 to
one full f/stop; when the background is light in tone,
open the aperture 1/2 to one full f/stop.
With the Nikon F-401/N4004, set aperture using the
camera’s aperture dial.
27
Page 40

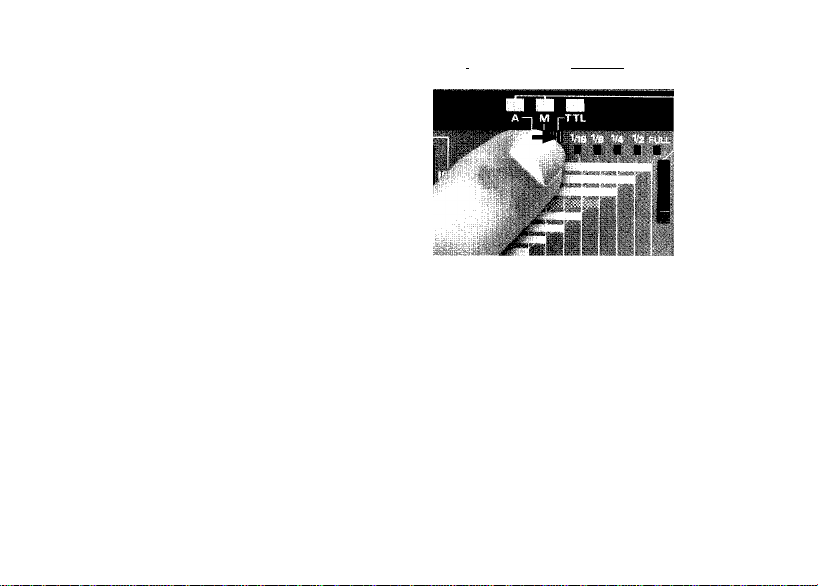
M Mode (for Manual Flash Exposure Control)
In M mode, you can choose the
amount of light output: full, 1/2,1/4,
1/8 or 1/16.
To determine aperture and/or light
output with the SB-20’s aperture
selection/shooting distance range
panel tor manual flash operation,
read the following.
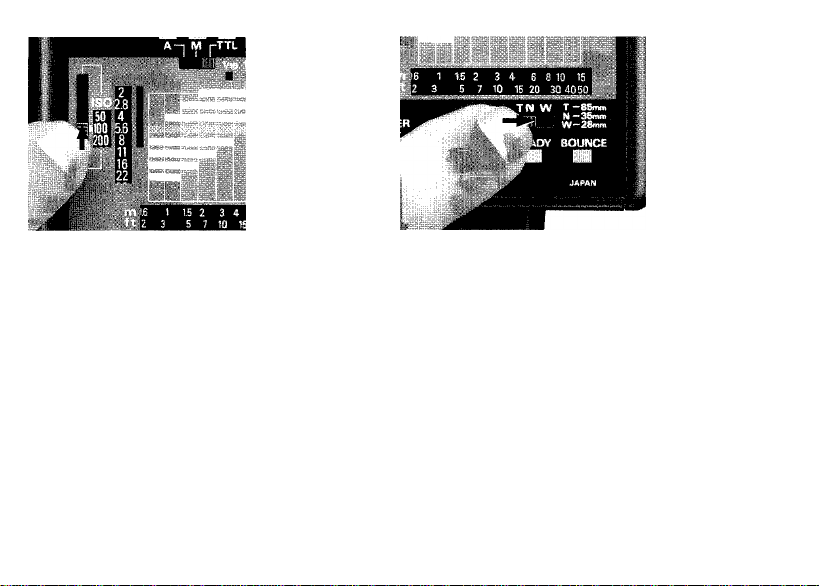
-] _ Set the SB-20’s flash
' mode selector to M.
28
Align film speed in use
' with the film speed index.
For intermediate film speeds, use
the figure on the scale nearest the
film speed in use. With ISO 32 film,
for example, set to ISO 25.
Page 41

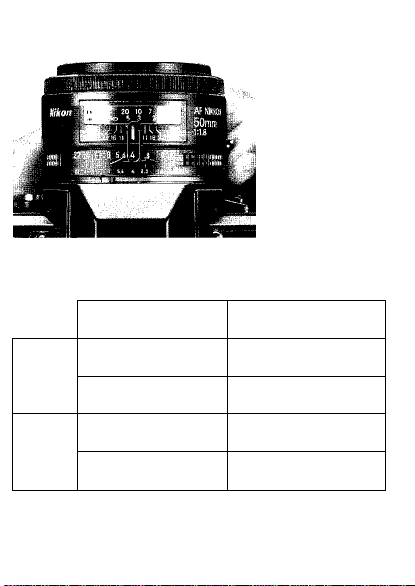
3, To read proper shooting
' distance, set distance
scale selector to letter shown
in zoom indicator window.
Choose and set aperture.
The aperture index window shows usabie apertures. For example, with
film speed index set at ISO 100 and the zoom set ring at N, and if you want
to shoot a subject 3m away, you can select any aperture from f/2 to f/8.
You can also determine aperture using the SB-20's guide number (GN).
For details, see page 32.
With Nikon F-401/N4004, use camera’s aperture dial.
29
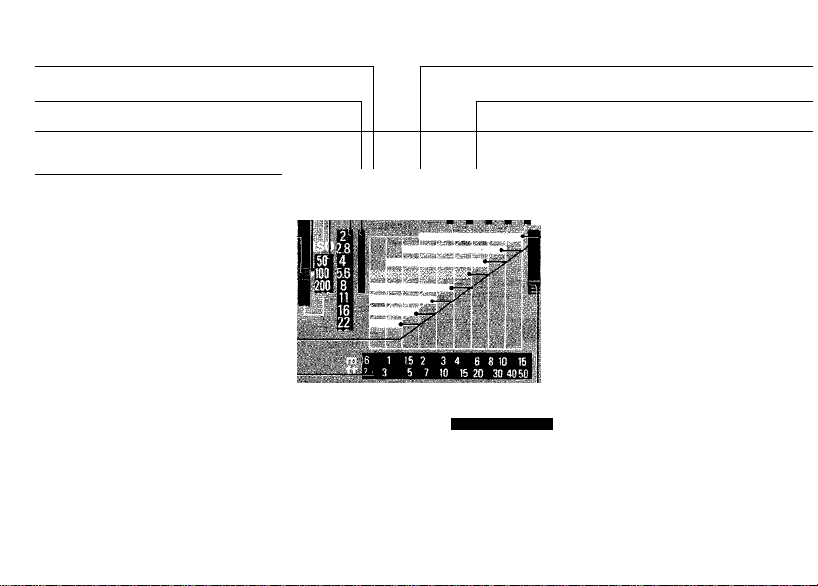
Page 42

Set light output selector to appropriate
' setting.
Follow the appropriate vertical line upward from the
distance scale window until it intersects with the hori
zontal distance scale indicator line for the selected
aperture. Then follow the diagonal dotted line upward
to determine the correct light output for the aperture
selected. For example, with the film speed set at ISO
too
and the zoom set ring at N, to shoot a subject 3.7m
away at fM.fire the flash at 1/4 light output. Set the light
output selector so the yellow output index shows “1/4”
in the window below.
30
Page 43

Next, turn on the flash unit and take shot in the same
manner shown in “BASIC OPERATION,” steps 12 to 15.
Page 44

To determine light output before selecting aperture
Use the following procedure instead of steps 4 and 5 to determine light output before selecting aperture:
_ Set the light output
' selector so the yellow
light output index indicates
the desired light output.
In the example photo, full light out
put is selected.
2, Determine and set proper iens aperture.
' To determine correct aperture, follow both the vertical line from the
distance scale window and the dotted line from the light output window to
the point of intersection. If the lines do not intersect, move closer to sub
ject or reset light output selector for more light output.
For example, with the film speed index at ISO 100 and zoom set ring at N,
to shoot a subject 10m away at full light output, follow both the vertical line
from figure 10 in the distance scale window and the dotted line from the
light output window to FULL. The two lines intersect at distance range indi
cators for f/2.8
To take intentionally over- or underexposed pictures, open or stop-down
the lens aperture.
—you must set your lens to f/2.8.
31
Page 45

Guide Number
See the table at right for guide numbers of the film
speeds and zoom settings.
In M mode, use the following equation to determine
aperture:
f/stop =
With ISO 400 film and the zoom set knob at N, the
SB-20’s guide number is 60(m) for full output. If the
subject is 15 m away, divide 60 by 15 to get f/4.
32
guide number
-----------------------------------flash-to-subject distance
Page 46

Light output
Full
1/2
1/4
1/8
1/16
Zoom
setting
1600 800 400 200 100 50 25
88
W
(289)62(203)44(144)31(102)22(72)15(49)11(36)
120
N
(394)
144
T
(472)
62
w
(203)
85
N
(279)
102
T
(335)72(236)51(167)36(118)25(82)18(59)13(43)
44
w
(144)31(102)22(72)15(49)11(36)
60
N
(197)
72
T
(236)
31
w
(102)22(72)15(49)11(36)
42
N
(138)30(98)21(69)
51
T
(167)
22
w
(72)15(49)11(36)
30
N
(98)21(69)15(49)11(36)
36
T
(118)25(82)18(59)13(43)9(30)
iSO film speed
85
60
(197)
(279)
102
(335)72(236)
44
(144)
60
(197)
42
(138)30(98)21(69)15(49)11(36)
51
(167)
36
(118)25(82)18(59)13(43)9(30)
(138)30(98)21(69)15(49)
(167)36(118)25(82)18(59)
31
(102)22(72)15(49)11(36)
42
(138)30(98)21(69)15(49)11(36)
36
(118)25(82)18(59)13(43)9(30)
(49)11(36)
7.8
(25)
Unit: m(ft.)
42
51
7.8
(25)
7.8
5.5
(25)
(18)
7.5
(25)
7.8
5.5
(18)
7.5
(25)
3.9
(13)
5.3
(17)
6.3
(21)
3.9
(13)
5.3
(17)
6.3
(21)
2.7
(8.8)
3.7
(12)
4.5
(15)
(25)
15
5.5
(18)
7.5
(25)
Page 47

SETTING POWER SWITCH
STBY (STANDBY) Position
Use to conserve energy and shorten recycling time.
With Nikon F-501/N2020, F-401/N4004, F-301/ N2000, FA, FE2, and FG:
Use the SB-20’s STBY position to turn on the SB-20.
In STBY position, when the camera's meter turns off, in
one or two minutes the SB-20 turns otf automatically.
To turn the SB-20 on again, lightly press the camera’s
shutter release button.
Note: When the Nikon FA or FE2 is connected to Nikon Motor
Drive MD-12 via a remote cord, the camera's meter stays on
and the SB-20 remains on at STBY position.
Page 48

With other cameras:
Though the ON position is normally recommended for
turning on the flash unit, STBY can also be used.
With other Nikon cameras, even if the camera’s expo
sure meter stays on, the SB-20 automatically turns off
when not used for one or two minutes. To turn on
again, set power switch to ON or OFF position, then
reset to STBY. For convenience, you may also push
the open-flash button to turn on the SB-20.
ON Position
With cameras other than the Nikon F-501/N2020,
F-401/N4004, F-301/N2000, FA, FE2, and FG:
This position is normally used to turn on the SB-20.
With the Nikon FA, FE2, and FG:
To turn on the SB-20 when using mechanical shutter
settings (M250, MOO or B), set power switch to ON.
OFF Position
When not using the flash unit, always set the power
switch to OFF position.
33
Page 49

READY-LIGHT INDICATIONS
5 7 10 IS 20 30 4050
When the flash unit is turned on, the SB-20's ready-light
lights up to indicate the flash is ready to fire.
To activate the viewfinder ready-light function when
using the Nikon FA, FE2, F-501/N2020, F-401/N4004,
F-301/N2000, FG, or FG-20, first turn on the camera's
meter by lightly pressing the shutter release button.
34
F3-series
Page 50

With alkaline-manganese batteries, if the ready-light
takes more than 30sec. to light up, replace the bat
teries with a fresh sef.
Page 51

Ready-Light Warning Functions
To prevent errors, the ready-light inside the camera’s
viewfinder blinks in the cases listed below. When blink
ing occurs, check the SB-20’s flash mode selector
setting, the camera’s shutter speed/mode selector set
ting or film speed setting and adjust as necessary.
1) When SB-20 is set at TTL with cameras other than
Nikon F-501/N2020, F-401/N4004, F-301/N2000,
FA, FE2, or FG. Reset SB-20’s flash mode selector
to A or M.
2) When using the FA, FE2, or FG to perform TTL auto
matic flash photography with the camera’s shutter
speed dial set at a mechanical setting (M250, M90
or B). Reset shutter speed dial to another shutter
speed setting. For M250, MOO or B setting, reset
SB-20's flash mode selector to A or M.
3) When performing programmed TTL auto or TTL
auto flash operation with a camera film speed set
ting beyond the usable range. Use film within the
appropriate range for TTL auto flash photography
(ISO 25 to 400 with the F-401/N4004, FA, FE2 or
FG; ISO 25 to 1000 with the F-501/N2020 or F-301/
N2000). With the FA, ready-light also blinks when
the film speed setting on the oamera is near ISO 12.
Page 52

4) When shutter speed set on the FE or FM2 is faster
than the flash sync speed. Set the shutter speed to
the flash sync speed or slower one.
5) With the Nikon F-401/N4004, when the built-in flash
and SB-20 are OFF, and when the camera detects
flash is effective, the ready-light in the camera's
viewfinder blinks when the shutter release button is
lightly pressed.
With the SB-20 in TTL or A mode, if both viewfinder
ready-light and SB-20 ready-light blink after taking pic
tures (to warn that lighting might have been insufficient
for correct exposure), confirm subject is within the
flash shooting distance range and, if necessary, use a
wider aperture or move closer to the subject.
With the Nikon F-401/N4004, for scenes where the
background is extremely bright, the ready-light may
not blink after the shot, even if flash is insufficient for
correct exposure.
With weak batteries, ready-lights blink to indicate in
sufficient flash power, even if the subject is within
the shooting distance range; replace batteries with
a fresh set.
35
Page 53

SYNCHRO-SUNLIGHT FILL-IN FLASH PHOTOGRAPHY
For backlit subjects, to fill in shadows and balance
lighting, use the SB-20 even in daytime.
In the following, use a slower shutter speed to
avoid a dark background.
Without flash:
The backlit subject
comes out too dark.
By setting the F-401 /
N4004 to program,
aperture-priority or
shutter-priority auto
exposure mode, with
the SB-20 set to TTL,
automatic balanced
fill-flash is possible in
situations where fill-flash
is effective, even with a
bright subject. For details,
see the F-401/N4004
With flash:
Both the subject
and the background
come out properly
exposed.
36
instruction manual.
(In manual exposure
mode, ordinary TTL fill-
flash is possible.)
Page 54

In TTL Mode
1. Set the camera shutter speed manually to a flash
synchronization speed or slower speed.
2. Frame the background in the camera viewfinder,
turn on the camera’s exposure meter to determine
aperture for a correct background exposure, then
set the aperture on the lens.
3. Set the flash mode selector to TTL, turn on the
SB-20 and take the shot.
With a strongly backlit subject (e.g., scene which in
cludes the sun), it may be difficult to obtain desired
exposure balance. In this case, use the SB-20 in M
mode.
Note: Do not use programmed TTL flash operation for fill-in
flash photography.
Page 55

In A Mode
1. Determine correct aperture for the backlit subject
(according to method on page 25) by referring to the
SB-20’s aperture selection/distance range panei,
then set both the aperture index and the aperture on
the iens.
2. Frame the background in the camera viewfinder and
turn on camera meter to determine proper shutter
speed for the aperture set on the lens. The shutter
speed must be equal to or slower than the flash sync
speed—without a proper shutter speed you cannot
perform fill-in flash photography in A mode.
3. Set the shutter speed from step 2 on camera’s
shutter speed dial.
4. Set the flash mode selector to A, turn on the flash
unit and take the shot.
With a strongly backlit subject, perform fill-in flash
photography in M mode.
37
Page 56

In M Mode
1. Manually set the camera shutter speed to a flash
synchronization speed or slower speed.
2. Frame the background In the camera’s viewfinder,
then turn on the camera’s exposure meter to read
proper aperture for correct background exposure,
and set the aperture on the lens.
3. Calculate the flash-to-subject distance using the
equation below and set the SB-20 at the calculated
distance.
flash-to-subject =
* For guide number, see page 32.
4. Set the SB-20’s flash mode selector to M, turn on the
flash unit and take the shot.
38
guide number*
f/stop
Page 57

To eliminate harsh shadows caused by ambient
daylight, decrease fiash iilumination by one or
two f/stops using one of the methods below.
1. Use an aperture one or two t/stops smaller
than that determined in step 2 in combina
tion with a shutter speed slower by one or
two steps.
2. Reduce the amount of light output by one or
two steps by resetting the light output selec
tor knob.
3. Use a flash-to-subject distance from 1.4 to
two times longer than that determined using
the equation in step 3.
Page 58

DIFFUSING THE LIGHT
Page 59

Diffused light eliminates harsh shadows and creates
attractive portraits. There are two ways to diffuse light:
1. Bounce light off a broad reflective surface such as
the ceiling;
2. Use a diffuser between the flash and the subject.
Direct flash: Harsh, unflattering
lighting.
Bounce flash: Soft, natural-looking
lighting.
39
Page 60

Bounce Flash Photography Procedure
1. Select a ceiling to bounce the flash from. In color
photography, selecf a white or silver ceiling—other
wise, color photographs come out with an unnatural
color cast similar to that of the reflecting surface.
2. Rotate the flash head upwards, towards the ceiling.
To avoid uneven illumination, rotate flash head back
60° or more.
3. Set flash mode selector to TTL for TTL auto flash
operation-or A for non-TTL auto flash operation, then
turn on the flash unit. The bounce indicator lights up.
4. Choose an aperture and perform a test firing. If the
ready-light blinks after test firing, indicating under
exposure may occur at the aperture set on the lens,
use a wider aperture or reduce the bounce distance
and test fire the flash again.
40
Page 61

5. Bracket your exposures. You are recommended to
take additional shots with the camera's exposure
compensation dial set in the + or - direction (not
possible with Nikon F-401/N4004) for TTL auto flash
operation or with the lens opened up or stopped
down one or two f/stops for non-TTL auto flash
operation.
Page 62

' mée. te«* s
rsM «rs !-
~X^T
\V\V'
To create a catchlight for the subject’s
eyes: Insert white paper into the SB-20’s re
flector slot so a small amount of direct illumi
nation fills in unfiattering shadows around the
eyes.
Page 63

Using A Diffuser
Place a translucent material, such as one or more
sheets of tracing paper, between the flash and subject
to diffuse light. It is recommended that you experiment
with different flash-to-diffuser distances andtor more
than one diffuser.
Use the SB-20 on TTL or M mode when using a diffuser.
41
Page 64

SYNCHRONIZATION WITH
--------------------
MOTOR-DRIVEN CAMERA
In M mode, you can perform sequential flash shootings
with a motor driven camera at up to 4.2fps (frames per
second).
The maximum number of flashes for continuous shoot
ing are listed below.
Batteries
AA-type alkaline-manganese
batteries inside SB-20
AA-type alkaline-manganese
batteries Inside SB-20 plus
C-type alkaline-manganese
batteries inside optional
DC Unit SD-7**
* When the SB-20 is charged for SOsec. after the ready-
light lights up; at4.2fps with fresh batteries: at 20°C
(68°F)
‘"'For details about the SD-7, see page 52.
‘"‘"'M ore flashes possible, but never fire the flash more than
40 times. Before firing the flash again, stop using for
more than 10 minutes.
42
Light output
1/4
1/8 4
1/16 8
1/4 4
1/8 10
1/16
Maximum
number of
fiashes*
2
40***
Page 65

MULTIPLE FLASH EXPOSURES
To create multiple-exposure “stroboscopic” effects or
paint the scene with light, use the following procedure:
1. Disconnect the flash unit from the camera body.
2. Set the camera at B (bulb).
3. Push the open-flash button repeatedly—as many
times as desired.
Page 66

MULTIPLE FLASH PHOTOGRAPHY
■ I ■
^1
TTL Multiple Flash Photography
Use the Nikon Speedlight SB-22, SB-20, SB-18,
SB-16B or SB-15 connected to an F-501/N2020,
F-401/N4004, F-301/N2000, FA, FE2, or FG camera
as a master flash unit; and use either the SB-22,
SB-21 B, SB-20, SB-18, SB-17, SB-16A, SB-16B and/or
SB-15 as slave flash unit(s). Up to five flash units can
be used.
For TTL multiple flash photography, use fhe opfional
TTL Mulfi-Flash Sync Cord SC-18 (l.5m) and/or SC-19
(3m) to conned fhe flash units via the TTL multiple
Page 67

flash terminal. Because the SB-22, SB-21 B, SB-20,
SB-18 and SB-15 are not provided with a TTL multiple
flash terminal, it is necessary to use TTL Remote Cord
SC-17 when using these flash units as a master flash
unit. To use the SB-22, SB-20, SB-18 and/or SB-15 as
slave flash units, use the AS-10. When using the
SB-140, SB-14 and/or SB-11 for TTL multiple flash
photography, you should also use TTL Remote Cord
SC-23. With the Nikon F-401/N4004, programmed TTL
auto flash and TTL auto flash are not possible with the
SB-11/14/140 (even with the SC-23) or SB-21. They
cannot be used for TTL multi-flash either, even as a
slave flash unit.
See the system chart on the next page.
43
Page 68

System chart for TTL multiple flash operation
Page 69

Page 70

AS-11 AS-11 AS-10
45
Page 71

Manual Multiple Flash Photography
Connect the SB-20 and other flash units with the
optional Nikon Sync Cord SC-11 or SC-15 via the
SB-20’s multiple flash terminal.
For correct exposure in manual multiple flash opera
tion, be sure all flash units are set at manual flash mode.
Caution
To avoid damaging the flash units or incorrect operation,
never mix Nikon Speedlight with flash units of other manu
facturers.
46
Page 72

AVOIDING ‘RED EYE”
“Red eye” is a common phenomenon in flash photog
raphy where the center portions of a subject's eyes
appear as bright red orbs in coior photographs, or
white in black-and-white pictures.
To avoid “red eye,” take any or all of the following pre
cautions:
•Ask the subject not to look directly into the lens when
the picture is taken.
• Using a sync cord or TTL Remote Cord SC-17, remove
the flash unit from the camera and hold it as far away
from the camera as possible.
•Increase the overall room illumination to reduce
opening of the subject's pupils.
______________
Page 73

CLOSE-UP FLASH PHOTOGRAPHY IN TTL MODE
When used with the Nikon F-501/N2020, F-401/N4004,
F-301/N2000, FA, FE2 or FG camera, the optionai TTL
Remote Cord SC-17 iets you perform fiash shooting
with a subject cioser than 0.6m.
1. Use the SC-17 to connect the SB-20 and camera.
(See SC-17 instruction manuai.)
2. Position the SB-20 and rotate the flash head so light
from the flash head covers the subject.
3. Regardless of the lens in use, set the zoom set ring
so “W” appears in the zoom indicator window.
4. To determine aperture, use the following equation:
f/stop£--------------------------------------
flash-to-subject distance
where A corresponds to the film in use according to
the table below:
A
If you are using ISO 100 film for example, and the
flash-to-subject distance is 0.5m, divide 4 by 0.5 to
get f/8. That means you can use an aperture of f/8 or
smaller. Use as small an aperture as possible.
5. Set the flash mode selector to TTL, turn on the SB-20
and take the shot.
With very light- or dark-toned subjects, make expo
sure compensation with the camera’s exposure com
pensation dial.
ISO film speed
A
•For F-501/N2020 and F-301/N2000 only.
25 32 40
2 2.2
50 64
2.5 2,8 3.2
80
100 125 160
3.5 4 4.4
200 250 320
5 5.6
6.3 7.1 8
400 500* 640*
8.9 10.1 11
800* 1000*
13
47
Page 74

TIPS ON SPEEDLIGHT CARE
•To remove smudges, wipe with a
dry soft or silicon-treated cloth.
Never use thinner, benzine or
aicohoi—they might damage
plastic parts.
48
• Never disassemble or repair the
flash unit; if the SB-20 malfunc
tions, take it immediately to an
authorized Nikon dealer or ser
vice center.
• Keep the SB-20 away from places
where temperature is higher than
50°C, and do not store in damp
places. Use within the range of
-10‘’C~-t-50°C.
Page 75

•Keep the SB-20 away from salt
wafer and out of the rain.
• When not using the SB-20, re
move batteries to avoid damage
due to battery leakage. If leakage
occurs, fake the SB-20 to your
nearest Nikon authorized service
facility.
•When the SB-20 is not used, per
form the following once a month:
1. Install batteries, turn on the
SB-20 and fire flash a few
times.
2. Wait until the ready-light comes
on.
3. Turn off the SB-20, and remove
the batteries.
49
Page 76

ABOUT BATTERIES
------------------------------
New batteries
Purchase the new (freshest) batteries possible.
Temperature
Battery life ratings are based on operation at 20°C
(68° F). At other temperatures, battery life is shortened.
For low temperature operation, keep spare batteries
and if possible, use NiCd batteries.
Continuous use
Batteries are drained much more quickly by continu
ous use than by intermittent use.
Storage
store batteries in a cool, dry place below 20°C (68°F).
Battery brand
Do not mix battery brands or model numbers, or new
and old batteries.
Disposai
Do not dispose of batteries by burning, and never dis
assemble batteries.
50
Page 77

NiCd batteries
In comparison with regular batteries, NiCd batteries
provide faster recycling time and better efficiency at
low temperatures.
Before charging NiCd batteries, thoroughly read in
structions for batteries and battery charger.
'Batteries with a "+ " terminat that exceeds 6mm in diame-
ter cannot be used-
Page 78

ACCESSORIES
-----------------------------------
Sync Cords SC-11 and SC-15
For off-camera or manual multiple lighting setups or to
connect the SB-20 to a camera without a hot shoe use
sync cord SC-11 (25cm long) or coiled sync cord SC-15
(one meter long).
TTL Remote Cord SC-17
For programmed TTL auto flash operation or TTL auto
flash operation when using the SB-20 off the Nikon
F-501/N2020, F-401/N4004, F-301/N2000, FA, FE2 or
FG camera, use coiled cord SC-17. The SC-17 ensures
automatic sync speed setting and ready-light veiwfinder indication just as if the flash unit were directly
mounted on the camera. Comes with two TTL multiple
flash terminals and one tripod socket.
TTL Multi-Flash Adapter AS-10
When using the SB-20, SB-18 or SB-15 as a slave flash
unit or when using more than three flash units, use the
AS-10. Comes with three multiple flash terminals and
one tripod socket.
Page 79

SC-17
AS-10
Ì» <»
51
Page 80

TTL Multi-Flash Sync Cords SC-18 and SC-19
Use the SC-18 or SC-19 to connect flash units in TTL
multiple flash operation. The SC-18 is approx. 1.5m
long; the SC-19 is approx. 3m.
Flash Unit Couplers AS-4 and AS-7
To mount the SB-20 on a Nikon F3-series camera with
the DE-2 or DE-3 tinder, use the AS-4 or AS-7. The AS-7
lets you change film without removing the flash unit.
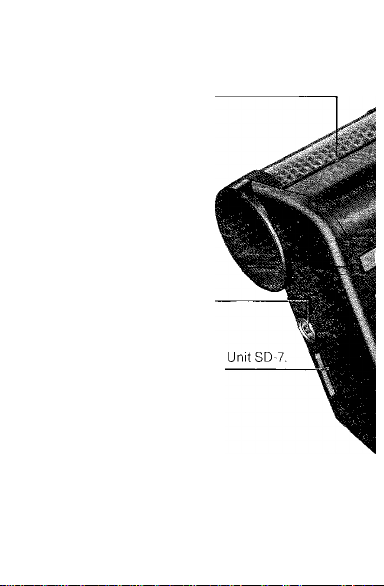
DC Unit SD-7
The Nikon DC Unit SD-7 is an optional external power
source. To use it, connect the SD-7’s power cord SC-16
to the SB-20’s external power terminal. Even when
powered with the SD-7, the SB-20 still requires bat
teries inside the flash unit—do not remove the
batteries.
52
Page 81

AS-4
SC-18
AS-7
SD-7
Page 82

SPECIFICATIONS
All performance data are for normal-temperature operation
[20°C (68°F)]
Electronic
construction
Guide number
(at manuai fuii iight
output)
Zoom capability
Angie of coverage
Zoom set
ring position
W (wideangle) 53°
N (normal) 45°
T (telephoto) 23“
Horizontal
Bounce capabiiity
Flash duration
Light output
(approx.)
Full
1/2
1/4
1/8
1/16
Automatic silicon-controlled
rectifier and series circuitry
30 (ISO too
49
(ISO
and meters) or
25 and feet) with the
zoom set ring at N ■
Three settings: W for
wideangle, N for normal and
T for telephoto
Vertical
70“
28 mm or longer
60“
35 mm or longer
31“
85mm or longer
Flash head can be rotated
down to -7° or up to 90“
Flash duration (approx.)
1/1200sec.
1/1500 sec.
1/3700sec.
1/7400 sec.
1/15000 sec.
Usable lens
Page 83

Power source
Power switch
Four 1.5V AA-type alkalinemanganese or NiCd batteries:
optional Battery Pack SD-7
holding six C-type batteries is
available as an external
power source
Three positions are pro
vided—OFF, STBY (for
standby) and ON; at STBY
position with the Nikon F-501/
N2020, F-401/N4004, F-301/
N2000, FA, FE2 or FG, SB-20
turns off automatically when
flash unit is not used for one or
two minutes and turns on when
camera exposure meter is on
53
Page 84

Number of flashes and recycling time at manual
full light output
Battery type
AA-type
alkaline-manganese
AA-type NiCd
C-type alkaline-
manganese inside
the optional SD-7**
'For autofocus operation assisted by the AF illum inator,
less number of flashes available.
'With four AA-type alkaline-manganese batteries instailed
in the SB-20
Flash exposure
control
TTL mode
Number of flashes
(approx.)*
160 times
60 times 4sec.
Up to 40 times
Up to 200 times 5 sec.
Up to 400 times
Up to 450 times
Three flash modes are
provided: TTL, A and M
Used only with Nikon F-501/
Recycling time
(approx.)
6 sec.
3sec,
10 sec.
30 sec.
N2020, F-401/N4004, F-301/
N2000, FA, FE2 or FG; for pro
grammed TTL auto flash oper
ation (with F-501/N2020, F-401/
N4004 or F-301/N2000 only) or
TTL auto flash operation; light
is measured through the lens
54
Page 85

Usable film speed
range in TTL mode
ISO 25 to 1000 with Nikon
F-501/N2020 and F-301/
N2000 or ISO 25 to 400 with
Nikon F-401/N4004, FA, FE2,
and FG
Usable aperture
f/2tof/22 (at ISO 100)
range in TTL mode
A mode
For non-TTL auto flash oper
ation; light is measured via
light sensor in front of fhe
flash unit
Usable apertures in
A mode
f/2, f/2.8, f/4, f/5.6 and f/8
(at ISO 100)
Shooting distance range in A mode
Aperture
f/2 1.9-15(6.2-49)
f/2.8 1.3-10(4.3-33)
f/4
f/5.6
f/8 0.6-3.7 (2.0-12)
M mode
Shooting distance range at ISO
too and zoom set ring set at N
1.0-7.5(3.3-25)
0.7-5.3(2.3-17)
For manual flash operation;
amount of light output can be
varied in five sfeps
Unit: m (ft.)
Page 86

AF assist LED Automatically fires LED
beam toward the subject
when performing autofocus
with the Nikon F-501/N2020
(Single Servo) or F-401/N4004
camera in insufficient iight
Dimensions
Approx. 71 (W)x110(H)x
70(D)mm (2.7x4.3x2.7 in)
Weight
Approx. 260g (9.1oz)
(without batteries)
Accessories provided
Specifications and designs are subject to change without
notice.
Soft Case SS-20
Page 87

55
Page 88

No reproduction in any form of this manual, in
whole or in part (except tor brief quotation in critical
articles or reviews), may be made without written
authorization from NIKON CORPORATION.
Nikon
NIKON CORPORATION
FUJI BLDG., 2-3, MARUNOUCHI 3-CHOME, CHIYODA-KU, TOKYO 100, JAPAN
PHONE: 81-3-3214-5311 TELEX: NIKON J22601 FAX: 81-3-3201-5856
Printed in Japan 9&221-C03(S136)
 Loading...