

Installing Capture NX 2
Installing Capture NX 2
Thank you for your purchase of Capture NX 2. This Quick Start Guide takes fi rst-time users through the
steps of installing Capture NX 2 and introduces some of the program’s core features. Follow along using the
fi les on the supplied CD to experience how Capture NX 2 can improve your images.
Notes
• In addition to being licensed for use in this guide, the images on the supplied CD are available for personal use.
cannot be otherwise used, copied, or distributed without permission of the copyright holder.
• Save where otherwise noted, the illustrations in this guide are from Windows Vista Ultimate but the instructions apply
to both Windows and Mac OS.
They
Installing Capture NX 2
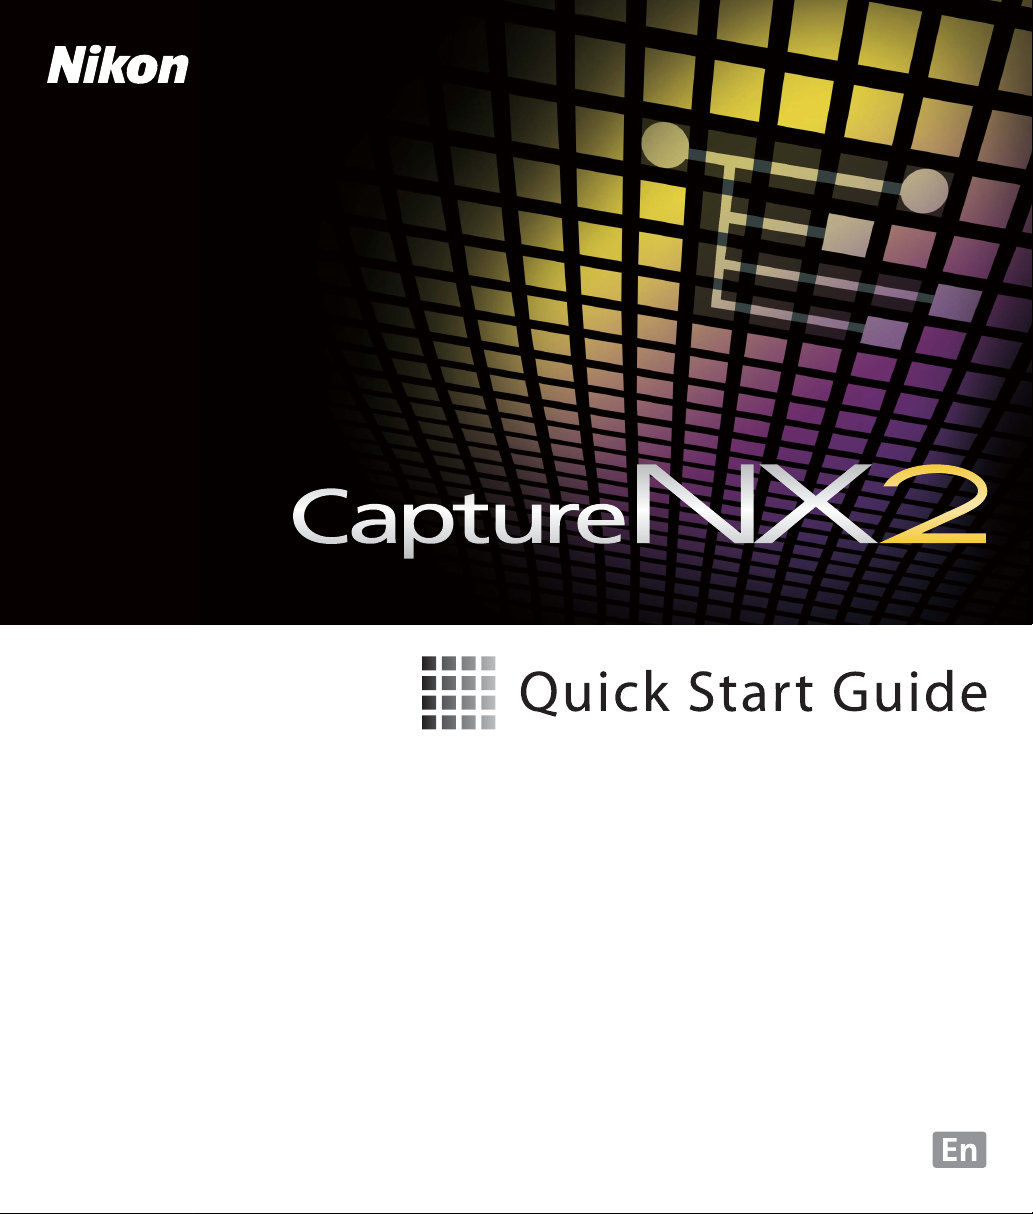
Step 1
Windows
Insert the Capture NX 2
installer CD into a CDROM drive. The installer
will start automatically
(A).
A
Mac OS
Insert the Capture NX 2
installer CD into a CDROM drive and doubleclick the CD icon on the
desktop (B). Doubleclick the Capture NX 2
Setup icon to start the
installer (C).
B
C
Step 2
Follow the on-screen instructions to complete installation, using the default installer options where applicable.
Windows
In the last dialog (D),
confi rm that Run
Capture NX 2 is selected and click Finish.
D
Mac OS
When the dialog shown
at right (E) is displayed,
confi rm that Run
Capture NX 2 is select-
E
ed and click Continue.
Capture NX 2 will now start. Proceed to “A First Look at Capture NX 2” on the following page.
Note
When Capture NX 2 starts, click Enter Product Key and enter your name, the name of your organization (optional), and
the product key, which may be found on the CD case. Do not lose the product key. It is required when installing or
upgrading Capture NX 2 and cannot be replaced if lost.
For More Information
For more information on installing Capture NX 2, see page 12 of the User’s Manual.
Capture NX 2 Quick Start Guide
2
A First Look at Capture NX 2
A First Look at Capture NX 2
A First Look at Capture NX 2
Have you ever found that a photograph looks slightly diff erent than you imagined? The color control point
feature in Capture NX 2 makes getting the results you imagined a snap. In this example, we will enhance the
blues in the sky without aff ecting the other colors in the image.
the supplied CD.
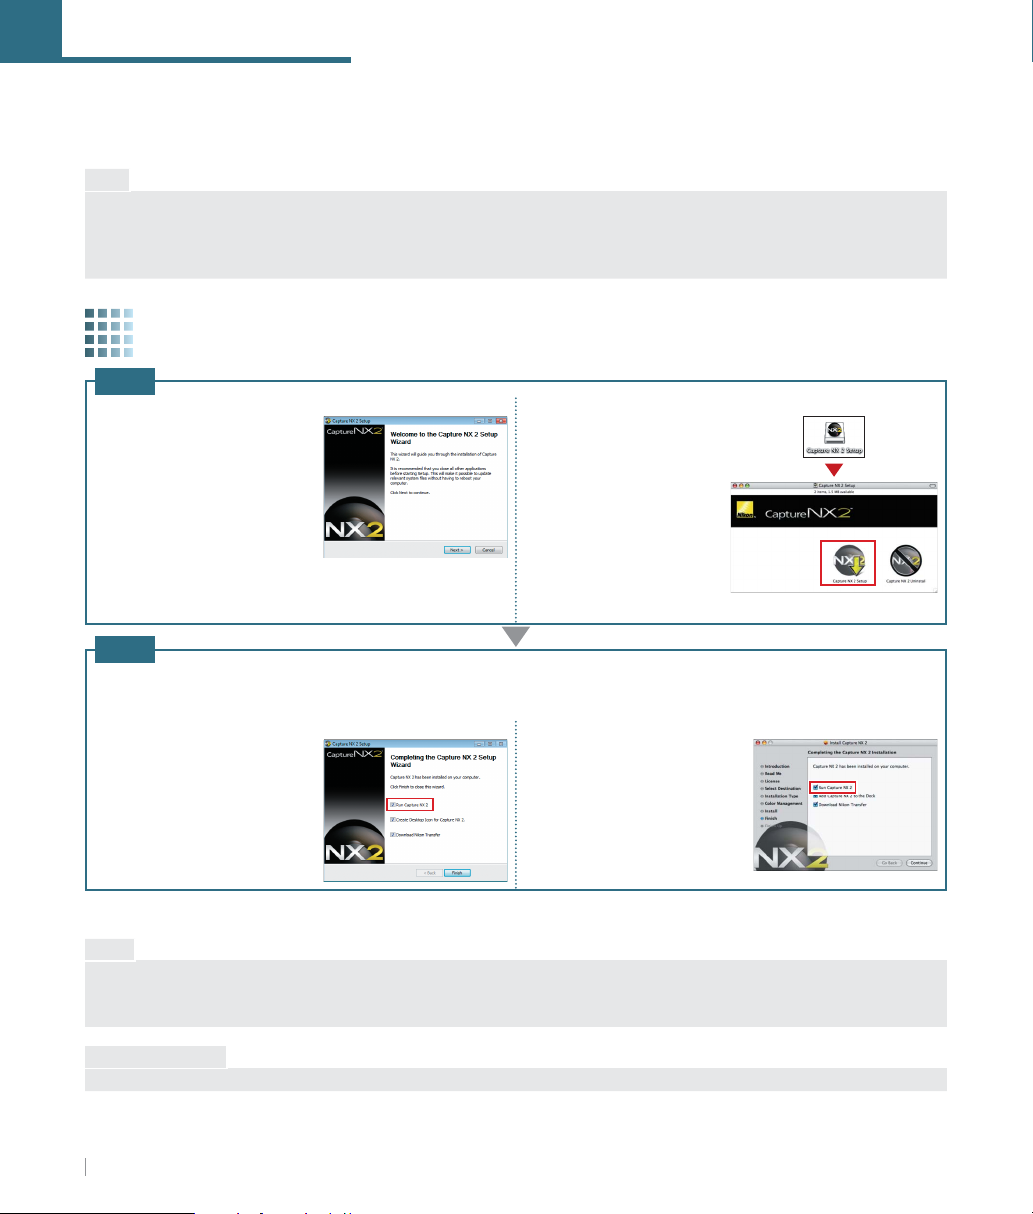
01
Click Open Image.
The “Welcome” dialog shown at right is displayed
when Capture NX 2 starts. Click Open Image in
the “New” section.
Tip
To start Capture NX 2:
• Windows: Double-click the Capture NX 2 shortcut on
the desktop.
• Mac OS: Click the Capture NX 2 icon in the Dock.
For More Information
For more information on starting Capture NX 2 and
opening images, see pages 15 and 16 of the User’s
Manual.
Note
If you removed the Capture NX 2 installer CD after installation, you will need to re-insert the disk to access the images on the CD. If the installer starts when the disk is inserted, click Cancel to exit.
Follow along using the sample images on
02
Select an image.
Navigate to the “NX2_samples“ folder on the CD and select “sample_01”. Click Open to open the image
in Capture NX 2.
Windows Mac OS
Capture NX 2 Quick Start Guide
3

A First Look at Capture NX 2
A First Look at Capture NX 2
03
Place a color control point.
In this example, we will use a color control point to make the sky more vivid without aff ecting the colors
in the rest of the image.
03-1: Click the color control point tool in the toolbar.
03-2: Click a point in the sky.
Click a point in the sky A color control point is added to the image
Note
Selected control points can be moved by dragging them to a new position or deleted by pressing the Delete key.
For More Information
For more information on color control points, see page 103 of the User’s Manual.
Capture NX 2 Quick Start Guide
4
A First Look at Capture NX 2
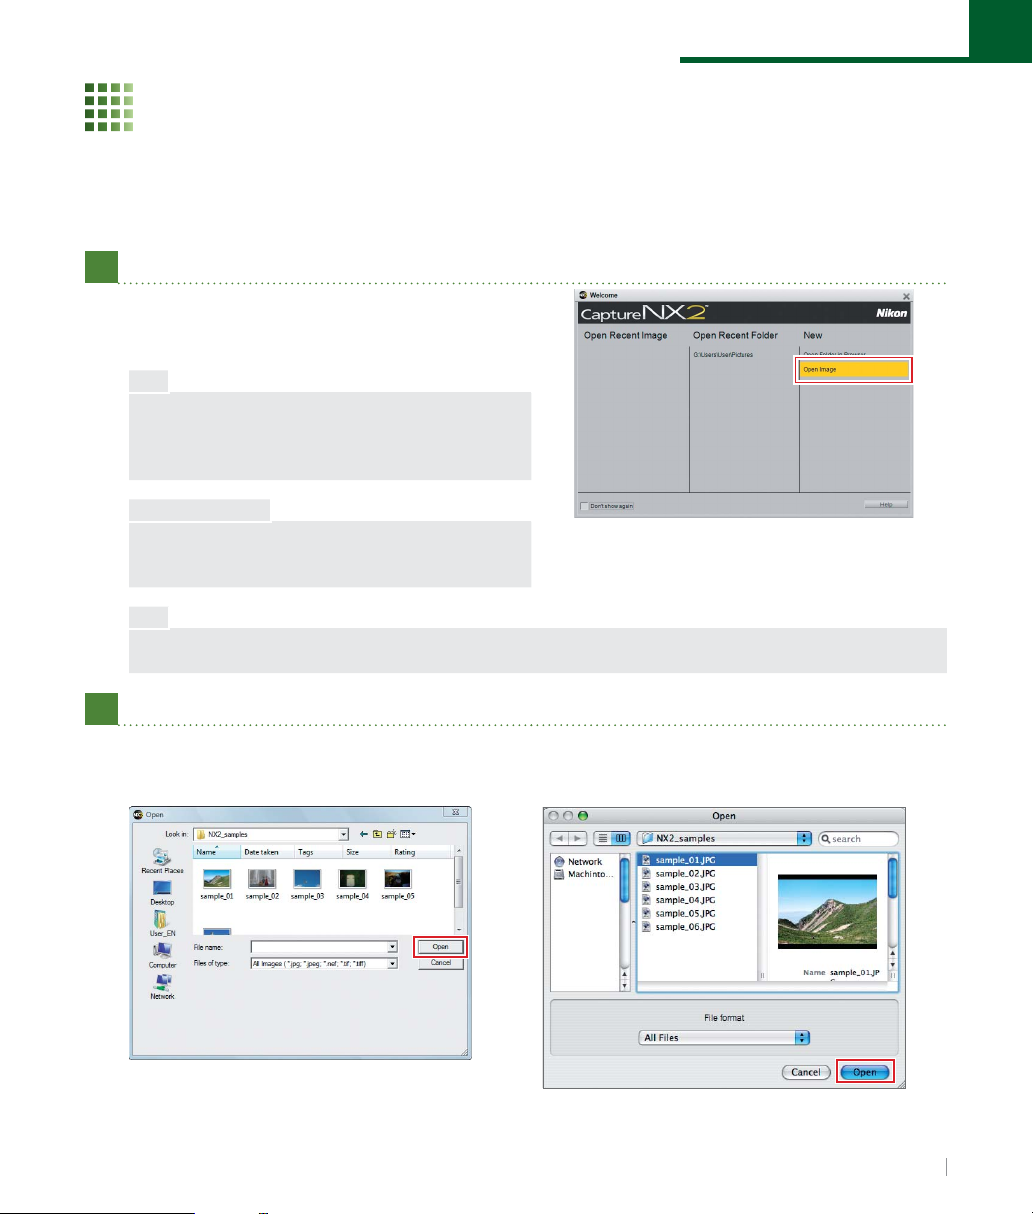
쐃
쐇
쐋
쐏
쐄
쐂
A First Look at Capture NX 2
Tip
Colors in an area centered around the control point can be adjusted by dragging the handles (
or ■) of its four sliders.
Changes to color and tonality apply to the area
or object identifi ed by this point.
Hide or display all sliders other than the selected slider.
04
Size the control point.
Color control point
쐃
Size slider Controls the size of the area aff ected.
쐇
Brightness slider Controls brightness.
쐋
Contrast slider Controls contrast.
쐏
Saturation slider Controls saturation (vividness).
쐄
Hide/display triangle
쐂
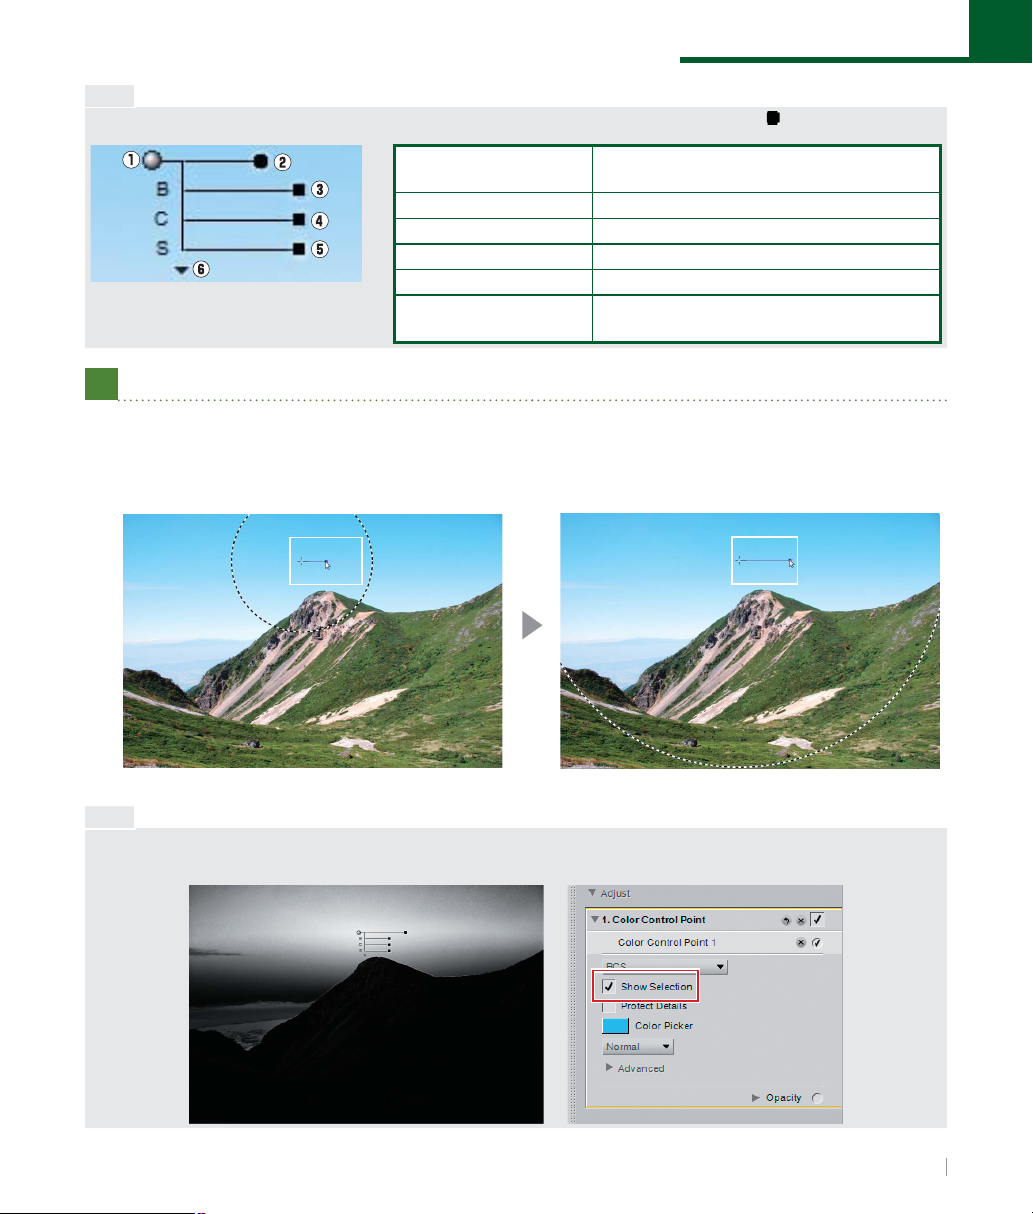
Adjust the size of the control point by dragging the handle of the size slider. The area of infl uence is
shown by a black-and-white dotted line.
Click size slider. Area of infl uence is indicated
by circle with dotted border
Drag handle outwards until
control point covers entire sky
Note: Dotted border is exaggerated for illustrative purposes.
Tip
Choose Show Selection in the edit list to view the area aff ected by the color control point. The area in which the eff ects
are most noticeable is shown in white; unaff ected areas are shown in black.
Capture NX 2 Quick Start Guide
5
A First Look at Capture NX 2
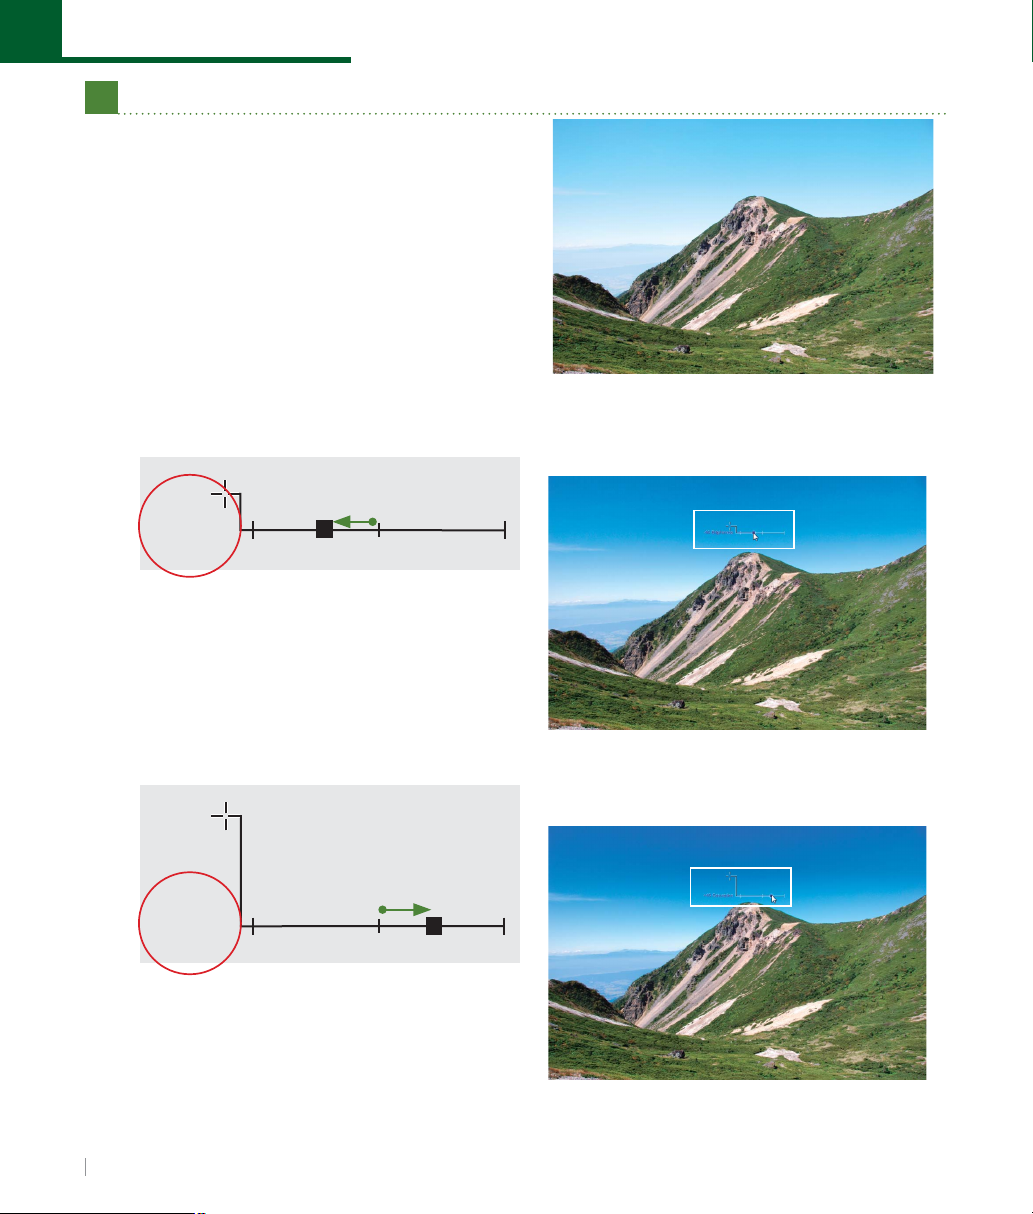
A First Look at Capture NX 2
05
Adjust color.
Use the brightness, contrast, and saturation sliders to adjust the selected color. In this example,
we will adjust the sliders to increase the vividness
of the blues in the sky; feel free to experiment
with other values.
05-1: Reduce brightness (B) to –40.
Drag inwards
Brightness
–40
Before
Sky assumes a darker hue
05-2: Increase saturation (S) to +40.
Saturation
+40
Capture NX 2 Quick Start Guide
6
Vividness of blues has increased, reducing eff ects of
haze without aff ecting other colors in area
Drag outwards
After
 Loading...