

Page 1
Page 1 of 8
VPN Configuration of ProSafe VPN Lite software and NETGEAR ProSafe
Router:
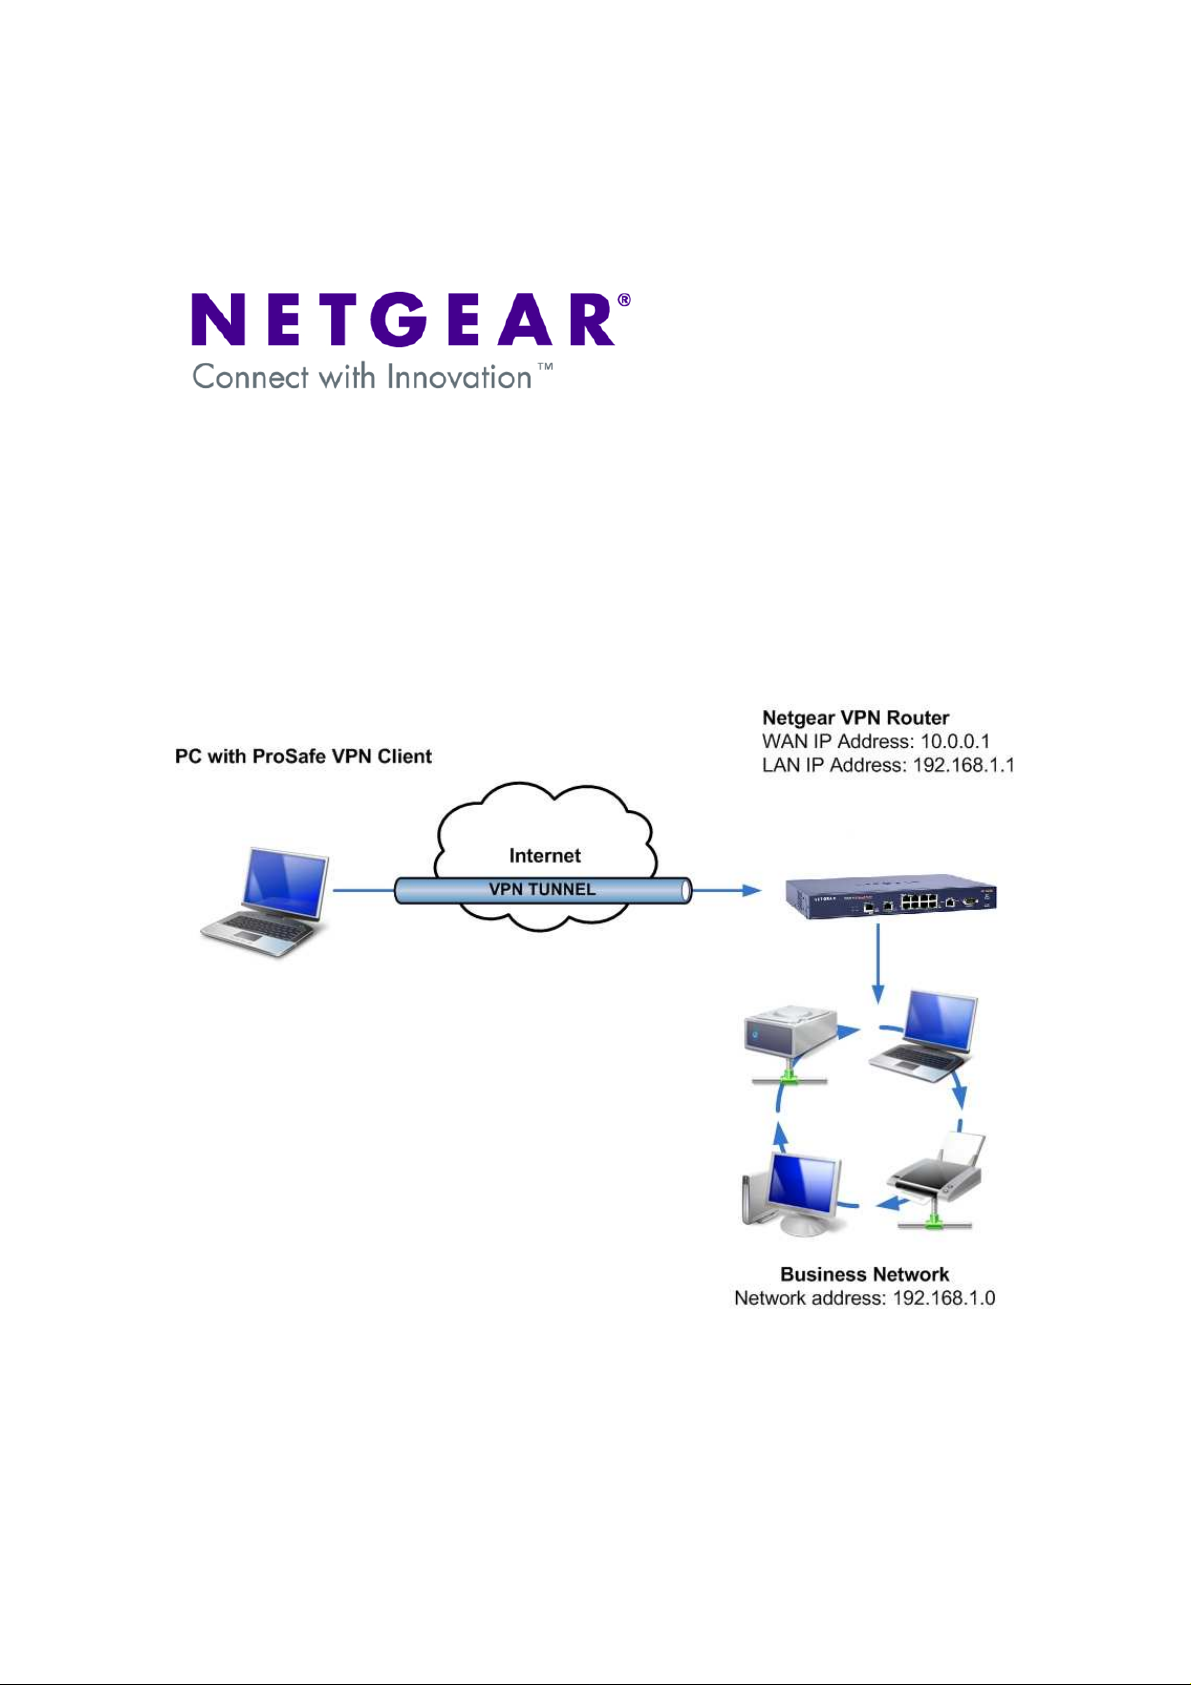
This document will guide you on how to create IKE and auto-VPN policies for your ProSafe
NETGEAR Router, as well as how to configure the ProSafe VPN Lite Client in order to allow a
Virtual Private Network to be established over the Internet.
NOTE: This document assumes that your router is either receiving a public IP address on the
WAN interface or that the gateway device(s) have the correct port forwarding or DMZ configured
so that port 500 UDP is open for the router, these gateway devices must also allow VPN passthrough.
Version 1.2
Page 2

Page 2 of 8
Router Settings:
As we configure the NETGEAR VPN Router, there will be information we’ll add which will later be
used in the configuration of the ProSafe VPN Lite Client. This information will be marked with rednumbered circles. You can print this form to help keep track of this information.
➊➊➊➊
➋➋➋➋
➌➌➌➌
➍➍➍➍
➎➎➎➎
➏➏➏➏
Pre-Shared Key: _____________________________________________________
Remote Identifier Information: ___________________________________________
Local Identifier Information: _____________________________________________
Router’s LAN Network IP Address: _______________________________________
Router’s LAN Network Mask: __________________________________________
Router’s WAN IP Address: _______________________________________________
Version 1.2
Page 3
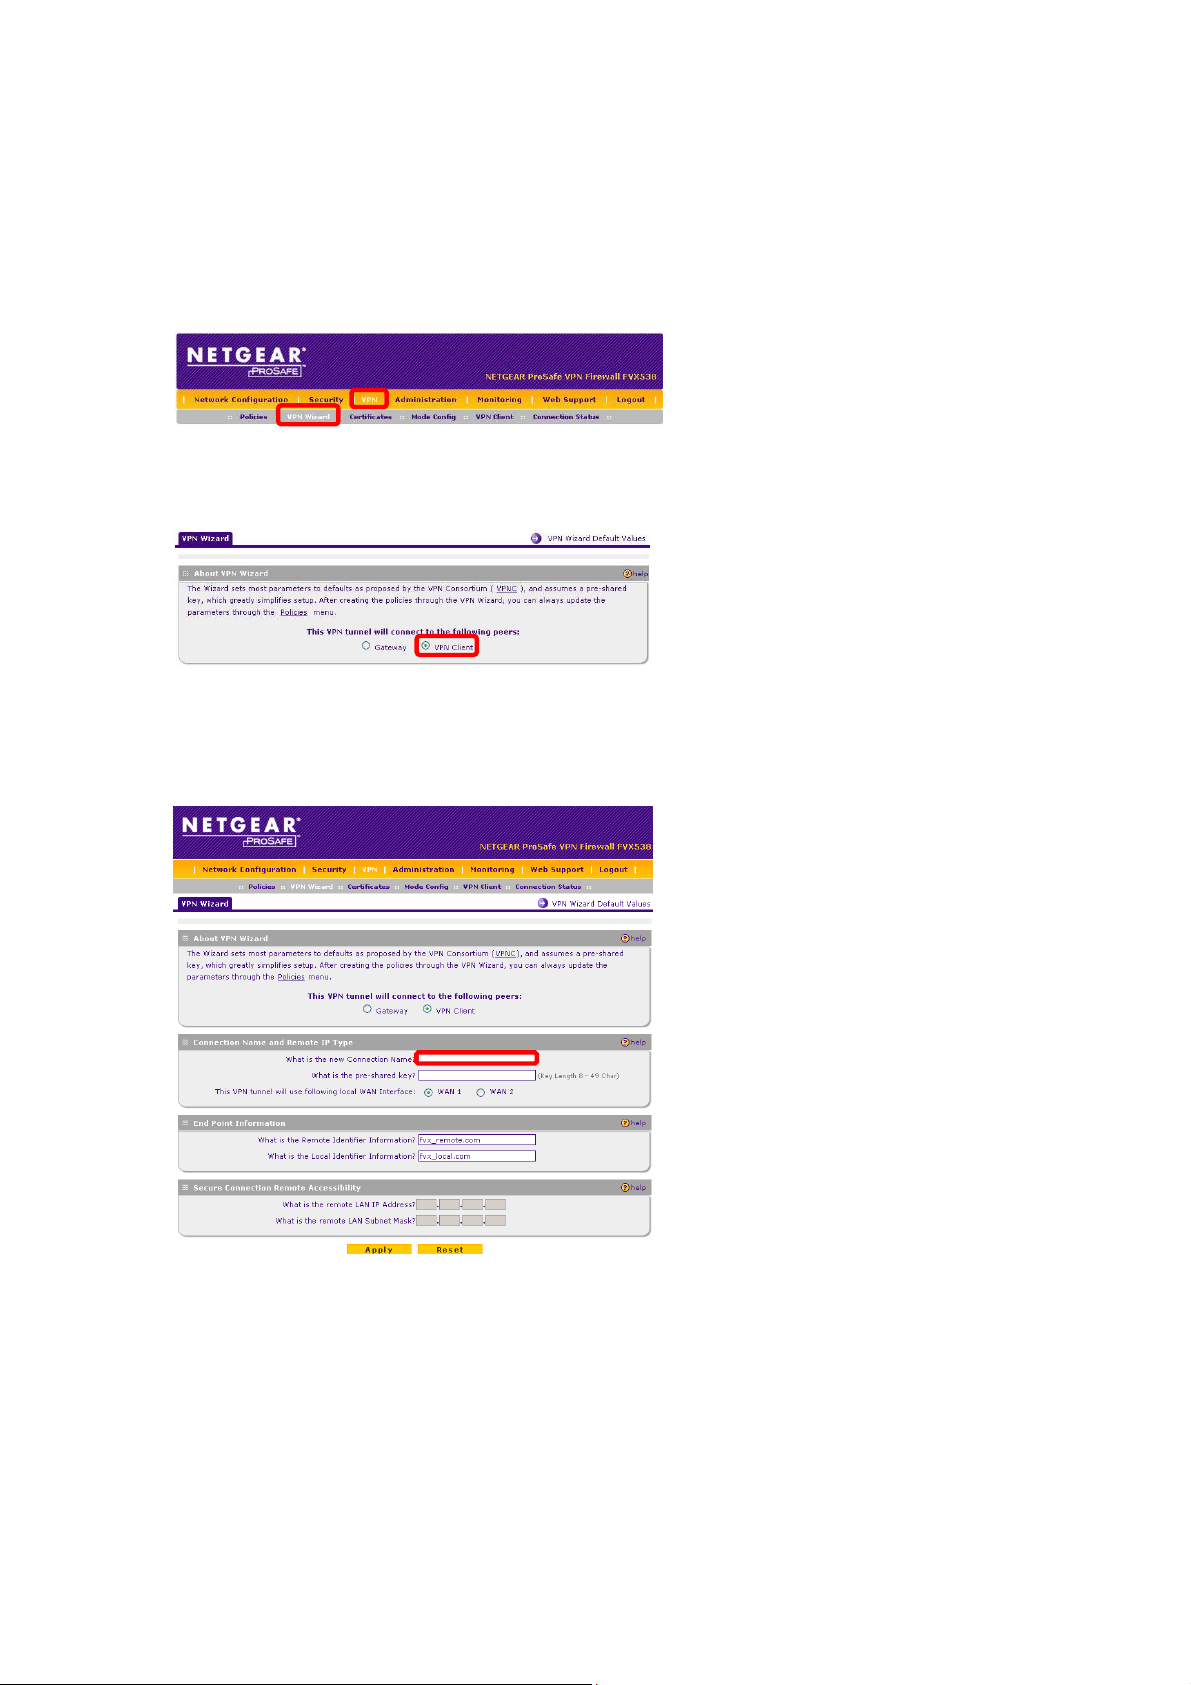
Connection Name:
The name can
Creation of the VPN Policy on the ProSafe Router:
•
•
The following fields will now be available:
➊➊➊➊
➋➋➋➋
➌➌➌➌
•
be any alphanumeric string. The
name identifies your tunnel, but it
bears no relevance to the
connection.
➊➊➊➊
Pre-Shared Key: The pre-shared
key can be any alphanumeric string
from 8 to 49 characters long.
➋
➋ Remote Identifier Information:
➋➋
The Remote Identifier can be any
alphanumeric string. It is a name
that identifies the remote peer
(Client) in the VPN Connection. You
can leave the default or create your
own identifier.
➌
➌ Local Identifier Information: The
➌➌
Local Identifier can be any
alphanumeric string. It is a name
that identifies the local peer (Router)
in the VPN Connection. You can
leave the default or create your own
identifier.
•
WAN Interface: If your router has
more than one WAN Interface, you’ll
be prompted to select which interface
to use for the VPN Tunnel.
Page 3 of 8
From the Router’s GUI, go to the
VPN section and then select the
VPN wizard.
Select the VPN Client option.
Version 1.2
Page 4

Page 4 of 8
Once you apply, you will see the policy we created in the list of VPN Policies. Make note of the
following:
➍➍➍➍
Router’s LAN Network IP
➍➍➍➍
NOTE: The values you used for the fields marked with red circles will be referenced with the
same circled numbers while configuring the ProSafe VPN Lite Client software.
➎➎➎➎
Address: The first segment in the
“Local” box. In our screenshot
described as 192.168.1.0 – but may
change depending on the setup of
your router.
➎➎➎➎
Router’s LAN Network Mask: The
second segment in the “Local” box.
In our screenshot described as
255.255.255.0 – but may change
depending on the setup of your
router.
Version 1.2
Page 5

Creation of the VPN Policy on the ProSafe Lite Client:
•
After installing and activating the
VPN Lite Client software, right-click
on the VPN Client tray icon and
select Configuration Panel.
•
Select Config Wizard from the VPN
Configuration option in the menu.
•
Select “A router or a VPN
gateway” to create a new policy to
establish a Client-to-Box connection
with a NETGEAR router or VPN
gateway.
Page 5 of 8
Version 1.2
Page 6

Page 6 of 8
➏➏➏➏
The IP or DNS public address of
the remote equipment will be the
value of your Router’s WAN IP
or FQDN.
➏➏➏➏
➊➊➊➊
➍➍➍➍
➊➊➊➊
Input the PreShared Key used
when creating the VPN Policy on
the Router.
➍
➍The value of the Internal IP
➍➍
address of remote network field
will be the value of your remote
Router’s LAN Network IP
Subnet.
•
Review the Configuration
Summary and click Finish once
you have confirmed that all the
information is correct.
Version 1.2
Page 7

Page 7 of 8
•
A new policy should be added
under Root.
•
Verify the Remote Gateway to
make sure that it is the remote
Router’s WAN IP or FQDN.
➏➏➏➏
•
➋➋➋➋
Select DNS and enter the router’s
Remote Identifier Information.
➌➌➌➌
Select DNS and enter the router’s
Local Identifier Information.
•
•
➋➋➋➋
➌➌➌➌
•
Click on the policy name, then
select the P1 Advanced button.
Check Aggressive Mode.
Click OK to go back to the Phase1
(Authentication) screen.
Click Save & Apply to save the
settings
Version 1.2
Page 8

Page 8 of 8
Open Tunnel
Connection Status
Connecting:
To connect and establish the VPN tunnel between the VPN Lite Client and the remote router,
click on Tunnel1, then Open Tunnel. If your settings are correct you’ll receive a message
confirming the connection.
Version 1.2
 Loading...