


Jet-Stream Oven™
™
Recipes & Instructions

Jet Stream Oven™
Recipes & Instructions
Congratulations on the purchase of your new Jet-Stream Oven! With it you will experience the thrill and excitement of being one of the first pioneers in a new era of food preparation.
Your Jet-Stream Oven represents a major state-of-the-art advancement in cooking. It is the “next generation” in oven technology. It’s uniquely patented features are designed to give you excellence in all your cooking results in a fraction of the time.
We hope that you will find this book a helpful guide in learning to use your new Jet-Stream Oven. It was prepared with you, our valued customer, in mind.
If you have a question we would be happy to answer it. If you have a problem, we want to hear about it. For assistance call our Customer Satisfaction number 1-800-288-4545 or contact us through our website at www.nesco.com.
1-800-288-4545 www.nesco.com
Executive Editor
Curt Drumm
Editor/Creative Director
Sheree Weston
Home Economist
Altanette Autry
Cover/Appetizer
Photo Courtesy of
Anchor Food Products, Inc.
$9.95 Value
Nesco American Harvest Corporation
1700 Monroe St.
Two Rivers, WI 54241
1-800-288-4545
www.nesco.com
300-03501
© 1999 Nesco American Harvest Corporation All Rights Reserved, including the right of reproduction in whole or part.
1
your warranty and Service Satisfaction
Limited One Year Warranty
This warranty applies to Nesco/American Harvest® appliances that were purchased for personal or household use. This warranty is not available to commercial purchasers or owners.
We warrant that your appliance will be free of defects in materials or workmanship, under normal home use, for a period of one year from the date of purchase. To assure proper handling of your warranty without delay, and to facilitate verification of the original date of purchase, we suggest that you complete and return the enclosed warranty registration card immediately.
Should your appliance prove to be defective within the warranty period, we will have the option to repair or replace your appliance at no charge. Transportation and/or shipping costs are not included in the terms of this warranty.
This warranty will be void if malfunction is caused by accident, misuse, negligence, including tampering, abuse, damage in transit, or use for commercial purposes.
It does not cover damage incurred due to servicing at a service center other than Nesco/American Harvest, or damage caused by anything other than a manufacturing defect.
This warranty excludes any relief for incidental or consequential damages. Some states do not allow limitations on how long an implied warranty lasts or the exclusion or limitation of incidental or consequential damages, so the above limitation may not apply to you.
This warranty gives you specific legal rights, you may also have other rights which may
vary from state to state.
Your new appliance comes equipped with numerous safety features. Any attempt to interfere with the operation of these safety features makes this warranty null and void. In the event we receive an appliance for service that has been tampered with, we reserve the right to restore it to it’s original state and charge for the repair.
Five Easy Steps to Satisfaction
Should you have a problem with your Jet-Stream Oven, please refer to these steps for help:
1.Call us on our toll free number, 1-800- 288-4545, and tell us about your problem.
2.If we instruct you to send us all or part of your appliance for repair or replacement, the Customer Satisfaction representative will give you an authorization number. This number notifies our receiving department to expedite your repair. Pack your unit carefully in a sturdy carton to prevent damage. Any damage caused in shipping is not covered by the warranty.
3.Print your name, address and authorization number on the carton.
4.Write a letter explaining the problem. Include the following: your name, address, and a copy of the original bill of sale.
5.Paste the sealed envelope containing the letter inside the carton. Insure the package for the value of the Jet-Stream Oven and ship prepaid to:
Nesco/American Harvest Corporation
1700 Monroe St.
Two Rivers,WI 54241
2
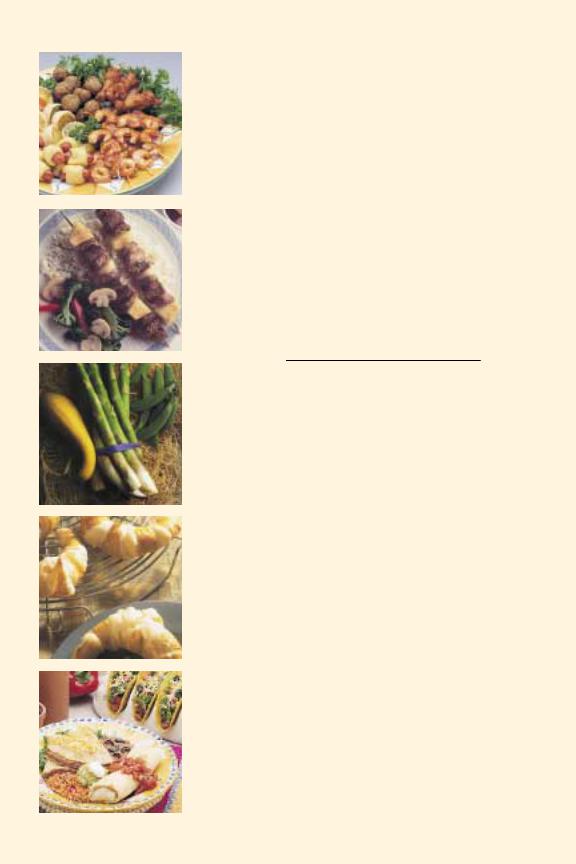
Table of Contents
Introduction 
 1 Warranty and Service
 2 Important Safeguards
 4 Important Operating Instructions
 5-7 Parts Diagram & Glossary of Terms
 8 Helpful Hints
 9-10 Before you Begin
 11 Use and Care 12-13 Let’s Get Started
 14-15 Appetizers and Snacks
 16-25 Cooking Guide for Convenience Foods
 17 Tips for Preparing Convenience Foods
 21 Entrees
 24-36 Cooking Guide for Meats
 37 Vegetables
 38-43 Cooking Guide for Vegetables
 40 Baked Goods
 44-55 Cooking Guide for Baked Goods
 55 Quick Combos
 56-61 Index
 62-63
62-63
3
IMPORTANT SAFEGUARDS/ READ ALL INSTRUCTIONS
1.For household use only. Do not use the Jet-Stream Oven™ for other than intended use.
2.Do not touch hot surfaces.
3.Do not place on or near hot electric or gas burners, or in heated oven.
4.To protect against electrical hazards do not immerse the fan assembly, cord or plug in water or other liquid. Do not use outdoors.
5.Close supervision is necessary when any appliance is used by or near children.
6.Unplug from outlet when not in use and before cleaning. Allow to cool before putting on and taking off parts.
7.Do not clean with metal scouring pads. Pieces may break off of the pad and touch electrical parts, creating risk of electric shock.
8.Do not operate any appliance with
a damaged cord or plug, after the appliance malfunctions, or has been damaged in any manner. Return appliance to the nearest authorized service facility for examination, repair or adjustment.
9.Use Accessory attachments recommended by the appliance manufacturer only.
10.Do not let cord hang over edge of table or counter, or touch hot surfaces.
11.Use extreme caution when
removing hot trays or racks, also when
moving an appliance containing hot oil or other hot liquids.
12.Always plug cord into the wall outlet before turning the machine on. To disconnect, turn switch to “OFF” before removing plug from wall outlet.
13.This appliance has a polarized plug (one blade is wider than the other). As a safety feature, this plug will fit in a polarized outlet only one way. If the plug does not fit fully in the outlet, reverse the plug. If it still does not fit, contact a qualified electrician. Do not attempt to defeat this safety feature.
14.If you have a countertop made of glass, Corian® or stone, set your Jet-Stream Oven on a cutting board, hot pad or trivet when cooking. The heat generated from some cooking appliances may damage these types of counter tops.
Short Cord Instructions-
A short power supply cord is provided to reduce the risk resulting from becoming entangled in or tripping over a longer cord. Extension cords may be used if care is exercised in their use. If an extension cord is used, the marked electrical rating of the cord should be at least as great as the electrical rating of the appliance. The longer cord should be arranged so that it will not drape over the table top where it can be pulled on by children or tripped over accidentally.
SAVE THESE INSTRUCTIONS
4

Important operating instructions
Model JS-3500T
A.Activating your Oven
1.Make sure the lid is securely fastened to the fan assembly
2.Plug the oven cord into an outlet.
3.If you need to cancel out the settings or reprogram your oven, press and hold the START/STOP button for 4 seconds. This will clear all settings.
B.Setting the Fan Speed
1.Turn the Fan Speed Dial to the desired speed of LOW or HIGH (the fan speed can be changed any time during cooking)
C.Setting the Temperature
1.The default temperature of 400˚ is displayed in the window when you press the TEMP button.
2.To change the temperature, push the TEMP button once for 375˚, twice for 350˚, 3 times for 325˚, 4 times for 300˚, 5 times for 200˚. Pressing the button one more time will bring it back to 400˚.
D.Using the Lights
1.Push the light button to turn lights on and off.
E.Setting the Timer
1.Use the up and down arrows to set the timer to the desired
cooking time. Press the START/STOP button to start cooking. The oven will automatically shut off when the time is up. The display will show a “d” for counting down the remaining time, and the remaining number of minutes.
2.If you do not program in a time, it will start cooking when you press the START/STOP button, and the timer will count the minutes up from zero. The display will show a “u” when counting up. The unit will run for 4 hours or until you stop it.
F.Start, Stop or Pause the Oven
1.To begin the cooking process, press the START/STOP button.
2.To stop the oven during the cooking process, press the PAUSE button or lift the lid.
3.To stop the oven permanently, press and hold the START/STOP button for 4 seconds or until it beeps.
4.The Jet-Stream Oven features two switches that turn the oven off when the lid is opened. To resume cooking, lower the lid and press Start. If your oven does not turn on when you press START/STOP, make sure the base and powerhead are assembled correctly.
5.When the oven is done cooking, it will beep several times to let you know it’s done, then continue to beep at 1 minute intervals to remind you.
NOTE: Your JS-3500T Jet-Stream Oven microprocessor is programmed to continuously monitor line voltage and temperature. If the oven stops and displays “Err” followed by a number, reset the time and temperature, then press start. (The fault may be due to a brief interruption in power that you may not notice). If the error messages become frequent, there may be some fault with the oven such as overheating. Please return your power head to an authorized service center to have it checked.
5

Model 3000T
with digital quartz timer
A.Turning the Oven on
1.Plug oven cord into outlet. The oven will beep twice and Display will blink (00).
2.If the oven is not programmed within 10 seconds the Display will shut itself off.
3.Pressing the Timer Increase or Timer Decrease pads
will turn the display back on (display will shut off after 20 seconds if the start pad isn’t pressed).
B.Setting the Fan Speed
1.Turn the Fan Speed Dial to the desired speed of LOW or HIGH (the fan speed can be changed any time during cooking).
C.Setting the Temperature
1.Turn the Temperature Dial to the desired temperature
setting (the temperature can be changed at any time during cooking).
D.Untimed Cooking
1.Set the temperature and fan speed to the desired settings and press the Start Pad.
2.The oven will start and the Display will begin from
(00)and count up to 120 minutes.
3.Unless you stop the oven, it will run for 120 minutes and then shut off.
E.Timed Cooking
1.Set the temperature and fan speed to desired settings.
2.Set the timer by pressing the Timer Increase and Timer Decrease pad until the desired number of minutes shows on the display (holding down the pads will cause the numbers to increase/decrease faster).
3.Press the Start Pad. The
oven will run until the set time has elapsed and the display has counted down to (00). The oven will then beep three times and shut off.
Pressing  (up Button) will cause the display to start at
(00)and count up to 120 minutes.
Pressing  (down button) will cause the display to start at (120) minutes and count down to (00).
6

Note: Timer can be changed during cooking but not when oven is paused. Timer will continue to beep until either the stop pad is pressed, or the lid is opened.
F.Using the Lights
1.Press the Light Pad to turn lights on and off (when the oven lid is open, the Light Pad doesn’t work).
G.Stopping and Pausing the Oven
1.To pause the oven during the cooking process, press the Stop/Pause Pad once or lift the oven lid (the display will show the remaining cooking
time). To restart the oven again, close the lid and press the Start Pad and the timer will
resume.
2.To stop the oven and clear the display, press the Stop/Pause Pad twice. If desired, you may now enter a new cooking time and restart the oven.
Model JS-1500
A.Turning the Oven on
1.Make sure the lid is securely fastened to the fan assembly.
2.Plug the oven cord into an outlet.
3.Turn the Fan Speed Dial to the LOW or HIGH position to begin cooking.
B.Setting the Fan Speed
1.Turn the Fan Speed Dial to the desired speed of LOW or HIGH (the fan speed can be changed any time during cooking)
C.Stopping the Oven
1.Turn the Fan Speed Dial to the OFF position.
2.Lifting the lid during cooking will stop the fan. Lowering the lid will start the fan again.
7

Parts Diagram and Glossary of Terms
1.Fan Assembly- houses the mechanical components of the oven.
2.Light bulbs (on some models)
3.Space washer - keeps the fan blade distanced from the fan assembly.
4.Fan blade - spins at 4000 rpm to cook food quickly
5.Space washer (on some models)
6.Lock washer - allows a snug fit of the fan blade.
7.Wing nut - secures fan
to the fan assembly.
8.Lid - see-through dome the cooking enclosure.
9.Top/Hold-down rack - as a “hold-down” rack for weight foods and at times be used as a second level.
10.Bottom rack - upper lower positions offer 2 of cooking.
11.Hinge pin assembly
connects to both the fan assembly and handle/leg of base. Provides a hinge when lifting the lid.
12.Non stick liner - prevents the base from reaching undesired temperatures. Allows easy cleanup.
13.Base - bottom of the cooking enclosure.
To order replacement 1-800-288-4545.
8

Helpful hints
Using the Racks
•The top rack is usually used as a hold down rack when cooking small or lightweight foods.
•Unless otherwise specified, when two racks are shown, food should be contained or sandwiched between the top and bottom racks.
•When baking small items, use a foil-wrapped rack that is pierced with a few holes.
•Always place food directly on bottom rack unless otherwise specified.
•Use the bottom rack upper position, as a rule, when following your own recipe.
•When cooking individual items i.e. baked potatoes or chicken fillets, arrange around outside of rack. Group lightweight foods together.
•Spraying rack with non stick spray will make cleanup even easier. (Do not spray the lid.)
•When preheating, remove bottom rack. Place food on rack while oven is heating, then replace quickly to prevent heat loss.
Caring for Your Fan Blade
•Check fan blade periodically for flatness by spinning it on a flat surface. Bent or warped blades will cause vibrating and/or unusual noise. Gentle adjusting by pushing down on the blade (while on a hard, flat
surface) should correct any problems. If a blade is severely bent and cannot be realigned, call our toll free number for assistance.
Preheating
•If a recipe calls for preheating, always preheat at 400˚HIGH for 2 minutes.
Cooking Semi-Liquids
•Start at LOW speed until surface is firm enough to prevent movement.
Cooking Bacon
•Cook on LOW speed and use caution when preparing bacon to avoid steam burns when lifting the lid.
•When cooking bacon and eggs, put bacon on bottom rack and cover with top rack (upside down and flat) and place eggs on top rack.
Using Cookware
•Use caution when using cookware i.e. pizza pans with lightweight objects. Use the top/hold down rack to add extra weight and eliminate danger of pans levitating and causing damage to fan.
Determining Cooking Times
•Use the cooking times in both the charts and recipes as a guide. Variables in food size and thickness, humidity, altitude and your personal preference for doneness all have bearing on actual cooking times.
Cooking Baked Products
•Do not preheat when cooking baked products.
9
•A 12 inch pizza pan with a hole in the center works very well for cooking baked products. Call Customer Satisfaction for details (800-288- 4545).
Automatic Shut-off
•The unit shuts off automatically upon lifting the lid. Lift lid slowly to prevent liner from lifting and grease splattering out.
Using Foil
•Poke a few holes in foil to allow air to circulate for better heating.
Serving
•When your food is finished cooking, detach the lid and hinge pin assembly, and use the base as a serving dish.
Be careful, as the unit will be hot!
Storage
•Stand the unit upright to sit vertically on your counter top, under your cupboards and out of the way.
Converting Recipes
As a rule of thumb:
•Temperature will be the same
•Recipes calling for 425-475˚ use 400˚
•Time will be 1⁄3 to 1⁄2 less than recipe time
•Experiment with fan speed - many foods will set on LOW and once set can be finished on HIGH.
Roasting Chicken
•Roast first half of cooking time with breast down and turn breast up for second half.
Cooking Meat
• As an option, lightly coat thin meats
with melted margarine or cooking oil to aid browning.
Baking Frozen Pizza
•For best results, cover pizza with top rack at level 1.
•For crispier crust cut hole in center
•To decrease time, cut large pizza in half before cooking.
Fig. A
Fig. B
10

Before You Begin
Preparing Your Unit
•Before using your Jet-Stream Oven™ for the first time wash base, liner, lid and racks in hot soapy water or run through the dishwasher. IMPORTANT - do not put fan assembly in water.
•For best results, and longevity of your liner and non stick racks cure before using. Brush a light coating of vegetable oil on the surfaces and then run unit empty at 400˚ HIGH for three minutes.
IMPORTANT - do not brush oil on lid.
Assembling the Oven
•Notice that the lid (#8 pg. 8) has 4 nibs that correspond to 4 L-shaped ridges (bayonette slots) in the fan assembly (#1). They allow a snug, precision fit and all 4 must be securely locked together to prevent the lid from releasing during use. You must take care to assure that the lid is squared with the fan assembly. We suggest you lay the lid on a flat surface and insert the fan assembly into the opening. Press gently until the fan slides all the way in and turn clockwise until locked into place. Check for proper fit by jiggling the assembly, there should be no movement. The collar should be the same all the way around. If your machine does not close properly, the lid is probably not on straight, remove it and repeat the procedure. (see fig. A & page 10)
•Snap hinge pin assembly (#11) over handle and leg of base (#13) as shown. Then, insert the handle of the base into
slot in Hinge Pin Assembly. Note: If done correctly, one of the base’s handles will be covered or hidden by the hinge pin assembly (see fig. B page 10)
•Slide fan assembly (#1) onto silver hinge pin (#11) until firmly in place (see fig. C page 11).
•Place liner (#12) in base of unit (#13) and bottom rack (#10) on liner (#12).
Never operate unit without using the liner (#12) as it may cause damage to your counter top or other surface.
•Lower lid (#8) onto bottom base (#13). Make sure lid is closed and seated properly in the base. Check to see that the fan is in the “OFF” position and plug into electrical outlet.
•Place unit far enough away from wall to assure free flow of air. Clear away any objects on the counter top that may obstruct airflow to the back of the unit.
•You are now ready to cook in your new Jet-Stream Oven!
Fig. C
11

Use and Care
Your Jet-Stream Oven™ is made of space age plastics, which are not only capable of withstanding high temperatures, but are also stain resistant and easy to care for. To keep your Jet-Stream Oven looking new and functioning properly, it is important to follow the care instructions below.
Protect the Non Stick Surfaces
For best results, use rubber, plastic or wooden utensils on the surface of the liner. Metal objects may cause damage to the surface. Plastic scrubbing pads may be used to remove baked on residue.
Never use non stick spray on the lid, it will become gummy and very difficult to remove without damaging the surface.
Using the Liner
Your Jet-Stream Oven comes equipped with a removable liner. The liner not only makes cleanup a snap but doubles as a heat shield, keeping the bottom of the unit from reaching undesired temperatures. Always use the liner to prevent damage to counter top or other surfaces.
Never Restrict Airflow
The motor is located at the back of the fan assembly. It is important to keep the counter clear behind the unit, to allow free flow of air to the motor.
Replacing the Bulbs (not on all units)
Your Jet-Stream Oven comes with 4 bulbs to enhance the visibility of your food while cooking. These are long-life and should not burn out for an extended period of time. If a bulb does
burn out, all 4 will go dark because they are wired in a series. Replacement bulbs are available, free of charge, for units still under warranty. See the warranty section of this manual for information and warranty procedures.
Voltage Drop in Older Homes
In older homes you may experience a drop in power, or blow a fuse or circuit breaker, if the unit is run simultaneously with another high-wattage appliance such as a toaster or microwave oven. This is due to the limited amount of current available in older kitchens with 15 amp service and is a common problem with all high-wattage appliances.
Cleaning
Your Jet-Stream Oven is made of durable easy care plastics. Cleanup is quick and easy. Disassemble oven before washing. Every part of your Jet-Stream Oven, except the power head, can be washed on the top rack of the dishwasher. Drying cycle must be on “Off” or “Energy Saver.”(Note: dishwasher may leave film on metal parts which can be undesirable.) DO NOT use rinsing agents in your dishwasher, they may deteriorate the plastic. On occasion,
it may become necessary to soak parts that have burned-on foods or greasy film in hot soapy water. Do not use abrasive metal cleaning pads or cleanser, they will scratch the polished surfaces.
The Lid and Base
Easy-Off® oven cleaner, cold method, can be used on both the lid and base when soaking is not effective.
12

Should stubborn stains occur in the base, remove by soaking in a solution of 1⁄2 cup liquid bleach and 4 cups of water or use “dip-it®” coffee pot cleaner. DO NOT use any spray cleaners.
The Liner Pan and Racks
Plastic mesh scrubbing pads may be used on the wire cooking racks for baked on foods. The chrome finish on the racks and nonstick finish on the liner pan should not require more than soaking in hot soapy water to remove stubborn stains. Do not use Easy Off® on nonstick metal surfaces.
Light Wash/Pre wash
Use this method for light cleaning jobs or as a pre-wash to make clean-up easier for heavy cleaning followed by hand washing. Place top rack in liner pan, place bottom rack on top, pour 1⁄2 tsp. dish washing liquid into liner pan, add 1⁄2 cup of warm water, close lid, set temperature control at 150˚ and fan on low. Let run for 5-10 minutes. Disassemble oven, rinse thoroughly to remove all cleaning residue, and dry.
For heavy cleaning jobs, use method above as a pre-wash to make clean-up easier, followed by hand washing. If a lot of grease has collected in the liner pan during cooking, wipe out grease with paper towels before using this cleaning method. Disassemble oven, rinse thoroughly to remove all cleaning residue, and dry.
The Fan Assembly
The fan assembly requires little maintenance because there is seldom
the occasion for it to get soiled. In the event that it requires cleaning, the same precautions must be taken for cleaning it as are taken for the liner and racks (never use abrasive cleaning pads, cleansers or Easy Off).
To disassemble the fan for cleaning, unplug from the AC outlet, remove the wing nut and any washers and then the fan blade, taking care not to bend it (See Fig. D). Wash the blade in hot soapy water, rinse and dry. Wipe the rest of the assembly with a hot soapy dish cloth, using care not to get water inside the unit. Rinse with clean damp cloth. Do not immerse the powerhead in water!
Before reattaching the fan blade check for flatness by spinning it on a flat surface. “Gently” correct any problems by pushing down on the blade while on a hard, flat surface. If the blade is severely bent and cannot be realigned, call our toll free number for assistance.
Reattach the fan blade. Take care to return washers to their proper location and securely fasten the wing nut (see Fig. D).
Note: Any other servicing should be performed by an authorized
service representative.
Fig. D
13

Lets Get Started
To save time, cut large dense foods into smaller pieces.
Although large items such as a whole chicken will cook up beautifully, it will take more time than chicken cut into pieces because there is less surface area available. For example, a whole chicken baked in a conventional oven would take about 2 hours. In the Jet-Stream Oven™, it would take 40 minutes, or 1⁄3 the time. Chicken pieces in an oven would be done in about 60 minutes. In the Jet-Stream Oven they would take 15-20 minutes, or 1⁄4 the time.
Utilize the adjustable racks for optimum results.
The Jet-Stream Oven comes with 2 adjustable racks which allow maximum airflow around the food. The size and consistency of the food being prepared determines the appropriate level and/or combination of racks to use.
The bottom rack offers a reversible upper/lower position. The top/hold down rack is adjustable to 3 different levels to accommodate different thicknesses of food. The top rack also serves as a hold-down rack for lightweight foods. Rack placement is given for all recipes in this book, see Guidelines at a Glance™ on next page.
When placed directly on the rack, food is cooked on both sides at once without turning! All cookware suitable for oven
and range top is also suitable for the Jet-Stream Oven (microwave cookware should not be used unless the manufacturer states that it is oven safe). Some recipes in this book call for a 12 inch pizza pan. This specifically refers to a pan that has no rim or handles and measures a maximum of 12 to 121⁄4 inches across. In some instances the same result may be achieved by wrapping the bottom rack tightly with heavy duty aluminum foil.
Cook a whole meal at once.
One of the nicest features of your new Jet-Stream Oven is it’s ability to prepare an entire meal simultaneously in one cooking enclosure, which washes up easily in the dishwasher. See our “Quick Combo’s™” section on page 50 for some creative combinations and then create some of your own!
Use accessory expander rings when a larger capacity is needed.
Don’t limit the benefits of the Jet-Stream Oven to just the small jobs. With accessory expander rings you can even roast a 12lb. turkey in 1 and 3⁄4 hours vs. 4 hours in your conventional oven!
Check with your local retailer or our Customer Satisfaction Department for availability.
14

Follow the Guidelines at a Glance™ instructions
In the recipe sections of this book you will find a quick reference guide for preparing each recipe. It contains all the detailed information you will need for success, including rack use. Study the example below to familiarize yourself with the components of the chart and you will see just how easy it is!
Guidelines at a GlanceTM
PREHEAT |
TEMP |
FAN SPEED |
TIME |
RACK USE |
YIELD |
YES |
400˚ |
HIGH |
5-6 |
|
4 |
MIN. |
|
||||
|
|
|
|
|
|
1. |
2. |
3. |
4. |
5. |
6. |
1.Preheat - YES or NO depending on the recipe. If yes, preheat at 400˚ HIGH for 2 minutes, then adjust to recipe temperature.
2.Temp - refers to the temperature setting. Turn the temperature dial until the arrow on the top corresponds to the desired temperature.
3.Fan Speed - indicates fan speed setting, which is either HIGH or LOW.
4.Time in min. - the time is always given in minutes.
5.Rack use - refers to the position of the racks for preparing each recipe.
bottom rackupper posi-
 tion
tion
bottom racklower position
The top/hold down rack is adjustable to
3 levels.
n/a
Level 1 |
|
|
|
|
|
|
Level 1 |
|
|
|
|||||
|
|
||||||
Level 2 |
|
|
|
|
|
|
Level 2 |
|
|
|
|
|
|||
Level 3 |
|
|
|
|
|
|
Level 3 |
Unless otherwise specified, when two racks are shown in a recipe, food should be contained or “sandwiched” in between the top and bottom racks. Note that the top rack is only used in conjunction with the bottom rack and never alone.
6. Yield - number of servings or individual pieces.
In recipes with 2 steps, the Guidelines at a Glance chart will have 2 sets of instructions. In the example below, note that the steps are numbered in the preheat box. The numbers correspond to the steps referenced in the body of the recipe. Follow the instructions for each
step
Guidelines at a GlanceTM
PREHEAT |
TEMP |
FAN SPEED |
TIME |
RACK USE |
YIELD |
1. YES |
400˚ |
HIGH |
5-6 |
|
|
MIN. |
|
|
|||
|
|
|
|
|
|
2. NO |
350˚ |
LOW |
20-25 |
|
4-6 |
MIN. |
|
||||
|
|
|
|
|
according to the chart.
15

Appetizers / Snacks
Good news hors d’oeuvres lovers! The Jet-Stream Oven™ makes large quantities of melt-in-your-mouth appetizers in just minutes! It’s perfect for parties because the cooking process is visually entertaining. Your guests will enjoy watching their food transform before their eyes and delight in the taste.
In addition to the following recipes, and any you may have of your own, you will find many frozen appetizers that will cook up better than you’ve ever tasted before. Follow the same guidelines referenced in the convenience section for preparing packaged foods.
16

Cooking Guide for Convenience Foods
ITEM |
QTY. |
PRE-HEAT |
TEMP/SPEED |
TIME |
RACK USE |
HELPFUL HINTS |
||||
|
|
|
|
|
|
|
|
|
|
|
Boneless Marinated |
2 (5 oz. ea.) |
YES |
400˚ HIGH |
6-8 MIN. |
|
|
|
|
|
Wipe off excess |
Chicken breasts |
|
|
|
|
|
|
|
|
|
Marinade |
|
|
|
|
|
|
|
|
|
|
|
Wieners in Wraps |
5 (1-2 oz. ea.) |
NO |
375˚ HIGH |
5-6 MIN. |
|
|
|
|
|
|
|
|
|
|
|
|
|
|
|
|
|
FROZEN |
|
|
|
|
|
|
|
|
|
|
|
|
|
|
|
|
|
|
|
|
|
Battered shrimp |
12-16 oz. pkg |
YES |
400˚ HIGH |
5-7MIN. |
|
|
|
|
|
|
|
|
|
|
|
|
|||||
|
|
|
|
|
|
|
|
|
|
|
Breaded Cheese |
|
|
|
|
|
|
|
|
|
|
Nuggets or sticks |
10 1⁄2 oz. pkg. |
YES |
400˚ HIGH |
4-5 MIN. |
|
|
|
|
|
|
|
|
|
|
|
|
|||||
|
|
|
|
|
|
|
|
|
|
|
Breaded Chicken |
|
|
|
|
|
|
|
|
|
|
Patties |
4 (2 1⁄2 - 3 oz. ea.) |
YES |
400˚ HIGH |
5-7 MIN. |
|
|
|
|
|
|
|
|
|
|
|
|
|
|
|
|
|
Breaded Fish Fillets |
4 (2-21⁄2 oz. ea.) |
YES |
400˚ LOW |
6-8 MIN. |
|
|
|
|
|
|
|
|
|
|
|
|
|
|
|
|
|
Buttered Fish Fillets |
4 (2-3 oz. ea.) |
NO |
375˚ LOW |
10-12 MIN. |
|
|
|
|
|
|
|
|
|
|
|
|
|
|
|
|
|
Chicken Fillets |
4 (3 3⁄4 oz. ea) |
YES |
400˚ HIGH |
7-10 MIN. |
|
|
|
|
|
|
|
|
|
|
|
|
|
|
|
|
|
Egg Rolls |
7 1⁄4 oz. pkg. |
YES |
400˚ LOW |
4-5 MIN. |
|
|
|
|
|
|
|
|
|
|
|
|
|||||
|
|
|
|
|
|
|
|
|
|
|
French Bread Pizza |
121⁄2 oz. pkg. |
NO |
375˚ LOW |
8-10 MIN. |
|
|
|
|
|
|
|
|
|
|
|
|
|
|
|
|
|
Fried Chicken |
4 pcs. |
NO |
375˚ High |
10-12 MIN. |
|
|
|
|
|
Place smaller |
|
8 pcs. |
NO |
375˚ High |
12-14 MIN. |
|
|
|
|
|
pieces in cntr. |
|
|
|
|
|
|
|
|
|
|
|
Pocket Sandwiches |
2 |
NO |
375˚ LOW |
6-8 MIN. |
|
|
|
|
|
|
|
|
|
|
|
|
|
|
|
|
|
Microwave Sausage |
4 |
NO |
400˚ LOW |
3-4 MIN. |
|
|
|
|
|
Pierce links |
Patties or links |
8 |
NO |
400˚ LOW |
4-5 MIN. |
|
|
|
|
|
with fork. |
|
|
|
|
|
||||||
|
|
|
|
|
|
|
|
|
|
|
Mini Quiches |
8 1⁄2 oz. pkg. |
YES |
375˚HIGH |
4-5 MIN. |
|
|
|
|
|
|
|
|
|
|
|
|
|||||
|
|
|
|
|
|
|
|
|
|
|
Pizza |
1 (9 or 10”) |
YES |
pkg. temp |
1⁄2 - 2⁄3 |
|
|
|
|
|
Light |
|
|
|
LOW |
conv. time |
|
|
|
|
|
ingredients |
|
|
|
|
|
|
|
|
|||
|
|
|
|
|
|
|
|
|
|
may fly around |
|
|
|
|
|
|
|
|
|
|
|
Pot Pie |
1 (7-8 oz. ea.) |
YES |
400˚ LOW |
16-20 MIN. |
|
|
|
|
|
Cut slits in |
|
|
|
|
|
|
|
|
|
|
top crust |
Sandwich Croissants |
2 (4 1⁄2 oz. ea.) |
NO |
350˚ LOW |
10-12 MIN. |
|
|
|
|
|
|
|
|
|
|
|
|
|
|
|
|
|
Waffles or French toast |
4 squares |
NO |
400˚ LOW |
3-4 MIN. |
|
|
|
|
|
|
|
|
|
|
|
|
|||||
|
|
|
|
|
|
|
|
|
|
|
Unless specified, when two racks are shown, food should be sandwiched between the top and bottom racks.
Arrange small items in circle around edge of rack.
17

18 |
The Party Tray |
|

Mini Mexican Meatballs |
Spicy Chicken Drumettes |
1 pound lean ground beef
1 (11⁄4 oz.) package taco seasoning mix
Bottled salsa or picante sauce
Thoroughly blend seasoning mix into ground meat. Shape into meatballs about 11⁄4 to 11⁄2 inch in diameter and place directly on rack. Bake according to guidelines until well browned. Serve with salsa.
Guidelines at a GlanceTM
PREHEAT |
TEMP |
FAN SPEED |
TIME |
RACK USE |
YIELD |
||||
YES |
400˚ |
LOW |
5-6 |
|
|
|
|
|
20-24 |
MIN. |
|
|
|
|
|
||||
|
|
|
|
|
|
|
|
|
|
Mini franks
1 pound package cocktail franks
2 refrigerated pie crusts
Roll pie crust slightly to create a square shape and cut into 24 2-inch squares. Repeat with second crust. Place a frank on each square and fold over opposite corners; press to seal.
Place fold side down directly on rack and cook according to guidelines until browned. Repeat with second batch. Serve hot with mustard or ketchup.
Guidelines at a GlanceTM
PREHEAT |
TEMP |
FAN SPEED |
TIME |
RACK USE |
YIELD |
YES |
400˚ |
HIGH |
6-7 |
|
48 |
MIN. |
|
||||
|
|
|
|
|
20 chicken drummettes
3 tablespoons soy sauce
2 tablespoons hot pepper sauce (increase amount for spicier drummettes)
Dip
2⁄3 cup light sour cream
2 tablespoons minced green onion
3⁄4 teaspoons soy sauce
Combine soy sauce, hot sauce and drummettes in a zip top bag. Marinate in refrigerator for 1-2 hours. Mix Dip and Chill.
Remove chicken from marinade and drain. Place 1/2 the chicken drummettes on each rack and cook according to guidelines until done.
Guidelines at a GlanceTM
PREHEAT |
TEMP |
FAN SPEED |
TIME |
RACK USE |
YIELD |
||||
NO |
400˚ |
HIGH |
8-10 |
|
|
|
|
|
20 |
|
|
|
MIN. |
|
|
|
|
|
|
Barbecued Shrimp
1 pound raw peeled and deveined
shrimp
Barbeque sauce
Thread raw shrimp on 6 inch bamboo skewers and brush with barbecue sauce. Place shrimp on rack and cook according to guidelines until shrimp are pink.
Guidelines at a GlanceTM
PREHEAT |
TEMP |
FAN SPEED |
TIME |
RACK USE |
YIELD |
YES |
400˚ |
LOW |
4-5 |
|
8 |
MIN. |
|
||||
|
|
|
|
|
19
 Loading...