

Page 1
Lo
Hi
MODE
USB
Po rt
Thank you for purchasing the Mustek Gsmart A30.
We have included this convenient Getting Started
guide to help with basic camera functions. For more
details on the different functions and operations,
please refer to the User Guide.
Website: ▪ GSmart A30
http://www.mustek.com ▪ Getting Started
Customer Service: ▪ Users Manual
(General Info) ▪ Installation CD
E-mail: cservices@mustek.com ▪ USB cable
FAX: (949) 788-3670 ▪ Strap
Technical Support:
E-mail: tsupport@mustek.com
Phone: (949) 788-3600
Address:
15271 Barranca Parkway
Irvine, CA 92618
PICTURE
Low Com-
pression
High Com-
pression
High Resolution
(640 x
26 52
480)
Low Resolution
(320 x
104 209
240)
VIDEO
Time
320 x 240 17 Seconds
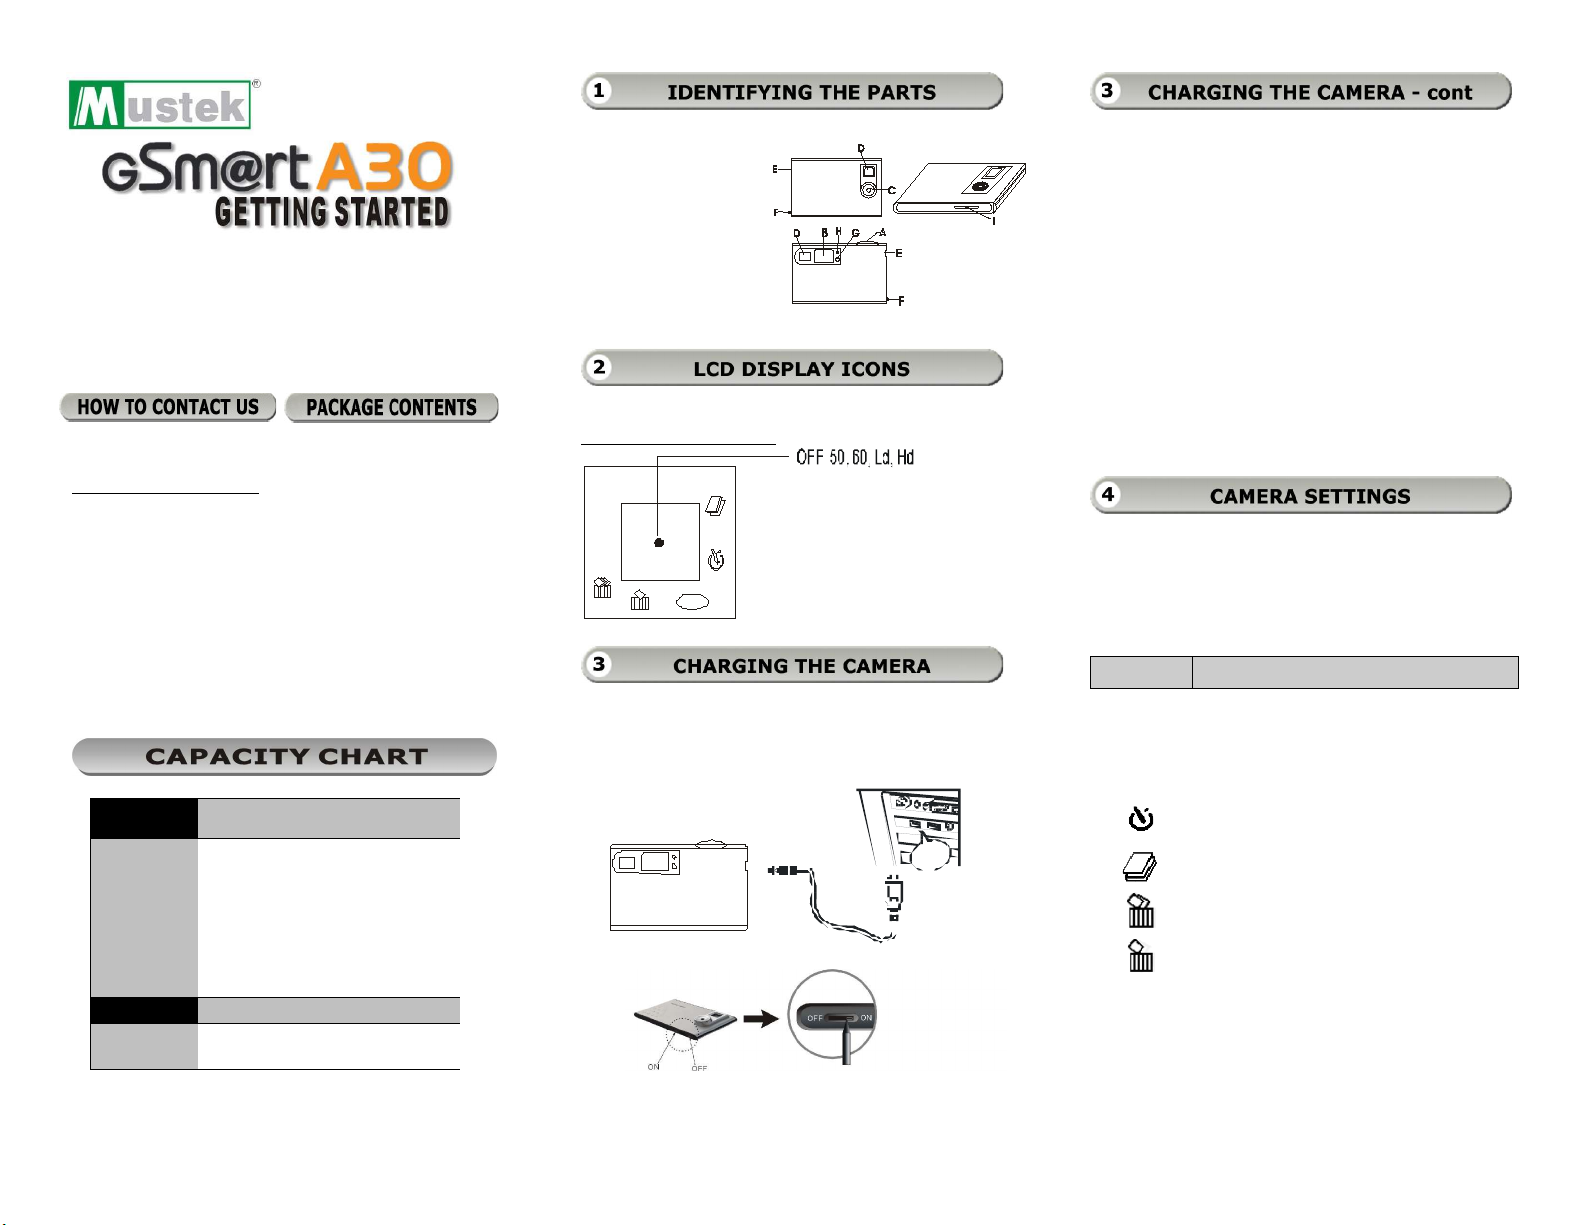
A. Shutter Button
B. LCD
C. Lens
D. Viewfinder
E. USB Socket
F. Strap Hole
G. Start / Function
Button
H. LED
I. ON/OFF Switch
Camera Functions Control
LCD Diagram Directions
(Fully charge camera before first usage)
Step 1. Using the provided USB cable, connect the
camera to the computer.
Step 2. Slide the “ON/OFF” Switch to “ON”.
LED: Red – Charging; Green – Fully Charged (ap-
prox. 3 hours. Do NOT overcharge battery).
Note: The camera may also be used while charging.
Step 3. Unplug the USB cable after the camera is
fully charged.
Warning: To prevent loss of files, download
them before sliding the ON/OFF Switch to
“OFF”.
After 30 seconds of inactivity, the camera switches
to “Power Save” mode.
In order to prolong battery life, slide the ON/OFF
Switch to “OFF” when not using your camera and
after all files have been transferred to your computer.
Step 1. Press the Start / Function Button to access
settings.
Step 2. Once at a desired setting, press the Shutter
Button to change.
Icons Descriptions
Hi High resolution mode (300K pixels)
Lo Low resolution mode (100K pixels)
OFF Turn off mode
Self timer provides a 10 second delay
Video mode
Delete all pictures in camera memory
Only delete the last picture/video taken
MODE Picture quality selection mode
Hd High compression (store more
pictures)
Ld Low compression
Page 2
Step 1. Slide the ON/OFF Switch to “ON”.
Step 2. Press the Start/Function Button to turn on
your camera.
Step 1. Insert installation CD into
the CD-ROM drive
Step 2. Close the CD-ROM drive
Step 4. Once the preview panel is loaded, click on
the red Download Photos camera icon and
choose the directory where you want to save
your files.
Step 3. Frame the subject through the viewfinder.
Step 4. Press the Shutter Button to take a picture.
A beep sound will confirm that a picture was
taken.
Step 5. To turn off the camera, press the
Start/Function Button, LCD displays
“OFF”, then press Shutter Button.
Step 1. To take video, press the Start / Function
Button until you see the Continuous Shoot
icon ( )
Step 2. Press the Shutter Button down and begin
taking a video.
Step 3. Release the Shutter Button when you are
done.
Step 1. To delete all pictures and videos in the
camera's memory, press the Start /
Function Button until you see the Delete
All icon
( )
Step 3. An installer wizard will automatically launch.
If the installer wizard does not appear, then;
Step 4. Click Start in the Windows Taskbar.
Then, select Run to continue.
Step 5. Click Browse and type Run.exe.
Step 6. Click Open and then OK
Step 8. Follow on-screen instructions to complete
driver and bundled software installations.
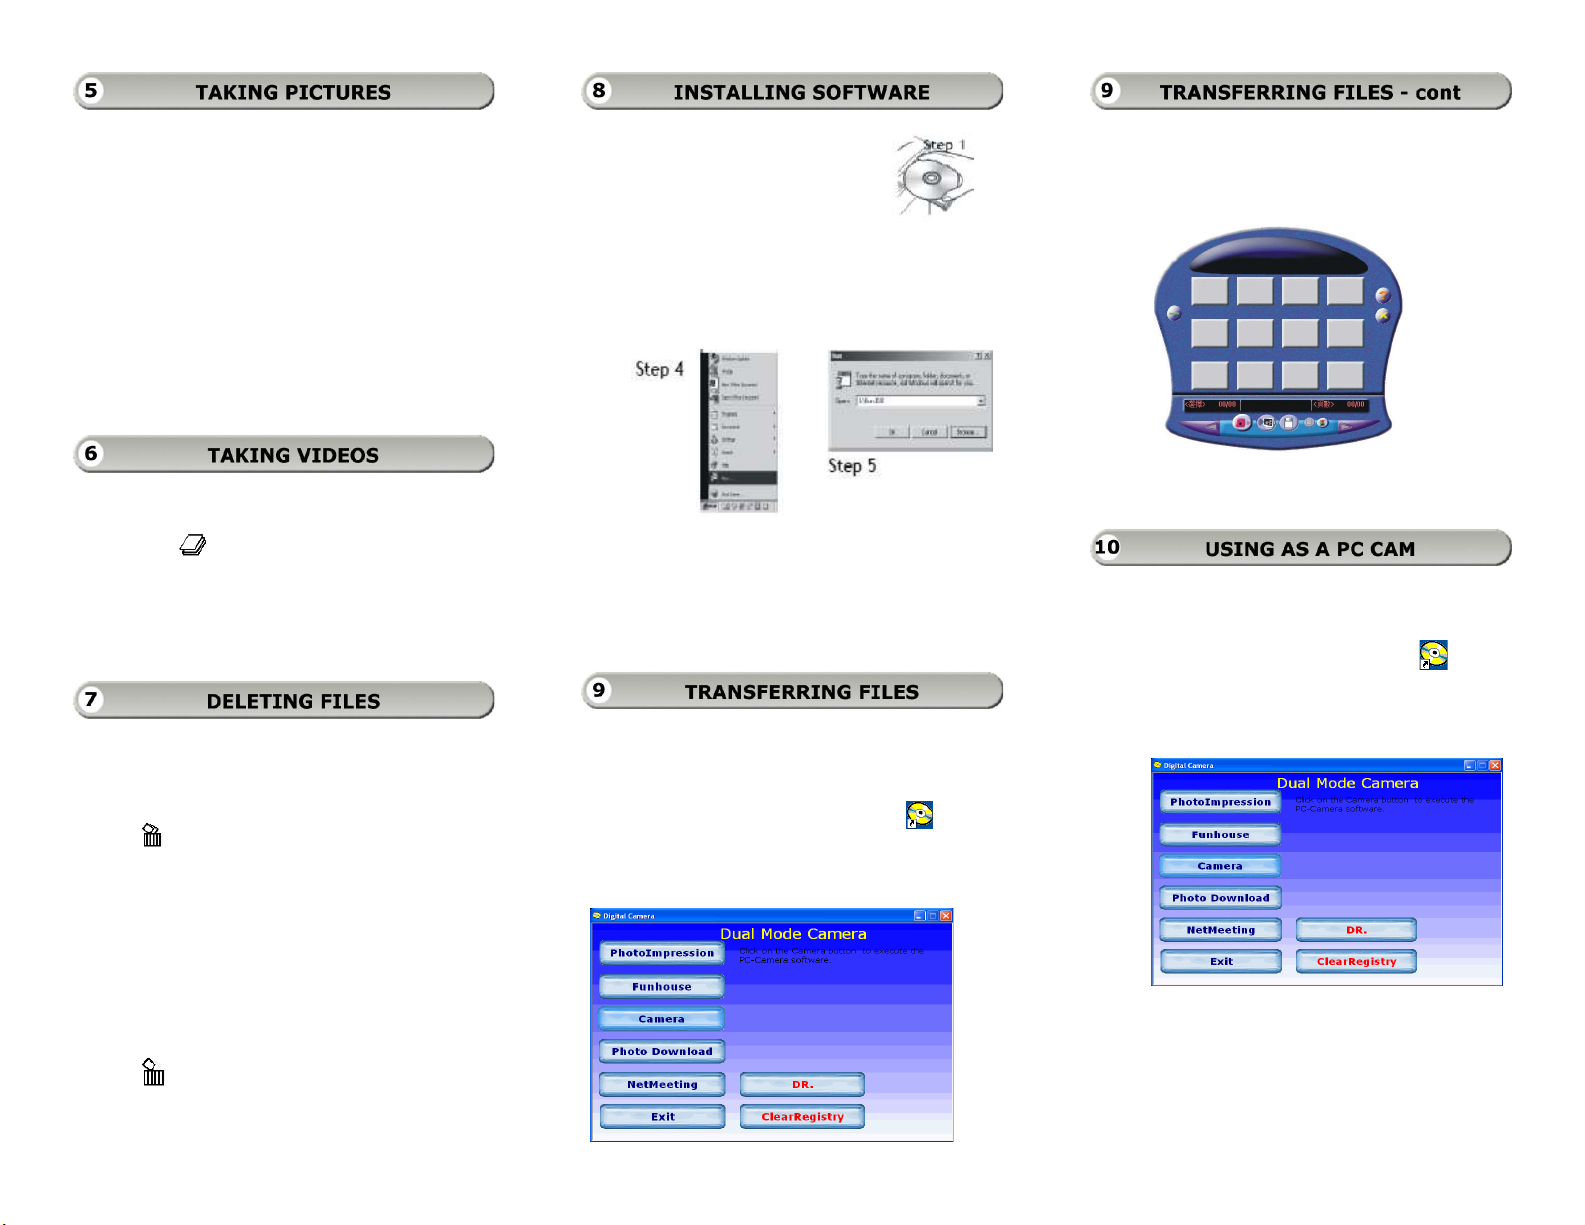
Step 1. After installing the software, connect the
camera to the computer with the USB cable
provided.
Step 2. Double click the Digital Camera icon on
your Desktop or in the Start Menu.
Step 5. Once your files are transferred, you can quit
the Panel application.
Step 1. Connect the camera to the computer with
the USB cable provided in the package.
Step 2. Double click the Digital Camera icon
on the Desktop or in the Start Menu.
Step 3. Once the menu is up, choose the Net
Meeting option.
Step 2. Press the Shutter Button once.
Step 3. When the Picture Count starts to flash,
press the Shutter Button again and all files
will be deleted.
Step 4. To delete one file at a time, press the Start /
Function Button to pass the Delete All icon
until you see the Delete One icon
( )
Step 5. Press the Shutter Button once and the last
picture or video taken will be deleted.
Step 3. Choose the Photo Download option from
the menu.
For further information on how to use Net
Meeting, please visit Microsoft's on line
tutorial page.
 Loading...