

Murata LB1PR User Manual
Murata Bluetooth mesh Node
Installation Guide
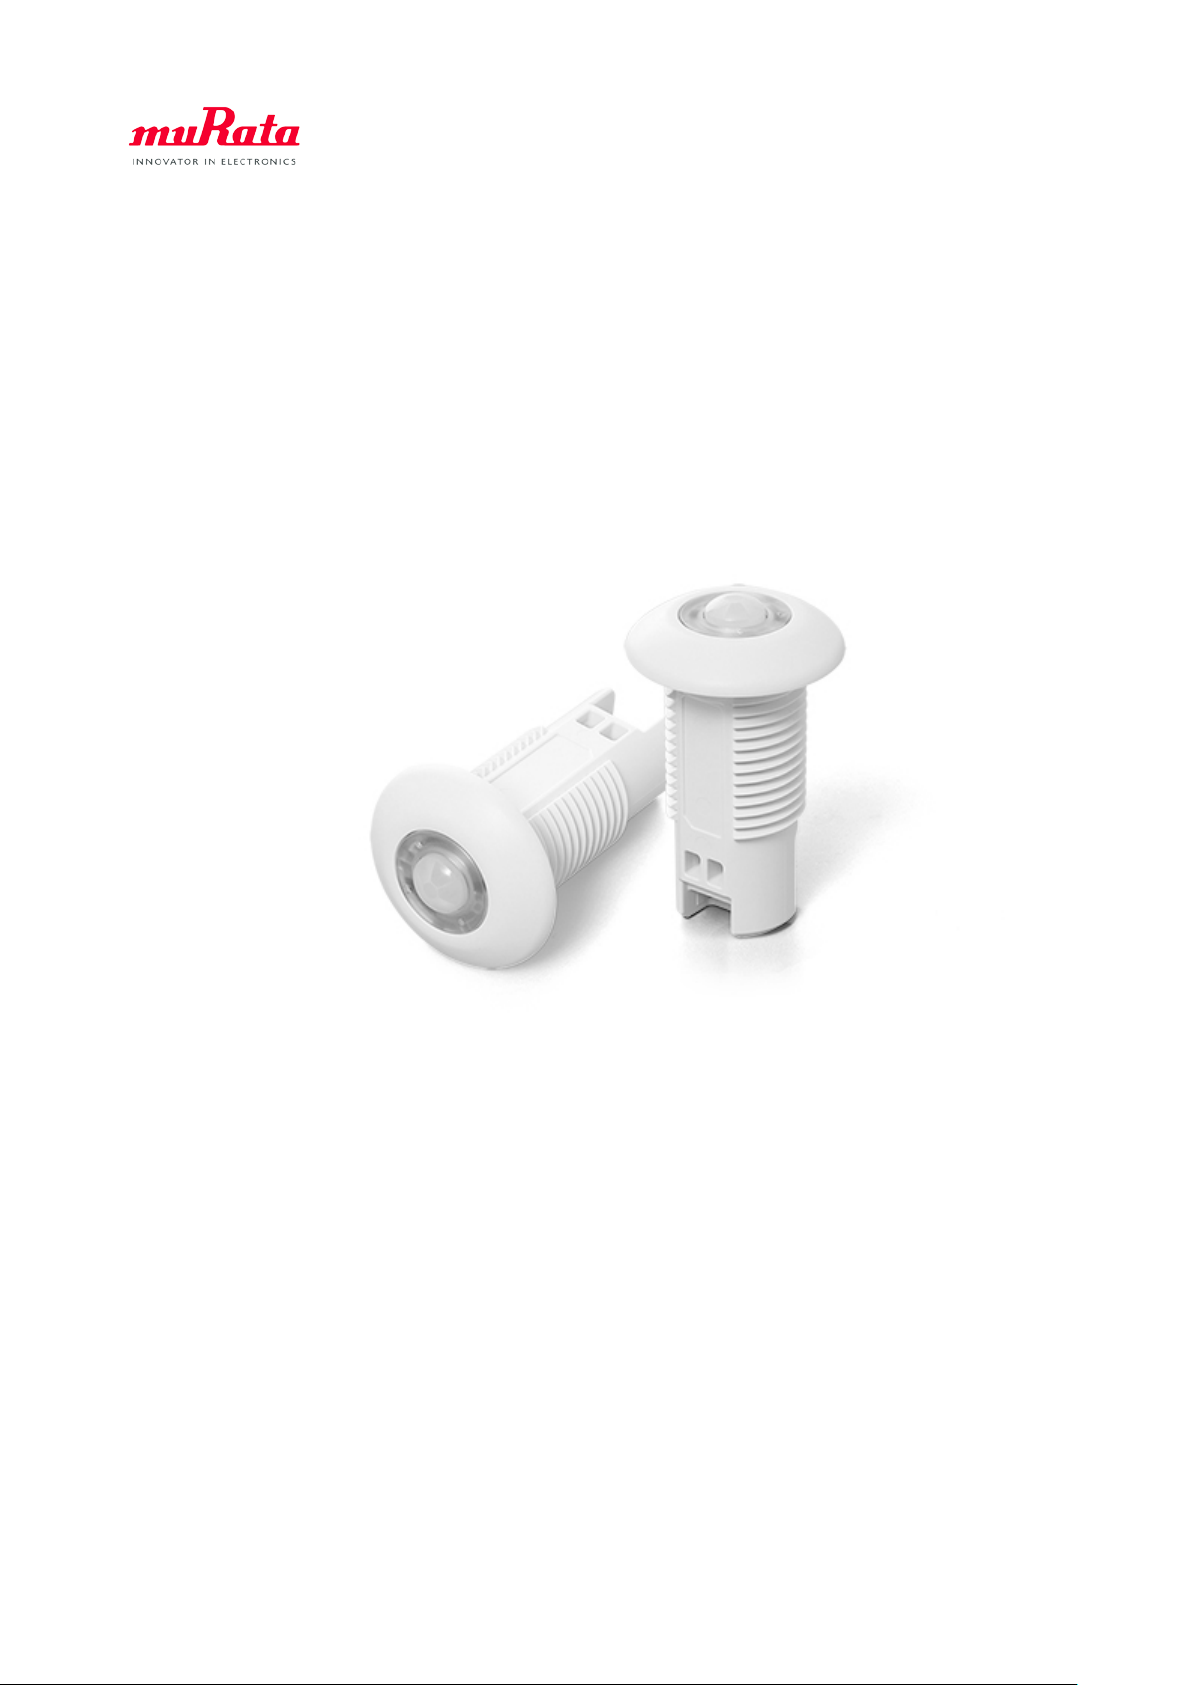
Shipped Components
Murata Bluetooth mesh Node (LBCC2ZZ1PR)
Locknut
1PR-IG Rev. 1
Copyright © Murata Manufacturing Co., Ltd. All rights reser ved.
Page 1
Caution
Installation and maintenance must be done in accordance with local, state and national electrical codes
(NEC) and requirements.
Bluetooth mesh Node Installation
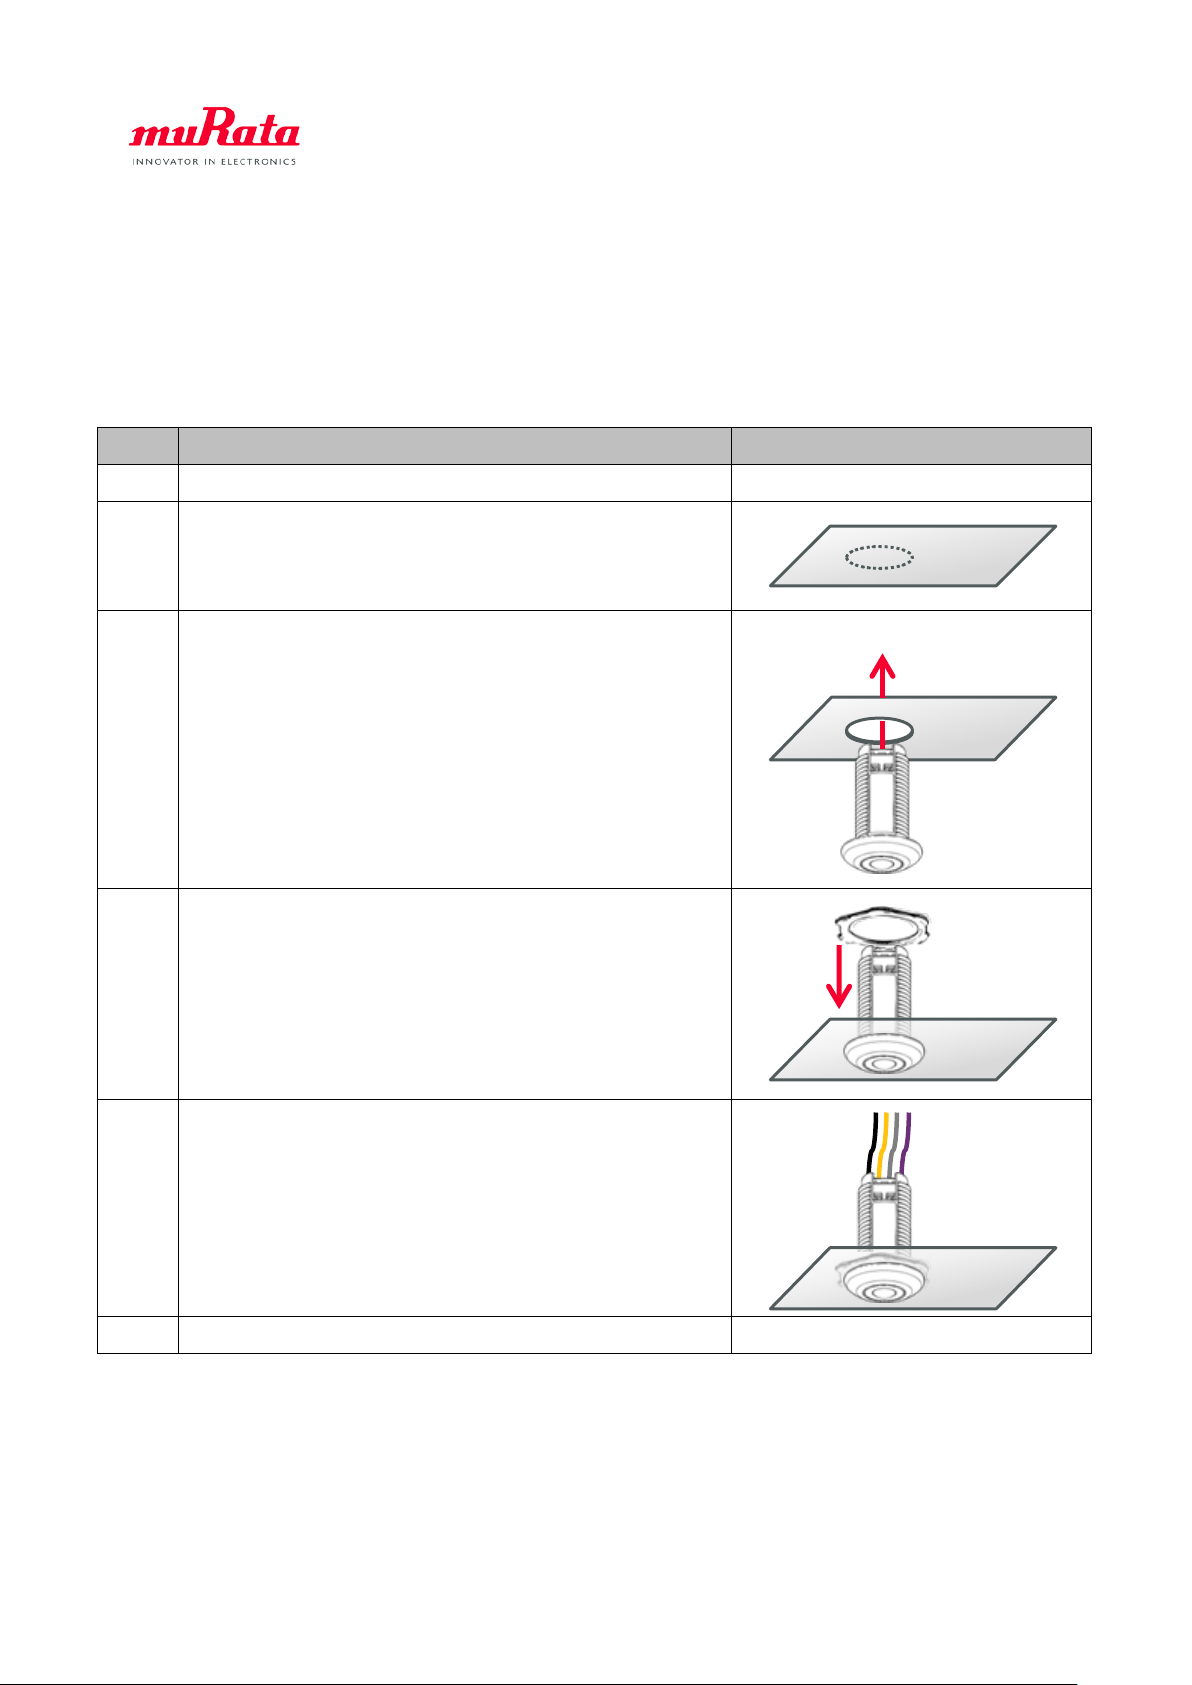
Step Description Figure
1 Make sure the luminaire is de-energized.
2 Determine the location for the Bluetooth mesh Node in
the luminaire and ma ke a 7/8 inch (23 mm) diameter hole
in the luminaire.
3 Insert the Bluetooth mesh Node through the hole.
4 Use the locknut from the rear of the sensor to fix the
Bluetooth mesh Node.
5 Connect the Bluetooth me sh Node with a compatible LED
driver in accordance with Wiring Diagram and Terminal
Assignment.
6 Install the luminaire on the ceiling and energize it.
1PR-IG Rev. 1
Copyright © Murata Manufacturing Co., Ltd. All rights reser ved.
Page 2
 Loading...