


31A-3BAD762
Operator's Manual
Two-Stage
Snow Thrower
Model 3BA
IMPORTANT: Read safety rules and instructions carefully before operating equipment.
Warning: This unit is equipped with an internal combustion engine and should not be used on or near any unimproved forest-
covered, brush-covered or grass-covered land unless the engine's exhaust system is equipped with a spark arrester meeting
applicable local or state laws (if any). If a spark arrester is used, it should be maintained in effective working order by the operator.
Inthe State of California the above is required by law (Section 4442 of the California Public Resources Code). Other states may have
similar laws. Federal laws apply on federal lands. A spark arrester for the muffler is available through your nearest engine authorized
service dealer or contact the service department, P.O. Box 361131 Cleveland, Ohio 44136-0019.
MTDLLC,P.O.BOX361131CLEVELAND,OHIO44136-0019
PRINTED IN U.S.A.
FORM NO. 769-00747C
(7/29/2004)

TABLEOFCONTENTS
Content
Important Safe Operation Practices
Assembling Your Snow Thrower
Know Your Snow Thrower
Operating Your Snow Thrower
Making Adjustments
Page Content Page
3 Maintaining Your Snow Thrower 11
5 Servicing Your Snow Thrower 12
7 Trouble Shooting 14
8 Illustrated Parts 15
10 Warranty 20
FINDINGMODELNUMBER
This Operator's Manual is an important part of your new snow thrower. Itwill help you assemble, prepare
and maintain the unit for best performance. Please read and understand what it says.
Before you start assembling your new equipment, please locate the model plate on the
equipment and copy the information from it in the space provided below. A sample model plate is
also given below. You can locate the model plate by standing at the operating position and
looking down at the rear of the snow thrower. This information will be necessary to use the
manufacturer's web site and/or help from the Customer Support Department or an authorized
service dealer.
Copy the model number here:
Copy the serial number here:
CUSTOMERSUPPORT
PleasedoNOTretl/m theunit to theretailer from where it waspurchased,without first contactingCustomerSupport.
If you have difficulty assembling this product or have any questions regarding the controls, operation or
maintenance of this unit, you can seek help from the experts. Choose from the options below:
Visit mtdproducts.com for many useful suggestions. Click on Customer Support button and
you will get the four options reproduced here. Click on the appropriate button and help is
immediately available.
_fD:_ NSN__S
)-j_ ;, ,;_s'_>,>u<'" '_' !';U fl Y
:*fi _,
,_,rv L :_cE_tor
_sisl_ @ i(le to
D19 ©l _ ........................................................
g* ,_t I )I I)_ _> JOWl OQI
iii='.,".=,>4:,>.CLICKIIH]q!f)'<I
If you prefer to reach a Customer Support Representative, please call 1-800-800-7310.
Of 4,?0.1(. ;;_;:'
L_En ine
The engine manufacturer is responsible for all engine-related issues with regards to
aerformance, power-rating, specifications, warranty and service. Please refer to the engine
manufacturer's Owner's/Operator's Manual, packed separately with your unit, for more
information.
SECTION1: IMPORTANTSAFEOPERATIONPRACTICES
_ ARNING: This symbol points out important safety instructions which, if not followed, could endangerthe personal safety and/or property of yourself and others. Read and follow all instructions in this manual
before attempting to operate this machine. Failure to comply with these instructions may result in personal
injury. When you see this symbol--heed its warning.
_ WARNING: Engine Exhaust, some of its constituents, and certain vehicle components contain
or emit chemicals known to State of California to cause cancer and birth defects or other
reproductive harm.
DANGER: This machine was built to be operated according to the rules for safe operation in this manual. As with
any type of power equipment, carelessness or error on the part of the operator can result in serious injury. This
machine is capable of amputating hands and feet and throwing objects. Failure to observe the following safety
instructions could result in serious injury or death,
Training 7.
1. Read, understand, and fellow all instructions on the
machine and in the manual(s) before attempting to
assemble and operate. Keep this manual in a safe place 8.
for future and regular reference and for ordering
replacement parts. 9.
2. Be familiar with all controls and their proper operation.
Know how to stop the machine and disengage them
quickly.
3. Never allow children under 14 years old to operate this
machine. Children 14 years old and over should read and
understand the operation instructions and safety rules in
this manual and should be trained and supervised by a
parent.
4. Never allow adults to operate this machine without
proper instruction.
5. Thrown objects can cause serious personal injury. Plan
your snow-throwing pattern to avoid discharge of material
toward roads, bystanders and the like.
6. Keep bystanders, helpers, pets and children at least 75
feet from the machine while it is in operation. Stop
machine if anyone enters the area.
7. Exercise caution to avoid slipping or falling, especially
when operating in reverse.
Preparatien
1. Thoroughly inspect the area where the equipment is to
be used. Remove all doormats, newspapers, sleds,
boards, wires and other foreign objects, which could be
tripped over or thrown by the auger/impeller.
2. Always wear safety glasses or eye shields during j.
operation and while performing an adjustment or repair to
protect your eyes. Thrown objects which ricochet can 0peratien
cause serious injury to the eyes.
3. Do not operate without wearing adequate winter outer 1.
garments. Do not wear jewelry, long scarves or other
loose clothing, which could become entangled in moving
parts. Wear footwear which will improve footing on
slippery surfaces.
4. Use a grounded three-wire extension cord and
receptacle for all units with electric start engines.
5. Adjust collector housing height to clear gravel or crushed
rock surfaces.
6. Disengage all control levers before starting the engine.
Never attempt to make any adjustments while engine is
running, except where specifically recommended in the
operator's manual.
Let engine and machine adjust to outdoor temperature
before starting to clear snow.
To avoid personal injury or property damage use extreme
care in handling gasoline. Gasoline is extremely
flammable and the vapors are explosive. Serious
personal injury can occur when gasoline is spilled on
yourself or your clothes, which can ignite. Wash your skin
and change clothes immediately.
a. Use only an approved gasoline container.
b. Extinguish all cigarettes, cigars, pipes and other
sources of ignition.
c. Never fuel machine indoors.
d. Never remove gas cap or add fuel while the
engine is hot or running.
e. Allow engine to cool at least two minutes before
refueling.
f. Never over fill fuel tank. Fill tank to no more than
1/zinch below bottom of filler neck to provide space
fer fuel expansion.
g. Replace gasoline cap and tighten securely.
h. If gasoline is spilled, wipe it off the engine and
equipment. Move machine to another area. Wait 5
minutes before starting the engine.
i. Never store the machine or fuel container inside
where there is an open flame, spark or pilot light
(e.g. furnace, water heater, space heater, clothes
dryer etc.).
Allow machine to cool at least 5 minutes before
storing.
Do not put hands or feet near rotating parts, in the auger/
impeller housing or chute assembly. Contact with the
rotating parts can amputate hands and feet.
2. The auger/impeller control lever is a safety device. Never
bypass its operation. Doing so makes the machine
unsafe and may cause personal injury.
3. The control levers must operate easily in both directions
and automatically return to the disengaged position when
released.
4. Never operate with a missing or damaged chute
assembly. Keep all safety devices in place and working.
5. Neverrunanengineindoorsorinapoorlyventilated
area.Engineexhaustcontainscarbonmonoxide,an
odorlessanddeadlygas.
6. Donotoperatemachinewhileundertheinfluenceof
alcoholordrugs.
7. Mufflerandenginebecomehotandcancauseaburn.Do
nottouch.
8. Exerciseextremecautionwhenoperatingonorcrossing
gravelsurfaces.Stayalertforhiddenhazardsortraffic.
9. Exercisecautionwhenchangingdirectionandwhile
operatingonslopes.
10.Planyoursnow-throwingpatterntoavoiddischarge
towardswindows,walls,carsetc.Thus,avoiding
possiblepropertydamageorpersonalinjurycausedbya
ricochet.
11.Neverdirectdischargeatchildren,bystandersandpets
orallowanyoneinfrontofthemachine.
12.Donotoverloadmachinecapacitybyattemptingtoclear
snowattoofastofarate.
13.Neveroperatethismachinewithoutgoodvisibilityor
light.Alwaysbesureofyourfootingandkeepafirmhold
onthehandles.Walk,neverrun.
14.Disengagepowertotheauger/impellerwhen
transportingornotinuse.
15.Neveroperatemachineathightransportspeedson
slipperysurfaces.Lookdownandbehindandusecare
whenbackingup.
16.Ifthemachineshouldstarttovibrateabnormally,stopthe
engine,disconnectthesparkplugwireandgroundit
againsttheengine.Inspectthoroughlyfordamage.
Repairanydamagebeforestartingandoperating.
17.Disengageallcontrolleversandstopenginebeforeyou
leavetheoperatingposition(behindthehandles).Wait
untiltheauger/impellercomestoacompletestopbefore
uncloggingthechuteassembly,makinganyadjustments,
orinspections.
18.Neverputyourhandinthedischargeorcollector
openings.Alwaysusetheclean-outtoolprovidedto
unclogthedischargeopening.Donotunclogchute
assemblywhileengineisrunning.Shutoffengineand
remainbehindhandlesuntilallmovingpartshave
stoppedbeforeunclogging.
19.Useonlyattachmentsandaccessoriesapprovedbythe
manufacturer(e.g.wheelweights,tirechains,cabsetc.).
20.Ifsituationsoccurwhicharenotcoveredinthismanual,
usecareandgoodjudgment.Contactyourdealerorcall
1-800-800-7310forassistanceandthenameofyour
nearestservicingdealer.
Maintenance& Storage
1. Never tamper with safety devices. Check their proper
operation regularly. Refer to the maintenance and
adjustment sections of this manual.
2. Before cleaning, repairing, or inspecting machine
disengage all control levers and stop the engine. Wait
until the auger/impeller come to a complete stop.
Disconnect the spark plug wire and ground against the
engine to prevent unintended starting.
3. Check bolts and screws for proper tightness at frequent
intervals to keep the machine in safe working condition.
Also, visually inspect machine for any damage.
4. Do not change the engine governor setting or over-speed
the engine. The governor controls the maximum safe
operating speed of the engine.
5. Snow thrower shave plates and skid shoes are subject to
wear and damage. For your safety protection, frequently
check all components and replace with original
equipment manufacturer's (HEM) parts only. "Use of
parts which do not meet the original equipment
specifications may lead to improper performance and
compromise safety!"
6. Check controls periodically to verify they engage and
disengage properly and adjust, if necessary. Refer to the
adjustment section in this operator's manual for
instructions.
7. Maintain or replace safety and instruction labels, as
necessary.
8. Observe proper disposal laws and regulations for gas,
oil, etc. to protect the environment.
9. Prior to storing, run machine a few minutes to clear snow
from machine and prevent freeze up of auger/impeller.
10. Never store the machine or fuel container inside where
there is an open flame, spark or pilot light such as a water
heater, furnace, clothes dryer etc.
11. Always refer to the operator's manual for proper
instructions on off-season storage.
YourResponsibility
Restrict the use of this power machine to persons who
read, understand and follow the warnings and
instructions in this manual and on the machine.
Donotmodifyengine
To avoid serious injury or death, do not modify engine in any
way. Tampering with the governor setting can lead to a
runaway engine and cause it to operate at unsafe speeds.
Never tamper with factory setting of engine governor.
NoticeregardingEmissions
Engines which are certified to comply with California and
federal EPA emission regulations for SORE (Small Off Road
Equipment) are certified to operate on regular unleaded
gasoline, and may include the following emission control
systems: Engine Modification (EM) and Three Way Catalyst
(TWC) if so equipped.
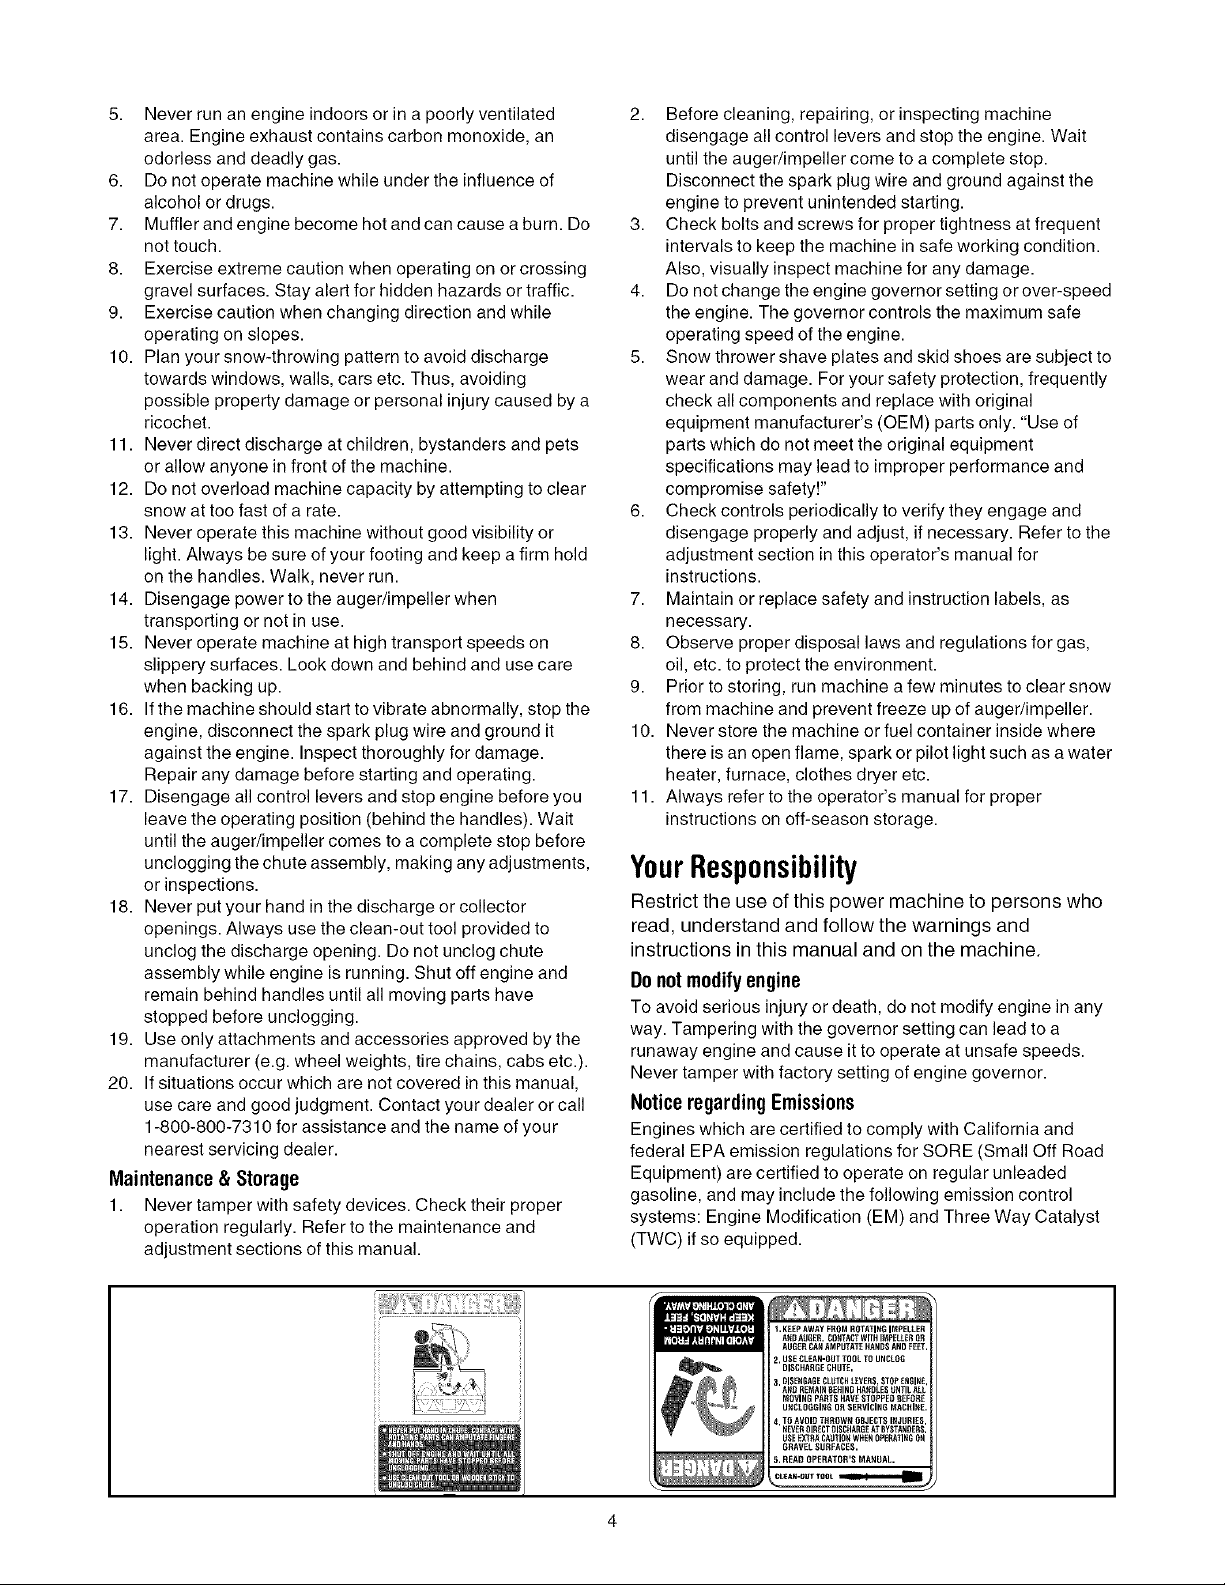
1,K;EP AWAYFROMROTATINGIMPELLER
A_HHHOER.CON'ACTWITHIMPELLEROH
t_UGERCANAMPUTATEHANDSANDFEET.
SECTION2: ASSEMBLINGYOURSNOWTHROWER
IMPORTANT:This unit is shipped with the engine full of
oil. After assembly, see page 8 for fuel and oil details.
RemovingFromCarton
• Cut the corners of the carton and lay the sides flat
on the ground. Remove all packing inserts.
• Move the snow thrower out of the carton.
• Make certain the carton has been completely
emptied before discarding it.
BeforeAssembly
NOTE: Reference to right, left, front or rear of the unit is
from the operating position unless otherwise stated.
• Cut the cable tie that secures the upper handle to
the chute assembly for shipping purposes.
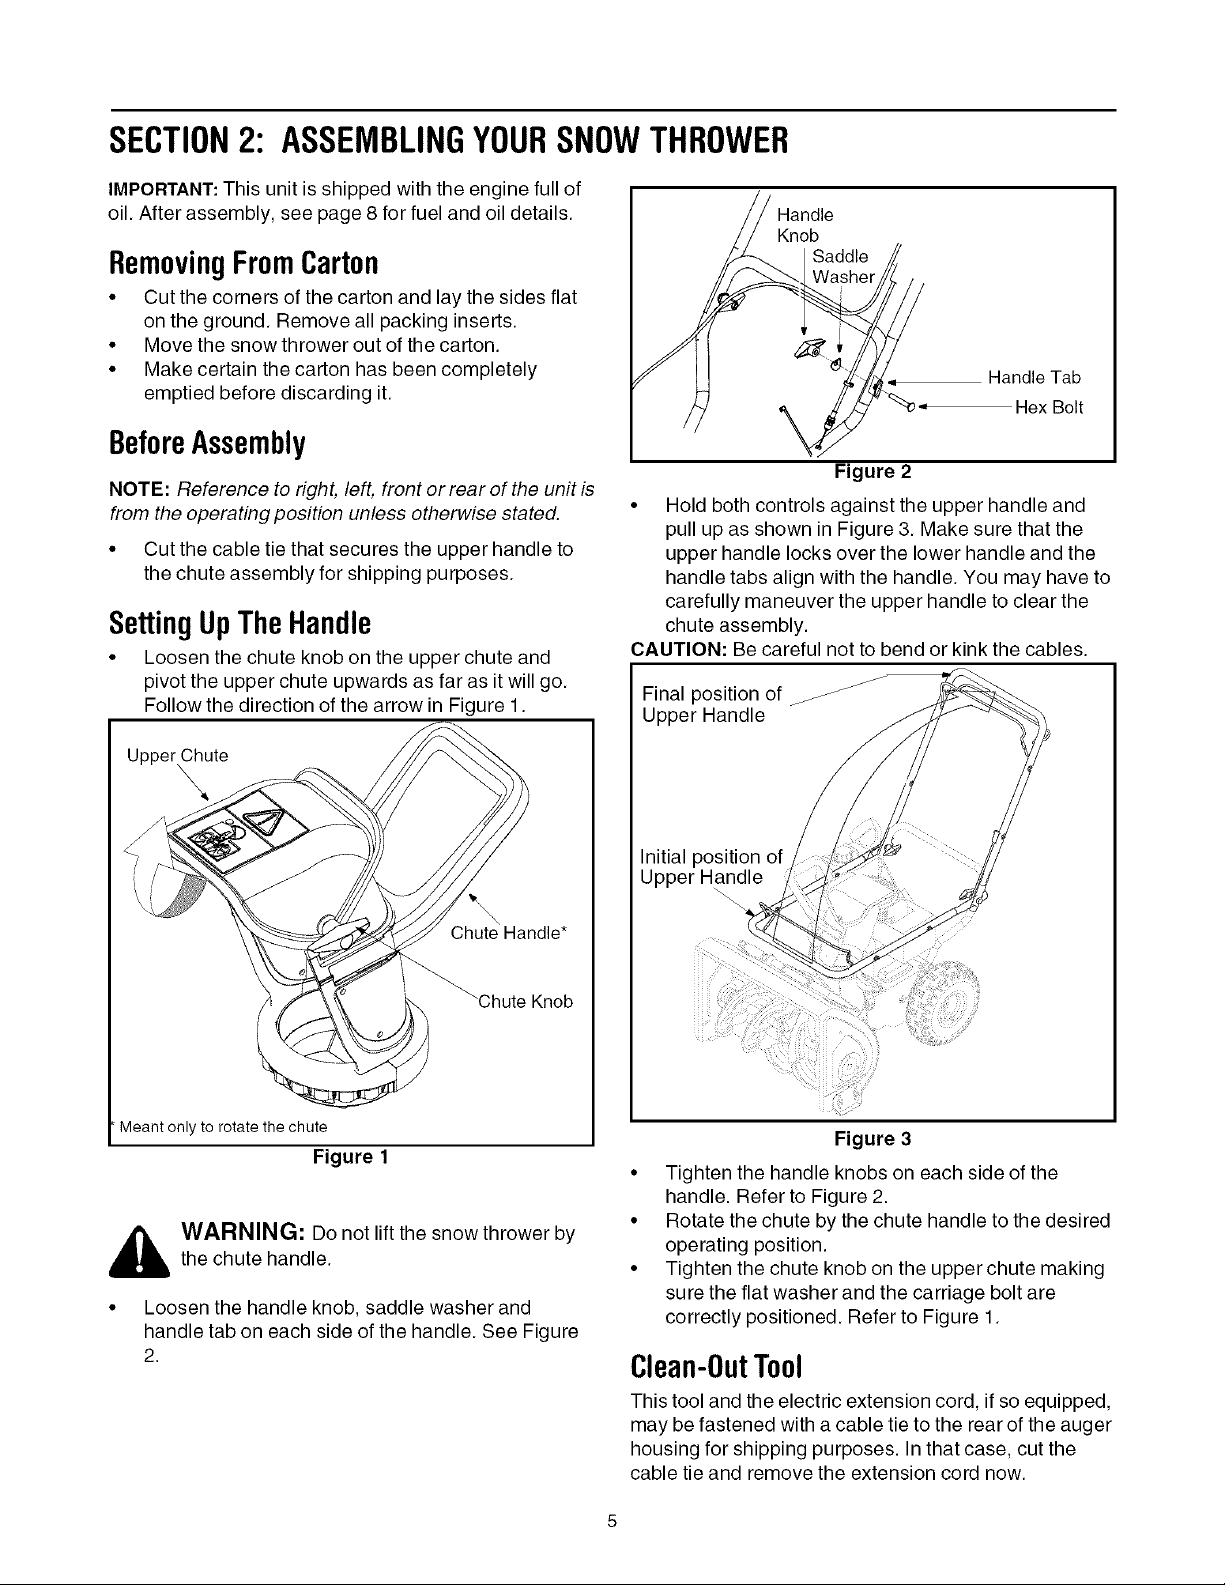
SettingUpTheHandle
• Loosen the chute knob on the upper chute and
pivot the upper chute upwards as far as it will go.
Follow the direction of the arrow in Figure 1.
• Hold both controls against the upper handle and
pull up as shown in Figure 3. Make sure that the
upper handle locks over the lower handle and the
handle tabs align with the handle. You may have to
carefully maneuver the upper handle to clear the
chute assembly.
CAUTION: Be careful not to bend or kink the cables.
Final position of
Upper Handle
Handle
Knob
Saddle
Handle Tab
_ " Hex Bolt
Figure 2
Chute
Chute Handle*
Knob
Meant only to rotate the chute
Figure 1
_ ARNING: Do not lift the snow thrower by
• Loosen the handle knob, saddle washer and
the chute handle.
handle tab on each side of the handle. See Figure
2.
Initial position of
Upper Handle
Figure 3
• Tighten the handle knobs on each side of the
handle. Refer to Figure 2.
• Rotate the chute by the chute handle to the desired
operating position.
• Tighten the chute knob on the upper chute making
sure the flat washer and the carriage bolt are
correctly positioned. Refer to Figure 1.
Clean-OutTool
This tool and the electric extension cord, if so equipped,
may be fastened with a cable tie to the rear of the auger
housing for shipping purposes. In that case, cut the
cable tie and remove the extension cord now.
FinalAdjustments
IMPORTANT:Check the adjustments as instructed and
make any final adjustments necessary before operating
the unit. Check all nuts and bolts for tightness.Failure to
follow these instructions may cause damage to unit.
Tire Pressure (PneumaticTires)
The tires are over-inflated for shipping purposes. Check
tire pressure and reduce pressure, if needed, to 10-15
psi. Maintain equal pressure on both wheels of the
snow throwe r.
_ WARNING: Maximum tire pressure underany circumstance is 15 psi. Equal tire pressure
should be maintained at all times. Excessive
pressure (over 15 psi) when seating beads
may cause tire/rim assembly to burst with force
sufficient to cause serious injury
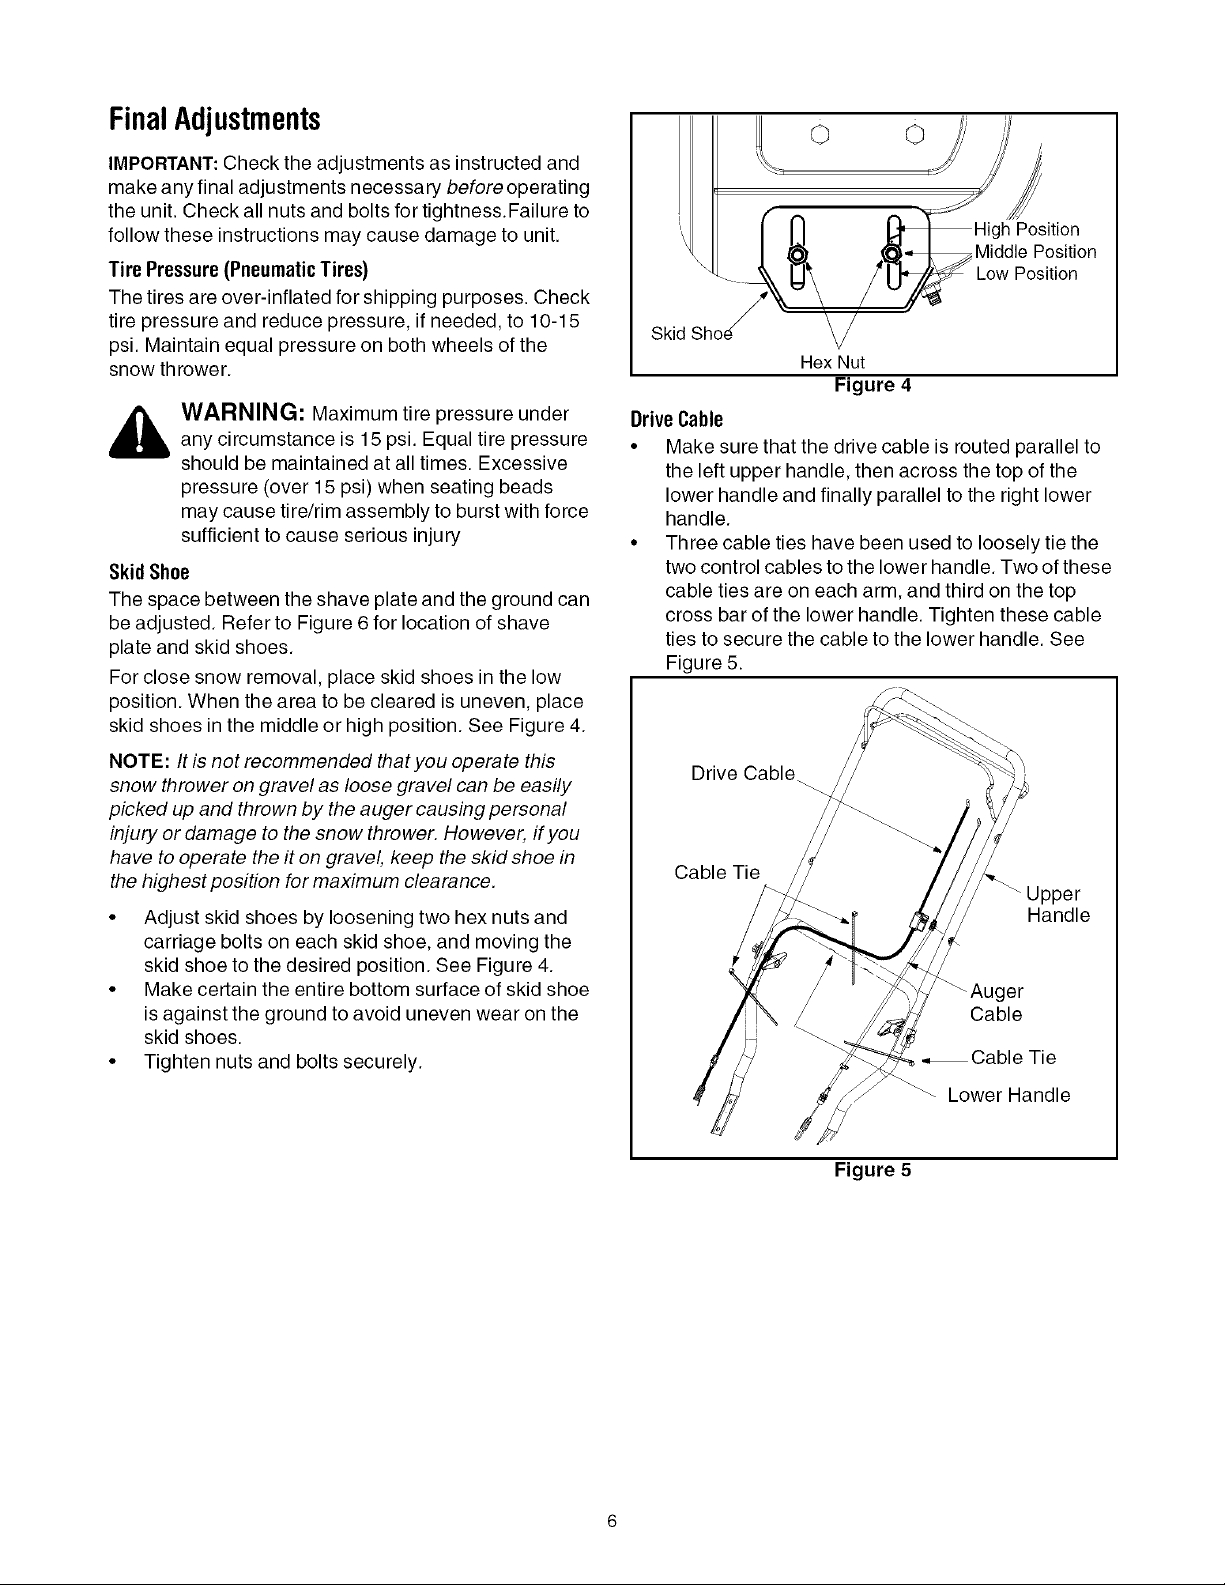
Skid Shoe
The space between the shave plate and the ground can
be adjusted. Refer to Figure 6 for location of shave
plate and skid shoes.
For close snow removal, place skid shoes in the low
position. When the area to be cleared is uneven, place
skid shoes in the middle or high position. See Figure 4.
o o
Position
Middle Position
Position
Hex Nut
Figure 4
DriveCable
• Make sure that the drive cable is routed parallel to
the left upper handle, then across the top of the
lower handle and finally parallel to the right lower
handle.
• Three cable ties have been used to loosely tie the
two control cables to the lower handle. Two of these
cable ties are on each arm, and third on the top
cross bar of the lower handle. Tighten these cable
ties to secure the cable to the lower handle. See
Figure 5.
NOTE: It is not recommended that you operate this
snow thrower on gravel as loose gravel can be easily
picked up and thrown by the auger causing personal
injury or damage to the snow thrower. However, if you
have to operate the it on gravel, keep the skid shoe in
the highest position for maximum clearance.
• Adjust skid shoes by loosening two hex nuts and
carriage bolts on each skid shoe, and moving the
skid shoe to the desired position. See Figure 4.
• Make certain the entire bottom surface of skid shoe
is against the ground to avoid uneven wear on the
skid shoes.
• Tighten nuts and bolts securely.
Drive Cable
Cable Tie
Handle
_Auger
Cable
_Cable Tie
Lower Handle
Figure 5
 Loading...