

Page 1
Quick Start
Page 2
Start here.
Introduction...
Thank you for purchasing MSI Wireless 11b CardBus
CB11B. In the fast growing network environment,
CB11B provides you with an innovative and convenient
solution that lets you connect to the network without
limitation, whether in office, at home, or even on the go.
How to use this guide...
This Quick Start Guide describes the features of CB11B,
and provides the steps needed to install and setup your
CB11B. You can know your CB11B well and complete
basic installation through the "instruction box" in this
guide:
Check the product and system requirements,
see 1a, 1b, 1c.
Connect hardware:
laptop PC users, see 2a.
desktop PC users, see 2b.
Set up software, see 3a,3b.
diagram of software installation, see 3c.
Configuration:
Ad-Hoc mode and diagrams, see 4a, 4c.
Infrastructure mode and diagrams, see 4b, 4d.
Test your networking, see 5a, 5b.
Please note that all figures in this guide are for reference
only; the actual setup screens may be vary on different
system. For more information, please visit MSI website:
http://www.msi.com.tw
Preparation.
Check...
Unpacking the box, and you should find:
Wireless 11b CardBus CB11B
User's Guide and Quick Start Guide
CD-ROM containing the user manual, quick start
guide, drivers and utilities
System requirements...
Laptop/desktop PC with PCMCIA slot and CD-ROM drive
(2X or higher)
Microsoft Windows 98SE/ME/2000/XP
Minimum 5MB free disk space
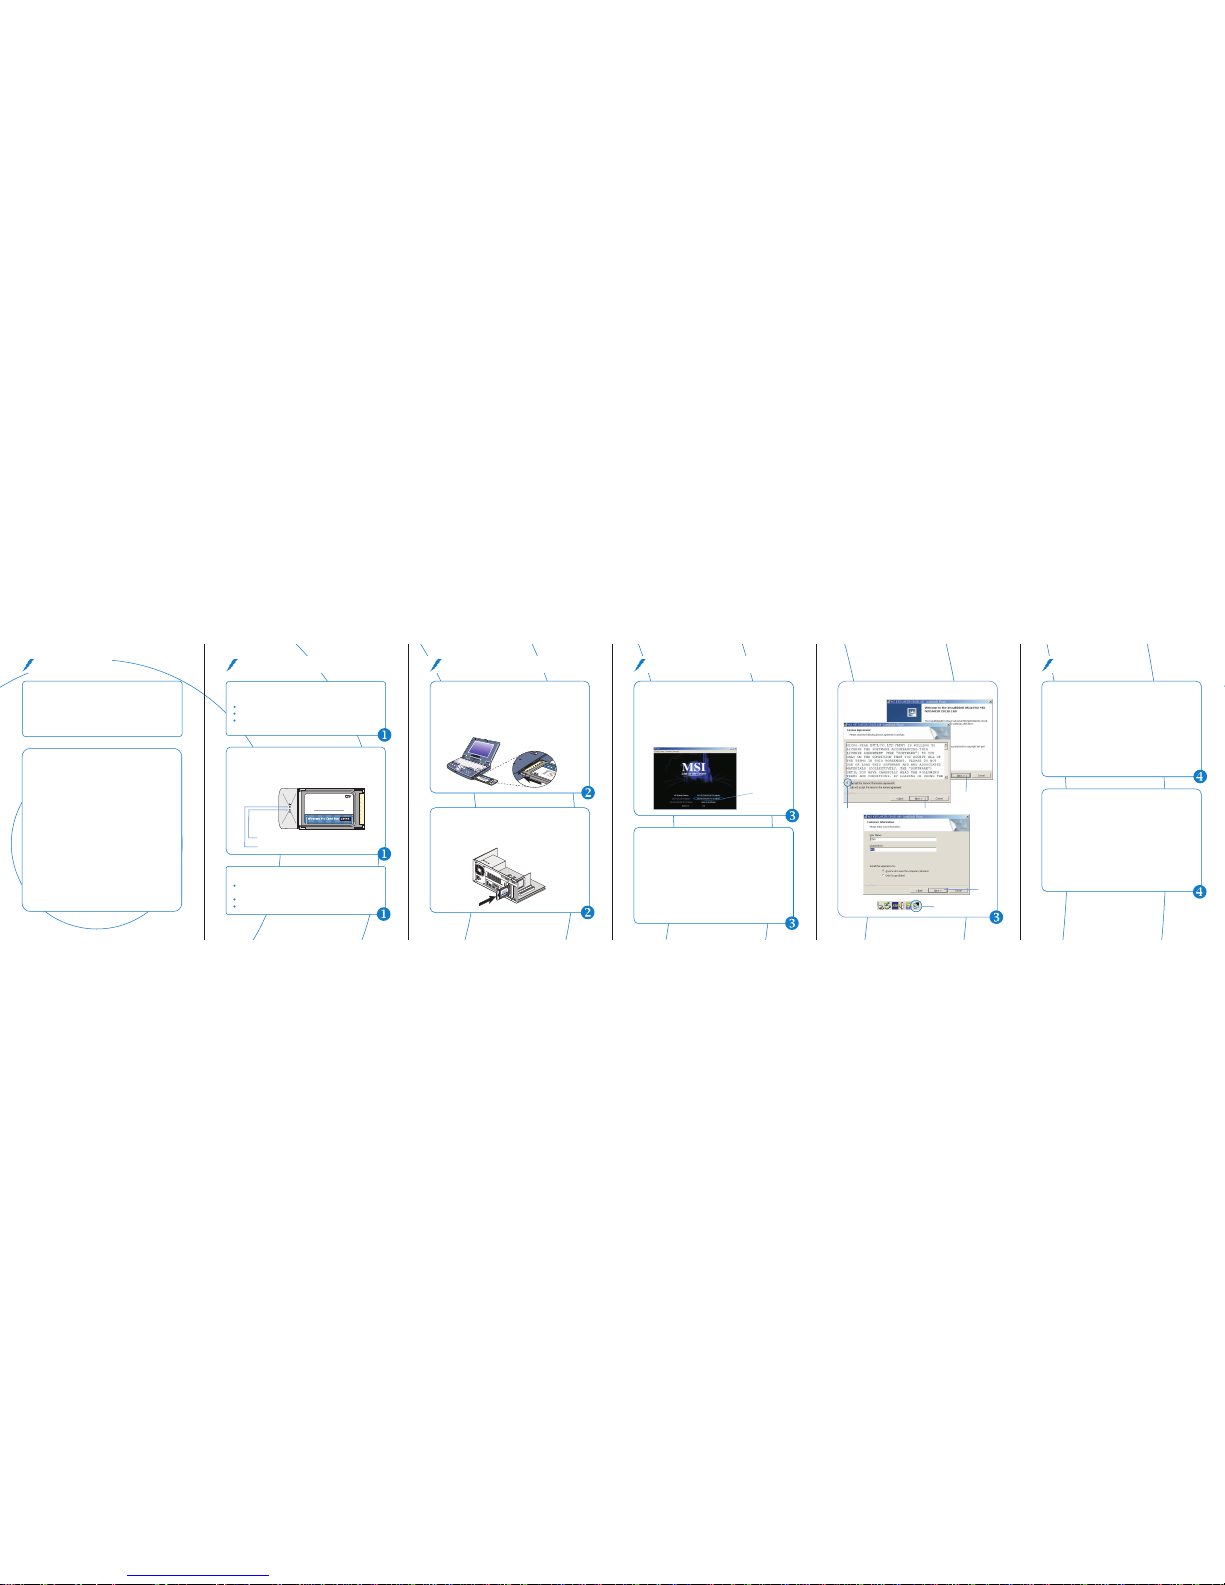
Product view...
CB11B is a CardBus-standard wireless device. It provides
one Power LED and one Link LED on the panel, so you can
monitor your CB11B and real-time network status.
Link LED - blinking blue to indicate that CB11B is receiving
or transferring data
Power LED - solid blue to indicate that CB11B is powered on
MSI
MICRO-STAR INTERNATIONAL
MSI
MICRO-STAR INTERNATIONAL
Connect hardware.
For laptop PC users...
Locate the PCMCIA slot and insert your CB11B into the
slot (for more instruction about the usage of PC card slot,
please see your laptop PC's manual). PCMCIA module is
a "plug & play" device, so it can be installed without
shutting down your computer.
For desktop PC users...
If you use CB11B on a desktop PC, an optional PCI-toPCMCIA adapter will be needed. Locate the PCMCIA slot
and insert your CB11B into the slot.
Set up software.
Start the Setup program...
Your computer will detect a new device and start to install
its driver and utilities as you connect CB11B for the first
time. Insert the enclosed driver CD into the CD-ROM
drive of your computer, and the Setup program should
start automatically (shown as below). Otherwise, go to
Start -> Run from the taskbar, and type E:\setup.exe
(where E is your CD drive).
To install...
1. Click Next on the welcome window of the InstallShield
Wizard, then choose "I accept the terms in the license
agreement" and click Next to continue installing.
Otherwise, click Cancel to exit the program.
2. Enter user's information and click Next.
3. Click Install to start, then click Finish to continue
when the installation completed.
4. InstallShield Wizard may ask you to restart the
computer, choose Yes to reboot.
5. After rebooting, you can see a MSI Wireless LAN icon
on the taskbar.
Click here to
start setup
Software installation...
Click
Click
Click
Check here
MSI Wireless LAN
a
a
b
b
C
C
a
a
b
b
a
a
b
b
c
c
Insert CB11B into your
desktop PC with an
optional adapter
Insert CB11B into
your laptop PC
115V115V
Ad-Hoc Mode (computer-to-computer)
1. Double click the MSI Wireless LAN icon on the task bar.
2. Click Advanced on the pop-up window.
3. Click Add... to add a new network.
4. Set up the Network Name (SSID) and the Network Key.
5. Check the last item to enable the Ad-Hoc mode, then
click OK to finish the settings for the first computer
(Administrator).
6. Any one who wants to access this Ad-Hoc network
should repeat step 1 to 3. In step 3, you will see the
network set by the first computer. Then, choose it and
click OK.
Setting.
a
a
Infrastructure Mode
(computer-to-access point)
1. Double click the MSI Wireless LAN icon on the task bar.
2. Click Advanced on the pop-up window.
3. A list of Available Network appears in the window.
Click Configure to set up the network selected.
4. As an administrator, you can change the Network Name
and Network Key.
5. You may also choose the networks you prefer from the
Available Networks list and use the Move up/Move
down to set the priority network.
6. Click OK. Now you can access the wireless network in
Infrastructure mode.
b
b
Page 3

(C) 2003 MICRO-STAR INTERNATIONAL. All Rights Reserved.
Ver. 1.0 Feb. 2003 PN/G52-W6802X2-K01
Click
Click
Click
All available
networks
Preferred
network list
Set up Infrastructure network...
Testing.
Check TCP/IP address...
or Windows 98SE/ME
1.
.
2. Type winipcfg in the pop-up DOS window and press
Enter key.
3. The IP Configuration screen appears, which shows the
IP address of your computer. Check the configuration
of IP address, Subnet Mask and Default Gateway are
correct.
or Windows 2000/XP
1.
.
Type ipconfig/all in the pop-up DOS window and
Press Enter key to display IP information.
F
F
Go to Start -> Run, type command in the Open box,
and click OK
Go to Start -> Run, type command in the Open box,
and click OK
2.
Check the connection by pinging...
1. Go to Start -> Run, type command in the Open box,
and click OK.
2. Type ping 172.16.0.1 in the pop-up DOS window,
which is the IP address of the Gateway in this case,
and press Enter key.
You will get replies if the pinging is successful
Set up Ad-Hoc network...
a
a
b
b
Add a network
Enter a name
for this network
Set up
Network Key
Check to enable
Ad-Hoc mode
Network Name (SSID)
Network Key
settings
Setting. (diagram)
Double click Double click
c
c
d
d
 Loading...