

Page 1

MOTOROLA XPRT™
This device may only be activated on a Boost Mobile account and not a Sprint postpaid account. In
the event that any of the Boost Mobile terms and conditions, device features and product
description conflict (collectively, “Boost features”) with any other terms, device features or product
descriptions found elsewhere on the packaging, within the enclosed materials, or within the device
itself (collectively, “Conflicts”) that may lead a consumer to believe that this is a Sprint postpaid
device, the Boost features shall supersede and replace any conflicts.
User Guide
www.boostmobile.com
Page 2
Consejo:
Para encontrar esta guía para usuarios en español,
por favor visita a
www.boostmobile.co m/userguides
To find this user guide in Spanish, please visit
www.boostmobile.co m/userguides
.
.
Important Privacy Message
apply to third-party applications. Third-party applications may
access your personal information or require Boost to disclose
– Boost’s policies often do not
your customer information to the third-party application
provider. To find out how a third-party application will collect,
access, use, or disclose your personal information, check the
application provider’s policies, which can usually be found on
their website. If you aren’t comfortable with the third-party
application’s policies, don’t use the application.
Sprint UG_11a_092110
Page 3
Table of Contents
Tip:
Looking for something? If you don’t see it in the headings
listed here, try the Index on page 81.
Introduction . . . . . . . . . . . . . . . . . . . . . . . . . . . . . . . i
Section 1: Getting Started . . . . . . . . . . . . . . . . . 1
1A. Setting Up Service . . . . . . . . . . . . . . . . . . . 2
Setting Up Your Phone . . . . . . . . . . . . . . . . . . . . . . 2
Setting Up Your Voicemail . . . . . . . . . . . . . . . . . . . 3
Setting Up Messaging & Social Networking
Accounts . . . . . . . . . . . . . . . . . . . . . . . . . . . . . . . . . . 3
Getting Help . . . . . . . . . . . . . . . . . . . . . . . . . . . . . . . 4
Section 2: Your Phone . . . . . . . . . . . . . . . . . . . . 6
2A. Phone Basics . . . . . . . . . . . . . . . . . . . . . . . . 7
Your Phone . . . . . . . . . . . . . . . . . . . . . . . . . . . . . . . . 7
Viewing Notifications . . . . . . . . . . . . . . . . . . . . . . . . 9
Turning Your Phone On and Off . . . . . . . . . . . . . 10
Battery and Charger . . . . . . . . . . . . . . . . . . . . . . . 10
Viewing Your Phone Number . . . . . . . . . . . . . . . 11
Touch Tips & Navigation . . . . . . . . . . . . . . . . . . . 12
Phone Setup Options . . . . . . . . . . . . . . . . . . . . . . 13
Making and Answering Calls . . . . . . . . . . . . . . . 17
Entering Text . . . . . . . . . . . . . . . . . . . . . . . . . . . . . . 19
2B. Settings . . . . . . . . . . . . . . . . . . . . . . . . . . . . 22
Sound Settings . . . . . . . . . . . . . . . . . . . . . . . . . . . 22
Display Settings . . . . . . . . . . . . . . . . . . . . . . . . . . . 22
Location Settings . . . . . . . . . . . . . . . . . . . . . . . . . . 23
Airplane Mode . . . . . . . . . . . . . . . . . . . . . . . . . . . . 24
TTY Use With Boost Service . . . . . . . . . . . . . . . . 24
Security Settings . . . . . . . . . . . . . . . . . . . . . . . . . . 25
2C. History . . . . . . . . . . . . . . . . . . . . . . . . . . . . . 27
Recent Calls . . . . . . . . . . . . . . . . . . . . . . . . . . . . . . 27
Frequent Calls . . . . . . . . . . . . . . . . . . . . . . . . . . . . 27
2D. Contacts . . . . . . . . . . . . . . . . . . . . . . . . . . . . 28
Viewing Contacts . . . . . . . . . . . . . . . . . . . . . . . . . 28
Creating Contacts . . . . . . . . . . . . . . . . . . . . . . . . . 29
Transferring Contacts . . . . . . . . . . . . . . . . . . . . . . 29
Calling Or Emailing Contacts . . . . . . . . . . . . . . . 30
Viewing and Using Contacts . . . . . . . . . . . . . . . . 31
Editing Or Deleting Contacts . . . . . . . . . . . . . . . . 31
Linking Contacts . . . . . . . . . . . . . . . . . . . . . . . . . . 31
Synchronizing Contacts . . . . . . . . . . . . . . . . . . . . 31
Page 4

Making Groups . . . . . . . . . . . . . . . . . . . . . . . . . . . 32
2E. Calendar & Tools . . . . . . . . . . . . . . . . . . . . 33
Calendar . . . . . . . . . . . . . . . . . . . . . . . . . . . . . . . . 33
File Manager . . . . . . . . . . . . . . . . . . . . . . . . . . . . . 33
Alarm Clock and Timer . . . . . . . . . . . . . . . . . . . . 34
Help Center . . . . . . . . . . . . . . . . . . . . . . . . . . . . . . 34
Calculator . . . . . . . . . . . . . . . . . . . . . . . . . . . . . . . . 34
Updating Your Phone . . . . . . . . . . . . . . . . . . . . . 35
2F. Voice Services . . . . . . . . . . . . . . . . . . . . . . 36
Voice Actions . . . . . . . . . . . . . . . . . . . . . . . . . . . . . 36
Voice Commands . . . . . . . . . . . . . . . . . . . . . . . . 36
2G. microSD Card . . . . . . . . . . . . . . . . . . . . . . . 37
Your Phone’s microSD Card . . . . . . . . . . . . . . . . . 37
microSD Card Settings . . . . . . . . . . . . . . . . . . . . 38
microSD Card Files . . . . . . . . . . . . . . . . . . . . . . . 38
Connecting Your Phone to Your Computer . . . 38
2H. Camera . . . . . . . . . . . . . . . . . . . . . . . . . . . . 40
Taking Photos . . . . . . . . . . . . . . . . . . . . . . . . . . . . 40
Recording Videos . . . . . . . . . . . . . . . . . . . . . . . . . . 42
Viewing Photos & Videos . . . . . . . . . . . . . . . . . . 43
Managing Photos and Videos . . . . . . . . . . . . . . 44
2I. Bluetooth & Wi-Fi . . . . . . . . . . . . . . . . . . . 45
Using Bluetooth® . . . . . . . . . . . . . . . . . . . . . . . . . . 45
Connecting With Wi-Fi . . . . . . . . . . . . . . . . . . . . . 47
Section 3: Boost Service . . . . . . . . . . . . . . . . 49
3A. Boost Basics . . . . . . . . . . . . . . . . . . . . . . . 50
Voicemail . . . . . . . . . . . . . . . . . . . . . . . . . . . . . . . . . 50
Messaging . . . . . . . . . . . . . . . . . . . . . . . . . . . . . . . 51
Social Networking . . . . . . . . . . . . . . . . . . . . . . . . . 53
Making a Conference Call . . . . . . . . . . . . . . . . . . 54
3B. Web and Apps . . . . . . . . . . . . . . . . . . . . . 55
Surfing the Web . . . . . . . . . . . . . . . . . . . . . . . . . . . 55
Android Market™ . . . . . . . . . . . . . . . . . . . . . . . . . . 56
Downloading Apps . . . . . . . . . . . . . . . . . . . . . . . . 57
YouTube™ . . . . . . . . . . . . . . . . . . . . . . . . . . . . . . . . 58
3C. Entertainment . . . . . . . . . . . . . . . . . . . . . . 59
Music . . . . . . . . . . . . . . . . . . . . . . . . . . . . . . . . . . . . 59
Digital Living . . . . . . . . . . . . . . . . . . . . . . . . . . . . . . 61
3D. Navigation . . . . . . . . . . . . . . . . . . . . . . . . . 64
Google Maps™ . . . . . . . . . . . . . . . . . . . . . . . . . . . . 64
Latitude™ . . . . . . . . . . . . . . . . . . . . . . . . . . . . . . . . . 65
TeleNav GPS Navigator . . . . . . . . . . . . . . . . . . . . 66
Page 5

Section 4: Safety and Warranty Information 67
4A. Important Safety Information . . . . . . . . . 68
General Precautions . . . . . . . . . . . . . . . . . . . . . . . 68
Maintaining Safe Use of and Access to
Your Phone . . . . . . . . . . . . . . . . . . . . . . . . . . . . . . . 69
Using Your Phone With a Hearing Aid
Device . . . . . . . . . . . . . . . . . . . . . . . . . . . . . . . . . . . 70
Caring for the Battery . . . . . . . . . . . . . . . . . . . . . . 72
Radio Frequency (RF) Energy . . . . . . . . . . . . . . . 72
Owner’s Record . . . . . . . . . . . . . . . . . . . . . . . . . . . 74
User Guide Proprietary Notice . . . . . . . . . . . . . . . 75
4B. Manufacturer’s Warranty . . . . . . . . . . . . 76
Manufacturer’s Warranty . . . . . . . . . . . . . . . . . . . . 76
Index . . . . . . . . . . . . . . . . . . . . . . . . . . . . . . . . . . . 81
Page 6

Introduction
This
User Guide
the features of your new MOTOROLA XPRT. It’s divided
into four sections:
⽧
Section 1: Getting Started
⽧
Section 2: Your Phone
⽧
Section 3: Boost Service
⽧
Section 4: Safety and Warranty Information
Note:
introduces you to Boost service and all
Because of updates in phone software, this printed
guide may not be the most current version for your
phone. Visit
access the most recent version of the user guide.
www.boos tmobile.com
and sign in to
WARNI NG:
i
Please refer to the
section on page 68 to learn about information
that will help you safely use your phone. Failure to
read and follow the Important Safety Information
in this phone guide may result in serious bodily
injury, death, or property damage.
Important S afety Information
Page 7

Section 1
Getting Started
Page 8
⽧
1A. Setting Up Service
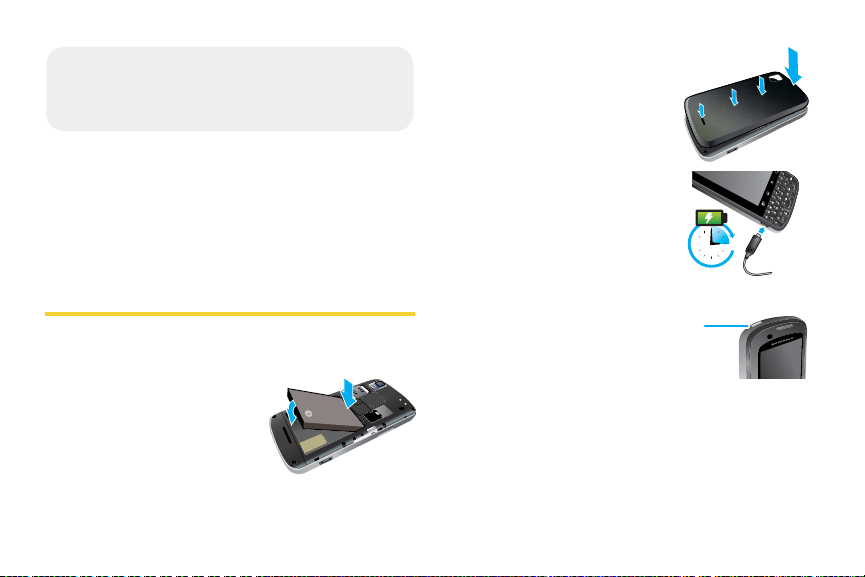
3H
Power
Button
Setting Up Your Phone (page 2)
⽧
Setting Up Your Voicemail (page 3)
⽧
Setting Up Messaging & Social Networking Accounts
(page 3)
⽧
Getting Help (page 4)
䡲
Position the battery cover
over the battery
compartment and press
down until you hear a click.
2.
Charge your battery for at
least three hours.
Setting Up Your Phone
1.
Install the battery.
䡲
Remove the battery from its packaging.
䡲
Insert the battery into the
opening in the back of
the phone, making sure
the connectors align.
Gently press down to
secure the battery.
2 1A. Setting Up Service
3.
Press and hold the
Screen Lock
Power/
button on top
of your phone to turn it on.
Your phone will turn on
and show some setup
instructions.
4.
Follow the prompts to add email and other
accounts. Or, touch
Skip
to go to the home screen
so you can start to make calls. You can add
accounts later.
Page 9
䡲
1
Touch the android to begin.
䡲
Log on to a Wi-Fi network.
䡲
Set up or log into your Google account.
䡲
Add additional accounts.
Setting Up Your Voicemail
Your phone automatically transfers all unanswered
calls to your voicemail, even if your phone is in use or
turned off. You should set up your voicemail and
personal greeting as soon as your phone is activated.
Always use a password to protect against unauthorized
access.
1.
Touch to open the dial screen, and then touch
and hold .
2.
Follow the system prompts to:
䡲
Create your password.
䡲
Record your name announcement.
䡲
Record your greeting.
Note:
Voicemail Password
Boost strongly recommends that you create a
password when setting up your voicemail to protect
against unauthorized access. Without a password,
anyone who has access to your phone is able to
access your voicemail messages.
For more information about using your voicemail, see
“Voicemail” on page 50.
Setting Up Messaging & Social Networking Accounts
If you skipped the setup steps when you first turned on
your phone, use these steps to add accounts:
1.
Touch >
2.
To sign into your account, use the user name or
email and password that you set up on that
account (the same as on your computer)
My Accounts
>
Add account
1A. Setting Up Service 3
.
Setting Up Service
Page 10
Note:
GHI
4
*
ABC
2
1
1
You can add corporate sync (Microsoft® Exchange®),
email, or social networking accounts (such as
.
Facebook, Twitter, and more) to your phone. If you don’t
have accounts, you can visit their websites to set them
up.
Tip:
For faster downloads and data connection speeds in WiFi covered areas,
page 47
see
.
“Connecting With Wi-Fi” on
Getting Help
Managing Your Account
Online: www.boostmobile.com
䢇
Access your account information.
䢇
Check your minutes used (depending on your
service plan) .
䢇
View and pay your bill.
䢇
Enroll in Boost online billing and automatic payment.
䢇
Purchase accessories.
䢇
Shop for the latest Boost phones.
4 1A. Setting Up Service
䢇
View available Boost service plans and options.
䢇
Learn more about data services and other products
like games, ringback tones, screen savers, and more.
From Your Boost Phone
䢇
Touch to check minute usage and
account balance.
䢇
Touch to m a ke a pay m e n t .
䢇
Touch to access a summary of your
Boost service plan or get answers to other questions.
*
DEF
3
*
From Any Other Phone
䢇
Boost Customer Service:
1-888-266-7848
.
Boost 411
Boost 411 gives you access to a variety of services and
information, including residential, business, and
government listings; movie listings or showtimes;
driving directions, restaurant reservations, and major
local event information. You can get up to three pieces
of information per call, and the operator can
automatically connect your call at no additional charge.
GHI
䊳
Touch .
4
Page 11

For more information or to see the latest in products
and services, visit us online at
www.boostmobile.com
.
Setting Up Service
1A. Setting Up Service 5
Page 12

Section 2
Your Phone
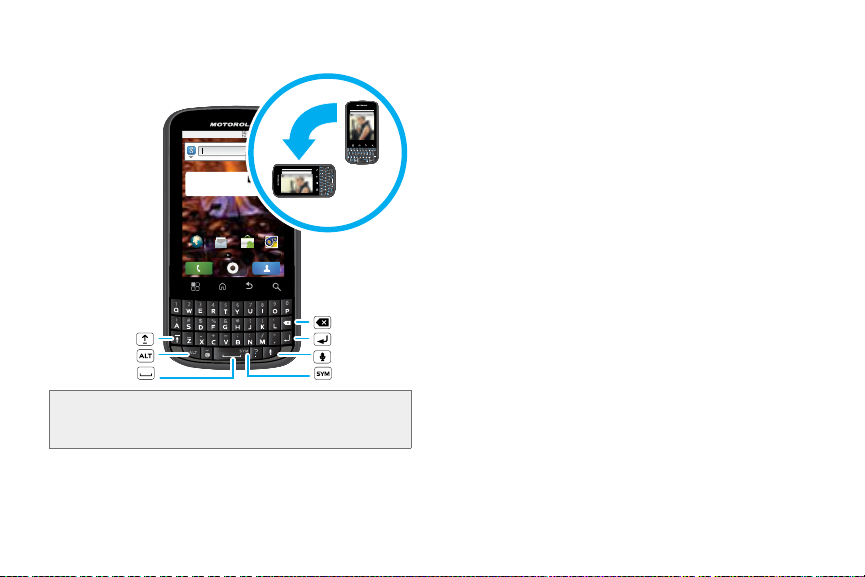
Page 13

⽧
2A. Phone Basics
Browser VoicemailMarketText Messa
a
11:35
See all your apps.
Touch the Launcher icon.
1 of 6
Press=Sleep/Wake up.
Hold=Turn on/off.
3.5mm
Headset
Jack
Home Key
Back
Key
Microphone
Menu Key
Micro USB
Connector
Charge or
connect to PC.
Message Light
On=Charged.
Flashing=New
notification.
Volume
Buttons
Search
Key
Programmable
Button
Touchscreen
International
calling, press
ALT + C.
Power/
Screen Lock
Button
Your Phone (page 7)
⽧
Viewing Notifications (page 9)
⽧
Turning Your Phone On and Off (page 10)
⽧
Battery and Charger (page 10)
⽧
Viewing Your Phone Number (page 11)
⽧
Touch Tips & Navigation (page 12)
⽧
Phone Setup Options (page 13)
⽧
Making and Answering Calls (page 17)
⽧
Entering Text (page 19)
Tip:
Phone Software Upgrades
software may become available from time to time. Boost
will automatically upload critical updates to your phone.
You can also use the menu to check for and download
updates. Touch
System updates
updates.
– Updates to your phone’s
> Settings > About phone >
to search for and download available
Your Phone
Phone Basics
2A. Phone Basics 7
Page 14
Browser VoicemailMarketText Messa
s
11:35
See all your apps.
Touch the Launcher icon.
1 of 6
http://www.motorola.com
http://www.motorola.com
Delete
Enter
Shift
Space
Symbols
Alternate
For some features, when you
turn your phone, the screen
adjusts for you.
Voice
Note:
From the home screen, press the voice key to start a
voice search. If you’re composing a message, press the
voice key to begin dictation.
Key Functions
䢇
Power/Screen Lock Button:
or put the display to sleep.
䢇
Message Light:
see when you have a new message
or see your phone’s charging status at a glance.
䢇
Volume But tons:
adjust the ringer volume or adjust
the voice volume during a call.
䢇
Home Key:
return to the home screen. Press and hold
the home key to see your most recently used apps.
䢇
Menu Key:
open additional options for whatever
screen you are viewing.
䢇
Micro USB Connector/Accessory Jack:
phone charger or an optional USB cable (included).
CAUTION! Inserting an accessory into the incorrect
connector may damage the phone.
䢇
Microphone:
allow other callers to hear you clearly
when you are speaking to them.
䢇
Search Key:
can search the web.
䢇
Back Key:
open a Google™ search screen so you
return to the previous screen.
turn the phone on or off
connect the
8 2A. Phone Basics
Page 15
䢇
Touchscreen:
display all the information needed to
operate your phone, such as the call status, the
Contacts list, the date and time, and the signal and
battery strength.
䢇
Programmable Button:
open your favorite feature with
just one press.
䢇
3.5mm Headset Jack:
plug in either a stereo headset
(included) or an optional headset for convenient,
hands-free conversations. CAUTION! Inserting an
accessory into the incorrect jack may damage the
phone.
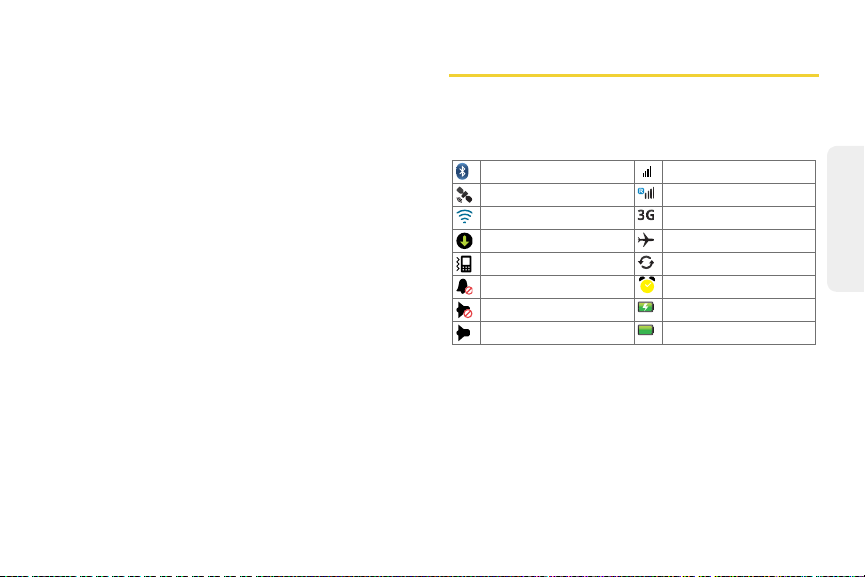
Viewing Notifications
Your phone’s display provides information about your
phone’s status and options. This list identifies some of
the symbols you’ll see:
Bluetooth® active
GPS active network (roaming)
Wi-Fi active 3G data service
downloading airplane mode
vibrate sync active
silent alarm set
mute call battery (charging)
speakerphone active battery (full charge)
network (full signal)
2A. Phone Basics 9
Phone Basics
Page 16
Turning Your Phone On and Off
Your screen remains blank while your phone is off
(unless the battery is charging).
Turning Your Phone On
䊳
Press and hold the Power/Screen Lock button on
the top of the phone.
Once your phone is on, it may display “Searching for
Service.” When your phone finds a signal, it enters
standby mode – the phone’s idle state. At this point,
you are ready to begin making and receiving calls.
If your phone is unable to find a signal after 15 minutes
of searching, a Power Save feature is automatically
activated. When a signal is found, your phone
automatically returns to standby mode.
Tip:
The Power Save feature conserves your battery power
when you are in an area where there is no signal.
Turning Your Phone Off
䊳
Press and hold Power/Screen Lock button to open
the phone options menu. Touch
the phone off.
10 2A. Phone Basics
Power off
to turn
Battery and Charger
WARNI NG:
Boost-approved or Motorola batteries and accessories
can be found at Boost Stores or through Motorola; or
call 1-866-866-7509 to order. They’re also available at
www.b oostmobile.com
Battery Capacity
Your phone is equipped with a Lithium Ion (Li-Ion)
battery. It allows you to recharge your battery before it is
fully drained.
Your phone warns you with a audible alert when the
battery reaches 15% and 5% of its capacity. When
there are approximately two minutes of talk time left, the
phone plays another alert and then turns off.
Use only Boost-approved or Motorola batteries
and chargers with your phone. The failure to use
a Boost-approved or Motorola battery and
charger may increase the risk that your phone
will overheat, catch fire, or explode, resulting in
serious bodily injury, death, or property damage.
.
Page 17
Note:
Long backlight settings, searching for service, vibrate
mode, browser use, and other variables may reduce
the battery’s talk and standby times.
Tip:
Watch your phone’s battery level indicator and charge the
battery before it runs out of power.
Installing the Battery
䊳
See “Setting Up Your Phone” on page 2.
Removing the Battery
1.
Make sure the power is off so that you don’t lose
any stored numbers or messages.
2.
Remove the back cover by pulling up from the
notch at the bottom, and then remove the battery
from the phone.
WARNING:
Do not handle a damaged or leaking Li-Ion
battery as you can be burned.
Charging the Battery
Keeping track of your battery’s charge is important. If
your battery level becomes too low, your phone
automatically turns off, and you will lose any
information you were just working on.
Always use a Boost-approved or Motorola desktop
charger, travel charger, or vehicle power adapter to
charge your battery.
䊳
Plug the flat end of the charger into the phone’s
charger jack and the other end into an electrical
outlet.
With the Boost-approved Li-Ion battery, you can
recharge the battery before it becomes completely run
down.
Viewing Your Phone Number
䊳
Touch
phone number and other information about your
phone and account appear.)
> Settings > About phone > Status
2A. Phone Basics 11
. (Your
Phone Basics
Page 18
Touch Tips & Navigation
Browser VoicemailMarketText Messa
Contacts: A-Z
Arthur Baudo
Contacts: All contacts
Send email
Arthur Bando
View contact
Call contact
Send text message
Here are some tips for navigating around your phone.
Touch
To choose an icon or option,
touch
it.
Touch & hold
To open special options,
touch and hold
other item. Try it: In the
home screen, touch , and
then touch and hold a
contact to open options.
12 2A. Phone Basics
an icon or
Drag
To scroll through a list or
move slowly,
drag
across
the touchscreen. Try it: In
the home screen, touch
, and then drag your
Contacts
list up or down.
Tip:
When you drag or flick a list, a
right. Drag the scroll bar to move the list to a letter A - Z.
Contacts: A-Z
Contacts: All contacts
Arthur Baudo
Barry Smyth
Cheyenne Medina
Christine Fanning
Jim Somers
Kat Bleser
scroll bar
Flick
To scroll through a list or move quickly,
touchscreen (drag quickly and release).
Tip:
When you flick a long list, touch the screen to stop it from
scrolling.
3:00 PM
appears on the
flick
across the
Page 19

Zoom
Randolph
E Ohio St
Messaging
N Clark St
Wacker Dr
M
N Rush St
N Wabash Ave
N Dearborn St
E Grand Ave
N Micigan Ave
N Micigan Ave
W Lake St W Lake St
E Wacker Pl
State/Lake
Grand Red
Lake
Randolph/
Wabash
Washington-Blue
E S WaterSt
M
M
M
M
E Randolph St
Ontario St
E Ontario St
Pull fingers
apart to zoom
out.
Get a closer look at
maps or web pages.
To zoom in,
touch
zoom out, doubletouch the screen
again.
You can also zoom
in or out by
pinching your
fingers together or
moving them apart on the screen.
Phone Covers
Your touchscreen might stay
dark during calls if the sensor
just above it is covered. Don’t
use covers or screen protectors (even clear ones) that
cover this sensor.
Screen protectors can also interfere with touchscreen
performance.
double-
the screen. To
Phone Setup Options
Home Screen
The home screen gives you all your latest information
in one place. It’s what you see when you turn on the
phone or touch
See all your apps.
Touch the Launcher icon.
Browser VoicemailMarketText Messa
Home
from a menu.
Notifications
Flick this bar down
11:35
to see details.
Battery Status
Widget
1 of 6
Touch to open.
Touch & hold to
move, delete, or
more.
Flick left or right to
see more screens.
Open the app menu.
2A. Phone Basics 13
Phone Basics
Page 20
Note:
Your home screen might look a little different.
The home screen extends beyond what you see on the
screen to give you more room for adding shortcuts,
widgets, and more. Flick the home screen left and right
to see more panels or to add widgets or shortcuts.
Shortcuts
To add shortcuts to the home screen, touch to
open the app menu, and then touch and hold the
shortcut you want. Or, touch >
Add
>
Shortcuts
You can also add shortcuts directly to the home
screen: touch and hold an empty spot on the home
screen, touch
Tip:
Shortcuts
You can launch your frequently used applications directly
from the keyboard. For example , set
browser, or
, and select a shortcut.
Search+D
for the dialer.
Search+B
to launch
Widgets
A widget is small app on the home screen that displays
information, such as weather, news, and social
networking updates. You can add a widget, such as a
14 2A. Phone Basics
clock, music player, or a calendar that shows
upcoming appointments. To open a widget, touch it.
Creating Widgets
1.
Find an empty spot on your home screen where
you want to add a widget. You can flick left or right
to open other panels on your home screen.
2.
Touch and hold the empty spot until you see the
Add to Home screen
3.
Touch
.
4.
Motorola widgets
Touch the type of widget. If necessary, enter the
menu.
or
Android widgets
widget settings.
Tip:
You can change a widget’s size. Just touch and hold the
widget. When the widget’s outline turns white, drag one of
the corners to make it the size you want.
Note:
If you install apps from Android Market™ that have
widgets, touch and hold the home screen, and then
select a widget to add to the home screen.
.
Page 21
Setting Up Widgets
Browser VoicemailMarketText Messa
s
You can customize some widgets. Touch a widget to
open it, and then touch .
You may already have several useful widgets on your
home screen:
䢇
Messages
long it shows new messages. To add email
accounts, see “Setting Up Messaging” on page 52.
䢇
Music
playlist, or just touch >
about “Music” on page 59.
䢇
News
shows new stories, or choose a news source. To
choose a source, touch , and then choose preset
Bundles
URL for a
䢇
Weat her
To add locations, touch , enter a city, and touch
Search
to see other locations you added.
: Change the widget name or choose how
: Set this widget to an artist, album, song,
Party shuffle
: Change the widget name, choose how long it
or
Channels
Webpage
, or choose
or an
RSS feed
Custom
: Change temperature units or add locations.
. When you open the weather widget, flick left
. There’s more
to enter a
.
App Menu
The app menu shows you all
of your applications. To open
it from the home screen,
touch .
Flick up and down to see all
of your apps. Any new apps
that you download (see
“Android Market™” on
page 56) are added to the app menu.
To close the app tray, touch
Recent Apps
Touch and hold to see the last few apps you used,
and then touch the app you want. Touch to return
to the home screen.
Home
or
Back
.
2A. Phone Basics 15
Phone Basics
Page 22
Search
Touch to search by
voice.
Touch here to enter text.
Touch here for
more search options.
䊳
Touch
Note:
Search
to start a Google search.
You can also use the Voice search key on the keypad.
Programmable Side Key
Set the key on the side of your phone to open the
feature you use most.
1.
To set the programmable side key, touch >
Settings
>
Applications
2.
Touch the item assigned to Side key (usually the
first item on the list), and then touch an application.
>
Quick Launch
.
Tip:
You can also use Quick Launch to set shortcuts for most
of the keyboard keys. To access these shortcuts, touch
and hold and press the key while holding .
To make assigning Quick Launch keys easier, you can
put a shortcut on the home screen. Touch and hold an
empty spot on the home screen and select
Settings
>
Quick Launch
.
Shortcuts
>
16 2A. Phone Basics
Page 23

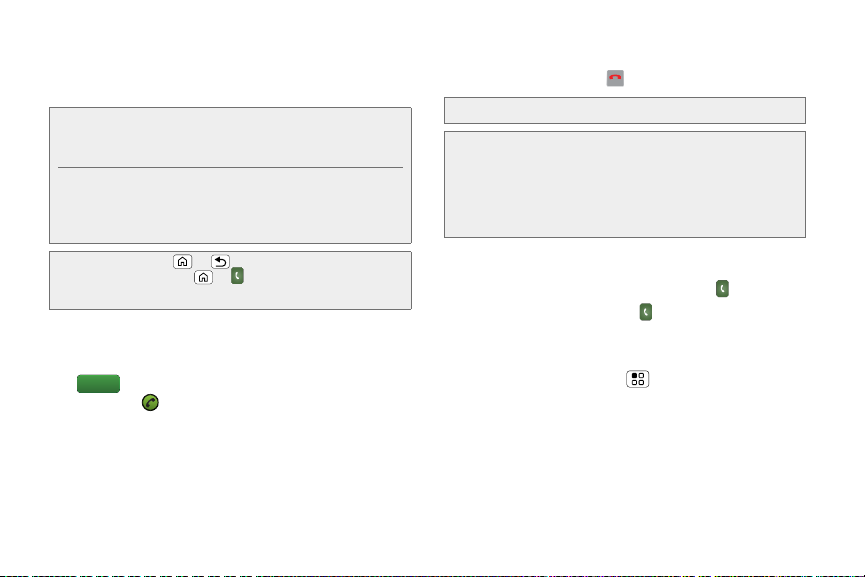
Making and Answering Calls
Active Call
00:12
Add call
Bluetooth Mute
DialpadEnd call
3:00
Mobile (555) 555-7931
Chicago, IL
Kristine Kelley
Going to pottery tonight. Looking
forward to it, it’s been forever...
Speaker
Call Timer
Mute
Touch to mute or
unmute the call.
Speakerphone
Touch to turn the
speakerphone on or
off.
Dialpad
Touch to enter
numbers during a call.
Making Calls
䊳
From the home screen, touch .
3:00
Recent Favorites
0
2
5
8
Contacts
ABC
JKL
TUV
+
DEF
3
MNO
6
WXYZ
9
#
Dialer
Type to search
1
4
7
*
GHI
PQRS
Recent
Calls List
Backspace
Delete digits.
Call Voicemail
Touch and hold
for voicemail.
Call
Enter a phone
number & then
touch here.
Voice Commands
Add Number To Contacts
In-Call Options
During a call:
䢇
To use a Bluetooth® device, touch
turn on your phone and pair it. See “Connecting New
Bluetooth
. (First,
2A. Phone Basics 17
Phone Basics
Page 24
Devices” on page 46.)
Answer
End call
䢇
To mute a call, touch
䢇
To use the speakerphone, touch
Note:
Using a mobile device or accessory while driving may
cause distraction and may be illegal. Always obey the
laws and drive safely.
Your phone includes a proximity sensor. When you
hold the phone to your ear, the display goes dark to
prevent accidental touches. When you move your
phone away from your ear, the display lights up again.
Tip:
You can touch or to leave the active call display.
To reopen it, touch > >
progress.
Mute
.
Speaker
Return to call in
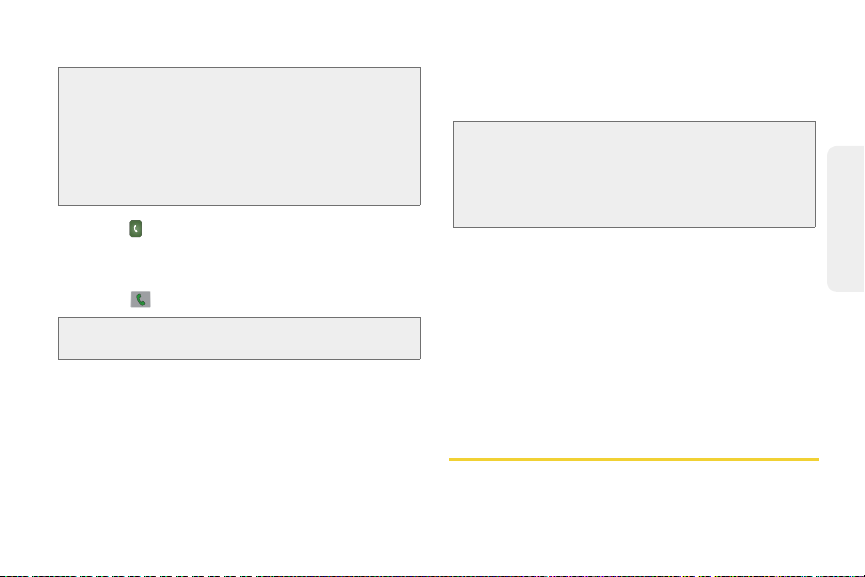
Answering Calls
䊳
To answer a call while the display is active, touch
. When the display is not active, answer by
dragging to the right.
If the incoming call is from one of your Contacts, the
person’s name is displayed. You may also see the
caller’s phone number, if available.
18 2A. Phone Basics
Ending a Call
䊳
.
To end a call, touch .
Tip:
To ignore a call, touch
Note:
Screen protectors can interfere with touchscreen
performance. Aftermarket screen protectors must have
an opening for the proximity sensor to operate properly.
You may experience abnormal function if an aftermarket-protector or protective film covers proximity
sensor area at the top of the phone.
Ignore
.
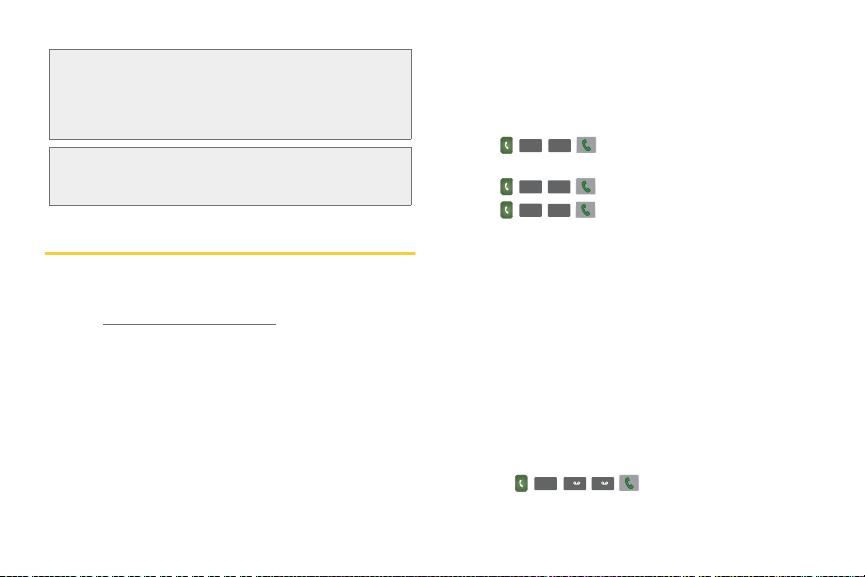
Recent Calls
䊳
To see recent or missed calls, touch >
䡲
To call a number, touch .
䡲
To send a text message, touch and hold an entry.,
and then select
䡲
To clear the list, touch >
Send text message
Clear list
Recent
.
.
Page 25
Calling Emergency Numbers
Note:
Your service provider programs one or more
emergency phone numbers (such as 911 or 112) that
you can call under any circumstances, even when your
phone is locked. Emergency numbers vary by country.
Your pre-programmed emergency number(s) may not
work in all locations, and sometimes an emergency call
cannot be placed due to network, environmental, or
interference issues.
1.
Touch . (If your phone is locked, touch
Emergency Call
2.
Enter the emergency number.
3.
Touch to call the emergency number.
Note:
Your mobile device can use GPS and AGPS signals to
help emergency services find you.
Enhanced 911 (E911) Information
This phone features an embedded Global Positioning
System (GPS) chip necessary for utilizing E911
emergency location services where available.
When you place an emergency 911 call, the GPS
feature of your phone seeks information to calculate
.)
your approximate location. Depending on several
variables, including availability and access to satellite
signals, it may take up to 30 seconds or more to
determine and report your approximate location.
Important:
Always report your location to the 911 operator
when placing an emergency call.
designated emergency call takers, known as
Public Safety Answering Points (PSAPs) may not
be equipped to receive GPS location information
from your phone.
Some
Cool Down
In very limited circumstances, such as where your
phone has been exposed to extreme heat, “Cool
Down” message screens will appear. To avoid possible
damage to your battery and phone, you should follow
these instructions until the phone is within its
recommended temperature range. When your phone is
in “Cool Down” mode, only emergency calls can be
made.
Entering Text
You can type using the phone’s QWERTY or
touchscreen keyboard.
2A. Phone Basics 19
Phone Basics
Page 26

QWERTY Keyboard
as
zxc vbnm
df g h jk l
we r ty u i op
?123
j
v
.
,
q
Dinner at Bistro V
Clear
x
c
, :-)
Delete
Emoticons
Space
Letters/Numbers
Touch to open a keypad for
symbols or numbers.
Shift
Alternate
Keys
Tip:
When you type, your phone suggests words for you. You
.
can turn this on or off or explore other options by
touching >
Note:
When you’re entering text, press the Voice Key to begin
Settings
>
Language & keyboard
voice recognition dictation.
Symbols
Voice Key
Multi-Touch Keypad
Use the touchscreen keypad to enter letters one at a
time.
k
.
Touchscreen Keypad
Touch a text field to open a touchscreen keypad. Press
Back
To move the cursor, touch and hold a word to open a
magnifier where you can drag the cursor.
20 2A. Phone Basics
to close it.
Typing Tips
To...
Enter
alternate
characters
To enter characters
appearing at the top of the
keys (including numbers),
touch .
Page 27
To...
Enter
one capital
Enter
only capital
until you touch
again
Cut
or
Copy
selected text
Move
the cursor
Paste
cut or copied text
Delete
a character (hold
to delete more)
letter
letters,
Shift
Touch
Touch
again to revert to lowercase.
Double touch to select text,
and then drag to left or right
to highlight words. Touch and
hold on or near the
highlighted text and select
Cut
Touch where you want to
move the cursor. When you
see a red icon, drag it to
where you want the cursor.
Touch and hold location to
paste then touch
Touch
or
Copy
Shift
.
Shift
twice. Touch
.
Delete
Paste
.
Input Methods
To select an input method, touch and hold a text entry
area on the screen to open the
Input method
, and then touch the method you want.
Edit text
menu. Touch
Auto-Correction
As you type, your phone suggests words from your
dictionary and chosen language.
Your phone also automatically enters apostrophes in
some words, like “dont.” You can also touch two keys at
the same time, such as
Shift
with a letter.
Phone Basics
Text Input Settings
䊳
Touch >
.
Settings >Language & keyboard
2A. Phone Basics 21
.
Page 28

⽧
2B. Settings
Volume
Buttons
Sound Sett ings (page 22)
⽧
Display Settings (page 22)
⽧
Location Settings (page 23)
⽧
Airplane Mode (page 24)
⽧
TTY Use With Boost Service (page 24)
⽧
Security Settings (page 25)
Sound Settings
Ringtones
䊳
To personalize your ringtones, touch >
Settings> Sound >Phone ringtone
ringtone
22 2B. Settings
Adjusting the Phone’s Volume Settings
䊳
Press the volume buttons
to change the ring
volume (in the home
screen), or the earpiece
volume (during a call).
Vibrate
䊳
To set your vibrate options, touch >
Sound >Vibrate
.
Settings
>
Display Settings
Changing the Display Screen
䊳
To set display brightness, touch >
Display >Brightness
䊳
or
Notification
.
To set orientation, touch >
Auto-rotate screen
.
.
Settings
Settings >Display
>
>
Page 29

䊳
To set animation, touch >
Animation
Note:
.
Some apps are designed so that your phone can
“animate” them by rotating, fading, moving, and
stretching one or more images.
Settings >Display
Wallpaper
To apply a new wallpaper:
1.
Touch and hold an empty spot on your home
screen.
2.
Touch
3.
Wallpapers
Touch
Live Wallpapers, Media gallery
.
and choose a wallpaper.
Display Language
To set your menu language and region:
䊳
Touch >
Select locale
Settings >Language & keyboard
.
, or
Wallpapers
>
>
Changing the Date & Time
To set date, time, time zone, and formats:
䊳
Touch >
Settings >Date & time
.
Location Settings
Your phone is equipped with a Location feature for use
in connection with location-based services.
The Location feature allows the network to detect your
position. Turning Location off will hide your location
from everyone, except 911.
,
Note:
Turning Location on will allow the network to detect
your position using GPS technology, making some
Boost applications and services easier to use. Turning
Location off will disable the GPS location function for all
purposes except 911, but will not hide your general
location based on the cell site serving your call. No
application or service may use your location without
your request or permission. GPS-enhanced 911 is not
available in all areas.
2B. Settings 23
Settings
Page 30

To enable your phone’s Location feature:
䊳
Touch >
Settings >Location & security
and
select one or more services to use.
Airplane Mode
Airplane Mode turns off all your wireless connections
and allows you to use many of your phone’s features,
such as Games, Notepad, and Voice Memos, when
you are in an airplane or in any other area where
making or receiving calls or data is prohibited. When
you set your phone to Airplane Mode, it cannot send or
receive any calls or access online information.
䊳
Press and hold the Power/Screen Lock button
and then touch
Airplane mode
.
TTY Use With Boost Service
A TTY (also known as a TDD or Text Telephone) is a
telecommunications device that allows people who are
deaf, hard of hearing, or who have speech or language
disabilities to communicate by telephone.
24 2B. Settings
Your phone is compatible with select TTY devices.
Please check with the manufacturer of your TTY device
to ensure that it is compatible with digital cell phones.
Your phone and TTY device will connect via a special
cable that plugs into your phone’s headset jack. If this
cable was not provided with your TTY device, contact
your TTY device manufacturer to purchase the
connector cable.
To turn TTY Mode on or off:
䊳
Touch >
Settings >Call settings
>
TTY mode
and select an option.
For additional information about Boost Relay Services
and TTY compatibility, call Boost Relay Customer
Service at
800-676-3777
.
Page 31

WARNING:
911 Emergency Calling
Boost recommends that TTY users make
emergency calls by other means, including
Telecommunications Relay Services (TRS),
analog cellular, and landline communications.
Wireless TTY calls to 911 may be corrupted
when received by public safety answering points
(PSAPs), rendering some communications
unintelligible. The problem encountered appears
related to software used by PSAPs. This matter
has been brought to the attention of the FCC,
and the wireless industry and the PSAP
community are currently working to resolve this.
Security Settings
Screen Lock
Note:
You can make emergency calls on a locked phone
(see “Calling Emergency Numbers” on page 19). A
locked phone still rings,
answer
.
Lock the screen in the following ways:
䊳
Press the Power/Screen Lock button on top of the
phone.
but you need to unlock it to
䊳
Let the screen time out (don’t press anything).
䊳
Switch the power off.
To unlock the screen, press the Power/Screen Lock
button. Then, drag to the right.
Lock Pattern
1.
To set the lock pattern, touch >
Location & security
2.
Follow the instructions to draw your lock pattern.
3.
When prompted, draw the pattern to unlock the
>
Set up screen lock
Settings
>
>
Pattern
phone.
Password or PIN Lock
1.
To set the passcode, touch >
Location & security
Password
2.
Enter password or a numeric PIN, and then
or
PIN
>
.
Set up screen lock
confirm it.
3.
When prompted, enter the password to unlock the
phone.
Settings
>
>
2B. Settings 25
.
Settings
Page 32
Forgot Your Pattern Or Passcode?
If you forget your pattern, password, or PIN, contact
Boost.
Resetting Your Phone
䊳
To reset your phone to factory settings and erase
all the data on your phone, touch >
Privacy >Factory Data Reset >Reset Phone
Settings
.
>
WARNI NG:
All data on your phone will be deleted. (Nothing
on your memory card is deleted.)
26 2B. Settings
Page 33
⽧
2C. History
Recent Calls (page 27)
⽧
Frequent Calls (page 27)
Recent Calls
To see all recent calls (call history):
䊳
Touch >
䡲
To call a number, touch it.
䡲
To send a text message, create a contact, view a
contact, or other options, touch and hold an entry.
䡲
To clear the list, touch >
Recent
.
Clear list.
Frequent Calls
䊳
Press >
䡲
To call a number, touch it.
䡲
To send a text message, view a contact, or other
options, touch and hold an entry.
Favorites
.
History
2C. History 27
Page 34
⽧
2D. Contacts
Viewing Cont acts (page 28)
⽧
Creating Contacts (page 29)
⽧
Transferring Contacts (page 29)
⽧
Calling Or Emailing Contacts (page 30)
⽧
Viewing and Using Contacts (page 31)
⽧
Editing Or Deleting Contacts (page 31)
⽧
Linking Contacts (page 31)
⽧
Synchronizing Contacts (page 31)
⽧
Making Groups (page 32)
28 2D . Contacts
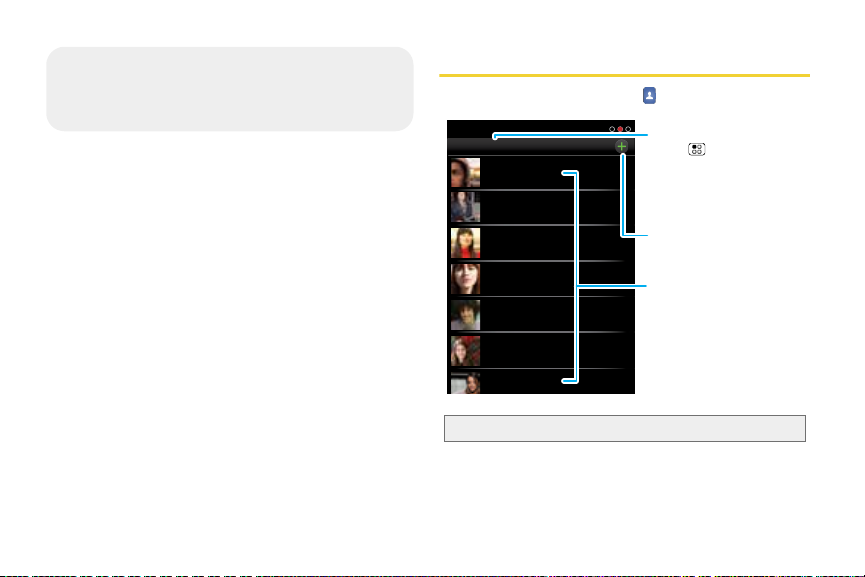
Viewing Contacts
From the home screen, touch .
Contacts: A-Z
Contacts: All contacts
Arthur Baudo
Barry Smyth
Cheyenne Medina
Christine Fanning
Jim Somers
Kat Bleser
Kristin Cullen
Tip:
To search the list, begin typing a name.
Group
Touch to choose which
group to show (like All or
Favorites).
Create Contacts
Contacts List
Touch to view contact
information. Touch & hold
to call, send a text
message, & more.
Page 35
Creating Contacts
3:00 PM
Sara
Walker
555-555-2385
Add contact
Phone
Mobile
Emails
IM
Addresses
Touch to add more
name details.
Touch to remove
this number.
Touch to add
another number.
Transferring Contacts
Note:
Before entering contacts, you must set up at least one
email account on your phone. See “Setting Up Your
Voicemail” on page 3 or “Setting Up Messaging” on
page 52.
1.
Touch > >
2.
Fill in as much or as little information as you'd like.
3.
When you’re finished, touch
Add contact
.
Save
.
Get all your contacts, all in one place. Here’s a few
helpful hints:
䢇
Use Gmail™
: All your Gmail contacts are
automatically synced to your phone. Various
computer applications for mobile phones and email
accounts allow you to export your contacts as a
“.CSV” file. You can then use Gmail to import the file.
For more details, go to
www.motorola.com/transfercontacts
or log in to your
Gmail account on your computer and select ”Help”.
䢇
Use a SIM card or a microSD card
: You can transfer
contacts from your old phone to your new Motorola
phone using your SIM card or a microSD card. See
“Transfering Contacts Using Your SIM Card” on
page 30 or “Transferring Contacts Using a microSD
Card” on page 30.
䢇
More
: Find other methods and tools to help you at
www.motorola.com/transfercontacts
.
2D. Contacts 29
Contacts
Page 36
Transfering Contacts Using Your SIM Card
1.
On your old phone, copy all the contacts you want
to your SIM card.
Tip:
For Motorola Android phones, touch >
SIM card
>
your SIM card.
2.
Insert your SIM card in your new phone. See “Your
SIM Card” on page 72.
3.
To import the contacts from your SIM card,
touch , and then touch >
Export contacts
to save your contacts to
Manage
Import/Export
.
Transferring Contacts Using a microSD Card
1.
On your old phone, copy all the contacts to your
microSD card. (They'll be copied as a VCard file.)
2.
Insert the microSD card in your new phone. See
“Your Phone’s microSD Card” on page 37.
3.
To import the contacts from your SIM card,
touch , and then touch >
Import contacts from: SD card
30 2D. Contacts
Import/Export
.
. >
Link Contacts
You might have two or more
person, such as a friend with two email addresses. To
combine these contacts:
1.
Touch .
2.
Touch a contact to open it, and then touch >
Link contact
and touch the second entry.
Contacts
for the same
Calling Or Emailing Contacts
1.
Touch .
2.
For
View contact, Call contact, Send text message
Send email
contact.
, or other options, touch and hold the
,
Page 37
Viewing and Using Contacts
Linking Contacts
When you set up a social networking account (see
page 3), you’ll know what everybody’s up to and when.
䊳
Touch .
䡲
To find a contact, type the contact name. Touch a
contact to open its details. Flick the screen left or
right to see
䡲
To change which group of contacts is shown (
Facebook
top.
䡲
To change how you view the list of contacts, flick
left or right at the bottom of the screen to select
History
Status
Social Networking
, and so on), touch the filter name at the
(recently used),
(list with status).
updates or
A-Z
(list without status) , or
History
All
Editing Or Deleting Contacts
1.
Touch .
2.
Touch the contact, and then touch >
Delete
.
Edit
or
You might have two
such as a friend with two email addresses. To combine
these two contacts:
1.
Touch .
2.
.
Touch a contact to open it, and then touch >
Link contact
social networking account remembers this
,
connection.
Contacts
for the same person,
and touch the second entry. Your
Synchronizing Contacts
When you change one of your
automatically updates your other social networking
accounts. Also, your phone updates your
social networking account whenever you change a
friend in your social networking accounts.
Contacts
, your phone
Contacts
2D. Contacts 31
Contacts
and
Page 38

Making Groups
䊳
Touch > >
.
group
You can put your
create (like “friends”, “family”, or “work”). Then, you
can find contacts faster by showing one group at a
time.
32 2D. Contacts
Display group
Contacts
into groups that you
>
Create new
Page 39
⽧
2E. Calendar & Tools
Calendar (page 33)
⽧
File Manager (page 33)
⽧
Alarm Clock and Timer (page 34)
⽧
Calculator (page 34)
⽧
Updating Your Phone (page 35)
Calendar
䊳
Touch >
Your calendar events can be viewed in different ways:
Touch >
highlight an event, more details appear.
Tip:
You can set up multiple calendars through your Gmail
account so you can access them from your phone
wherever you go.
Calendar
Agenda, Day, Week
.
, or
Month
. When you
Adding Calendar Events
1.
From any view, touch >
More >New event.
Enter the event start time and other details. You
can even set a reminder so you don’t forget about
the event. (When you set the reminder time to
, it plays at the event start time.)
minutes
2.
When you finish entering event details, touch
0
Save
Managing Calendar Events
䊳
To edit an event, touch and hold it, and then
touch
Edit event
䊳
To delete an event, touch and hold it, and then
touch
Delete event
䊳
To go to today, touch >
. When you’re done, touch
.
Tod ay
.
Save
.
File Manager
File Manager allows you to manage files such as
pictures, videos, music, and applications stored on the
microSD card.
䊳
Touch >
Files >SD card
.
.
Calendar / Tools
2E. Calendar & Tools 33
Page 40
Touch a file or folder to open, and then touch and hold
Alarm Name
7:00
Alarm Name
8:30
I
I
I
I
I
V
V
V
V
I
I
V
V
I
I
I
I
V
V
I
I
I
I
I
I
I
I
X
X
Alarm Timer
Tuesday
AM
AM
3:00 PM
a file to
Delete
or
Share
.
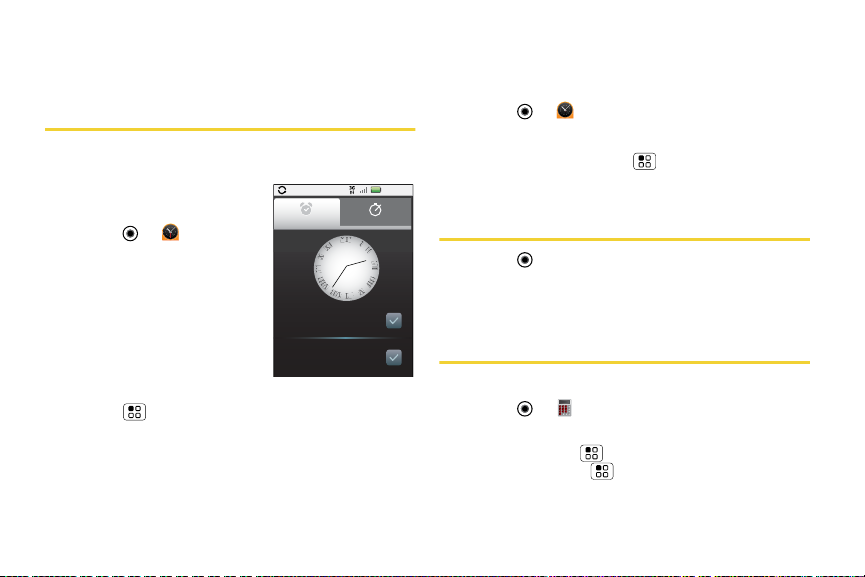
Alarm Clock and Timer
Alarm Clock
Your phone has multiple alarm
capabilities.
䊳
Touch >
>
Timer
䡲
To turn on an alarm,
touch the check box.
䡲
When an alarm sounds,
slide to
off or
Snooze
five minutes.
䡲
To add an alarm,
touch >
details. Touch
䡲
To enable or disable an alarm, touch the check
box.
34 2E. Calendar & Tools
Alarm
Dismiss
Alarm &
.
to turn it
to delay for
Add alarm
, and then enter alarm
Done
when you are finished.
Timer
To set a timer:
1.
Touch >
2.
Set a time and touch
䡲
For timer details, touch >
your settings, and then touch
Alarm & Timer
Start
.
>
Timer
Settings
Done
.
, change
.
Help Center
䊳
Touch >
Help Center
.
You can also flick your home screen left or right to
see the Tips & Tricks widget.
Calculator
Your phone comes with a handy calculator.
䊳
Touch >
Your calculator has basic and advanced views. To
change views, touch >
To clear history, touch >
Calculator
.
Advanced panel/Basic panel
Clear history
.
.
Page 41

Updating Your Phone
Stay up to date with the latest software updates for your
phone. You can check, download and install updates
using your phone, or using your computer:
䢇
Using your phone:
You may get an automatic notification of an
available update on your phone. Simply follow the
instructions to download and install.
To manually check for updates, touch >
Settings
>
About phone
Select one of these options:
䡲
Update firmware:
updates over your mobile network. Remember,
these updates can be quite large (25MB or more)
and may not be available in all countries. If you
don’t have an unlimited data plan, or mobile
network updates are not available in your country,
you can update using a computer.
䡲
Update profile:
Activation.
>
System updates
.
Your phone downloads any
Manually perform a Hands Free
䡲
Update PRL:
If a Boost Customer Service
representative asks you to do so, select this
option to download the latest Preferred Roaming
List (PRL).
䢇
Using your computer:
On your computer, go to
www.motorola. com
for your phone model, and check the “Software”
links. If an update is available, follow the installation
instructions.
2E. Calendar & Tools 35
, search
Calendar / Tools
Page 42

2F. Voice Services
To... Say...
Browse the web “go to”
Make a voice note “note to self”
Get directions “directions to”
Voice Actions
䊳
To begin a voice search, press the Voice key on
the keypad.
Note:
If you’re writing a text message, press the Voice key to
begin dictation mode. Your phone recognizes words
you speak and enters them into your message.
Or, press the Voice key and say one of the following
commands:
To... Say...
Map a route “navigate to”
Send a text message “send text”
Make a call “call”
Send email “send email”
Find local businesses “map of...”
36 2F. Voice Services
Tip:
To learn more about voice actions, press the Voice key on
the keypad, and then select
Watch Video.
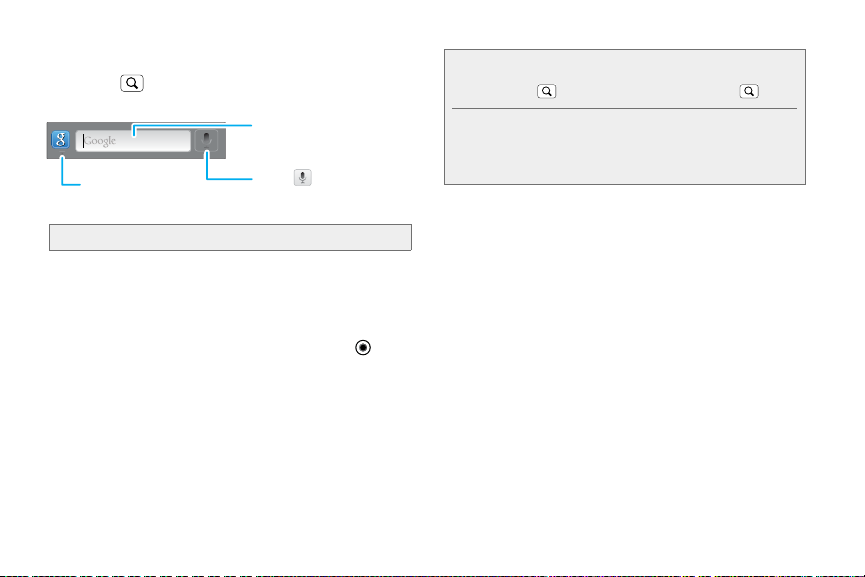
Voice Commands
For more voice commands, touch >
Commands
Tip:
and follow the prompts.
For quick access to Voice Commands, add a shortcut to
one of the home screens. Touch and hold an empty area,
and then touch
Commands
.
Shortcuts
>
Applications
Voic e
>
Voic e
Page 43

⽧
2G. microSD Card
Your Phone’s microSD Card (page 37)
⽧
microSD Card Settings (page 38)
⽧
microSD Card Files (page 38)
⽧
Connecting Your Phone to Your Computer (page 38)
Your Phone’s microSD Card
The microSD Card
Your phone is equipped with a preinstalled microSD
(Secure Digital) memory card to expand the phone’s
available memory space. It allows you to store images,
videos, music, and voice data in your phone.
Note:
You can easily damage the microSD card by improper
operation. Please be careful when inserting, removing,
or handling them.
Inserting the microSD Card
Note:
Be sure to use only recommended microSD cards.
Using non-recommended microSD cards could cause
data loss and damage your phone.
Note:
DO NOT
remove a microS D c ard while files are being
accessed or transferred. Doing so will result in loss or
damage of data.
Make sure your battery is fully charged before using the
microSD card. Your data may become damaged or
unusable if the battery runs out while using the
microSD card.
microSD Card
2G. microSD Card 37
Page 44

microSD Card Settings
Viewing Memory in the microSD Card
䊳
With the microSD card inserted, touch >
Settings
>
available memory space will be displayed.)
SD card & phone storage
Formatting the microSD Card
Note:
Do not remove your memory card while your phone is
using it or writing files on it.
1.
Before you remove or format your memory card
you need to unmount it. Touch >
SD card & phone storage >Unmount SD card
2.
To format your memory card, touch
.
card
Note:
The formatting procedure erases all the data on the
microSD card, after which the files CANNOT be
retrieved. To prevent the loss of important data, please
check the contents before you format the card.
38 2G. microSD Card
. (The used and
Settings
Format SD
microSD Card Files
䊳
Touch >
Touch a file or folder to open, and then touch and hold a
file to Delete or Share.
Files >SD card
.
Connecting Your Phone to Your Computer
You can connect your phone to a computer with a USB
cable.
Note:
>
.
The first time you use a USB connection, your
computer may indicate that drivers are being installed.
Follow any prompts you see to complete the
installation. This may take a few minutes.
1.
With a memory card inserted, and your phone
showing the home screen, connect a Motorola
micro USB data cable from your phone’s micro
USB port to a USB port on your computer. Your
phone should show in the status bar.
Page 45

Note:
Make sure to connect the phone to a high power USB
port. Typically, these are located directly on your
computer.
2.
On your phone, flick down the status bar to see the
USB connection options.
3.
Touch an option:
䡲
Motorola Phone Portal
computer with a cable or a Wi-Fi network to share
files through an easy-to-use home screen.
䡲
Windows® Media Player Sync
: Connect your phone and
: Share media files
between your computer and phone.
Note:
This device can be administered through Microsoft
Exchange server security policies. Additional security
policies may be applied to your device depending on
rules set by your company.
䡲
USB mass storage
: Drag and drop files between
your computer and memory card folders. When
you’re done, use “Safely Remove Hardware”
before disconnecting the USB cable.
Note:
You can’t use the files on your memory card with your
phone while it is connected to the computer.
䡲
Charge Only
device.
: Use the connection only to charge a
microSD Card
2G. microSD Card 39
Page 46

⽧
2H. Camera
8MP 536
536
Scenes
Flash
Effects
Switch to
Chicago,
Illinois
WSWSWS
-1
Scenes
Flash
Effects
Switch to
A
Santa Cruz,
California
Photo
Capture
Settings
Adjust for
greater
creative
contol.
Tag photos with
your location.
Touch to focus.
Zoom in
or out.
Switch to
camcorder.
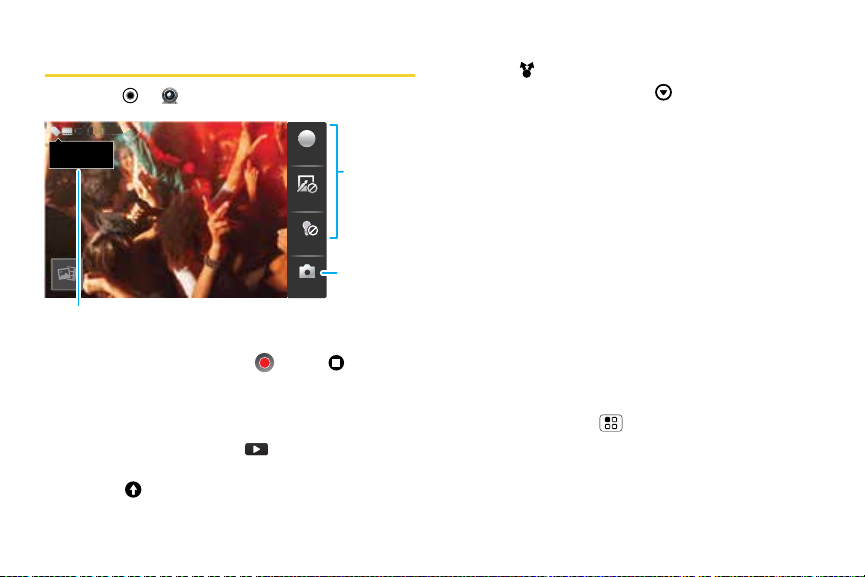
Taking Photos (page 40)
⽧
Recording Videos (page 42)
⽧
Viewing Photos & Videos (page 43)
⽧
Managing Photos and Videos (page 44)
Taking Photos
Take that family photo, and post it online for everyone
to see.
1.
Touch > .
Tip:
You can also program the side key on your phone to
open the camera. See “Programmable Side Key” on
page 16.
40 2H. Camera
Note:
Photos are stored on your microSD memory card.
2.
To take the photo, touch the viewfinder to lock the
focus, and then touch to take the photo.
䡲
To upload the photo to an online photo album,
touch . You can set your Quick upload album
when you upload your first picture.
䡲
To send the photo in a message or post it online,
touch .
䡲
To delete the photo, touch >
Delete
.
Page 47

Photo Options
You can make adjustments to optimize your shot.
Touch a button on the right side of the screen to make
changes (touch the screen to turn on the buttons if
necessary):
• Scenes: Adjust for better image capture in different
environments: Auto, Portrait, Landscape, Sport, and
more. Touch the screen when finished to return to
the viewfinder.
• Effects: Change photo look: Normal, Negative, Black
and White, and more.
• Flash: Set Flash On, Flash Off, or Auto Flash.
• Switch to: Toggle between photo and camcorder
modes.
Camera Settings
In the viewfinder, touch >
camera menu and adjust these settings:
• Picture Resolution: Adjust for optimal resolution.
• Video Resolution: Adjust for best resolution for your
needs.
Settings
to open the
• Quick upload album: Automatically upload photos to
accounts you select, such as Facebook, MySpace,
Photobucket, and more.
• Face Detection: Let the viewfinder automatically
detect a face and adjust image quality accordingly.
• Exposure: Select the best exposure for your
environment.
• Shutter Tone: Select whether your camera makes a
sound when you take a photo.
• Shutter Animation: Select how the viewfinder looks
when you take a photo.
2H. Camera 41
Camera
Page 48
Recording Videos
Chicago,
Illinois
DVD 00:38:05
Scenes
Light
Effects
Switch to
A
Chicago,
Illinois
Tag videos with
your location.
Video
Capture
Settings
Adjust for
greater
creative
contol.
Switch to
camera.
1.
Touch >
2.
To record the v ideo,
the recording.
3.
Open your gallery and touch a video to view
options:
䡲
To play the video, touch .
䡲
To upload the video to an online album,
touch .
42 2H. Camera
Camcorder
.
touch . Touch to stop
䡲
To send the video in a message or post it online,
touch .
䡲
To delete the video, touch >
Delete
.
Video Options
You can make adjustments to optimize your video.
Touch one of the buttons on the right side of the
viewfinder to make changes (you may need to touch
the screen to make the buttons appear):
䢇
Scenes:
Adjust for better video capture in different
environments:
䢇
Effects:
and White
䢇
Light:
Auto
and
Night
Change video look:
Normal, Negative, Black
, and more.
Turn a light on or off to adjust for the lighting
where you are recording.
䢇
Switch to:
Toggle between camcorder and camera.
Camcorder Settings
In the viewfinder, touch > Settings to open the
camcorder menu and adjust these settings: Video
Resolution, Shutter Animation, and more.
Page 49
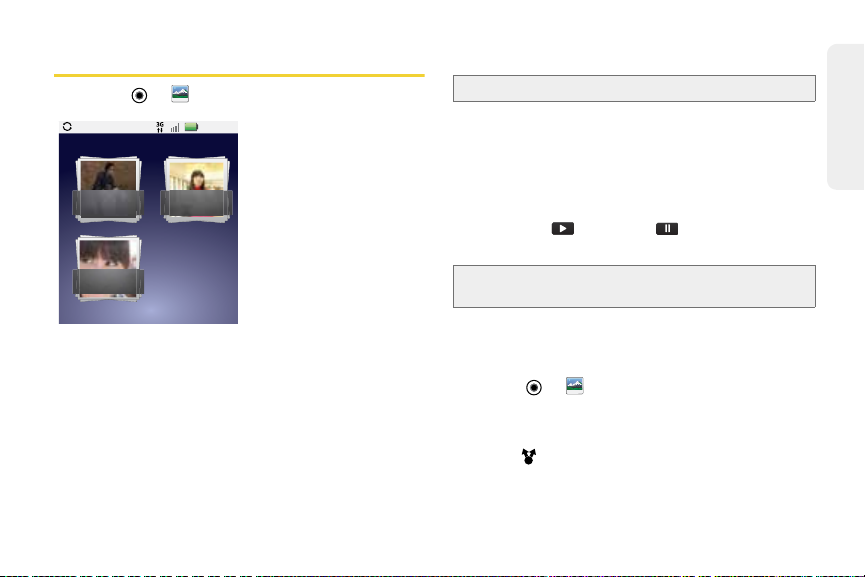
Viewing Photos & Videos
Gallery
Folders
2 folders
All photos
1 photos
All videos
3 videos
3:00 PM
䊳
Touch >
Gallery
.
View Photos and Videos
Tip:
Turn the phone sideways for a widescreen view.
The
Gallery
thumbnails. Scroll through the thumbnails by flicking
them left or right. Touch a thumbnail to select it for
viewing or playback.
When you select a thumbnail, it is enlarged to normal
viewing size. Videos are paused at the beginning.
Touch the play and pause buttons on the
screen to control video playback.
Note:
first shows photos and videos as
To see the buttons while a video is playing, touch the
display.
Camera
Touch a folder to display all of its photos or videos.
䢇
Camera roll:
your phone.
䢇
My Tags:
䢇
Folders
where they’re saved.
䢇
All photos
䢇
All videos
All of the captured photos and videos on
Photos and videos grouped by tag.
– Photos and videos grouped by the folders
– All photos, no groupings.
– All videos, no groupings.
Share Photos and Videos
To send your photo in a message or post it online:
1.
Touch >
2.
Select an image.
3.
Touch and hold a photo or video, and then
touch .
Gallery
.
2H. Camera 43
Page 50
Choose how you want to share, such as
4.
Email, Text Messaging
, and more.
Managing Photos and Videos
1.
Touch >
2.
Select an image.
3.
Touch and hold a photo or video, and then touch
, , or (to edit, delete, set as, print, and
more).
Tip:
To copy photos to/from a computer, go to “Connecting
Your Phone to Your Computer” on page 38.
44 2H. Camera
Gallery
.
Bluetooth
,
Page 51
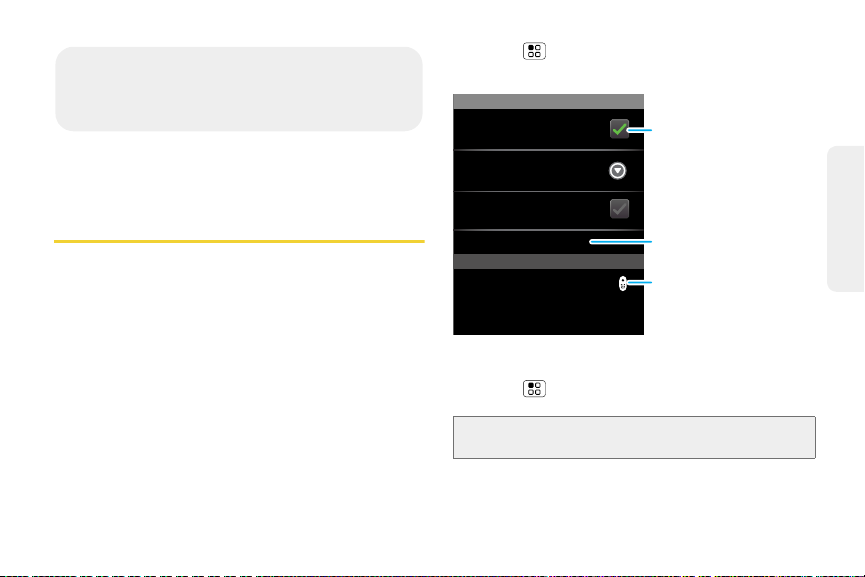
⽧
2I. Bluetooth & Wi-Fi
Bluetooth devices
Bluetooth settings
Motorola phone
Device name
Scan for devices
Make device discoverable
Discoverable
Bluetooth
Pair with this device
MOTOROLA Phone
Touch to turn on
& off & to scan.
Touch to re-scan.
Touch to connect.
Using Bluetooth® (page 45)
⽧
Connecting With Wi-Fi (page 47)
Using Bluetooth®
Bluetooth is a short-range communications technology
that allows you to connect wirelessly to a number of
Bluetooth devices, such as headsets and hands-free
car kits, and Bluetooth-enabled handhelds, computers,
printers, and wireless phones. The Bluetooth
communication range is usually up to approximately
30 feet.
䊳
Touch >
Bluetooth settings
Settings >Wireless & networks
.
Turning Bluetooth On or Off
䊳
Touch >
Bluetooth
Note:
To extend battery life, turn Bluetooth power off when not
in use.
Settings >Wireless & networks
.
2I. Bluetooth & Wi-Fi 45
>
Bluetooth
>
Page 52
Connecting New Devices
Note:
This feature requires an optional accessory.
To connect with a new device, you need to pair with it.
You only need to do this once for each device – to
connect again, just turn on the device.
1.
Make sure the device you are pairing with is in
discoverable mode.
Note:
Refer to the guide that came with the device for details.
2.
Touch >
Bluetooth settings
3.
Touch
power is already on, touch
4.
Touch a device to connect.
5.
If necessary, touch OK, or enter the device passkey
(like
device is connected, the Bluetooth indicator
appears in the status bar.
46 2I. Bluetooth & Wi-Fi
Settings >Wireless & networks
.
Bluetooth
0000
to turn on and scan. If Bluetooth
Scan for devices
) to connect to the device. When the
>
.
Note:
Using a mobile device or accessory while driving may
cause distraction and may be illegal. Always obey the
laws and drive safely.
The Bluetooth Enhanced Audio setting is not
recommended for older Bluetooth headsets, as it may
not deliver acceptable sound quality.
.
Reconnecting Devices
䊳
To automatically reconnect your phone with a
paired device, simply turn on the device.
䊳
To manually reconnect your phone with a paired
device, touch the device name in the
list.
devices
Bluetooth
Disconnecting Devices
䊳
To automatically disconnect your phone from a
paired device, simply turn off the device.
䊳
To manually disconnect your phone from a paired
device, touch the device name in the devices list,
and then touch >
Disconnect
.
Page 53

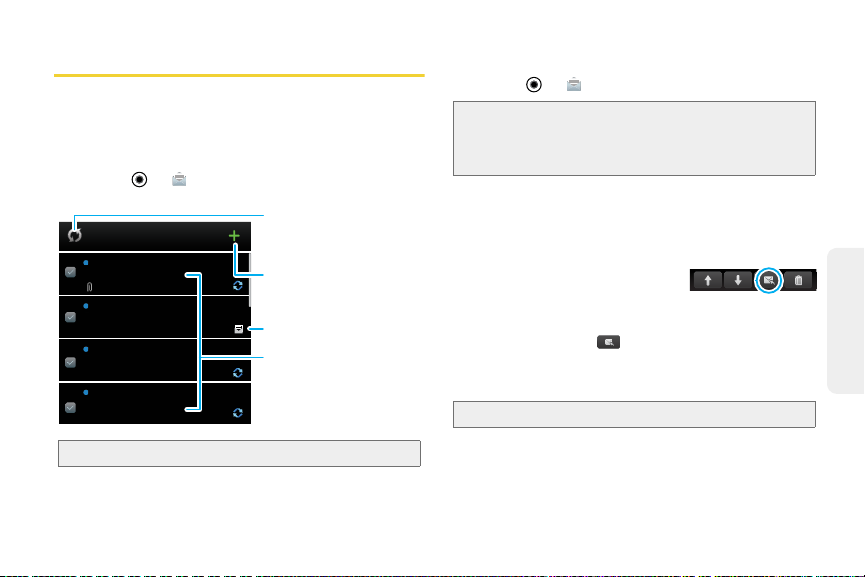
Editing Settings
Wi-Fi networks
Wi-Fi settings
Notify me when a secure network is
available
Secure Network
Wi-Fi
Jenny’s Coffee Shoppe
Network notification
Notify me when an open network is
available
Open Network
Add Wi-Fi network
Secured with WEP
Touch to turn on & scan.
Touch to connect.
䊳
Touch >
Settings >Wireless & networks
Bluetooth settings >Device name
and touch
OK
.
Connecting With Wi-Fi
To use a Wi-Fi computer network for even faster Internet
access:
䊳
Touch >
Wi-Fi settings
Note:
Your phone's Wi-Fi features and power levels are not
allowed for outdoor operation in France. To avoid
unlawful interference with radio signals, do not use the
Wi-Fi features in France unless you are indoors.
Settings >Wireless & networks
.
. Enter a name
>
>
Turning Wi-Fi On or Off
䊳
Touch >
Wi-Fi
Note:
To extend battery life, turn off Wi-Fi power when not in
use.
Settings >Wireless & networks
.
2I. Bluetooth & Wi-Fi 47
Bluetooth
>
Page 54
Wi-Fi Search and Connect
To find networks in your range:
1.
Touch >
Wi-Fi settings
2.
Touch
on, touch >
networks it finds within range.
Tip:
To see your phone’s MAC address or other Wi-Fi details,
touch >
3.
Touch a network to connect.
4.
If necessary, enter
Wireless password
phone is connected to the network, the wireless
indicator appears in the status bar.
Tip:
When you are in range and Wi-Fi is on, you will
automatically reconnect to available networks you’ve
connected to before.
48
Settings >Wireless & networks
.
Wi-Fi
to turn on and scan. If Wi-Fi is already
Scan
. Your phone lists the
Advanced
.
Network SSID, Security
, and touch
Connect
>
, and
. When your
Page 55

Section 3
Boost Service
Page 56
⽧
3A. Boost Basics
Voicemail (page 50)
⽧
Messaging (page 51)
⽧
Making a Conference C all (page 54)
Voicemail
Setting Up Your Voicemail
To set up voicemail, see “Setting Up Your Voicemail”
on page 3
.
50 3A. Boost Basics
Retrieving Your Voicemail Messages
When you have a new voicemail, shows at the top
of your screen. To hear the message, touch
touch and hold .
then
Tip:
If you have a shortcut on your home screen, just touch
Voi cema il
1
to retrieve your voicemail.
If you need to change your voicemail number, in the
home screen touch >
Voicemail settings
.
Settings >Call settings
, and
>
Page 57
Messaging
View your text, IM, and email messages all in one
place.
View Your Inbox
䊳
Touch >
Universal Inbox (3)
Mary Morgan
Copy Revisions
Hi Paul, Please take a look at the ...
Jim Somers
Meet me outside the theater at 8
and don’t forget your ID. Would yo...
Arthur Bando
Meeting invitation
Meeting is set for next Thursday at...
Mary Morgan
freelancers
Paul, We’re going to need help w...
Messaging >Universal Inbox
Check for
Messages Now
2:50 PM
Create Message
2:47 PM
Message Type
2:45 PM
Touch to open a message.
Touch & hold to move,
delete, & more.
2:41 PM
Reading and Replying to Messages
䊳
Touch >
Note:
Universal Inbox
text, email, and social networking messages. To show
only one type of message, touch a message account
type instead of
.
䡲
To
open
message and all of its replies, touch it.
䡲
To
reply
response in the text box at the bottom.
䡲
To
forward
touch and hold a message
in the conversation, and then
touch
Forward message
For email, touch to choose a reply or forward
option.
䡲
To op e n
Note:
Try t he
Messaging >Universal Inbox
.
shows all of your messages together—
Universal Inbox
.
a text message or social networking
to a message, just open it and enter your
a text message,
.
options
, touch and hold a message.
Messages
widget in “Widgets” on page 14.
Boost Basics
Tip:
To see more messages, flick or drag up.
Creating Messages
1.
Press the Voice key on the keypad and say, “send
text.”
3A. Boost Basics 51
Page 58

Note:
You can also touch >
Messaging
2.
Choose a message type, such as
or
Facebook
>.
. Then, enter the recipient and
Messaging
Text Messaging
message. In text messages and emails, touch
for options such as
Insert...
or
Insert smiley
.
Sending and Receiving Attachments
䊳
To send a file in a message, open a new message
and touch >
When you receive a message with an attachment,
open the message and touch the file name to
download it. Then, touch the name again to open it.
Some file formats can be converted to HTML for faster
viewing, and your phone will show
While viewing the attachment, touch it to save it, share
it, and more.
Tip:
To send and receive large attachments faster, use Wi-Fi.
See “Connecting With Wi-Fi” on page 47.
52 3A. Boost Basics
Insert
.
Get HTML version
Setting Up Messaging
䊳
To add other email accounts, touch >
Settings
Tip:
䊳
.
>
䡲
Corporate Sync
accounts. Enter details from your IT administrator.
You might need to enter your domain name with your
user name (like domain/username).
䡲
Email
is for most personal email accounts. For
account details, contact the account provider.
To change your settings, touch >
Messaging
䡲
Manage accounts
䡲
Edit Universal Inbox
show messages in the
䡲
Messaging Settings
account type (along with other preferences, for
email).
Accounts >Add account
.
is for Exchange server work email
> , and then touch:
to add or remove an account.
to choose which accounts
Universal Inbox
to set the notification for each
.
Page 59
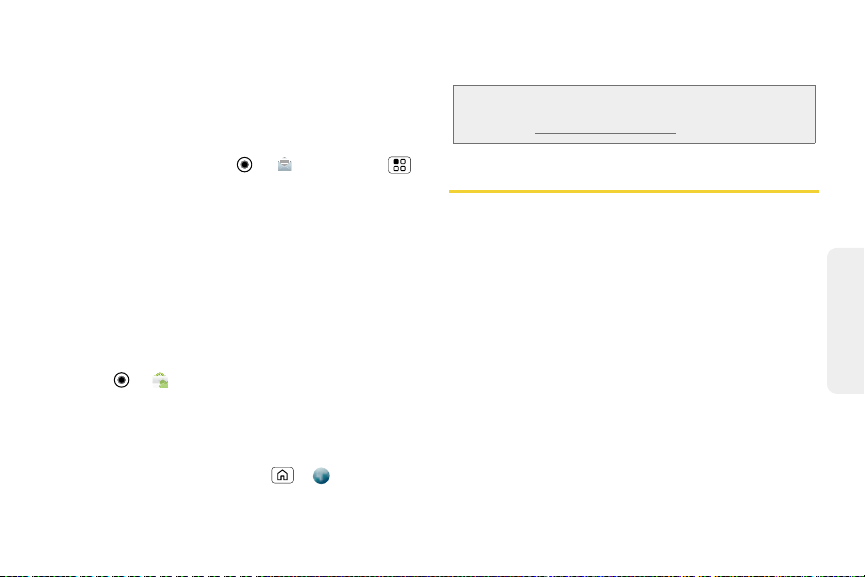
The first time you turned on your phone (see page 2),
you were prompted to log in to your Gmail™ account.
You can add any other email account that you set up.
To add other email accounts to your
and
Universal Inbox
and then touch
the
Setup accounts
and enter your email account information.
Sync
, touch >
Manage accounts >Add account
screen, touch
Messaging
Messaging
Email
or
widget
>,
. On
Corporate
Instant Messages
To send and receive instant messages, use an instant
messaging app or your browser. Your device comes
preloaded with Google Talk™. You can also download
an instant messaging app from the Android Market:
䢇
To download and use an instant messaging app,
touch >
and then choose an app for your provider. Once you
download the app, you’ll see it in the app menu. See
“App Menu” on page 15.
䢇
If you don’t see an app for your IM provider, you can
use your Web browser. Touch >
Market >Apps >Communication
Browser
,
, and
then enter your provider’s Web address. Once you’re
there, follow the link to sign in.
Note:
Your IM options will depend on your IM provider. To
browse instant messaging apps from your computer,
go to
www.android.com/market
.
Social Networking
䊳
To add a social networking account, see “Setting
Up Messaging & Social Networking Accounts” on
page 3.
When you sign into social networking accounts, you’ll
see your friends and contacts in your Contacts list, and
your status and updates can appear in Social Status and
Social Networking widgets.
Tw itt er and MySpace messages will always appear as
“read” on your phone, but your phone notifies you
when you receive a new message.
3A. Boost Basics 53
Boost Basics
Page 60

Making a Conference Call
With 3-way calling, you can talk to two people at the
same time. When using this feature, the normal airtime
rates will be charged for each of the two calls.
䊳
To start a conference call, call the first number.
After the call connects, touch
number, or select it from contacts or favorites.
When the next number answers, touch
54 3A. Boost Basics
Add Call
. Dial the next
Merge calls
.
Page 61

⽧
3B. Web and Apps
Surfing the Web (page 55)
⽧
Android Market™ (page 56)
⽧
Downloading Apps (page 57)
⽧
YouTube™ (page 58)
Surfing the Web
䊳
To open the browser, touch
1:53
Google
Web Images
Local News
more
Near me now
Chicago
Bookmarks
Forward
Windows
More
New window
Refresh
Note:
If you can’t connect, contact Boost.
PM
Browser
.
Touch for
browser options.
Web and Apps
3B. Web and Apps 55
Page 62

Connect
Your phone uses the mobile phone network (over the
air) or a Wi-Fi connection to automatically access the
Web.
To use a Wi-Fi connection, touch >
Wireless & networks
Wi-Fi settings
. Touch
Wi-Fi
to search for nearby wireless networks.
Settings
>
to turn it on and touch
Touch a network to connect.
Select Links
When you touch a link, your phone outlines it and goes
to that page. If you touch and hold the link, your phone
shows options, such as
Bookmark link
.
Open in new window
or
See Options
Touch with the browser open to see browser
options:
Options
New Window
Bookmarks
56 3B. Web and Apps
Open a new browser window.
See your bookmarks.
Options
Windows
Refresh
Back/Forward
More
View the browser windows that are
currently open.
Reload the current page.
Navigate to previously viewed pages.
See additional browser options.
Android Market™
Note:
You must set up a Gmail account (see “Setting Up Your
Phone” on page 2) in order to buy and download apps
from the Android Market.
䊳
Touch >
Get all the fun games and cool apps you want! Android
Market provides access to applications created by
developers worldwide, so you can find the app you
want. If you need help or have questions about Android
Market, touch >
Market
Help
.
.
Page 63

Browsing and Installing Apps
䊳
Scroll to and touch the app you want to install.
Then, touch
Install
(if app is free) or
Buy
.
If an app you are downloading requires access to your
data or control of functions on your phone, you’ll be
asked to give your permission. After selecting
the app will download. After selecting
Buy
, you may be
Install
,
asked to sign in to an additional Google™ account.
Sign in and select
Purchase now
to proceed. Follow the
on-screen instructions. To see the download progress,
open the notifications window.
After you download an app, the icon for that app
appears on the App menu. (See “App Menu” on
page 15.)
Managing and Restoring Apps
1.
Touch >
applications
2.
Touch an app in the list, and then touch
(for apps you downloaded),
options.
Settings >Applications >Manage
.
Clear cache
Uninstall
, or other
Tip:
To reinstall any downloaded items, touch >
Market
.
Downloading Apps
WARNI NG:
To download apps:
1.
2.
3.
Note:
Manage Your Downloads
䊳
Apps downloaded from unknown sources can
include spyware, phishing, or viruses that affect
your phone, phone performance, and personal
data. For security, download apps only from
trusted sites like
To download apps from any Web page, touch
>
Settings
>
To launch the browser, touch
Find the app you want to download and touch the
download link.
Downloaded apps are stored in your phone’s memory.
To view files or apps you’ve downloaded,
touch
Browser
Market
.
Applications
> >
>
Unknown sources
Browser
More
>
Downloads
3B. Web and Apps 57
.
.
Web and Apps
.
Page 64
䊳
To clear your download history, touch >
To cancel, touch >
list.
Cancel all downloads
YouTube™
Share videos with YouTube users everywhere. You
don’t need a YouTube account to browse and view
videos.
䊳
Touch >
Note:
If you want a YouTube account, go to
www.youtube.com
touch >
videos, touch .
58 3B. Web and Apps
YouTub e
.
. To create an account or sign in,
My account
. To
Browse
or
Upload
Clear
.
Page 65
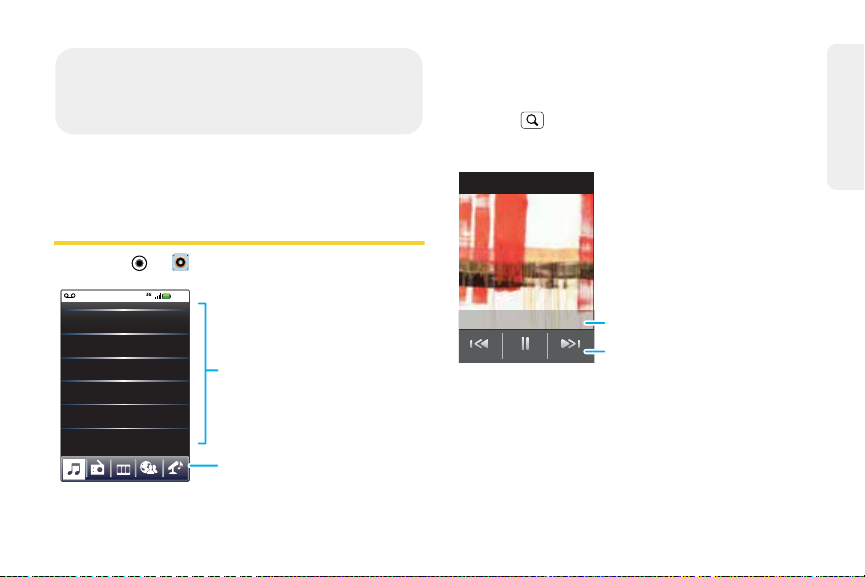
⽧
3C. Entertainment
Music (page 59)
⽧
Digital Living (page 61)
Music
1.
Touch >
Music Library
Artists
Albums
Songs
Playlists
Shuffle All Songs
Music
>
10:47
Categories
Touch to list songs or
playlists.
Music Activities &
Community
Play music, radio, videos,
visit music community,
or ID songs.
My Music
Your music is stored by artists, albums, songs, and
playlists. Touch a category, and then touch the
song or playlist you want to play. Touch
These Songs
touch
2.
Touch a song or playlist to start playing music.
Artist Name -
to randomly play all your songs, or
Search
to look for a song.
Song title
Shuffle
Entertainment
.
song lyrics
See song lyrics
in real time.
Music Controls
Your Music Community
Touch, touch, play — instant music. Just open your
music library, then select what you want to play.
3C. Entertainment 59
Page 66
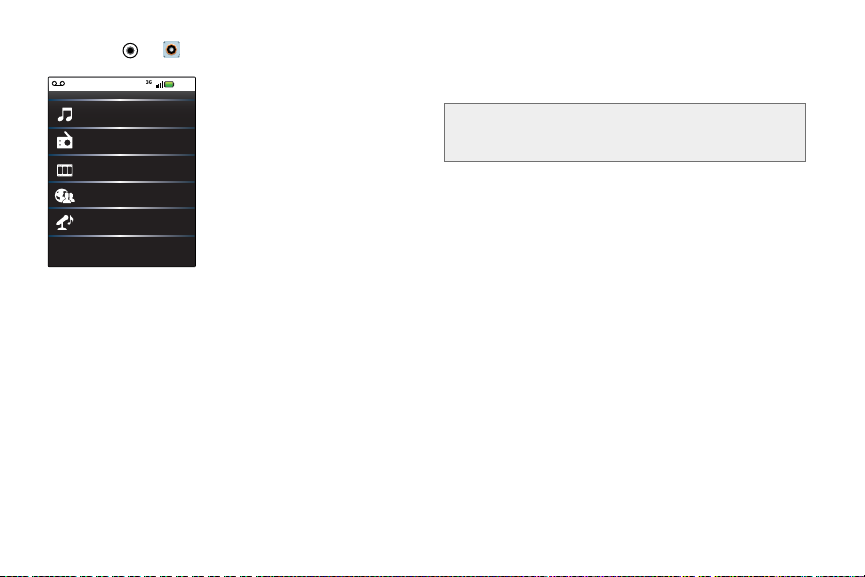
䊳
My Music
Connected Music Player
Radio
Music Videos
Community
Song Identification
10:47
Touch >
Music
.
My Music: Listen to your tunes.
Radio: Surf the airwaves for fresh music. There’s
something for everyone. You need a headset for FM
Radio.
Music Videos: Watch videos from YouTube™,
prerecorded TV shows, and your own videos.
Community: Find songs, see what people are listening
to all around the world, and see what’s hot on the music
charts.
60 3C. Entertainment
Song Identification: Get information about a song that is
playing. Select Tell me what is playing and hold your
phone close to the source of the music.
Note:
Song identification may not be successful if the music
is from a live concert or a musical event in which digital
reco rdi ng i s not even.
Setting Up Music
What music transfer tools do I need?
To put music on your computer and then load it on your
phone, you need:
䢇
Microsoft®Windows®PC or Apple™ Macintosh™.
䢇
USB data cable (included with your phone).
䢇
microSD memory card (2GB—included with your
phone).
Yo u r music is stored on your memory card. Your
phone supports removable microSD memor y cards
up to 32GB capacity. To make sure your memory card
is installed, go to “Your Phone’s m icroSD Card” on
page 37.
Page 67
Tip:
To see the available memory on your memor y
card, touch >
storage
.
Settings >SD card & phone
What audio file formats can I play?
Your phone can play many types of files: AAC, AMR,
MP3, WAV, WMA, AAC+, and MIDI.
Note:
Your phone does not support DRM-protected files.
What headphones can I use?
Your phone has a 3.5mm headset jack for wired stereo
listening. You can go wireless with Bluetooth
headphones or speakers. (See “Using Bluetooth®” on
page 45.)
®
stereo
Getting Music
You can transfer music from your computer to your
phone by using a USB connection.
For more information on transferring music, see
“Connecting Your Phone to Your Computer” on
page 38.
Digital Living
Note:
Copyright – do you have the right? Always follow the
rules. See “Content Copyright” in your legal and safety
information.
Media Share
Media Share is an easy way to share your media
content – photos, videos, and tunes – with friends and
family.
Share your media on DLNA devices on your network: The
Media Share wizard guides you through the easy setup
steps.
Swap photos & videos: Share any photos or videos on
your phone, even the ones you created.
More tunes: Enjoy favorites from your phone playlist on
your sound system at home. Or get music from your
portable music player and add it to your phone’s music
library.
3C. Entertainment 61
Entertainment
Page 68
Connecting
First, connect to a Wi-Fi® network or another device:
• Connect to your computer with a USB cable.
(See “Connecting Your Phone to Your Computer” on
page 38.)
• Connect to a Wi-Fi network or use your own Wi-Fi
hotspot. (See “Connecting With Wi-Fi” on page 47.)
Media Share will lead you the rest of the way.
Your Media Share World
Note:
If you’re using a Wi-Fi connection, you need to allow
access to other devices to download media from your
phone and to share your files.If you want to access
media files on other devices, they must allow access.
䊳
To use Media Share, touch > M
Then, select the Media Share feature you want to
use.
䡲
Share media:
allow other devices to access media
files on your phone. Without downloading any
media from your phone, other people can view
your pictures or videos, or play your songs, on
their own devices.
62 3C. Entertainment
edia Share
䡲
Sync media:
sync the media files on your phone
with other devices.
䡲
Copy media:
copy a picture from one phone to
another.
䡲
Play media:
select media for playback on another
device in a Wi-Fi network.
.
Page 69
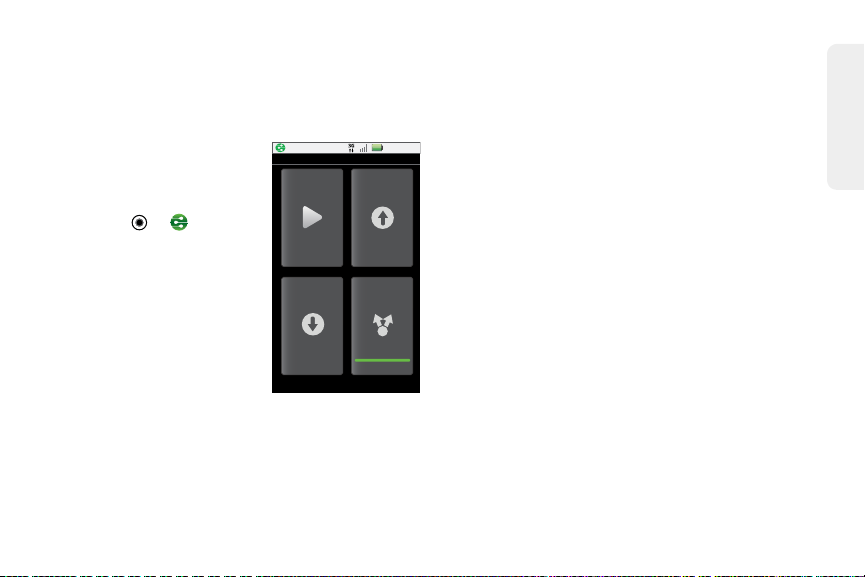
Share Using DLNA
11:35 PM
Play media
DLNA
Copy media
to server
Share media
Copy media
to phone
Expand the ways you can enjoy your photos and videos
on a DLNA Certified computer, TV, or monitor, using
your own Wi-Fi network.
Make sure your phone is
connected to an active Wi-Fi
network and has access to a
DLNA Certified device.
1.
Touch >
2.
Touch
Play media, Copy
to server,
media
media to phone
. Then follow the
media
instructions you see on
your phone.
DLNA
Copy
, or
.
Share
Entertainment
3C. Entertainment 63
Page 70

⽧
3D. Navigation
v
v
v
v
v
v
v
v
v
v
v
v
v
v
v
v
e
e
e
e
e
e
e
e
e
e
e
e
e
e
e
e
e
e
e
e
Search
Clear Map Join Latitude More
Directions
Starred Places
Search Maps
Touch
for options.
Find places.
Change the
view by
adding
layers.
Center the
map on
your current
location.
Google Maps™ (page 64)
⽧
Latitude™ (pa ge 65)
⽧
TeleNav GPS Navigator (page 66)
Google Maps™
䊳
Touch >
Google Maps offers powerful, user-friendly mapping
technology and local business information — including
business locations, contact information, and driving
directions.
For help, touch >
Tip:
Want to know what’s in your immediate area? Try Google
Places™. Touch >
Restaurants, ATM s, Gas Stations
your current location.
Maps
More
.
>
Help
Places
.
to see listings for
, and more based on
Ontario St
E Ontario St
N Wabash Ave
Grand Red
M
N Dearborn St
N Clark St
Wacker Dr
E Wacker Pl
State/Lake
W Lake St W L ake St
M
M
Lake
Randolph/
Wabash
M
E Randolph St
Washington-Blue
Messaging
M
N Rush St
N Micigan Ave
E Ohio St
E Grand A
N Micigan Ave
E S WaterSt
Randolph
St Metra
64 3D. Navigation
Page 71
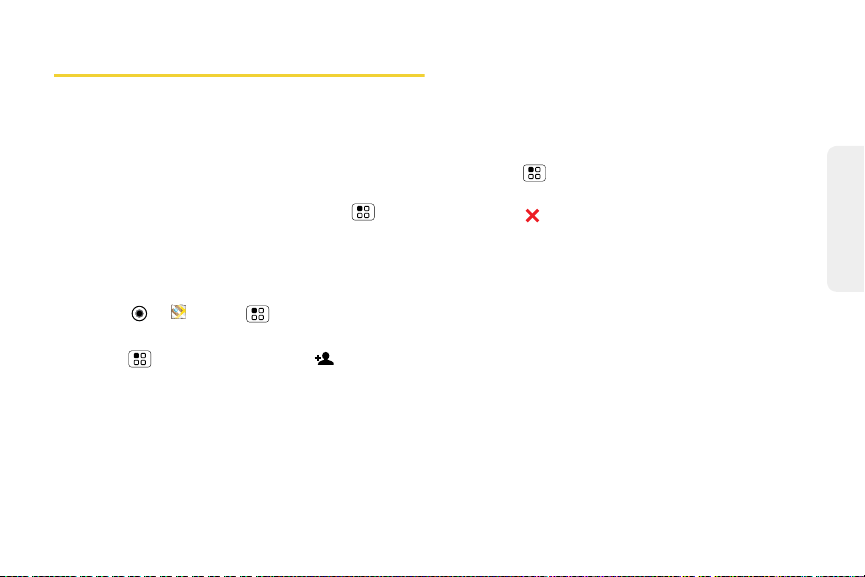
Latitude™
See where your friends and family are on Google
Maps™. Plan to meet up, check that your parents got
home safely, or just stay in touch.
Don’t worry, your location is not shared unless you
agree to it. You need to join Latitude, and then invite
your friends to view your location or accept their
invitations. When using Google Maps, touch >
. Read the privacy policy and if you agree with
Latitude
it, touch
Agree & Share
.
Adding and Removing Friends
䊳
Touch >
To add friends:
1.
Touch >
2.
Touch
Select from Contacts
contact. Or, touch
enter an email address.
3.
Touch
Yes
Maps
Add friends
Add via email address
.
> >
Latitude
or touch .
, and then touch a
Join
.
, and then
If your friends already use Google Latitude, they’ll
receive an email request and a notification. If they have
not yet joined Google Latitude, they’ll receive an email
request that invites them to sign in to Google Latitude
with their Google account.
To remove friends:
1.
Touch >
Latitude
to show your friend’s list, and
then touch a friend in your list.
2.
Touch .
Sharing Location
When you receive a request to share location details
you can choose to:
䢇
Accept and share back
and your friend can see yours.
䢇
Accept, but hide my location
location, but they can't see yours.
䢇
Don't accept
– Location information is not shared
between you and your friend.
– See your friend’s location,
– See your friend's
3D. Navigation 65
Navigation
Page 72
Hiding Your Location
䊳
To hide your location from a friend, touch >
Latitude
to show your friend’s list. Touch your
contact name, and then touch >
>
settings
Hide your location
.
Edit privacy
Turning Off Google Latitude
䊳
Touch >
Touch >
Latitude
Latitude
to show your friends list.
Edit privacy settings >Tur n o ff
.
TeleNav GPS Navigator
You can also use TeleNav GPS Navigator to get
around. Use your keyboard or your voice to get stepby-step directions to your destination, get traffic
updates, hear about the weather, and more.
1.
Touch >
time you access the app, your phone downloads
files.)
2.
Follow the onscreen instructions to sign in and use
the app.
66 3D. Navigation
TeleNav GPS Navigator
. (The first
Page 73

Section 4
Safety and Warranty
Information
Page 74

⽧
4A. Important Safety
Information
General Precautions (page 68)
⽧
Maintaining Safe Use of and Access to Your Phone
(page 69)
⽧
Using Your Phone With a Hearing Aid Device (page 70)
⽧
Caring for the Battery (page 72)
⽧
Radio Frequency (RF) Energy (page 72)
⽧
Owner’s Record (page 74)
⽧
User Guide Proprietary Notice (page 75)
This phone guide contains important operational and
safety information that will help you safely use your
Failure to read and follow the information
phone.
provided in this phone guide may result in serious
bodily injury, death, or property damage.
68 4A. Important Safety Information
General Precautions
There are several simple guidelines to operating your phone
properly and maintaining safe, satisfactory service.
䢇
To maximize performance, do not touch the bottom portion
of your phone where the internal antenna is located while
using the phone.
䢇
Speak directly into the mouthpiece.
䢇
Avoid exposing your phone and accessories to rain or liquid
spills. If your phone does get wet, immediately turn the
power off and remove the battery.
䢇
Do not expose your phone to direct sunlight for extended
periods of time (such as on the dashboard of a car).
䢇
Although your phone is quite sturdy, it is a complex piece of
equipment and can be broken. Avoid dropping, hitting,
bending, or sitting on it.
䢇
Any changes or modificati ons to your phone not expressly
approved in this document could void your warranty for this
equipment and void your authority to operate this
equipment.
Note:
For the best care of your phone, only Boos t-authori zed
personnel should serv ice your phon e and acces sories. Failure
to do so may be dangerous and void your warranty.
Page 75

Maintaining Safe Use of and Access to Your Phone
Do Not Rely on Your Phone for Emergency Calls
Mobile phones operate using radio signals, which cannot
guarantee connection in all conditions. Therefore you should
never rely solely upon any mobile phone for essential
communication (e.g., medical emergencies). Emergency calls
may not be possible on all cellular networks or when certain
network services or mobile phone features are in use. Check
with your local service provider for details.
Using Your Phone While Driving
Talking on your phone while driving (or operating the phone
without a hands-free device) is prohibited in some jurisdictions.
Laws vary as to specific restrictions. Remember that safety
always comes first.
Tip: Purchase an optional hands-free accessory at your local
Boost Store, or visit
www.boostmobile.com
Following Safety Guidelines
To operate your phone safely and efficiently, always follow any
special regulations in a given area. Turn your phone off in areas
where use is forbidden or when it may cause interference or
danger.
Using Your Phone Near Other Electronic Devices
Most modern electronic equipment is shielded from radio
.
frequency (RF) signals. However, RF signals from wireless
phones may affect inadequately shielded electronic
equipment.
RF signals may affect improperly installed or inadequately
shielded electronic operating systems or entertainment
systems in motor vehicles. Check with the manufacturer or their
representative to determine if these systems are adequately
shielded from external RF signals. Also check with the
manufacturer regarding any equipment that has been added to
your vehicle.
Consult the manufacturer of any personal medical devices,
such as pacemakers and hearing aids, to determine if they are
adequately shielded from external RF signals.
Note:
Always turn off the phone in healthcare facilities, and request
permission before using the phone near medical equipment.
Turning Off Your Phone Before Flying
Turn off your phone before boarding any aircraft. To prevent
possible interference with aircraft systems, the U.S. Federal
Aviation Administration (FAA) regulations require you to have
permission from a crew member to use your phone while
the plane is on the ground. To prevent any risk of interference,
FCC regulations prohibit using your phone while the plane is in
the air.
Turning Off Your Phone in Dangerous Areas
To avoid interfering with blasting operations, turn your phone
off when in a blasting area or in other areas with signs
4A. Important Safety Information 69
Important Safety Information
Page 76

indicating two-way radios should be turned off. Construction
crews often use remote-control RF devices to set off explosives.
Turn your phone off when you’re in any area that has a
potentially explosive atmosphere. Although it’s rare, your phone
and accessories could generate sparks. Sparks can cause an
explosion or fire, resulting in bodily injury or even death. These
areas are often, but not always, clearly marked. They include:
䡲
Fueling areas such as gas stations.
䡲
Below deck on boats.
䡲
Fuel or chemical transfer or storage facilities.
䡲
Areas where the air contains chemicals or particles such
as grain, dust, or metal powders.
䡲
Any other area where you would normally be advised to
turn off your vehicle’s engine.
Note:
Never transport or store flammable gas, flammable liquids, or
explosives in the compartment of your vehicle that contains
your phone or accessories.
Restricting Children’s Access to Your Phone
Your phone is not a toy. Do not allow children to play with it as
they could hurt themselves and others, damage the phone or
make calls that increase your Boost invoice.
70 4A. Important Safety Information
Using Your Phone With a Hearing Aid Device
A number of Boost phones have been tested for hearing aid
device compatibility. When some wireless phones are used
with certain hearing devices (including hearing aids and
cochlear implants) , users may detect a noise which can
interfere with the effectiveness of the hearing device.
Some hearing devices are more immune than others to this
interference noise, and phones also vary in the amount of
interference noise they may generate. ANSI standard C63.19
was developed to provide a standardized means of measuring
both wireless phone and hearing devices to determine usability
rating categories for both.
Ratings have been developed for mobile phones to assist
hearing device users find phones that may be compatible with
their hearing device. Not all phones have been rated for
compatibility with hearing devices. Phones that have been
rated have a label located on the box.
has an M3 rating
These ratings are not guarantees. Results will vary depending
on the user’s hearing device and individual type and degree of
hearing loss. If a hearing device is particularly vulnerable to
interference noise; even a phone with a higher rating may still
cause unacceptable noise levels in the hearing device. Trying
.
You r M OTOR OLA XPR T
Page 77

out the phone with your hearing device is the best way to
evaluate it for your personal needs.
M-Ratings
hearing aid compatibility and are likely to generate less
: Phones rated M3 or M4 meet FCC requirements for
interference to hearing devices than unrated phones. (M4 is the
better/higher of the two ratings.)
T-Ra tings
: Phones rated T3 or T4 meet FCC requirements and
are likely to be more usable with a hearing device’s telecoil
(“T Switch” or “Telephone Switch”) than unrated phones. (T4 is
the better/higher of the two ratings. Note that not all hearing
devices have telecoils in them.)
Note:
New Technologies, Including Wi-Fi
This phone has been tested and rated for use with hearing
aids for some of the wireless technologies that it uses. However,
there may be newer wireless technologies (including Wi-Fi)
used in this phone that have not been tested for use with
hearing aids.
Hearing aid devices may also be measured for immunity to
interference noise from wireless phones and should have
ratings similar to phones. Ask your hearing healthcare
professional for the rating of your hearing aid. Add the rating of
your hearing aid and your phone to determine probable
usability:
䢇
Any combined rating equal to or greater than six offers
excellent use.
䢇
Any combined rating equal to five is considered normal use.
䢇
Any combined rating equal to four is considered usable.
Thus, if you pair an M3 hearing aid with an M3 phone, you will
have a combined rating of six for “excellent use.” This is
synonymous for T ratings.
Boost further suggests you experiment with multiple phones
(even those not labeled M3/T3 or M4/T4) while in the store to
find the one that works best with your hearing aid device. More
information about hearing aid compatibility may be found at:
www.fcc.gov, www.fda.gov
, and
www.accesswireless.org
.
Getting the Best Hearing Device Experience With Your Phone
To further minimize interference:
䢇
Set the phone’s display and keypad backlight settings to
ensure the minimum time interval:
1.
Tou ch
2.
Touch the minimum time interval setting.
䢇
Position the phone so the internal antenna is farthest from
your hearing aid.
䢇
Move the phone around to find the point with least
interference.
> Settings > Display > Screen timeout
.
4A. Important Safety Information 71
Important Safety Information
Page 78

Caring for the Battery
Protecting Your Battery
The guidelines listed below help you get the most out of your
battery’s performance.
䢇
Recently there have been some public reports of wireless
phone batteries overheating, catching fire, or exploding. It
appears that many, if not all, of these reports involve
counterfeit or inexpensive, aftermarket-brand batteries with
unknown or questionable manufacturing standards. Boost is
not aware of similar problems with Boost phones resulting
from the proper use of batteries and accessories approved
by Boost or the manufacturer of your phone. Use only Boostapproved or manufacturer-approved batteries and
accessories found at Boost Stores or through your phone’s
manufacturer, or call 1-866-866-7509 to order. They’re also
available at
Buying the right batteries and accessories is the best way to
ensure they’re genuine and safe.
䢇
In order to avoid damage, charge the battery only in
temperatures that range from 32° F to 113° F (0° C to 45° C).
䢇
Don’t use the battery charger in direct sunlight or in high
humidity areas, such as the bathroom.
䢇
Never dispose of the battery by incineration.
䢇
Keep the metal contacts on top of the battery clean.
䢇
Don’t attempt to disassemble or short-circuit the battery.
䢇
The battery may need recharging if it has not been used for
a long period of time.
72 4A. Important Safety Information
www.boostmobi le.com
— click
Accessories
.
䢇
It’s best to replace the battery when it no longer provides
acceptable performance. It can be recharged hundreds of
times before it needs replacing.
䢇
Don’t store the battery in high temperature areas for long
periods of time. It’s best to follow these storage rules:
䡲
Less than one month:
-4° F to 140° F (-20° C to 60° C)
䡲
More than one month:
-4° F to 113° F (-20° C to 45° C)
Disposal of Lithium Ion (Li-Ion) Batteries
Do not handle a damaged or leaking Li-Ion battery as you can
be burned.
For safe disposal options of your Li-Ion batteries, contact your
nearest Boost authorized service center.
Special Note
some areas, the disposal of batteries in household or business
trash may be prohibited.
: Be sure to dispose of your battery properly. In
Radio Frequency (RF) Energy
Understanding How Your Phone Operates
Your phone is basically a radio transmitter and receiver. When
it’s turned on, it receives and transmits radio frequency (RF)
signals. When you use your phone, the system handling your
call controls the power level. This power can range from 0.006
watt to 0.2 watt in digital mode.
Page 79

Knowing Radio Frequency Safety
The design of your phone complies with updated NCRP
standards described below.
In 1991–92, the Institute of Electrical and Electronics Engineers
(IEEE) and the American National Standards Institute (ANSI)
joined in updating ANSI’s 1982 standard for safety levels with
resp ect to h uman exposure to R F signals . More than 120
scientists, engineers and physicians from universities,
government health agencies and industries developed this
updated standard after reviewing the available body of
research. In 1993, the Federal Communications Commission
(FCC) adopted this updated standard in a regulation. In August
1996, the FCC adopted hybrid standard consisting of the
existing ANSI/IEEE standard and the guidelines published by
the National Council of Radiation Protection and
Measurements (NCRP).
Body-Worn Operation
To maintain compliance with FCC RF exposure guidelines, if
you wear a handset on your body, use a Boost-supplied or
Boost-approved carrying case, holster or other body-worn
accessory. If you do not use a body-worn accessory, ensure
the antenna is at least
body when transmitting. Use of non-Boost-approved
accessories may violate FCC RF exposure guidelines.
For more information about RF exposure, visit the FCC website
at
www.fcc.gov
7/16 inch (1.5 centimeters
.
) from your
Specific Absorption Rates (SAR) for Wireless
Phones
The SAR value corresponds to the relative amount of RF
energy absorbed into the head of a user of a wireless handset.
The SAR value of a phone is the result of an extensive testing,
measuring and calculation process. It does not represent how
much RF the phone emits. All phone models are tested at their
highest value in strict laboratory settings. But when in
operation, the SAR of a phone can be substantially less than
the level reported to the FCC. This is because of a variety of
factors including its proximity to a base station antenna, phone
design and other factors. What is important to remember is that
each phone meets strict federal guidelines. Variations in SARs
do not represent a variation in safety.
All phones must meet the federal standard, which incorporates
a substantial margin of safety. As stated above, variations in
SAR values between different model phones do not mean
variations in safety. SAR values at or below the federal standard
of 1.6 W/kg are considered safe for use by the public.
The highest reported SAR values of the MOTOROLA XPRT are:
Cellular CDMA mode (Part 22)
Head: 1.03 W/kg; Body-worn: 0.97 W/kg
PCS mode (Part 24)
Head: 1.39 W/kg; Body-worn: 1.34 W/kg
:
4A. Important Safety Information 73
:
Important Safety Information
Page 80
FCC Radio Frequency Emission
This phone meets the FCC Radio Frequency Emission
Guidelines.
FCC ID number: IHDP56LK1.
More information on the phone’s SAR can be found from the
following FCC website:
http://www.fcc.gov/oet/ea/
.
FCC Notice
This device complies with Part 15 of the FCC Rules. Operation
is subject to the following two conditions: (1) this device may
not cause harmful interference, and (2) this device must accept
any interference received, including interference that may
cause undesired operation.
Changes or modifications not expressly approved by the party
responsible for compliance could void the user’s authority to
operate the equipment.
Note:
This equipment has been tested and found to comply with the
limits for a Cla ss B digital device, pursuan t to Part 15 of the
FCC Rules.
These limits are designed to provide reasonable protection
against harmful interference in a residential installation. This
equipment generates, uses and can radiate radio frequency
energy and, if not installed and used in accordance with the
instructions, may cause harmful interference to radio
communications.
74 4A. Important Safety Information
However, there is no guarantee that interference will not occur
in a particular installation.
If this equipment does cause harmful interference to radio or
television reception, which can be determined by turning the
equipment off and on, the user is encouraged to try to correct
the interference by one or more of the following measures:
䢇
Reorient the direction of the internal antenna.
䢇
Increase the separation between the equipment and
rece iver.
䢇
Connect the equipment into an outlet on a circuit different
from that to which the receiver is connected.
䢇
Consult the dealer or an experienced radio/TV technician for
help.
Owner’s Record
The model number, regulatory number, and serial number are
located on a nameplate inside the battery compartment.
Record the serial number in the space provided below. This will
be helpful if you need to contact us about your phone in the
future.
Model: MOTOROLA XPRT (MB612)
Serial No.:
Page 81

User Guide Proprietary Notice
Certain features, services and applications are network
dependent and may not be available in all areas; additional
terms, conditions and/or charges may apply. Contact your
service provider for details.
All features, functionality, and other product specifications, as
well as the information contained in this guide, are based upon
the latest available information and believed to be accurate at
the time of printing. Motorola reserves the right to change or
modify any information or specifications without notice or
obligation.
MOTOROLA and the Stylized M Logo are trademarks or
registered trademarks of Motorola Trademark Holdings, LLC.
.All rights reserved. Al l other product or service names are the
property of their respective owners.
© 2012 Motorola Mobility LLC. All rights reserved.
Changes or modifications made in the radio phone, not
expressly approved by Motorola, will void the user’s authority to
operate the equipment.
Product ID: MOTOROLA XPRT
Manual Number: 68XXXXX619-A
User Guide template version 11a (September 2010)
Important Safety Information
4A. Important Safety Information 75
Page 82
⽧
4B. Manufacturer’s Warranty
Manufacturer’s Warranty (page 76)
Your phone has been designed to provide you with
reliable, worry-free service. If for any reason you have a
problem with your equipment, please refer to the
manufacturer’s warranty in this section.
For information regarding the terms and conditions of
service for your phone, please visit
www.boostmobile.com
.
Manufacturer’s Warranty
Motorola Limited Warranty for the United States and Canada
What Does this Warranty Cover?
Subject to the exclusions contained below, Motorola
Mobility, Inc. warrants its mobile telephones
76 4B. Manufacturer’s Warranty
(“Products”), Motorola-branded or certified accessories
sold for use with these Products (“Accessories”), and
Motorola software contained on CD-ROMs or other
tangible media and sold for use with these Products
(“Software”) to be free from defects in materials and
workmanship under normal consumer usage for the
period(s) outlined below. This limited warranty is a
consumer's exclusive remedy, and applies as follows to
new Motorola Products, Accessories, and Software
purchased by consumers in the United States or
Canada, which are accompanied by this written
warranty:
Products and Accessories
Products Covered Length of Coverage
Products and
Accessories
defined above, unless
otherwise provided for
below.
as
One (1) year
purchase by the first consumer
purchaser of the product
unless otherwise provided for
below.
from the date of
Page 83
Products Covered Length of Coverage
Decorative
Accessories and
Cases.
Decorative
covers, bezels,
PhoneWrap™ covers
and cases.
Monaural Headsets.
Ear buds and boom
headsets that transmit
mono sound through a
wired connection.
Products and
Accessories that are
Repaired or Replaced.
Limited lifetime warranty
the lifetime of ownership by the
first consumer purchaser of the
product.
Limited lifetime warranty
the lifetime of ownership by the
first consumer purchaser of the
product.
The balance of the original
warranty or for ninety (90)
days
from the date returned to
the consumer, whichever is
longer.
for
for
Exclusions (Products and Accessories)
Normal Wear and Tear.
replacement of parts due to normal wear and tear are
excluded from coverage.
Periodic maintenance, repair and
Batteries.
Only batteries whose fully charged capacity
falls below 80% of their rated capacity and batteries
that leak are covered by this limited warranty.
Abuse & Misuse.
Defects or damage that result from:
(a) improper operation, storage, misuse or abuse,
accident or neglect, such as physical damage (cracks,
scratches, etc.) to the surface of the product resulting
from misuse; (b) contact with liquid, water, rain, extreme
humidity or heavy perspiration, sand, dirt or the like,
extreme heat, or food; (c) use of the Products or
Accessories for commercial purposes or subjecting the
Product or Accessory to abnormal usage or conditions;
or (d) other acts which are not the fault of Motorola, are
excluded from coverage.
Use of Non-Motorola Products and Accessories.
Defects
or damage that result from the use of non-Motorola
branded or certified Products, Accessories, Software or
other peripheral equipment are excluded from
coverage.
Unauthorized Service or Modification.
Defects or
damages resulting from service, testing, adjustment,
installation, maintenance, alteration, or modification in
any way by someone other than Motorola, or its
4B. Manufacturer’s Warranty 77
Warranty
Page 84
authorized service centers, are excluded from
coverage.
Altered Products.
Products or Accessories with (a) serial
numbers or date tags that have been removed, altered
or obliterated; (b) broken seals or that show evidence
of tampering; (c) mismatched board serial numbers; or
(d) nonconforming or non-Motorola housings, or parts,
are excluded from coverage.
Communication Services.
Defects, damages, or the
failure of Products, Accessories or Software due to any
communication service or signal you may subscribe to
or use with the Products Accessories or Software is
excluded from coverage.
Software
Products Covered Length of Coverage
Software.
physical defects in the media that
embodies the copy of the
software (e.g. CD-ROM, or floppy
disk).
78 4B. Manufacturer’s Warranty
Applies only to
Ninety (90) days
the date of purchase.
from
Exclusions (Software)
Software Embodied in Physical Media.
made that the software will meet your requirements or
will work in combination with any hardware or software
applications provided by third parties, that the operation
of the software products will be uninterrupted or error
free, or that all defects in the software products will be
corrected.
Software NOT Embodied in Physical Media.
is not embodied in physical media (e.g. software that is
downloaded from the Internet), is provided “as is” and
without warranty.
No warranty is
Software that
Who is Covered?
This warranty extends only to the first consumer
purchaser, and is not transferable.
What Will Motorola Do?
Motorola, at its option, will at no charge repair, replace
or refund the purchase price of any Products,
Accessories or Software that does not conform to this
warranty. We may use functionally equivalent
reconditioned/refurbished/pre-owned or new Products,
Accessories or parts. No data, software or applications
Page 85
added to your Product, Accessory or Software,
including but not limited to personal contacts, games
and ringer tones, will be reinstalled. To avoid losing
such data, software, and applications, please create a
back up prior to requesting service.
How to Obtain Warranty Service or Other
Information
USA
Canada
TTY
You will receive instructions on how to ship the
Products, Accessories or Software, at your expense, to
a Motorola Authorized Repair Center. To obtain service,
you must include: (a) a copy of your receipt, bill of sale
or other comparable proof of purchase; (b) a written
description of the problem; (c) the name of your
service provider, if applicable; (d) the name and
location of the installation facility (if applicable) and,
most importantly; (e) your address and telephone
number.
1-800-734-5870
1-800-461-4575
1-888-390-6456
What Other Limitations are There?
ANY IMPLIED WARRANTIES, INCLUDING WITHOUT
LIMITATION THE IMPLIED WARRANTIES OF
MERCHANTABILITY AND FITNESS FOR A
PARTICULAR PURPOSE, SHALL BE LIMITED TO THE
DURATION OF THIS LIMITED WARRANTY,
OTHERWISE THE REPAIR, REPLACEMENT, OR
REFUND AS PROVIDED UNDER THIS EXPRESS
LIMITED WARRANTY IS THE EXCLUSIVE REMEDY OF
THE CONSUMER, AND IS PROVIDED IN LIEU OF ALL
OTHER WARRANTIES, EXPRESS OR IMPLIED. IN NO
EVENT SHALL MOTOROLA BE LIABLE, WHETHER IN
CONTRACT OR TORT (INCLUDING NEGLIGENCE)
FOR DAMAGES IN EXCESS OF THE PURCHASE
PRICE OF THE PRODUCT, ACCESSORY OR
SOFTWARE, OR FOR ANY INDIRECT, INCIDENTAL,
SPECIAL OR CONSEQUENTIAL DAMAGES OF ANY
KIND, OR LOSS OF REVENUE OR PROFITS, LOSS OF
BUSINESS, LOSS OF INFORMATION OR DATA,
SOFTWARE OR APPLICATIONS OR OTHER
FINANCIAL LOSS ARISING OUT OF OR IN
CONNECTION WITH THE ABILITY OR INABILITY TO
USE THE PRODUCTS, ACCESSORIES OR SOFTWARE
TO THE FULL EXTENT THESE DAMAGES MAY BE
DISCLAIMED BY LAW.
4B. Manufacturer’s Warranty 79
Warranty
Page 86

Some states and jurisdictions do not allow the limitation
or exclusion of incidental or consequential damages, or
limitation on the length of an implied warranty, so the
above limitations or exclusions may not apply to you. This
warranty gives you specific legal rights, and you may also
have other rights that vary from state to state or from one
jurisdiction to another.
80 4B. Manufacturer’s Warranty
Page 87

Index
Numerics
3-Way Call 54
A
Abbreviated Dialing 19
Airplane Mode 24
Alarm Clock 34
Android Market 56
Answering Calls 18
Apps, Downloading 57
B
Battery 10–11
Capacity 10
Charging 2, 11
Disposal 72
Installing 11
Bluetooth 45–47
Boost Service
Boost 411 4
C
Calculator 34
Calendar 33
Adding Events 33
Camcorder 42
Clock Display 23
D
Date & Time 9, 23
Dialing Options 17
Directions 64
Display Screen 22
Language 23
E
Emergency Numbers 19
Enhanced 911 (E911) 19
Entering Text 19–21
F
FCC Notice 74
le Manager 33
Fi
G
Gallery 43
Google Latitude 65
Google Maps 65
Google Places 64
H
History 27
I
Instant Messaging 53
K
Key Functions 8
L
Language 23
Latitude 65
Location Settings 23
M
Making Calls 17
Maps 65
Messaging
Email 53
Instant Messages 53
Tex t M e s s a g i n g 51
Voicemail 3, 50
microSD Card 37–39
File Manager 33
Formatting 38
Installing 37
Index
Index 81
Page 88

Missed Calls 18
Music
Downloading 38, 61
Playing 59
N
Navigation 64
O
Owner’s Record 74
P
Phone (illus.) 7
Phone Number
Displaying 11
Phone Settings 22–26
Airplane Mode 24
Display Settings 22–23
Language 23
Location Settings 23
Sound Settings 22
TTY Use 24
Phone Updates 35
Pictures 43
Plus (+) Code Dialing 19
82 Index
R
Resetting Your Phone 26
Ringertones
Vibrate 22
S
Safety Information 68–75
Screen Lock 25
Settings 22–26
SMS Text Messaging 51
Software Updates,
Downloading 35
Special Numbers 25
T
TeleNav GPS Navigator 66
Text Entry
see Entering Text
Text Messaging 51
ree-W
Th
Transferring Files 38
TTY Use 24
Turning Your Phone On and
ay Calling 54
Off 10
U
Updating Your Phone 35
USB 38
V
Vibrate 22
Video Camera 42
Videos 43
Voicemail
Retrieving 50
Setting Up 3, 50
Volume 22
W
Warranty 76
Wi-Fi 47
Wireless
Bluetooth 45
Wi-Fi 47
 Loading...