

XD95U Projector – RS232 Operation Manual
1. Hardware requirement
a. Mini-DIN to DB-9 RS232 cable
b. Desktop or laptop with DB-9 connector
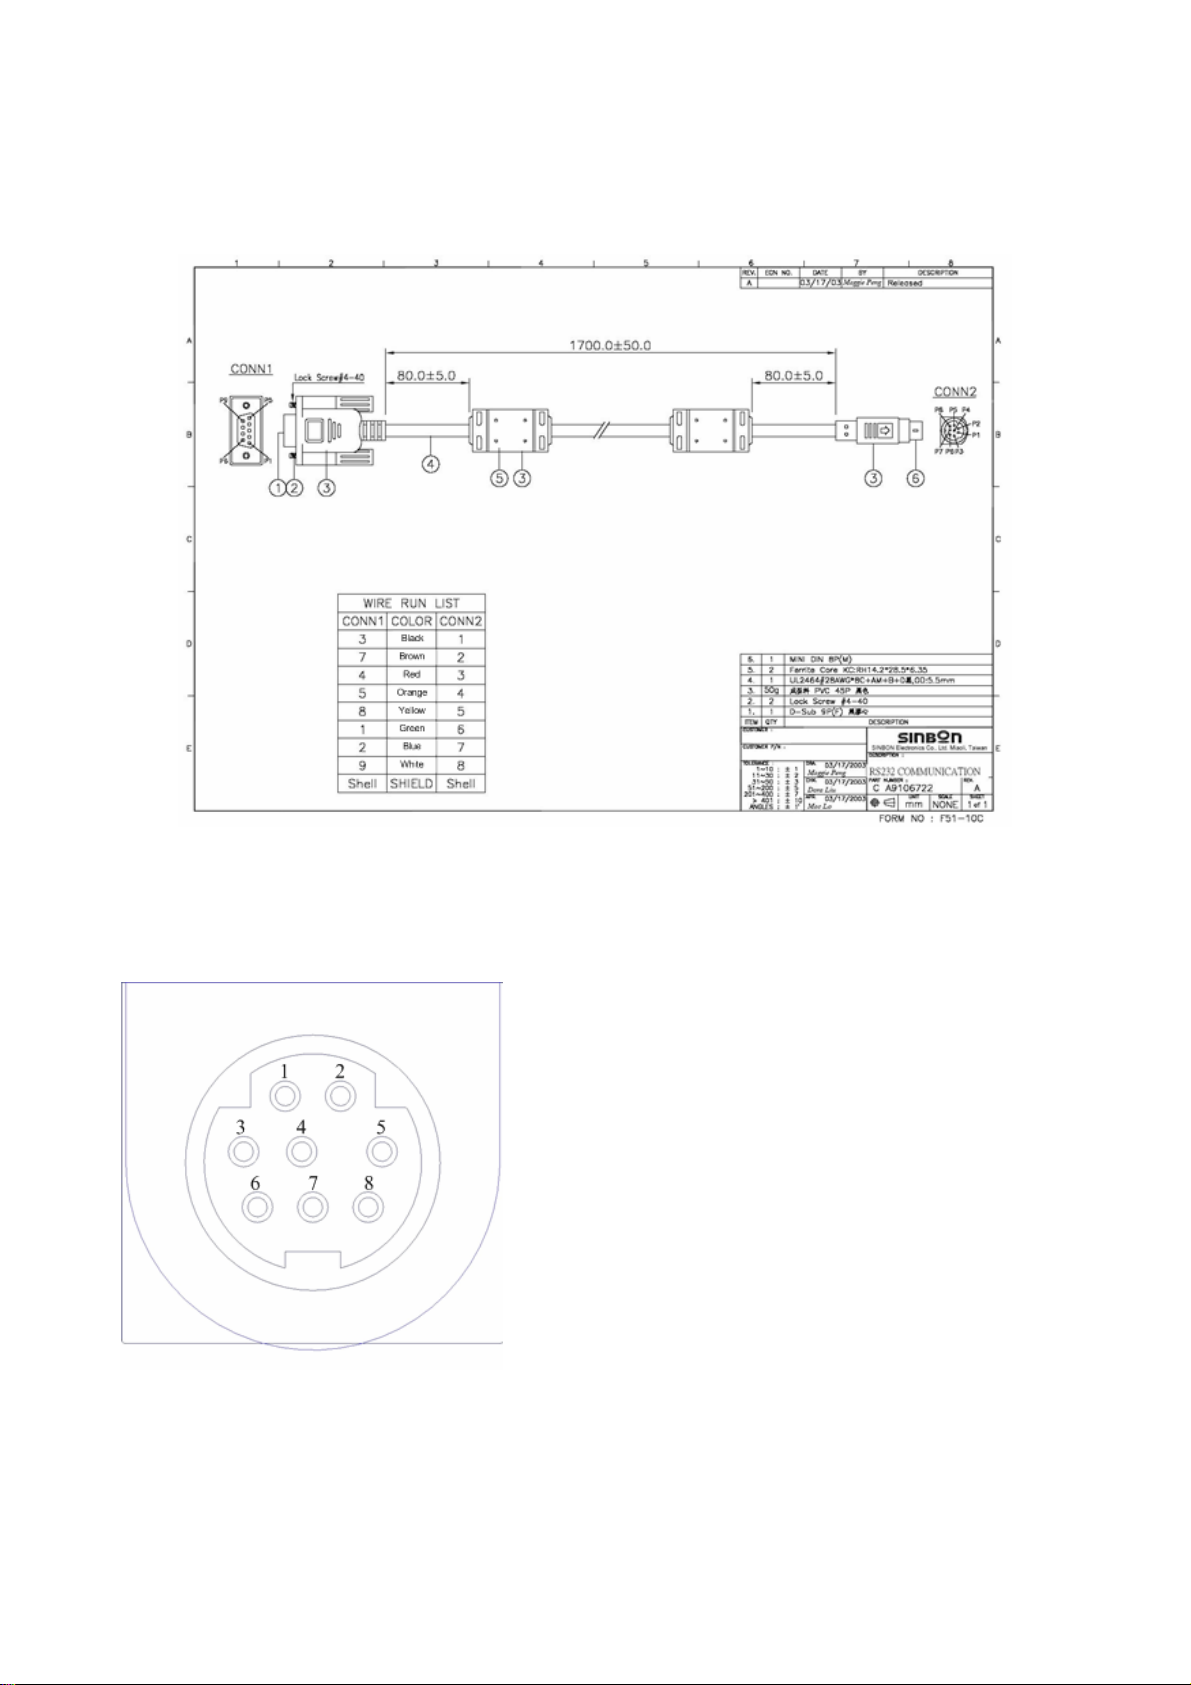
2. Physical layout of RS232 connector
a. Projector-side female connector pin definition
Pin 1 – PC RS232 TX (Projector RS232 RX)
Pin 4, 8 – GND
Pin 7 – PC RS232 RX (Projector RS232 TX)
Other Pins – floating
b. PC-side male connector pin definition
1
Pin 2 – PC RS232 TX
Pin 3 – PC RS232 RX
Pin 5 – GND
Other Pins -- floating
3. Setup for RS232 communication
a. Baud rate – 115200 bps
b. Data bits – 8 bits
c. Parity – none
d. Stop bits – 1 bit
4. Procedure of operation by HyperTerminal
Step1. Connect projector and computer via a RS232 cable
Step2. Turn on projector
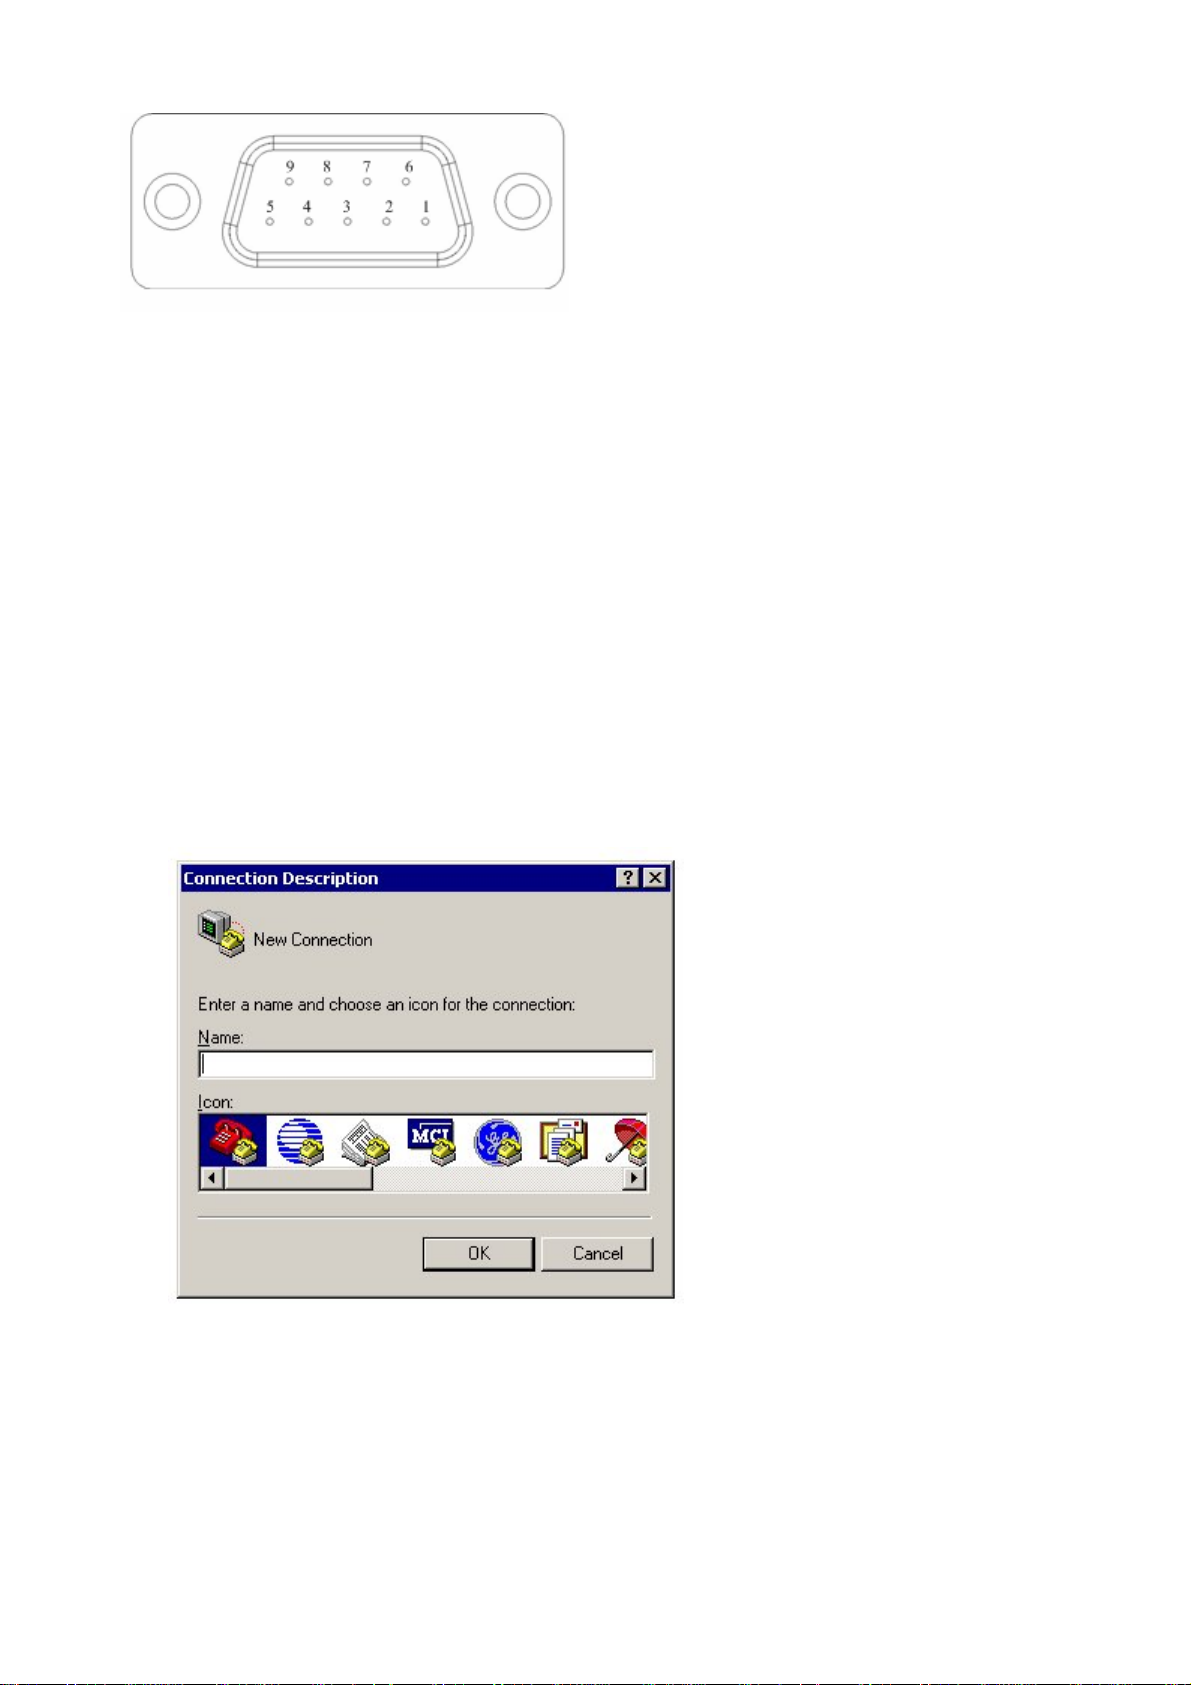
Step3. Create a connection between computer and projector by HyperTerminal
a. Open “HyperTerminal”
b. Name this connection
c. Select a permitted COM port – COM1 usually
2
 Loading...