

Page 1

Installation sheet.
Page 2
Mitel 3000 Basic Installation instructions
Basic Installation instructions for the Mitel 3000
This is a basic installation sheet for the Mitel 3000 system.
Detailed installation instructions are supplied in the Installation Manual that is on the CD supplied
with the phone system.
Step 1
Find a suitable location
The equipment is intended for installation in a residential or office-type environment. It needs to be
mounted at a convenient working height on a dry, flat wall. The normal height is five feet from the
floor to the bottom of the case.
Do not place the Common Control Unit (CCU) where it will be subjected to excessive levels of
heat, dust, or high humidity. Locating the equipment near sources of electromagnetic radiation, such
as heavy electrical switchgear, elevator machinery, or electric arc welders, should be avoided.
Allow at least six inches of free space all around the CCU for ventilation.
The CCU needs to be located within six feet of an isolated, dedicated power supply outlet. The
CCU must not share the same circuit with any other electrical appliance.
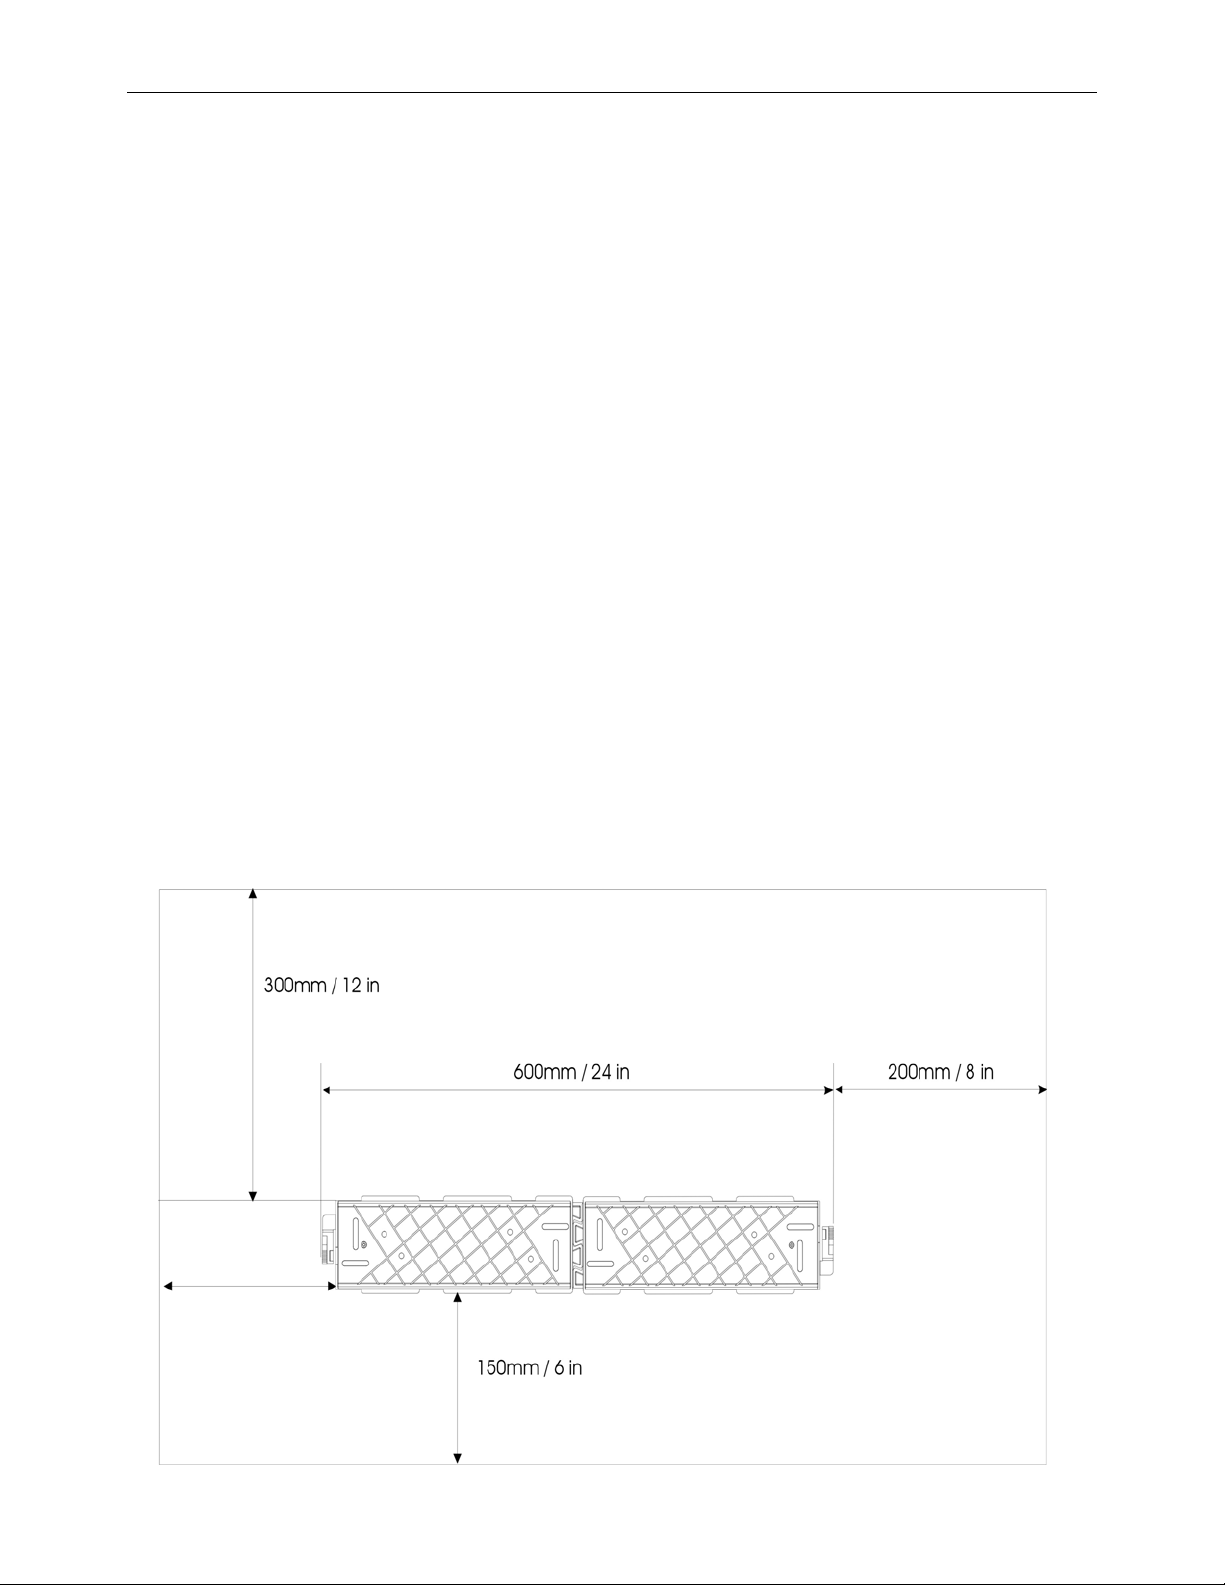
Step 2
Mount the wall bracket(s)
Use the wall bracket as a template to mark the screw holes for the first bracket. If a unit with
expansion modules (Extension or Broadband Module) is to be installed, install the second bracket.
Allow the clearances shown below so that the unit can be expanded even if you are only installing
one bracket now.
Page 1
Page 3
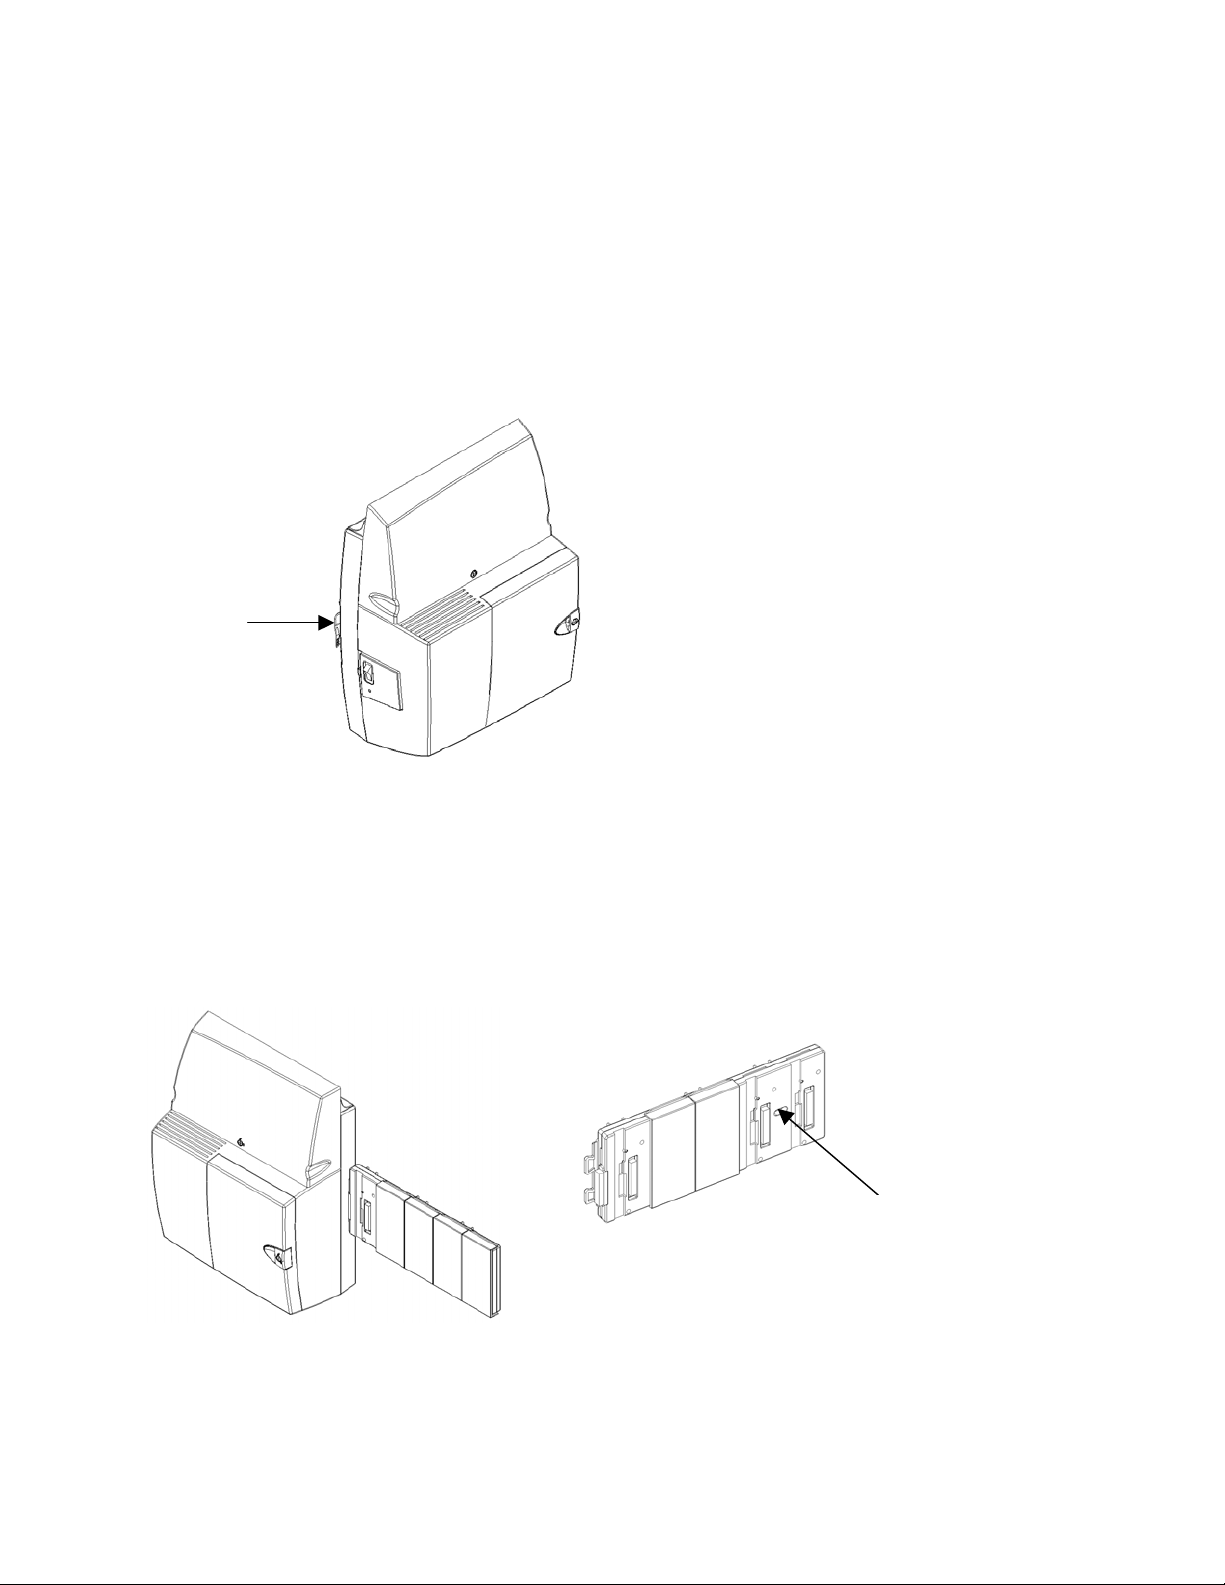
Step 3
Mount the CCU on the first bracket
The CCU is mounted on the bracket by sliding it on from the left-hand side. There are two marks on
the right-hand side of the CCU. Line these up with the inside edge of the last flange on the bracket
and slide the CCU to the right. When you slide the CCU fully to the right it is automatically locked
in place.
To remove the CCU, depress the lock located on the left-hand side of the wall bracket and slide the
CCU to the left.
Lock
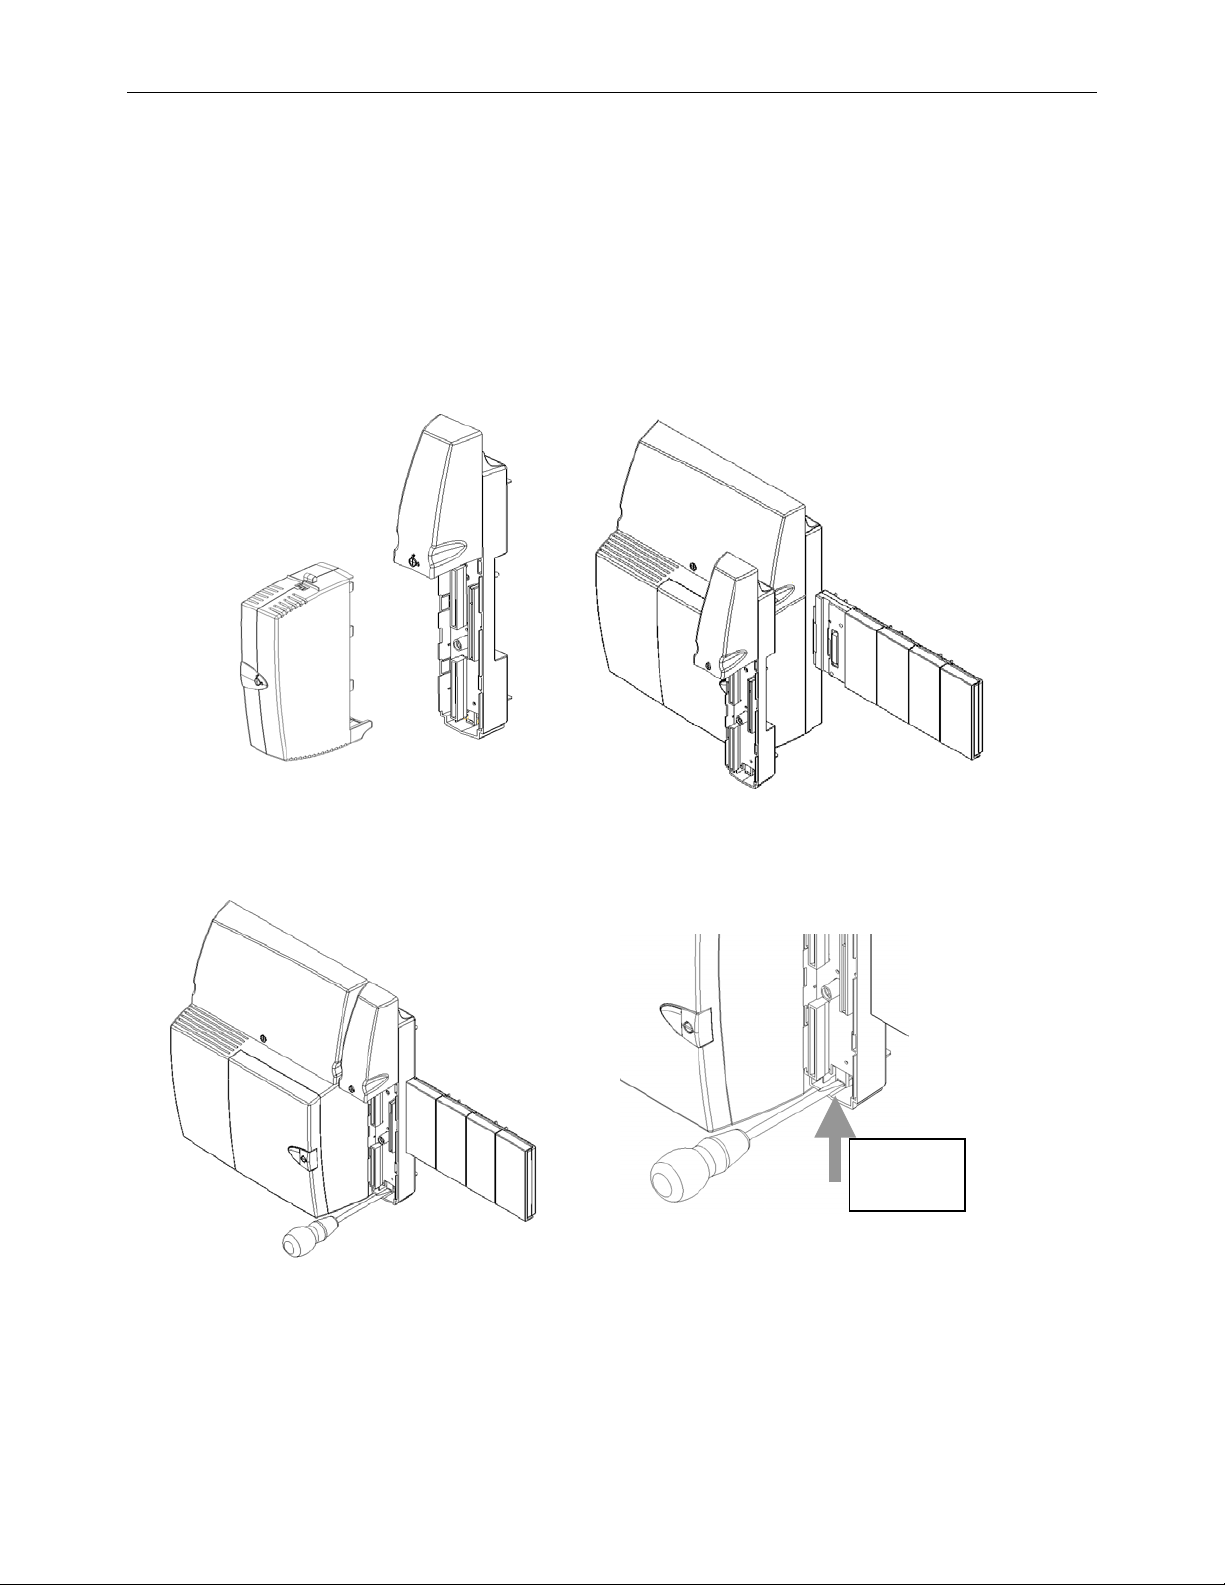
Step 4
Install the backplane and secure it to the wall bracket
If the unit is equipped with expansion modules (Extension or Broadband Module) the expansion
backplane must be installed on the second wall bracket and secured to it with the mounting screw
provided. Remove the fourth and fifth covers to locate the mounting screw hole.
Mounting screw
hole
IMPORTANT: The backplane must be secured to the wall bracket using the mounting screw
to ensure it is securely locked in place and does not move when modules are being installed.
Page 2
Page 4
Mitel 3000 Basic Installation instructions
Step 5
Install any additional modules on the Backplane
The Extension and Internet Router Modules are supplied in two parts: the Main Distribution Frame
(MDF) and the Module itself.
Install the MDF on the backplane; lock it by pushing the locking bar up as shown and then insert the
module. Note: If installing CO Module(s) in the Extension Module perform step 6B before inserting
the Extension Module.
Module
MDF
Push the Locking bar UP to lock the MDF in place
Push bar
UP
Page 3
Page 5
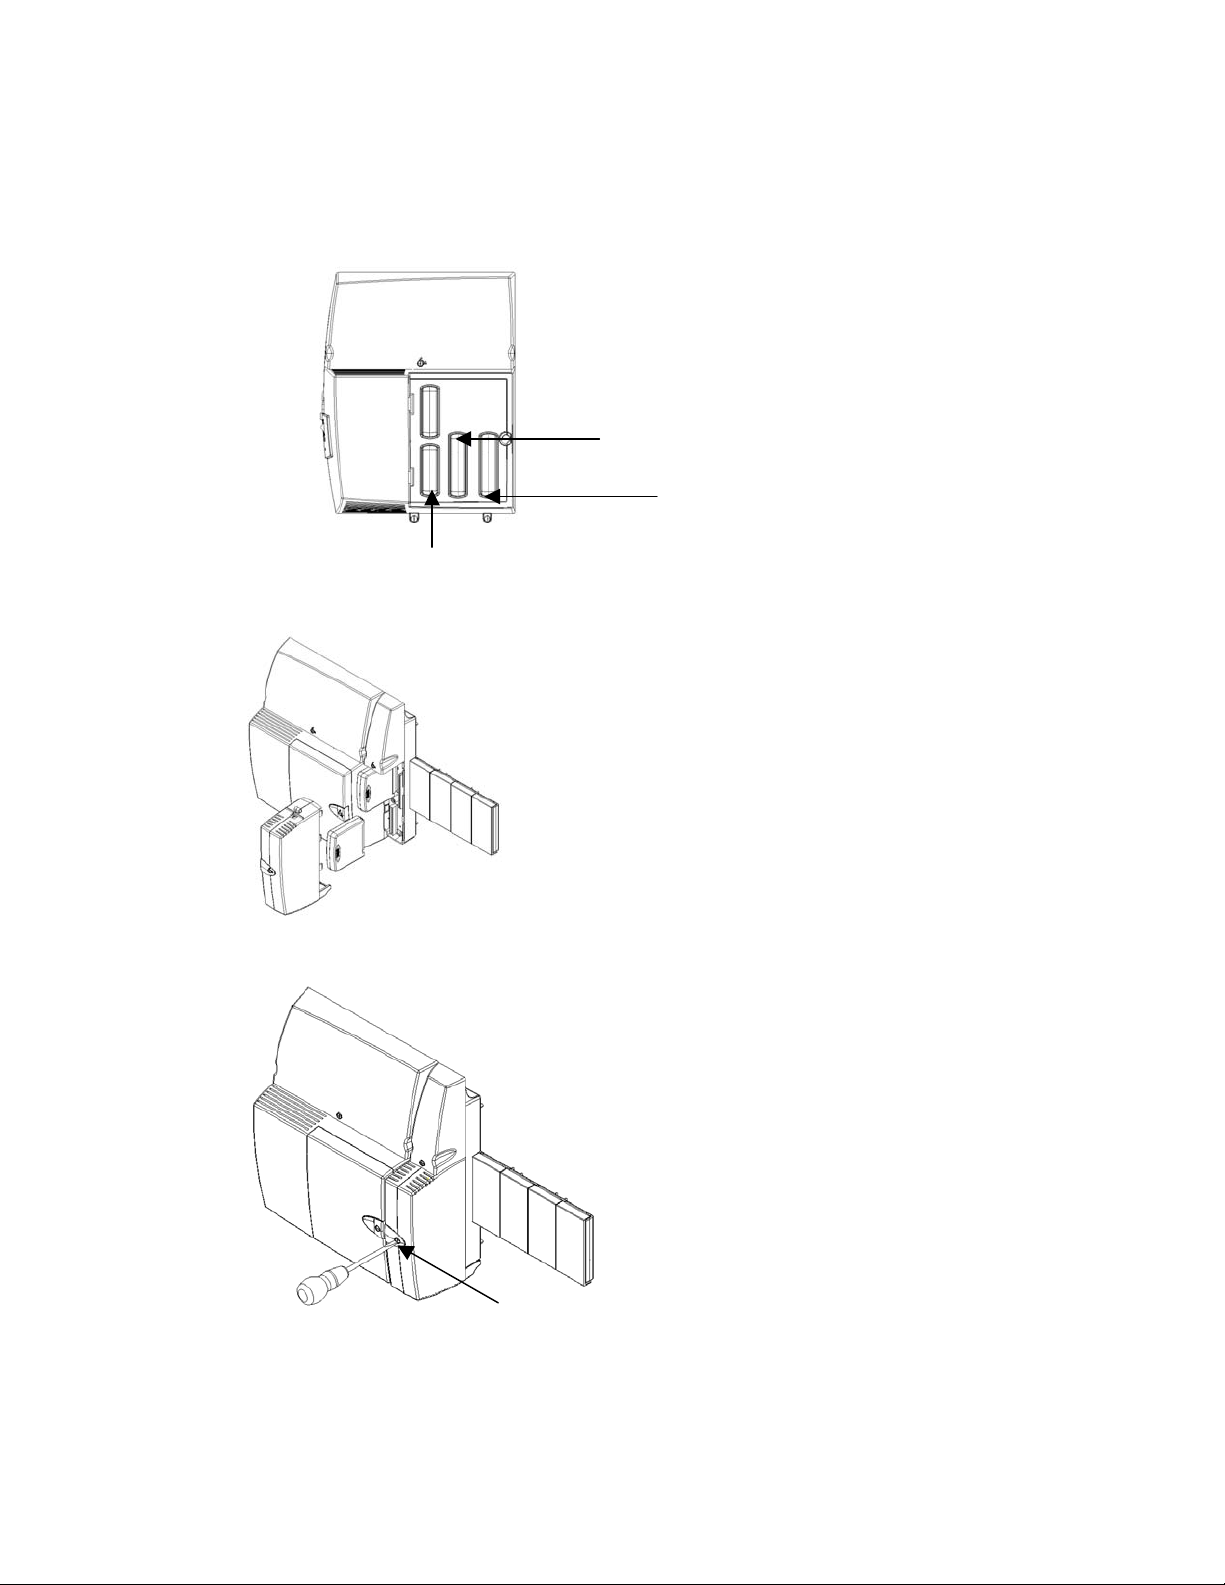
Step 6
PN LR2739.06200-2
Install the CO modules and the Voice module
6A: Installing modules in the CCU
Voice Module
CO Module 1
CO Lines 1 and 2
6B: Installing CO Modules in the Extension module
CO Module 2
CO Lines 3 and 4
NOTE: Ensure all the locking screws are locked after the modules are installed.
Page 4
Locking screws
Page 6

Global Headquarters
Tel: +1(613) 592-2122
Fax: +1(613) 592-4784
U.S.
Tel: +1(480) 961-9000
Fax: +1(480) 961-1370
EMEA
Tel: +44(0)1291-430000
Fax: +44(0)1291-430400
CALA
Tel: +1(613) 592-2122
Fax: +1(613) 592-7825
Asia Pacific
Tel: +852 2508 9780
Fax: +852 2508 9232
www.mitel.com
For more information on our worldwide office locations, visit our website at www.mitel.com/offices
THIS DOCUMENT IS PROVIDED TO YOU FOR INFORMATIONAL PURPOSES ONLY. The information furnished in this document, believed by Mitel to be accurate as of the
date of its publication, is subject to change without notice. Mitel assumes no responsibility for any errors or omissions in this document and shall have no obligation to you
as a result of having made this document available to you or based upon the information it contains.
M MITEL (design) is a registered trademark of Mitel Networks Corporation. All other products and services are the registered trademarks of their respective holders.
© Copyright 2008, Mitel Networks Corporation. All Rights Reserved.
 Loading...