

Page 1

Mitel NuPoint Messenger Technical Documentation - Release 7.0
Reference and Configuration Manual
Volume 1, Reference Information
2700-1398-B1, Issue 2
Contents ©Copyright 2002, Mitel Networks Corporation
Distributed Courtesy of
8777 E. Via De Ventura Suite #340
Scottsdale, Arizona 85258
Main: (480) 998-9500
Fax: (480) 718-7355
http://www.legacyvoicemail.com
Support:
Sales:
General:
support@legacyvoicemail.com
sales@legacyvoicemail.com
info@legacyvoicemail.com
©
Copyright 2002, Mitel Networks Corporation 1
Page 2

Mitel NuPoint Messenger Technical Documentation - Release 7.0
About This Manual
This manual describes how to configure the NuPoint Voice™ software in any of these NuPoint
Messenger™ servers:
• Model 640
• Model 120
• Model 70
Who Should Read This Manual
This manual is intended for technicians and administrators who are respon sible for configuring
software on the NuPoint Messenger system.
How to Use This Manual
This manual contains two volumes. Volume 1 includes reference chapters and a glossary.
Volume 2 includes tasks lists, procedures, and user aids, such as worksheets an d menu maps.
Reference Chapters
The reference chapters, 1 through 12, located in Volume 1, provide details about the NuPoint
Messenger software configuration. These chapters discuss how compone nts are related,
elaborate on concepts, give operational details, and contain tables and figures about
configuration. The
preparing for a NuPoint Messenger server installation. The
your system) provides installation procedures.
System Implementation Guide
gives suggestions and recommendations on
Installation and Service Manual
(for
Task List
Task lists appear in Volume 2. To use a task list, start with a principal task (shown in boldface)
to configure a new system. Each task listed is described in more detail in a procedure. If you
want to perform other tasks on a system that is already configured, look up the task you want to
perform in the task list.
Procedures
Each reference chapter in Volume 1 contains a list, by title and number, of related Procedures
(CPs). The collection of those configuration CPs follows the task lists in Volume 2; the number of
a CP does not indicate a sequence of performance. Follow the steps in the CPs to accomplish
desired tasks. A reference list in each CP contains pointers to supplemental information, such as
other procedures, other manuals, menu maps, and so forth.
©
Copyright 2002, Mitel Networks Corporation 2
Page 3

Mitel NuPoint Messenger Technical Documentation - Release 7.0
g
Worksheets
Volume 1 includes information about completing worksheets, which helps you perform
procedures. Volume 2 includes blank worksheets. You many need to complete a worksheet
before you begin performing the steps in a CP.
Navigation Aids
Volume 1 contains a glossary of NuPoint Messenger, telecommunications and telephony terms.
Volume 2 contains menu maps, or “road maps,” which help you reach a menu or see which task
to perform next.
Which Document Do I Use?
Topics listed below are described in NuPoint Messenger documents, as indicated. This table lists
documents for the base hardware and software only, not optional features.
Topics
Activating an inactive
configuration
Administration by Phone
Billing
Call placement
Card configuration
Card replacement
Defining a line group
Diagnostics
DID NuPoint Voice™
application
Disk replacement
Distribution lists
Notice to
Installer
Installation
and Service
Manual
Technical
Reference
Manual
Reference
and
Confi
uration
Manual
Diagnostics
Manual
(Model 640
only)
√
√
√
√
√ √
√
√
√
√
√
√
Duplicating a configuration
Error Log messages
Event Recorder messages
FCOSs and feature bits
Floppy backup and restore
FPSA
GCOSs and groups
Glossary
©
Copyright 2002, Mitel Networks Corporation 3
√
√
√
√
√
√
√
√
Page 4

Mitel NuPoint Messenger Technical Documentation - Release 7.0
Greetings
Hardware changes
Hardware descriptions
Installation procedures
LCOSs and limits
Mailboxes
Message delivery
Message waiting lights
Paging
Passcode - mailbox
Password - console
Phoneline exceptions
Power information
Prompts
RCOSs (NPA/NXX)
Release Notes
√
√ √
√
√ √
√
√
√
√
√
√
√
√
√
√ √
√
√
Repairing a server
Replacing a server
Reports
Resource Manager
Service procedures
Site preparation
System administration
System maintenance
System security
System verify
Testing a configuration
Troubleshooting
Updating
Upgrading
Verifying configuration
parameters
√
√
√
√
√
√
√
√
√
√
√ √
√
√ √
√ √
√
NuPoint Voice application
√
©
Copyright 2002, Mitel Networks Corporation 4
Page 5
Mitel NuPoint Messenger Technical Documentation - Release 7.0
What If Information Is Missing?
If information you need is not available in the documents listed above, go to these documents:
Release Notes
•
• Other documents, as applicable
How Do I Obtain the Documents I Need?
To obtain other documents, contact your distributor.
Conventions Used in This Manual
The procedures, located in Volume 2, use certain conventions to describe how you enter
configuration data and to indicate information displayed at the server maintenance console.
Press Enter Press the Enter key. For example, “Press Enter if the current number is
correct.” On some keyboards, this key is labeled “Return” or has a return
arrow.
Enter Type the text shown, then press the Enter key. For example, “Enter the line
number (1-24)” means to type a number from 1 through 24 then press the
Enter key.
bold Words or characters in bold type indicate either a value to be entered by you
exactly as shown or, when used to indicate a variable entry, describe the
type of value to be supplied by you.
Note: Unless otherwise stated, press Enter after each response you enter.
User Advisories
Reader advisories are given in this manual as shown below.
Note Information especially useful in relation to this procedure.
CAUTION!
Information that helps you prevent equipment or software damage.
CAUTION!
Information that helps you avoid electrostatic discharge (ESD) damage
to the equipment.
WARNING!
Information that helps you prevent an interruption to telecommunications
traffic.
WARNING!
A hazard that can cause you personal injury.
©
Copyright 2002, Mitel Networks Corporation 5
Page 6

Mitel NuPoint Messenger Technical Documentation - Release 7.0
X
DANGER!
Warns of a condition that could severely injure or kill you.
Before You Start
This manual assumes that you are familiar with using a console and keyboard. This section
describes how to use the NuPoint Messenger server effectively.
Console Tips and Techniques
The tips and techniques offered in the following paragraphs can make configuration entry
sessions at the NuPoint Messenger server console more productive.
Viewing Menus
• When you finish entering a value for a parameter, the server displays an abbreviated form of
the current menu, called the "short menu." To view the complete current menu when a short
menu is displayed, press Enter.
• To return to the Main Menu from any NuPoint Voice configuration menu, press X (Exit), until
the Main Menu appears.
Accepting Defaults
• To accept a default displayed in a prompt, just press Enter.
• To accept a default displayed in a menu, no action is necessary.
Quitting an Entry Session
You can quit at any point during entry of offline or online parameters and Class of Service menus.
Quitting discards all entries you have made and leaves the NuPoint Voice configuration the way it
was before you started entering parameters.
To quit from the NuPoint Voice Configuration Offline or Online menu:
Select: (Q) Quit -- Forget Changes
Prompt: Quit and Forget changes? (y/n) =
Response: Y to return to the NuPoint Voice Configuration Main Menu.
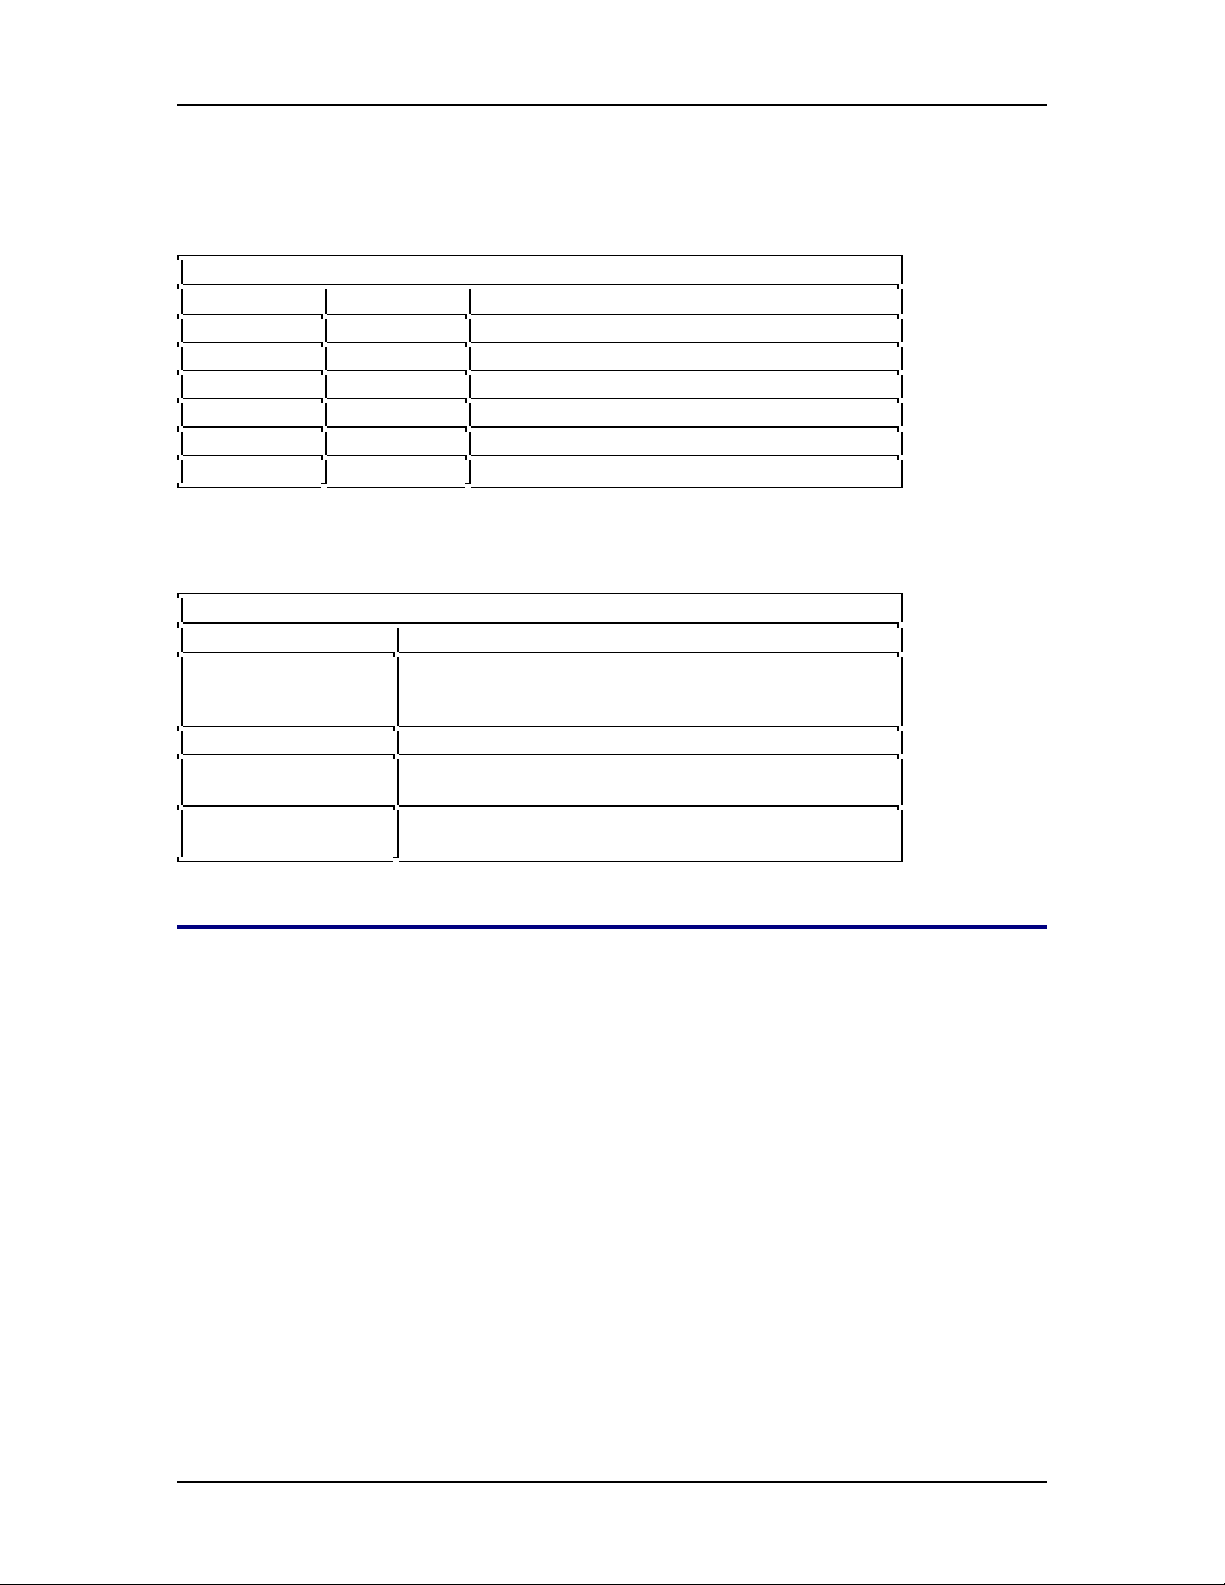
Shortcut Commands
You can use the Ctrl (Control) key or the / (slash) key while simultaneously pressing another key
to execute shortcut commands at a system maintenance console.
To do this... Type...
Activate a timed-out console any key
Exit from the offline or online menus, or FCOS, LCOS, GCOS
menus, and save any entries.
©
Copyright 2002, Mitel Networks Corporation 6
Page 7

Mitel NuPoint Messenger Technical Documentation - Release 7.0
Exit from the offline or online menus, or FCOS, LCOS, GCOS
menus, without saving any entries.
Stop scrolling a displayed report.
Resume scrolling a displayed report.
Return to the NuPoint Voice application when a # prompt is
displayed.
Return to the Reports Menu if you paused the display
Q + Y
Ctrl-S
Ctrl-Q
Ctrl-D or
type exit
Q + return or
Esc,Esc + return
Preparing for a Configuration Session
• Before you begin a configuration session, you need the following:
• The
• A NuPoint Messenger server console (video monitor and keyboard) and NuPoint Voice
• At least two telephones for configuration testing
• A blank 3.5-inch diskette on which you can copy your configuration
• Completed worksheets (blank worksheets are included in Volume 2)
Reference and Configuration Manual
module, with power on
1 Using NuPoint Voice Software
The NuPoint Messenger server (the server) is a set of hardware and software used for ada ptive
information processing. When you configure your software, you need to choose one or more
applications, then configure a number of modifiers common to all of the applications. Each
application is discussed in its own chapter. The modifiers are discussed in this chapter and
following chapters where applicable. When one of the modifiers operates differently in one
application compared to the others, this is highlighted in the application chapter.
“Configuration” is the process of organizing application and modifier data on wo rksheets, then
entering the data at a server console. This data is stored in a configuration file on the hard disk,
and controls call processing.
Procedures
The following frequently-used procedures do not fit into any one category. You must use them
when performing many other procedures that are mentioned elsewhere in this manual. These
procedures are located in Volume 2 of this manual.
Procedure Number
Activate the Inactive Configuration CP 7002
Add or Delete Feature Bits CP 5011
Assign an FCOS to a Mailbox CP 5003
Customize an FCOS Copy CP 5007
Define a Line Group CP 5010
Duplicate a Configuration CP 5044
Perform a Floppy Backup CP 5703
Run a System Configuration Report CP 4353
©
Copyright 2002, Mitel Networks Corporation 7
Page 8

Mitel NuPoint Messenger Technical Documentation - Release 7.0
Verify Configuration Parameters CP 5015
Applications
These are the applications provided with your NuPoint Messenger server. Your server may use
one or more of them. Each of these applications must be in a separate
telephone lines connected to the server) if you have more than one application running, with the
exception of NP Receptionist and NuPoint Agent™.
line group
(a group of
NuPoint Voice Application
This is the basic business application, used for message taking and retrieval. Most of the
modifiers discussed later are explained in terms of this application. In addition, many of the
modifiers are discussed in some detail in the NuPoint Voice Application chapter.
DID NuPoint Voice Application
Similar to the NuPoint Voice application, but for direct-inward dial telephone lines. The hardware
setup is very different, and additional configuration steps are needed.
Pager Application
This application is used for a number of features that place telephone calls out of the server.
Paging
can call a radio pager to let the user know there is a message waiting. The user must call
into the server to receive the message.
log in and receive a message.
Some optional features, such as NuPoint Fax™ and Cut-through Paging, also use this application
to place outdials.
Call placement
Message delivery
calls a telephone number to deliver a message.
calls a telephone and allows the user to
Message Waiting Applications
These applications allow a message waiting indicator at users’ phones to signal that a new
message has arrived. Typically, these indicators are lights, but this depends on the telephone
equipment and switch installed. The software supports 24 ki nds of message waiting indicators.
Optional Features
Optional features are not discussed in this manual. If you purchase them, you will receive the
documentation to place in your Optional Features Manual. However, they are configured with
many of the same modifiers discussed in this manual. Optional features often purchased are
listed below.
• AMIS Analog Network
• NP WakeUp
• NuPoint Agent
• Call Detail Recorder
• NP CSO
• Cut-Through Paging
©
Copyright 2002, Mitel Networks Corporation 8
Page 9

Mitel NuPoint Messenger Technical Documentation - Release 7.0
• NuPoint Fax
• Integrations
• NP Forms
• NP Net Digital Network
• NP Receptionist
Note: NP Receptionist and NuPoint Agent can work in the same line group as the NuPoint Voice
application, depending on your integrations. Most other optional features use different line groups.
Use by the Hearing Impaired
Almost all the functions and capabilities in a standard NuPoint Messenger server are available to
hearing-impaired mailbox owners and callers. NP TDD is an optional feature that you can
configure at any NuPoint Messenger server site where a TDD machine is installed.
Modifiers
These characteristics of NuPoint Messenger server software are common to all applications. By
configuring the modifiers, the capabilities and behavior of the application can change.
Most modifiers are introduced in the NuPoint Voice Application chapter.
Types of Configuration
The NuPoint Messenger server has two different kinds of configuration, online and offline
configuration.
This includes setting up line groups.
settings that can be modified at any time. However, since many offline and online configuration
settings work together, there are two kinds of online configuration as well: the active and the
inactive configuration. The
any changes you make to it take effect immediately. The
configuration that is in reserve, and this option should be used when you also make cha nges in
the offline configuration. Then activate the configuration to implement all the changes you made,
both online (inactive) and offline.
Offline configuration
active configuration
handles server settings that cannot be changed immediately.
Online configuration
is the online configuration currently in use, and
includes the remainder of server
inactive configuration
is the online
Line Groups
A
line group
the server hardware. Each application you use must be assigned to its own line group (except for
NP Receptionist and NuPoint Agent). Any of the various operations involving outdials can,
however, use the same line group assigned to the Pager application. Most of the modifications
you may want to make to an application are made to its line group.
is a set of one or more incoming telephone lines, which come into line card ports on
Dialing Plan
To configure each application, you must define its dialing plan, which is the structure of how the
mailboxes are numbered. Related features include which key a user presses to speak to a
system attendant, or to use call placement.
©
Copyright 2002, Mitel Networks Corporation 9
Page 10

Mitel NuPoint Messenger Technical Documentation - Release 7.0
Day and Night Hours
This feature of the NuPoint Voice application lets you set the work schedule: both office hours
and which days are handled as weekends. This also handles certain situations such as a user
wishing to speak to a system attendant.
Mailboxes
Every user of the server needs a mailbox, and all applications require mailboxes. The
administrator’s mailbox and attendant’s mailbox are special mailboxes that interact with
applications; they are discussed in the NuPoint Voice Application chapter. Other special
mailboxes – tree, rotational, and broadcast, for example – are discussed in the Mailboxes
chapter. Mailbox features, such as Distribution Lists and receipts, are also discussed in that
chapter.
Classes of Service
There are several classes of service, which are groups of characteristics that affect how the
server operates. The different classes of service are assigned to each mailbox by the system
administrator.
Features Class of Service
The NuPoint Voice software has over two hundred
functions or that control how the server can be used. These features are grouped into a set called
a Features Class of Service (FCOS), that define who can do what, and how. One FCOS is
assigned to each mailbox. FCOSs are explained in the Features Class of Service chapter.
feature bits
that allow users to perform
Limits Class of Service
A Limits Class of Service (LCOS) is a group of limitations on each user, such as length and
number of messages. LCOSs also affect how some optional features work. One LCOS is
assigned to each mailbox. These are explained in the Other Classes of Service chapter.
Group Class of Service
A Group Class of Service (GCOS) determines which users can send messages or respond to
messages from other users. There are two kinds of GCOSs, affinity and bit-mapped. One GCOS
is assigned to each mailbox. These are explained in the Other Classes of Service chapter.
Network Class of Service
A Network Class of Service (NCOS) controls users’ network access and is a part of the NP Net
Digital Network optional feature. More NCOS information is contained in the
NuPoint Voice NP
Net Optional Feature Manual.
Restriction Class of Service
A Restriction Class of Service (RCOS) is an element of NPA/NXX call screening that restricts
mailbox outdials to certain area codes or to certain prefixes within an area code. One RCOS is
assigned to each mailbox. These are explained in the Other Classes of Service chapter.
Tenant Class of Service
A Tenant Class of Service (TCOS) is used with the ESMDI “Multi-Tenant” application, to govern
©
Copyright 2002, Mitel Networks Corporation 10
Page 11

Mitel NuPoint Messenger Technical Documentation - Release 7.0
mailbox interaction between user communities. Refer to the
Integration Manual
for more information.
NuPoint Voice Enhanced SMDI
Billing and Reports
You can generate reports from information on the existing applications and whatever
modifications you have put into effect. Billing is an application that collects call and message
information so users can be billed for their server usage. Refer to the Billing chapter for
information on how to set up billing and different rate structures, and to the Reports chapter for
more information on different reports available.
Worksheets
Worksheets are supplied (see Volume 2 of this manual) to help you organize configuration data
before you enter it at the NuPoint Messenger server maintenance console. There is a worksheet
for each application, for different kinds of mailboxes, and for FCOSs, LCOSs, and GCOSs.
Complete the worksheets for all applications that you wish to add to the configuration before you
begin entering data at a server maintenance console. This prevents duplication of line group
assignments, and gives an accurate picture of how server reso urces have been divided among
the applications. Fields of data on these worksheets are explained in the application chapters that
follow.
Optional features are shipped with instructions similar to the worksheet format.
NuPoint Messenger Server Software at a Glance
Figure 1-1 shows how the various parts of NuPoint Messenger server software work together. It
illustrates how line groups are made up of phone lines, how each application is assigned one line
group, and how modifiers work on all applications. In addition, it shows how mailboxes have a
number of different configuration parameters. Finally, it shows how Billing and Reports use all
server information.
Figure 1-1 NuPoint Messenger Server Software Overview
2 NuPoint Voice Application
This chapter covers:
• Overview of the NuPoint Voice application
• Default software configuration
• NuPoint Voice Application Worksheet
• Line group definition
• Configuring the application
• Using the NuPoint Voice application
©
Copyright 2002, Mitel Networks Corporation 11
Page 12

Mitel NuPoint Messenger Technical Documentation - Release 7.0
Overview
The NuPoint Voice application provides voice messaging capability where each server user can
have a personal mailbox. It is the standard business application for NuPoint Messenger servers.
The NuPoint Voice application can be used with most Central Offices (COs), PBXs, and with all
key systems. Other applications, such as DID NuPoint Voice or the Pager application are
variations
NuPoint Voice application.
Numerous customized integrations, which are also variations of the NuPoint Voice application,
are available. These are optional features; they provide message waiting control, and functions
such as personal greetings for forwarded calls. See the specific integration documents in the for
more information.
To use the NuPoint Voice application on your server, you must perform any necessary system
level configuration. System level configuration through the NuPoint Voice application involves two
steps: defining the line group, and configuring the application. In the first step, you assign server
ports to the NuPoint Voice application. In the second step, you customize the application for your
server. Procedures covering these steps are available in Volume 2 of this manual.
Once you have completed the NuPoint Voice configuration, you must activate changes, create
mailboxes, record a company greeting, and test the configuration. Procedures covering these
steps are listed below.
of the NuPoint Voice application, and are used either together with, or instead of, the
Procedures
You can perform the following procedures with the NuPoint Voice application. These procedures
are located in Volume 2 of this manual.
Procedure Number
NuPoint Voice Application Configuration CP 3301
Configure a Dialing Plan CP 5002
Configure for Transfer to a System Attendant CP 5020
Configure for Unaddressed Messages CP 3314
Configure Speech Quality for an Application CP 5053
Configure NP TDD CP 3291
Enable Multiple Messages for Outside Callers CP 5022
Enable the Dial-by-Name Function CP 3309
Prevent Unaddressed Messages CP 5023
Test the NuPoint Voice Application CP 5315
Default Software Configuration
The NuPoint Voice application is the only application that is pre-installed in the factory
configuration. To add capabilities, and to meet the requirements of a particular site, you usually
must change one or more of the defaults. All of the defaults can be changed at a server
maintenance console.
The default configuration has the values shown in Table 2-1.
Table 2-1 NuPoint Voice Application Defaults
©
Copyright 2002, Mitel Networks Corporation 12
Page 13

Mitel NuPoint Messenger Technical Documentation - Release 7.0
Parameter NuPoint Voice Application
Default
Administrator’s mailbox number 998
Allow dial an extension for callers N
Allow dial an extension for users N
Allow multiple messages for outside caller Y
Answer delay 0
Attendant’s mailbox number 999
Attendant transfer string S+
Dial by name, last name first Y
Exact match break Y
General greeting mailbox number None
Group name None
Key 0 for attendant transfer N
Line group number 1
Line(s) in group All on server
Mailbox dialing plan 3,3,3,3,3,3,3,3,3
Number of names threshold 3 names
Passcode length 4 digits min. – 10 digits max.
Passcode trip count 5
Passcode trip period 24 hours
Pre-company name dial string None
Pre-mailbox greeting dial string None
Prompts language English
Single digit access None
Speech quality for messages 18
Speech quality for names and greetings 18
Suppress mailbox number None
System attendant’s extension 0
Wait prompt Y
Weekend days table DDDDDNN
Work day 8 a.m. – 5 p.m.
NuPoint Voice Application Worksheet
Use the NuPoint Voice Application Worksheet (Figure 2-2) to organize the data. The rest of this
chapter explains concepts you need to know for completing the worksheet and using it to
configure the NuPoint Voice application.
The following paragraphs explain sections of the worksheet. Pre-programmed (default) values are
given, where applicable. If you want to use a default value, indicate that fact on the worksheet.
Then you do not have to select or enter any information for that parameter during reconfiguration.
Configuration Types
The NuPoint Voice application has two different kinds of configuration, online and offline. The
©
Copyright 2002, Mitel Networks Corporation 13
Page 14

Mitel NuPoint Messenger Technical Documentation - Release 7.0
NuPoint Voice Application Worksheet is divided into these two types to help you enter settings
into the console in the right order.
Offline configuration
up line groups.
modified at any time. Many offline and online configuration settings work together, so there are
two kinds of online configuration: the active and the inactive configuration.
The
active configuration
to it take effect immediately after exiting the menus. The
configuration that is in reserve; changes made to it do not take effect until you perform an
additional step. This option should be used when you also make change s in the offline
configuration. Then you
online (inactive) and offline.
Figure 2-1 shows the relationship between the different configuration types.
handles server settings that cannot be changed immediately, such as setting
Online configuration
is the online configuration currently in use, and any changes you make
activate the configuration
Figure 2-1 Handling Configuration Types
Figure 2-2 Sample NuPoint Voice Application Worksheet
includes the remainder of server settings that can be
inactive configuration
to implement all the changes you made, both
is the online
Defining a Line Group
All NuPoint Messenger server ports (telephone lines) are assigned to line groups. Each line
group, in turn, is assigned to a single application, and any programming that is done for that
application applies to every port in the line group. The number of ports you assign to each line
group depends on how heavy you expect the phone traffic to be for the particular application.
At the PBX or CO level, all telephone lines connected to the ports of an individual line group are
typically assigned to a hunt group, ACD group, UCD group, etc. to ensure that incoming calls are
answered by the first port that is available for the particular application.
Line Group Number
Each line group is represented by a discrete number. Valid line group numbers are 1 through 24.
The preset default for the NuPoint Voice application is 1.
Group Name
The group name identifies the line group’s purpose. For example, a line group co uld be called
“Message Center.” There is no default group name.
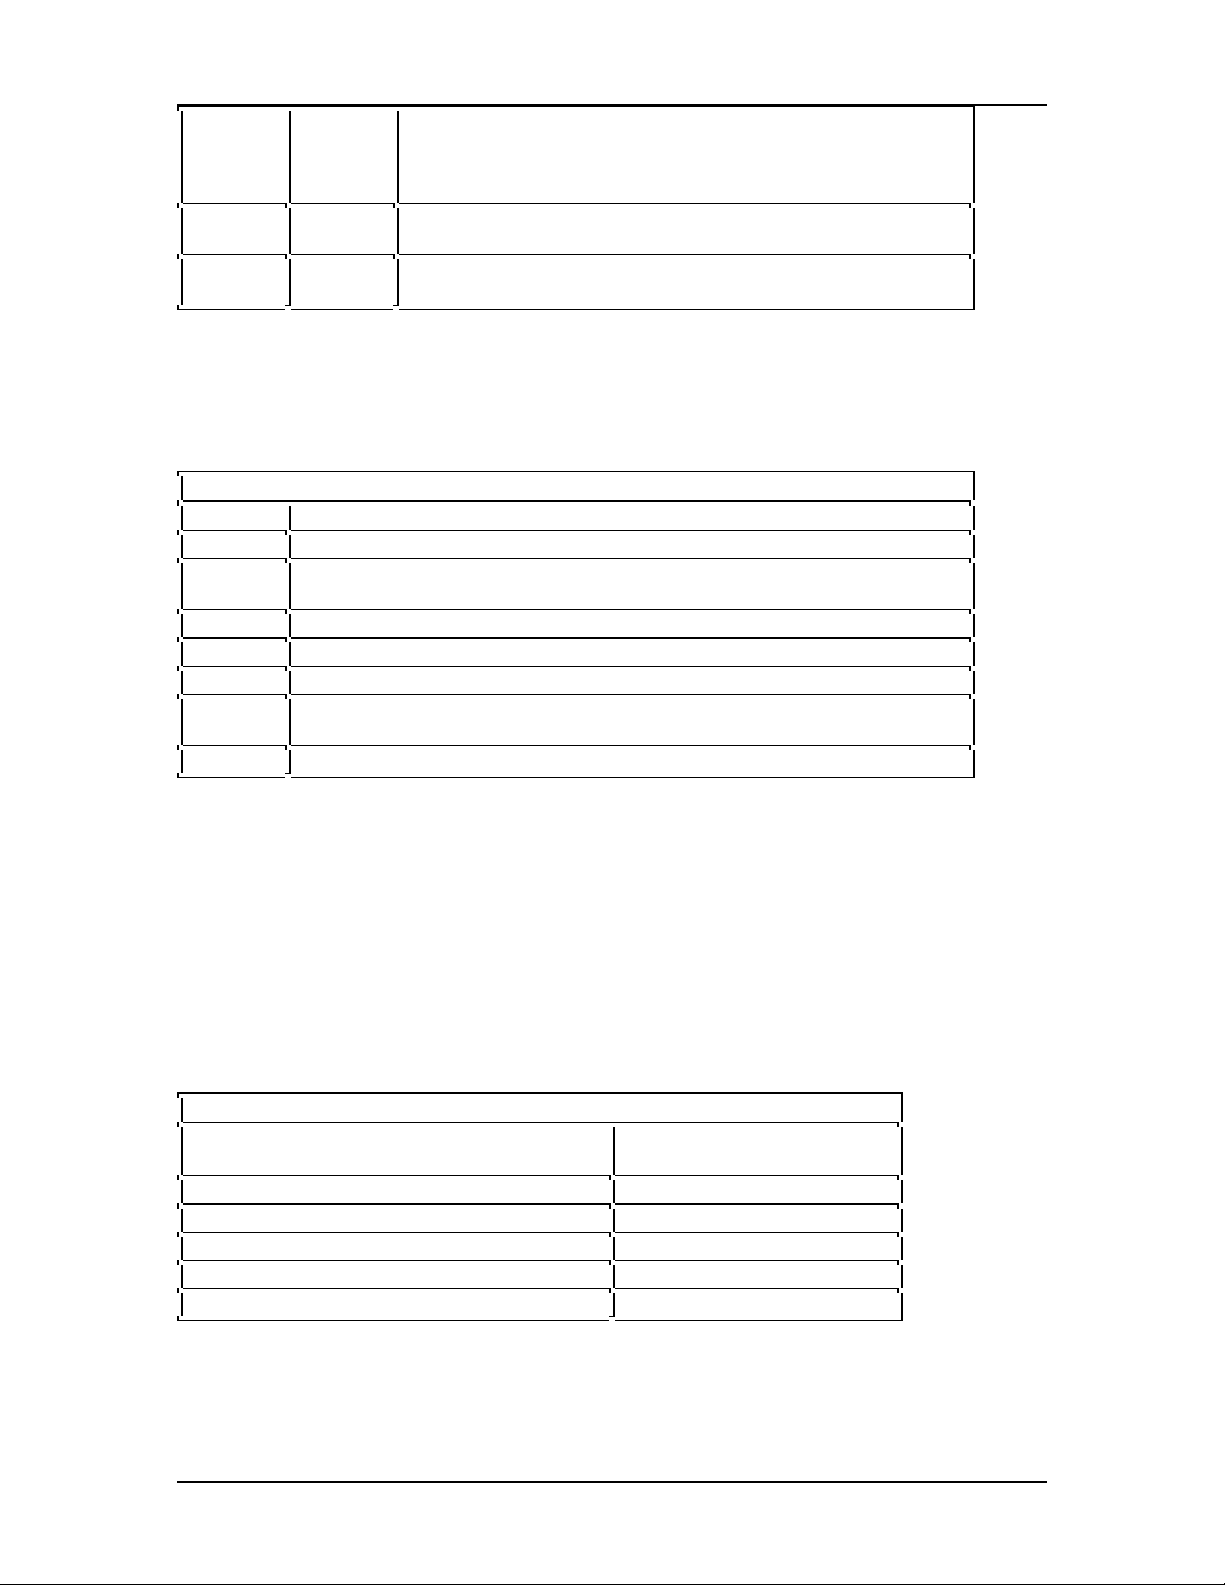
Line(s) in Group
You identify each line (or port) in a group with three identifiers, which indicate a module, a line
card, and a port on a line card. “Module” refers to a CPU, the server’s main processor. Modules
are numbered from 1 through 4. Line cards are numbered 0 through 15. Each line card has a
number of ports, and you can connect one telephone line to each port. Port numbering also starts
at 0 and the upper limit depends on the type of line card you are using. The set of three identifiers
(module, line card, and port) is called a “triplet,” and is used in this format:
The default setting has all telephone lines on the server assigned to group 1.
©
Copyright 2002, Mitel Networks Corporation 14
Page 15
Mitel NuPoint Messenger Technical Documentation - Release 7.0
If you have more than one line in the group, separate the line numbers by commas as you enter
them on the worksheet. For example, write 1:0:0,1:0:1,1:1:0 since this is how you must enter
them. If you are entering a range of lines, you must use the full triplet on both sides of the range,
such as 1:0:0-2:7:2 for everything on module 1, and everything on module 2 up to slot 7, port 2.
(You can omit the module number if it is module 1; for example, 0:1-3:7.) For each module, line
card, and port,s.here are several valid values. Table 2-2 describes them.
Table 2-2 Module, Line Card, and Port Values and Interpretations
Valid Value Interpretation
Module blank Module 1
number Specified module
Line card * All line cards controlled by the specified host
number Specified line card
Port * All ports on the specified line card(s)
number Specified port
As Table 2-2 implies, there are many possible combinations. Table 2-3 shows several examples
of valid module, line card, and port combinations and how the server interprets them.
Table 2-3 Module, Line Card, and Port Combinations
Expression Interpretation
1:* All the line cards controlled by module 1 on a multi-
module server; for a single-module server this means all
ports on line card 1
1:2:* All ports controlled by module 1, line card 2
1:0-3:7 Module 1, all ports on line cards 1-3 (assuming 8-port
cards)
2:1:2, 2:2:0-2:3:7 Module 2, line card 1, port 2 plus all ports on line cards
2 and 3 (assuming 8-port cards)
Configuring the Application
Configuring the NuPoint Voice application consists of establishing day and night hours,
establishing a mailbox dialing plan, specifying call transfers and the use of attendants, and
identifying administrator’s and attendant’s mailboxes.
You must also decide whether to configure other operations such as a wait prompt, the default
language for prompts, and passcodes.
Day and Night Hours
The NuPoint Voice application can issue different company greetings for day answering and
night/weekend answering. With the NP Receptionist optional feature, the software can treat
individual extensions differently when calls are received during night and weekend hours, rather
than during normal business hours. The hours that constitute a normal work day, and the days of
the week that are considered a weekend, can be customized for the individual installation. The
company greeting is the greeting in the administrator’s mailbox.
Day and night hours are scheduled for each line group. If you have different day and
night/weekend hours for each line group on the server, the greeting that an outside caller he ars
©
Copyright 2002, Mitel Networks Corporation 15
Page 16

Mitel NuPoint Messenger Technical Documentation - Release 7.0
depends on the line group used to access the mailbox. Of course, if you don’t record any custom
greetings then all callers hear the same default greeting.
Start Time of the Work Day
This is the time for the start of the work day in the format “hh:mm AM (or PM)”; where hh is the
hour and mm is the minute. The default start time for the work day is 8 a.m. If neither AM nor PM
is specified, the server assumes that the time is AM.
End Time of the Work Day
This is the time for the end of the work day in the format “hh:mm AM (or PM)”; where hh is the
hour and mm is the minute. The default end time for the work day is 5 p.m. If neither AM nor PM
is specified, the server assumes that the time is PM.
If you want to use the same greeting 24 hours a day, enter “12:00AM” in both Start and End time.
Weekend Days Table
This is a table that tells the NuPoint Voice application when to treat calls that are answered during
the work day interval (as specified in the two entries above) as day calls, and when to treat these
calls as night/weekend calls. The table starts with Monday. The default value is DDDDDNN,
which means that the work days are Monday through Friday, and the weekend days are Saturday
and Sunday.
Mailbox Dialing Plan
The mailbox dialing plan is a string of nine elements. The elements in the string define, by
position, the number of digits in valid mailbox numbers. The first element shows the number of
digits allowed for mailboxes that begin with 1. The next element shows the number of digits
allowed for mailboxes that begin with 2, and so on up to mailboxes that begin with 9. Each
element is separated by commas.
You must reenter the entire mailbox dialing plan when you change any element.
Valid mailbox numbers can be up to 11 digits long, so valid numeric elements can be 0 (zero)
through 11. When an element is zero, no mailboxes beginning with that digit are allowed.
0, 3, 3, 7, 3 3, 3, 3, 10,
For example, if your dialing plan is
interprets the string as follows:
Table 2-4 Mailbox Dialing Plan Example (0,3,3,7,3,3,3,3,10)
Digit Element Interpretation
1 0 No mailboxes start with 1. Mailbox numbers 1, 11, 111, and so
on are all invalid.
2 3 Mailboxes starting with 2 are three digits long. Mailbox numbers
2, 22, 2222 are invalid. Mailbox numbers 222 and 246 are valid.
3 3 Mailboxes starting with 3 are three digits long. Mailbox numbers
3, 33, and 3333 are invalid. Mailbox number 333 is valid.
4 7 Mailboxes starting with 4 are seven digits long. Valid mailboxes
are 434-1234 and 499-8765.
,
the NuPoint Voice application
©
Copyright 2002, Mitel Networks Corporation 16
Page 17
Mitel NuPoint Messenger Technical Documentation - Release 7.0
5
6
7
8
9 10 Mailbox num bers starting with 9 are ten digits long. Valid
1 0 No mailboxes start with 1. Mailbox numbers 1, 11, 111, and so
3
3
3
3
Mailboxes starting with 5, 6, 7, and 8 are three digits long.
mailbox numbers are 916-456-7777 and 912-456-7777.
on are all invalid.
The default dialing plan is
Other entries allowed in the dialing plan allow other NuPoint Messenger server features. Table 25 lists these entries for your reference.
Table 2-5 Dialing Plan Elements
Element Explanation
0-11 Length of the mailbox. Zero means none may start with this number.
V Variable number (1 through 11) of digits; server uses timeout to determine
end of mailbox number
M Analog networking (AMIS) mailboxes leading digit
A Dial-by-Name (ASCII) leading digit
T Call placement leading digit
An Networked mailboxes, n = mailbox number length. NV (variable number
length) acceptable
Pn Network mailbox prefix used, n = mailbox length including prefix digit
3,3 3,3 3,3 3,3,3
, , ,
meaning all mailboxes have 3 digits.
If the extension numbers at your site use too many starting digits to implement all these
capabilities in your dialing plan, you could use the optional star prefix dialing plan, described
below.
Optional Star Prefix Dialing Plan
The dialing plan described above tells the NuPoint Voice application how to handle DTMF digits 1
through 9. If you have mailbox numbers and other features that use all ten of these digits, you
can implement the optional star prefix dialing plan. This allows additional features using digit entry
followed by the star (*) key. You can implement several features with the optional dialing plan, as
shown in Table 2-6.
Table 2-6 Optional Star Prefix Dialing Plan Capabilities
Optional Dialing Plan Choices Counterpart in Regular
Dialing Plan
Dial-by-Name A
Analog Networking M
Networking without prefix N
Networking with prefix P
Call Placement T
PBX Considerations
A PBX only allows a certain range of extension numbers. Ideally, employees’ mailbox numbers
©
Copyright 2002, Mitel Networks Corporation 17
Page 18

Mitel NuPoint Messenger Technical Documentation - Release 7.0
should match their extension numbers. This makes it easier for callers to remember the proper
mailbox number. If the numbers do not match, and the optional NP Receptionist program is
installed, you can program certain conversion factors to allow the NuPoint Voice application to
match the extension with the correct mailbox number.
If the company has employees in the field who do not have regular PBX extension numbers, you
can give them mailbox numbers that do not fall in the range of allowable PBX extensions, even if
there are enough mailbox numbers in this range. You can reserve these extra mailboxes for
future expansion of in-house staff. For example, if the PBX allows extensions 200 to 399, you can
keep the dialing plan at the default setting of
mailboxes 600 through 799.
3,3,3,3 3 3,3 3,3
, , ,
, and assign all field personnel
Dial-by-Name
To configure the Dial-by-Name function, you need to:
• Change the dialing plan to specify a digit for Dial-by-Name.
• Specify the name dialing sequence.
• Set a threshold for playing matching names.
• Specify whether a caller must enter a complete name or just enough letters to get a match.
• Specify whether a caller can press a single digit to reach a mailbox or must enter the entire
mailbox number.
• Specify whether a caller hears matched names and mailbox numbers or just the matched
names.
• Determine the grouping of access within the Dial-by-Name database (sometimes called
“Partitioned Dial-by-Name”). Even though mailbox owners may all be in the same Dial-byName database, they can only reach others in the database who share the same GCOS
group (in a bit-mapped GCOS) or affinity group. Refer to the GCOS section in Chapter 8 for
more information on GCOSs,
Dialing Plan
In the Dialing Plan Menu, coding a digit with the A element reserves that digit for dialing names.
Name Dialing Sequence
You specify the name dialing sequence with the Last Name First Flag parameter. This parameter
determines whether a user’s name must be dialed in the last name-first name sequence or the
first name-last name sequence. In most cases, callers need not enter user’s full name. When a
caller finishes pressing a series of keys, the NuPoint Messenger server searches a special file for
entries that match the series. If it finds more than one match, it plays the names and mailbox
numbers of the partial matches. If the server finds a unique match, it plays either the user’s name
or personal greeting.
Matching Threshold
Setting a threshold for playing matching names determines the maximum number of name s a nd
mailboxes the server plays in response to a partial name match. A partial name match occurs in
either of these cases:
• Callers enter some portion, but not all, of a recipient’s name.
• Callers enter a complete name, but the server finds more than one recipient that matches the
entry.
©
Copyright 2002, Mitel Networks Corporation 18
Page 19

Mitel NuPoint Messenger Technical Documentation - Release 7.0
If more than one name is found that matches the name dialed, the server plays the specified
number of matching names. A threshold of 3, for example, means that up to three matching
names will be recited, even if there are more than three. If the number of names for a partial
match is greater than the threshold, the server prompts a caller to continue entering letters.
Exact Match Break
Specifying an exact match break determines how callers can enter the partial name of a user.
When “yes” is specified, the caller hears the name and mailbox number play as soon as there is a
match. The caller can, however, end a name entry with the pound (#) key; the caller hears
whatever names match. When “no” is specified and a caller stops entering letters, the server
waits for a time out period before responding; if a caller presses the # key, the server responds
immediately. If the server can determine exactly who the intended recipient is, it plays that
recipient’s name (and mailbox number if not suppressed). Alternatively, the server plays, for
outside callers, that recipient’s personal greeting. If more than one recipient’s name matches the
caller’s input, the server plays the names and mailbox numbers of the possible recipients. A caller
can interrupt the server during name or greeting play by pressing any key on the telephone
keypad.
Single Digit Access
Specifying single digit access means that a caller can enter a single digit to reach a mailbox after
matched names have been played, similar to a tree mailbox operation. When single digit access
is allowed, a match with the name dialed by a caller causes the server to play a prompt such as:
“There are three entries: Jean Brown, mailbox 4321, press 1; John Brown, mailbox 4222, press 2;
Jill Brown, mailbox 4567, press 3. Enter a mailbox number. Press 0 to return to Dial-by-Name.”
The caller can then press the appropriate digit to reach the desired person instead of entering the
entire mailbox number.
When no single digit access is allowed, a caller must enter an entire mailbox number to reach a
mailbox after matched names have been played. A match with the name dialed by a caller
causes the server to play a prompt like the one shown above except that there is no single digit
stated. The caller must enter the entire mailbox number.
Suppressing Mailbox Numbers
Suppressing the mailbox number means the server omits the mailbox numbers in the list of
names played when there is a match with a dialed name. The default is to include the mailbox
number.
Dial-by-Name Database
Each mailbox that can be reached by name must be configured with an FCOS that includes
feature bit 92, which places users’ mailbox numbers in the Dial-by-Name database. The server
searches this database for entries to match a caller’s input. See the FCOS chapter for more
information on this feature bit and how to implement FCOSs.
Even with all the parameters just described set, a mailbox owner’s name can be listed only when
the mailbox owner’s name is specified in the mailbox configuration. Once all these requiremen t s
are met, the name goes into the database as soon as you exit from the respective configuration
menus.
To make sure there is only one mailbox per user’s name, you can print out a phone book for your
©
Copyright 2002, Mitel Networks Corporation 19
Page 20

Mitel NuPoint Messenger Technical Documentation - Release 7.0
site. This phone book shows the mailbox owners accessible through the Dial-by-Name function
and their mailbox numbers.
Same Digit for Dial-by-Name and Mailbox Numbers
Occasionally you may need the same digit for a Dial-by-Name trigger
With the optional star prefix dialing plan (described above), the digit specified for Dial-by-Name
not
can still be used for mailbox numbers when the digit is
example, that your server has mailboxes beginning with 1 but you also need the digit 1 for Dialby-Name. You can specify 1 as the Dial-by-Name dialing plan digit, which causes the server to
prompt the caller to press 1 and * to dial by name.
followed by a star (*). Suppose, for
and
in a mailbox number.
Transfers and Attendants
The NuPoint Voice application allows you to specify dial strings and methods for transferring
callers, and to specify the use of a wait prompt. If the NP Receptionist optional feature is installed,
you can specify the conditions for a company greeting and mailbox greeting.
Attendant’s Transfer String and System Attendant’s Extension
These two dial strings together describe the steps needed to transfer a call to a live attendant, or
other general assistance number. These steps are PBX-dependent, and can be determined by
actually transferring a call to the attendant from a station set. Use the dial string characters in
Table 2-7.
The attendant’s transfer string contains the coding for all the steps that the PBX must take before
dialing the attendant’s extension number. The default attendant’s transfer string is S+ which
means “do a switch hook flash, then pause for one second.” This string is also used when
transferring a caller to a mailbox attendant’s extension number.
The system attendant’s extension consists of the PBX extension number of the live attendant (or
a “must answer” number, with no mailbox), plus coding that describes any subsequent steps
necessary to complete the call. Up to 30 characters can be entered in this field.
Table 2-7 Transfer Dial String Characters
Character Explanation
0-9, *, # Keys on a standard pushbutton telephone
( The following digits should be dial pulsed (10 PPS)
) Stop pulsing; resume sending DTMF tones
+ Pause for one second
A-D Fourth column DTMF keys
E Go off-hook, wait for dial tone or other steady tone (pager go-ahe ad or
confirmation tone, for example), then do next item in string
F Switch hook flash and wait for dial tone
G Greet - Wait for a voice or computer tone answer
H Hang up (go on-hook)
L Answer supervision - Wait for telephony signal from destination. Use only
with trunk (four-wire) connections.
N Start a new activity; do not go off-hook
O Ring once
P Go off-hook, do not wait for dial tone
S Switch hook flash, no wait required
©
Copyright 2002, Mitel Networks Corporation 20
Page 21

Mitel NuPoint Messenger Technical Documentation - Release 7.0
T Go off-hook, wait for dial tone
V Voice pager: play the first unplayed message and update mailbox
The default system attendant’s extension number is 0. In addition, the NuPoint Voice application
automatically appends an H (hang up) command to the end of the string. This allows the PBX to
drop the call if the caller hangs up before the NuPoint Messenger server completes the transfer to
the attendant. If your PBX does not allow blind transfers to the attendant, add a G (the code for
“wait for a greeting”) to the end of the system attendant’s extension.
If the PBX allows trunk-to-trunk transfer, you can program an off-site system attendant’s
extension number.
Each mailbox can be programmed to direct calls to an intermediate attendant when the caller
requires assistance. In the absence of an intermediate attendant, calls are routed to the system
attendant. Transfer to an attendant can occur in the following situations:
1. When the Key_0 for Attendant Transfer During Greeting parameter is enabled, a caller can
press 0 while listening either to the server greeting or to a mailbox greeting. When 0 is
pressed during the server greeting, the caller is transferred to the system attendant’s
extension. When 0 is pressed during a mailbox greeting, the server first checks the mailbox
for the attendant’s extension number; if none is present, the caller is transferred to the system
attendant’s extension.
2. While logged in, a mailbox owner can press 0 to be transferred to an attendant, if the
mailbox’s FCOS includes feature bit 002 (Can Reach Mailbox Attendant). The server first
checks the mailbox for the attendant’s extension number; if none is present, the caller is
transferred to the system attendant’s extension. (See the Features Class of Service chapter
for more information on FCOSs and feature bits.)
3. If the called party’s mailbox FCOS includes outside caller functions, a caller can press 0, after
recording a message, to send the message and transfer to an attendant. If the message is
left in the attendant’s mailbox, the caller is always transferred to the system attendant. If the
message is left in a personal mailbox, the caller is transferred to the system attendant only if
no attendant’s extension number is present in the mailbox.
4. If the attendant’s mailbox has been deleted, or has a Greeting-Onl y FCOS, and the wait
prompt is enabled, the outside caller who waits is transferred to the system attendant’s
extension.
Key_0 for Attendant Transfer During Greeting
This function designates the 0 key as either an attendant access number or a log in cod e. The
default is N, or disabled.
To enable the Key_0 function, you must enter Y. If this function is enabled, be sure to define a
suitable system attendant’s extension number and dial string.
When the Key_0 for Attendant Transfer During Greeting parameter is enabled:
• The server allows an outside caller to press the zero key, while either the company greeting
or a mailbox greeting is playing, to be transferred to the system attendant’s extension.
• Mailbox owners must log in by pressing the star (
mailbox numbers. The zero key cannot be used to signal a login.
When the Key_0 for Attendant Transfer During Greeting parameter is disabled:
©
Copyright 2002, Mitel Networks Corporation 21
*) key either before or after entering their
Page 22

Mitel NuPoint Messenger Technical Documentation - Release 7.0
• Mailbox owners can press either the zero or star (*) key, before or after entering their mailbox
number, to log in. (The zero option is essential when telephones at the installation-site do not
have a * key.)
Automatic access to the attendant on time out (that is, when the caller waits in response to the
“Please enter a mailbox number or wait” prompt) can be provided, if necessary, by assigning a
Greeting-Only class of service to the attendant’s mailbox. The attendant’s mailbox can then be
used only to make messages of the day.
Pre-Company Name Dial String
The NuPoint Voice application outputs this dial string immediately after going off-hook, and be f ore
playing the Company Greeting (either the standard “Welcome to the message center” prompt, or
the Administrator’s mailbox greeting).
This string is used only if the NP Receptionist (Receptionist) optional feature has been installed
and
on your server,
center number. In this situation, an NP Receptionist port may inadvertently be connected to one
of the ports that is running the message center application. The pre-company name dial string
forces NP Receptionist to drop the call, and instructs the server to wait a designated number of
seconds before playing the company greeting.
There is no pre-programmed default.
employees can manually call forward their phones directly to the message
• The pre-company name dial string must include a pound sign (#). You can configure DTMF A
(fourth column DTMF key) in place of the pound sign if the PBX recognizes the pound tone
as a code for some other function. The port that answers the call issues this tone, which
forces NP Receptionist to release the call. Be aware that callers and mailbox owners always
hear this dial string when a mailbox is reached through the NuPoint Voice applic ation.
• To give the PBX time to make the connection before the company greeting is played,
program a series of plus signs (+++) after the # or A. Each + in the NuPoint Voice application
configuration means “wait one second.” To determine how many pluses are needed, forward
one station to another station, make a test call to the first station, then count the number of
seconds that elapse before the second station rings.
• If the test call showed that it takes two seconds for a forwarded call to connect to the second
extension, for example, use “#++” for the pre-company name dial string.
• You can experiment to find the optimum number of seconds to wait for call connection. If the
first half of the message center greeting does not play when NP Receptionist calls are
forwarded, add more pluses to the string. If there is a long silence before the greeting is
played, delete pluses from the string.
Pre-Mailbox Greeting Dial String
The NuPoint Voice application outputs this dial string immediately after receiving a valid mailbox
number, and before playing the mailbox’s greeting.
This string is used only if 1) the NP Receptionist optional feature has been installed on your
server and 2) employees may manually call forward their phones directly to their mailboxes. In
this situation, an NP Receptionist port may inadvertently be connected to one of the ports that is
running the message center application. The pre-mailbox greeting dial string force s NP
Receptionist to drop the call, and instructs the server to wait a designated number of seconds
before playing the mailbox greeting.
There is no pre-programmed default. The same conditions apply as listed above in “PreCompany Name Dial String.”
©
Copyright 2002, Mitel Networks Corporation 22
Page 23

Mitel NuPoint Messenger Technical Documentation - Release 7.0
Wait Prompt
When the Wait prompt is enabled, the server issues the prompt “Please enter a mailbox number,
or wait” immediately after the server greeting is played. The default value is Y (enabled).
To disable this prompt, you must enter N. In some cases, you must disable the Wait prompt for
any number of reasons, among them:
• To record the company greeting (administrator’s mailbox greeting) and the Wait prompt in the
same voice. The text of the Wait prompt is recorded as the last sentence of the company
greeting.
• When neither a system attendant’s number nor an attendant’s mailbox is defined, and the
Wait prompt is enabled, callers who wait are thanked for calling, then disconnected.
• If you disable the Wait prompt and are using the Dial-by-Name function, you must record the
“Press [digit] to dial by name” prompt in your own voice. The server prompt for Dial-by-Name
plays if the Wait prompt is enabled.
Administrator’s Mailbox Number
The initial software installation contains 10 possible default administrator’s mailboxes. They are
as follows:
98 9999998
998 99999998
9998 999999998
99998 9999999998
999998 99999999998
Since the default dialing plan is 3,3,3,3,3,3,3,3,3, the default administrator’s mailbox number is
998. If the ninth position digit is changed to any number between 2 and 11, the default
administrator’s mailbox number should be changed to the corresponding 9.....8 number. An error
message is generated if the number does not match the mailbox dialing plan.
The administrator’s mailbox can be any mailbox number on the server; but if you select a mailbox
number other than one of the defaults, you must create the mailbox before it can be used. The
mailbox number you select must be allowed by the Dialing Plan.
Note: For server securit y, you should change the administrator’s mailbox number from the default. (See
“Mailboxes” in the task list for administrator’s mailbox procedures, Volume 2 of this manual.)
The administrator’s mailbox number has special privileges:
• The administrator’s mailbox day and night greetings are the day and night company
greetings. If you do not record one or both of these greetings, the default (“Welcome to the
message center”) is played instead.
• Distribution lists that are created from the administrator’s mailbox are server-wide master lists
that can be used by any mailbox owner on the server.
• The system administrator may add/delete/modify mailboxes over the telephone, from the
Telephone Administration Menu.
Attendant’s Mailbox Number
The initial software installation contains 10 possible default attendant’s mailboxes. They are as
©
Copyright 2002, Mitel Networks Corporation 23
Page 24

Mitel NuPoint Messenger Technical Documentation - Release 7.0
follows:
99 9999999
999 99999999
9999 999999999
99999 9999999999
999999 99999999999
Since the default dialing plan is 3,3,3,3,3,3,3,3,3, the default attendant’s mailbox number is 999. If
the ninth position digit is changed to any number between 2 and 11, the default attendant’s
mailbox number should be changed to the corresponding 9.....9 number. An error message is
generated if the number does not match the mailbox dialing plan.
The attendant’s mailbox can be any mailbox number on the server; but if you select a mailbox
number other than one of the defaults, you must create the mailbox before it can be used. The
mailbox number you select must be allowed by the Dialing Plan.
Note: For server securit y, you should change the attendant’s mailbox number from the default. (See
“Mailboxes” in the task list for attendant’s mailbox procedures, Volume 2 of this manual.)
The attendant’s mailbox also has special privileges:
• Its greeting is the message of the day. This message is heard by all mailbox owners whose
FCOSs include feature bit 043 immediately after they log in. The message is played twice
(after two separate logins), the first time hard-played and the second time soft-played. (Hardplayed prompts cannot be interrupted; soft-played prompts can.)
• The message of the day is stored only in the attendant’s mailbox. Once it has been deleted,
no mailbox owners hear the message, even if they have not logged in since the last message
was created. Conversely, if an old message of the day is not deleted, or replaced by a new
message, all newly created mailboxes receive the outdated message. For procedures on
enabling and disabling the message of the day, see “NuPoint Voice Application” in the task
list, Volume 2 of this manual.
• A customized site tutorial greeting can also be recorded from the attendant’s mailbox. When
the system administrator presses G to record a company greeting, the server prompts, “Press
M to record the message of the day; press T to record a site tutorial.” See “NuPoint Voice
Application” in the task list for procedures on recording a site tutorial, Volume 2 of this
manual.
• When outside callers access the message center, they are prompted to “Please enter a
mailbox number or wait” after the company greeting is played. Callers who wait (because
they have rotary dial phones, or do not know the correct mailbox number, for example) are
then prompted, “Please leave your name, the name of the person you are calling, and a
message.” These unaddressed messages go into the attendant’s mailbox.
Multiple Attendant’s Mailboxes
If a large number of unaddressed messages is expected, up to five Attendant’s Mailboxes may be
configured by entering the mailbox numbers, separated by commas (for example, 999, 910, 911,
912, 913). The message of the day and the site tutorial can be made only from the first
attendant’s mailbox that is configured; the other mailboxes are used only for storing unaddressed
messages. When the first mailbox is full, NuPoint Voice begins using the second mailbox until it is
full, and so on until all attendant’s mailboxes are full.
You can configure any mailbox as the attendant’s mailbox by entering the mailbox number in this
field. If you select a mailbox number other than one of the defaults, you must create the mailbox
before it can be used. (See “Mailboxes” in the task list.)
©
Copyright 2002, Mitel Networks Corporation 24
Page 25

Mitel NuPoint Messenger Technical Documentation - Release 7.0
Disabling the Attendant’s Mailbox
When an outside caller accesses the message center number, NuPoint Voice issue s the prompt,
“Please enter a mailbox number or wait.” Callers who wait are prompted to leave a message in
the attendant’s mailbox. Some installations require these callers to be transferred to the system
attendant’s extension, instead. There are two ways to do this:
• If the system administrator does not issue messages of the day, delete the attendant’s
mailbox.
• Assign a Greeting-Only FCOS to the attendant’s mailbox.
Note: If you disable the atten dant’s mailbox, and you do not define a system attendant’s extension
number, be sure to disable the Wait prompt. Otherwise, when a caller waits, NuPoint Voice says
“Thank you for calling,” then hangs up!
Default Language for Prompts
This entry specifies the primary language in which prompts are issued. The default language is
English. You must purchase and install language prompts diskettes in order to use any other
language on your server. Table 2-8 lists some of the languages available. Contact your di stributor
for further information.
A mailbox’s LCOS can specify a different prompts language. The prompts set of diskettes in the
secondary language must be installed before these mailboxes issue any prompts at all. Callers
hear prompts in the default language.
Table 2-8 Some Supported Languages
Full Set and Hotel Set Full Set Only
American English Australian, British, or New Zealand English
French NP TDD
Japanese
German
Korean
Latin American or Mexican
Spanish
Mandarin
Portuguese
A server can have one default language and up to eleven alternate languages, depending on the
number and size of the hard drives. For more details about the number and kinds of languages
supported, see the Other Classes of Service chapter.
NP TDD can be installed like any of the language prompts. If NP TDD is installed, selecting it as a
response to the Default Language for Prompts parameter enables the NP TDD feature of the
NuPoint Voice application in the current line group. When any mailbox owner receives or makes a
call through that line group, NP TDD replaces voice prompts with TDD tones. (See “NP TDD for
the Hearing Impaired” below for more information.)
NP TDD for the Hearing Impaired
The NP TDD feature of the NuPoint Voice application supports telecommunications devices for
the deaf (TDDs). With NP TDD, hearing-impaired mailbox owners can receive TDD-generated
©
Copyright 2002, Mitel Networks Corporation 25
Page 26

Mitel NuPoint Messenger Technical Documentation - Release 7.0
text from other users.
NP TDD users can be notified about messages by message waiting lights or any other message
waiting indication supported by a NuPoint Messenger server, just as other users can.
Outside callers with a TDD can call a mailbox configured for NP TDD prompts, be answe red by a
TDD greeting, and leave a message for the mailbox owner. Standard user options such as
reviewing and recording over a message, making a message urgent, appending to a message,
and dialing an extension are also allowed.
Configuring NP TDD
You can configure NP TDD to apply to either an entire line group or specific mailboxes. To
configure NP TDD, make the following changes:
• Set the default language for prompts to TDD in the NuPoint Voice application (if configuring
the line group).
• Assign an NP TDD LCOS or another LCOS specifying NP TDD as the prompts language to
any mailboxes using NP TDD. This LCOS should also have the Greeting Length and User
Name Length limits parameters appropriately set for NP TDD.
• Change the Stop Record Timeout and Dial Tone Detect Time telephony parameters
(phoneline exceptions) for the line group in which NP TDD is configured.
Refer to the Task List (Volume 2 of this manual) for specific instructions on configuring NP TDD.
For more information configuring NP TDD, refer to
NP TDD Configuration Note 14
.
Effect of NP TDD on Other Server Features
Certain NuPoint Messenger server features and user options are not available to any mailbox
associated with the line group in which NP TDD is configured. These features are:
• NP WakeUp optional feature
• Call scheduling for pages
• Future delivery
• Standard tutorial
Answer Delay
You may set a variable answer delay with the Delay Before Answer parameter. The default for
this parameter is zero (no delay), and in most cases, it does not need to be changed. A delay of
up to 1/2 second can be required for certain applications (for example, the NuPoint Voice
application and the NP Receptionist optional feature) that use E & M trunks.
Users need to use this delay if the application software sometimes answers an incoming call
before all the digits are received, causing the switch to stop sending digits. This can happen when
E & M trunks are being used.
The Delay Before Answer parameter can be helpful with other types of trunks and applications. In
cases where the DID application does not work for a custome r be cause the server answers too
fast, this parameter should resolve the problem.
Note: The answer delay for the first call into a port after any online configuration change (FCOS, LCOS,
GCOS, NCOS, line group, phoneline exceptions) is up to a second longer than for subseque nt calls
©
Copyright 2002, Mitel Networks Corporation 26
Page 27

Mitel NuPoint Messenger Technical Documentation - Release 7.0
on the port. Consequently, changes to the answer delay parameter do not become effective until the
second call is made into the port.
Mailbox Passcodes
NuPoint Messenger includes security devices to protect your installation at a server level and
mailbox level. A device for use at the mailbox level is mailbox passcodes, which you configure
through the NuPoint Voice application. The following paragraphs outline the configuration of
mailbox passcodes; for more complete information, see the Server Security chapter.
Minimum and Maximum Passcode Length
Minimum and maximum passcode length sets the range for the number of digits a passcode can
be.
Enter the minimum number of digits that constitute a valid passcode for users of this line group.
The minimum passcode length can be any number from 4 through 10. The default value is 4. This
means no user can enter a new passcode shorter than 4 digits. If you want users to have longer
passcodes (for security reasons) then you can specify a larger minimum length.
Enter the maximum number of digits that constitute a valid passcode for users of this line group.
The maximum passcode length can be any number from 4 through 10. The default value is 10.
If you leave the maximum passcode length at the default, 10, then all passcodes can be no
longer than 10 digits. You cannot enter a value greater than 10, and users cannot enter a
passcode longer than 10 digits.
Passcode Trip Count, Passcode Trip Period
These two entries set the parameters for the passcode break-in warning, which is a server
security feature. The default values for the passcode trip count and the passcode trip period are 5
and 24. This means that a warning is issued to a mailbox if someone attempts to enter an
incorrect passcode for that mailbox at least 5 times (the passcode trip count) within a 24 hour
period (the passcode trip period).
The passcode trip count can be set to any value from 0 to 255. The passcode trip period can
range from 0 to 240 hours. In both cases, zero means the passcode break-in warning function is
disabled.
The passcode break-in warning function is enabled when you configure both a trip count and trip
period.
Using the NuPoint Voice Application
This section covers the final steps toward using the NuPoint Voice application.
Activate Changes
After the necessary configuring has been completed, and you have returned to the Main Menu,
the NuPoint Messenger server makes all active configuration online changes e ffective
immediately.
©
Copyright 2002, Mitel Networks Corporation 27
Page 28

Mitel NuPoint Messenger Technical Documentation - Release 7.0
WARNING!
Activating the inactive configuration causes the server to restart all tasks,
resulting in an interruption to call processing. You should perform the
next step only during periods of low call traffic.
To make offline and inactive online configuration changes take effect, activate the inactive
configuration. When you activate the inactive configuration, the server automatically shuts down
and resets the software to the new configuration, then returns to the NuPoint Voice Active
Configuration Menu.
Create Mailboxes
The final step for making NuPoint Voice operational is to create mailboxes. Refer to the
Mailboxes chapter for more information.
If the administrator’s or the attendant’s mailbox is set to a number other than the default, you
must create the mailbox before using it. Identifying the mailboxes in the NuPoint Voice application
line group gives them the ability to perform their special functions, but the functions are not
enabled until the mailboxes are added to the server. The recommended FCOS for both mailboxes
is 10 (VIP), the LCOS is 1 (Default), the GCOS is 1, and the message waiting type should be
whatever is available for your server.
Record a Company Greeting
When callers reach NuPoint Voice by dialing its number, they hear the administrator’s mailbox
greeting, which is the company greeting. (DID callers hear the mailbox’s personal greeting.) It is
possible to record separate day and night greetings. See the Mailboxes chapter for more
information.
Test the Configuration
After phone lines have been installed, and you have completed all the applicable steps discussed
so far, test your NuPoint Voice application. See the task list for the procedure in Volume 2 of this
manual.
3 DID NuPoint Voice Application
This chapter covers:
• Overview of the DID NuPoint Voice application
• Default software configuration
• DID NuPoint Voice Application Worksheet
• Line group definition
• Configuring the application
• Using the DID NuPoint Voice application
• Usage Considerations
©
Copyright 2002, Mitel Networks Corporation 28
Page 29

Mitel NuPoint Messenger Technical Documentation - Release 7.0
Overview
The DID NuPoint Voice application is a software application that uses the DID lines to answer a
call with the mailbox owner’s personal greeting. In other words, the DID NuPoint Voice
application gives the server the ability to manipulate and translate the digits received from the
Central Office (CO).
Each voice mailbox owner has either a four digit telephone number or seven digit telephone
number, depending on the digits received from the CO. Calling that number causes the
telephone company’s central office to seize one of the several DID lines connecting the CO to the
NuPoint Messenger server, and to dial some or all of those digits into the server. The server
matches the dialed number to the appropriate mailbox, and answers with the personal greeting of
the mailbox owner.
DID mailboxes allow callers to dial a telephone number that is answered with the mailbox
greeting. While some servers can use the PBX’s forwarding capability to allow the server to
answer calls with the user’s mailbox greeting, DID mailboxes answer the calls directly.
To use the DID NuPoint Voice application on your server, you should confirm that the line cards
are set to DID settings. You must also perform any necessary server level configuration. Server
level configuration through the DID NuPoint Voice application involves two steps: defining the line
group, and configuring the application. In the first step, you assign server ports to the DID
NuPoint Voice application. In the second step, you customize the application for your server.
Procedures covering these steps are listed below, and presented in detail in Volume 2 of this
manual.
A third step is necessary if your CO requires wink start: you need to make a phoneline exception.
Once you have completed the DID NuPoint Voice application configuration, you need to activate
changes, create mailboxes, and test the configuration. Procedures covering these steps are
listed below.
When configuring the DID NuPoint Voice application, it helps to keep in mind the DID sequen ce
that occurs between the server and the CO. Figure 3-1 gives a general view of the progress of a
typical DID call into the server.
Figure 3-1 Typical Steps in the DID Sequence
Procedures
You can perform the following procedures with the DID NuPoint Voice application. These
procedures are located in Volume 2 of this manual.
Procedure Number
DID VoiceMemoConfiguration CP 3320
Set Parameters for Digit Absorption and Offset CP 6000
Test the DID NuPoint Voice Application CP 3413
DID NuPoint Voice Application Worksheet
Use the DID NuPoint Voice Application Worksheet (Figure 3-2) to organize the data. The rest of
©
Copyright 2002, Mitel Networks Corporation 29
Page 30

Mitel NuPoint Messenger Technical Documentation - Release 7.0
this chapter explains concepts you need to know for completing the worksheet and using it to
configure the DID NuPoint Voice application.
Sections of the worksheet are explained in the following paragraphs. Pre-programmed (default)
values are given, where applicable. If you want to use a default value, indicate that fact on the
worksheet. Then you do not have to select or enter any information for that parameter during
reconfiguration.
Many of the parameters on this worksheet are identical to those explained in the NuPoint Voice
Application chapter. The parameters that are the same are identified in the following sections,
and you can refer to the NuPoint Voice Application chapter for the information you need.
Defining a Line Group
When you configure a line group, you dedicate certain ports to a single application. After you
arrange line groups, you set parameters for the entire group, which eliminates the need to ent er
information for each individual port. For example, you can assign all ports for the DID NuPoint
Voice application to a single line group; then you can specify the dial plan, dial strings, etc., for
this entire group. The server software recognizes line groups by their number.
Line Group Number
Each line group is represented by a discrete number. Valid line group numbers are 1 through 24.
Group Name
The group name, though optional, should identify the line group’s purpose. For example, a line
group could be called “DID SYS.” There is no default group name.
Line(s) in Group
You identify each line (or port) in a group the same as for the NuPoint Voice application. For
more information on identifying lines in a group, see the NuPoint Voice Application chapter.
Configuring the Application
Configuring the DID NuPoint Voice application consists of configuring digit manipulation, then, as
with the NuPoint Voice application, establishing day and night hours, establishing a mailbox
dialing plan, specifying call transfers and the use of attendants, and identifying administrator’s
and attendant’s mailboxes. You must also decide whether to configure other operations such as
a Wait prompt, the default language for prompts, and passcodes.
Digit Manipulation
The CO typically transmits, as requested, the last three, four, five, or seven digits of the dialed
number. The server accepts the transmitted digits and the application software manipulates them.
Digit manipulation means one or more of the following:
• Ignoring one or more of the leading transmitted digits
• Adding a fixed quantity (offset) to the received digits
• Subtracting a fixed quantity from the received digits
©
Copyright 2002, Mitel Networks Corporation 30
Page 31

Mitel NuPoint Messenger Technical Documentation - Release 7.0
When the server has received the proper number of digits, it answers the call with the mailbox
owner’s greeting.
Digits Expected
Enter the number of digits that are supplied by the CO to this DID trunk group (1-11 digits).
Digits Absorbed
If the number of digits expected is greater than the number of digits in a valid mailbox number,
the DID NuPoint Voice application can be programmed to ignore or “absorb” these extra digits.
The digits are absorbed in the order received. For example, if Digits Absorbed = 2, the software
absorbs (ignores) the first two digits that it receives. See examples 1 and 2 at the end of this
discussion for a more complete illustration of this operation.
On the DID NuPoint Voice Application Worksheet, enter the number of digits supplied by the CO
to this DID trunk group that are to be ignored or “absorbed” (1 through 9 digits).
Offset (+/-)
Ideally, the digits that the server receives from the CO should match the mailbox number. If this
is not possible, the server must map these digits (or convert them) into the corresponding mailbox
numbers. One method of doing this is to absorb digits, as mentioned above. Another option
(which can be combined with the absorption of digits) is to add a signed offset number:
• To subtract from prefix digits, use a minus (-) offset.
• To add to prefix digits, use a + offset.
• Use offset = 0 to pass digits through unchanged.
The process of mapping DID received digits into mailbox numbers can be seen in the following
examples:
Figure 3-2 Sample DID NuPoint Voice Application Worksheet
Example 1. Assume:
Digits expected 4
Digits absorbed 1
Offset -100
This means that any set of four digits, as received on DID, maps as follows:
3275 (digits received on DID)
275 (absorb one digit)
-100 (add signed offset)
175 (mailbox number)
Under the same circumstances, receiving a sequence of 3276 result s in mailbox number 176, a
3280 is converted to mailbox number 180, and so on.
Example 2. Assume:
Digits expected 2
©
Copyright 2002, Mitel Networks Corporation 31
Page 32

Mitel NuPoint Messenger Technical Documentation - Release 7.0
Digits absorbed 0
Offset 200
This means that any set of two digits received on DID maps as follows:
17 (digits received on DID)
17 (do not ab sorb any digits)
+200 (add signed offset)
217 (mailbox number)
Notice that, given the DID parameters in example 2, only mailbox numbers 200 through 299 can
be accessed from this DID trunk.
Example 3. This example illustrates a situation where the offset plus the dialed number leads to
digit carrying. Assume:
Digits expected 4
Digits absorbed 0
Offset 250
This means that any set of four digits received on DID will map as follows:
1587 (digits received on DID)
1587 (do not absorb any digits)
+250 (add signed offset)
1837 (mailbox number)
Note: DID NuPoint Voice us es “normal” addition, adding 1587 and 250 to get 1837. Applications using
“no-carry” math, such as Enhanced Inband, add each digit separately, discarding any ca rried digits.
Day and Night Hours
Parameters that establish day and night hours (and work days versus weekend days) operate in
the DID NuPoint Voice application the same as in the NuPoint Voice application. See the
NuPoint Voice Application chapter for more information.
Mailbox Dialing Plan
The available DID number block may only allow a certain range of extension numbers. Ideally,
mailbox numbers should match the DID numbers. This makes it easier for callers to remember
the proper mailbox number. While a mailbox owner with a single mailbox could get along fine
without ever knowing his mailbox number, owners of multiple mailboxes often need access to a
series of mailboxes without the inconvenience of making a telephone call to each DID number.
This is a particularly valuable feature for mailbox owners who are traveling and call from a long
distance away.
In all other respects, you establish a DID NuPoint Voice mailbox dialing plan the same as
described for NuPoint Voice. For more information on the dialing plan, see the NuPoint Voice
Application chapter.
©
Copyright 2002, Mitel Networks Corporation 32
Page 33

Mitel NuPoint Messenger Technical Documentation - Release 7.0
Transfers and Attendants
Note: Tr ansfers involving a pre-company name dial string, a pre-mailbox greeting dial string, and a system
attendant’s extension generally are not used in DID applications. However, if the switch integrated
with your installation does support these operations, the following paragraphs appl y.
Pre-Company Name Dial String
This string is the sequence of digits or pauses that the server inserts before playing the com pany
greeting (administrator’s mailbox greeting). It is generally not used in DID applications.
Pre-Mailbox Greeting Dial String
Similarly, this is the string of activities that the server executes before playing out a mailbox
greeting. In some telephone offices, the forwarding and answer is so fast that it is disconcerting
to some callers. Putting a + sign in this position causes the server to wait a second after
answering, before playing the greeting.
For more information, see the NuPoint Voice Application chapter.
System Attendant’s Extension (Optional)
The DID NuPoint Voice application supports Return to Operator for DID line g rou ps. The system
attendant’s extension is used to process the call being returned to the operator.
In most cases, DID NuPoint Voice does not use a system attendant’s mailbox, extension, or dial
string. This is because only some COs support this feature. If your CO does support Return to
Operator, then you should also configure the Key_0 for Attendant Transfer During Greeting
parameter and the Attendant’s Transfer String parameter when setting up this application. See
the NuPoint Voice Application chapter for more information on these parameters.
Wait Prompt
The Wait prompt operates in DID NuPoint Voice the same as in NuPoint Voice. See the NuPoint
Voice Application chapter for more information.
Administrator’s and Attendant’s Mailboxes
For most DID applications it is appropriate to remove these mailboxes. If you do use them,
however, the following information applies.
The default mailbox file contains 10 possible default administrator’s mailboxes. It also contains
10 possible default attendant’s mailboxes. The defaults are:
Administrator’s Mailbox Defaults Attendant’s Mailbox Defaults
98 99
998 999
9998 9999
99998 99999
©
Copyright 2002, Mitel Networks Corporation 33
Page 34

Mitel NuPoint Messenger Technical Documentation - Release 7.0
999998 999999
9999998 9999999
99999998 99999999
999999998 999999999
9999999998 9999999999
99999999998 99999999999
See the NuPoint Voice Application chapter for more information on these two mailboxes.
While 0 through 11 are acceptable entries for each position in the dial plan, if you wish to use one
of these default mailboxes, the dial plan entry for mailboxes that begin with 9 must be within the
range 2-11.
Mailbox Passcodes
Passcode parameters operate in the DID NuPoint Voice application the same as in the NuPoint
Voice application. See the NuPoint Voice Application chapter for more information.
Default Language For Prompts
The default language for prompts operates in the DID NuPoint Voice application the same as in
the NuPoint Voice application. See the NuPoint Voice Application chapter for more information.
Answer Delay
You may set a variable answer delay. The default for this parameter is zero (no delay), and in
most cases, it does not need not be changed. A delay of up to 1/2 second may be required for
certain applications (for example, NuPoint Voice and NP Receptionist) that use E & M trunks.
Users need this delay if the application software sometimes answers an incoming call before all
the digits are received, causing the switch to stop sending digits. In cases where the DID
NuPoint Voice application does not work for a customer because the server answers too fast, this
parameter should solve the problem.
For more information on this parameter, see the NuPoint Voice Application chapter.
Making a Phoneline Exception for Wink Start
The NuPoint Messenger server is compatible with both rotary and DTMF outpulsing from the CO.
However, the telephone company normally requires wink start operation with DID service. To
enable the NuPoint Messenger server to send wink to the CO on seizure, you must change the
Wink Start telephony parameter (24) to 1 (yes) for each DID trunk. See “DID NuPoint Voice
Application” in the task list for the procedure, Volume 2 of this manual.
©
Copyright 2002, Mitel Networks Corporation 34
Page 35

Mitel NuPoint Messenger Technical Documentation - Release 7.0
Using the DID NuPoint Voice Application
This section covers the final steps to take in order to use the DID NuPoint Voice application.
Activating Changes
Activating changes for the DID NuPoint Voice application is identical to activating changes as
discussed in the NuPoint Voice Application chapter.
Creating Mailboxes
The final step for making DID NuPoint Voice operational is to create mailboxes. Refer to Chapter
6, Mailboxes, for more information.
If the administrator’s or the attendant’s mailbox is desired and is set to a number other than the
default, you must create the mailbox before using it. Identifying the mailbox numbers in the DID
NuPoint Voice application gives the mailboxes the ability to perform their special functions, but
the functions are not enabled until the mailboxes are configured. The recommended FCOS for
both mailboxes is 10 (VIP), the LCOS is 1 (Default), the GCOS is 1, and the message waiting
type should be whatever is available for your server.
Testing
After phone lines have been installed, and you have completed all the applicable steps discussed
so far, test your DID NuPoint Voice application. In addition to the testing tips listed in the
following paragraphs, see the task list for the procedure in Volume 2 of this manual.
• For test purposes, standard single line telephones perfectly mimic a CO; a rotary dial
telephone mimics dial pulse signaling, and a pushbutton phone generates the DTMF of tone
trunks.
• Unplugging a CO line makes the line neither idle nor busy to the CO. The CO’s automatic
testing eventually discovers the unplugged line, and takes it out of service. You must then
call the telephone company and have them reactivate the line manually, unless the local
phone company has configured the trunk group for auto-restore. Whenever possible, it is
better to make a line busy to the CO than to unplug it. Make a line busy by reversing its
polarity (grounding the M lead).
• Once the server is working, use caution when substituting telephone line cord s. Two kinds of
line cords are commonly available. You can tell them apart by the positions of the two tabs
on their end connectors. The standard cord (that is, the most readily available) has tabs on
opposite sides of the line cord. The other type, which is sometimes called a data cord, has
tabs that are both on the same side of the line cord. Replacing an existing line cord with a
different type can take the port out of service.
– The standard cord (tabs on opposite sides) reverses the positions of the E & M leads, but
maintains Tip & Ring polarity. Plugging in a cord that switches E & M lead positions
between the Tellabs cards and the NuPoint Messenger server immediately takes the
server off-hook, and holds the port out of service.
– The data cord (tabs on the same side) maintains E & M continuity, but reverses Tip &
Ring polarity. Plugging in a cord that reverses polarity between the CO and the Tellabs
equipment automatically makes the trunk busy, and effectively takes it out of service.
©
Copyright 2002, Mitel Networks Corporation 35
Page 36

Mitel NuPoint Messenger Technical Documentation - Release 7.0
Usage Considerations
In a DID environment, there are mailbox login differences if you are using Greeting-Only DID
mailboxes. In addition, a DID environment can confuse new mailbox owners when they record
their first greeting. These considerations are discussed in the following paragraphs.
Logging Into Greeting-Only DID Mailboxes
DID mailboxes with FCOS 6 (Greeting Only) or with any other FCOS that issues greetings but
does not allow receipt of outside caller messages, have a different login procedure. To log into
one of these DID mailboxes, a mailbox owner must:
1. Press the star (*) or zero key during the playing of the greeting. This does not interrupt the
greeting.
2. When the entire greeting has been played, the se rver asks the mailbox owner to enter a
passcode, if there is one. The mailbox owner is not required to wait for the prompt, but is
required to wait until the entire greeting plays before entering the passcode. The mailbox
owner is now logged in.
Recording the First Greeting for Greeting-Only DID Mailboxes
Newly created Greeting-Only DID mailboxes do not have greetings; when new mailbox owners try
to reach their mailbox to record a greeting, the server responds, “That is not a valid mailbox
number.”
Mailbox owners can log into a Greeting-Only mailbox that does not have a greeting by pressing
the star (*) key or zero key during the playing of “That is not a valid mailbox number,” then
entering the passcode after the prompt has finished playing. However, this procedure can be
confusing to a new mailbox owner and can make the first experience with the server
unnecessarily difficult.
To avoid this situation and to create goodwill, follow this procedure:
1. Initially assign FCOS 1 (Unlimited) to the mailbox when you create it.
2. Log into the mailbox and record a greeting that welcomes the new mailbox owner.
3. After the greeting is recorded, modify the mailbox configuratio n to give the mailbox the
correct FCOS.
4 Pager Application
This chapter covers:
• Paging, Message Delivery, and Call Placement
• Configuration Requirements and Worksheets
• Line Group Definition
• Mailbox Configuration
• Examples
• Testing the Configuration
• Billing Issues
©
Copyright 2002, Mitel Networks Corporation 36
Page 37

Mitel NuPoint Messenger Technical Documentation - Release 7.0
• The User Interface
Overview
The Pager application causes the NuPoint Messenger server to initiate, rather than receive, a
telephone call. Don’t let the name “Pager application” confuse you. It is used for paging, but also
for a number of other functions that require outdials. An outdial is a call placed by the server. Two
other uses of this application are message delivery and call placement. Some optional features,
such as NuPoint Fax and Cut-through Paging, use the Pager application as well.
Paging is a function that allows the server to notify a mailbox owner when a message arrives in
the mailbox by activating a radio pager. Parameters can be set to limit the hours that a page may
be sent, or the types of messages that activate a page. For information on Cut-through Paging,
see the Cut-through Paging optional feature documentation.
Message delivery is a function that allows the server to notify a mailbox owner when a message
has been received, by calling the mailbox owner at a predefined telephone number and allowing
the owner to log into the mailbox. Parameters can be set to limit the hours that a message
delivery may be made, or the types of messages that activate the message delivery.
Call placement is similar to message delivery, in that it places a call to a telephone number. In
by
this case, the message is made
to a telephone number rather than to a mailbox. The answering party does not have to log in to
hear the message. Call placement was formerly known as “off-system messaging.”
(rather than to) the mailbox owner. The message is addressed
Procedures
You can perform the following procedures with the Pager application. These procedures are
located in Volume 2 of this manual.
Procedure Number
Call Placement
Enable Call Placement CP 3306
Test Call Placement CP 3362
Message Delivery Configuration
Message Delivery Configuration CP 3337
Allow Mailbox Owners to Control Message Delivery CP 3339
Allow Receipt of Urgent Pages or Urgent Message Delivery Only CP 3344
Configure a Mailbox For Message Delivery CP 5018
Define a Pager System for Message Delivery CP 5013
Set Limits for Message Delivery CP 3338
Set Paging or Message Delivery Schedules and Intervals CP 3321
Test Message Delivery CP 3361
Turn All Pagers or Message Delivery in a Mailbox On or Off CP 5014
Paging
Display Pager Configuration CP 3330
Tone Pager Configuration CP 3343
Voice Pager Configuration CP 3335
Allow Mailbox Owners to Control Paging CP 3332
Allow Receipt of Urgent Pages or Urgent Message Delivery Only CP 3344
Assign an Alternate Pager to a Mailbox CP 3334
Configure a Mailbox for Paging CP 5019
©
Copyright 2002, Mitel Networks Corporation 37
Page 38

Mitel NuPoint Messenger Technical Documentation - Release 7.0
r
f
Define a Pager System CP 5012
Set Limits for Paging CP 3336
Set Paging or Message Delivery Schedules and Intervals CP 3321
Test a Page
Turn All Pagers or Message Delivery in a Mailbox On or Of
View Pager Configuration CP 6001
CP 3358
CP 5014
Paging
The NuPoint Messenger server supports three pager types: tone pagers that beep when they are
activated, display pagers that show the paging party’s telephone number, and voice pagers that
play a few seconds of a message that was left. Servers can access any of these types of pagers,
and can activate the display of a display pager or issue a message for a voice pager when the
message is left in a mailbox.
Figure 4-1 shows one way paging works in the server. When a message is left in a mailbox
configured for paging, the server places a call to the paging company (through the PBX and the
CO). The pager then indicates the call. BBL paging and the TNPP integration are optional
features that supply a direct RS-232 link to the paging system, rather than the dial-up system
shown here.
Figure 4-1 Pager Call Processing
Paging has these features:
• Three types of pager support (tone, display, voice)
• Paging can be activated for specific types of messages.
• Users can specify the hours available for paging.
• Users can enter the number to be paged.
• Limits for paging can be set through the Limits Class of Service (LCOS).
• The server can track number of pages for billing purposes.
• Pages can be billed to a credit card or other billing account.
Message Delivery
Message delivery provides message waiting indication by calling a mailbox owner at a preconfigured telephone number. When the phone is answered, the server says, “Hello [user’s
name]. You have [number] unplayed message(s) in your mailbox. Please enter your passcode.”
When the mailbox owner enters a passcode, the server says, “You have [number] unplayed
messages in your mailbox. Press P to play the first message.” The mailbox owner is now logged
into the mailbox, and can use any of the features (Play, Make, Give, etc.) available to that
mailbox.
The server prompts for the passcode once, then waits 30 seconds for a resp onse. If someone
other than the user answers, and does not know the passcode, the server says “Call back when
you can remember your passcode. Good-bye.” and hangs up.
Message delivery is particularly valuable for users who do not work on-site, and so cannot use
ordinary message waiting indicators. Without message delivery, they might have to call in many
times a day to receive messages in a timely manner.
©
Copyright 2002, Mitel Networks Corporation 38
Page 39

Mitel NuPoint Messenger Technical Documentation - Release 7.0
Message delivery has these features:
• Message delivery can be activated for specific types of messages.
• Users can specify the hours available for message delivery.
• Users can enter the number to be called.
• Limits for message delivery can be set through the LCOS.
• The server can track number of messages delivered for billing purposes.
• Message delivery calls can be billed to a mailbox owner’s credit card or other billing account.
Call Placement
Call placement (formerly known as “off-system messaging”) allows server users to send
messages to the telephones of people who are not server users, that is, who do not have
mailboxes. For example, users can send messages when their time at a phone is limited (at a pay
phone, for example) and expect the other party to receive their information. A company can send
a product announcement to many target customers at once, or a volunteer group can notify its
members of a meeting time change. Any mailbox owner can have this feature if you configure the
mailbox properly.
Call placement provides voice message delivery by dialing a telephone number entered by the
caller. When the phone is answered, the server says, “Hello [recipient’s name]. You have a call
from [user name].” The recipient can accept, reject, delay, or hold the call for 30 seconds. If the
call is accepted, the message plays and the recipient can reply to the message.
Call placement is compatible with all applications and integrations. It has these features:
• Users can send a single message to any number and combination of mailboxes and call
placement numbers.
• The server retries delivery until successful.
• The server administrator can adjust redialing interval and frequency.
• A user can give an existing message to an outside number.
• Calls can be passcode protected, to ensure only the intended recipient can play the
message.
• Limits for call placement can be set through the LCOS and RCOS (see the Other Classes of
Service chapter).
• The server notifies users about calls that cannot be delivered.
• The server can track the number of calls for billing purposes.
• Message delivery calls can be billed to a mailbox owner’s credit card or other billing account.
Summary of Configuration Requirements
Paging configuration occurs in two primary areas, the server configuration data and the mailbox
configuration of each mailbox that uses the Pager application. You may also need to set up the
Feature Class of Service (FCOS) and Limits Class of Service (LCOS) used in the mailbox
configuration.
Message delivery is implemented the same way as paging, with one addition: when configuring a
mailbox, the Message Delivery parameter is set to Yes. The Busy Pager Attempts parameter and
Busy Pager Interval parameter are not listed. The server uses only the Pager Frequency
©
Copyright 2002, Mitel Networks Corporation 39
Page 40

Mitel NuPoint Messenger Technical Documentation - Release 7.0
parameter and Pager Interval parameter in the message delivery process.
Call placement configuration occurs in the same two areas for each mailbox: the NuPoint Voi ce
application configuration data and the mailbox configuration file. Message waiting indicators are
not used with call placement.
NuPoint Voice Configuration Data
Paging, message delivery, and call placement require this information in the NuPoint Voice
configuration data:
• The line group used for outdials
• Pager system names. These are unique names, also called “pager names,” to help you
identify which pager system you are referring to. An example of a pager system name is
“Outside Access.”
• Hold time. This is the number of seconds that the outdial port remains off-hook after all
outdialing is performed. It should be long enough to allow a reorder or busy tone to be
returned, which alerts the server that a page has failed. The default value is 20 seconds. The
maximum hold time allowed is 90 seconds. Set a value of 3 seconds to clear the port more
quickly.
• Pager systems. These are outdial indexes that outdial a certain dial string when accessed.
Each pager system is represented by a number. (You later enter this number as an internal
outdial index, billed outdial index, or unbilled outdial index, and specify the access code index
when adding a pager, message delivery, call placement, or fax retrieval to a mailbox.)
Message delivery also requires the server features that make it possible for the user to log into a
mailbox, and to interact with the server .
Call placement also requires:
• Server features that make it possible for the user to send messages to outside telephone
numbers
• Modification of the NuPoint Voice line group’s dialing plan
Mailbox Configuration Data
Paging, message delivery, and call placement require this information in the user’s mailbox
configuration:
• A properly modified FCOS
• A properly modified LCOS
• The outdial indexes (which point to a specific pager system)
• The pager access type (which points to an internal outdial index, billed outdial index, or
unbilled outdial index)
Both paging and message delivery need this information:
• The pager number (the telephone number that the server outdials t o)
• The pager frequency (the number of times that the server attempts to notify the user of an
unplayed message)
• The pager interval (the number of minutes the server waits between repages)
©
Copyright 2002, Mitel Networks Corporation 40
Page 41

Mitel NuPoint Messenger Technical Documentation - Release 7.0
For paging you also need:
• The post-pager number (used with display pagers). Once the server has rea ch ed the pager
number and the call is answered, it then sends the post-pager number to be displayed on the
pager.
• The busy pager attempts (the number of times that the server attempts to notify the user of
an unplayed message when it receives a busy tone on the last page attempt)
• The busy pager interval (the number of minutes the server waits between repages when it
receives a busy tone on the last page attempt)
Pager Application Worksheets
Use the combined information from three worksheets to organize data for configuring a Pager
application: the NuPoint Voice (or DID NuPoint Voice) Application Worksheet, the Mailbox
Individual Worksheet, and the Outdial Line Group Worksheet.
• The NuPoint Voice (or DID NuPoint Voice) Application Worksheet you completed for the
NuPoint Voice or DID NuPoint Voice application contains information applicable to message
delivery and call placement.
• If you are including message delivery in this application, you set all parameters in the Other
Pager Features Menu to the same settings as the primary application that is configured on
your server. For example, if the NuPoint Voice application is used for processing most calls
on your server, copy the entries from the NuPoint Voice Worksheet into the Other Pager
Features Menu. (The primary application could be NuPoint Voice, or one of the integrations,
such as SL-1/IVMS, NEC 2400, Intecom, ITT, or Centrex.)
• If you are including call placement in this application, establish a dialing plan on this
worksheet that tells the server that mailboxes starting with the specified digit are actually
telephone numbers. Figure 4-2 shows a sample NuPoint Voice Application Worksheet for call
placement. See the NuPoint Voice Application chapter for more information.
• The Mailbox Worksheet organizes information you need to configure individual mailboxes for
paging, message delivery, or call placement, or any combination of these functions. Figure 43 shows a sample Mailbox Worksheet for paging.
• If you are including call placement in this application, specify the appropriate outdial index
and access type for call placement. Also specify the appropriate FCOS and LCOS for call
placement.
• The Outdial Line Group Worksheet organizes information you need to configure the line
group that outdials paging and message delivery calls and identify the pager system. Figure
4-4 shows a sample Outdial Line Group Worksheet for paging.
Figure 4-2 Sample NuPoint Voice Application Worksheet for Call Placement
Figure 4-3 Sample Mailbox Worksheet for Paging
Figure 4-4 Sample Outdial Line Group Worksheet for Paging
Defining a Line Group
Use the information in the following paragraphs for entries on the NuPoint Voice Worksheet and
Outdial Line Group Worksheet.
©
Copyright 2002, Mitel Networks Corporation 41
Page 42

Mitel NuPoint Messenger Technical Documentation - Release 7.0
Guidelines for Port Allocation
The server requires at least one port to outdial calls for paging, message delivery, and call
placement. Outdialing ports must be dedicated exclusively; this means that there are fewer ports
available to accept incoming calls. If not enough ports are reserved to handle the outdial traffic,
however, the requests are queued, and users do not receive message waiting notification or
messages in a timely manner. In addition, certain other types of message waiting indicators
require the exclusive use of at least one server line card port. Before assigning pagers or
message delivery to mailboxes, you should analyze call traffic flow and decide how much of the
server you wish to devote to outdials.
Each call to a radio pager ties up an outdialing port for less than a minute; queuing becomes a
problem only when there are a great many users with pagers. Message delivery can require more
ports than paging, since each port is tied up for the entire time that the user is logged in. For
example, if a user does more than simply play the unplayed message(s) that activated message
delivery, the outdialing port can be in use for a considerable amount of time. Call placement is
more like message delivery because ports are in use for more time than for paging.
Note: The server installation site, as the calling party, is responsible for any charges that accrue when
paging, message delivery or call placement calls are made to numb ers outside of the PBX system.
Line Group Information
All the server ports are assigned to line groups. Each line group, in turn, is assigned to a single
application, and any configuring that is done for that application applies to every port in the line
group. The number of ports in each line group depends on how heavy the phone traffic is
expected to be for the particular application.
Line Group Number
Each line group is represented by a discrete number. Valid line group numbers are 1 through 24.
Group Name
The group name should identify the line group’s purpose. For example, “Pager Outdialer.”
Line(s) in Group
You identify each line (or port) in a group by a triplet, which represent the module, slot (line card),
and port on a line card. Module refers to a CPU, the server’s main processor. Modules are
numbered 1 through 4. Slots are numbered 0 through 15. Ports are numbered from 0 to the
number of ports on the line card; you can connect one telephone line to each port.
For more information on line groups, see the NuPoint Voice Application chapter.
Call Placement
To use call placement, you must change the dialing plan. Use the letter T as a dialing plan entry.
For example, if you entered T in position 8 of the plan, users would enter 8 from the keypad to
activate the call placement function. You can use T in any position of the dialing plan, but only
once. Refer to the NuPoint Voice Application chapter for more information on the dialing plan.
You may also want to define a new pager system or dial string (see the following) to implement
call placement.
©
Copyright 2002, Mitel Networks Corporation 42
Page 43

Mitel NuPoint Messenger Technical Documentation - Release 7.0
Pager Systems Supported
You can configure the server with up to 16 different outdial access codes, each identified by an
index number (0-15). Each outdial line group does not need to support all access codes; for
example, a line group dedicated to radio paging for the local area code does not need to support
an access code designed for long distance call placement. Assigning only the required access
codes to an outdial line group makes it easier to plan and control traffic and prevent abuse.
The mailbox configuration specifies these access codes for use in placing internal calls, unbilled
external calls, and external calls charged to a billing number. You enter the appropriate pager
system numbers as the internal outdial index, billed outdial index, and unbilled outdial index.
The Pager Systems supported parameter assigns specific pager system s to the line group that is
currently selected. You should analyze your needs carefully before assigning pager systems. For
example, if your server will have message delivery, call placement, and outdialing to radio
pagers, you should take into account the fact that a single message delivery can take several
minutes (while the user plays the message, answers it, etc.), while activating a radio pager takes
a fraction of that time. Therefore, you might want to assign pager systems that outdial call
placement or message delivery calls to a larger line group.
Configuring a Dial String
Use the information in the following paragraphs for entries on the Mailbox Worksheet and Outdial
Line Group Worksheet.
When you are configuring the server to outdial, you want it to duplicate the steps that you would
perform to dial a pager or place a phone call.
Paging
Many telephone switches require that you dial an access code to get an outside line. To call the
pager, you usually dial the pager company telephone number, listen for a pager tone, then dial
the code number of the pager. Before you dial the pager company telephone number, however,
you pick up the receiver on the telephone, and listen for a dial tone to be sure that the telephone
system is ready to accept the number that you dial. The steps for successfully activating this
pager, therefore, are to (1) go off-hook and listen for the dial tone, (2) dial any access code
necessary to get an outside line, (3) dial the pager company telephone number, (4) listen for the
pager tone, then (5) dial the pager number. All these steps must be configured.
Message Delivery and Call Placement
Many telephone switches require that you dial an access code to get an outside line. Anything
you must do, such as waiting for tones, other than dialing the actual number, must be configured.
Translate Operations to a Dial String
The server recognizes certain characters, which allow you to duplicate the steps required to page
or place a telephone call. The pager dial strings consist of the characters listed in Table 4-1.
Note: The server always assumes a G (wait for greeting) as the last character in a message delivery dial
string.
Pager System Dial Strings
The server divides the characters for the sequence of events into three parts: the access code
©
Copyright 2002, Mitel Networks Corporation 43
Page 44

Mitel NuPoint Messenger Technical Documentation - Release 7.0
(defined in one of the 16 pager systems), the pager number and the post-pager number. The
access code contains the part of the dial string that is stored in the online configuration. The
pager number and post-pager number are the parts of the dial string that are stored in an
individual user’s mailbox configuration. Assign dial strings to each section using the following
structure:
• The access code, identified by the pager system index number, contains the first part of the
dial string necessary to reach the user’s pager. It is usually the part of the dial string that is
common to some group of users.
• The pager number is the balance of the dial string necessary to reach the user’s pager.
• The post-pager number is used as the data to display on a display pager.
Note: If there is no pager or post pager di al string entered, a page will not be sent.
Table 4-1 Pager Dial String Characters
Character Explanation
0-9, *, # Keys on a standard pushbutton telephone
( The following digits should be dial pulsed (10 PPS)
) Stop pulsing; resume sending DTMF tones
+ Pause for one second
A-D Fourth column DTMF keys
E Go off-hook, wait for dial tone or other steady tone (pager go- ahead or
confirmation tone, for example), then do next item in string
F Switch hook flash followed immediately by dialing
G Greet - Wait for a voice or computer tone answer
H Hang up (go on-hook)
L Answer Supervision - Wait for telephony signal from destination. Use only
with trunk (four-wire) connections.
N Start a new activity; do not go off-hook
O Ring once
P Go off-hook, do not wait for dial tone
S Switch hook flash, no wait required
T Go off-hook, wait for dial tone
V Voice pager: play first unplayed message (and update mailbox to count it as
played)
When designing your dial strings, observe the following rules in assigning each of the three
components:
• The first character in the dial string must make the server go off-hook and wait for a dial tone.
A T is recommended.
• An F (switch hook flash) produces the switch hook flash followed immediately by dialing
• The access code is always outdialed before the pager number. The dial string used is
dependent on the pager system selected.
• The pager system part of the dial string is limited to 30 characters.
• Only 16 pager systems can be stored in the NuPoint Voice configuration at any one time,
regardless of the number of paging groups configured. However, each pager system can be
shared by many users or line groups.
©
Copyright 2002, Mitel Networks Corporation 44
Page 45

Mitel NuPoint Messenger Technical Documentation - Release 7.0
g
• The pager number is limited to 16 characters. The server administrator enters it in a
mailbox’s configuration.
For example, you might configure a pager system of T9T, since everyone must dial this to reach
an outside number. You would then configure the digits of the mailbox owner’s telephone number
as the pager number when entering a pager message waiting type into the mailbox’s
configuration. As an alternative, if many mailbox owners have message delivery to the local prefix
292 you might choose to configure a pager system of T9T292.
The choice of where to assign each portion of the dial string is flexible. In this example, you have
three pager systems available, which contain the following dial strings:
Pa
er System Index
Access Code*
Number
0 T9T
2 T9T1408
4 T
* Same as “Dial String” in the report of outdial indexes, Figure 4-5.
If the dial string that you have formulated is T9T14085551313++G1234#, you can set up your
pager number in three different ways, depending on which access code you select:
Pager System
Index Number
Access Code* Pager Number
Post-Pager
Number
0 T9T 14085551313++G 1234#
2 T9T1408 5551313++G ++G1234#
4 T 9T14085551313++G ++G1234#
* Same as “Dial String” in the report of outdial indexes, Figure 4-5.
In each of these examples, the individual pager number was put in the post-pager numb er. You
can see that the page works no matter how the balance of the string is split between pager and
post-pager numbers.
Note: When designing your paging setup, choose your pager system dial strings carefully. You can only
refer to 16 pager system access codes
per server
.
Mailbox Configuration
To use the Pager application, you must configure mailbox parameters as well as offline and
online parameters. Use this section to see which parameters you must change. You must set
different mailbox parameters for each capability (paging, message delivery, call placement). The
specifics of each capability are discussed at the end of this section.
General Considerations
Since you are configuring the server to outdial, you want it to duplicate the steps that you would
take to activate the pager, or to place the phone call. You must configure these steps into the
©
Copyright 2002, Mitel Networks Corporation 45
Page 46

Mitel NuPoint Messenger Technical Documentation - Release 7.0
pager system and pager number. You can configure up to four pagers per mailbox.
Creating or Modifying Mailboxes for a Pager Application
After specifying the classes of service, you identify the outdial index for the pager system as an
internal outdial, billed outdial, or unbilled outdial.
When you select message waiting type 5 (pager) while creating or modifying a mailbox, you must
set the parameters in the following list:
• Pager access type
• Pager access code index
• Pager number
• Post-pager number
• Pager frequency
• Pager interval
• Message delivery enabled or disabled
• Suppressing of pages enabled or disabled
• Busy pager attempts
• Busy pager interval
• Pager start time
• Pager stop time
• Additional pager , if any
• Call placement access type pager access code index
• Pager/outcall notification enabled or disabled
For procedures on creating or modifying mailboxes with paging or message delivery notification
or call placement ability, see “Message Delivery” or “Paging” in the task list, Volume 2 of this
manual. The material in this section explains how the mailbox configuration works.
Pager System Access Code
The dial string that you formulate is divided into three parts. The first part of the string is the pager
system access code, which is represented in the mailbox by the internal outdial index, billed
outdial index, or unbilled outdial index. The balance of the string is split between the pager
number and the post-pager number. See “Pager System Dial Strings” in the previous section for
information on configuring the pager system.
An outdial index is a number from 0 to 15. It assigns a pager system to the mailbox. Even if you
want to enter the entire outdial string into the pager number field, you still must choose an outdial
index to assign a pager system. If you do not select an outdial index for a pager schedule, the
server cannot issue a page when a message is left in that mailbox.
You can obtain a printout of pager systems, and their indexes and dial strings, either by running
the pager access codes report from the Reports Menu or, when you are creating a mailbox and
the server prompts for the outdial index, by requesting help. The server displays the available
indexes, dial strings, and pager names (“paging system names”) as in the following example
(Figure 4-5).
©
Copyright 2002, Mitel Networks Corporation 46
Page 47

Mitel NuPoint Messenger Technical Documentation - Release 7.0
Figure 4-5 Sample Report of Pager Systems Access Codes
Enter one of the following index numbers:
Index Dial String Paging System Name
0... T9T Outside line
1... T9T1415 415 Area Code
2... T9T1408 408 Area Code
3... T9T1916325 PAGER 916-325
4... T Internal Pager calls
5... Empty
6... [ No Name ]
7... [ No Name ]
8... [ No Name ]
9... [ No Name ]
10... [ No Name ]
11... [ No Name ]
12... [ No Name ]
13... [ No Name ]
14... [ No Name ]
15... [ No Name ]
Note that, in this sample, pager systems 6 through 15 have no name. These are pager systems
that are not yet set up. Pager system 5 (Empty) is set up for use with pagers whose entire dial
strings are contained in the pager number.
If you need to add a pager that requires the outdialing of more than 16 characters (thus the
coding string is too long to fit into the pager number field) and no appropriate outdial index
already exists, you must configure a new pager system before you can add the pager.
Pager Number
The pager number tells the server what numbers and/or characters to dial after the pager system
dial string, and before the post-pager number. See “Pager System Dial Strings” in the previous
section.
Pager numbers are limited to 16 characters.
A mailbox FCOS with feature bit 124 (User can change paging phone number) or 143 (User can
change message delivery number) allows the user to change the pager number without affecting
the post-pager number. Refer to the Features Class of Service chapter for more in formation
about FCOSs and feature bits.
Post-Pager Number
The post-pager number is used in two cases. With display pagers, the post-pager number
(typically the NuPoint Voice telephone number or the mailbox owner’s mailbox number) is
displayed on the pager screen. A second use is when the mailbox owner can change the pager
number, and non-numeric pager dial string characters must be transmitted after the pag er
number to ensure a successful page. If the mailbox owner changes the pager number, then these
non-numeric characters cannot be entered on the telephone set. In this case the post-pager
number tells the server what numbers and/or characters to dial after the paging or me ssage
delivery number a user enters from the keypad. Such characters include G, +, and T. Mailbox
owners cannot alter this post-pager number from the keypad.
Post-pager numbers are limited to 24 digits.
©
Copyright 2002, Mitel Networks Corporation 47
Page 48

Mitel NuPoint Messenger Technical Documentation - Release 7.0
g
g
Pager Frequency
The pager frequency is the maximum number of times that the server attempts to notify the user
of an unplayed message, if each page is successful. The default pager frequency is 3.
A page is considered successful if the server places the call and it is answered. In other words,
the server does not encounter a busy signal, reorder tone, or Ring No Answer after the
pager/message delivery call is made. After a successful page is made, the server waits the
number of minutes that are specified for the pager interval (see below), then, if there is still an
unplayed message in the mailbox, repeats the page.
If the page is unsuccessful, the server retries the number until a successful page is made. For
this reason, it is very important that you make a test call to verify that pager configuration is
correct.
Alternate Pagers
Each mailbox can be configured with up to three message waiting types, and all are activated
simultaneously. For example, the first message waiting type could be a pager, and the second
message waiting type could be a message waiting light. You do not need a message waiting type
to use call placement.
Note: You cannot use the third message waiting type for the Pager application, because it can only be
used for the Centrex message waiting type.
By setting up two message waiting types as pagers, each with a primary and an alternate
number, your mailbox can be configured to contact up to four pagers or four message delivery
numbers, or any combination of the two. Message waiting type 1 and message waiting type 2
both can have a primary pager number and an alternate pager number. When you designate two
both
message waiting types as pagers,
are activated. The alternate pager numbers, however, are
only activated if the primary pager numbers do not get a successful response. If you want to use
one pager number as a primary and one as a backup, and no other message waiting function,
then set up one primary and one alternate pager number (for example, through just the first
message waiting type parameter).
The alternate pager numbers can also be used to assign a second frequency and/or interval to
the same pager number. The pager frequency is the maximum number of times that the server
attempts to notify the mailbox owner of an unplayed message, if each page is successful. The
pager interval is the number of minutes that the server waits before re-paging, when the previous
page was successful. If you want the server to place a page twice, five minutes apart, then (if the
message still has not been played) to page the mailbox owner three times, at 30 minute intervals,
you would assign a frequency of 2 and an interval of 5 to the primary pager in the mailbox, and a
frequency of 3 and an interval of 30 to the alternate pager (both through the first message waiting
type parameter).
Note: The pager numbers are sometimes called “pager 1,” “pager 2,” “pager 3,” and “pager 4.” Pager 2 is
an alternate for pager 1, using the first message waiting type parameter, and pager 4 is an alternate
for pager 3, using the second message waiting type parameter. See the following table. (These
numbers are allocated by how many pager numbers are set up, however.)
Message
Waitin
Type
Parame
ter 2
Designation Message
Waitin
Type
Parame
ter 1
©
Copyright 2002, Mitel Networks Corporation 48
Page 49

Mitel NuPoint Messenger Technical Documentation - Release 7.0
Primary Pager 1 Pager 3
Alternate Pager 2 Pager 4
Paging and Message Delivery in the Same Mailbox
You cannot assign both paging and message delivery to the same Message Waiting Indicator. If
you want to assign both Paging and Message Delivery to the same mailbox, be sure each has a
different indicator. You can use any of the four different indicators: MWI1 primary, MWI1
alternate, MWI2 primary, MWI2 alternate to accomplish this.
Other Mailbox Parameters
Other Pager application parameters that you can set in the mailbox configuration are listed below.
Pager interval
This is the length of time (0-255 minutes) the server waits between pages. The default is 30 (wait
half an hour between pages).
Busy pager attempts
This is the number of times (0-255) the server retries the page until it completes the specified
number of pages or completes a successful page. Set the number of attempts to a high number if
the server will be encountering busy pager systems.
The default is 0, unlimited retries.
Busy pager interval
This is the length of time (0-255 minutes) the server waits between pages when a busy sign al has
been received. Set the Busy Pager Interval lower than the Pager Interval setting. The idea is that
if a busy signal has been received, the page should be retried sooner than if speech or silence
was received.
The default is 0, retry every minute.
Message delivery
This activates the message delivery option of paging. When enabled (set to Y), a new message
causes the server to call the telephone number defined for message delivery, and ask whomever
answers to log into the user’s mailbox. Then the user can hear the message and perform other
NuPoint Voice operations.
If message delivery is enabled, paging is not available for that message waiting type. However,
you can set one message waiting type can for paging and another for message delivery. Or, on
the same message waiting type, you can set the primary for paging and the alternate for
message delivery.
The default is N, no message delivery.
Suppress pages
This parameter turns off the paging feature without removing all the settings. Use this option to
temporarily remove the paging option from a mailbox.
©
Copyright 2002, Mitel Networks Corporation 49
Page 50

Mitel NuPoint Messenger Technical Documentation - Release 7.0
Enter Y or N; Y to suppress pages. The default is N, do not suppress pages. Set this field to N to
resume the paging option after turning it off.
Pager start time
This is the time that the server starts sending pages for this mailbox. By setting both start and
stop time to 12:00 a.m., paging is available 24 hours.
Enter the time in the form “hh:mm xm”, where “hh” is hours, “mm” is minutes, and “xm” is either
a.m. or p.m. The default is 12:00 a.m.
Pager stop time
This works with Pager start time, above, and is the time the server stops sending pages for this
mailbox. The default is 12:00 a.m.
Paging Considerations
This section covers specifics applicable only to paging.
Changes by the Server Administrator
You can alter the following mailbox information to use paging:
• FCOS
• LCOS
• Pager number
• Post-pager number
Changes by Mailbox Owners
From a pushbutton telephone, mailbox owners can modify the following parameters:
• Telephone number to send pages
• Time at which the server starts paging
• Time at which the server stops paging
To allow mailbox owners to reset these parameters, you might need to modify the mailbox
owners’ mailbox configuration:
• An FCOS that includes feature bit 070, and either 077 or 124 or both
• The LCOS that sets limits for the length of paging phone numbers
• The post-pager number
Feature Bits Used in Paging Mailboxes
Feature bits listed in Table 4-2 control paging. Two that deserve special mention affect changes
to the weekday/weekend schedule and pager re-queuing.
Change Weekday/Weekend Schedule
With one exception users of any Pager application can set schedules for weekdays or weekends,
showing when they can be reached. The exception is that when NP TDD is enabled, call
scheduling is not available.
©
Copyright 2002, Mitel Networks Corporation 50
Page 51

Mitel NuPoint Messenger Technical Documentation - Release 7.0
To change a paging schedule, a mailbox owner’s mailbox must have an FCOS that includes
feature bit 077 (Change pager schedule). To change a paging number, a mailbox own er’s
mailbox must have an FCOS that includes bit 124 (Change paging phone number). Both these
bits require bit 070 (User Options Menu) to work. The mailbox owner’s mailbox FCOS must
contain bit 182 or 183 to change the schedule according to the weekday or weekend.
Note: If mailbox owners’ pager n umbers conta in ch aracters not on the keypad, such as G or T, put a post-
pager number in their mailboxes to transmit these codes.
Table 4-2 Feature Bits That Control Paging
Feature Function
070 User Options Menu
077 Enable paging from a telephone; allow schedule changes from a telephone
079 Set message wait # 1 for urgent messages only
080 Set message wait # 2 for urgent messages only
124 Change paging number
168 Message wait 1, pager requeue
169 Message wait 2, pager requeue
181 Paging over message delivery, message waiting 1 over message waiting 2
182 Use pri/alt as week/weekend for MWI (message waiting type) 1
183 Use pri/alt as week/weekend for MWI (message waiting type) 2
212 Send page upon answer, greeting-only mailbox
Pager Re-Queue
The pager re-queue feature is activated by feature bit 168 for schedule one and bit 169 for
schedule two. If you have paging scheduled from 9 a.m. to 5 p.m. and receive a call at midnight,
the server does not automatically page you at 9 a.m., and does not page until another message
arrives during the scheduled time period. By including these feature bits in the FCOS you
assigned to the paging mailbox, you are called as soon as the scheduled start time begins,
instead of having to wait for another message.
For further information on FCOSs and feature bits, see the Features Cl ass of Service chapter.
Changing an LCOS Definition
The limits listed in Table 4-3 affect paging mailboxes. You might need to change the LCOS
assigned to the paging mailbox accordingly. The limits listed in the table and discussed in the
following paragraphs are:
• Pagers per billing period
• Paging—phone length
• Receipt retention, regular
Pages Per Billing Period
This limit can control the number of pages allowed for a billing period. This allows server
administrators to control the number of paging functions allowed a user per billing period, and can
©
Copyright 2002, Mitel Networks Corporation 51
Page 52

Mitel NuPoint Messenger Technical Documentation - Release 7.0
be used where a paging service is sold for a flat fee per month. A limit of 0 means no limit is set.
Table 4-3 Paging Limits
Limit Unit Default Valid Values
Pages per billing period pages 0 0-999
Paging—phone length digits 7 3–11
Receipt retention, regular hours 0 0-8760
Paging—Phone Length
This controls user modification of paging. The paging phone length determines the maximum
number of digits users can enter for a paging number. The default is 7, the allowable range is 3 to
11 digits. It is useful for preventing long-distance calls.
Note: This does not apply to phone numbers entered at a server maintenance console.
Receipt Retention, Regular
This is used in the Pager application to limit the amount of time regular receipts are kept. (The
Receipt Retention, CTP limit is used with the Cut-through Paging optional feature.) The limit can
be up to 8760 hours (1 year). Alternatively, you can specify unlimited receipt retention by entering
0.
For more information about LCOSs and limits, see the Other Classes of Service chapter.
Action at the End of a Dial String
After the last character is outdialed, the server goes on-hook (hangs up) automatically when
dialing a pager.
Voice Pager Code in the Dial String
A V (Voice Pager) anywhere in the dial string causes the server to play the first unplayed
message only. If there is more than one message in the mailbox, the user is paged again almost
immediately and the next unplayed message is played.
Greet Code in the Dial String
When the server is configured to outdial a telephone number, and the number is followed by a G
(Greet) code, the “clicks” and “pops” of particularly noisy switching equipment could be
misinterpreted as a greeting. You can usually avoid this by inserting a + before the Greet code;
for example, T9T5551212+G. If this still does not prevent the misinterpretation, dial the telephone
number, then count the number of seconds that it takes for the pager to answer. Insert the
appropriate number of plus signs (+) between the number and the G. (For example, if the dial
string is T9T5551212G, and it takes the pager five seconds to answer, chan ge the string to
T9T5551212+++++G.)
Answer Supervision Code in the Dial String
• You can use the Answer Supervision (L) code if you have analog phone lines. This is a good
alternative to the Greet (G) code, because answer supervision can increase reliability and
lower connect time.
• Answer supervision time out controls how many seconds the line card waits until issuing a
©
Copyright 2002, Mitel Networks Corporation 52
Page 53

Mitel NuPoint Messenger Technical Documentation - Release 7.0
time out. If the line card does not detect answer supervision (a ringing on the line) by the
number of seconds set in this exception, the page is considered a failure. This time out can
be set between 0 and 255 seconds, where 0 means no time out period is enforced (wait
forever).
Message Delivery Considerations
This section covers specifics applicable only to message delivery. Remember that you must set
the Message Delivery parameter to Yes in the mailbox owner’s mailbox configuration to enable
message delivery.
Changing an FCOS Definition
You must modify an existing FCOS or create a new one to give mailbox owners with message
delivery control of their schedules and telephone numbers.
Feature bits listed in Table 4-4 control message delivery.
Change Weekday/Weekend Schedule
Message delivery users can set schedules for weekdays or wee ke nds , showing when they can
be reached.
To change a message delivery schedule, a user’s mailbox must have an FCOS that includes
feature bit 094 (Enable message delivery; change message delivery options). To change a
message delivery number, a user’s mailbox must have an FCOS that includes bit 143 (Change
message delivery phone number). Both these feature bits require bit 070 (User Options Menu ) to
work.
Pager Re-Queue
The pager re-queue functionality is activated by feature bit 168 for schedule one and bit 169 for
schedule two. If you have message delivery scheduled from 9 a.m. to 5 p.m. and receive a call at
midnight, the server does not automatically call you at 9 a.m., and does not call you until another
message arrives during the scheduled time period. With this feature, the server calls you at the
beginning of the next scheduled message delivery start time.
For further information on FCOSs and feature bits, see the Features Cl ass of Service chapter.
Table 4-4 Feature Bits That Control Message Delivery
Feature Function
070 User Options Menu
079 Set message wait # 1 for urgent messages only
080 Set message wait # 2 for urgent messages only
094 Enable message delivery; change message delivery options
143 Change message delivery phone number
168 Message wait 1, pager requeue
169 Message wait 2, pager requeue
181 Paging over message delivery, message waiting 1 over message waiting 2
©
Copyright 2002, Mitel Networks Corporation 53
Page 54

Mitel NuPoint Messenger Technical Documentation - Release 7.0
182 Use pri/alt as week/weekend for message waiting type 1
183 Use pri/alt as week/weekend for message waiting type 2
Changing an LCOS Definition
Only one limit applies to message delivery, the Message Delivery-Phone Length limit. It controls
user modification of message delivery. The message delivery phone lengths determine the
maximum number of digits users can enter for a message delivery number. The default is 7, the
allowable range is 3 to 11 digits. The limit is useful for preventing long-distance calls.
Note: This limit does not app ly to phone numbers entered at a server maintenance console.
For more information on LCOSs and limits, see the Other Classes of Service chapter.
Action at the End of a Dial String
When a mailbox is configured for message delivery, the server automatically waits for a greeting.
(If a G is erroneously included at the end of the dial string, the server ignores it.)
Noisy Switching Equipment
When the server is configured to outdial a telephone number, the “clicks” and “pops” of
particularly noisy switching equipment could be misinterpreted as a greeting. To avoid this, dial
the telephone number, then count the number of seconds that it takes for the telephone at the
other end to ring or the pager to answer. Since message delivery always assumes a G at the end
of the dial string, put the appropriate number of pluses (+) at the end of the pager number.
Answer Supervision Code in the Dial String
• You may want to use the Answer Supervision (L) code if you have the appropriate switches
or use certain cellular exchanges (MTSO). This is a good alternative to the Greet (G) code
where progress tones or noise can cause the server to errone ously assume success.
• Answer supervision time out controls how many seconds the line card waits until issuing a
time out. If the line card does not detect answer supervision (a ringing on the line) by the
number of seconds set in this exception, the page is considered a failure. This time out can
be set between 0 and 255 seconds, where 0 means no time out period is enforced (wait
forever).
Call Placement Considerations
This section covers specifics applicable only to call placement. Remember that you must set the
outdial indexes and the call placement pager access type parameters in the user’s mailbox
configuration to enable call placement.
Changing Mailbox Information
You may want to alter the following mailbox information to use call placement:
• FCOS
• LCOS
• RCOS
• Call placement pager access type
©
Copyright 2002, Mitel Networks Corporation 54
Page 55

Mitel NuPoint Messenger Technical Documentation - Release 7.0
Changing an FCOS Definition
To use call placement, you must add feature bit 110 (Give/make to telephone number) to an
existing FCOS or create a new one with this feature in it.
Changing an LCOS Definition
The limits listed in Table 4-5 control call placement. You might need to change the LCOS
assigned to the call placement mailbox configuration accordingly.
Table 4-5 Call Placement Limits
Limit Unit Default Valid Values
Ring No Answer retry limit no. of retries 10 1-255
Ring No Answer retry interval minutes 60 1-255
Busy retry limit no. of retries 10 1-255
Busy retry interval minutes 10 1-255
Phone length digits 7 3–11
Count no. of messages 73 1–73
Length minutes 5 0–60
RNA Retry Limit
This limit determines the maximum number of times the server redials a call placement phone
number when no one answers the phone on the first delivery attempt.
RNA Retry Interval
This limit determines how often the server redials a call placement phone number wh en no one
answers the phone on the first delivery attempt.
Busy Retry Limit
This limit determines the maximum number of times the server redials a call placement phone
number when the server detects a busy signal on the first delivery attempt.
Busy Retry Interval
This limit determines how often the server redials a call placement phone number wh en the
server detects a busy signal on the first delivery attempt
Phone Length
This limit determines the maximum number of digits users can enter for a call placement pho ne
number. Setting this limit higher accommodates long-distance calls.
Note: This limit does not app ly to phone numbers entered at a server maintenance console.
Count
The count determines the maximum number of undelivered messages for a call placement phone
number per mailbox.
Length
©
Copyright 2002, Mitel Networks Corporation 55
Page 56

Mitel NuPoint Messenger Technical Documentation - Release 7.0
The length determines the maximum size of a single message made for a call placement phone
number.
If you send a message to both mailboxes and telephone numbers, this limit interacts with the limit
on the size of messages sent to mailboxes; the shorter of the two limits overrides the longer. For
instance, if you limit messages sent to mailboxes to a maximum of five minutes and limit call
placement messages to two minutes, the server enforces the two-minute limit for both kinds of
messages.
For more information on LCOSs and limits, see the Other Classes of Service chapter.
Call Placement Pager Access Type
This parameter identifies whether call placement calls are to be internal, billed, or unbilled. The
call placement pager access type points to the corresponding internal outdial index (I), billed
outdial index (B), or unbilled outdial index (U) specified earlier in the originating mailbox. Users
cannot alter this index from the keypad.
The indexes refer to the same set of access codes used for standard paging. This means you
might be able to use the same indexes as those already set up for paging.
The server prompts you to enter a call placement pager access type after it prompts you for
message waiting types. For more information on creating access codes, see “Configuring a Dial
String” earlier in this chapter.
Pager Application Examples
This section shows examples of how to program the pager application for paging, message
delivery and call placement.
Paging Examples
Pager Dial Strings
Dial strings for pagers can be divided into several parts.
Outside Access Code
This code allows access to the public switched network. For PBXs, this is normally 9.
Pager Company Telephone Number
This is a 7- or 11-digit telephone number (including 1 then an area code) use d to access the
pager system. Calls to the pager company telephone number are answered with signals or
recorded instructions, which indicate that the system is ready to accept the individual pager
number. (Many pagers use DID, where each radio pager is assigned its own unique telep hone
number. In these cases, there is no pager company telephone number.)
Individual Pager Number
This is the address of the specific pager, and is usually 4 to 6 digits long. For DID pagers, the
pager number is a regular 7- or 11-digit phone number. When the pager is activated, the system
normally returns a “beep-beep-beep” signal or recorded instructions. For a displ ay pager, this
means that the system is ready to receive display information.
©
Copyright 2002, Mitel Networks Corporation 56
Page 57

Mitel NuPoint Messenger Technical Documentation - Release 7.0
Display Number
This is the string of digits that is displayed on the viewer of a display pager. Most display pagers
accommodate a 16-digit number. Usually this string is specified as the post-pager number.
Other Activation Codes
Each pager manufacturer has modifications to the activation code that you must identify before
configuring pagers. For example, most paging systems encourage a # tone to be sent after the
display information to speed call processing.
Example 1: A DID Tone Pager
To page John Smith manually, you lift the telephone receiver; wait for a dial tone, dial 9 to get an
outside line, listen for another dial tone, dial 1-408-555-9876, listen for a computer tone, then dial
555-1234 and press # to finish the page. This causes John’s pager to “beep” only.
The dial strings for these actions is:
Caller Action
Wait for dial tone. T
Tell the PBX that you want an outside line. 9
Wait for dial tone to confirm that you have the outside line. T
Call the pager company’s number. 14085559876
Wait 2 seconds for the line to settle. ++
Wait for a computer tone. G
Dial the call-back number. 555-1234
Enter # to indicate end and make paging terminal hang up. #
When a number outside the PBX is outdialed, followed by a G (Greet), extra + characters (Wait
One Second) should precede the G. This is done because line noise during call setup of
particularly noisy switching equipment can be misinterpreted as a greeting by the server.
If pagers are in widespread use at John’s company, it is very likely that more than one
employee’s pager is on the same pager company system number, so the dial string for this pager
can be organized like this
Pager system dial string T9T14085559876++G+
Pager number 1234# (or PIN)
Post-pager number (None)
Dial Strings
If you do not reach John on the first page, he wants you to try again every 10 minutes, for a
maximum of four tries. The other information needed for the Mailbox Worksheet for the pager as
follows
Pager frequency 4
Pager interval 10
Message delivery N
Example 2: Non-DID Display Pager
In this example, John’s pager allows display of numeric data, so you can leave your phone
number when you page him. The phone number is displayed on the pager when John is pag ed.
The dial string for these actions is:
Caller Action
Wait for dial tone. T
©
Copyright 2002, Mitel Networks Corporation 57
Dial String
Page 58

Mitel NuPoint Messenger Technical Documentation - Release 7.0
Dial 9 to get outside access. 9
Wait for second dial tone. T
Dial pager company system number. 18005552368
Wait two seconds for line to settle. ++
Wait for pager tone. G
Wait one second for pager tone to finish. +
Dial individual pager number (or PIN) 458216
Wait for pager tone. G
Wait for pager tone to finish. +
Dial display data. 2374444
Enter # to indicate end and make paging terminal hang up. #
The dial string to accomplish the actions listed above is organized like this:
Pager system dial string T9T18005552368++G+
Pager number 458216G+
Post-pager number 2374444#
Other information needed for the Mailbox Worksheet is:
Pager frequency 4
Pager interval 10
Message delivery No
Example 3: DID Display Pager
Jane Jones has a DID display pager. To access this pager manually, you lift the telephone
receiver; wait for a dial tone; dial 9 to get an outside line; listen for a dial tone; dial 1-213-5559116; wait for a computer tone; dial the display data, 1-415-555-6644; then dial # to tell the pager
that all the display data has been entered. (This activates the pager). The dial string for these
actions is:
Caller Action
Dial String
Wait for dial tone. T
Dial 9 to get outside access. 9
Wait for second dial tone. T
Dial individual pager number is. 12135559116
Wait four seconds for line to settle. ++++
Wait for computer (dial) tone. G
Dial display data. 14155556644
Enter # to indicate that all the data has been entered and make
#
paging terminal hang up.
When a number outside the PBX is outdialed, followed by a G (Greet), extra + characters (Wait
One Second) should precede the G. This is done because line noise during call setup of
particularly noisy switching equipment could be misinterpreted as a greeting by the server.
In this case, configuration is more involved, since there is insufficient room in the mailbox Pager
and
Number parameter to specify the individual pager number
unique to this pager. In most installations, however, DID display pagers share a common area
code and prefix (1-213-555, in this case), and configuring the area code and prefix into the outdial
index allows more than one pager to use that pager system.The organization of the dial string is:
the display data, both of which are
Pager system dial string T9T1213555
©
Copyright 2002, Mitel Networks Corporation 58
Page 59

Mitel NuPoint Messenger Technical Documentation - Release 7.0
Pager Number 9116++++G+
Post-Pager Number 14155556644#
Jane wants you to make 3 attempts to reach her, and each attempt should be 30 minutes apart.
These are the default values for pager frequency and pager interval.
The paging Mailbox Worksheet entries are:
Pager access type I, B or U (internal, billed, or unbilled outdial index)
Pager frequency 3 (default)
Pager interval 30 (default)
Message delivery No
Example 4: Voice Pager
Joe Stockman works in a huge warehouse that is located behind the factory. Since the only
telephone is located in the warehouse office, Joe was given a voice pager, which allows
employees to notify him when they want to pick up stock. To access this pager manually, you lift
the telephone receiver; wait for a dial tone; dial extension 6457; wait for his mailbox to answer,
leave your order (as a message), then hang up. The dial string for these actions is:
Caller Action
Wait for dial tone and go off-hook. T
Dial extension number. 6457
Wait for answer (“hello”) and speak your order. G
Play newest message to Joe’s voice pager, and hang up. V
Dial String
Note: If you enter a V (for voice pager), do not turn message deliv ery on when configuring the mailbox.
For in-house paging, it is useful to set up a pager system that either has no dial string or has the
T (Wait for Dial Tone) code. Since this call does not access an outside line, no pluses need to be
added before the Greet command.
This is organized into the following dial string:
Pager system dial string T
Pager number 6457GV
Post-pager number (None)
Joe is so efficient that he only needs to be paged once per message. The appropriate pager
Mailbox Worksheet entries are:
Pager Frequency 1
Pager Interval 0
Message Delivery No
Message Delivery Example
Message delivery configuration is usually simpler than paging configuration. Here is an example.
Anita Pacheque is a contractor who works off-site. When she is not working at her office, she
©
Copyright 2002, Mitel Networks Corporation 59
Page 60

Mitel NuPoint Messenger Technical Documentation - Release 7.0
wants the server to try to reach her at home. Her office phone number is (415) 555-6836, and her
home number is (408) 555-0921. She wants the server to try her office number three times, with
calls that are 10 minutes apart, then to try her home twice, with 30 minutes between calls. When
test calls are made, it takes five seconds for her office telephone to ring, after dialing is
completed, and three seconds for her home telephone to ring. The dial string to call he r office is:
Caller Action
Wait for dial tone. T
Tell the PBX that you want an outside line. 9
Wait for a dial tone, to confirm that you have the outside line. T
Dial the office number. 14155556836
Wait 5 seconds for the connection to be completed. +++++
Dial String
Similarly, the dial string to call her home is T9T14085550921+++++. Remember that the server
automatically appends a G (Greet) code at the end of the pager string for message delivery calls.
In addition, you need to set phone line exception 11 to 1 and line exception 170 to 1700.
To add message delivery to Anita’s mailbox, specify the following on an Outdial Line Group
Worksheet:
Pager system index 1
Access code T9T
On the message delivery Mailbox Individual Worksheet, entries are:
Pager system Pager access code index 1 (defined as T9T)
Pager number 5556836
Post-Pager number +++++
Pager frequency
Pager interval 10
Pager access type U (unbilled)
Message delivery Yes
3 or press Enter
To add additional pagers or message delivery numbers to Anita’s mailbox, the server prompts for
additional pagers. If you answer Yes, the server prompts you for the next pager’s information.
Note: Selecting message delivery in the mailbox automatically tells the server to wait for a greeting. Do not
include a V or G in the dial string.
Call Placement Example
Call placement only has to be configured once. The following example shows how you might use
call placement.
Call placement is an efficient way to contact large numbers of people in an emergency. For
example, a pharmacy chain can quickly notify its branches of a product recall.
Caller Action
Wait for dial tone. T
Tell the PBX that you want an outside line. 9
©
Copyright 2002, Mitel Networks Corporation 60
NuPoint Voice Code
Page 61

Mitel NuPoint Messenger Technical Documentation - Release 7.0
Wait for a dial tone, to confirm that you have the outside line. T
Dial the number of the pharmacy branch. 12135556598
To send the message, the pharmacy headquarters makes the message and sends it to a
distribution list that contains all the pharmacies’ numbers. This list is created either at the server
maintenance console or by the user at a telephone (see the Distribution Lists chapter). If the
dialing plan is set to make 8 the call placement digit (for example, 3,3,3,3,3,3,3,T,3), the
distribution list looks like this:
Distribution List: 01
Members:
T12135556598
T12135551434
T12135557969
etc.
This sends the message to each phone number in the list.
To add call placement to a mailbox, specify the pager system in the appropriate outdial index
prompt, then respond to the call placement pager access type prompt as follows:
Billed outdial index or unbilled outdial index 1 (A pager system set to T9T)
Call Placement access type B or U
Testing the Configuration
After telephone lines have been installed, and after you create mailboxes for a Pager application,
test each mailbox.
Note: It is very important to test a pager immediately after it is added to a mailbox, since a seemingly
minor error in configuration can cause every page to fail. Furthermore, the server can tie up pager
ports for a long time dialing invalid paging codes.
Testing Paging
Before performing individual test steps, configure the Event Recorder and enable it. After testing
is completed, disable the Event Recorder. For detailed instructions about the Event Recorder,
see the
Briefly, you test paging by leaving a message in the mailbox, then contacting the user to be sure
that the page was successful. You can use the Lights Test option from the server maintenance
console to test each display or tone pager mailbox. See the task list for procedures, Volume 2 of
this manual.
Testing Alternate Pager Activation
If you have configured an alternate pager, it is activated after the frequency and interval of the
primary pager have expired, but before the message has been played. After testing the primary
pager, repeat the test for the alternate pager dial strings. (See the task list for procedures,
Volume 2 of this manual.)
NuPoint Messenger Installation and Service Manual.
©
Copyright 2002, Mitel Networks Corporation 61
Page 62

Mitel NuPoint Messenger Technical Documentation - Release 7.0
Testing Message Delivery
For message delivery, the server should call the appropriate telephone number and, when the
call is answered, should prompt, “Hello, [user’s name]. You have unplayed message(s) in your
mailbox. Please enter your passcode.” If the first part of the greeting has been cut off, add more
plus signs to the end of the pager number or post-pager number. Conversely, if the user answers
and there is a long silence before the server plays the greeting, decrease the number of plus
signs at the end of the pager number or post-pager number.
Message delivery calls can be tested using the Lights Test option mentioned earlier; however, i f
an actual test call is made, you can check server prompts and the mailbox user interface at the
same time. (See the task list for procedures, Volume 2 of this manual.)
The server can outdial very quickly—too quickly for some PBXs. One result can be that the server
fails to get an outside line. To prevent this situation, try slowing down the server’s outdialing
speed. You do this by inserting pluses (++) in dial strings. Each plus tells the server to pause for
one second.
For example, suppose you have the following outdial string:
• T9T4155551212++
You can slow the pacing of the sequence by inserting two pluses after each major step in the
string. The result would be as shown below.
• T9T++4155551212++++
If this result works, you can experiment by removing one pause at a time to achieve the fastest
speed that your PBX can handle.
Testing Call Placement
To test call placement, log into the server and press M to make a message. If you configured the
mailbox with the correct FCOS, you are prompted about which digit to press for making a
message for a telephone number. Address the message to a telephone number, make the
message, then send it. Verify that the message is delivered to the telephone number.
Make a message for a telephone number by specifying the call placement dialing plan digit, and
the phone number itself. Do not include the numbers to get an outside line; this should be in the
call placement pager system access code. If you have DID, you can make a message for your
own number as if it were outside the server. For example, if your call placement dialing plan digit
is 2, and your telephone number is 555-4567, then make a message for mailbox 25554567.
See the task list for procedures, Volume 2 of this manual, on the testing discussed in this section.
Successful vs. Unsuccessful Outdialing
The server applies specific criteria to call processing and treats an outdial as su ccessful or
unsuccessful accordingly.
Successful Outdialing
If the server encounters speech, other than a lengthy greeting, after outdialing, it considers the
call successful.
©
Copyright 2002, Mitel Networks Corporation 62
Page 63

Mitel NuPoint Messenger Technical Documentation - Release 7.0
Successful pages are retried a specified number of minutes apart (the pager interval), for a
maximum number of times (the pager frequency). Paging is discontinued when any of the
following occurs:
• The frequency number is reached
• The user listens to all unplayed messages in the mailbox and logs out
• The user disables paging
Unsuccessful Outdialing
If the server encounters a Busy or Reorder tone, or a Ring No Answer condition after outdialing,
the call is considered unsuccessful. Other examples of unsuccessful calls are if no dial tone i s
detected, or no tone or voice “greets” the server after the page is made. The server retries the
page according to the busy frequency and busy interval.
When the server detects that an “illegal” dial string (that is, a string that does not conform to
configuration rules) has been outdialed, it considers the page successful. This prevents the
server from continually retrying the page. However, if a dial string is configured incorrectly (that is,
it cannot activate the pager), but conforms to pager configuration rules, the server continually
retries the page. This is why it is critical to test every pager immediately after configuring is
completed.
Note: If you are using answer supervision (the L code) in any of your outdial strings, your outdial is
considered a failure unless the server detects a ringing on the line.
Billing Considerations
The billing function is capable of billing both paging and message delivery on a per-call basis.
Remember, however, that the server site is the calling party and thereby responsible for any
charges that accrue when paging or message delivery calls are made to the outside telephone
network. As stated earlier, pager calls are usually of very short duration, but message delivery
calls can be quite long. Since the cost of each call depends on the time of day that it is made, the
duration of the call, the distance between the server and the user, and the rates of the local
telephone company, the server makes no provisions for this aspect of the billing.
Outdial Billing
Outdials such as paging calls can, however, be billed back to a mailbox owner’s account. This
form of outdial billing can be implemented through individual mailboxes’ configuration and is
explained more fully in the Mailboxes chapter.
Here is an example:
Henry Huggins has a pager and has his pager calls billed to his calli ng card number. To perform
this manually, you lift the telephone receiver; wait for a dial tone; dial 9 to get an outside line;
listen for a dial tone; dial 0-612-555-4534 (0 indicates you will charge the call); wait for a
computer tone; dial the calling card number; wait for another tone; dial his mailbox number, 6446;
then dial # to tell the pager that all the display data has been entered. (This activates the pager).
The dial string for these actions is:
Caller Action
Dial String
Wait for dial tone. T
Dial 9 to get outside access. 9
Wait for second dial tone. T
©
Copyright 2002, Mitel Networks Corporation 63
Page 64

Mitel NuPoint Messenger Technical Documentation - Release 7.0
Dial individual pager number is. 06125554534
Wait four seconds for line to settle. ++++
Wait for computer tone. G
Dial calling card number 503102533346666
Wait four seconds for line to settle. ++++
Wait for computer (dial) tone. G
Dial display data (mailbox). 6446
Enter # to indicate that all the data has been
entered and make paging terminal hang up.
#
In this case, such as in Example 3 (DID Display pager), configuration is complex, since there is
insufficient room in the mailbox Pager Number parameter to specify the individual pager number,
and
the calling card number,
installations, however, DID display pagers share a common area code and prefix (0-612-555, in
this case), and configuring the area code and prefix into the outdial index allows more than on e
pager to use that pager system.
The organization of the dial string is:
Pager system dial string T9T0612555
Pager Number 4534++++G503102533346666
Post-Pager Number ++++G6446#
the display data, all of which are unique to this pager. In most
The paging Mailbox Worksheet entries are:
Pager access type B (billed outdial index)
Billing order nb
Message delivery No
Finally, to use the calling card capability, you must set Phoneline Exception 32 to a value
between 35 and 40. (The default is 24.) Refer to the
Manual
for your platform to do this.
NuPoint Messenger Installation and Service
Individual Rates
The server’s billing rates structure does allow you to specify an individual rate for each pager
system. This rate is multiplied by the number of pages that are issued for the mailbox. If you put
message delivery accounts and radio pager accounts on separate pager systems, you can
increase the charges on the pager systems that serve message delivery subscribers to
compensate for any toll charges that the telephone company levies.
User Telephone Interface
The following paragraphs discuss the user telephone interface for paging, message delivery, call
placement, and passcode protection.
Paging and Message Delivery Telephone Interface
Users control their schedules and phone numbers by beginning at the Call Schedule Optio ns
Menu, an option on the User Options Menu. From there, they go to the Paging/Message Delivery
Schedule Menu, where they can alter the start and stop times and phone numbers.
©
Copyright 2002, Mitel Networks Corporation 64
Page 65

Mitel NuPoint Messenger Technical Documentation - Release 7.0
Note: When NP TDD is enabled, call scheduling is not available.
When users make a choice from the Paging/Message Delivery Schedule, the server gives them a
series of prompts to guide them through each change they make. Whether users hear the
prompts for paging or message delivery depends on the FCOS, and whether the Message
Delivery parameter was set to Y in the mailbox configuration.
Call Placement Telephone Interface
To use this feature, users begin with these steps:
1. Press M to start making a message.
2. Press the key (set in the dialing plan) that activates call placement.
3. Dial the destination phone number.
The server automatically prompts users to record the name of a recipient, and then to record a
message. After recording, users can send their messages immediately (with “n ormal” delivery), or
use message addressing options, including passcode protection (se e below). When users send
their messages, the server dials the specified phone number.
When someone answers the phone at the destination number, the server announces, “This is a
message for [recipient’s name] from [sender’s name].” Recipients then have the following options
from the keypad:
• Accept this message.
• Delay the message for 30 seconds.
• Reject this message.
• Tell the server to try to redeliver in an hour.
Note: All options require recipients to have a pushbutton phone.
If recipients accept the message, they can replay it and/or answer the sender. If recipients reject
the message or the server cannot deliver it, the server notifies the sender with a non-delivery
receipt—even if the sender did not request a receipt. Of course, users can still request the
standard receipt.
Passcode Protection
As a message addressing option, users can attach a 4- to 10-digit passcode to their messages,
which recipients must enter before they can play the messages. Of course, a sender and
recipient must agree on this passcode beforehand.
To use this feature, a user presses M for message addressing options when making the me ssage
for a call placement number. The user then presses O for off-site passcode, and is prompted for a
4- to 10-digit passcode. The user then exits message addressing options and sends the
message.
The called person is prompted for the passcode before the message can be played.
©
Copyright 2002, Mitel Networks Corporation 65
Page 66

Mitel NuPoint Messenger Technical Documentation - Release 7.0
5 Message Waiting Application
This chapter describes the two standard message waiting applications in a NuPoint Messenger
server that can turn PBX message waiting indicators on and off, and explains how to use the
appropriate worksheet for configuring the desired application. Topics covered include:
• DTMF to PBX MWI Worksheets and Configuration
• RS-232 MWI Worksheets and Configuration
• Pre-Programmed and Programmable Interfaces
• PBX Information
• Testing
Note: Many PBX integration optional features have their own method for turning message waiting
indicators on and off, and do not use the functions discussed in this chapter.
Overview
Two message waiting applications can be used when an integration itself does not handle
message waiting indicators. The two applications, DTMF-to-PBX Message Lights and RS-232
Message Waiting Indicators Interfaces, allow the server to turn PBX message waiting on and off.
• DTMF-to-PBX uses one or more line card ports to send DTMF signals over the telephone
lines
• RS-232 uses one or more serial ports to send signals to the PBX over an RS-232 data link or
modem between the server and the PBX.
You may wish to refresh or supress the message waiting indicators. Reach the Supress/Refresh
MWI menu from the Main Menu by selecting (S) System Manitenance, (R) Reconfiguration, then
(C) Supress/Refresh MWI.
At the Supress/Refresh MWI menu, you can set parameters to refresh some or all message
waiting indicators, supress message waiting indicators for specific MWI types, and view the
current MWI types and settings. When you set the first and last mailboxes, be sure that the range
is a maximum of 2400 mailboxes.
Procedures
These procedures are located in Volume 2 of this manual.
Procedure Number
DTMF-to-PBX Message Waiting Indicator Configuration CP 3323
Programmable RS-232 Interface Configuration CP 3324
Pre-Programmed RS-232 Interface Configuration CP 3325
Assign Message Waiting Indicators to a Mailbox CP 5031
©
Copyright 2002, Mitel Networks Corporation 66
Page 67

Mitel NuPoint Messenger Technical Documentation - Release 7.0
Compensate for Different Directory and Mailbox Numbers CP 5032
Create an RS-232 Programmable Interface String CP 5036
Define an RS-232 Serial Port CP 5038
Enable/Disable Light-on Requests for Successive Messages CP 5034
Send the Number of Unplayed Messages CP 5039
Set Delay times for RS-232 Message Waiting Requests CP 5040
Assign Additional Serial Ports for RS-232 Programmable Interface CP 5055
Set DTMF-to-PBX Protocols CP 8008
DTMF-to-PBX Message Waiting Indicators
This application allows the server to turn PBX message waiting indicators on and off by sending
DTMF signals over the telephone lines. Some PBXs allow telephone users to turn message
waiting indicators on and off by dialing in a code. If your PBX has this capability, and if the code
is not sent using proprietary signaling, you may be able to configure the server to behave as if it
were a station user.
When a message is left in a mailbox that uses this type of message waiting, the server takes a
line-card port off-hook, dials a string of DTMF digits, then goes on-hook. The PBX translates
these digits and turns the appropriate indicator on. When all unplayed messag es have been
played, the server follows the same procedure (dialing a different string of digits) to turn the
indicator off.
You need to set up a line group of at least one line, which is dedicated to outdialing DTMF-toPBX message waiting signals.
DTMF-to-PBX Message Lights Worksheet
Configuring these message indicators involves two steps: setting up a line group of at least one
line to serve as an outdialer of message indicators requests, and configuring the dial strings that
constitute these requests. Complete the worksheet (Figure 5-1), then see "Message Waiting
Indicators" in the task list for configuration procedures.
Configuring the PBX
Assign, to each server line that is dedicated to this application, a PBX class of service that
permits the server to turn message waiting indicators on and off.
Configuring the Application
There are three steps to configuring DTMF-to-PBX message indicators:
©
Copyright 2002, Mitel Networks Corporation 67
Page 68

Mitel NuPoint Messenger Technical Documentation - Release 7.0
1. Determine what DTMF strings the PBX uses to turn message waiting indicators on and off,
and use this information to complete the DTMF-to-PBX Message Lights Worksheet. A blank
worksheet is located in Volume 2 of this Manual.
2. Create a line group with one or more lines to be used as an outdialer port. If your PBX only
allows a message waiting indicator to be turned off by the same extension that turned it on,
you can still configure a multi-line group if needed for heavy traffic volumes. The NuPoint
Messenger server uses the correct port to turn off message waiting indicators for specific
extensions.
3. Enter the information at the server maintenance con sole.
All configuring of the DTMF-to-PBX message waiting indicators is PBX-dependent. If your PBX
allows users to turn the message indicators of other users on and off, then the proper coding can
usually be found in the PBX users' guide. Otherwise, consult the PBX operating manual or your
PBX vendor for the necessary codes.
The DTMF-to-PBX Message Lights application menu prompts for specific sections of the dial
strings. The dial strings are dialed out in the following order:
1. PBX special access code
2. Pre-DN on or off string (after dial tone confirmation)
3. Directory number
4. Post-DN on or off string (followed by a wait for dial tone)
Figure 5-1 Sample DTMF-to-PBX Message Lights Worksheet
Line Group Information
All server ports are assigned to line groups. Each line group is then assigned to a single
application, and any configuring that is done for that application applies to every port in the line
group. The number of ports in each line group depends on how heavy the phon e traffic is
expected to be for that particular application.
Line Group #
Each line group is represented by a distinct number. Valid line group numbers are 1 through 24.
Group Name
The group name is optional. It serves to easily identify the line group's purpose; for example, the
line group for this application can be called "DTMF-to-PBX Outdialer."
Line(s) in Group
You identify each line (or port) in a group using a triplet, which stand for a module, the slot
number for a line card, and a port on the line card. Module refers to a CPU, the server's main
n
processor. Slot numbers are 0 through 15. Ports are numbered 0 through
number on the line card); you can connect one telephone line to each port.
(the highest port
For more information on triplets and line group numbering, see the NuPoint Voice Application
chapter.
Initial Dial Tone Detection
When building outdial strings, the Initial Dialtone Detect parameter gives you precise control.
©
Copyright 2002, Mitel Networks Corporation 68
Page 69

Mitel NuPoint Messenger Technical Documentation - Release 7.0
This parameter allows you to include a T code (Go Off-Hook, Wait for Dial Tone) if you are
integrating with most PBXs, or delete a T code in the dial string if you are integrating with cellular
or other non-PBX equipment that cannot produce a dial tone.
The outdial string consists of the following parts:
• Initial T code produced by this parameter, if enabled
• PBX special access code parameter, if any
• Appropriate on or off dial string parameter (the pre-DN on dial string, pre-DN off dial string,
post-DN on dial string, or post-DN off dial string).
Note: If you enable this parameter ("enabled" is the default), do not enter a T code as the first part of the
special access code. If you do, the server waits for two separate dial tones. But two separate dial
tones cannot occur in this context, so every message indicator request fails.
If you disable this parameter, you typically begin the special access code with the S (Go OffHook, Do Not Wait for Dial Tone) code.
PBX Special Access Code
Some PBXs require the server to dial a special access code before sending message indicators
requests. The special access code indicates to the PBX that one of its special features is about
to be invoked. Table 5-1 lists the characters allowed in this code.
Note: The NuPoint Messenger server automatically configures a T (Go Off-Hook, Wait for Dial Tone) as
the first part of the outdial string. DO NOT enter a T as the first part of the special access code
because then the server waits for two separate dial tones.
There is no default PBX special access code.
Dial Tone Confirmation
Answer Yes to this parameter only if (1) a PBX special access code is required and (2) if, after
the special access code has been sent, the PBX expects the server to wait for a dial tone before
the server outdials any other digits. The default is No (no wait).
Pre-DN On or Off String
This string is sent before the directory number (extension number) to instruct the PBX to turn the
message waiting indicator on or off at that station. There is no default Pre-DN on or off string.
Note: Never enter a T as the first part of the Pre-DN on string because then the server waits for two
separate dial tones.
Enter the coding, if any, that must be sent before the directory number to turn message waiting
indicators on or off.
Suppress Updates to MWL
Each time a mailbox receives a new message, the server sends a request to the PBX to turn on
the message indicator. However, if the user logs into the server, listens to all the new messages,
and logs out, a single indicator-off request is sent to the PBX. Some PBXs stack the indicator-on
requests. Then, when the single indicator-off request is sent, it cancels only one of the indicatoron requests, and the message indicator stays on. To prevent the server from sending an
indicator-on request when the message indicator is already activated, leave this feature at the
©
Copyright 2002, Mitel Networks Corporation 69
Page 70

Mitel NuPoint Messenger Technical Documentation - Release 7.0
default setting of Yes. This feature also cuts down on overall message waiting indicators traffic.
Table 5-1 PBX Special Access Code Characters
Character Explanation
0-9, *, # Keys on a standard pushbutton telephone
( The following digits should be dial pulsed (10 PPS)
) Stop pulsing; resume sending DTMF tones
+ Pause for one second
A-D Fourth column DTMF keys
E Go off-hook, wait for dial tone or other steady tone (pager go-ahead or
confirmation tone, for example), then do next item in string
F Switch hook flash and wait for dial tone
G Greet - Wait for a voice or computer tone answer
H Hang up (go on-hook)
L Answer Supervision - Wait for telephony signal from destination. Use only
with trunk (four-wire) connections.
N Start a new activity; do not go off-hook
O Ring once
P Go off-hook, do not wait for dial tone
S Switch hook flash, no wait required
T Go off-hook, wait for dial tone
V A voice pager system is being used
Post-DN ON or OFF String
This string is sent after the directory number (extension number) to instruct the PBX to turn the
message waiting indicator on or off at that station. There is no default post-DN on or off string.
Enter the coding, if any, that must be sent after the directory number to turn message waiting
indicators on or off.
Wait for Dial Tone
The default value is N. If the PBX can return dial tone to the server to indicate that a message
indicator has been turned on or off successfully, answer Yes. The server registers an error
condition if dial tone is not returned, and redials the appropriate dial string.
Enable Alternate Code
The alternate code is the DTMF string that the server transmits after the pre-DN on string.
Typically, the directory number (DN) and the mailbox number are the same. The server expects
this to be the case, because it includes the mailbox number as the DN when it sends a message
indicators request to the PBX. Sometimes, though, the DN and mailbox number are different. In
those cases, do the following to make sure users get message waiting indication:
• Enable this parameter.
• Put the DN in the Department Code parameter of the mailbox's configuration. (The software
supports up to 2000 department codes.)
After you complete these steps, the server uses the value of the Department Code parameter in
the mailbox's configuration as the DN when it sends the request to the PBX.
Testing
See the task list for testing procedures.
©
Copyright 2002, Mitel Networks Corporation 70
Page 71

Mitel NuPoint Messenger Technical Documentation - Release 7.0
RS-232 Message Waiting Indicators Interfaces
This application allows servers to turn PBX message waiting indicators on and off by sending
signals to the PBX over RS-232 data links. The data links can be either direct serial connections
to the PBX, or they can connect to modems that are connected to analog ports on the PBX.
When a message is left in a mailbox, the server sends an ASCII message that tells the PBX to
turn on the message waiting indicator at the appropriate station. Conversely, when all unplayed
messages are played, the server sends an ASCII string that directs the PBX to turn off the
message waiting indicator.
Serial Port or Modem Requirement
To use any RS-232 message waiting indicators interface, an RS-232 cable must be run from a
server serial port to the PBX (or, in the case of CentrexRS-232 MWI interface, to a modem that
communicates with the Central Office). The physical setup uses RS-232 pins 2, 3, and 4, with
communications parameters of 1200 baud, 8 data bits, 1 stop bit, no parity, full duplex, and no
flow control.
If you have an expansion serial port card installed in your server, you can use as many serial
ports as necessary for the programmable RS232 message waiting application. You first assig n
and configure a single serial port using index 1, and then any additional ports assigned to the
application will adopt the configuration of the first port.
RS-232 Message Waiting Indicators Interface Worksheet
Complete an RS-232 Message Waiting Indicators Interface Worksheet. A blank worksheet is
located in Volume 2 of this Manual. Then see "Message Waiting Indicators" in the task list for
configuration procedures.
Pre-Programmed Interfaces
A server can operate with a variety of pre-programmed interfaces. These are described briefly in
the following paragraphs.
SL-1 Background Terminal Facility
Use this message waiting indicators interface when the SL-1 background terminal facility (X37
release 3) message waiting protocol is required.
Note: This option has been superseded in SL-1 software. Unresolved conflicts can occur with some newer
features.
NuPoint Messenger Standard Interface
A wide variety of PBXs can use this interface. Default settings for this interface are listed in Table
5-2.
Table 5-2 Default Settings for Standard Interface
String Setting
Initialization string \r\r\r (three carriage returns)
Reply string None
Pre-DN ON string M1
©
Copyright 2002, Mitel Networks Corporation 71
Page 72

Mitel NuPoint Messenger Technical Documentation - Release 7.0
Pre-DN OFF string M0
Post-DN ON string \r
Post-DN OFF string \r
See the table of ASCII codes under "Configuring the Programmable Interface" for definitions of
these settings.
Specialized Message Waiting Indicator Systems
The following specialized message waiting indicator systems require the purchase of additional
hardware and software. Instructions for installing and configuring these systems are shipped with
the products.
AC Message Lamp
The server is equipped with the NuPoint Messenger AC Message Lamp system. When you
create or modify a mailbox, the server prompts for the address of the user's AC message lamp
unit, which is set with the thumbwheel switches on the message indicator box.
An AC message lamp address starts with a house code, which can be any letter from A through
P. This is followed by a unit code, which can be any number from 1 through 16. Examples are
A1, D5, P16. Address P1 is reserved for troubleshooting and diagnostics, and must not be
assigned to a mailbox.
After the address is entered, the server prompts for the number of the AC controller. The
controller number is either 1 or 2, depending on the controller unit that is shipped with the AC
message lamp system. Both controllers are equivalent; the unit shipped depends on availability.
The controller number is displayed in the server's configuration report.
Tip and Ring Message Waiting Lamps
The server sends signals over the telephone lines to either a Tip and Ring Message Waiting
Notification Controller (TRNC), which controls message waiting indicators at users' stations; or to
a dispatch indicator board, which is used for automated dispatch applications.
When this message waiting type is chosen (during mailbox create or modify), the server issues a
prompt that lets you specify the chassis number and line number. More than one TRNC unit can
be connected to a server. The chassis number is the number of the TRNC unit to which the
user's telephone line is connected. The line number is the exact position where the line is
attached to that chassis. The technician who installs the Tip & Ring message wai t ing indicators
system makes a list of the users' stations and their corresponding addresses.
You can also use this message waiting type with the Alltel Dispatch System.
Video Dispatch
Video Dispatch is part of the Automated Dispatch Communications System. Video terminals
display the status of dispatch mailboxes. These displays are updated as messages are received,
played, and deleted. Special hardware and software must be purchased from your distributor to
run a Video Dispatch system.
Optional Features
The other pre-programmed RS-232 message waiting indicators interfaces, listed below, are
©
Copyright 2002, Mitel Networks Corporation 72
Page 73

Mitel NuPoint Messenger Technical Documentation - Release 7.0
optional features. For more information about any of them, contact your distributor.
• BBL Pager
• Hyatt Encore PMS Integration
• PMS Integration
• HIS PMS Integration
• Hitachi PMS Integration
• Hitachi DX
• ITT
Programmable Interface
The Programmable option allows you to customize the RS-232 message indicator software
interface between the server and the PBX. All codes are sent in ASCII. Numbers, letters, and
certain special characters (Table 5-3) are understood by the software.
Configuring a Pre-Programmed RS-232 Interface
Configuring any of these interfaces consists of defining a serial port then making selections from
the respective interface menu. See "Message Waiting Indicators" in the task list for configuration
procedures.
Use the RS-232 Message Waiting Lights Worksheet (Figure 5-2) to orga nize the information you
need for configuring one of these interfaces. If the interface is an optional feature, also contact
your local distributor for additional directions. A blank worksheet is located in Volume 2 of this
Manual.
Configuring the Programmable Interface
The RS-232 Message Waiting Lights Worksheet (Figure 5-2) organizes the information that is
necessary for configuring the programmable interface. You can use ASCII codes in any of the
strings described in the following paragraphs.
Table 5-3 lists the valid ASCII codes that can be used. The following descriptions can help you to
complete this worksheet.
Initialization String
This string is sent to the PBX to notify it that the server is ready to send message waiting indicator
requests.
Reply String
After the initialization string is sent, the server waits for the PBX to return this reply string, before
sending message indicators requests.
Pre-DN On String
This string is sent before the directory number (extension number) to instruct the PBX to turn the
message waiting indicator on at that station.
Pre-DN Off String
©
Copyright 2002, Mitel Networks Corporation 73
Page 74

Mitel NuPoint Messenger Technical Documentation - Release 7.0
This string is sent before the directory number (extension number) to instruct the PBX to turn the
message waiting indicator off at that station.
Table 5-3 RS-232 Message Waiting Indicators
Interface Codes
Code Explanation
\r carriage return
\n new line
\t tab
\b backspace
\f form feed
\\ backslash
\" double quotes
\? question mark
. no string needed
Post-DN On String
Enter the coding, if any, that must be sent after the directory number to turn message waiting
indicators on. There is no default post-DN on string.
Post-DN Off String
Enter the coding, if any, that must be sent after the directory number to turn message waiting
indicators off. There is no default post-DN off string.
Department Code as DN?
Enter Yes if you want the server to send the department code as the DN when issuing a request
to turn indicators on or off. When this feature is set at the default value, No, the server sends the
mailbox number as the DN.
Figure 5-2 Sample RS-232 Message Waiting Lights Worksheet
Unplayed Number Sent?
Enter Yes if you want the server to send the number of unplayed messages after the DN, when
issuing a request to turn indicators on. The default value is No.
Delay After Post-DN String
This parameter is the period of time, in seconds, between the post-DN off string and the ending
trailer string. This delay gives the PBX time to process each request correctly. If requests come
too quickly, the PBX could drop or corrupt them. From 0 to 255 seconds can be specified. There
is no default delay.
Ending Trailer String
If the PBX requires this string, the server sends it after the delay just described. Use the
characters in Table 5-3 to create this string, up to 30 characters long. There is no default ending
trailer string.
Suppress Updates to MWL?
©
Copyright 2002, Mitel Networks Corporation 74
Page 75

Mitel NuPoint Messenger Technical Documentation - Release 7.0
A server administrator can configure whether message waiting indicator on or off requests are
sent out for every new unplayed message, or only when the message waiting indicator state
changes from off to on or from on to off. Using the latter functionality (only when the message
waiting indicator state changes) makes better use of server resources.
The server does not suppress message waiting indicator updates by default. To suppress them,
you must enter the message waiting type number of your RS-232 system, then enter Yes. (The
default is No for all types.)
Message waiting types are listed in Table 5-4.
Modem Result Code
The modem result code parameter allows the server to determine if a message waiting request
was accepted by the switch, and to retry a failed request if necessary. The modem result code
tells the server to look for a certain message from the modem to indicate that the message
waiting request was accepted by the switch. You must know the message that the modem
returns, for example, "NO CARRIER." The server looks for the exact message set in the Modem
Result Code field, and, if it does not see it, retries the message waiting request up to 18 times.
You can find out what result code the modem returns by setting this field to some value (it doesn't
matter what), and then turning on the Pager/Programmable RS232 interface in Event Record er.
Use the Lights Test to send an MWI request to a mailbox that has its MWI type set to
Programmable RS232. The Event Recorder message will show you the actual result string that is
returned from the modem. You can then set the Modem Result Code field to that value, assuming
that the request was completed successfully.
Leave this field blank to have the server ignore any result code returned by the modem and
assume that all message waiting requests are successful. To remove a previously configured
value, enter a period.
Testing
Create at least one mailbox with the RS-232 message waiting type that is appropriate for your
server. To test RS-232 message waiting indicators, choose the Lights Test option from the
server maintenance console, and select the proper message waiting type. See the task list for
testing procedures.
Table 5-4 Message Waiting Types
Number Message Waiting Type
0 None
1 Not available
2 AC message lamp
3 DTMF-to-PBX
4 Fixed RS-232 (and Hitachi DX)
5 Pager
6 SL-1
7 Program RS-232
8 Tip & Ring RS-232
9 Centrex RS-232
10 Intecom RS-232
11 NEC RS-232
12 Video Dispatch
13 ITT RS-232
14 Text
©
Copyright 2002, Mitel Networks Corporation 75
Page 76

Mitel NuPoint Messenger Technical Documentation - Release 7.0
15 AT&T System 75
16 HIS PMS
17 Unified Integrations
18 ROLM
19 Mitel
20 SL-1 Message Waiting
21 Hitachi PMS
22 SL-1 Enhanced Meridian
23 Fujitsu 960
24 SMS-MWI
6 Mailboxes
This chapter describes the most common component of the NuPoint Messenger server software
applications, the mailbox. These topics are covered:
• Outside callers and Mailbox Owners
• Mailbox Creation and Modification
• Worksheets
• Classes of Service
• Greetings
• Distribution Lists
• Other Configuration Parameters
• Unplayed Messages and Receipts
• Types of Mailboxes
• Outdial Billing
Overview
Mailboxes are the user component of a server. Every server user has at least one mailbox, and
the server administrator must make a number of configuration decisions that affect mailboxes.
Some configuration is server-wide, and has been discussed in the previous application chapters.
This chapter describes different mailbox configuration options and how to do them.
Procedures
You can perform the following procedures to configure mailboxes. These proce dures are located
in Volume 2 of this manual.
Procedure Number
Distribution Lists
©
Copyright 2002, Mitel Networks Corporation 76
Page 77

Mitel NuPoint Messenger Technical Documentation - Release 7.0
Distribution Lists Configuration
Allow Broadcasting to a Broadcast Mailbox
Configure a Mailbox for Distribution Lists
Configure for Name and Greeting Broadcast
Create a Master Distribution List
Create or Modify a List for Mailbox Owners
Delete a Distribution List
Delete a Member from All Distribution Lists
©
Copyright 2002, Mitel Networks Corporation 77
Page 78

Mitel NuPoint Messenger Technical Documentation - Release 7.0
Nest a Distribution List or Prevent Nesting
View All Lists Containing a Specified Member
View Members of a Single List
Greetings and Prompts
Allow a Transfer Automatically After a Greeting
Configure for Name and Greeting Broadcast
Configure for a Receipt Notice or Receipt Summary
Copy a Mailbox Greeting
©
Copyright 2002, Mitel Networks Corporation 78
Page 79

Mitel NuPoint Messenger Technical Documentation - Release 7.0
Enable an Alternate Company Greeting
Enable or Disable a Message of the Day
Enable or Disable Tutorials
Record an Alternate Company Greeting
Record Company Greetings
Schedule Company Greetings
Set Languages for Prompts
Test Conditional Greetings
©
Copyright 2002, Mitel Networks Corporation 79
Page 80

Mitel NuPoint Messenger Technical Documentation - Release 7.0
Mailboxes
Mailboxes Configuration
Configure a Broadcast Mailbox
Configure a Chain Mailbox
Configure a Rotational Mailbox
Configure a Standard Mailbox
Configure a Shared Extension Mailbox
Configure a Tree Mailbox
©
Copyright 2002, Mitel Networks Corporation 80
Page 81

Mitel NuPoint Messenger Technical Documentation - Release 7.0
Configure an Overflow Mailbox
Define an Administrator’s Mailbox
Define an Attendant’s Mailbox
Delete a Mailbox
Inquire About Mailboxes
Modify a Mailbox Configuration
Search for Mailboxes
Set the Passcode, Passcode Count and Tutorial
Setting for a Mailbox
©
Copyright 2002, Mitel Networks Corporation 81
Page 82

Mitel NuPoint Messenger Technical Documentation - Release 7.0
Test Mailbox Capabilities
Test Message Waiting Indication
Outside Callers vs. Mailbox Owners
In many discussions of server mailboxes, you encounter the terms
owner
, or
mailbox owner
or users. A caller dials the server number, enters a mailbox number, listens to the mailbox
greeting or prompt (such as “Please leave a message for Kim Smith”), then leaves a message. A
person who is assigned a mailbox is a “mailbox owner.” Owners can log into their own
mailboxes, play messages, choose selections from a User Options Menu, and select other voice
messaging operations. The term “user” usually refers to mailbox owners, as opposed to outside
callers, as they are users on the server.
. There is a difference between (outside) callers and (mailbox) owners
caller, outside caller, user
,
Mailbox Creation and Modification
Mailbox creation, deletion, and modification are implemented in different ways depending on how
your terminal has been configured.
Scrolling Interface
If you are using the scrolling menu interface, then mailbox creation and modification are similar to
that used in the Release 5.04 application. Creation, deletion, and modification are three different
menu choices. Mailbox creation and modification both generate a set of prompts for the
administrator to answer, one at a time. If you mistakenly answer one prompt incorrectly, you
cannot return to it; you must finish the prompts and recreate or remodify that mailbox again. The
advantage of this method is that it works on any kind of terminal.
Full-Screen Interface
The server has a full-screen interface you use to create, modify or delete mailboxes. All three
options are combined in one menu choice. You use function keys for different options when in
this mailbox menu. The mailbox screen is shown in Figure 6-1. The function keys you can use in
the mailbox maintenance screen are:
Function Key Explanation
F1
F2
F6
F8
©
Copyright 2002, Mitel Networks Corporation 82
Display next mailbox
Display previous mailbox
Delete mailbox
Statistics
Page 83

Mitel NuPoint Messenger Technical Documentation - Release 7.0
|
F9 or Esc
F10
Exit the Mailbox Screen
Edit current mailbox’s information
These are the appropriate function keys when you are editing a mailbox’s parameters (after
pressing F10):
Function Key Explanation
F6
F7
F8
F9
F10
Home
End
Billing
Family/Guest Mailbox Setup (for VMUIF interface only)
Display Statistics
Cancel edit session and ignore changes
Exit and Save new information
Help (based on where cursor is located)
Edit Additional Fields (where cursor is located)
Figure 6-1 shows the Message Waiting Indicator screen, which you can edit for Message Waiting
1, 2, and 3. Use the mailbox worksheets when creating new mailboxes. The worksheets are
described in the next section.
Figure 6-1 Mailbox Maintenance Screen
Mailbox: 00000000998 Code:
Name:
Classes of Service
Limits: Default 1 Tenant: Default TCOS 1 1
Features: UNLIMITED 1 Restriction: 1
Group: Default GCOS 1 1
Network: Default 1
Bad Login Count: 0 Last Login Time: NEVER
Access Code:
Password: N
Day Treatment: M
Extension: 998
Atten DN:
List Rights: Review: Change
F1 Next F2 Prior F6 Delete F8 Stats F9 or Esc Exit F10 Edit
Enter mailbox number to modify or create.
Speech Quality Msgs: 0 Greets: 0
Tutorial: N
Night Treatment: M
Index: 0
Index: 0
CallPlacement Index: N TimeZone: 0
Message Waiting 1: 0 None
Message Waiting 2: 0 None
Message Waiting 3: 0 None
There are additional fields to edit for the three Message Waiting Indicator Fields, and for the two
List Rights fields. In both cases, press the End key to edit the Use this screen to configure
paging or message waiting. Figure 6-2 shows the List Rights screen, which you use when editing
distribution list change or review right.
Figure 6-2 Message Waiting Indicator Screen
M A I L B O X M A I N T E N A N C E
+------------------------------------------------------------
----+
Mailbox: | Message Waiting Light Fields
|
Name:
|
©
Copyright 2002, Mitel Networks Corporation 83
Pager #01 Pager #02
Page 84

Mitel NuPoint Messenger Technical Documentation - Release 7.0
|
|
|
|
|
|
|
|
Classes of| Suppress: N N
|
Limits: D
Pager Num:
|
Features:U
Post Pager:
|
Group: D| System: 0 0
|
Network: D
Frequency: 0 0
|
Bad Login
Interval: 0 0
|
Access Cod| Busy Frequency: 0 0
|
Password:
Busy Interval: 0 0
|
Day Treatm
Msg dlvr: N N
|
Extension:
Start Time: 12:00 am 12:00 am
|
Atten DN:
Stop Time: 12:00 am 12:00 am
|
| Alt Page: N
|
+------------------------------------------------------------
----+
Message Waiting 2: 0 None
Message Waiting 3: 0 None
List Rights: Review: Change:
F9 Cancel F10 Exit and Save Home Help End Menu Selection
Suppress Pager (Y/N)
Figure 6-3 Distribution List Rights Screen
M A I L B O X M A I N T E N A N C E
Mailbox: 00000003553 Code:
Name: ma+-------------------------------------------------+
Classes of S| Distribution List Review Rights |
Limits: DDe| 02 03 04 05 06 07 08 09 10 11 12 13 14 15 |1 1
Features:UUN| 01 1 1 1 1 1 1 1 1 1 1 1 1 1 1 |
Group: DDe| 16 17 18 19 20 21 22 23 24 25 26 27 28 29 30 31 |
Network: DDe| 1 1 1 1 1 1 1 1 1 1 1 1 1 1 1 1 |
Bad Login Co| 32 33 34 35 36 37 38 39 40 41 42 43 44 45 46 47 | NEVER
Access Code:| 1 1 1 1 1 1 1 1 1 1 1 1 1 1 1 1 | Greets: 24
Password: | 48 49 50 51 52 53 54 55 56 57 58 59 60 61 62 63 |
Day Treatmen| 1 1 1 1 1 1 1 1 1 1 1 1 1 1 1 1 |
Extension: | 64 65 66 67 68 69 70 71 72 73 74 75 76 77 78 79 |
Atten DN: | 1 1 1 1 1 1 1 1 1 1 1 1 1 1 1 1 |
| 80 81 82 83 84 85 86 87 88 89 90 91 92 93 94 95 |TimeZone: 0
| 1 1 1 1 1 1 1 1 1 1 1 1 1 1 1 1 |Pager
| 96 97 98 99 |None
| 1 1 1 1 |None
+------------------------------------------------F6 Billing F7 Family F8 Stats F9 Cancel F10 Exit and Save Home Help
Enter 1 to have rights; 0 to not have rights
©
Copyright 2002, Mitel Networks Corporation 84
Page 85

Mitel NuPoint Messenger Technical Documentation - Release 7.0
Mailbox Maintenance
Mailbox maintenance allows you to:
• Search for mailboxes meeting specified configuration criteria (Search for Mailboxes option)
• Obtain configuration information about a specific mailbox (Inquire About Mailboxes option)
• Obtain configuration information about every mailbox in the system (Mailbox Data Report
option)
• View comprehensive details about mailbox activity that is helpful for debugging mailbox
configuration (Mailbox Dump option)
You can also obtain a summary report about disk speech usage for a given mailbox. This report
shows the number of messages played, unplayed, and urgent; message receipt s; and the
recorded name and greetings for the mailbox. A report option allows you to obtain the total disk
usage for a range of mailboxes.
Any of these options presents a report that you can have displayed at the server maintenance
console or printed at a console printer. For sample reports and detailed explanations about their
contents, see the Reports chapter.
Mailbox Worksheets
Before configuring a standard mailbox, complete the Mailbox Individual Worksheet. Each
worksheet entry is explained in the following sections. If you want to use a default value, indicate
that fact on the worksheet. Then you will not need to select or enter any information for that
parameter during reconfiguration. Figure 6-4 shows a sample Mailbox Individual Worksheet. A
blank Mailbox Individual Worksheet is located in Volume 2 of this manual.
To configure a mailbox for paging, message delivery, or call placement, see also “Mailbox
Configuration” in the Pager Application chapter.
Department codes are required for some message waiting applications. In addition, the billing
report includes the department code to allow billing by department. If the mailbox uses a
department code, the software supports up to 2000 department codes.
When you need to organize information for large groups of mailboxes, you can use a Mailbox
Group Worksheet (Figure 6-5). This worksheet allows you to enter configuration values for
several mailboxes on a single sheet. Use it in conjunction with the Mailbox Individual Worksheet
when appropriate. A blank Mailbox Group Worksheet is located in Volume 2 of this manual.
Classes of Service
Each mailbox is assigned classes of service. A Feature Class of Service (FCOS) is a collection
of mailbox features, options, and abilities, called
a group of mailbox limits, such as how many messages a user can store. The LCOS also
determines the mailbox prompts language. A Group Class of Service (GCOS) determines which
mailboxes can communicate with each other. A Restriction Class of Service (RCOS) establishes
a calling area for a mailbox that is subject to NPA/NXX call screening. For further information on
FCOSs and feature bits, see the Features Class of Service chapter. For information on LCOSs
and limits, GCOSs and groups, and RCOSs, refer to the Other Classes of Service chapter.
feature bits
. A Limits Class of Service (LCOS) is
©
Copyright 2002, Mitel Networks Corporation 85
Page 86

Mitel NuPoint Messenger Technical Documentation - Release 7.0
A Network Class of Service (NCOS) and Tenant Class of Service (TCOS).parts of optional
features.can also be assigned to mailboxes.
For more information about NCOSs and TCOSs, respectively, see
and
Enhanced SMDI Integ ation Manual. r
Figure 6-4 Sample Mailbox Individual Worksheet
Figure 6-5 Mailbox Group Worksheet
The NP Net Digital Network
Names and Greetings
A mailbox owner can record a name for the mailbox. If the owner does not record a name, the
server uses the mailbox number instead. For example, if you have mailbox 5731 and record
“Kevin Lee” as your name, other users hear “Kevin Lee” when they make messages for your
mailbox. If you do not record a name, users hear “Mailbox fifty-seven thirty-one.” Users also
hear mailbox names when they play messages from other users. If you get a message from an
outside caller, no name is used.
Greetings are played when callers or users reach your mailbox, either by entering your mailbox
number or by dialing your extension (if you have an integration that supports this feature).
Mailbox owners can choose various types of greetings, depending on their FCOS. In many of the
integrations that a server supports, owners can choose greetings that respond to the condition
under which a call has been received by the server: Ring No Answer, Busy, or Forward.
Personal greetings for these three possible conditions are called
the same greeting played under all conditions, a user would enable the
conditional greetings
primary greetings
. To have
.
The general greeting option allows a user to select whether to use personal or server greetings.
If conditional greetings are also enabled, the user can select conditional server greetings that play
in response to line conditions as shown in Table 6-1.
Table 6-1 Greetings Supplied by the Server
Condition Greeting
Ring No Answer “I’m sorry, [name] does not answer. Please leave your message at
the tone.”
Busy “I’m sorry, [name] is on another call. Please leave your message at
the tone.”
Call Forward “I’m sorry, [name] is not available. Please leave your message at
the tone.”
You can copy a mailbox greeting to a mailbox name and copy a mailbox name to a greeting.
Distribution Lists
This section covers:
• How distribution lists are used in the server software
• Interactions between distribution lists and various class of service settings
• Distribution list administration
©
Copyright 2002, Mitel Networks Corporation 86
Page 87

Mitel NuPoint Messenger Technical Documentation - Release 7.0
Overview
A distribution list allows a mailbox owner to send the same message to a number of recipients by
entering the distribution list number instead of entering each mailbox number. Mailbox owners
can create distribution lists by phone, or a server administrator can create them at the server
maintenance console.
There are two types of distribution lists: mailbox owner distribution lists (sometimes called “user
distribution lists”), which are only accessible by the mailbox owner, and master distribution lists
(sometimes called “system distribution lists”), which are accessible by all users of a line group.
In addition to addressing messages, distribution lists control the actions of several special
mailbox features. The distribution lists in tree mailboxes and rotational mailboxes identify child
mailboxes, and the distribution lists in broadcast mailboxes identify the recipients of broadcast
messages, greetings, and so forth.
Distribution list administration involves many parts of server administration:
• FCOS settings allow mailbox owners to send to and receive from distribution lists.
• LCOS settings control the maximum number of list per mailbox, up to 99, and the maximum
number of recipients per list, up to 65,535.
• GCOS settings identify which mailboxes can exchange messages.
• Mailbox settings control the ability of mailbox owners to review and/or modify distribution lists.
Once you have configured mailboxes appropriately, you can create distribution lists – including
master distribution lists – and maintain them from a telephone. In addition, you can create
distribution lists from the server console using the List Maintenance Menu.
Mailbox Owner Distribution Lists
Mailbox owners can create up to 99 distribution lists for groups of people that they communicate
with frequently. Mailbox owner distribution lists are only accessible by the mailbox owner.
Although a server administrator can create distribution lists for any mailbox, it is usually easier to
let the mailbox owners create and maintain their own lists.
When mailbox owners are given the capability to create and use their own distribution lists, the
server plays the appropriate prompts and options in the User Options Menu. Besides a dding and
deleting members, mailbox owners can review the members of a list and record a spoken name
for it to serve as a confirmation when addressing messages to the list.
A server administrator can control whether or not a mailbox owner can review or modify
distribution lists. Turning off both capabilities can be useful for broadcast mailboxes, while turni ng
off the modify capability can be useful in service bureau environments in which the service
bureau maintains the lists for the customers.
Mailbox owners address messages to their distribution lists by pressing a 0 (zero) before the list
number, for example “015” to address a message to distribution list 15. If feature bit 036 is
enabled, the sender receives a receipt listing which recipients have and have not listened to the
message.
©
Copyright 2002, Mitel Networks Corporation 87
Page 88

Mitel NuPoint Messenger Technical Documentation - Release 7.0
Master Lists
Master lists are useful when more than one person must send messages to the same group o f
people. A master list is a line group-specific distribution list that you can define in the
administrator’s mailbox for that line group. There can be up to 99 master lists. All mailbox
owners who call in on that particular line group can use a master list by pressing “00” before the
list number; for example, “009” to address a message to master distribution list 9, or “0025” for
master list 25.
A master list defined for one line group is not necessarily a distribution list for another line group.
They can share master lists if they share the same administrator’s mailbox.
Although you can create master distribution lists over the phone, it is usually easier to use the
server maintenance console due to the size of some lists. It is often necessary to add newlycreated mailboxes to one or more master list. You must use the phone to log in to the
administrator’ mailbox and record spoken names for master distribution lists.
Distribution Lists and Special Mailboxes
Several types of special-function mailboxes use distribution lists to accomplish their purposes.
These include:
• Tree and rotational mailboxes
• Broadcast message mailboxes
• Broadcast password mailboxes
• Broadcast greeting mailboxes
• Broadcast name mailboxes
Tree, rotational, and broadcast message mailboxes all use distribution list 1 to define child or
recipient mailboxes. For tree and rotational mailboxes, the order of child mailboxes in the
distribution list can affect what callers hear.
Broadcast greeting, name and passcode mailboxes use distribution list 9 to identify the recipients
of the broadcasts. Using list 9 for these features allows these mailboxes to also perform other
special functions, such as broadcast messages, which use distribution list 1. The mailbox owner
can define the remaining distribution lists.
For more information on special mailboxes, see the Special Mailbox section, later in this chapter.
Nesting Distribution Lists
“Nesting” refers to the ability to make one distribution list a member of another list. This allows
you to create a distribution list for each department, and then create a company-wide distribution
list that only contains the department lists. Any changes to the department lists are automatically
picked up by the company-wide list.
The server allows unlimited distribution list nesting by default, except in a broadcast mailbox.
Nesting operates as shown in Figure 6-6.
Figure 6-6 Distribution List Nesting
Once the lists in Figure 6-6 are set up, mailbox 301 can make a message to list 2, and the
©
Copyright 2002, Mitel Networks Corporation 88
Page 89

Mitel NuPoint Messenger Technical Documentation - Release 7.0
following mailboxes receive the message: 224 through 227, 101 through 104, and 401 through
403. Mailbox 104 only receives one copy of the message, even though it appears in both lists 3
and 4.
Feature bit 222 prevents mailbox owners from nesting distribution lists.
If you are creating the distribution list from the server console, identify a nested distribution list by
including “D” before the list number (for example, D03). This is not needed when creating a list
from the telephone; just enter the list number (for example, 03). For complete information refer to
the Mailbox task list in Volume 2 of this manual.
Note: If you send a message to a nested list that contains many mailboxes, a mailbox owner can receive a
message twice. This can happen if a mailbox appears in two lists and the mailbox owner receiv es
the message while the server is still processing the rest of the list. If the mailbox owner discards the
message, the server can send another copy when it reaches to the second occurrence of the
mailbox. This is only an issue with very large nested distribution lists.
Distribution List Interaction With FCOS
You can use the mailbox FCOS to control the ability to send messages to distribution lists,
receive messages sent to other lists, or create or modify distribution lists. As described above, a
feature bit prevents distribution list nesting. Additional feature bits control whether mailbox
owners can use master distribution lists.
The feature bits listed in Table 6-2 affect distribution list use.
Table 6-2 Feature Bits that Control Distribution Lists
Feature Bits Descriptions
032 Make (messages) to user distribution list
033 Give (messages) to user distribution list
034 Make to master distribution list
035 Give to master distribution list
036 Auto-receipt for user distribution list messages
044 Receive user distribution list messages
045 Receive master distribution list messages
074 Create or modify user distribution list
134 Broadcast message waiting status
222 Deny nesting of distribution lists
In addition, these limits affect distribution lists:
• Maximum number of distribution lists (maximum 99)
• Maximum recipients count (maximum 65,535)
For more information, see the Features Class of Service and Other Classes of Service chapters.
©
Copyright 2002, Mitel Networks Corporation 89
Page 90

Mitel NuPoint Messenger Technical Documentation - Release 7.0
Distribution List Interaction With LCOS
You can use LCOS settings to control the number of distribution lists per mailbox, the number of
members per list, and the maximum number of recipients for any message. The specific limits
that apply to distribution lists are:
• Maximum members per distribution list (maximum 65,535)
• Maximum number of distribution lists (maximum 99)
• Maximum recipients count (maximum 65,535)
You can use the “Maximum recipients count” limit to control the impact of nested distribution lists.
The server does not deliver the message to more recipients than this limit allows, even if the total
recipients in the nested distribution lists is greater.
Note: The maximum for a distribution list in a tree or rotational mailbox is 190 members.
For more information on any of these features, see the Other Classes of Service chapter.
Distribution List Interaction With GCOS
Distribution lists are affected by the GCOS settings that control the ability of any mailbox owner to
send messages to other mailbox owners. You must ensure that all members of a master
distribution list have GCOS settings that allow them to exchange messages. Mailbox owners
cannot add recipients who do not share GCOS settings to their distribution lists.
For more information on Group Class of Service, see the Other COS Chapter.
Mailbox Settings for Distribution Lists
Each mailbox has two parameters that are specific to distribution lists:
• Lists with review rights
• Lists with change rights
These parameters control which lists a mailbox owner can review or change. Review rig hts allow
the owner to play the names and numbers of all mailboxes in a list. Denying review rights can
keep the contents of a list confidential. Change rights allow the owner to add or delete mailboxes
in a list. Denying change rights prevents the user from altering a distribution list, which is helpful
for certain applications, such as networking, that require distribution lists.
List Maintenance
The List Maintenance Menu allows you to create, modify, delete and view distribution lists in any
mailbox. You can also locate all lists that contain a specific mailbox, and delete that mailbox from
all lists.
By using Administration by Phone you can create, modify, delete and review master distribution
lists in an administrator’s mailbox, and you can record names for those lists. From an
administrator’s mailbox you can create and modify master lists from 1 to 99, just like a mailbox
owner’s personal lists. Administrators’ mailboxes do not have user (mailbox owner) distribution
lists, only master lists.
©
Copyright 2002, Mitel Networks Corporation 90
Page 91

Mitel NuPoint Messenger Technical Documentation - Release 7.0
Other Mailbox Configuration Parameters
Along with other parameters in a mailbox configuration, you can also specify a message waiting
type that determines how mailbox owners are notified when unplayed messages arrive in their
mailboxes. Mailboxes can also be configured for paging and message delivery. Refer to the
Pager Application chapter for more information on these topics.
Mailboxes can be password-protected.
Variable Length Mailbox Numbers
The variable length mailbox number capability allows the server administrator greater flexibility
when assigning mailbox numbers. You can configure a dialing plan to allow variable length
mailbox numbers. Code a V in the desired digit position in the dialing plan, as described in the
NuPoint Voice Application chapter under “Mailbox Dialing Plan.”
Without this capability, all mailboxes in the same line group that begin with the same digit must be
the same length. If, for example, you specify “3” as the mailbox number length for mailboxes
beginning with 1, then all 1-series mailboxes must be three digits long: 100, 101, 102-199, etc.
This means you have only 100 mailboxes available beginning with 1.
When you specify that mailboxes beginning with a certain digit can be variable length, those
mailboxes can be as short as one digit (9), or as long as 11 (99999999999). This allows you over
11 billion different mailboxes beginning with 9! (You cannot, of course, configure 11 billion
mailboxes, since that would exceed the storage capacity of the disk.)
Hotel installations can make good use of variable length mailboxes. It is convenient for a guest’s
mailbox number, telephone number, and room number to be the same, but this is impossible to
achieve with fixed length mailbox numbers and a single line group. To understand why, realize
that most hotel dialing plans assign three-digit numbers to rooms on floors one through nine, and
four-digit numbers to rooms on floor 10 and above. If the mailbox for room 111 matched the
phone number, the mailbox for room 1111 could not.
Variable length mailboxes allow you to keep all mailboxes in a single line group and still assign
mailboxes that match room and telephone numbers.
Configuration Considerations
If you configure variable length mailboxes, mailbox owners must modify their interactions in these
ways:
• When addressing a message to multiple recipients, they must enter a pound sign (#) after
each mailbox number that is variable length, or wait for the server to prompt for the next
recipient’s mailbox number.
Note: If mailbox owners enter a pou nd sign after a mailbox number that is not variable length, the server
interprets it to mean that message addressing is complete. This can be confusing to mailbox
owners, who find that pressing a pound sign at “the same time” elicits differing prompts. To avoid
this confusion, it is recommended that you make either all mailboxes variable length, or none.
After entering the final mailbox number and pound sign, they must do one of the following:
• Enter an additional pound sign to get the “Begin recording . . .” prompt.
• Wait for the “Begin recording . . .” prompt.
©
Copyright 2002, Mitel Networks Corporation 91
Page 92

Mitel NuPoint Messenger Technical Documentation - Release 7.0
Integrations Supported
You can configure variable length mailboxes with all integrations which are supported except for
the Omni S1 series and the MD-110.
Server Time-and-Date Stamp for Messages
The time-and-date stamp is optional information that the server can add to every message, to tell
the recipient when the message was recorded. If a mailbox owner plays the message the same
day it arrives, only the time is given (for example, 2 p.m.). If the mailbox owner plays the
message on a later day within the same week, the day of the week and the time are announced
(for example, Monday, 2 p.m.). If the mailbox owner plays a message more than a week after it
was received, the day of the week, date, and time are given (for example, Monday, May 11, 2
p.m.).
Time Zone Offset
A mailbox time zone offset is a number the server adds to or subtracts from the hour portion of a
message’s time stamp. This allows mailbox owners to convert the time stamp on a message to
the time zone of their choice.
The server converts the time in a mailbox, so only the mailbox owner hears the converted time
stamp for a message. Users sending messages to or receiving messages from such a mailbox
hear the server’s normal time stamp.
This ability is useful for mailbox owners who live and work in a time zone different from the one
where their server is located.
The time zone offset affects all types of messages except call placement.
Mailbox Configuration Parameters
When you create a mailbox from the console, the time zone offset is one of the mailbox
configuration parameters.
The Mailbox Data Report displays the time zone offset, along with other parameter settings.
Example of Use
Suppose a mailbox owner works in Atlanta, but uses an server based in San Jose. By default, all
the mailbox owner’s messages would have a time stamp based on San Jose’s time zone. If
someone sends the mailbox owner a message at 2 p.m. Pacific Standard Time, that is the time
stamp the mailbox owner hears for this message.
However, if the time zone offset in a mailbox owner’s mailbox has a value of 3, the server tells the
mailbox owner that same message was sent at 5 p.m. The sender of the message, though,
hears that the server sent the message at 2 p.m.
Tutorials
The standard tutorial, which gives basic instructions to a mailbox owner on how to set up a new
not
mailbox, is automatically enabled when a mailbox is created. The standard tutorial is
available, however, if NP TDD is enabled. When the tutorial is accessed the first time on a new
©
Copyright 2002, Mitel Networks Corporation 92
Page 93

Mitel NuPoint Messenger Technical Documentation - Release 7.0
mailbox, it directs the new owner to record a name and greeting, and to set a passcode. There
are times when mailbox owners do not want to hear the tutorial (for example, if they are setting up
a series of tree mailboxes for directory assistance). The Set Passcode/Tutorial option from the
Mailbox Maintenance menu is used to disable (or enable) a standard tutorial, when desire d.
Instead of the standard tutorial, customized information tailored to an individual installation can be
recorded in the attendant’s mailbox and played for new mailbox owners. This is a site tutorial, a
greeting typically recorded by a server administrator.
Unplayed Messages and Message Receipts
The server offers customers message processing flexibility in two related areas:
• Defining unplayed messages
• Controlling when the server sends receipts
Unplayed Messages
Feature bit 145 (Message stays in original queue) determines how the server classifie s a
message if a mailbox owner does not explicitly keep a message (by pressing K) or discard it (by
pressing D).
Message Receipts
Feature bit 147 (Send receipt after full play) controls whether the server waits for a mailbox owner
to explicitly keep a message (by pressing K) or discard it (by pressing D) before sending a receipt
to the sender of that message. The server makes this decision only after a mailbox owner plays
the entire message.
The presence of this feature bit works on a partially played message exactly as it does on a
completely played message. Otherwise, it would be possible for the server to put a partially
played message into a mailbox owner’s saved queue but not send a receipt.
147 has an effect only when it and feature bit 145 are in the same FCOS. Refer to the Features
Class of Service chapter for more information on how these two feature bits interact.
Types of Mailboxes in a Typical Installation
Besides standard mailboxes, a server typically has an admini strator’s mailbox, up to five
attendant’s mailboxes, and other special mailboxes. Basically, special mailboxes have all the
characteristics of standard mailboxes, plus special privileges and capabilities.
Standard Mailboxes
A standard mailbox is a collection point for voice messages. It also has greetings and prompts
associated with it and can be configured to provide an array of capabilities related to voice
messaging. The classes of service mentioned earlier are the means by which y ou can configure
mailboxes to provide the desired capabilities.
©
Copyright 2002, Mitel Networks Corporation 93
Page 94

Mitel NuPoint Messenger Technical Documentation - Release 7.0
Special Mailboxes
The following sections describes the types of special mailboxes listed at the beginning of the
chapter. There are 13 types of special mailboxes:
• Administrator’s mailbox
• Attendant’s mailbox
• Broadcast
• Chain
• Check-In and check-out mailboxes
• Greeting-Only mailboxes
• Guest mailboxes
• NP OnDemand templates
• Rotational mailboxes
• Shared extension mailboxes (a variation of a tree mailbox)
• Template mailboxes (NP Forms)
• Tree (bulletin board) mailboxes
Administrator’s Mailbox
The initial software installation contains an administrator’s mailbox that has these special
privileges:
• Contains the company greetings
• Can create or edit master distribution lists that can be used by any mailbox owner in the
server (with an appropriate FCOS)
• Can add mailboxes, delete mailboxes, and change mailbox configuration, by phone
For more information about the administrator’s mailbox, see the NuPoint Voice Application
chapter.
Attendant’s Mailbox
The initial software installation also contains an attendant’s mailbox. This mailbox supplies these
functions:
• Its greeting is the message of the day, which is stored only in the attendant’s mailbox.
• A customized site tutorial (a form of greeting) can be recorded from the attendant’s mailbox.
• When outside callers access the message center, they are prompted to enter a mailbox
number or wait. Callers who wait are then prompted to leave a name and a message. These
unaddressed messages are stored in the attendant’s mailbox.
For more information about the attendant’s mailbox, see the NuPoint Voice Application chapter.
Broadcast Mailboxes
With a broadcast mailbox, any caller can send a single message to multiple mailboxes. In
addition, mailbox owners can send names and greetings to other mailbox owners. This capability
is particularly useful for disaster recovery or overflow mailboxes. Broadcast mailboxes other than
©
Copyright 2002, Mitel Networks Corporation 94
Page 95

Mitel NuPoint Messenger Technical Documentation - Release 7.0
broadcast message mailboxes can also send a message waiting status to multiple mailboxes.
To illustrate use of a broadcast message mailbox, suppose the manager of a company health
club wants club members to know about an upcoming tournament. The manager logs in to his or
her mailbox and makes a message for the broadcast message mailbox. The broadcast message
mailbox, in turn, sends the message to all members’ mailboxes (this is sometimes called the
“bulletin board feature”).
In this example, the server administrator assigns a Broadcast FCOS to one mailbox. The server
administrator then creates distribution list 01 for that mailbox, including the mailbox numbers of all
the club members, to a maximum of 65,535.
This is a useful feature if you have mailboxes accessed in different calling areas. You can update
the greeting for all the mailboxes, and then callers can reach the local mailbox to get the
information they need. Or, you could use it to broadcast to remote mailboxes through NP Net (an
optional feature).
Broadcast Message Mailbox
A broadcast message mailbox must contain a distribution list 01. If you want the broadcast
message mailbox to be able to keep messages that have been broadcasted, it must first be able
to receive messages. Add any of the “receive” feature bits to the broadcast message mailbox.
Feature bit 043 (Receive message of the day) is needed only if the broadcast message mailbox is
only
also the user’s
message length so the mailbox will not fill up too quickly.
mailbox. In the LCOS assigned to this mailbox, you should set a shorter
Broadcast Greeting, Name, or Passcode Mailbox
Broadcast greeting is a method of propagating a newly recorded or modified greeting to a list of
mailboxes, similar to the method used for propagating messages with broadcast messages
mailboxes. Broadcast name is identical in concept to broadcast greeting, except that newly
recorded and modified names will be propagated to the broadcast list. Broadcast passcode is
similar, except that it propagates a new mailbox passcode to the list.
You can create the broadcast list for a broadcast greeting, name or passcode mailbox like any
distribution list, either from the User Options menu or from the List Maintenance Menu at the
server maintenance console. All three of these mailbox types use distribution list 09. By
assigning the appropriate feature bits to a mailbox, one, two, or all three of these capabilities can
be performed by one mailbox.
Greeting
A broadcast greeting mailbox requires feature bit 174 (Define broadcast greetin g) in its FCOS.
All types of greetings and all names created or modified on these broadcast mailboxes will be
broadcasted, including:
• Day/night company greetings for the administrator’s mailbox
• Message of the day
• Site tutorial for attendant mailboxes
• Multiple mailbox greetings
Name
You can record a name in the broadcast name mailbox and have it announced. The mailbox is
defined by the presence of feature bit 178 (Define broadcast name mailbox) in the FCOS. Since
©
Copyright 2002, Mitel Networks Corporation 95
Page 96

Mitel NuPoint Messenger Technical Documentation - Release 7.0
the name in the mailbox should be the name of the recipient group, such as “Sales Bulletin
Board,” users must remember to state their names at the beginning of their messages. This
name override capability is enabled through feature bit 123 (Announce broadcast mailbox name)
in the mailbox FCOS. With this feature, if you do not record a name in the broadcast mailbox, the
mailbox number is announced. In addition, answers to the messages are also broadcasted.
Without this feature, the server announces the name of the broadcast message originator, if that
person is a server user. In this case, answers to a message go to the sender only. Outside
callers must remember to announce their names if they want recipients to know who sent the
message.
Passcode
You can change the passcode in the broadcast passcode mailbox and have it transmitted to all
mailboxes in the distribution. This feature is enabled through feature bit 231 (Passcode
Broadcast Mailbox) in the mailbox FCOS.
Multiple Mailbox Greetings
Mailboxes with multiple mailbox greetings defined broadcast each individual greeting as it is
created or modified, and a recipient mailbox is checked to see if its FCOS has feature bit 175
(Receive broadcast greeting) or feature bit 179 (Receive broadcast name), or feature bit 232
(Allow receipt of passcode broadcasts). Mailboxes generating broadcast greetings that also have
multiple mailbox greetings enabled can only send messages to recipient mailboxes that also have
multiple mailbox greetings enabled.
Broadcast Message Waiting Status
The server also has the ability to automatically send the message waiting status of a mailbox to a
distribution list of mailboxes without sending the actual message. This is useful in a business
where any one of a number of people can respond to a message, but only one person needs to.
A single response eliminates redundant answers to a message, thereby raising staff productivity
and satisfying the sender of the message.
Example of Use
In a brokerage firm, any of six account executives can respond to potential clients’ requests for
information. If the request results in a sale, the account executive who answered the request
receives credit for that sale.
Broadcasting the message waiting status of a mailbox gives this firm an easy and efficient way to
pass these potential sales on to its brokers. The brokerage first routes all prospects to a main
mailbox in which they can leave requests. When callers leave requests, the server automatically
turns on the message waiting lights on brokers’ phones. The first available broker then log s into
the main mailbox and responds to the request.
Configuration Requirements
The broadcast message waiting status capability uses a server feature plus distribution list 01 of
a mailbox:
• You must include feature bit 134 (Broadcast message waiting only) in the FCOS assigned to
a mailbox before it can send its message waiting status to a distribution list.
• You must also set up distribution list 01 of a mailbox to include all the destination mailboxes
to which to send the message waiting status of the main mailbox.
Multiple Mailboxes per User
©
Copyright 2002, Mitel Networks Corporation 96
Page 97

Mitel NuPoint Messenger Technical Documentation - Release 7.0
Each mailbox in distribution list 01 always reflects the message waiting status of the main
mailbox, regardless of how many messages are in that destination mailbox. Therefore, you may
want to assign a separate mailbox to users for their messages and reserve the destination
mailbox simply to notify them a message is in the main mailbox.
Incompatibility With Broadcast Message Feature
A mailbox can either send its messages or its message waiting status to the mailbox in its
distribution list 01, but not both. This means the FCOS assigned to a mailbox cannot have both
of these feature bits:
• 122 (Define broadcast mailbox)
• 134 (Broadcast message waiting only)
Combining Broadcast Mailbox Types
In addition to being a standard mailbox, a broadcast greeting, name, or passcode mailbox can
also be a tree mailbox. A broadcast greeting, name or passcode mailbox can itself be a
broadcast message mailbox that contains different broadcast lists for messages and greetings.
To have both messages and greetings broadcasted to the same list of recipients, it is necessary
to make distribution lists 01 and 09 identical. List 01 controls the messages broadcasted to
recipients, and list 09 controls the greeting, name, or passcode broadcasted to recipients.
Limits
Standard server limits on greeting and name length also restrict the broadcast greeting or name
lengths for the sending mailbox; limits for recipient mailboxes are ignored.
Greetings will not be broadcasted when modified through the console Greeting Copy/Delete
Menu at the server maintenance console.
Statistical or billing information is not available for broadcast greeting activity.
Non-Delivery Receipts
Non-delivery receipts are deposited in the broadcast mailbox under any of the following
conditions:
• The recipient mailbox does not have the appropriate bit in its FCOS to receive a broadcasted
greeting or name.
• A remote recipient mailbox could not be reached because of network blockage.
• A greeting could not be copied or recorded for a mailbox (local or remote) for miscellaneous
reasons.
Chain Mailbox
Chain mailboxes play a greeting, then route calls to the mailbox selected by the caller. The chain
mailbox itself cannot accept messages from users or callers. Chain mailboxes are useful for
routing incoming callers. For example, a chain mailbox greeting could say, “Welcome to the
Acme Company Credit Department. If you are calling about new home mortgages, enter 100 on
your pushbutton phone. If you want to refinance your existing mortgage, enter 110. For car and
truck loans, enter 120. If there is a problem with your credit report, enter 130. If you wish to
speak to an operator, or have a rotary phone, please wait.” The caller can then dial the
appropriate mailbox number and be transferred to it.
©
Copyright 2002, Mitel Networks Corporation 97
Page 98

Mitel NuPoint Messenger Technical Documentation - Release 7.0
A mailbox owner can log into a chain mailbox and change the mailbox name, greeting, and
passcode, but cannot make messages, or create or use distonbution lists.
Check-In/Check-Out Mailboxes1958
These mailboxes are used by hotels.
A check-in mailbox is a special mailbox that manipulates other mailboxes. When a check-in
mailbox is accessed, the server prompts for the mailbox number to be checked in, then prompts
the caller (usually a hotel or motel attendant) to record a name and enter a passcode for the
mailbox. More than one desk clerk can call into a single check-in mailbox at one time, so it is
unnecessary to create more than one check-in mailbox for your server.
A check-out mailbox is the counterpart of the check-in mailbox. When the attendant calls a
check-out mailbox, the server prompts for the mailbox number to be checked ou t. It then gives
the attendant the choice of either keeping or discarding any messages left in the mailbox. Finally,
the server purges the guest’s name, greeting and passcode, and follows the attendant’s
command about messages. The mailbox is then ready to be checked in for the next guest.
A check-out mailbox must also be created to use the hotel check-in/check-out feature of the
server.
Greeting-Only Mailboxes
When a caller reaches a Greeting-Only mailbox, the server plays the greeting and then hangs up.
Greeting-Only mailboxes are established by assigning FCOS 6 (Greeting Only) or a similar FCOS
to them.
To illustrate a use of a Greeting-Only mailbox, imagine that a theater manager wants callers to
hear an announcement of show times. The manager would create a mailbox with this FCOS, call
the mailbox, log in, then record a greeting.
The mailbox user can change the mailbox name, greeting, and passcode but cannot create or
use distribution lists. No one can make messages for or give messages to a Greeting-Only
mailbox.
A Greeting-Only mailbox must have a greeting; otherwise the server considers the mailbox
invalid. To log into a Greeting-Only mailbox that does not have a greeting, press the star (*) key
on the phone key pad; then enter the mailbox number. You may choose to remove feature bit
066 (Login during greeting in Greeting-Only mailbox) after you record a greeting for the mailbox.
Guest Mailboxes
A guest mailbox is one that is assigned to each guest, typically in a hotel or motel. You establish
a guest mailbox by assigning an FCOS, such as the Lodging FCOS described in the Feature
Classes of Service chapter, to it. These mailboxes are particularly appreciated by users who
might be unfamiliar with voice messaging systems, and their uninitiated callers.
The guest does not need to do any kind of mailbox set-up, such as recording a name and
passcode, before using the mailbox.
The server can usually be integrated with the hotel/motel telephone system to allow the user to
©
Copyright 2002, Mitel Networks Corporation 98
Page 99

Mitel NuPoint Messenger Technical Documentation - Release 7.0
log in simply by pressing a button on the telephone and entering a passcode, when prompted by
the server. Immediately after the guest logs in, the server will play the first message
automatically. The guest is given the options of keeping or discarding the message; when the
choice is made, the next message, if any, is played without any input from the guest.
Prompts for a guest mailbox are in the form, “Press P, the 7 key, to play your message....” in
order to be most helpful to the uninitiated user.
Callers also hear these expanded prompts, “Press R, the 7 key, to review your message...”
As a variation, a hotel or motel may wish to assign the full-feature guest mailbox. This is a
mailbox with FCOS 2 (Full Guest) or its equivalent in the mailbox configuration. The desk clerk
would still check in this mailbox; however, the guest would be able to change the name and
passcode, and would also be able to record a personal greeting, make messages for other
guest’s mailboxes, and so on.
NP OnDemand Template Mailboxes
NP OnDemand is an optional feature where the AIP™ system creates mailboxes only when they
are needed. A NP OnDemand template mailbox is used as a model for the temporary mailboxes
that this application creates. Typically, temporary mailboxes have their LCOS limits set to very
small numbers (such as a day or two).
Rotational Mailbox
A rotational mailbox allows callers to hear greetings that change. Greetings change either by
time and date (in a “period” rotational mailbox) or with every call (in an index type rotational
mailbox).
A rotational mailbox of either the period type or the index type plays its greeting, then plays the
greeting of a child mailbox. Distribution list 01 in the rotational mailbox controls the rotating (or
cycling) of callers through the child mailboxes. Rotational mailboxes do not require greetings,
which can be useful in some applications.
You make a standard mailbox rotational by assigning FCOS 17 (Rotational) to it. You make a
standard mailbox a child mailbox by including it in the distribution list of the rotational mailbox.
Callers cannot leave messages in the rotational mailbox itself, but they can leave messages in
one of the child mailboxes, if the child mailbox is assigned an FCOS that allows callers to leave
messages. You may have up to 190 child mailboxes in the rotational mailbox’s distribution list 01.
Period-Type Rotational Mailboxes
To illustrate a use of a period-type rotational mailbox, suppose that a restaurant owner wants all
callers to hear the special of the day. Tuesday callers, for example, would hear the restaurant
greeting and the special for Tuesday; Wednesday callers would hear the re staurant greeting and
the special for Wednesday, and so on. Figure 6-7 illustrates this example.
In this example, the restaurant owner would assign FCOS 17 (Rotational Mailboxes) to one
mailbox (mailbox 100) and record a restaurant greeting for this mailbox. For this mailbox, the
owner would also create distribution list 01 containing seven child mailboxes (mailboxe s 101 -
107). To each of the seven child mailboxes the owner would assign FCOS 6 (Greeting Only); for
each the owner would also record the daily special. The owner would then set the start date and
©
Copyright 2002, Mitel Networks Corporation 99
Page 100

Mitel NuPoint Messenger Technical Documentation - Release 7.0
start time for the rotation and the length of time before the server rotates to the next mailbox (24
hours in this example).
Index-Type Rotational Mailboxes
The server assigns a sequential index to each member of the rotational mailbox’s distribution list.
If a sorted list is created, mailboxes are indexed starting with the lowest-numbered mailbox. If an
unsorted list is created, mailboxes are indexed starting with the first mailbox entered in the list.
The first caller reaches the first indexed mailbox; the second caller reaches the second index ed
mailbox, and so on. When the last-indexed mailbox is reached, the cycle starts over at the first
indexed mailbox.
As an example of an index-type rotational mailbox, imagine that a veterinarian wants pet owners
to hear three pet-care messages over an unspecified period of time. Each time pet owners call
the veterinarian’s number, they (are likely to) hear a different one of the three messages.
In this example (Figure 6-8) the veterinarian assigns FCOS 17 (Rotational Mailboxes) to one
mailbox (mailbox 781) and records a standard veterinary-practice greeting for this mailbox. For
this mailbox the veterinarian also creates distribution list 01 containing three mailboxes
(mailboxes 711-713). To each of the three mailboxes, the veterinarian assigns FCOS 6 (Greeting
Only); for each, the veterinarian also records a different pet-care message.
Messages
Callers cannot leave messages in the rotational mailbox itself, but they can leave messages in
one of the child mailboxes, if the child mailbox is assigned an FCOS that allows callers to leave
messages. You may have up to 190 child mailboxes in the rotational mailbox’s distribution list 01.
Greetings
If you want the server to hang up after it plays the child mailbox greeting, assign a Greeting-Only
FCOS to these child mailboxes, including feature bit 062 (Hang up immediately after greeting).
If you want each mailbox to provide an introductory announcement before connecting the caller
with an employee, give the child mailboxes an FCOS that includes feature bit 063 (Call mailbox
attendant after greeting) or feature bit 064 (Call mailbox’s extension number after greeting). Do
not
include feature bit 062 (Hang up after greeting). Be sure to include the attendant’s or
extension number in the appropriate field when creating the mailbox.
Rotational mailboxes can also be used with NP Forms applications (see FCOS 16).
Mailbox Status
You can obtain information on existing rotational mailbox parameters, such as whether the
mailbox is the period or index type, by using the MailboxDump option in the Mailbox Maintenance
menu.
Figure 6-7 Sample Period-Type Rotational Mailbox
Figure 6-8 Sample Index-Type Rotational Mailbox
Nested Rotational Mailboxes
You can build nested rotational mailbox arrangements by making a child mailbox itself a rotational
mailbox. Figure 6-9 shows an arrangement in which the rotational mailbox has three child
©
Copyright 2002, Mitel Networks Corporation 100
 Loading...