How it Works
Log In / Sign Up
Buy Points
How it Works
FAQ
Contact Us
Questions and Suggestions
Users
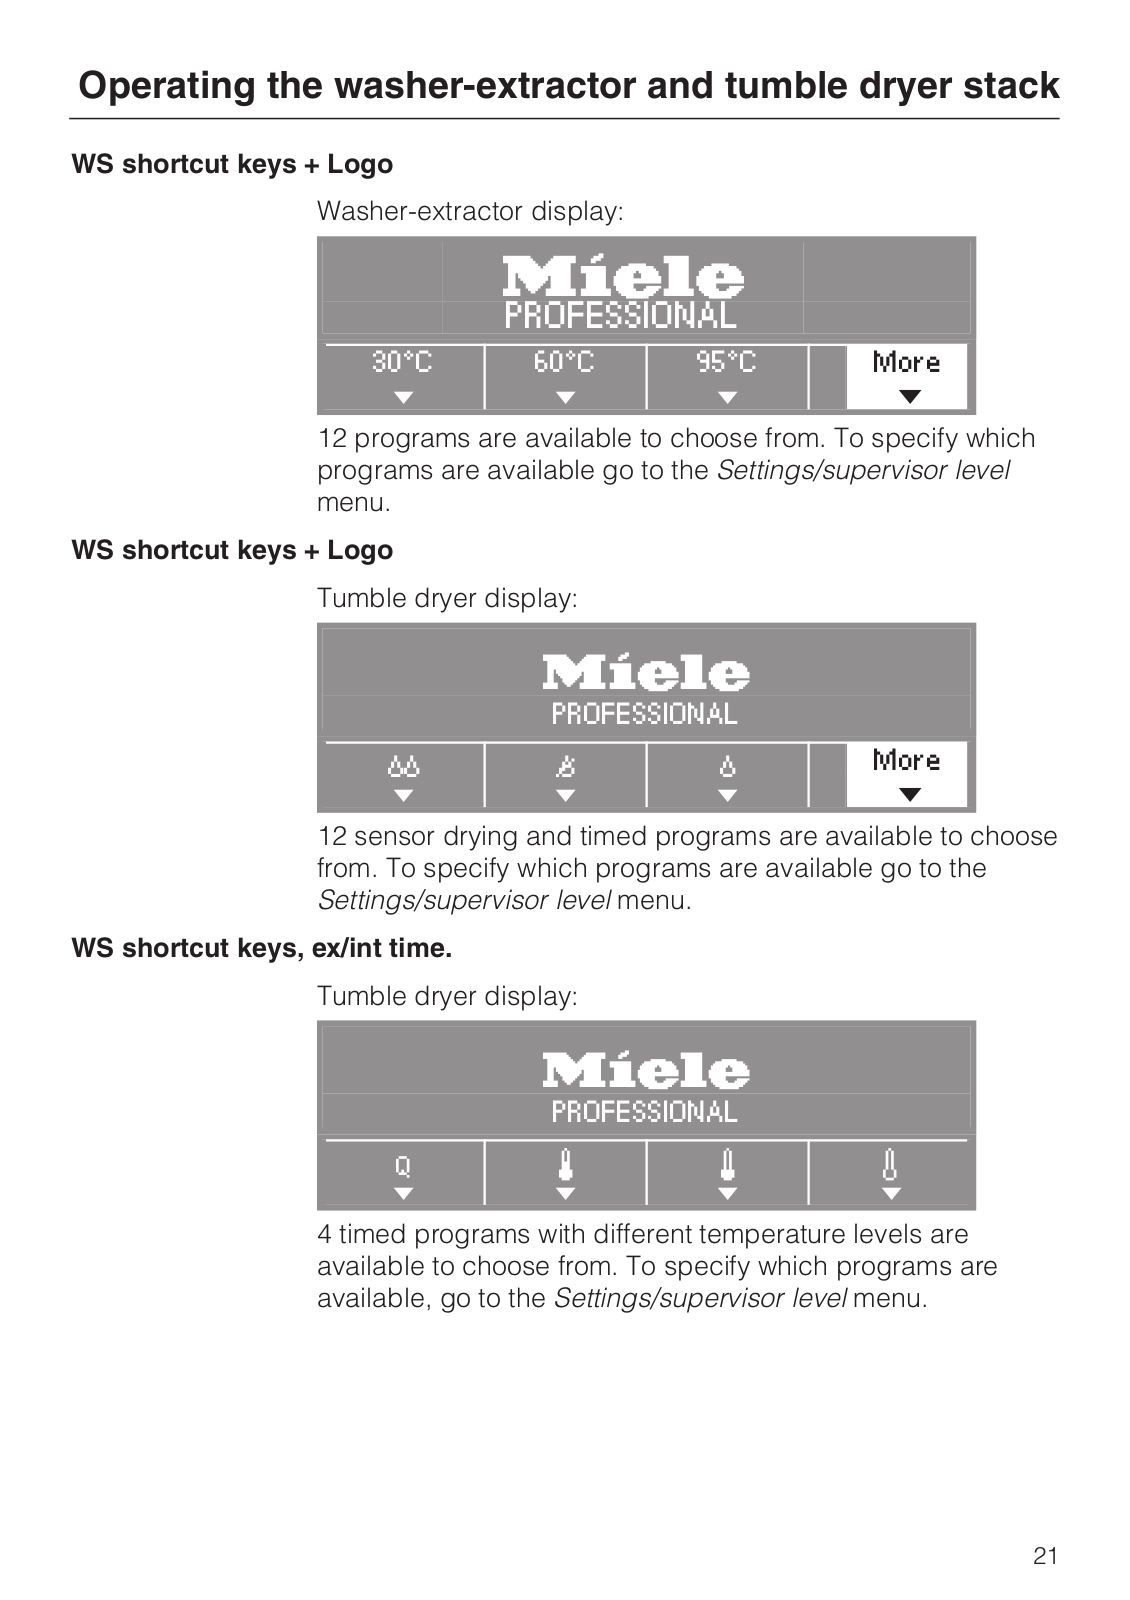
Miele
Loading...
P
PWM300
PWM506 DV MS 60
3
PWM507 DV RU SST
2
PWM507 DV SP
2
PWM 507 Performance Hygiene-ANL
PWM 507 Special
17
PWM 507 Special ISS T
PWM 508
PWM 508 DV MOPSTAR 80
15
PWM508 DV MS 80
PWM 508 Mop Star 80
19
PWM 514
PWM 520
PWM 520 EH
PWM 520 EL
PWM 520 RH
PWM 900-09 CH
3
PWM 906
14
PWM 906 DP
5
PWM 906 DV
5
PWM 906 EcoExpress
PWM 906 LavaPiu
PWM 906 MAR
3
PWM 907
21
PWM 907 DP
14
PWM907 DP RU LW
PWM 907 DV
14
PWM 907 Performance Plus-ANL
PWM 907 SES
PWM 908
27
PWM 908 DP
23
PWM 908 DP RU SST
2
PWM908DPSS
PWM 908 DV
23
PWM908 DV RU SST
2
PWM 908 LavaPiu
PWM 908 MAR
3
PWM 908 Marine ANL
PWM 908 Performance Plus-ANL
PWM 912
PWM 912 EL
PWM 912 RH
PWM 916
PWM 920
PWT 6089
4
PWT6089 ED
3
PWT 6089 EL
2
PWT 6089 EL AV
5
PWT 6089 EL LP
6
PWT 6089 LP
3
PWT 6089 LP OB
3
PWT6089 OB
3
PWT 6089 Vario
2
PWT 6089 Vario LP
PWT 6089 Vario XL
16
R
R 1
Rangehoods and kitchen ventilation technology
RBS30
RBS36
RBS48
2
Revolution
RGGC1000
ROSE
Rosito
RWP 120
RWP 60
2
RWP 70
2
RWP 90
2
RX1
RX2
S
S 022
S 1028
S 125
S 128
S 135
2
S 140
25
S 148
S 160
7
S 163 CH
S 168
9
S 190
7
S 192
S 194
2
S 194 CH
S 195
S 198
6
S 2000
3
S 2001
9
S 2111
12
S 2130
4
S 2180
12
S 2181
14
S 240 I
2
S 246i
8
S 246i m
S 246i t
S 247 I
2
S 248i
2
S 249i
S 250i
Loading...
Loading...
Nothing found
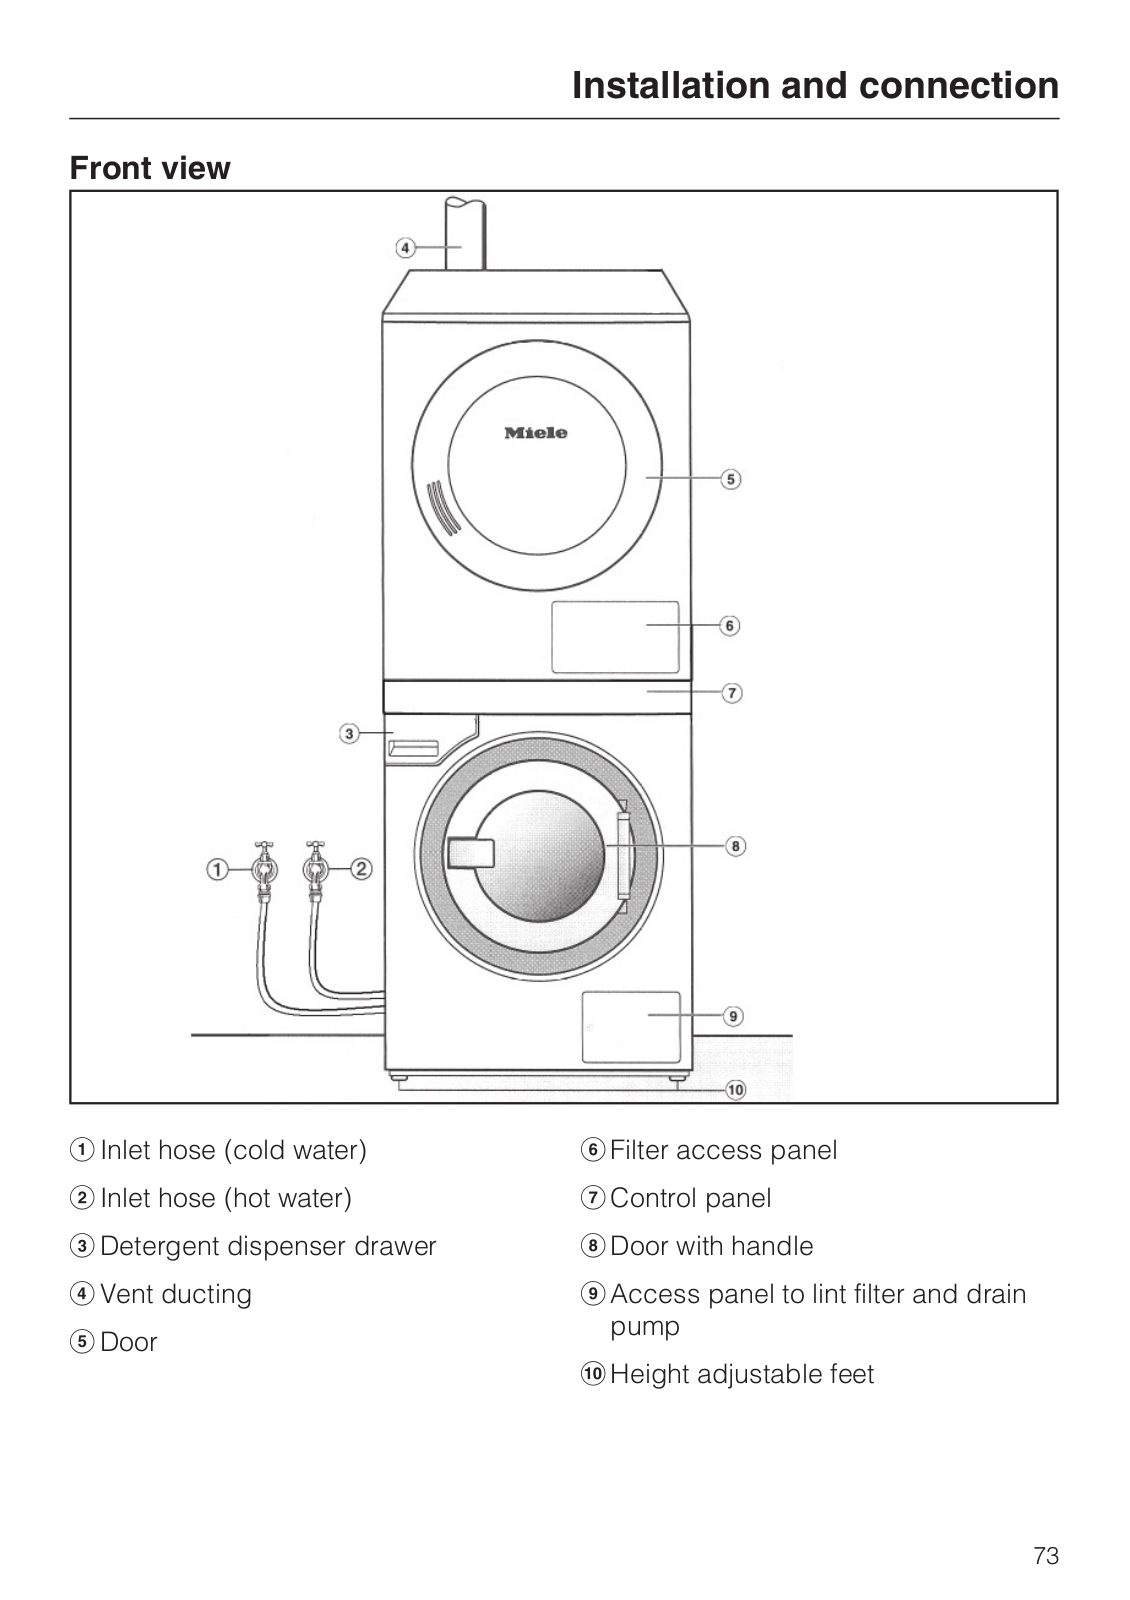
PWT 6089 Vario
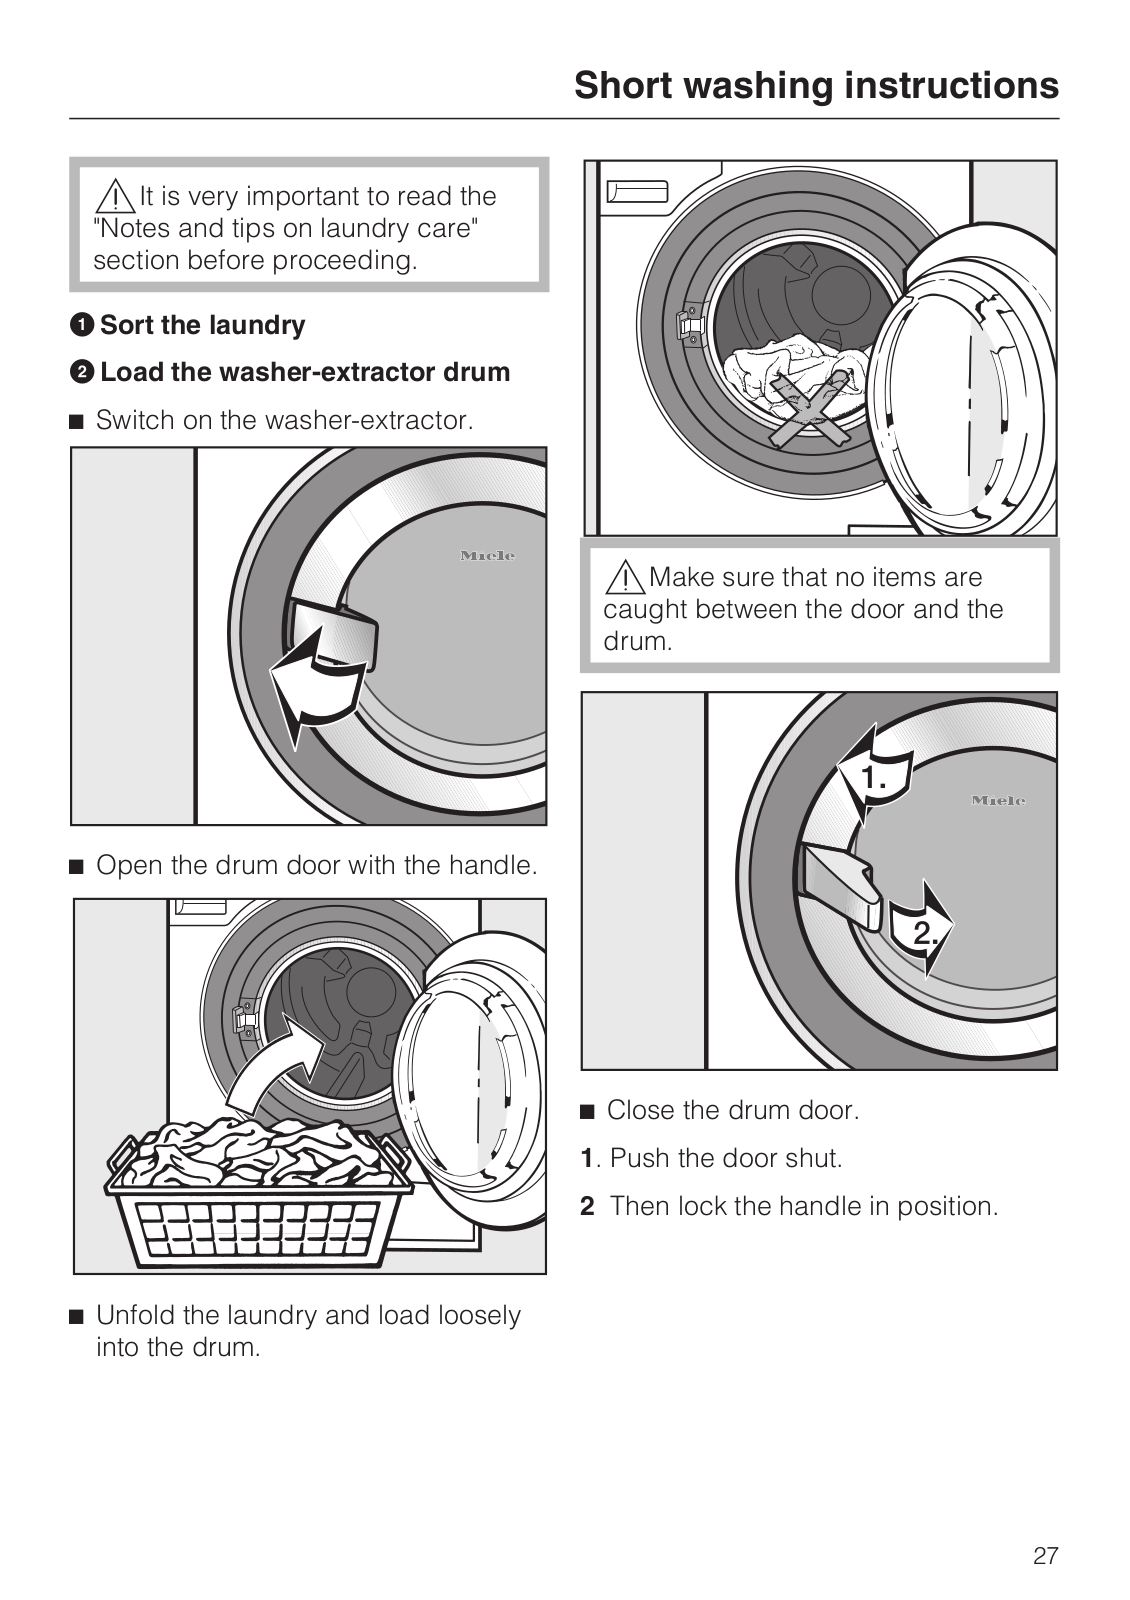
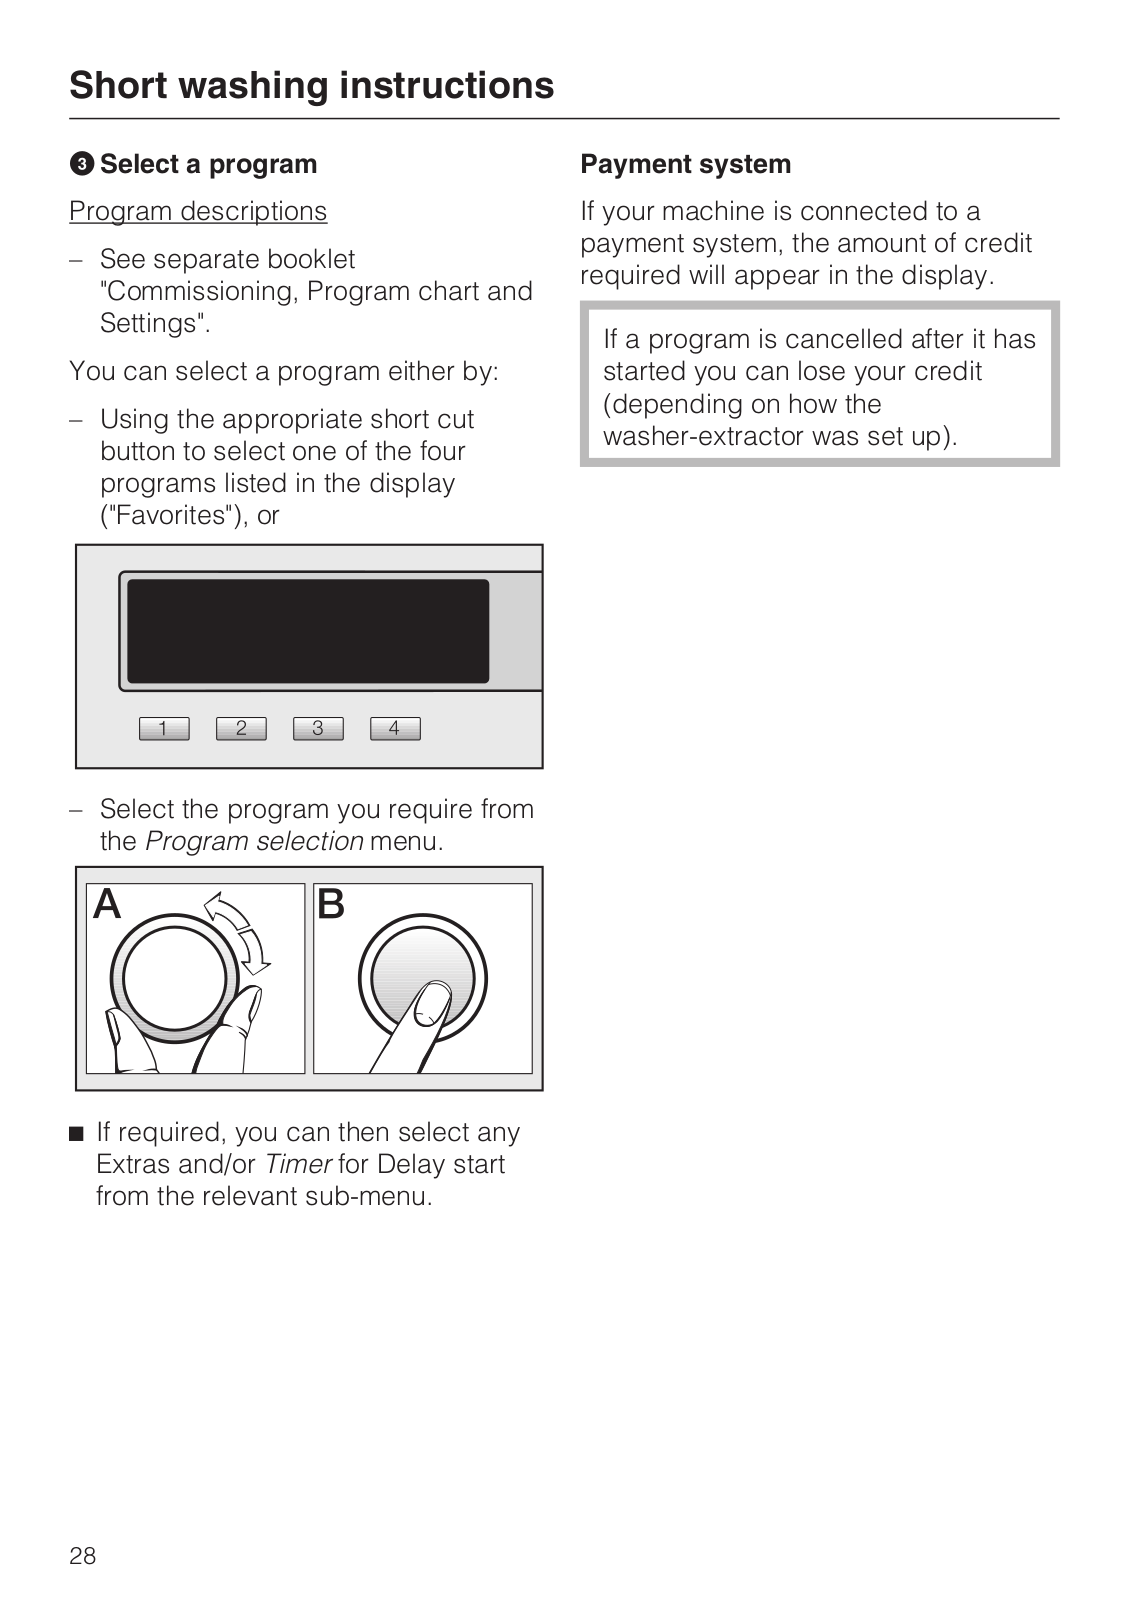
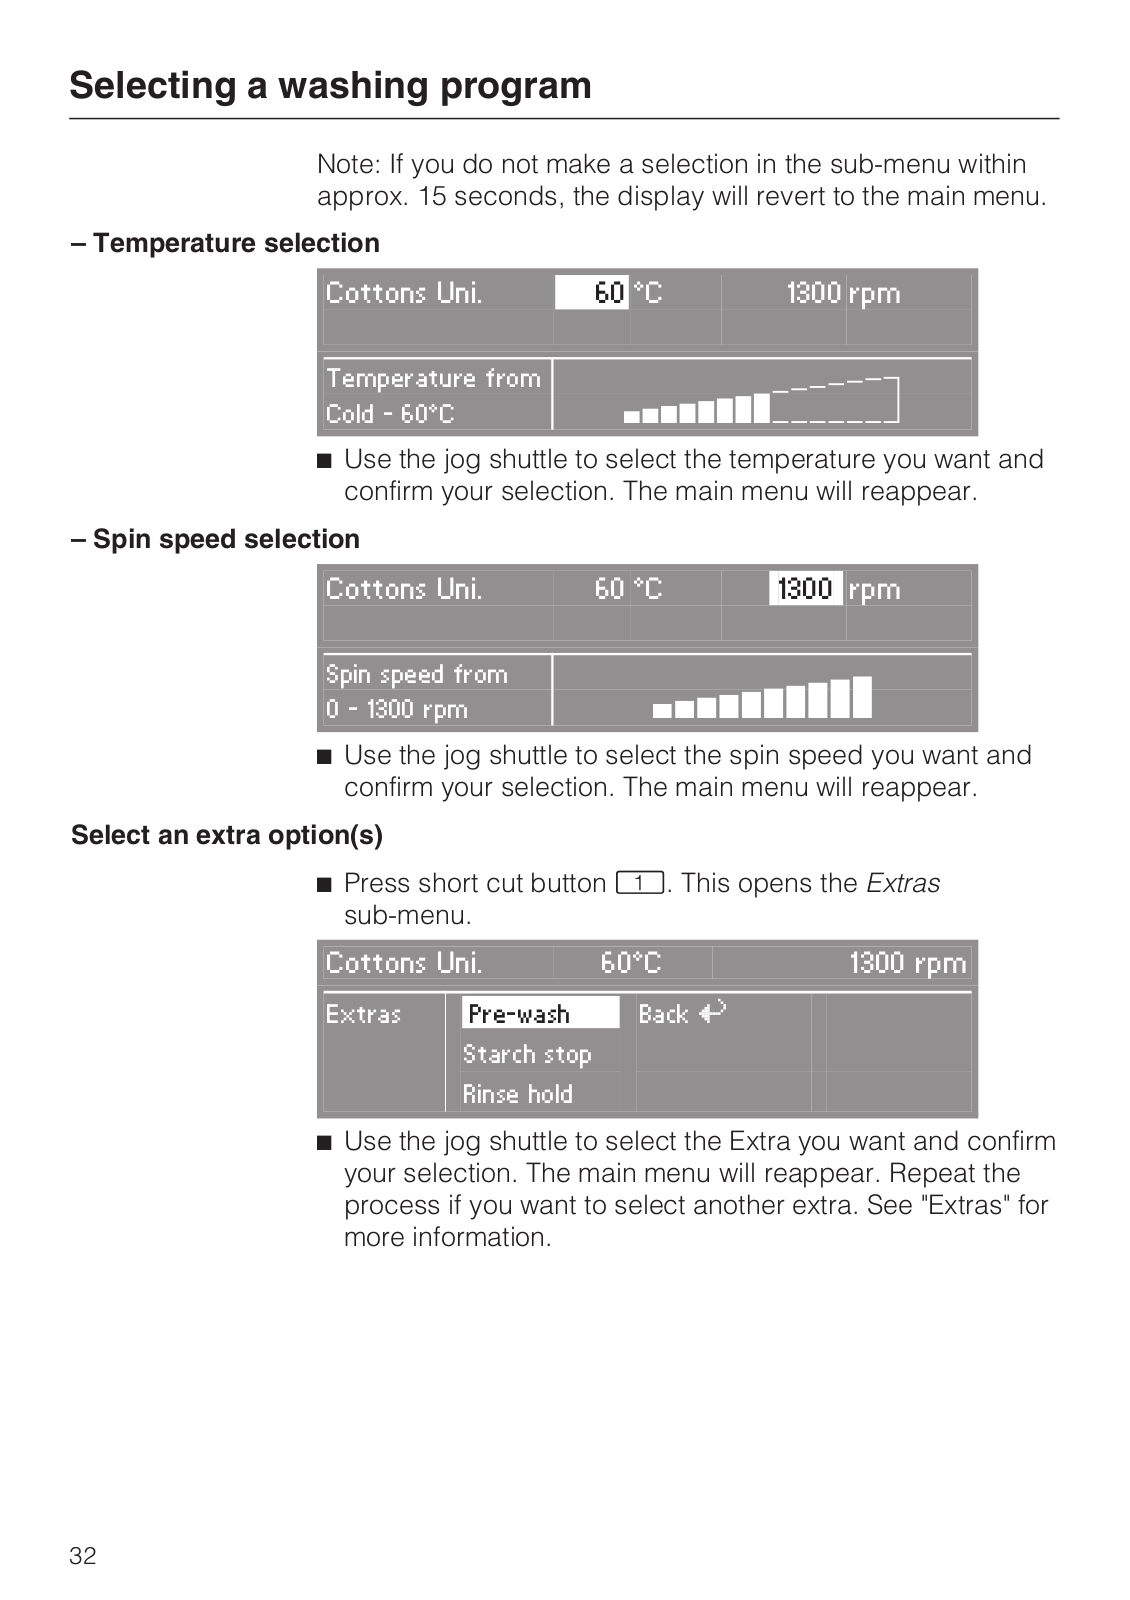
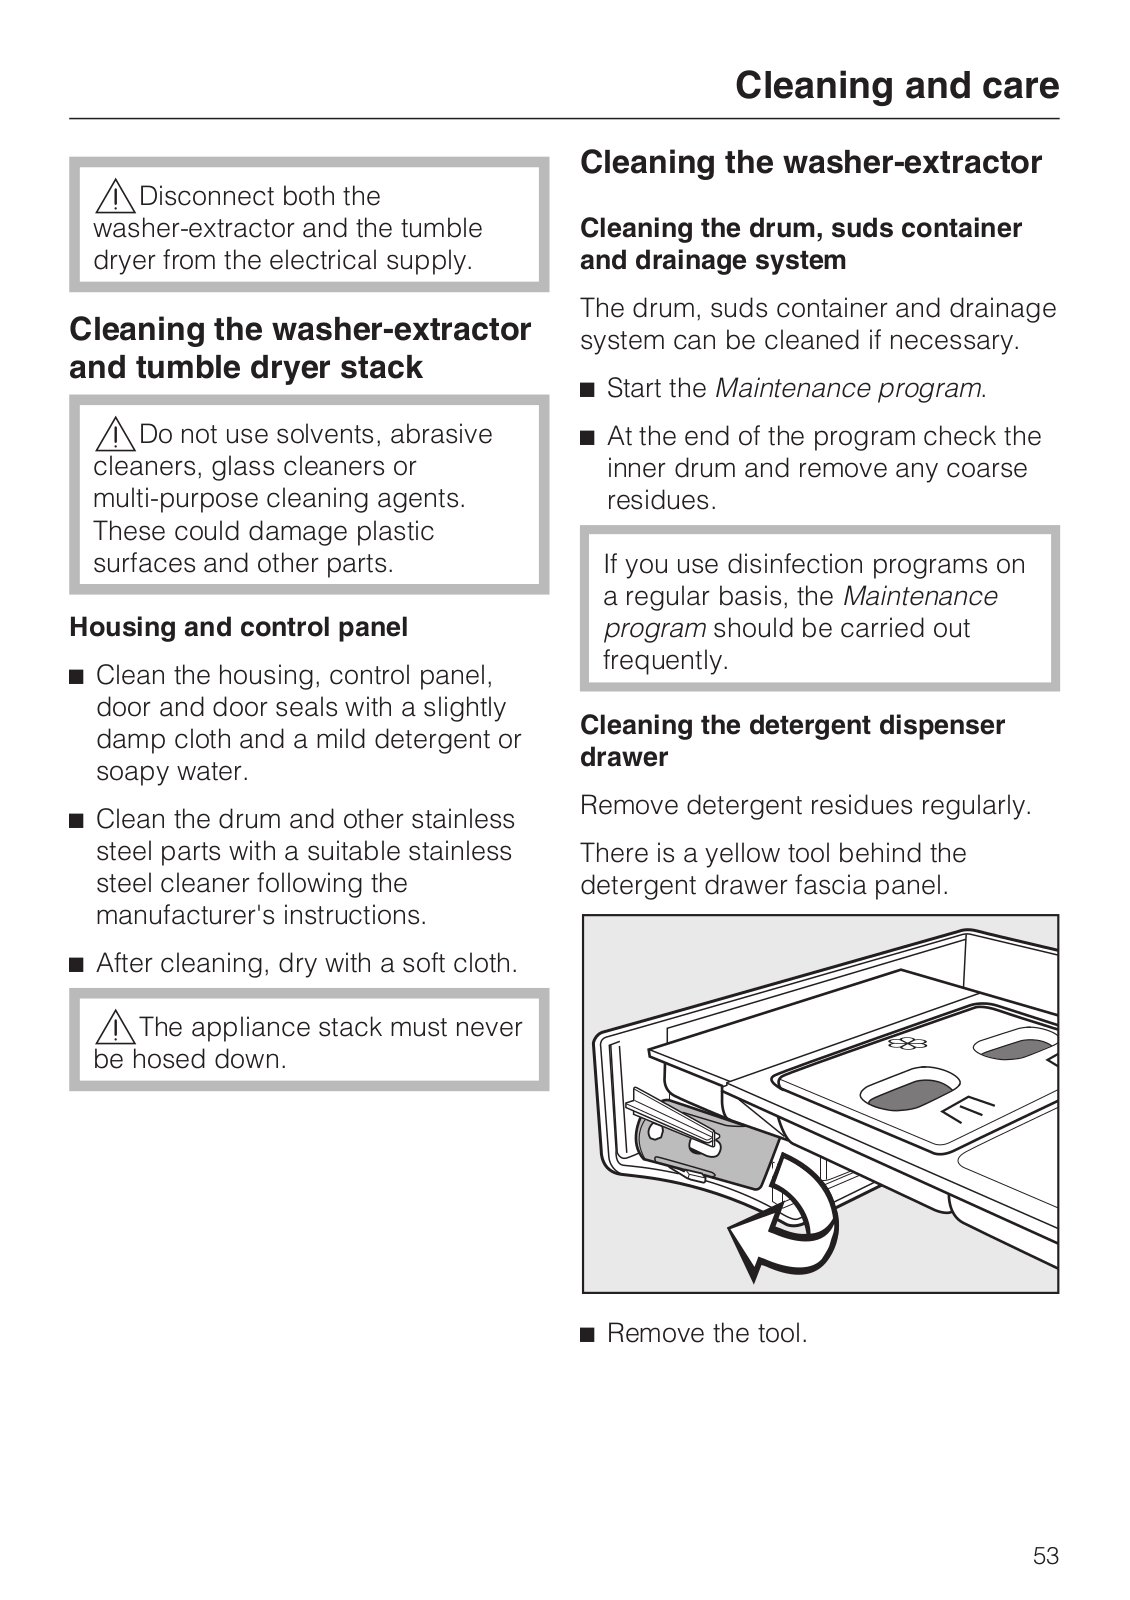
Operating And Installation Instructions
88 pgs
3.15 Mb
0
Operating instructions
96 pgs
2.43 Mb
0
Table of contents
Loading...
Miele PWT 6089 Vario Operating instructions
...
Miele Operating instructions
Download
Specifications and Main Features
Frequently Asked Questions
User Manual
Download
Loading...
+
hidden pages
Unhide
You need points to download manuals.
1 point = 1 manual.
You can buy points or you can get point for every manual you upload.
Buy points
Upload your manuals