

Page 1
What is ScanWizar d 5?
H
t
5
l
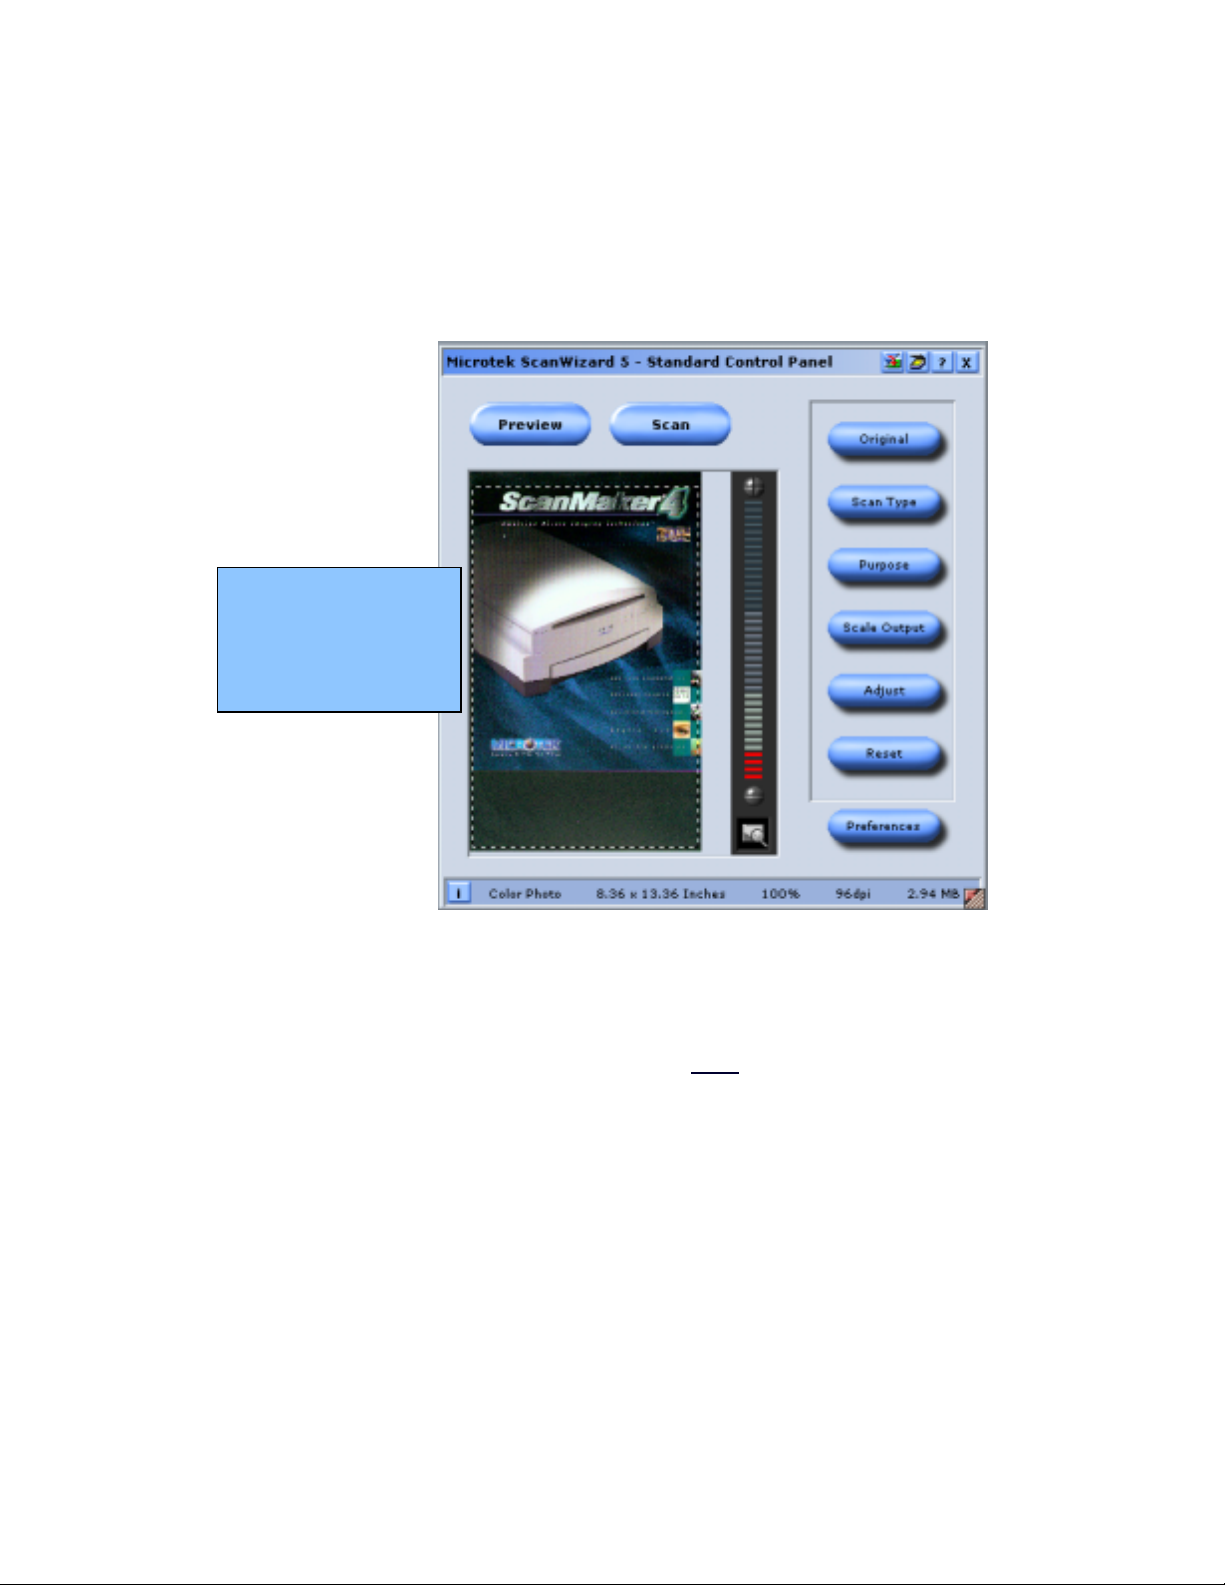
ScanWizard 5 is a scanning software that provides both amateur and professional levels
of color reproduction and scan-stage image editing for printed material, 35mm color
slides and filmstrips. ScanWizard 5 is also the driver for your scanner (see definition of
driver below).
ere is a screen sho
of the ScanWizard
– Standard Contro
Panel Interface.
Driver - A program that controls a device. Every device, whether it is a printer, scanner,
or keyboard, must have a driver program. Many drivers, such as the keyboard driver,
come with the operating system. For other devices, you may need to load a new driver
when you connect the device to your computer. In DOS systems, drivers are files with
a.SYS extension. In Windows environments, drivers often have a.DRV extension.
A driver acts like a translator between t he device and pro grams that use the device. Each
device has its own set of specialized commands that onl y its driver knows. In contrast,
most programs access devices by using generic commands. The driver, therefore, accepts
generic commands from a program and then translates them into specialized commands
for the device.
ScanWizard 5 interfaces with the scanner and Image Editing Software’s using
TWAIN
TWAIN - An image capture API for Microsoft Windows and Apple Macintosh operating
systems. The standard was first released in 1992, and is currently ratified at version 1.9 as
of January 2000. TWAIN is typically used as an interface between image processing
software and a scanner or digital camera.
Page 2
The word TWAIN is from Kipling's "The Ballad of East and West" - "...and never the
twain shall meet...", reflecting the difficulty, at the time, of connecting scanners and
personal computers. It was up-cased to TWAIN to make it more distinctive. This led
people to believe it was an acronym, and then to a contest to come up with an expansion.
None were selected, but the entry "Technology Without An Interesting Name" continues
to haunt the standard. " 1
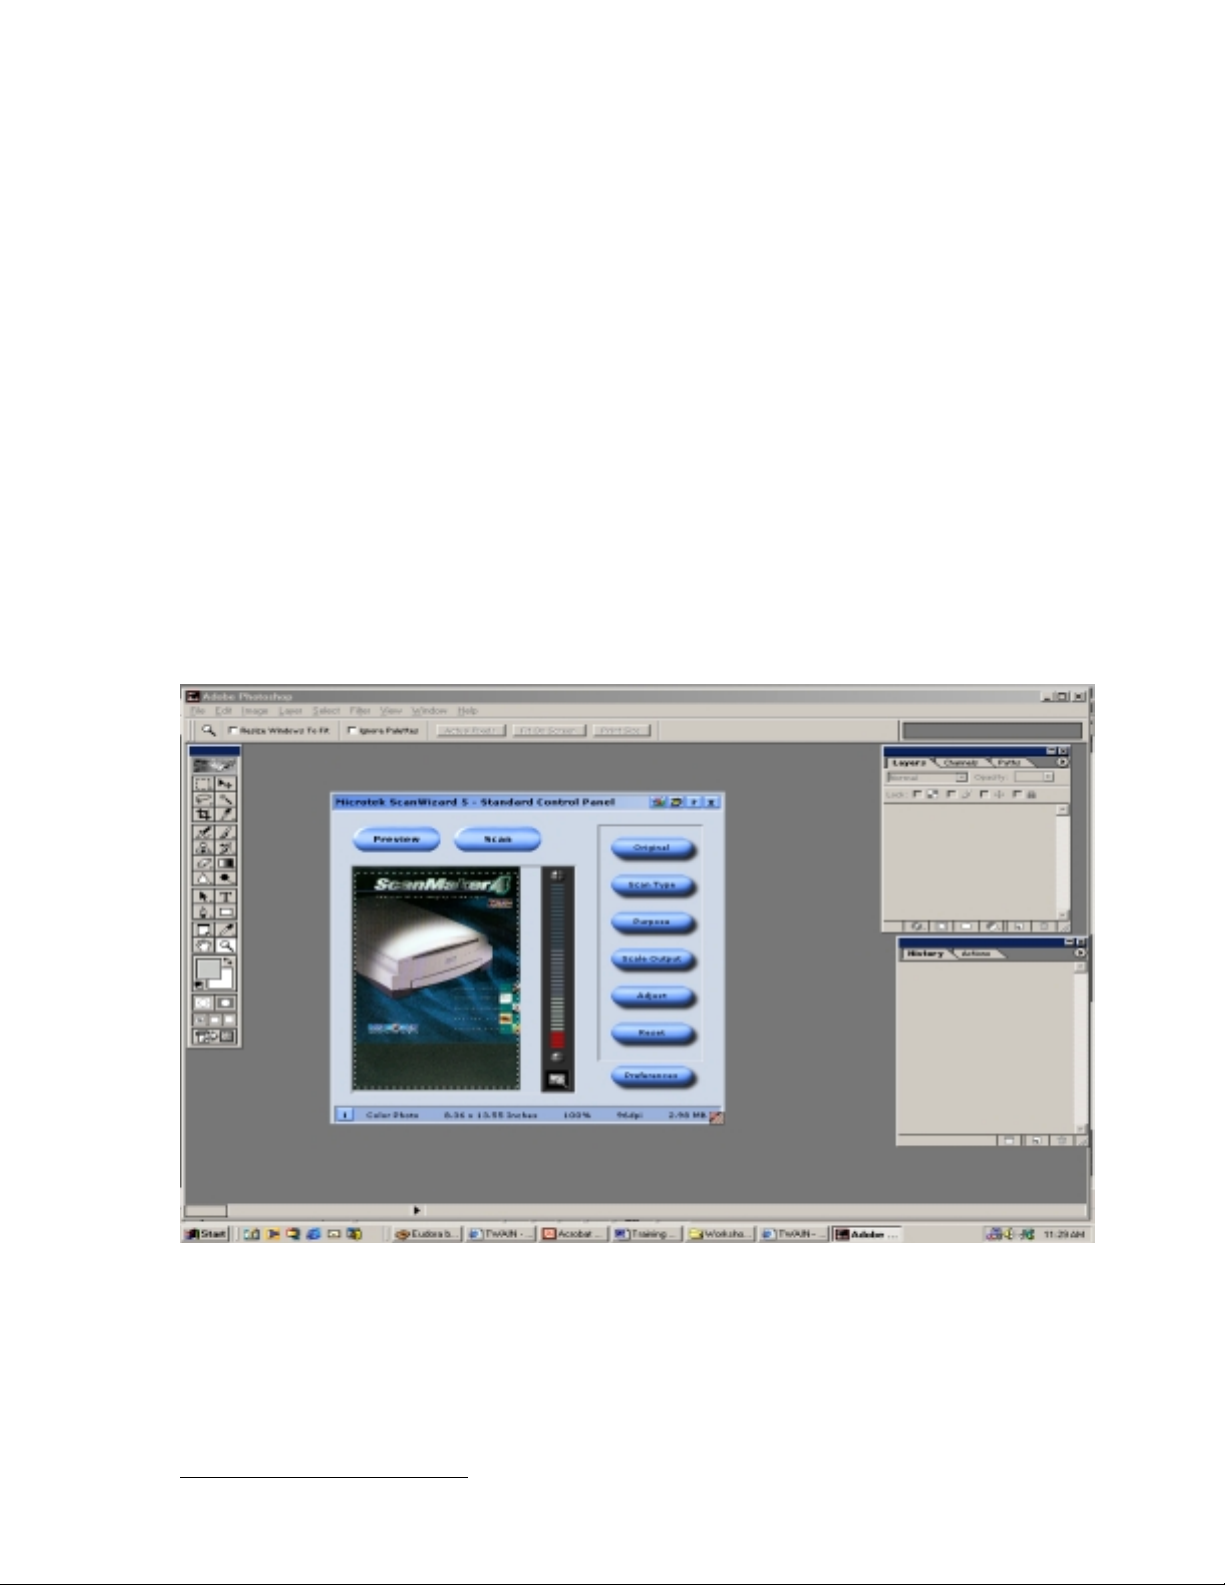
All of our Microtek line of scanners are TWAIN compliant and therefore will work with
all TWAIN compliant image editing programs such as (Adobe PhotoShop, PhotoImpact,
Imaging, and etc.).
Launching ScanWizard 5 from various TWAIN compliant programs
Adobe PhotoShop – Click on File > Import > Microtek ScanWizard 5
Page 3
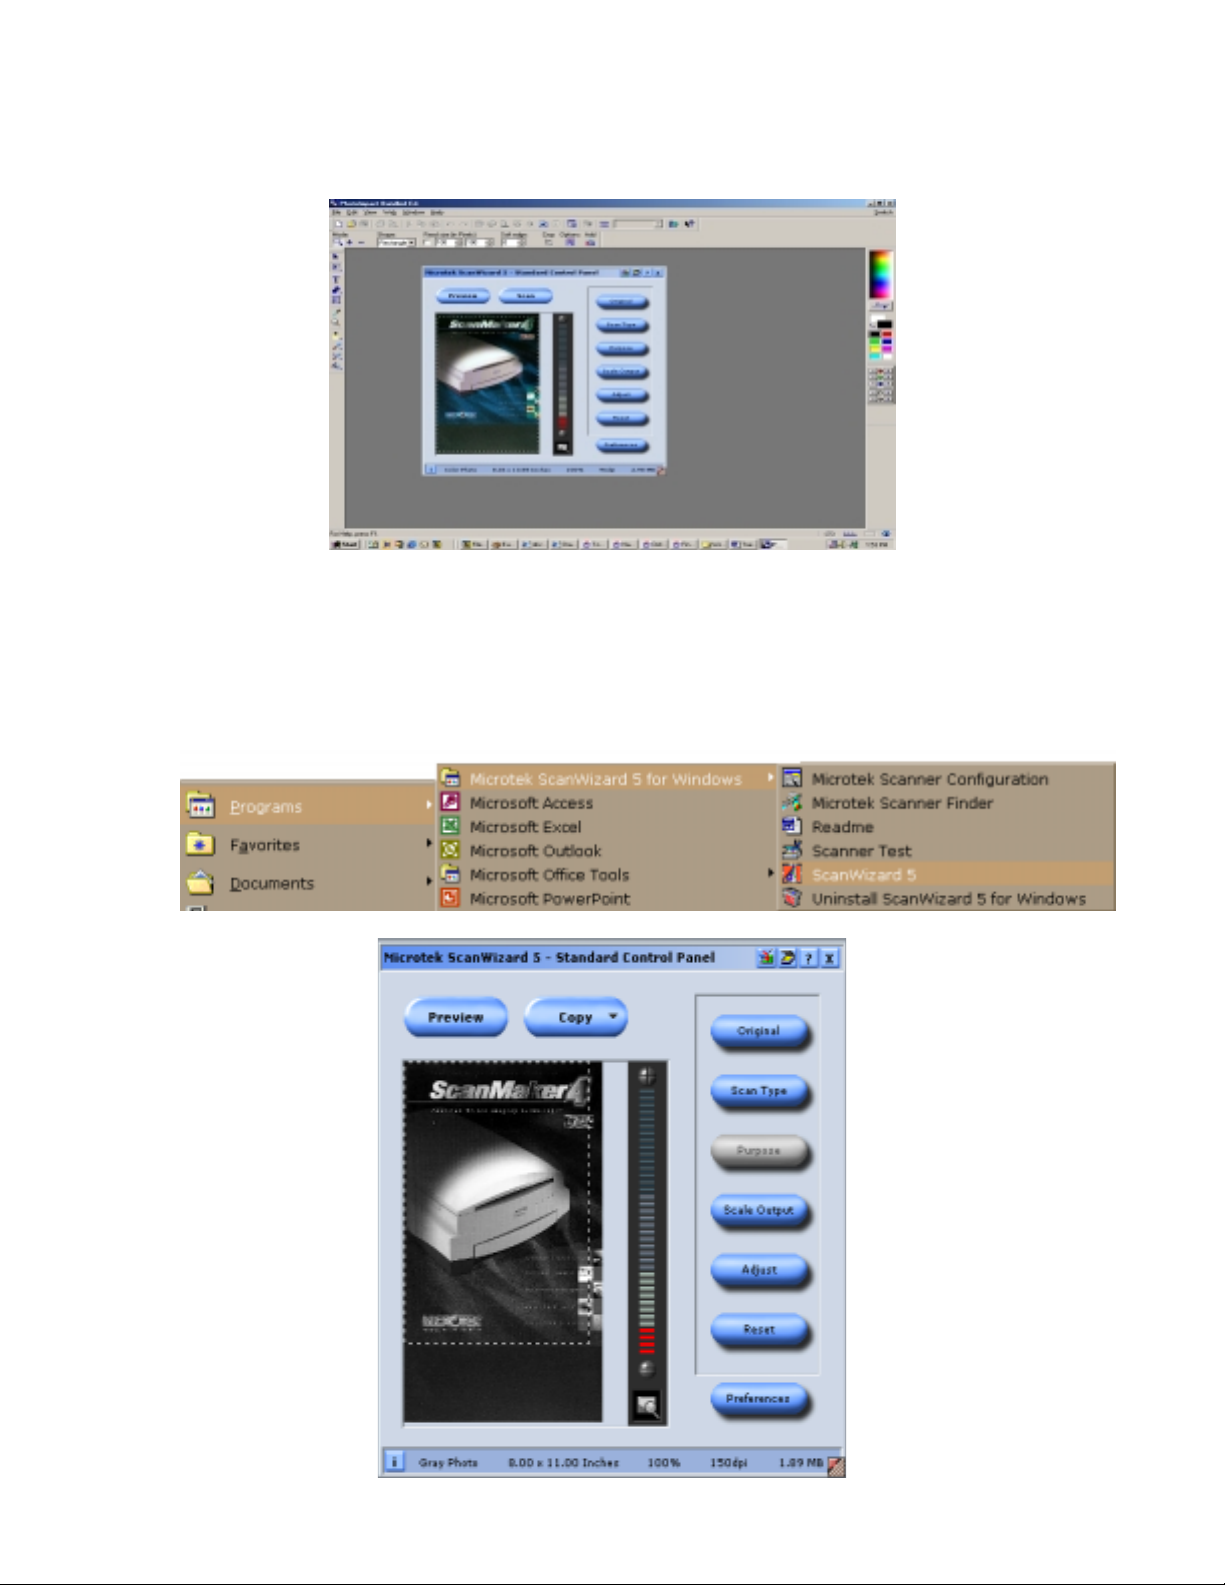
Ulead Photo Impact – Click on File > Scanner > Microtek ScanWizard 5
Launching ScanWizard 5 as a stand-alone program
Click on Start > Programs > Microtek ScanWizard > Microtek ScanWizard 5
Page 4
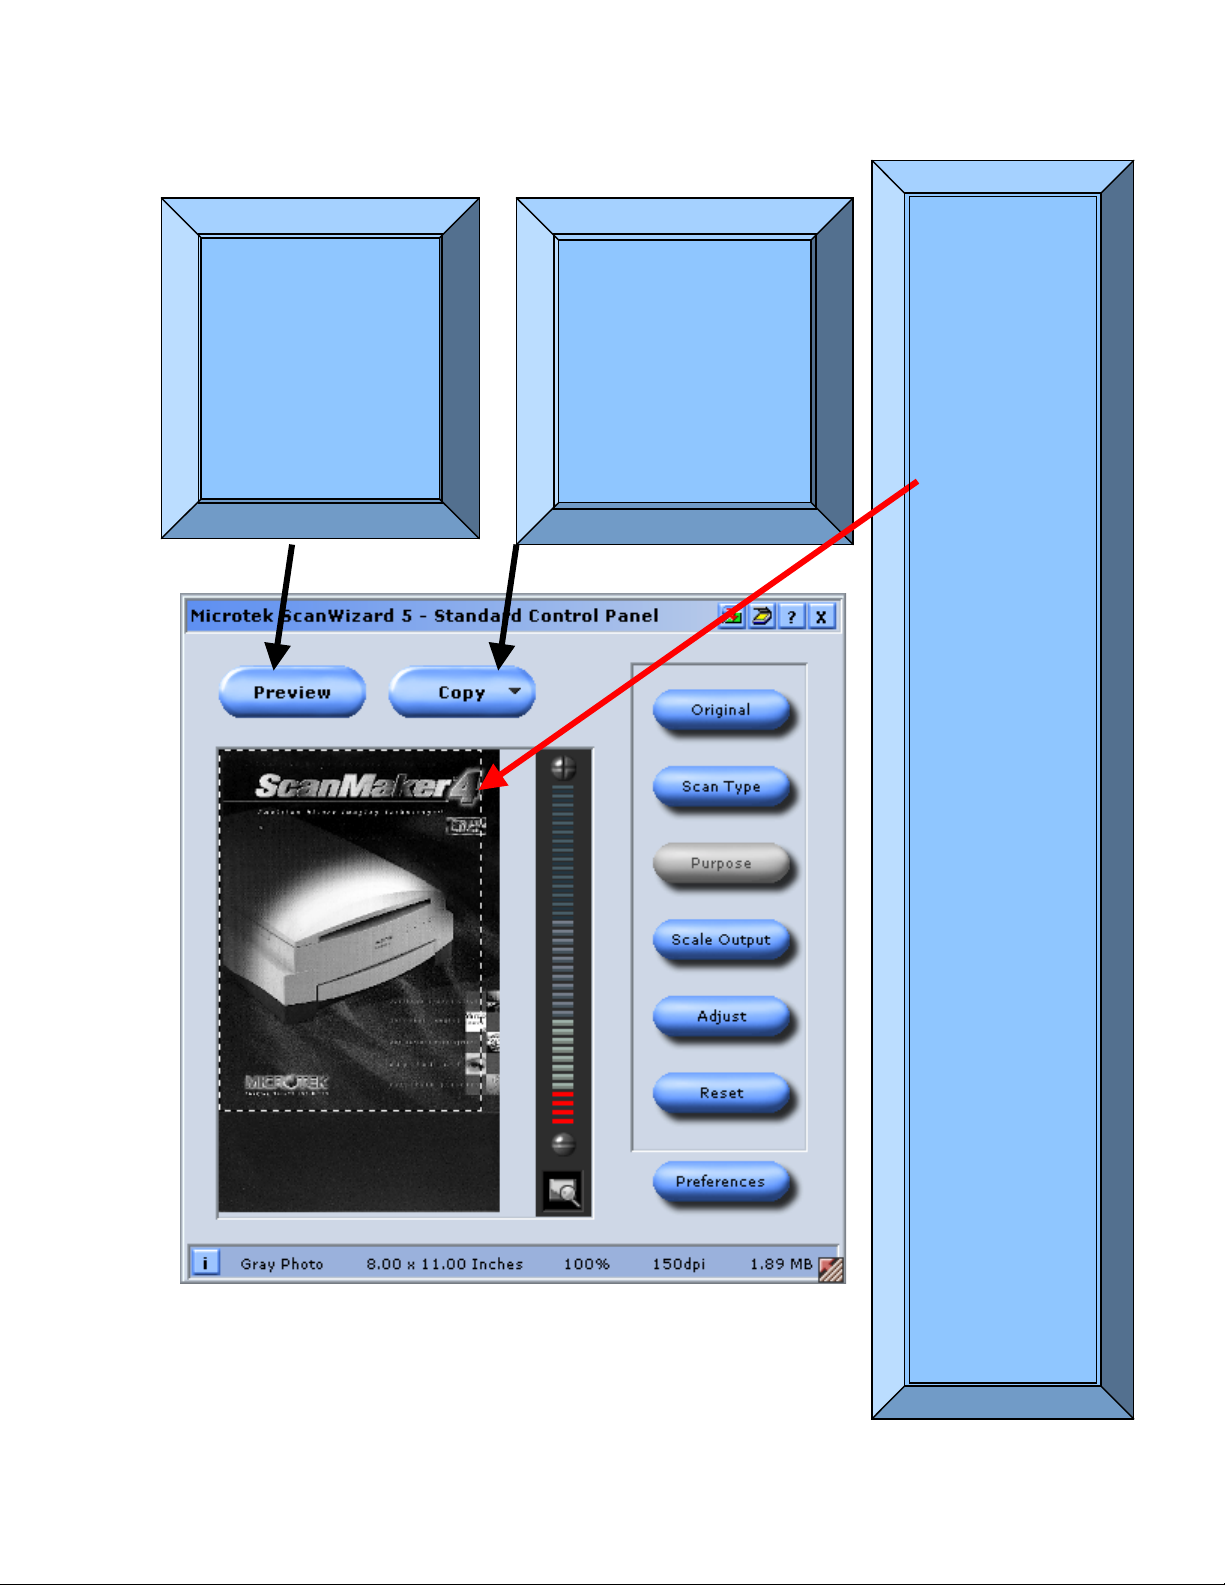
Identifying the buttons of ScanWizard 5
f
f
r
r
r
n
p
f
p
Click To Prescan and
preview scan material.
When clicking on the
Preview button the
scanner carriage glides
across the entire length o
the glass bed and displays
a rough draft preview o
the scanned image or
documents.
Click to perform final scan
and select a destination fo
the scanned image. Once
you have selected you
destination such as (Adobe
PhotoShop, PhotoImapact,
and etc), then the scanne
will only transfer the image
surrounded by the sca
frame
Scan Frame – this
window of flashing
or cascading lines
is referred to as a
scan frame. The
purpose of having
such a useful tool
is to allow the
scanner user to
select specified
areas that the user
wishes to scan.
Any part of the
reviewed material
that is not within
the framed area
will not be
transferred to the
selected
destination. You
can Re-size the
scan frame by
pointing at any
side of the scan
frame. A 2-way
arrow pointer will
appear. Then you
simple drag the
pointer
horizontally or
vertically until you
have achie ved the
desired selection or
adjustment of
width and he ight o
the scan frame.
You can also drag
the scan frame
diagonally by
pointing at the
corners and when
ointing within the
scan frame a 4 way
arrow will appear
allowing to move
the entire scan
frame to a different
image selection
without changing
the original size of
the scan frame.
Page 5
a
b
y
b
p
t
y
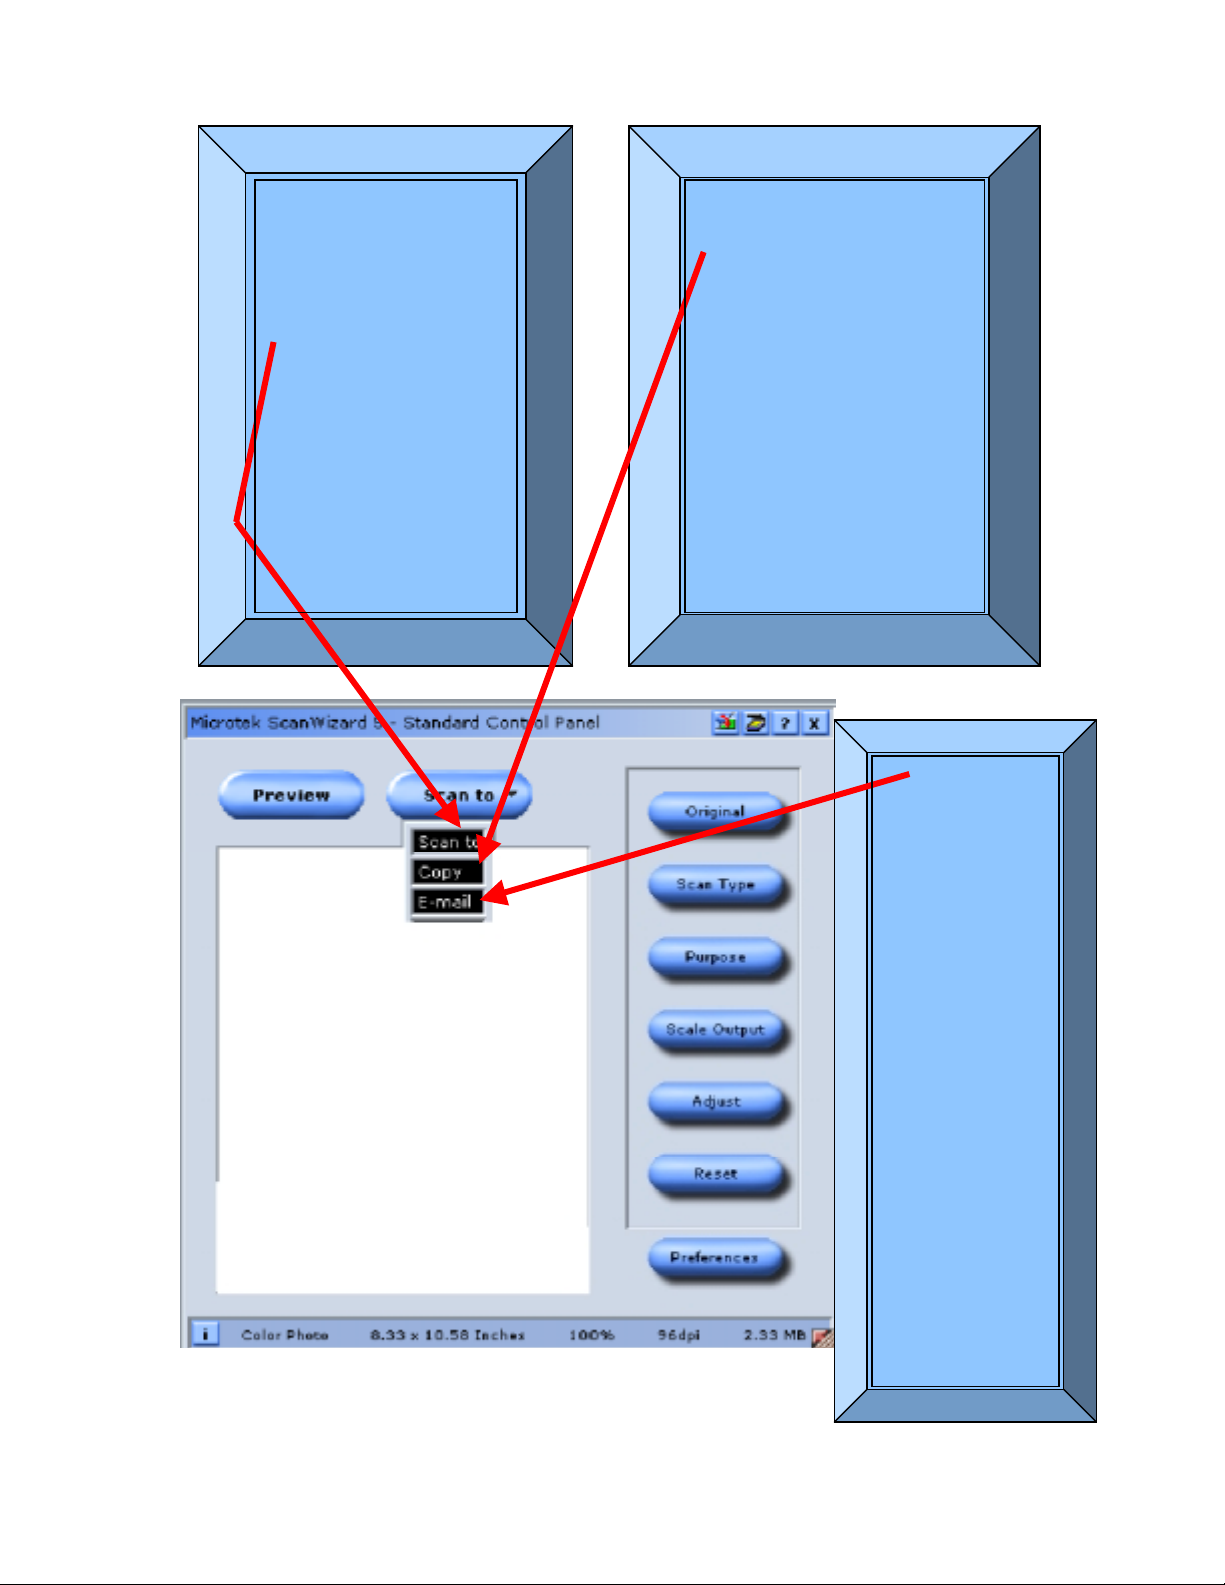
Scan to – Allow the
user to scan into
specified folder. Once
the document or Image
has been scanned the
scanner user will have
the option to name his
file and save it to the
specified folder which,
then the user will be
able to retrieve the
saved file in the future
y any Image editing
software.
Copy – Selecting the cop
utton will prompt you to
send the scanned output to
your printer for printing.
Basically you will be using
your scanner a (photo copier).
A couple of advantages to this
roposition are that you can
copy a color image and prin
in color not to mention the
amount of space, money, time
and maintenance that is
required to keep a cop
machine.
E-mail – When
you select the email option,
your e-mail
editor will be
invoked. The
output file or
image will be
attached
automatically to
your e-mail
editor. Using
the e-mail
option saves
time by
skipping many
steps that are
needed in order
to attach an
image or
document to be
e-mailed.
Page 6
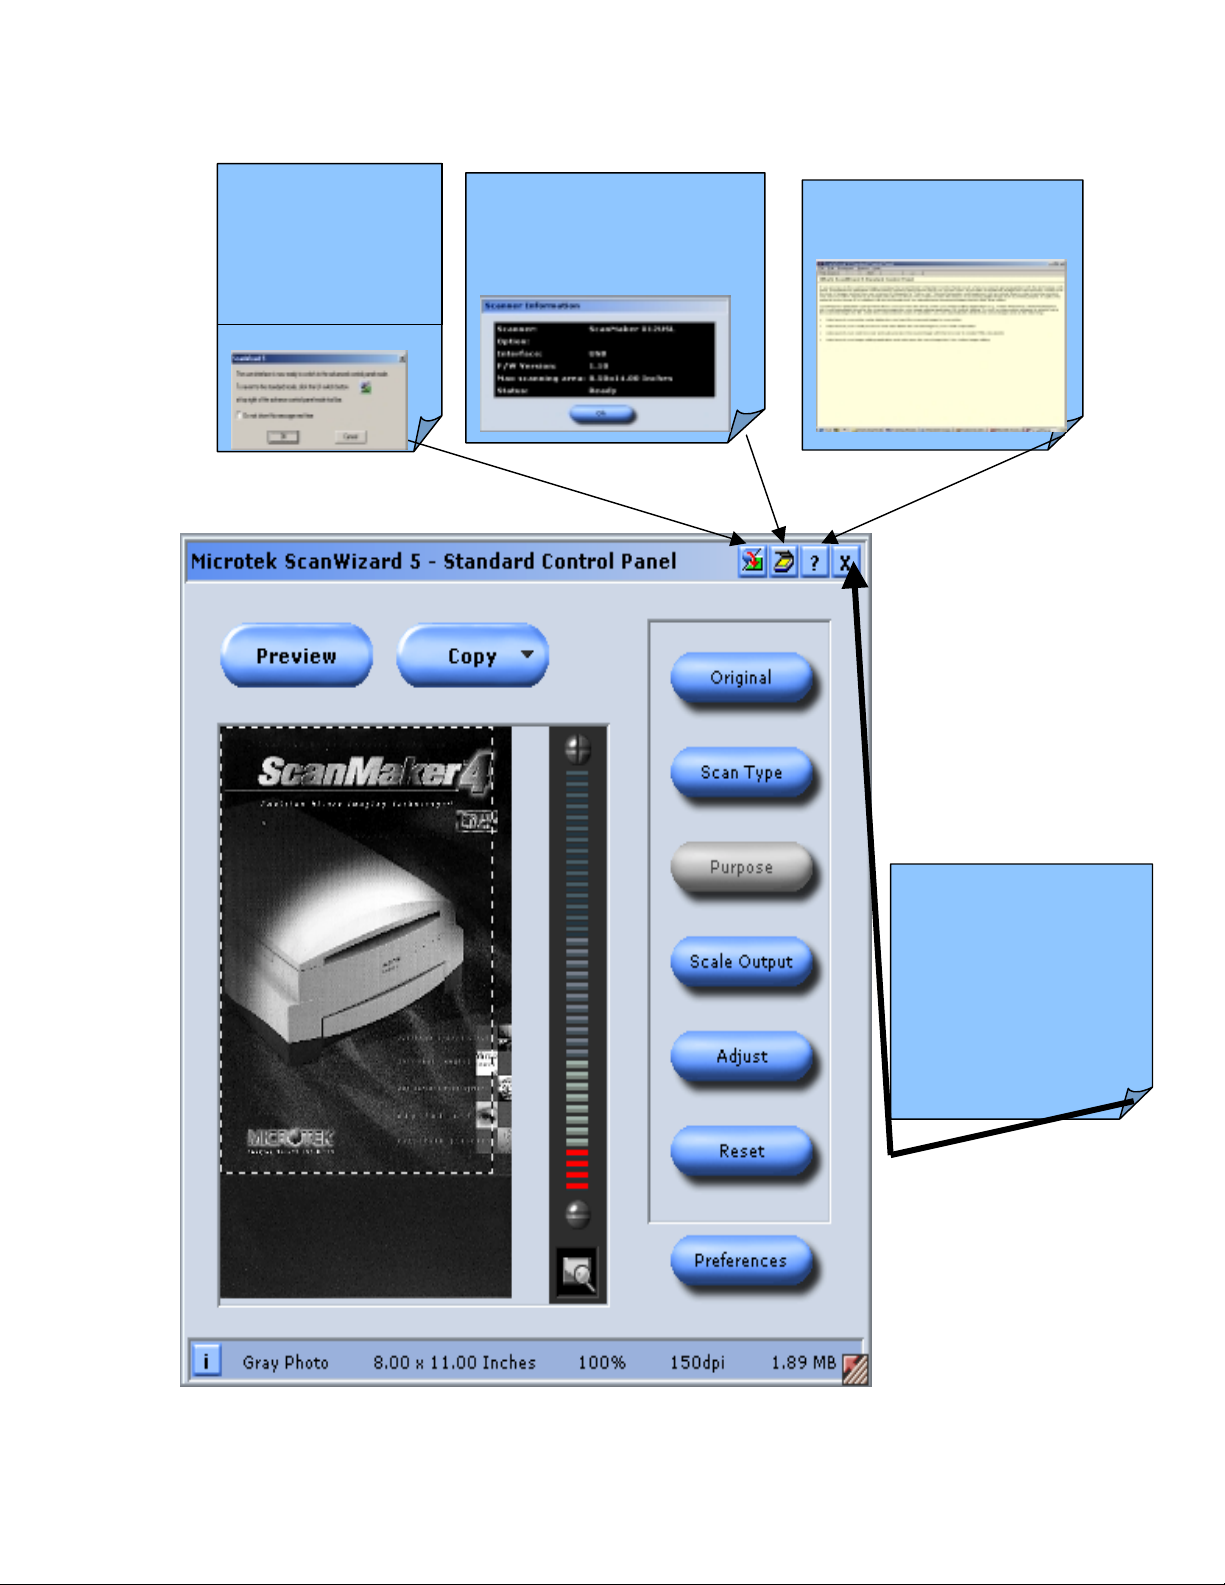
Advanced – Click
this button to
switch to advanced
control interface.
Scanner Information –
Click this button to switch
to scanner information
window.
Help – Click this button
for help and tutorials
Close Button –
Click here when
you are finished
with your scan and
want to edit your
image in your
image editing
software.
Page 7

Clicking on the Original button will display a menu from which you have to select the
appropriate category of your scan material. This will help ScanWizard 5 Standard
determine the best in-house scanning parameters to accommodate your original.
Clicking on the Scan Type button allows you to select into what image output category
you wish to convert your original scan material.
Page 8

When clicking on the Purpose button a menu displays allowing you to select the
intended usage of the output image resolution. Different values of image resolution are
provided for different output applications. The higher the resolution, the bigger is the
memory size required.
When clicking the Scale Output button, a menu displays which will let you select (in %
scale), the desired image output size.
Page 9

Clicking on the Adjust button will display a menu showing the ScanWizard 5 Image
correction tool Panel. Adjust image appearance by dragging the button of each tool along
its grooves. Observe the live update-taking place with the preview image as you
reposition each button.
Click outside the image correction tool to exit the panel, or press the Enter key.
If you click the Reset button, it will set all the previously set custom settings back to the
original Default. Click the reset button only if you are sure you want to start setting the
different settings from scratch or if you intend to use the default settings.
Clicking the preferences button will display a dialog box to set up scanning and repaint
ScanWizard 5 Standard Window. Look at the two examples below.
Page 10

To exit the ScanWizard 5 Standard control panel interface simply click on the close
button on the upper right hand corner with a picture of an X in the middle of the button.
Example 1: Default Color Settings (SKY) of ScanWizard 5 – Standard Control Panel
Page 11

Example 2: This is the new color setting (SPRUCE) of Microtek ScanWizard 5 –
Standard Control Panel.
Page 12

Producing a raw scan usin g Standard Control Panel Interface
b
b
p
p
the zoom scale
Previewing your original Image.
Placing the reflective,
positive and negative
materials on the
scanner’s glass bed.
Notice how the scan
material can easily be
aligned along the edges
of the scanner’s glass
ed.
Magnifying Your Preview Image.
ScanWizard 5
allows as much as
four times the size
of your original
preview image.
The Zoom Scale
ar (located at the
right side of your
review image) is
rovided to easily
accomplish
zooming of your
preview image.
To zoom in,
simply click on
Page 13

Define Type of Output Image
Page 14

Resolution of Output Image
Page 15

Intended Size of Output Image
By Default, ScanWizard 5-Standard scans your original
into an actual size (100%) output image. To change the
output image dimension, click on the Scale Output
button. From the resulting menu, select the predefined
scaled size that best matches your intended image output
dimension.
Improving Image Before Final Scan
When you scan your original image without
making any adjustments of your own.
ScanWizard 5-Standard will auto process to
enhance the quality of your digitized image by
using its default image editing settings. If you are
not satisfied with what ScanWizard 5-Standard
has done for you (as reflected in the preview
image), you may modify the default artwork and
apply your own image manipulation before final
scanning by using the image correction tools
panel under the Adjust button.
Click the Adjust button. When the image
correction panel displays, adjust the preview
image by dragging the pellet button of each tool
along its groove. Observe a live update taking
place with your preview image as you manipulate
each of the image correction tools. To reset a
correction tools. To reset a correction tool back to
its original position, click on the reset icon right
end of each tool (see figure at right).
Note that the new settings are automatically saved and will remain in effect for the
subsequent scanning sessions (after a reboot) unle ss otherwise r edefined or if they are reset
to default settings (as explained in the following section).
Page 16

Output Image Setting Information
As you perform adjustments and define various settings for the output of your original
image (as reflected in preview image), scanWizard 5- Standard monitors and makes
records of them. Part of the defined settings are displayed in the Status Bar (at the bottom
of ScanWizard 5 window) as soon as changes are made, while a separate and more
comprehensive record of the changes are kept at the same time. To view a complete record
of your settings, click on the information icon [ I ] at the left end of Status Bar. The
Image Information window then appears, listing all the current settings for your output
image. If you have not made any adjustment, the default settings will display.
Status bar showing summary
settings for output image
Click icon to display
detailed info box (right)
Drag this corner to
resize preview
window
Reset and Revert to Default Settings
If you want to abandon the adjustments you have just made, you can easily revert to
ScanWizard 5-Standard default settings and start all over again. Click on the Reset
button. All changes you have made in the menus and control panels under Original,
Scan Type, Purpose, Scale Output, and Advance buttons are then reset back to
ScanWizard 5- Standard defaults
Page 17

Click on Preview to preview your image. Crop your image using the Scan Frame tool.
Click on “Scan” to scan the image. After it finish scanning it will transfer the image
automatically to the Windows Imaging program.
Final Output: Ready For Printing, editing or viewing.
 Loading...