

Page 1

Metrohm AG
CH-9100 Herisau
Switzerland
Phone +41 71 353 85 85
Fax +41 71 353 89 01
info@metrohm.com
www.metrohm.com
1 Minimum system requirements
Processor Pentium 4 equivalent or higher
Operating system 32-bit version of:
■ Windows 2000
■ Windows XP
■ Windows Vista
■ Windows 7
64-bit version of:
■ Windows XP
■ Windows Vista
■ Windows 7
■ Windows 8
Vision 4.0.1
Installation
Screen resolution Resolution 1024 x 768 or higher, EGA equivalent or
higher
RAM All operating systems: 1 GB minimum; 4 GB recom-
mended
Hard disk capacity Minimum 100 GB; 500 GB recommended (Non-rotat-
ing storage media also acceptable in the above
amounts or higher).
CD-ROM drive One CD-ROM (or compatible) drive is required for
Vision installation.
USB ports USB 2.0 or higher, two free ports recommended
Mouse/pointer Required, USB, PS/2 style, or wireless
Printer compatibility
Must be connected to one of the following:
■ USB printer
■ Network printer within immediate work area
■ Alternative print connection, including parallel, IR,
or other reliable methods
(A test page should be printed to verify correct operation)
8.105.8006EN
Keyboard Compatible keyboard using USB / PS/2, or similar con-
nection
1
Page 2
Serial port ■ Required for System II (Model 6500 Series)
■ 1 additional required for Vision I/O Module inter-
face
The Windows user (installer) must have administrator
rights in order to install Vision software.
Network environment
■ 100 Mbits/sec, stable and permanent
■ Communication via Ethernet; RJ-45 connection
■ XDS requires DHCP server with available TCP/IP
addresses (permanent address may be assigned)
System backup Network or CD backup required for data archiving
2 Installation
2.1 Server installation for MultiUser
NOTE
System platform
The System platform for installation the server and clients have to be with
the same Windows version.
The Multi-user installation involves two main steps:
■ 1: - "Install Vision Server"
■ 2: - "Install Vision Client" (see Chapter 2.2, page 5)
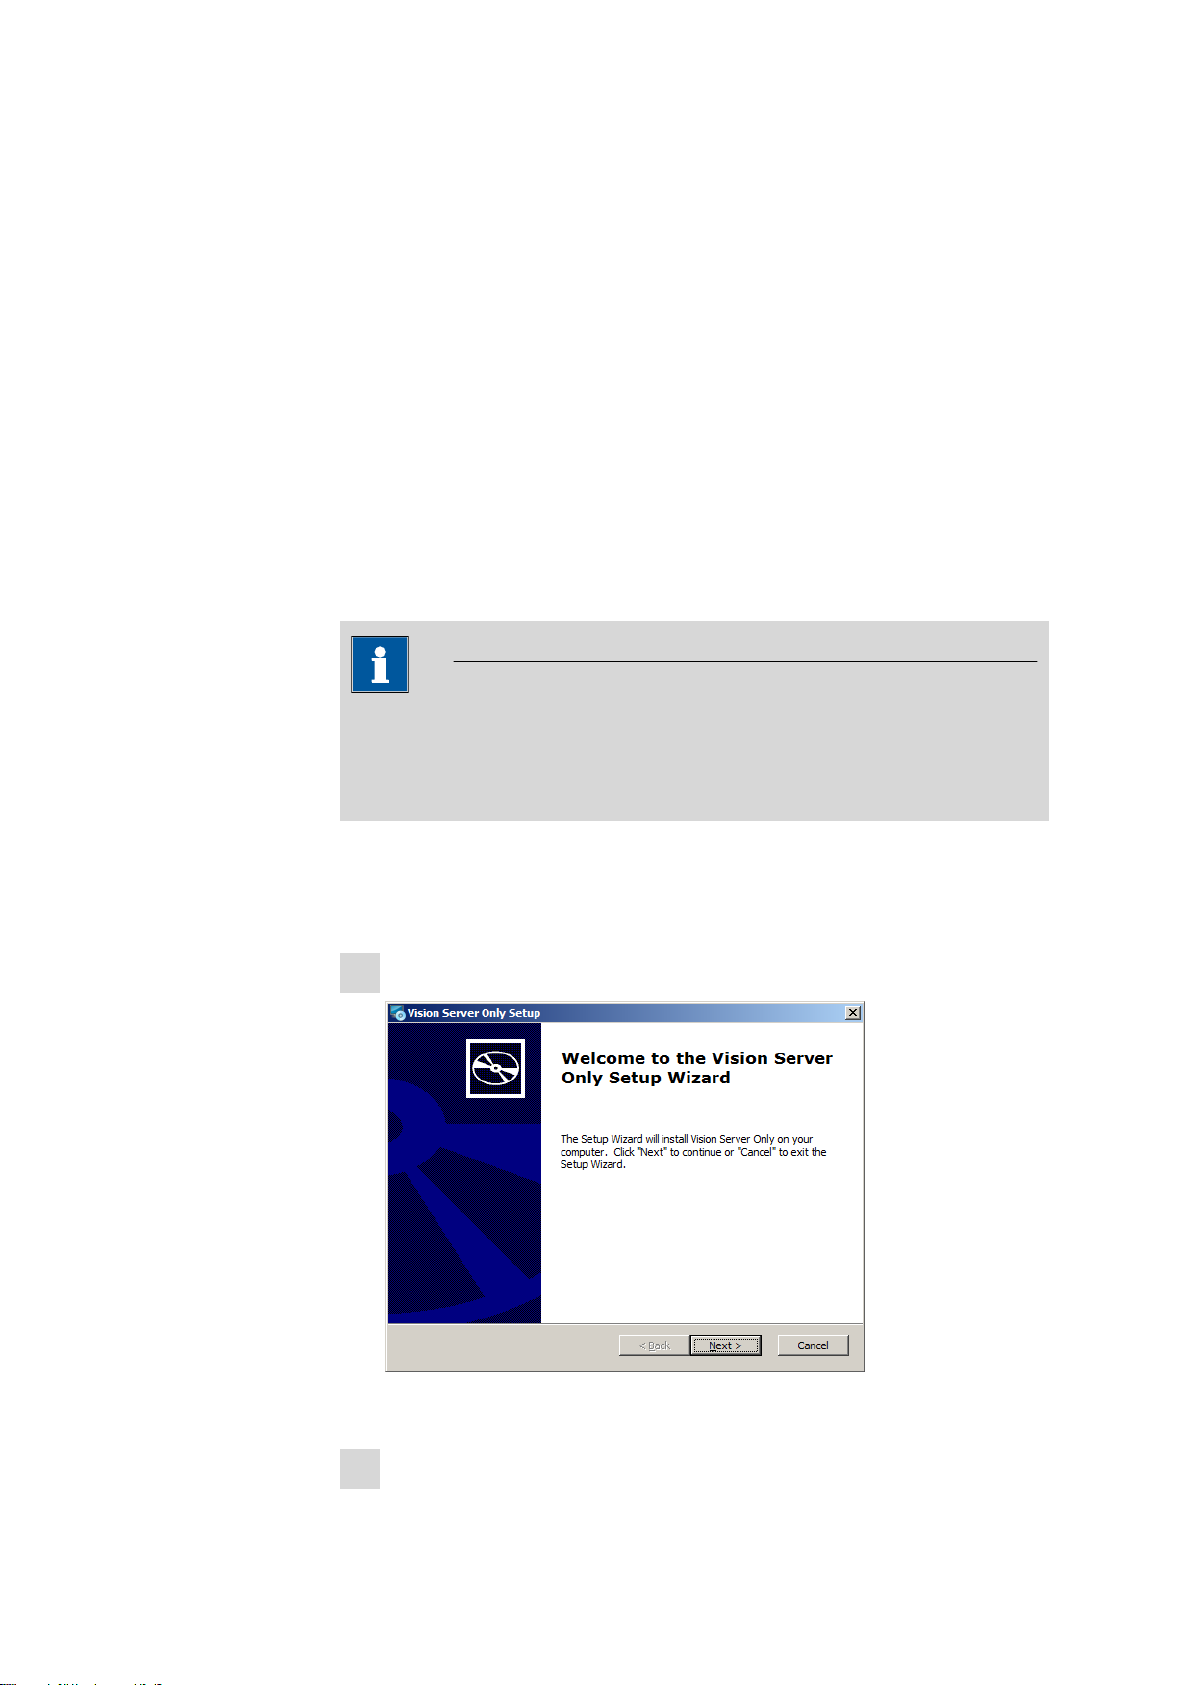
After start the server installation, this screen will be displayed:
1
Next, click on "Install Vision Server".
Vision requires the name and company of the primary user. Enter your
2
name and company, the combination of the serial number and license
2
8.105.8006EN
Page 3
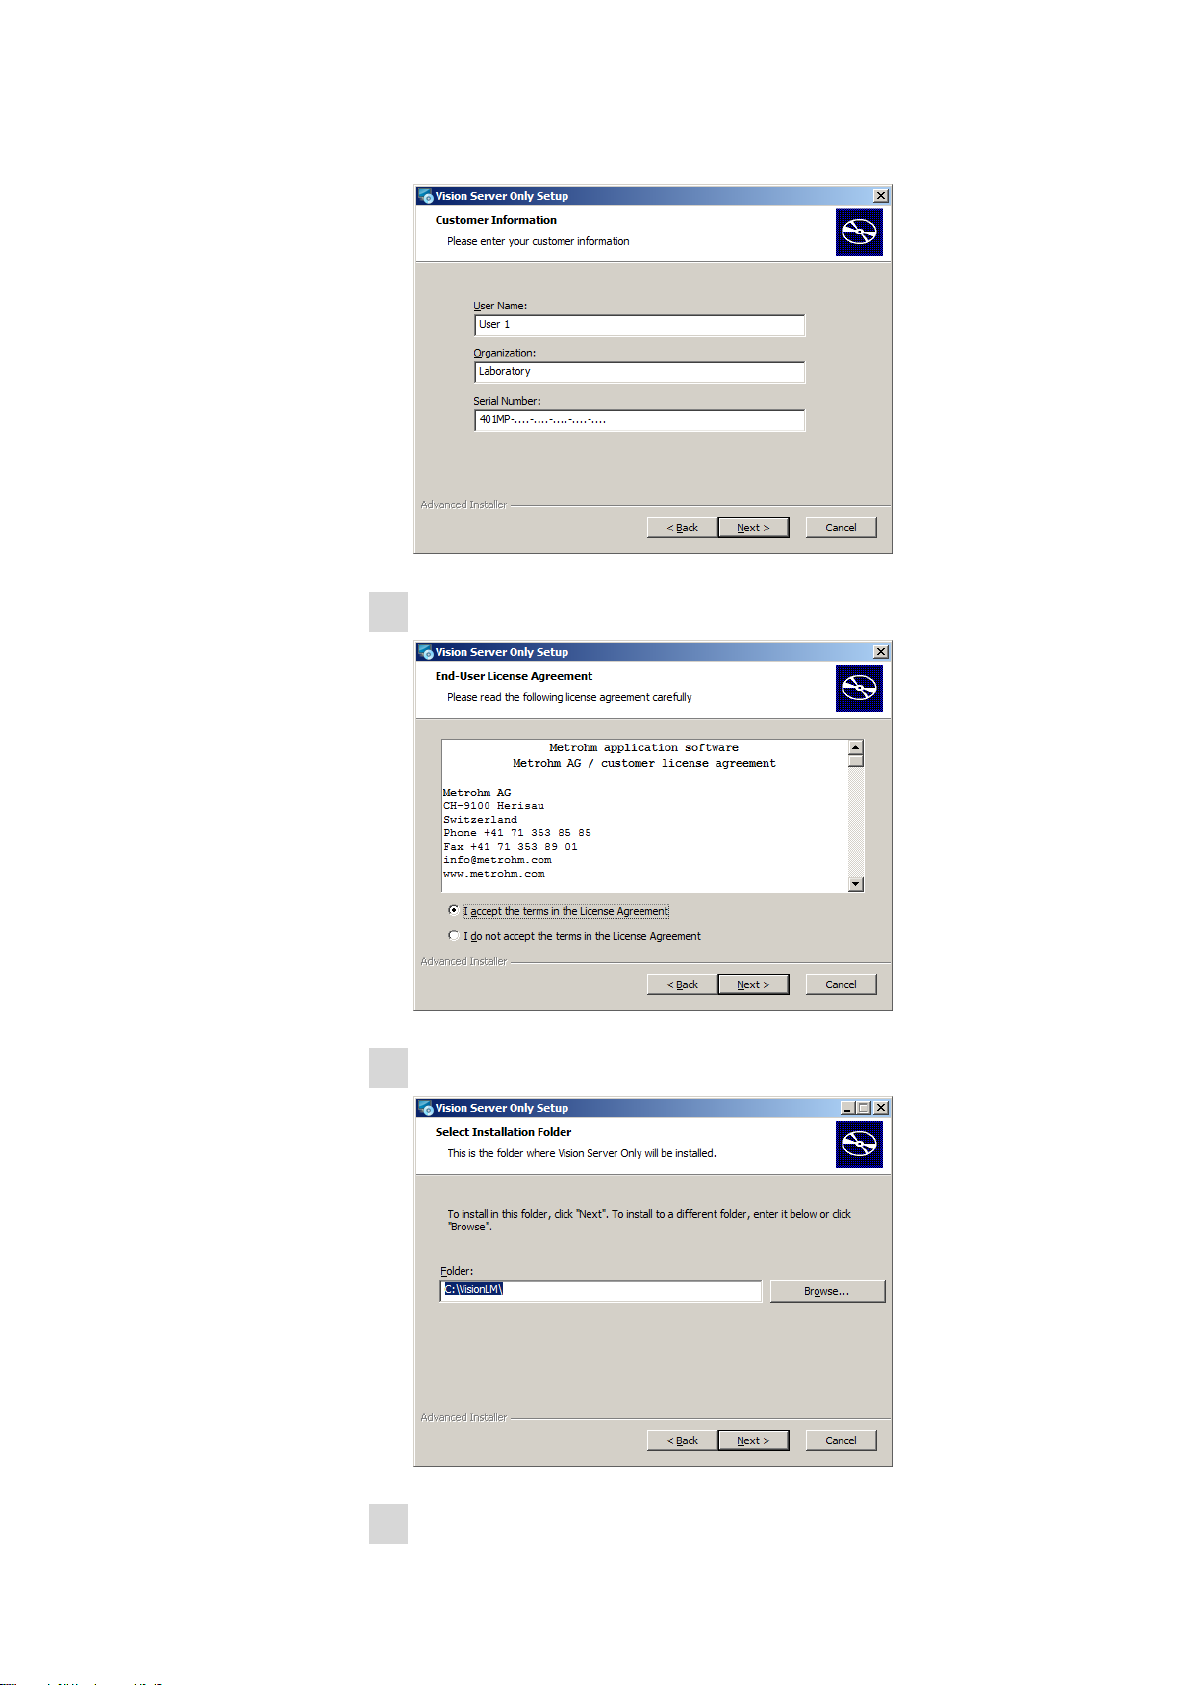
number of Vision in the line below. (The serial number format may vary
from that shown.) Click on “Next”.
Confirm this message and click on "Next".
3
8.105.8006EN
Vision Server installation begins as shown. Click on "Next".
4
Click on “Install” to continue.
5
3
Page 4
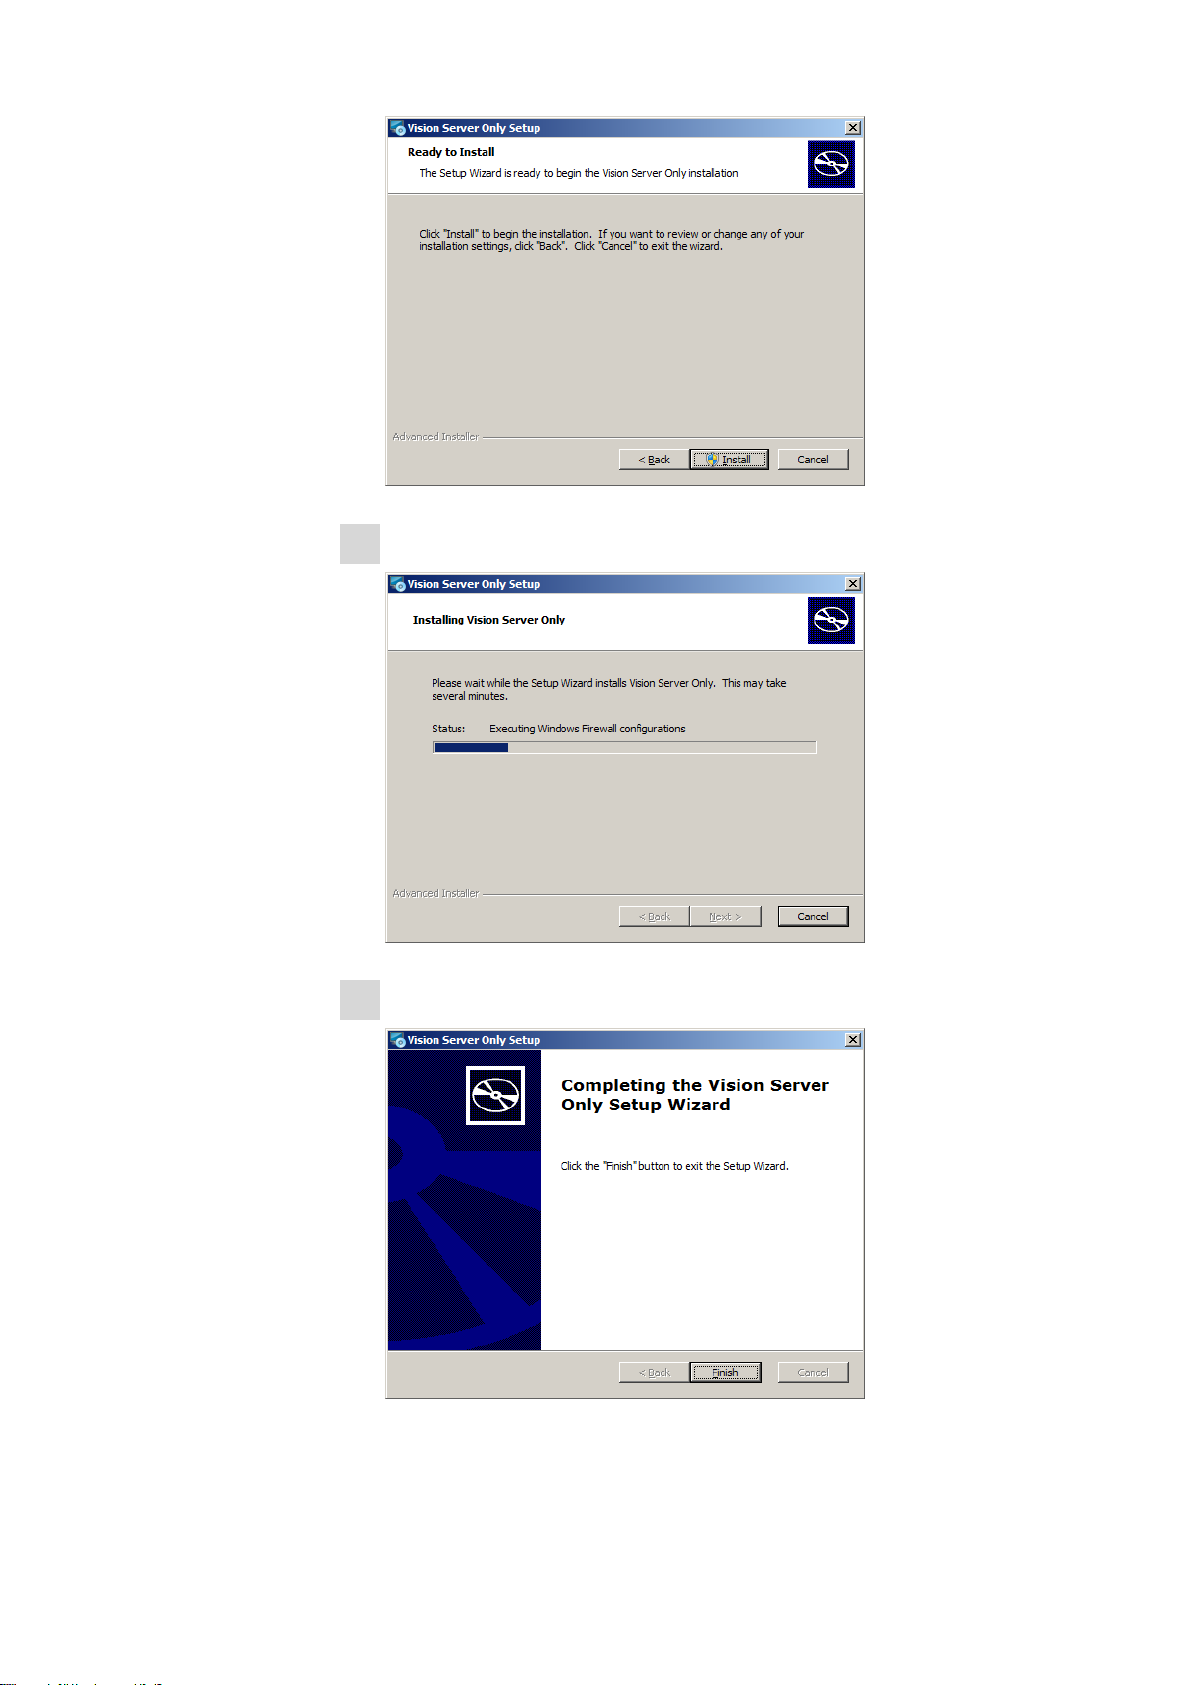
Wait for the installation of Vision.
6
Click on "Finish".
7
4
8.105.8006EN
Page 5
2.2 Client installation for SingleUser and MultiUser
Please follow these instructions to complete a Vision client installation:
If replacing an earlier Vision installation, do not uninstall the existing
1
Vision. The new Vision installation will preserve all projects and database
structures in the existing Vision and will operate in an updated manner
using existing projects and files.
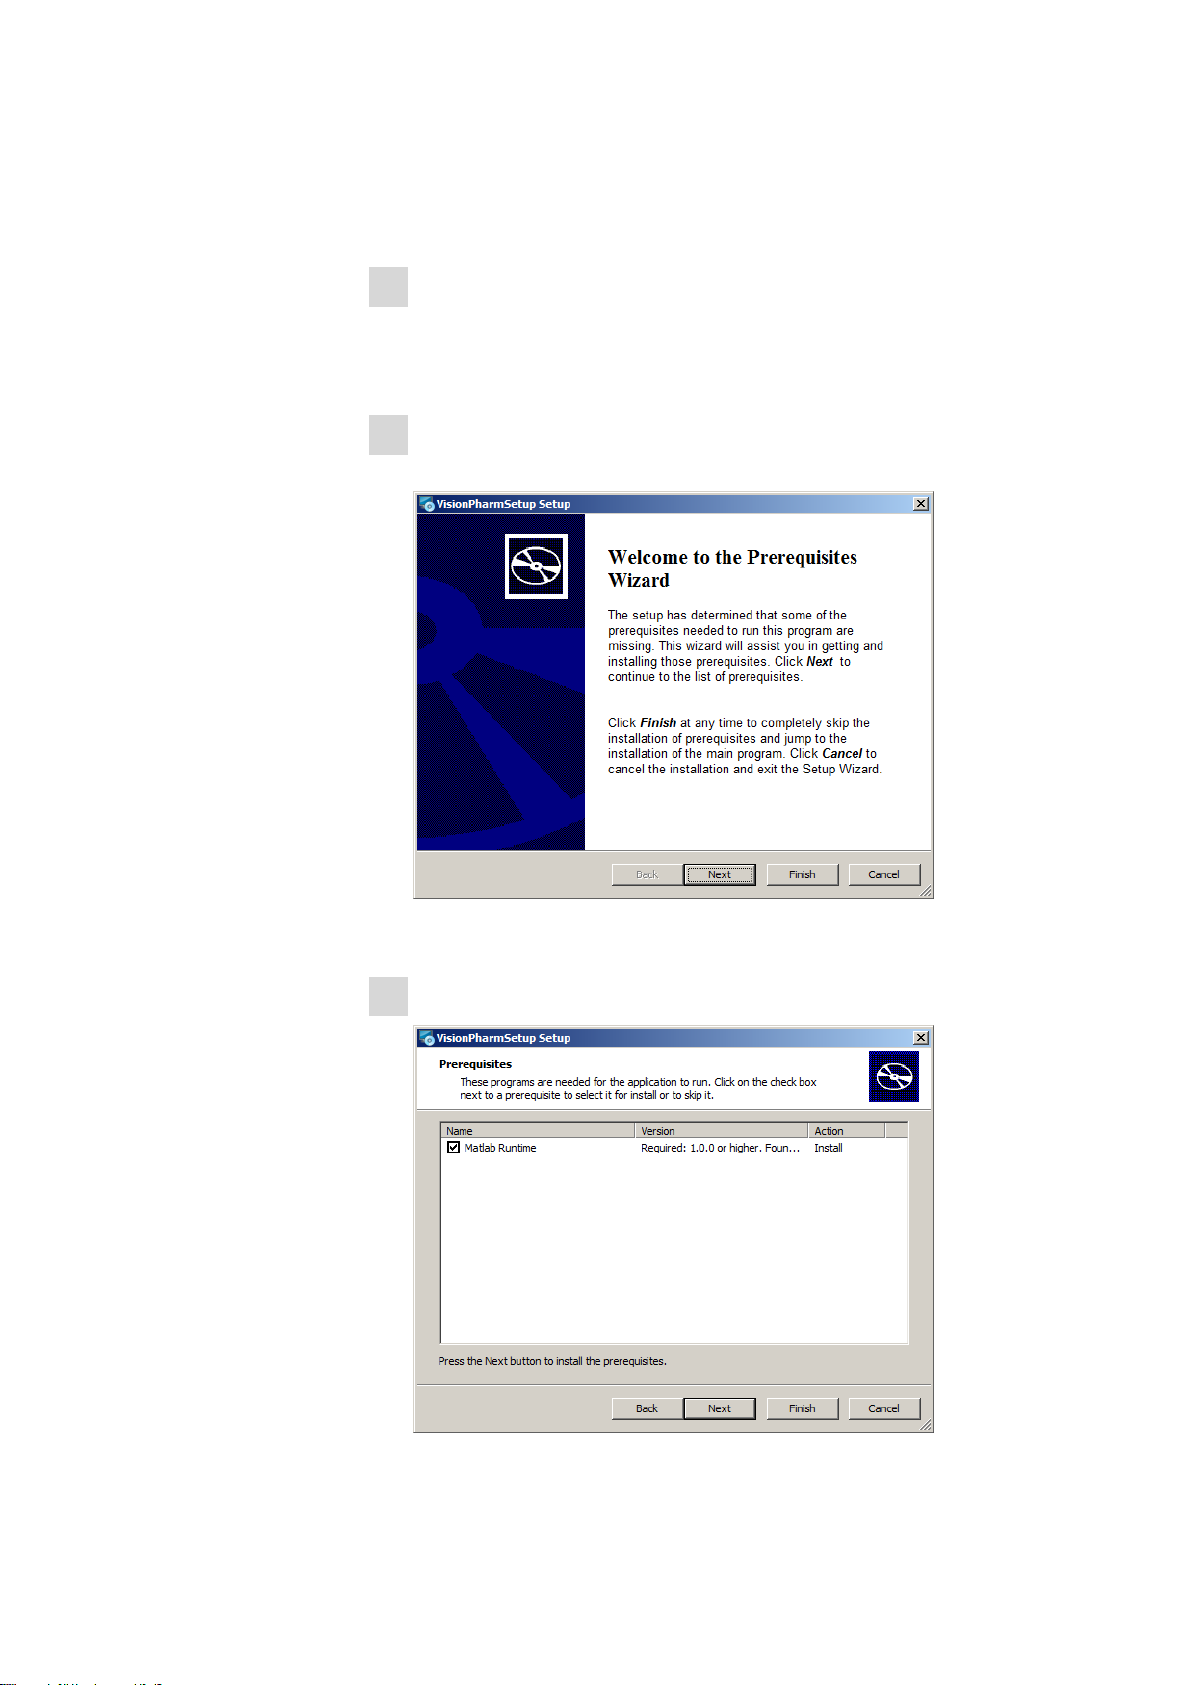
Insert the Vision “Installation” CD into the CD drive. This screen will be
2
displayed:
Click on “Next” to continue the installation.
If using a DS2500 Analyzer, Matlab must be installed before Vision.
3
Select the box for "Matlab Runtime", click on "Next" and continue with
the next step.
8.105.8006EN
5
Page 6

If a DS2500 will not be used, click only on "Next" and skip directly to step
17.
This screens will be displayed:
4
Click on “Next” to continue the installation.
At this screen, click on “Next”.
5
At this screen, click on “Install”.
6
6
8.105.8006EN
Page 7

This screens will be displayed:
7
Choose your local language, and click on “OK”.
8
8.105.8006EN
The InstallShield Wizard opens. Click on “Install”.
9
7
Page 8

This screen is displayed to show progress. No action is needed.
10
The Matlab Compiler screen is shown. Click on “Next”.
11
This screen will be shown. Click on “Next”.
12
8
8.105.8006EN
Page 9

At this screen, click on “Next”.
13
At this screen, click on “Install”.
14
8.105.8006EN
When Matlab is installed, this screen will be displayed. Click on “Finish”.
15
9
Page 10

At this screen, click on “Finish”.
16
At this screen, click on “Next”.
17
Now is starting the installation part of Vision.
10
Fill up the fields with a user name, the organisation and the serial number.
18
8.105.8006EN
Page 11

NOTE
The serial number is printed on the CD label.
Click on “Next” to continue the installation.
Please read and accept the License Agreement and click on “Next” to
19
continue the installation.
8.105.8006EN
20
NOTE
Client installation for MultiUser
This step occurs only in conjunction with the server installation.
Database of the server with the appropriate path of the vision must be
entered in the input field (see the example on the screenshot).
11
Page 12

Click on “Next” to continue the installation.
At this screen, click on “Next”.
21
At this screen, click on “Install”.
22
12
At this screen, click on “Finish”.
23
8.105.8006EN
Page 13

3 User rights for Vision
For Vision to function properly in Windows 7, Vista, NT4, 2000, and XP it is
very important to have Full Control in Vision directory and all subdirectories
and files underneath.
This is how you can check if you have Full control.
Start Windows Explorer. Right-click on the Start button on the desktop
1
and select Explorer menu.
In Windows Explorer, navigate to Vision directory. (This is directory where
2
Vision was installed) By default it is c:\vision.
8.105.8006EN
Select Vision directory in a tree.
3
Right click on it and select menu Properties
4
13
Page 14

In Properties dialog select Tab Security. If you don’t see this tab, it means
5
you don’t have sufficient rights in Windows. You can’t run Vision.
In Security tab select a user which is logged-in in Windows right now. If
6
user is not listed select a group to which this user belongs.
14
8.105.8006EN
Page 15

Look at permissions for selected user. He/she must have Full Control
7
checked.
Click on Advanced button underneath permissions list. Again select user
8
who is logged-in in Windows right now or user group where this user
belongs if user is not listed separately.
8.105.8006EN
15
Page 16

This user should have Full Control applied to “This folder, subfolders and
9
files”.
If all above is does not apply and you can’t change it, please talk to your IT
department to gain required permission. When you need Vision to be used by
low level user in Windows, use Vision Secure Operator utility which works with
any version of Vision, and allows low level users in Windows to run Vision
using hidden Administrative account, so Vision can function properly, but users
stay restricted in what they can do in Windows outside of Vision software.
Vision also requires the same full control for vision.ini and sys3.ini (in case of
XDS instrument) in Windows directory. Windows directory is usually c:\windows for Windows 7, Vista, Windows XP and c:\winNT for Windows 2000, or
NT4.
To check if you have full control over those files follow steps from 1 to 9.
If users create their projects and libraries in locations other then default Vision
location in vision directory, those projects and libraries directories also have to
have full control permissions for current Windows user. To check that follow
steps from 1 to 9 again.
If user doesn’t have sufficient rights to run Vision following symptoms can
occur:
16
Frequent crashes, error messages about not being able to open certain files
(like vision.ini and sys3.ini), error messages about not being able to access
DCM, certain projects, libraries, security database, diagnostics database, etc..
8.105.8006EN
 Loading...