

Page 1
Quick Start Guide
KeyStudio 49i
Keyboard-based Music Production System
English
Page 2

KeyStudio 49i Quick Start Guide
| 1
English
Introduction
Congratulations on your purchase of M-Audio KeyStudio 49i: a 49-key full-size,
velocity sensitive USB keyboard, digital piano, audio interface, and software
package, designed for easy integration with your computer. KeyStudio 49i is ideal for
use with a multitude of music creation applications. We recommend you spend a few
minutes reviewing this Quick Start Guide to ensure proper setup.
KeyStudio 49i Features
Keyboard:
< 49-key velocity sensitive keyboard
< on-board piano sound
< on-board piano reverb effect
< Pitch Bend wheel
< Modulation wheel;
MIDI re-assignable
< Piano Volume knob;
MIDI re-assignable
< Octave up/down buttons;
MIDI re-assignable
< Sustain foot pedal input;
MIDI re-assignable
< MIDI Out port
< 20-note polyphony
< Edit mode button for advanced
functions and programming
< bus-powered through USB or DC
power for standalone functionality
< Class-compliant operation: no driver
installation required—simply connect
the keyboard and power on
Built-in Audio Interface:
< 16-Bit, 44.1kHz, 2-input, 2-output audio interface
< XLR microphone input, 1/4" instrument input, and stereo RCA inputs
< two rear-panel 1/4" audio outputs
< two front-panel 1/4” headphone outputs
< dedicated Instrument and Microphone gain control knobs with signal and
peak LEDs
< Direct Monitor knob for near-zero latency hardware monitoring
Software:
< M-Audio GM Module application
< Ableton Live Lite
Page 3
KeyStudio 49i Quick Start Guide
2
|
What’s in the Box?
< M-Audio KeyStudio 49i MIDI controller keyboard / audio interface
< Printed Quick Start Guide
< M-Audio KeyStudio 49i CD-ROM containing:
• Softwaredriversanddocumentation
• M-AudioGMModuleapplication
< Ableton Live Lite CD-ROM and registration card
< USB cable
If any of the above listed items are missing, please contact the retailer where you
purchased the product.
About this Guide
This Quick Start Guide covers:
< Basic operation of KeyStudio 49i.
< Driver installation for KeyStudio 49i.
< Using KeyStudio 49i with M-Audio GM Module software.
Basic Operation of KeyStudio 49i
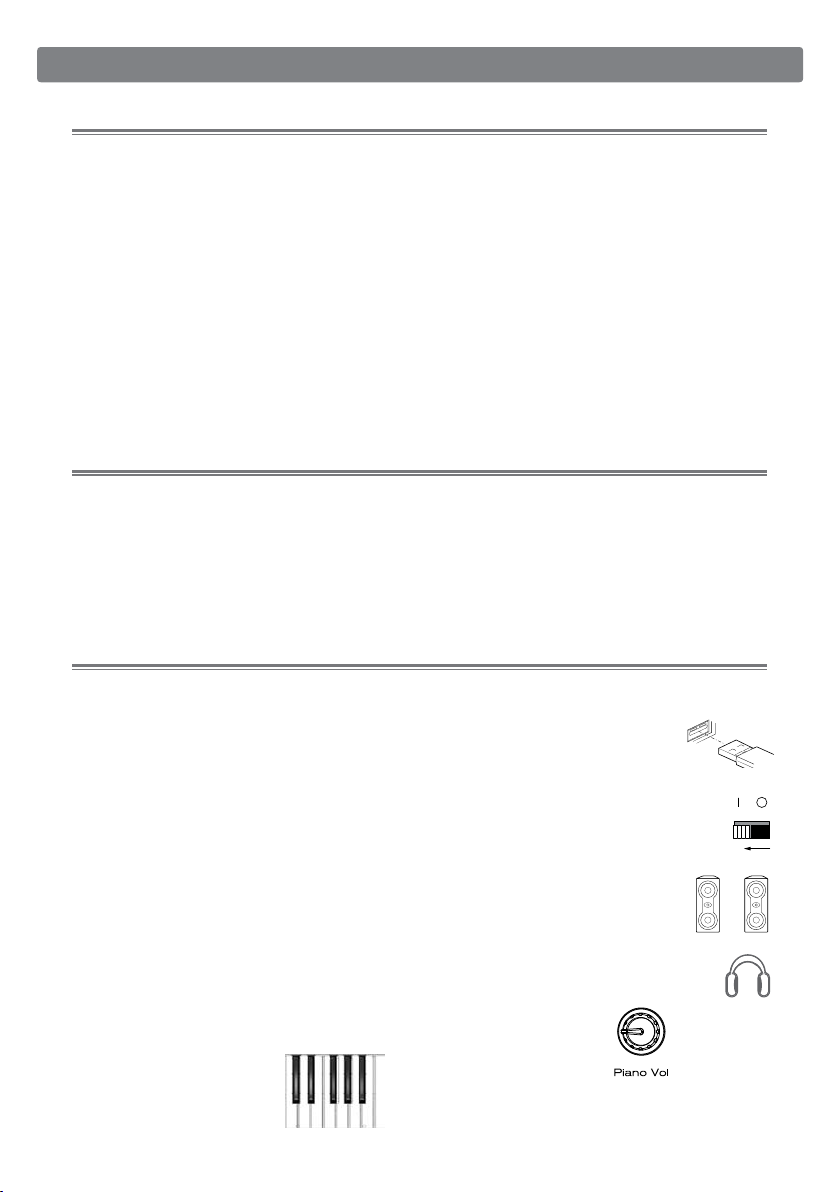
1. Use the provided USB cable to connect KeyStudio 49i to an available
USB port on your computer. The USB cable not only powers the
keyboard but also transmits MIDI data to and from your computer.
2. Make sure that the power switch on the back of the keyboard is in the “on”
position. KeyStudio 49i is now ready to be used – no additional installation
steps are required for basic operation.
3. Connect the two 1/4" outputs on the rear panel of KeyStudio 49i to
powered monitors, an amplifier, or a mixer.
You may also listen through headphones by connecting one or two sets of
headphones to the 1/4" stereo headphone outputs on KeyStudio 49i.
4. Be sure the Piano Vol. knob is at a reasonable listening level.
5. Play the keyboard.
ON
Page 4
KeyStudio 49i Quick Start Guide
| 3
English
The KeyStudio 49i Piano Demo
KeyStudio 49i has a built-in piano demo song. To hear this demo:
1. Press the Edit Mode button so that the Edit Mode LED lights.
2. Press the Reverb button.
Demo playback can be stopped by pressing either the Edit Mode
button or the Reverb button.
Using the Audio Inputs
A dynamic microphone can be connected to the XLR input located on the rear
panel*, and an instrument such as a guitar or bass can be connected to the 1/4"
input jack also located on the rear panel.
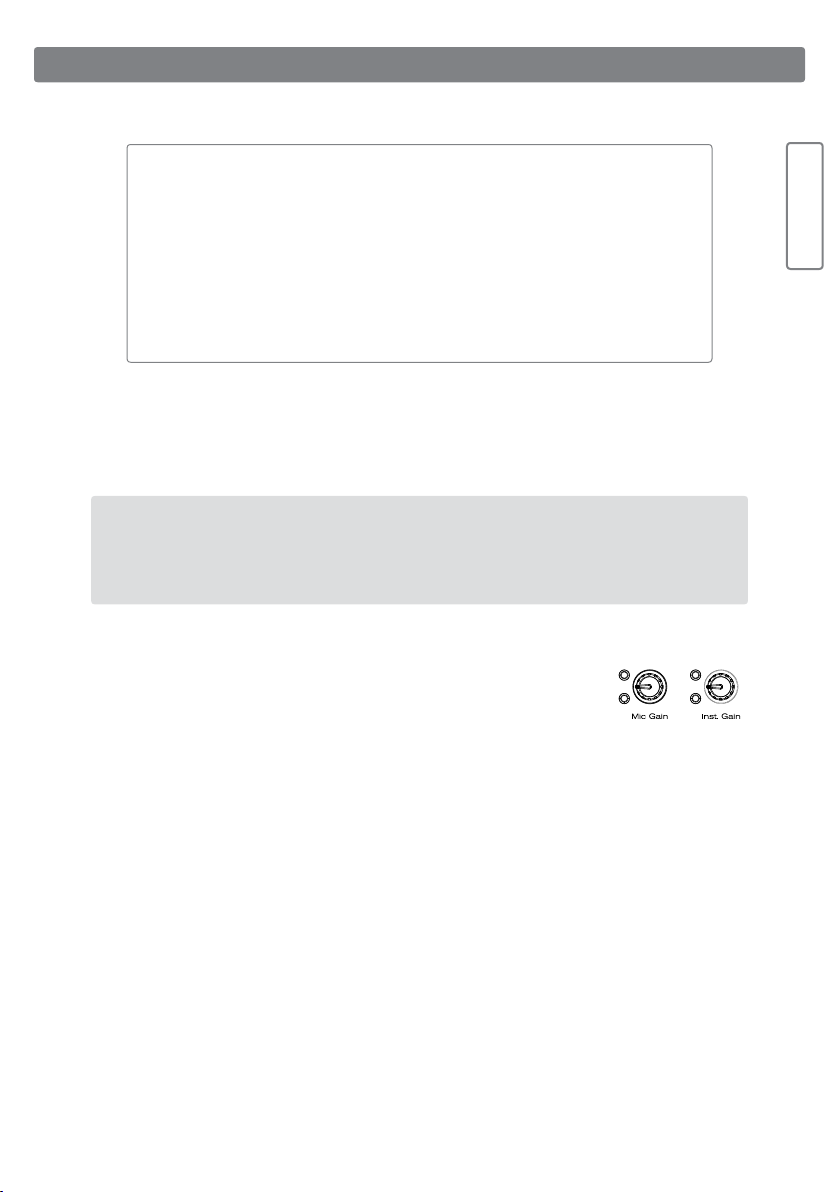
*IMPORTANT: Be sure the Mic and Inst. Gain knobs are turned down before
connecting equipment to these two input jacks. Failure to do this can result in
a loud pop or feedback which can damage your speakers and hearing.
Each of these two inputs has an independent preamp featuring a dedicated gain
control knob, and signal and clip LEDs. Two analog RCA inputs
are also located on the back panel. Signal from these inputs is
mixed with the Microphone and Instrument input signals and
routed to the 1/4" output jacks.
Advanced Features in Edit Mode
KeyStudio 49i provides many advanced MIDI features and programming options.
Pressing the Edit Mode button puts the keys of the keyboard into Edit mode. This
mode enables you to configure internal features of KeyStudio 49i and transmit
advanced MIDI messages. Consult the User Guide found on the included CD-ROM
for a complete description of the KeyStudio Edit mode.
Page 5

KeyStudio 49i Quick Start Guide
4
|
MIDI Connections
You can connect the KeyStudio 49i MIDI output to an external MIDI device’s MIDI
input. This enables you to control an external synthesizer or sound module while
using KeyStudio 49i as a standalone keyboard controller. A sustain pedal can also
be connected to the 1/4” Sustain pedal jack on the back of KeyStudio.
Driver Installation for KeyStudio 49i
KeyStudio 49i functions as a class-compliant device. This means your computer
will recognize KeyStudio 49i without the need to install additional drivers. This gives
immediate access to all audio inputs and outputs as well as to the built-in MIDI
interface. As you become more familiar with the KeyStudio keyboard, you may wish
to take advantage of this product’s additional professional features by installing the
KeyStudio 49i drivers.
Installing the KeyStudio ASIO drivers in Windows improves audio performance by
reducing Latency. Latency is the time it takes for MIDI input (when using software
synthesizers) or audio input signals to appear as audio at your computer’s outputs
for monitoring purposes. In Windows, additional features also include: using your
new keyboard with more than one application at the same time (multi-client), sending
large SysEx messages, or using your KeyStudio 49i with the Pro Tools M-Powered
recording software or the included GM Module software.
On a Macintosh computer, installing the M-Audio drivers enables you to use your
KeyStudio 49i with the Pro Tools M-Powered recording software.
Windows XP and Windows Vista (32-bit editions)
PLEASE NOTE: If you are installing drivers for KeyStudio 49i on your
Windows XP or Windows Vista computer, disconnect your KeyStudio until
you are instructed to connect it.
To install drivers for KeyStudio 49i:
1. Insert the M-Audio KeyStudio 49i CD-ROM into your computer’s CD-ROM
drive.
2. The computer will automatically display the interactive install screen. If your
computer fails to launch the installer, manually start it by clicking Start > My
Computer, and double-clicking KeyStudio 49i.
3. Choose the KeyStudio 49i keyboard from the pull down menu and click
"Install."
Page 6

KeyStudio 49i Quick Start Guide
| 5
English
4. Follow the driver installer’s on-screen direction prompts.
5. At various points in this installation process, you may be notified that the driver
being installed has not passed Windows Logo Testing, or asked whether the
program you wish to run is a trusted application. Click Continue Anyway or Install
to proceed with installation.
6. Click "Finish" once the installer has completed the installation.
Macintosh
M-Audio driver installation is not required in order to use KeyStudio 49i with the GM
Module software on your Macintosh OS X computer. These drivers are however,
required for Pro Tools M-Powered use. Instructions for installing the KeyStudio 49i
OS X drivers can be found in the User Guide on the included KeyStudio 49i
CD-ROM.
Page 7

KeyStudio 49i Quick Start Guide
6
|
Connecting KeyStudio 49i to your Computer
Use the provided USB cable to connect KeyStudio 49i to an available USB port on
your Windows or Macintosh computer. Make sure that the power switch on the back
of the keyboard is in the “on” position. The USB cable not only powers the keyboard
but also transmits MIDI data to your computer.
In Windows XP, the Found New Hardware Wizard will appear with the following
questions:
1. Can Windows connect to Windows Update to search for software?
Select “No, not this time,” and click Next to continue.
2. What do you want the wizard to do?
Select “Install the software automatically,” and click Next to continue.
Continue to follow the New Hardware Wizard’s on-screen direction prompts. Once
the New Hardware Wizard has completed, click “Finish.”
You will see a message
pop up stating, “Your new hardware is installed and ready to use.”
Windows may repeat steps 1 and 2 of the installation process. This behavior
is normal.
Page 8

KeyStudio 49i Quick Start Guide
| 7
English
Installation of the M-Audio GM Module Software
Windows XP and Windows Vista (32-bit editions)
1. Insert the M-Audio KeyStudio 49i CD-ROM into your computer’s CD-ROM drive.
2. The computer will automatically display the interactive install screen. If your
computer fails to launch the installer, manually start it by clicking
Start > My Computer, and double-clicking KeyStudio 49i.
3. Choose M-Audio GM Module from the pull down menu and click "Install."
4. Follow the installer’s on-screen direction prompts.
5. During setup, the installer will ask you to specify two directories on your
computer. The first is for the GM Module Data directory (approximately 350
MB) and the second is for your VST plug-in directory. You may specify a custom
location, or use the default setting.
6. When the installer finishes installing the software, click “Finish.”
7. M-Audio GM Module is now installed on your computer.
Note: The GM Module software requires the KeyStudio 49i hardware to be
connected and its drivers to be installed in order to operate in Windows.
Macintosh OS X
1. Insert the M-Audio KeyStudio 49i CD-ROM in your computer’s CD-ROM drive.
2. A CD-ROM icon will appear on your desktop once the disc is inserted into your
computer. Double-click this icon to view the contents of the disc.
3. Double-click the “Open Me” icon.
4. Select “GM Module” from the drop-down menu and click “Install.”
5. The software installer will launch. Follow the on-screen direction prompts. During
Installation, Mac OS X will ask you to enter your user name and password. Enter this
information and click OK to confirm. If you have not configured a password for your
computer, leave the password field blank and click OK. If you are not the computer’s
owner, ask the owner or your Administrator for the missing information.
6. The M-Audio GM Module is now installed on your computer.
Page 9

KeyStudio 49i Quick Start Guide
8
|
Opening the M-Audio GM Module Software
Once the M-Audio GM Module application is properly installed, there are two
options for opening your new software:
1. Software standalone mode: Double click the M-Audio GM Module shortcut
icon that was placed on your computer’s desktop during installation. If this
icon does not appear in Windows, click on Start > All Programs > M-Audio >
M-Audio GM Module > M-Audio GM Module to launch your new software. On a
Mac, go to Applications > M-Audio GM Module.
2. RTAS, VST, or AU plug-in mode: Launch your host application, and select the
M-Audio GM Module as a virtual instrument on an empty track. Consult your host
application’s documentation to learn how to do this.
M-Audio GM Module Software Configuration
Overview
M-Audio GM Module is a 16-channel, multi-timbral General MIDI sound player.
The GM Module software provides 128 instruments (0-127). It receives MIDI
messages from your KeyStudio 49i USB keyboard, and sends audio signal out of the
KeyStudio audio outputs.
Channels 1-16
M-Audio GM Module has 16 individual channels that can simultaneously produce
sounds. Each of these channels can be set to a different instrument and has its own
Volume, Pan, Tone, Category/Instrument, Chorus, Reverb, Mute and Solo controls.
To select a channel, click on its level meter located above the channel’s number, and
an outline will appear around the level meter. The set of controls to the right of the
channel meter display (including the Mute (M) and Solo (S) buttons) only affect
the selected channel.
The General MIDI standard provides for 16 MIDI channels, 15 of them can play any
of 128 available instruments. Channel 10 is an exception and is always mapped
to the General MIDI drum kit. This assignment is fixed and cannot be changed.
Information on how to transmit MIDI messages to M-Audio GM Module on different
channels can be found in the "Advanced MIDI Features in Edit Mode" section of the
User Guide on the included KeyStudio 49i CD-ROM.
Page 10

KeyStudio 49i Quick Start Guide
| 9
English
Selecting Categories and Instruments
When the M-Audio GM Module software is launched in standalone mode, it sends
a MIDI message to the KeyStudio keyboard. This message programs the Octave
buttons on KeyStudio 49i to send program change messages. The GM Module
software always opens with program zero selected on GM Module channel 1. This
mutes the GM Module, allowing only the KeyStudio 49i built-in piano sound to be
heard. Pushing the Octave “>” button unmutes the GM Module, and allows you to
step through program numbers 1-127, which trigger General MIDI sounds in the
GM Module software (see the User Guide Appendix A). The built-in piano sound in
KeyStudio 49i will remain silent while playing any of the GM Module sounds when
the software is in standalone mode. If program zero is once again selected on GM
Module channel 1, the GM Module software will once again be muted, and the
KeyStudio 49i built-in piano sound will be heard.
GM Module arranges its sounds into General MIDI standard categories. Clicking
the category field produces a drop-down menu of all of these categories.
Although selecting a new Category changes the list of available instruments in
the Instrument field, it is necessary to make a selection from the Instrument field
for a new sound to load. This is useful when using the GM Module software in live
performance situations where it may be undesirable for the first sound in a category
to automatically load. In such situations, it is usually preferred to have the previous
sound loaded until you select a particular sound from within a category.
Additional GM Module Software Information
For more information on M-Audio GM Module, see the KeyStudio 49i User Guide
contained on the KeyStudio 49i CD-ROM.
Third Party Software Configuration
With the KeyStudio 49i keyboard properly installed, any MIDI capable software
application on the same system should recognize KeyStudio 49i as a MIDI input
device. To use the KeyStudio 49i keyboard with your software, you may need to
configure the software to read MIDI data being sent from KeyStudio 49i. This
often entails going into the Options or Device Setup menu in your music software
application and selecting “M-Audio KeyStudio IO In” or “USB Audio Device” as the
MIDI input. In Windows XP, KeyStudio 49i will appear as “USB Audio Device” if the
M-Audio drivers have not been installed. After installing these drivers, KeyStudio
49i should appear as “M-Audio KeyStudio IO.*” Please consult your software’s
documentation for instructions on how to configure the software for use with MIDI
input devices.
*The actual KeyStudio name displayed by the computer may vary slightly depending
on what recording software is being used.
Page 11

KeyStudio 49i Quick Start Guide
10
|
Additional Information and Support
For more information on M-Audio GM Module, see the KeyStudio 49i User Guide
contained on the KeyStudio 49i CD-ROM.
Warranty
Warranty Terms
M-Audio warrants products to be free from defects in materials and workmanship,
under normal use and provided that the product is owned by the original, registered
user. Visit www.m-audio.com/warranty for terms and limitations applying to your
specific product.
Warranty Registration
Immediately registering your new M-Audio product entitles you to full warranty
coverage and helps M-Audio develop and manufacture the finest quality products
available. Register online at www.m-audio.com/register to receive FREE product
updates and for the chance to win M-Audio giveaways.
KeyStudio 49i
Tested to comply with
FCC standards
FOR HOME OR STUDIO USE
ESD and Fast Transient may cause the unit to temporarily malfunction. Switch off
and on again to restore normal operation.
WARNING: This product contains chemicals, including lead, known to the State
of California to cause cancer, and birth defects or other reproductive harm. Wash
hands after handling.
© 2008 Avid Technology, Inc. All rights reserved. Product features, specifications,
system requirements and availability are subject to change without notice. Avid,
M-Audio, KeyStudio 49i, Pro Tools and GM Module are either trademarks or
registered trademarks of Avid Technology, Inc. All other trademarks contained
herein are the property of their respective owners.
Page 12

ML02 -13 4C0
M-Audio USA
5795 Martin Rd., Irwindale, CA 91706
Technical Support
web . . . . . . . . . . . . . . www.m-audio.com/tech
tel (pro products) . . . . . . . . . . (626) 633-9055
tel (consumer products) . . . . . . . (626) 633-9066
fax (shipping) . . . . . . . . . . . . . (626) 633-9032
Sales
e-mail . . . . . . . . . . . . . . . sales@m-audio.com
tel . . . . . . . . . . . . . . . . . . 1(866) 657-6434
fax . . . . . . . . . . . . . . . . . . (626) 633-9070
Web . . . . . . . . . . . . . . . . . www.m-audio.com
M-Audio U.K.
Floor 6, Gresham House, 53 Clarenden Road, Watford
WD17 1LA, United Kingdom
Technical Support
e-mail . . . . . . . . . . . . . .support@maudio.co.uk
tel (Mac and PC support) . . . +44 (0)1753 658630
Sales
tel . . . . . . . . . . . . . . . . +44 (0)1923 204010
tel . . . . . . . . . . . . . . . . +44 (0)1923 204039
Web . . . . . . . . . . . . . . . . . www.maudio.co.uk
Benelux
Technical Support
Belgium tel . . . . . . . . . . . . . +32 22 54 88 93
Holland tel . . . . . . . . . . . . . +31 35 625 0097
M-Audio France
Floor 6, Gresham House, 53 Clarenden Road, Watford
WD17 1LA, United Kingdom
Renseignements Commerciaux
tel . . . . . . . . . . . . . . . . . . . . 0 810 001 105
email . . . . . . . . . . . . . . . . . .info@m-audio.fr
Assistance Technique
PC . . . . . . . . . . . . . . . . . . . 0 820 000 731
Mac . . . . . . . . . . . . . . . . . . . 0 820 391 191
e-mail (PC) . . . . . . . . . . . . support@m-audio.fr
email (Mac) . . . . . . . . . . . . . . mac@m-audio.fr
fax . . . . . . . . . . . . . . . +33 (0)1 72 72 90 52
Web . . . . . . . . . . . . . . . . . www.m-audio.com
M-Audio Germany
Kuhallmand 34, D-74613 Ohringen, Germany
Technical Support
email . . . . . . . . . . . . . . . support@m-audio.de
tel . . . . . . . . . . . . . . . +49 (0)7941 - 9870030
tel . . . . . . . . . . . . . . +49 (0)7941 - 98 70070
Sales
e-mail . . . . . . . . . . . . . . . . . info@m-audio.de
tel . . . . . . . . . . . . . . . . +49 (0)7941 98 7000
fax . . . . . . . . . . . . . . +49 (0)7941 98 70070
Web . . . . . . . . . . . . . . . . . . www.m-audio.de
M-Audio Canada
1400 St-Jean Baptiste Ave. #150, Quebec City,
Quebec G2E 5B7, Canada
Technical Support
e-mail . . . . . . . . . . . .techcanada@m-audio.com
tel . . . . . . . . . . . . . . . . . . . (418) 872-0444
fax . . . . . . . . . . . . . . . . . . (418) 872-0034
Sales
e-mail . . . . . . . . . . . . infocanada@m-audio.com
tel . . . . . . . . . . . . . . . . . . . (866) 872-0444
fax . . . . . . . . . . . . . . . . . . (418) 872-0034
Web . . . . . . . . . . . . . . . . . . www.m-audio.ca
M-Audio Japan
エムオーディオ/アビッドテクノロジー
株式会社
〒
107-0052
東京都港区赤坂
2-11-7 ATT
新館
ビル
4F
Avid Technology K.K. | M-Audio
4F ATT Bldg. 2-11-7 Akasaka, Minato-ku Tokyo
107-0052 Japan
製品をお持
ちのお
客様|
Customer Support &
Technical Support
online . . . . . . . . .http://www.m-audio.jp/support
tel . . . . . . . . . . . . . . . . . . . . 03-3505-4034
製品をお持
ちでないお
客様|
Pre Sales
e-mail . . . . . . . . . . . . . . . . .sales@m-audio.jp
tel .
. . . . . . . . . . . . . . . . . . . 03-3505-7963
fax . . . . . . . . . . . . . . . . . . . 03-3505-3417
Web
. . . . . . . . . . . . . . . . . . .www.m-audio.jp
Web
. . . . . . . . . . . . . . . . . . .www.m-audio.jp
080609_KyStu49i_QSG_EN01
 Loading...