

Page 1

Model CDR632 User Guide
CD Recorder
CLASS 1 LASER PRODUCT
LUOKAN 1 LASERLAITE
KLASS 1 LASERAPPARAT
Page 2
Warnings and Cautions
CAUTION
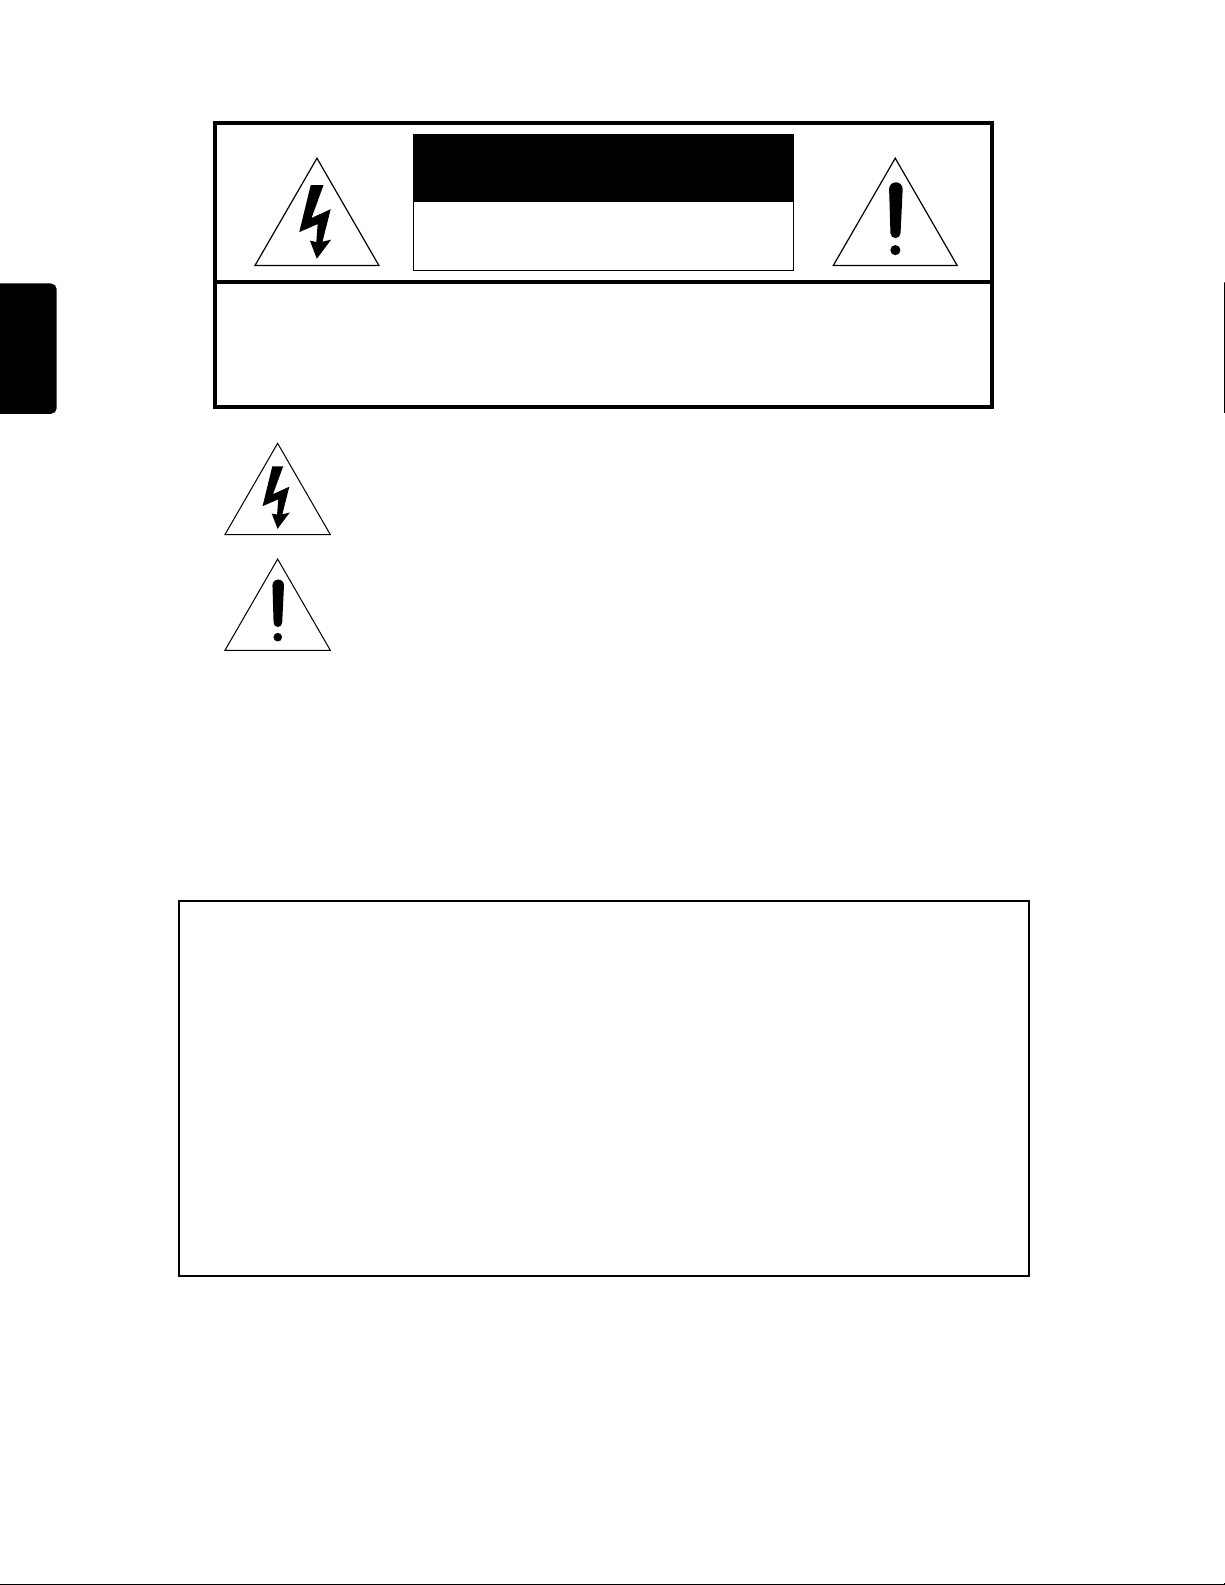
RISK OF ELECTRIC SHOCK
DO NOT OPEN
ENGLISH
CAUTION: TO REDUCE THE RISK OF ELECTRIC SHOCK,
DO NOT REMOVE COVER (OR BACK).
NO USER-SERVICEABLE PARTS INSIDE.
REFER SERVICING TO QUALIFIED SERVICE PERSONNEL.
The lightning flash with arrowhead symbol within an equilateral triangle is intended to alert the user to the presence of uninsulated
"dangerous
sufficient magnitude to constitute a risk of electric shock to persons.
The exclamation point within an equilateral triangle is intended to
alert the user to the presence of important operating and maintenance (servicing) instructions in the literature accompanying the
product.
voltage
" within the product's enclosure. It may be of
WARNING
TO REDUCE THE RISK OF FIRE OR ELECTRIC SHOCK,
DO NOT EXPOSE THIS PRODUCT TO RAIN OR MOISTURE.
CAUTION
USE OF CONTROLS OR ADJUSTMENTS OR PERFORMANCE OF
PROCEDURES OTHER THAN THOSE SPECIFIED HEREIN MAY RESULT IN
HAZARDOUS RADIATION EXPOSURE.
:
WARNINGS
• Do not expose the equipment to rain or moisture.
• Do not remove the cover from the equipment.
• Do not insert anything into the equipment through the ventilation holes.
• Do not handle the mains lead with wet hands.
• Do not cover the ventilation with any items such as tablecloths, newspapers,
curtains, etc.
• No naked flame sources, such as lighted candles, should be placed on the
equipment.
• When disposing of used batteries, please comply with governmental regulations or
environmental public instruction’s rules that apply in your country or area.
• Do not place anything about 0.1 meter above the top panel.
• Make a space of about 0.1 meter around the unit.
• No objects filled with liquids, such as vases, shall be placed on the apparatus.
• When the switch is in the OFF position, the equipment is not completely switched
off from MAINS.
Copyright
• Recording and playback of any material may require consent. For further
information refer to the following US ordinances:
• Copyright act of 1956
• Dramatic and Musical Performance Act 1958
• Performers Protection Acts 1963 and 1972
• any subsequent statutory enactments and orders
2
Page 3

— Important Safety Instructions
Important Safety
Instructions
READ BEFORE OPERATING
EQUIPMENT
This product was designed and manufactured to
meet strict quality and safety standards. There are,
however, some installation and operation precautions
which you should be particularly aware of.
1. Read these instructions.
2. Keep these instructions.
3. Heed all warnings.
4. Follow all instructions.
5. Do not use this apparatus near water.
6. Clean only with dry cloth.
7. Do not block any ventilation openings. Install in
accordance with the manufacture’s instructions.
8. Do not install near any heat sources such as
radiators, heat registers, stoves, or other
apparatus (including amplifiers) that produce
heat.
9. Do not defeat the safety purpose of the polarized
or grounding-type plug. A polarized plug has two
blades with one wider than the other.
A grounding type plug has two
blades and a third grounding
prong. The wide blade or the
third prong are provided for your
safety. If the provided plug does
not fit into your outlet, consult an
electrician for replacement of
the obsolete outlet.
10. Protect the power cord from being walked on or
pinched particularly at plugs, convenience
receptacles, and the point where they exit from
the apparatus.
11. Only use attachments/accessories specified by
the manufacturer.
12. Use only with the cart, stand, tripod, bracket, or
table specified by the manufacturer, or sold with
the apparatus. When a cart is used, use caution
when moving the cart/apparatus combination to
avoid injury from tip-over.
13. Unplug this apparatus during lightning storms or
when unused for long periods of time.
14. Refer all servicing to qualified service personnel.
Servicing is required when the apparatus has
been damaged in any way, such as power-supply
cord or plug is damaged, liquid has been spilled
or objects have fallen into the apparatus, the
apparatus has been exposed to rain or moisture,
does not operate normally, or has been dropped.
• The apparatus should be located close enough to
the AC outlet so that you can easily grasp the
power cord plug at any time.
• Apparatus with Class I construction shall be
connected to an AC outlet with a protective
grounding connection.
Additional Safety Information!
• This product should not be placed in a built-in
installation such as a bookcase or rack unless
proper ventilation is provided or the manufacturer’s
instructions have been adhered to.
• Apparatus shall not be exposed to dripping or
splashing and that no objects filled with liquids,
such as vases, shall be placed on the apparatus.
• When the switch is in the OFF position, the
apparatus isn’t completely switched-off from the
MAINS.
ENGLISH
3
Page 4
— Important Safety Instructions
ENGLISH
NOTE TO CATV SYSTEM INSTALLER:
This reminder is provided to call the CATV (CableTV) system installer's attention to Article 820-40 of
the NEC, which provides guidelines for proper
grounding and, in particular, specifies that the cable
ground shall be connected to the grounding system
of the building, as close to the point of cable entry as
practical.
NOTE:
This equipment has been tested and found to comply
with the limits for a Class A digital device, pursuant to
Part 15 of the FCC Rules.
These limits are designed to provide reasonable
protection against harmful interference when the
equipment is operated in a commercial environment.
This equipment generates, uses, and can radiate
radio frequency energy and, if not installed and used
in accordance with the instruction manual, may
cause harmful interference to radio communications.
Operation of this equipment in a residential area is
likely to cause harmful interference in which case the
user will be required to correct the interference at this
own expense.
NOTE:
Changes or modifications may cause this unit to fail
to comply with Part 15 of the FCC Rules and may
void the user's authority to operate the equipment.
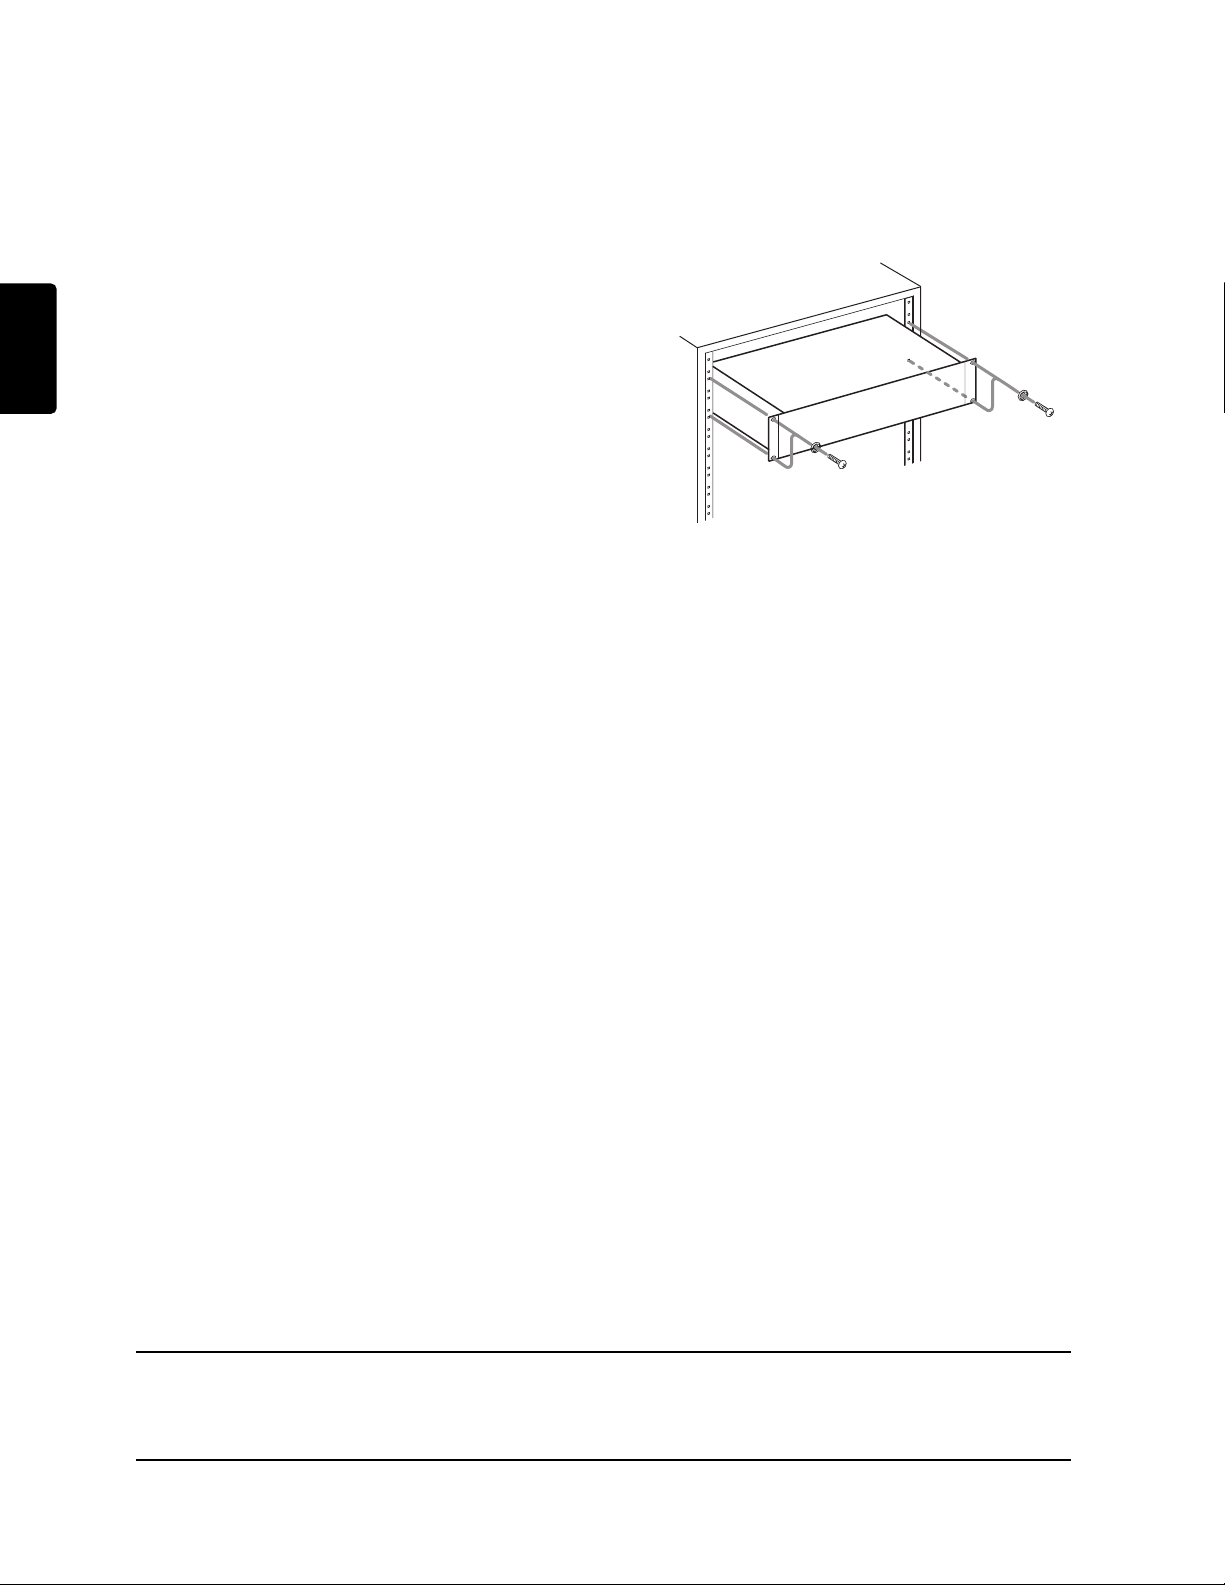
Rack-mounting the Unit
Use the supplied rack-mounting kit to mount the unit
in a standard 19-inch rack, as shown below.
Remove the feet of the unit before mounting.
NOTE
• Leave 1U of space above the unit for ventilation.
• Allow at least 10 cm (4 in) at the rear of the unit
for ventilation.
• The range of operating temperatures for this unit
is 5–35 degrees C.
• Place this unit on a level surface.
• To allow for proper cooling, do not place objects
on top of this unit.
• Do not place this unit on a power amp or other
device that generates heat.
This Class A digital apparatus complies with Canadian ICES-003.
Cet appareil numérique de la Classe A est conforme á la norme NMB-003 du Canada.
4
Page 5

1 – Introduction
Thank you for purchasing the CDR632.
Before using the CDR632, please read this manual care-
fully, and use the product as directed to insure troublefree enjoyment. After you have read this manual, please
keep it handy for future reference.
Contents
Introduction .......................................................5
What this product consists of ..............................5
Conventions in this manual................................. 5
About discs..........................................................6
What is finalizing? ..............................................7
Using the remote control unit.............................. 7
Front and rear panel .........................................8
Front panel ..........................................................8
Rear panel............................................................ 9
RC632CDR (remote control unit)..................... 10
Audio signal connections ..................................11
Menu mode operations ...................................12
Menu structure ..................................................12
Basic operation in Menu mode .........................12
Playback .........................................................14
Types of disc that can be played .......................14
Basic playback operation ..................................14
Selecting a song................................................. 15
Track search ......................................................16
Playback modes................................................. 17
Switching the time display................................ 19
Timer playback.................................................. 19
Repeat playback ................................................ 20
Pitch control playback.......................................21
Playing MP3 files.............................................. 21
Recording .......................................................24
Before you record.............................................. 24
Basic recording operations................................ 25
Switching the time display................................ 26
Fade-in/out ........................................................27
Sync recording ..................................................27
Auto track recording .........................................29
Manually updating the track number ................30
Rec mute............................................................30
CD-R/CD-RW disc operations ........................31
Finalizing...........................................................31
Un-finalizing ..................................................... 31
Refreshing ......................................................... 32
Erasing a disc ....................................................32
Erasing a track...................................................33
Entering names.............................................. 34
Naming a disc ................................................... 34
Naming a track.................................................. 35
Messages....................................................... 36
Error messages.................................................. 36
Messages during operation ............................... 36
Troubleshooting ............................................. 37
Specifications................................................. 38
Caution
Your use of copyrighted material such as music, movies, computer programs, and databases may be
restricted by copyright law and other laws, and by the
agreement that exists between you and the copyright
owner. Before you use this product to copy any such
material, please make sure that you are in compliance
with such laws and agreements, and use this product in
a way that does not violate them. The manufacturer of
this product will accept no responsibility for any copyright infringement you may commit using this product.
What this product consists of
This product consists of the following items.
• CDR632 rewritable recorder x 1
• RC632CDR remote control unit x 1
• Power cable x 1
• Audio cable x2
• Battery (AAA size) x 2
Conventions in this manual
The following conventions are used in this manual.
• XXX
Indicates a value you can select.
Example: SRC> XXX (you can select ON/OFF)
•[
]
Refers to an indicator in the display.
Example:
•“
”
Indicates characters shown in the display.
Example:
[SHUFFLE]
“Open”
ENGLISH
5
Page 6
ENGLISH
1 – Introduction—About discs
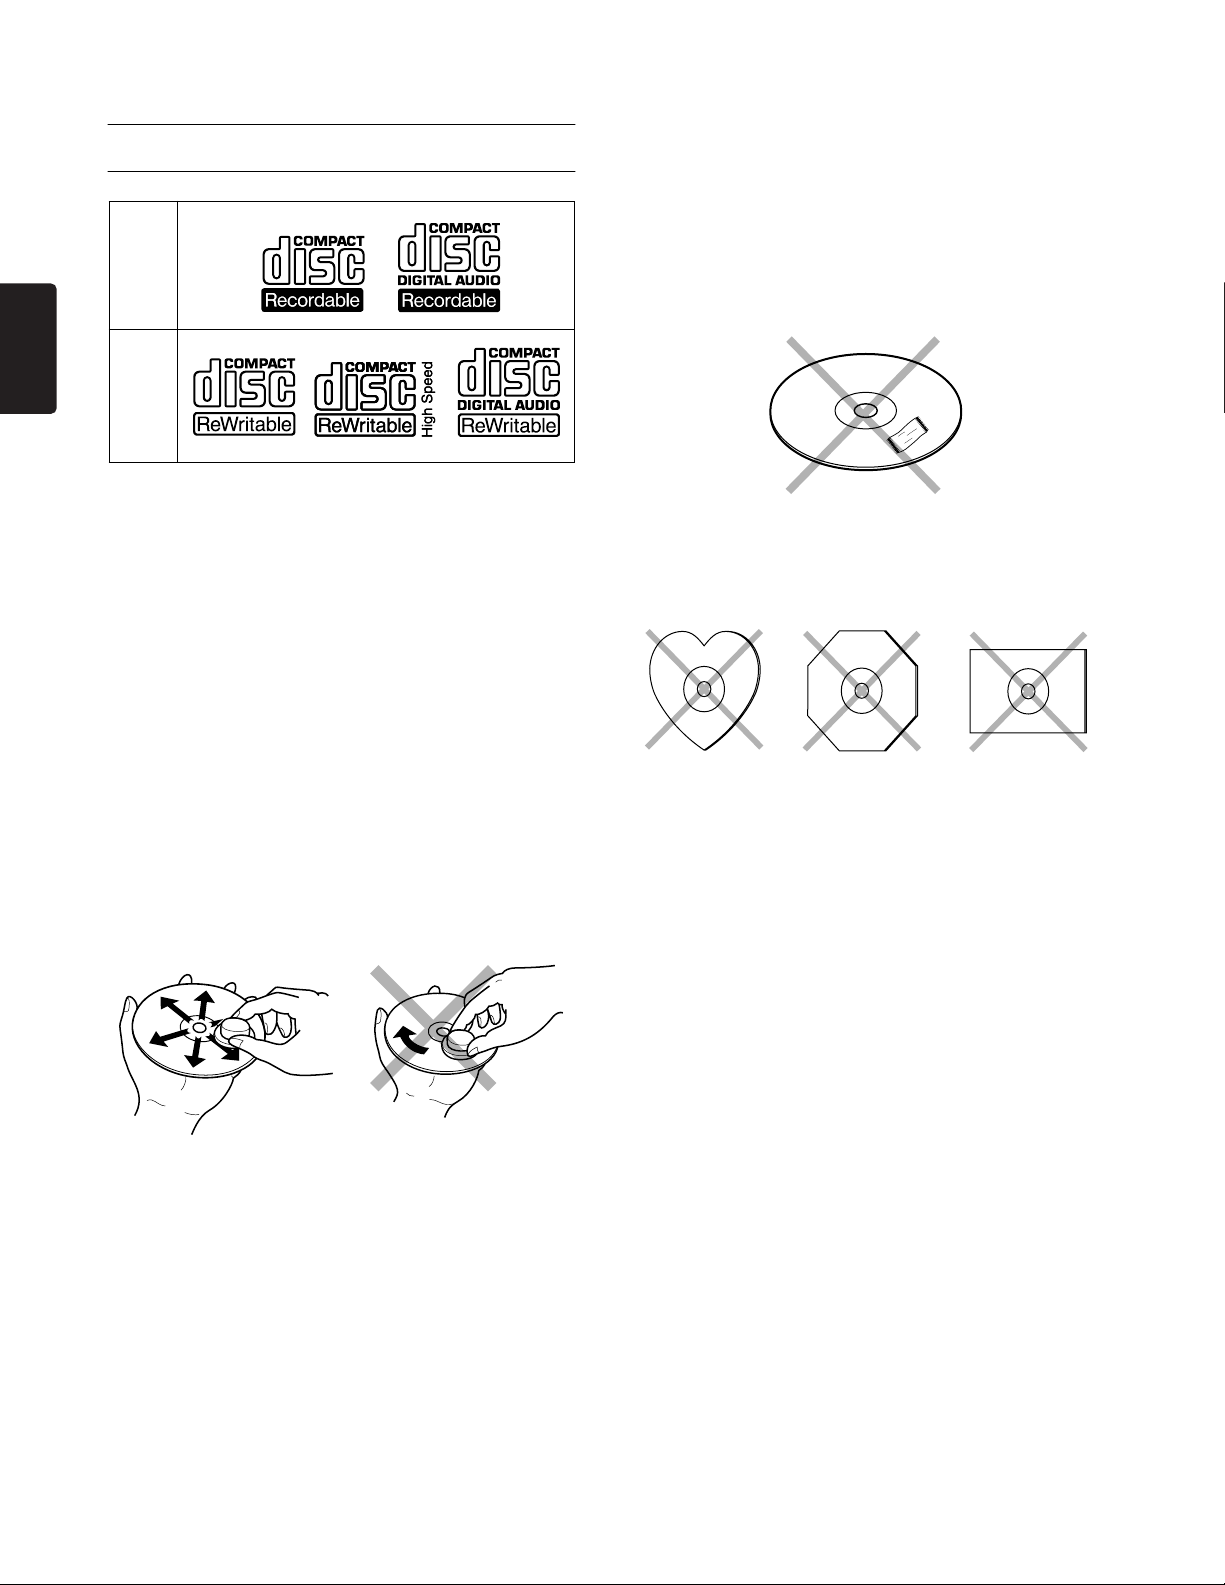
About discs
CD-R
CD-RW
Handle discs carefully so as not to damage
or scratch the front side.
To protect the disc, avoid placing it in the
following locations:
• In direct sunlight or near a source of heat like a
heater.
• In a place which is damp or dirty.
• In a place which could be exposed to rain, such as
near a window.
• Do not attach a piece of paper or sticker on the
label side of disc. When a disc has a piece of plastic tape or rental CD label with paste protruded
from the edge or when a disc has a trace of such a
sticky object, do not attempt to play the disc. If
such a disc is played on the CD recorder, impossibility of taking out the disc or other malfunction
may result.
• Do not use a disc with a special shape.
Do not attempt to play a disc with a special shape
such as a heart-shaped disc or octagonal disc.
Otherwise the equipment malfunction may result.
Always keep the disc surface clean.
When cleaning the disc surface, always be sure to use
a special compact disc cleaner and wipe as shown
below.
• Do not use conventional record cleaner for analog
records, as this will adversely affect the disc surface.
Store discs properly by placing them in their disc
cases.
6
Page 7
What is finalizing?
Even after audio data is recorded on a CD-R or CDRW disc, it cannot be played back on a conventional
CD player until the final TOC
recorded on the disc. The process of recording this
TOC data is called “finalizing”.
No further recording can be performed on a finalized
disc. However in the case of a CD-RW, the disc can be
“un-finalized” to allow additional recording (
* TOC: Table of Contents = information about the
recorded data, such as the number and playing
times of the songs
(*)
data has been
p.31).
Using the remote control unit
→
1 – Introduction—What is finalizing?
Caution regarding batteries
Incorrect use of batteries may cause leakage or bursting. Please carefully read and observe the following
cautions.
• Be sure to insert the batteries in the correct orientation as indicated by the “+” and “–” markings
on the battery case.
• Do not mix new batteries with old batteries, or
batteries of differing types.
• Never attempt to recharge batteries.
• Remove the batteries if you won’t be using the
remote control unit for an extended period (more
than one month).
• If leakage occurs, carefully wipe off any liquid
from inside the case and install new batteries.
ENGLISH
Cautions for use
• Remote control operations may not be possible if
the remote control receiver is in direct sunlight or
under intense illumination.
• Please be aware that operating the remote control
unit may cause unintended operations to occur on
other infrared-controlled equipment.
Installing the batteries
Open the cover on the back panel of the remote control unit, and install two batteries (AAA size) in the
correct orientation as indicated by the “+” and “-”
markings on the case.
When to replace the batteries
If the range of control has lessened, or if pressing a
button does not produce an operation, please replace
both batteries with new ones.
7
Page 8
ENGLISH
2 – Front and rear panel
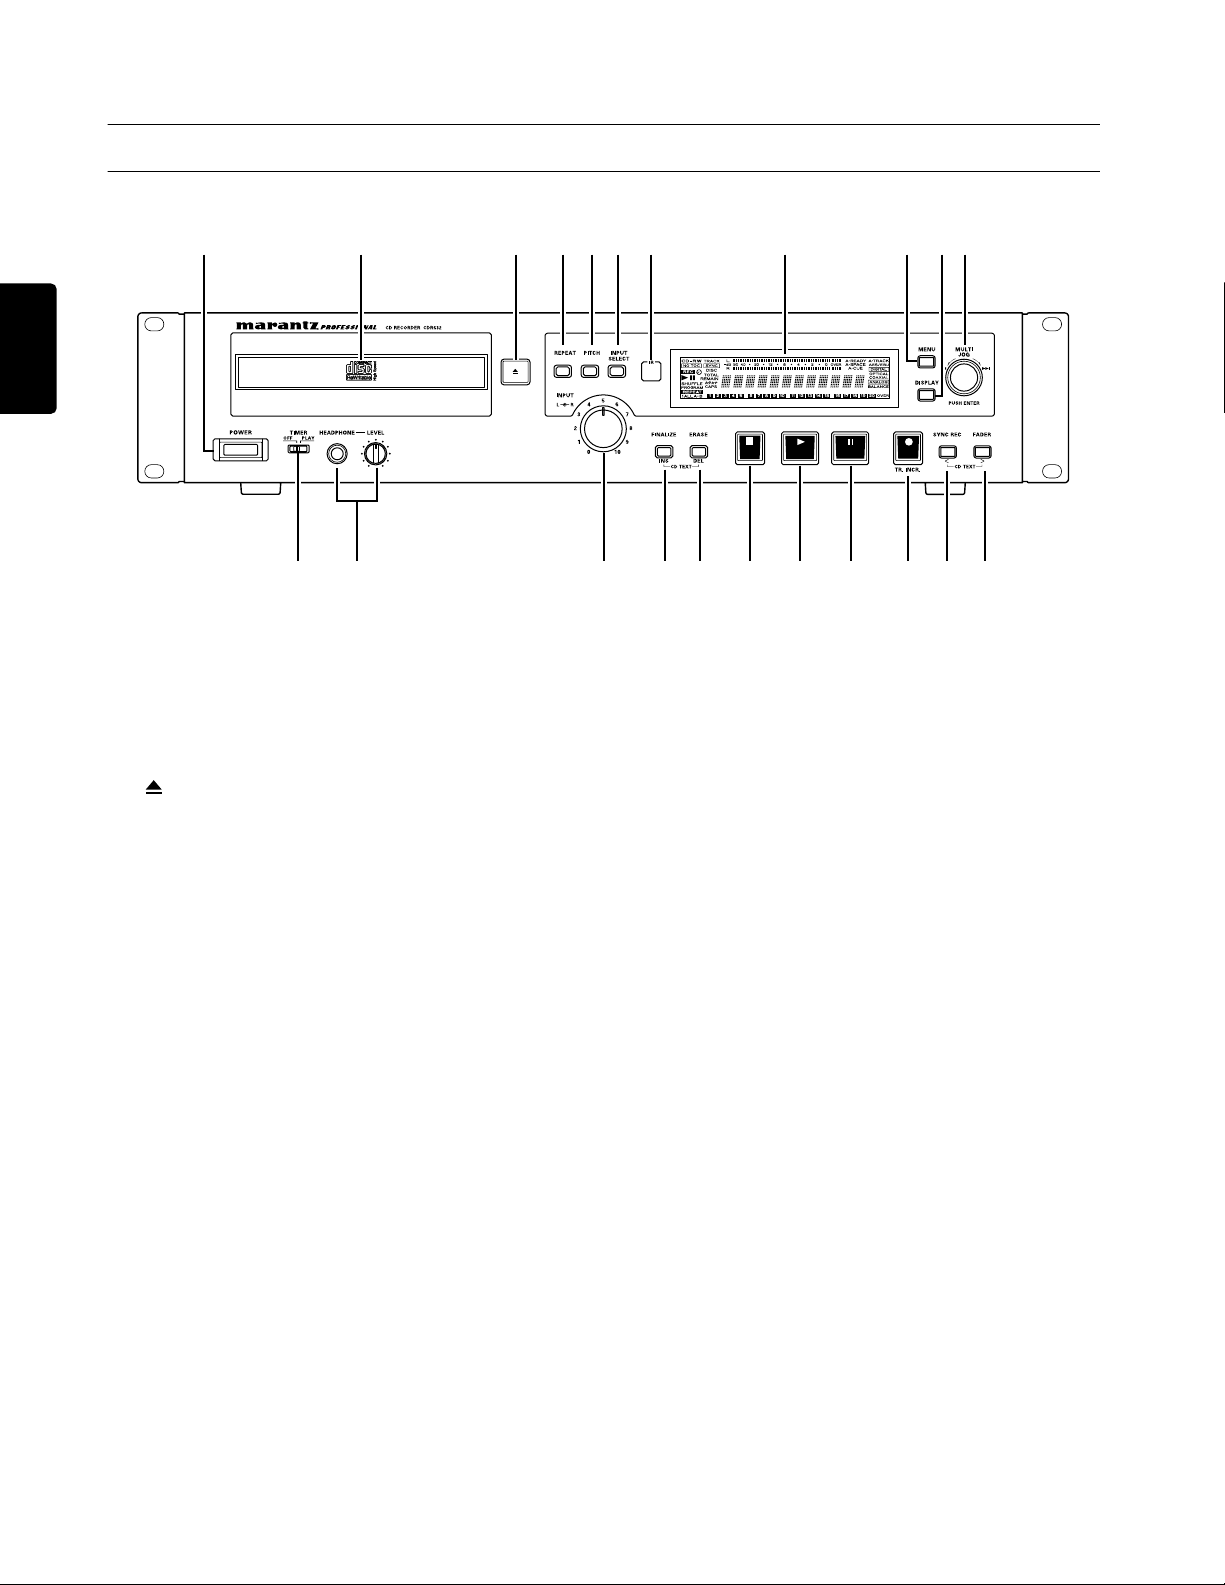
Front panel
2 3 7 8 A91 04 56
B E F G H I J K LD
C
→
1
POWER switch
Turns the power on/off.
2
Disc tray
Insert a disc (CD, CD-R, CD-RW) here.
3
4
5
6
7
8
9
(Open/Close) button
Opens or closes the disc tray. The display will
indicate “Open” when the tray is opened, or
“Close” when the tray is closed.
REPEAT button
Switches the repeat playback function on/off.
PITCH button
Switches pitch control on/off.
INPUT SELECT button
Selects the input jacks that will be the recording
source.
Remote signal sensor
Receives commands from the RC632CDR
(remote control unit). Be aware that if there are
obstructions in front of this sensor, commands
may not be received successfully.
Display
Displays menus and the current operating status.
MENU button
Accesses the Menu mode ( → p.12) where you
can use various menu items.
0
DISPLAY button
Switches the time mode shown on the display.
When entering text, this button switches the type
of characters (upper or lower case) being input.
MULTI JOG dial
A
This is used to select tracks or to edit the value of
a setting. This dial can be pressed to operate as an
ENTER button to finalize a selected menu item or
an edited value.
B
TIMER switch
Switches the timer playback function ( → p.19)
on/off.
C
HEADPHONE jack/LEVEL control
You can connect a set of stereo headphones to this
jack. The LEVEL control located at the right
adjusts the volume of the headphones.
INPUT controls
D
This is a level control for the analog inputs. The
outside ring controls the level of the left channel,
and the inside knob controls the level of the right
channel. Normally, turning one will cause both to
turn together. However by holding one of them,
you can adjust the left and right levels independently.
E
FINALIZE/INS button
Executes the Finalize operation for a disc (
When entering text, this button inserts a space at the
cursor location.
p.31).
8
Page 9

2 – Front and rear panel—Rear panel
ERASE/DEL button
F
When using a CD-RW disc, this button lets you
erase a track or the disc. When entering text, this
button deletes the character at the cursor location.
G
H
I
(stop) button
Stops recording or playback.
(play) button
Starts recording or playback.
(pause) button
Pauses recording or playback.
Rear panel
M N O P Q
J
K
L
(record)/TR.INCR. button
Selects record-ready mode. This button is also
used to assign track numbers manually ( → p.30).
SYNC REC/< button
Switches the Sync Record function ( → p.27).
When entering text, this button moves the cursor
location toward the left.
FADER/> button
Applies a fade-in/fade-out during recording (
When entering text, this button moves the cursor location toward the right.
→
p.27).
ENGLISH
M ANALOG IN (UNBALANCED) jacks L/R
Connect these jacks to the unbalanced output of
the unit you are using as a recording source.
N ANALOG OUT (UNBALANCED) jacks L/R
Connect these jacks to the unbalanced input of the
unit you are using as your monitor system.
O DIGITAL IN/OUT (COAXIAL) jacks
These are digital input/output jacks that comply
with IEC60958 Type II (S/PDIF).
P DIGITAL IN/OUT (OPTICAL) jacks
These are digital input/output jacks that comply
with IEC60958 Type II (S/PDIF).
Q AC IN (AC Power Inlet)
Connect the included power cable to this connector.
9
Page 10

ENGLISH
2 – Front and rear panel—RC632CDR (remote control unit)
RC632CDR (remote control unit)
4
5
8
9
B
E
F
H
J
K
1
2
3
7
6
A
0
D
C
G
I
L
1 OPEN/CLOSE button
Performs the same function as the front panel
Open/Close button (
3).
2 0–9 buttons
Use these buttons to enter track numbers or to
make program playback settings.
3 CLEAR button
Cancels the number entered by the 0–9 buttons.
When programming, this button deletes the most
recently entered program.
4 REPEAT button
Performs the same function as the front panel
REPEAT button (
4).
5 A-B button
Use this button for A-B Repeat Playback operations
(
→
p.20).
6 MENU button
Performs the same function as the front panel
MENU button (
9).
7 ENTER button
Performs the same function as when the front
panel MULTI JOG dial (
A) is pressed.
8 DIR button
Switches MP3 file directory playback (→ p.23)
on/off.
9 PITCH button
Performs the same function as the front panel
PITCH button (
5).
0 DISPLAY button
Performs the same function as the front panel
DISPLAY button (
0).
A PLAY MODE button
Switches the Playback modes (→ p.17).
B FADER button
Performs the same function as the front panel
FADER/> button (
L).
C FINALIZE button
Performs the same function as the front panel
FINALIZE/INS button (
E).
10
Page 11
D ERASE button
Performs the same function as the front panel
ERASE/DEL button (
F).
2 – Front and rear panel—Audio signal connections
Audio signal connections
E RECORD button
Performs the same function as the front panel
(record)/TR.INCR. button (
J).
F SYNC REC button
Performs the same function as the front panel
SYNC REC/< button (
K).
G REC MUTE button
Records approximately four seconds of silence.
After the silence is recorded, the CDR632 will
enter record-ready mode (→ p.30).
H SEARCH , buttons
Search through the disc forward ( ) or backward ( ).
I SKIP , buttons
Perform the same function as turning the front
panel MULTI JOG dial (
A).
J STOP button
Performs the same function as the front panel
(stop) button (
G).
K PAUSE button
Performs the same function as the front panel
(pause) button (I).
Input
Only the input jack(s) selected by the front panel
6
INPUT SELECT (
Choose one of the following three sets of input jacks,
and make the appropriate connections.
• ANALOG IN (UNBALANCED) jacks L/R (M)
• DIGITAL IN (COAXIAL) jack (
• DIGITAL IN (OPTICAL) jack (
The display indicates the currently selected input
→
jack(s) (
p.24).
) button will be used.
O)
P)
ENGLISH
Output
Signals are output from all of the following three sets
of output jacks. Connect the desired set(s) of output
jacks.
• ANALOG OUT (UNBALANCED) jacks L/R
(
N)
• DIGITAL OUT (COAXIAL) jack (
• DIGITAL OUT (OPTICAL) jack (
O)
P)
L PLAY button
Performs the same function as the front panel
(play) button (
H).
11
Page 12
3 – Menu mode operations
4
This section explains the basic procedures in Menu
mode, where you can make various settings for the
CDR632 and perform various editing operations.
Menu structure
Basic operation in Menu mode
This section explains how to select items in Menu
mode. You can perform these operations either from
the front panel or the remote control unit.
ENGLISH
Menu mode is organized as follows. For details on
each item, refer to the appropriate page.
Menu item Function Reference page
PLAY MODE
PITCH CONT
PITCH STEP
DIRECTORY
VOLUME
FADE IN
FADE OUT
SRC
SYNC LEVEL
AUTO_TRK
A_TRK LEVEL
A_TRK TIME
M_TR INCR
TEXT EDIT
Select the playback
mode
Adjust the pitch
control value
Choose the step size
for pitch control
Specify directory
playback of MP3 files
Adjust the input level
of the digital signal
Specify the fade-in
time for recording
Specify the fade-out
time for recording
Enable the Sample
Rate Converter
Specify the level for
sync recording
Select the auto track
mode
Specify the level setting
for auto track operation
Specify the time interval
for auto track operation
Manually increment
the track number
Edit a CD title or track
name
Playback modes
(→ p.17)
Pitch control
playback (→ p.21)
Pitch control
playback (→ p.21)
Specifying a
directory for
playback (→ p.21)
Basic recording
operations (→ p.25)
Fade-in/out (→ p.27)
Fade-in/out (→ p.27)
Using the sample rate
converter (
Sync recording
(→ p.27)
Auto track recording
(→ p.29)
Auto track recording
(→ p.29)
Auto track recording
(→ p.29)
Manually updating
the track number
(→ p.30)
Entering a name
(→ p.34)
→
p.24)
If using the front panel
1, 4 2, 3,
1 Press the MENU button to enter Menu
mode.
You will switch from normal mode (in which you
perform normal playback and recording) to Menu
mode, and the display will show the menu items.
2
Turn the MULTI JOG dial to select a menu
item.
3
Press the MULTI JOG dial.
This will confirm your selection, and you will
now be able to edit the menu item.
For details on how to operate each menu item,
refer to the page given in the “Menu structure”
table.
4
To return from Menu mode to normal mode,
press the MENU button or the ENTER button.
The menu item you were editing will be finalized,
and you will return to normal mode.
12
Page 13

3 – Menu mode operations—Basic operation in Menu mode
If using the remote control unit
1, 4
3, 4
2
1 Press the MENU button to enter Menu
mode.
You will switch from normal mode to Menu
mode, and the display will show the menu items.
2
Use the SKIP buttons to select a menu item.
3
Press the ENTER button.
This will confirm your selection, and you will
now be able to edit the menu item.
For details on how to operate each menu item,
refer to the page given in the “Menu structure”
table (→ p.12).
ENGLISH
4
To return from Menu mode to normal mode,
press the MENU button or the ENTER button.
The menu item you were editing will be finalized,
and you will return to normal mode.
13
Page 14

4 – Playback
ENGLISH
This section explains how to playback CD/CD-R/CDRW media inserted in the disc tray, and how to playback
MP3 format audio files from media such as CD-ROM.
Types of disc that can be played
The CDR632 can play the following types of disc.
• Commercial audio CDs recorded in CD-DA format
• CD-R/CD-RW discs recorded in CD-DA format
• CD-ROM/CD-R/CD-RW discs containing MP3
format files
Note
• The CDR632 can playback MP3 files that are
recorded in ISO9660 level 1, level 2, or Joliet formats.
It can also playback discs that were recorded as multisession discs.
• The following limitations apply to the number of MP3
files and directories.
Maximum number of directories: 255
Maximum number of layers: 8
Maximum number of MP3 files: 999
Maximum length of MP3 directory names, file
names, and ID3 tags: 255 characters
• Regarding MP3 track information
During playback, this information is shown in the display with a priority order of ID3v2 > ID3v1 > file name.
While stopped, the file name is shown.
Caution
MP3 files encoded with a sample rate other than 44.1 kHz
cannot be played back correctly. The recommended format
is 44.1 kHz sampling rate and 128 kbps or higher bit rate.
2
Press the POWER switch to turn on the
power.
3
Press the (Open/Close) button to open
the disc tray.
4
Place the disc on the tray with the label facing upward.
5
Press the (Open/Close) button to close
the tray.
The display will indicate “Close”. When the disc
tray has closed completely, the display will
change to “TOC Reading.”.
When the disc has been read, the display will
indicate the total number of tracks and the total
playback time.
Disc type Total number of tracks
Total playback time
Track number indicator
The type of disc inserted is shown as follows.
CD: Commercial audio CD
CD-R: CD-R media
CD-RW: CD-RW media
NO TOC: CD-R or CD-RW media that has not
been finalized
Basic playback operation
This section explains the procedure for basic operations such as play, pause, and stop.
4
1 62
1 If you’re monitoring through headphones,
connect your headphones to the PHONES
jack and turn down the LEVEL control.
3, 5
6
To start playback, press the (play) button.
Operate the connected monitor system or the
HEADPHONE LEVEL control to adjust the
monitor level appropriately.
To pause or stop, proceed as follows.
To pause playback
Press the (pause) button. Press the (play)
button once again to resume playback.
To stop playback
Press the (stop) button.
Note
Unless otherwise specified, the explanations in this man-
→
ual assume that the playback modes (
Continue Play.
p.17) is set to
14
Page 15

4 – Playback—Selecting a song
Selecting a song
Here’s how to select a song when playing a CD that
contains more than one track. You can select a song
either by moving to the previous or next track (Skip)
or by directly specifying a track number.
Skipping
1
2
Here’s how to skip to the previous or next track number.
1 Use the MULTI JOG dial on the front panel
(or the SKIP buttons on the remote control unit) to select tracks.
The dial or buttons operate as follows.
• MULTI JOG dial
Turn the dial to the right to select the next track
number, or to the left to select the preceding
track number.
• SKIP buttons
Press the button to select the next track
number, or the button to select the preceding track number.
2
Press the button on the front panel (or
the PLAY button on the remote control unit).
The selected track will begin playing. Instead of
pressing the PLAY button, you can press the front
panel (pause) button (or PAUSE button on the
remote control unit) to move to the beginning of
the selected track and enter pause mode.
Specifying a track number
1
2
Here’s how to use the 0–9 buttons on the remote control unit to directly specify the track number you want
to play.
1 Use the 0–9 buttons on the remote control
unit to enter a track number (maximum
three digits).
Enter the track number starting with the highestplace digit.
• To specify track 1
Press the 1 button once.
• To specify track 12
Press the 1 button → 2 button in that order
• To specify track 103
Press the 1 button → 0 button → 3 button in that
order.
2
Press the PLAY button on the remote control
unit.
The selected track will begin playing. If you press
the PAUSE button on the remote control unit
instead of the PLAY button, you will move to the
beginning of the selected track and enter pause
mode.
Note
• You can also confirm your track selection by pressing
the ENTER button instead of the PLAY button.
• You can’t use the numeric buttons to specify a track
number in Program or Shuffle mode.
ENGLISH
15
Page 16

4 – Playback—Track search
ENGLISH
Track search
During playback (or while paused), you can search to
find the portion of the track you want to hear. You can
search either in the normal way by fast-forwarding/
rewinding while listening to the audio, or by directly
specifying a track or time and moving to that point
(direct search).
Normal search
SEARCH buttons
Here’s how to use the remote control unit SEARCH
buttons to search through a track while listening to the
audio.
1 Play or pause the desired track.
2
Hold down one of the SEARCH buttons on
the remote control unit.
Search will begin in either the forward ( ) or
reverse ( ) direction.
Direct search
Here’s how to search by directly specifying the
desired track or time (direct search).
1
2
1
To perform a direct search, use the 0–9
buttons on the remote control unit to enter
an eight-digit number as follows.
• Track number (three digits)
• Elapsed time (minutes) from the beginning of
the track (three digits)
• Elapsed time (seconds) from the beginning of
the track (two digits)
For example to specify the location at 1 minute 30
seconds into track 2, press the buttons in the following order.
0 → 0 → 2 → 0 → 0 → 1 → 3 → 0
3
To stop searching, release the SEARCH button.
You will return to the state (playing or paused) in
which you were before searching.
Note
You cannot use normal search in an MP3 file.
You will immediately move to the specified location as soon as you finish entering the eight digits.
Note
• You can use direct search whether the track is
stopped, playing, or paused.
• If you perform direct search while stopped or playing,
playback will begin from the location you specify. If
you perform direct search while paused, the disc will
be paused at the location you specify.
• You can’t use direct search in Program or Shuffle
mode.
Caution
• If an MP3 disc is inserted, you will not be able to specify
a time location within a track. The specified track will play
when you enter the track number (the first three digits).
• If you specify a track number or time that does not
exist on the currently inserted disc, the search operation will be cancelled at that point.
16
Page 17

2
If you want to specify only the track number,
or the track number and the minutes, enter
the desired digits and press the ENTER button on the remote control unit (or the PLAY
or PAUSE button).
If you specify only the track number
If you specify the track number (up to three digits)
and then press the ENTER button on the remote control unit (or the PLAY or PAUSE button), direct
search will be executed. The minutes and seconds
digits will all be zero.
Note
If you use this method to specify a track, you may omit
the 0 or 00 at the beginning. For example, press 2 to
select track 2, or press 1 and then 2 to select track 12,
and then press the ENTER button (or the PLAY or
PAUSE button).
If you use the ENTER button to perform direct search
while stopped or playing, playback will begin from
the location you specify. If you perform direct search
while paused, the disc will be paused at the location
you specify.
If you press the PLAY button to perform direct
search, playback will begin immediately from the
location where you moved. If you press the PAUSE
button, the disc will be paused at the location where
you moved.
4 – Playback—Playback modes
Playback modes
On the CDR632 you can use one of four different
playback modes. The following playback modes are
available.
Continue playback (default setting)
Tracks will playback consecutively as their number.
Note
Unless otherwise specified, the explanations in this manual assume that playback mode is selected.
Single playback
Only one track will play, and then playback will stop.
Program playback
Tracks will play in the order you specify.
Shuffle playback
All tracks on the disc will play in a random order
regardless of the track number.
You can switch the playback mode either by using the
PLAY MODE button on the remote control unit or by
using MENU button.
Using the remote control unit buttons
ENGLISH
Note
This operation is the same as “Specifying a track num-
→
ber” (
p.15).
If you specify a track number and
minutes position
If you specify the track number and the starting location in minutes (a total of six digits) and then press
the ENTER button on the remote control unit (or the
PLAY or PAUSE button), direct search will be executed. In this case, the seconds digits will be zero.
The operation when you press each button will be the
same as when you specify only the track number.
For example to specify the location at 1 minute 00 seconds into track 2, press the buttons in the following
order.
0 → 0 → 2 → 0 → 0 → 1 → ENTER button on the
remote control unit (or PLAY or PAUSE button)
Note
When using this method to specify the location, you can
omit the leading zero of the minutes. In the example
above, press the buttons in the order of 0
and then press the ENTER button (or the PLAY or
PAUSE button).
→ 0 → 2 →
1
PLAY MODE button
1 While stopped, press the PLAY MODE but-
ton on the remote control unit repeatedly.
The mode will change each time you press the
button. The display will indicate the currently
selected playback modes as follows.
Display Playback modes
Continue Continue playback
Single Single playback
Program Program playback
Shuffle Shuffle playback
17
Page 18

ENGLISH
4 – Playback—Playback modes
2
The previous display will reappear shortly
after you stop operating the PLAY MODE
button.
With the exception of Continue playback mode,
the playback mode is shown as follows in the left
part of the display.
Normal playback No indication
Single playback [1] is lit
Program playback [PROGRAM] is lit red
Shuffle playback [SHUFFLE] is lit red
Using menu mode
1 While stopped, access the “PLAY MODE?”
menu item as described in “Basic operation in Menu mode” (→ p.12), and press
the [ENTER] button.
2
Turn the MULTI JOG dial to select the
desired playback mode.
The playback mode you selected is shown immediately. The display will show the currently
selected mode as follows.
Single playback
In this playback mode only one track will playback.
1 While stopped, set the playback mode to
“Single”.
For the procedure refer to “Playback modes” (→
p.17).
2
As necessary, use the SKIP buttons on the
remote control unit, the 0–9 buttons on the
remote control unit, or the MULTI JOG dial
on the front panel to select the track you
→
want to playback (
3
Press the (play) button on the front
panel (or remote control unit).
Only one track will playback, and then playback
will stop.
p.15).
Program playback
In this playback mode, tracks will playback in the
order you specify beforehand. You can program up to
99 tracks for playback.
Display Playback modes
Mode>Cont Continue playback
Mode>Single Single playback
Mode>Program Program playback
Mode>Shuffle Shuffle playback
3
To return from menu mode to normal mode,
press the MENU button or the ENTER button.
Caution
The playback mode you selected is remembered even if
you turn off the power. However, the program you specified in program playback mode will be erased when you
turn off the power.
Continue playback
This is the standard mode, in which tracks will playback consecutively in order of their track number.
1 While stopped, set the playback mode to
“Continue” or “Mode>Cont”.
For the procedure refer to “Playback modes” (→
p.17).
2
Press the (play) button on the front
panel (or the remote control unit).
Playback will occur in the order of the track number.
2
4
1 While stopped, set the playback mode to
“Program”.
For the procedure refer to “Playback modes” (→
p.17).
2
Use the 0–9 buttons on the remote control
unit to enter the track number you want to
program, and press the ENTER button to
confirm it.
The track number will be programmed.
Note
Alternatively, you can select a track by turning the MULTI
JOG dial and then press the ENTER button to program it.
3
Repeat step 2 to program the other tracks
you want to play.
Note
• You may program the same track more than once.
18
Page 19

4 – Playback—Switching the time display
• You can press the CLEAR button on the remote control unit to delete the most recently programmed track
from the program data.
4
Press the PLAY button to begin program
playback.
Caution
• In this playback mode, playback is not possible unless
at least one track has been programmed.
• If you press the STOP button while stopped, all of the
program data will be erased.
• If you change the playback mode while stopped, all of
the program data will be erased.
• If you turn off the power of the CDR632, all of the program data will be erased.
Note
• If you attempt to program 100 or more songs, an error
message of “PGM Full!” will appear. You can program a maximum of 99 songs.
• If the total playback time of the programmed tracks
exceeds 999 minutes 59 seconds, the display will indicate “--- : --”.
No indication
The elapsed time of the current track is displayed.
[REMAIN] lit
The remaining time of the current track is displayed.
[TOTAL] lit
The elapsed time of the disc is displayed.
[TOTAL] and [REMAIN] lit
The remaining time of the disc is displayed.
Note
• While stopped, the total recorded time of the disc is
always displayed, regardless of how the [TOTAL] and
[REMAIN] indicators are lit.
• In program mode, the elapsed time or remaining time
of the entire program (not the entire disc) is displayed.
• When playing an MP3 file, the elapsed track time is
always displayed. The DISPLAY button is not used.
• For details on the time display during recording or in
record-ready mode, refer to “Switching the time dis-
play” in the “Recording” section (→ p.24).
ENGLISH
Shuffle playback
This mode plays all tracks in a random order.
1 While stopped, set the playback mode to
“Shuffle”.
For the procedure refer to “Playback modes” (→
p.17).
2
Press the (play) button on the front
panel (or remote control unit).
All tracks will play in a random order, regardless
of their track number.
Switching the time display
Here’s how to switch the time display.
DISPLAY button
Timer playback
Timer playback is a function that automatically starts
playback when the power is turned on. By using this
function, you can use a commercially available timer
to turn on the power of the CDR632, and start playback at a desired time.
TIMER switch
1 Connect the CDR632 to your timer so that
power is supplied from the timer to the
CDR632.
2
Insert the disc that you want to play.
3
To turn on the timer playback function, set
the CDR632’s TIMER switch to PLAY.
When the timer playback function is on, the timer
indicator in the display will light.
Press the DISPLAY button on the front panel (or the
remote control unit).
Each time you press the button, you will cycle
through the following four types of time display. The
currently selected display type is shown by the following indicators.
Note
The timer indicator will blink if no disc is inserted.
4
Set your timer to the desired time.
The CDR632 will turn on at the time specified by
your timer, and playback will begin automatically.
19
Page 20

4 – Playback—Repeat playback
ENGLISH
Repeat playback
Here’s how you can repeatedly play all tracks of the
currently inserted disc, or repeatedly play a specified
region within a track (A-B Repeat Playback).
Normal repeat playback
All tracks on the disc will play repeatedly.
REPEAT button
1
Press the REPEAT button on the front
panel (or the remote control unit) to turn
on the repeat playback function.
The display will indicate “Repeat ON” and the
[REPEAT] indicator will light.
In this state, all tracks on the disc will play repeatedly.
During playback, if the Repeat mode is turned on,
playback continues as before, and when the last
track finishes, playback resumes from the first
track. If Repeat mode is turned on when the disc
is stopped, press the (play) button to begin
operation.
2
To turn off the repeat play function, press
the REPEAT button on the front panel (or the
remote control unit) once again.
The display will indicate “Repeat OFF” and the
[REPEAT] indicator will go dark.
Note
Combining the repeat mode with the program playback,
single-track playback and shuffle playback functions will
enable program repeat, single-track repeat and shuffle
repeat operations, respectively.
A-B repeat playback
The region (A-B) you specify within a track will play
repeatedly.
A-B button
1
During playback, press the A-B button on
the remote control unit at the point (A)
where you want to start A-B repeat playback.
The [REPEAT] indicator in the display will light,
and the [A-B] indicator will blink.
2
At the point where you want repeat playback
to end (B), press the A-B button on the
remote control unit once again.
In addition to the [REPEAT] indicator in the display, the [A-B] indicator will also light.
The region (A-B) has now been specified, and AB repeat play will begin.
Note
Alternatively, you can pause the playback and then specify the start (A) and end (B) points.
3
To turn off the A-B repeat playback function,
press the A-B button or the repeat button on
the remote control unit.
The [REPEAT] indicator and [A-B] indicator in the
display will go dark, and A-B repeat playback
will be cancelled. If you cancelled during playback, playback will continue even the point specified as the end of A-B repeat play is passed.
Caution
• The specified region (A-B) will be erased if you press
the STOP button.
• You can’t use the A-B repeat playback function in an
MP3 file.
• You can’t use the A-B repeat playback function across
two or more tracks.
20
Page 21

4 – Playback—Pitch control playback
Pitch control playback
The CDR632 has a pitch control playback function
that lets you adjust the pitch (and speed) of the playback.
PITCH button MULTI JOG/ENTER
Caution
Pitch control does not work for MP3 files.
1 To turn pitch control playback on, press
the PITCH button on the front panel (or
the remote control unit).
The current pitch change value is shown as a percentage, and after a time the previous display will
reappear.
2
As described in “Basic operation in Menu
mode” (
menu item and press the ENTER button.
The display will indicate “Pitch> XXX%”
(adjustable in a range of –16.0 to 0.0 to +16.0).
3
Turn the MULTI JOG dial to adjust the
amount of pitch change.
Note
You can use the
steps in which this adjustment will occur, in a range of
0.1%–1.0%.
4
Press the MENU button or the ENTER button
to return from menu mode to normal mode.
5
To temporarily turn off pitch control playback, press the PITCH button on the front
panel (or the remote control unit).
The display will indicate “Pitch OFF” and the
pitch control playback function will be turned off.
To turn it back on, press the same button once
again.
→
p.12), access the
“PITCH STEP?”
“PITCH CONT?”
menu item to adjust the
Playing MP3 files
Here’s how to play a disc that contains MP3 files (an
MP3 disc).
When playing back an MP3 disc, you can use either
of two modes; a mode in which all MP3 files on the
disc can be played, or
the MP3 files in a specific directory (folder) will be
available for playback.
Playing back all MP3 files
The CDR632 can playback an MP3 disc in the same
way as a conventional disc.
1 Press the (Open/Close) button to open
the disc tray.
2
Place the disc on the tray with the label facing upward.
3
Press the (Open/Close) button to close
the disc tray.
The display will indicate “Close” and when the
disc tray has closed completed the display will
change to “TOC Reading.”.
When the contents of the disc have been read, the
[TRACK] indicator in the display will light, and
the total number of tracks on the MP3 disc will be
displayed. The total playback time is not displayed.
Total number of tracks
“directory mode” in which only
ENGLISH
1, 32
4
Caution
Please note that if you turn the pitch control playback
function on/off during playback, the audio playback may
be momentarily interrupted.
Track number indicator
21
Page 22

4 – Playback—Playing MP3 files
ENGLISH
Caution
MP3 files converted at a sampling rate other than 44.1
kHz cannot be played correctly. The recommended
format is a 44.1 kHz sampling rate and a bit rate of
128 kbps or higher.
Note
• For a disc on which MP3 files are stored, each MP3
file is handled as a “track”.
• Even if the MP3 disc is internally divided into multiple
directories (a hierarchical structure), all MP3 files
including those in sub-directories and sub-sub-directories will be read.
• Track numbers are assigned automatically, starting
with MP3 files in the root directory (the top level of the
disc).
4
To begin playback, press the (play) button.
The MP3 will playback.
Note
• You can select songs in the same way as when operating a conventional disc.
• You can use program playback and repeat playback
(except for A-B repeat playback) in the same way as
on a conventional disc.
• If you press the ENTER button during playback or
while paused, the ID3 tag of the MP3 file is displayed.
If there is no ID3 tag, the file name is displayed.
Note
• For a disc on which MP3 files are stored, each MP3
file is handled as a “track”.
• Directories that do not contain MP3 files cannot be
selected for operations. For example in the illustration
below, directories B and C contain MP3 files and can
be selected for operations, but directory A is excluded
from operations.
Disc
Directory
A
Directory
B
Directory
C
Directory
D
(MP3 file)
mp3. 1
mp3. 2
mp3. 3
mp3. 4
mp3. 5
mp3. 6
mp3. 7
mp3. 8
Caution
You can’t search through a track on an MP3 disc.
Specifying a directory for playback
Here’s how to use directory mode, in which you can
playback the MP3 files within a specified directory of
the MP3 disc.
<About directory playback>
A directory (also called a “folder”) is a hierarchical
level on CD media or a hard disk.
If directory mode is on, only the files within the
selected directory will be the target of your operations, and functions such as program playback and
repeat playback will all occur within the same directory.
If directory mode is off, the directory structure of the
disc is ignored, and all MP3 files on the disc will be
subject to playback.
mp3. 9
Caution
If you turn directory mode on, the MP3 files in the root
directory (the top level that contains directory A and
directory D in the above illustration) cannot be played.
22
Page 23

4 – Playback—Playing MP3 files
Directory playback settings
Here’s how to turn directory mode on/off and perform
operations in directory mode.
Note
In the explanation below, we use menu mode to switch
directory mode on/off, but you can also do this by pressing the DIR button on the remote control unit.
1
As described in “Basic operation in Menu
mode” ( → p.12), access the
“DIRECTORY?” menu item and press the
MULTI JOG dial.
The display will indicate
“DIR> XXX”
(you can
select ON or OFF).
Turn the MULTI JOG dial to turn directory
2
mode on/off.
If you turn this on, the [DISC] indicator in the display will light.
3
Press the MENU button to return from menu
mode to normal mode.
4
To select the desired directory for operations, use the MULTI JOG dial (or the SKIP
buttons on the remote control unit) while
stopped.
The display will indicate “DIR XXX” (you can
select the directory number).
The previous display will reappear a short time
after you stop operations. The directory that had
last been displayed will be selected for operations.
ENGLISH
Note
• Directories that do not contain MP3 files are excluded
from operations and will not be displayed. This means
that the selectable directory numbers may not be consecutive.
• While stopped, you can press the ENTER button to
view the name of the currently selected directory.
Press the (play) button on the front
5
panel (or remote control unit).
Playback will start within the selected directory.
Functions such as program playback or repeat
playback will all occur within the same directory.
Note
During playback, you can use the MULTI JOG dial (or the
SKIP buttons on the remote control unit) to select tracks
(MP3 files).
23
Page 24

5 – Recording
ENGLISH
This section explains how to record on CD-R/CD-RW
media inserted in the disc tray, and how to use various
recording functions.
Before you record
Understanding the following points will help you avoid
unnecessary problems when recording. Before recording, please take a moment to read these.
• The CD specification allows no more than 99
tracks (songs) to be recorded on a disc. Also, it is
not possible to record a song that is shorter than
four seconds.
• If you press the STOP button or PAUSE button
less than four seconds after you start recording,
the recorder will stop or enter record-ready mode
only after four seconds have elapsed. Silence will
be recorded during this time.
• If the number of songs reaches 99 during recording, the display will indicate “Disc Full!” and
“PMA Writing” and then the recorder will stop.
• If the available recording time of the disc is completely used up while recording, a fade-out will be
performed. Then the display will indicate “Disc
Full!” and “PMA Writing” and the recorder
will stop.
• If you insert a disc that has been partially
recorded (and not yet finalized), recording will
continue following the already-recorded portion.
• If you want to record additional material on a CDRW that has already been finalized, you can unfinalize the disc (
Selecting the input signal
You can select one of the following three input signals
(recording sources).
→
p.31).
INPUT SELECT button
[ANALOG] lit
The input signal of ANALOG IN (UNBALANCED)
jacks L/R is selected as the recording source.
The display will briefly indicate
[DIGITAL] and [OPTICAL] lit
The input signal of the DIGITAL IN (OPTICAL) jack
is selected as the recording source.
The display will briefly indicate
[DIGITAL] and [COAXIAL] lit
The input signal of the DIGITAL IN (COAXIAL)
jack is selected as the recording source.
The display will briefly indicate
“Analog”
“Optical”
“Coaxial”
.
.
.
Using the sample rate converter
The CDR632 always records at 44.1 kHz (the CD
sampling rate). If you wish to digitally record a signal
of a different sampling rate from a DIGITAL IN jack
(OPTICAL/COAXIAL), you must turn on the sample
rate converter (SRC) as follows.
1 As described in “Basic operation in Menu
mode” (→ p.12), access the “SRC?” menu
item and press the ENTER button.
The display will indicate “SRC> XXX” (you
can select ON or OFF).
2
Turn the MULTI JOG dial to turn the SRC on/
off.
3
To return from menu mode to normal mode,
press the MENU button or the ENTER button.
Note
• If a signal is being received from the DIGITAL INPUT
jack (OPTICAL/COAXIAL) when the SRC is off, the
[DIGITAL] indicator on the display will blink while
recording, record-ready, or monitoring.
• Digital signals other than 44.1 kHz cannot be
recorded if the SRC is off. If you attempt to record, an
error message of “Not Fs44.1K!” is displayed.
Adjusting the input signal
Here’s how to adjust the level of the input signal.
Press the INPUT SELECT button on the front panel
to select the recording source.
Each time you press the button, you will cycle
between the following three recording sources. The
currently selected recording source is shown by the
state of the following indicators.
24
INPUT controls
1
Make sure that your recording source (e.g.,
playback unit) is connected to the jack(s)
you selected as the recording source.
Page 25

2
If the recording source is analog (
lit), use the INPUT controls to adjust the
level received from the connected playback
unit.
Set the level as high as possible without allowing
the meters shown in the upper part of the display
to reach the clipping point.
[ANALOG]
5 – Recording—Basic recording operations
Monitoring the input signal
Here’s how to monitor the input signal.
(record)/TR.INCR. button
The outer part of the INPUT controls
adjusts the level of the left channel, and
the inner part adjusts the level of the right
channel. Normally, both parts will move in tan-
dem when you move one part, but you can adjust
the left and right levels individually by holding
down one part while you move the other.
Caution
The INPUT control setting has no effect if the recording
source is a digital signal.
Note
The INPUT control adjusts the level of the input signal
from the ANALOG IN (UNBALANCED) L/R jacks before
it is converted to a digital signal.
3
Use the following procedure to set the level
(digital volume) that is recorded on the disc.
1 As described in “Basic operation in Menu
mode” (→ p.12), access the “VOLUME?”
menu item and press the ENTER button.
The display will indicate “Vol> XXXdB”
(adjustable in a range of –54.0 to 0.0 to +18.0).
2 Turn the MULTI JOG dial to set the
recording level.
If an analog signal is being input, the ideal is
to adjust the level in step 2 using the INPUT
controls, and set the digital volume at 0 dB.
If a digital signal is being input, use this setting to compensate when the level of the signal
is too low or too high.
Caution
Be aware that the signal will clip if you raise the digital
volume inappropriately.
3
Press the MENU button or the ENTER button
to return from menu mode to normal mode.
1 With no disc inserted, press the
(record)/TR.INCR. button on the front
panel (or the RECORD button on the
remote control unit).
The display will indicate “Monitor” and input
signal monitoring will be enabled.
2
To defeat monitoring of the input signal,
press the (stop) button on the front
panel (or the remote control unit).
Basic recording operations
This section explains how to insert a disc and record.
2, 4 5 7
1 8 6
1 Press the POWER switch to turn on the
power.
2
Press the (Open/Close) button to open
the disc tray.
3
Place a writable disc on the tray with the
label facing upward.
4
Press the (Open/Close) button to close
the disc tray.
The display will indicate “Close”. When the disc
tray has closed completely, the display will switch
to “TOC Reading.”.
If you inserted a blank disc, the display will indicate “Blank Disc”.
5
Press the INPUT SELECT button to select
the recording source.
For details on recording sources, refer to “Selecting the input signal” (→ p.24).
ENGLISH
25
Page 26

ENGLISH
5 – Recording—Switching the time display
6
Press the (record) button to enter
record-ready mode.
The [REC] and [] will light, and the display
will indicate “Now OPC.”.
Note
• “OPC” stands for Optimum Power Control. This is a
function that optimizes the power of the laser used to
record the disc.
• If a digital signal is recorded as the recording source
but no signal (or an inappropriate signal) is being
input, an error message of “D-IN UNLOCK!” is displayed.
7
Adjust the input level.
For details on the input level, refer to “Adjusting
the input signal” (→ p.24).
Set the level as high as possible without allowing
the [OVER] indication of the meters shown in the
upper part of the display to light.
Clipping will produce digital noise if [OVER]
lights. Be aware that unlike the case of analog
recording, there is no headroom beyond the [0]
point of the meter.
Note
• When recording a CD, we recommend that as a general rule you set the menu mode VOLUME at “0.0
dB”. This allows you record the recording-source CD
without clipping.
8
To start recording, press the (play) button.
Input a signal from the playback unit etc. you’ve
connected as the recording source.
If you want to stop or pause recording, proceed as
follows.
To pause recording
Press the (pause) button. Press the (play)
button once again to resume recording.
Switching the time display
Here’s how to switch the time display during recording (or in record-ready mode).
DISPLAY button
During recording (or in record-ready mode), press the
DISPLAY button on the front panel (or the remote
control unit).
Each time you press the button, you will cycle
through the following four types of time display. The
currently selected display type is shown by the following indicators.
No indication
The elapsed recording time of the current track is displayed.
[REMAIN] lit
The remaining recordable time of the disc is displayed.
[TOTAL] lit
The total elapsed recording time of the entire disc is
displayed.
[TOTAL] and [REMAIN] lit
The remaining recordable time of the disc is displayed.
Note
For details on the time displays while playing or paused,
refer to “Switching the time display” in the “Playback” sec-
tion (
→
p.14).
To stop recording
Press the (stop) button.
The display will indicate
“PMA Writing”
and
the recorded content will be written to the disc.
Caution
• While the display indicates “PMA Writing” the
recorded content is being written to the disc. button
operations are disabled during this time.
• Never subject the CDR632 to severe vibration or turn
off the power while the “PMA Writing” indication is
shown. The recorded content will not be written correctly if you do so.
26
Page 27

5 – Recording—Fade-in/out
Fade-in/out
When recording, you can fade-in the input signal
from silence to the specified level, or fade-out from
the current level to silence. The fade-in/out times can
be specified independently.
FADER button
1 As described in “Basic operation in Menu
mode” (→ p.12), access the “FADE IN?”
menu item and press the ENTER button.
The display will indicate “Fade In> XXs” (you
can select 1–30).
Here you can specify the fade-in time.
2
Turn the MULTI JOG dial to specify the fadein time.
3
Press the MENU button to return from menu
mode to normal mode.
By selecting the “FADE OUT?” menu item in
step 1, you can specify the fade-out time in the
same way.
4
To execute a fade-in, press the FADER button on the front panel (or the remote control
unit) from record-ready mode.
Recording will begin at the same time as the fadein, and the display will indicate “Fade In”.
5
To execute a fade-out, press the FADER button on the front panel (or the remote control
unit) during recording.
The fade-out will begin, and recording will stop
when the fade reaches silence. The display will
indicate “Fade Out” while the fade-out is occurring.
Note
You are able to operate fade-out during a fade-in, or fadein during a fade-out.
Sync recording
Sync recording makes recording begin automatically
when the input signal exceeds a specified level (the
sync level) and end automatically when silence is
detected at the end.
2
1, 4
1
After entering record-ready mode (→
p.25), press the SYNC REC button repeatedly to select “Sync ALL” or “Sync 1”.
Each time you press the button, the display will
cycle through the following settings: “Sync ALL”
(repeatedly sync-record the input source) →
“Sync 1” (sync-record only once) → “Sync
OFF” (sync-record is off).
If “Sync ALL” is selected, the [SYNC] indicator
in the display will light, and the CDR632 will be
ready to sync-record.
If “Sync 1” is selected, the [SYNC] indicator in
the display will blink, and the CDR632 will be
ready to sync-record.
2
If necessary, you can adjust the sync level
as follows.
1 As described in “Basic operation in Menu
mode” (→ p.12), access the “SYNC
LEVEL?” menu item and press the MULTI
JOG dial.
The display will indicate “S_LEV> XXXdB”.
2 Turn the MULTI JOG dial to set the sync
level. The range is –24 dB to –72 dB (6 dB
steps).
3 Press the MENU button or ENTER button
to exit menu mode.
ENGLISH
27
Page 28

ENGLISH
5 – Recording—Sync recording
3
Begin playback on input source unit.
After playback is begun on input source unit, the
CDR632 will start recording automatically when
it detects audio signal which is above the sync
level adjusted in step 2. However, after Sync1 or
Sync ALL is selected, and if the signal below the
adjusted sync level is not detected over one second, the CDR632 will not begin recording automatically even it detects the audio signal.
If the sync level setting is too high, you may lose the
first part of a song that begins softly.
level
Recording
starts
S_LEV
This part of the track
is not recorded
level
Start of recording
S_LEV
noise level
time
Note
In this manual, we refer to audio below the currently
specified sync level as
“silence”
.
When five seconds of silence occurs, the CDR632
will automatically enter record-ready mode. If you
selected
“Sync 1”
, the sync recording setting will be
defeated.
level
5 seconds
S_LEV
REC pause
time
time
Conversely, you should be aware that if the sync level
setting is too low, the noise level of an analog source
may be higher than the sync level, so that sync
recording fails to start.
level
Noise is higher than
threshold
S_LEV
level
S_LEV
Song you want to record
Start of track is not registered
time
Division between tracks
Song you don’t
want to record
time
4
To cancel sync recording, press the SYNC
REC button to select Sync OFF.
Note
• If “Sync 1” is selected, pressing the (pause) but-
ton will stop the disc and defeat the sync recording
setting.
• If “Sync ALL” is selected, pressing the (pause)
button will enter record-ready mode, but the sync
recording setting will be maintained.
• In either case, the sync recording setting will be
defeated if you stop by pressing the (stop) button.
28
Page 29

Auto track recording
Auto track recording is a function that automatically
updates the track number when the specified condition occurs.
1 Select the auto track mode as follows.
1 As described in “Basic operation in Menu
mode” (→ p.12), access the “AUTO_TRK?”
menu item and press the ENTER button.
The display will indicate “A_Trk> XXX”.
2 Use the MULTI JOG dial to select one of
the following modes.
Level
The track number will be updated when the signal
exceeds the specified auto track level after being
below this level for two seconds or longer.
To specify the auto track level, use the
LEVEL?”
menu item. You can specify this level in
the range of –24 dB to –72 dB (6 dB steps).
When A_Trk=Level, the [A•TRACK] indicator in
the display will light.
At least 2
level
S_LEV
seconds
Digi
When recording a digital source (CD, DAT, MD),
the track number will be updated when a track
boundary has been detected in the source.
When A_Trk=Digi, the [A•TRACK] indicator in
the display will light.
However if an analog source is being recorded
even though Digi is selected, or when recording a
digital source other than the above, the track number will be updated according to the input level in
the same way as with the “Level” setting
described above.
“A_TRK
Track
increment
time
5 – Recording—Auto track recording
Minute
The track number will be updated when the specified length of time has elapsed after recording
began. Use the “A_TRK TIME?” menu item to
specify this length of time.
When A_Trk=Minute, the [A•TRACK] indicator in
the display will light.
The [A•TRACK] indicator will blink while recording and in record-ready mode.
2
If you selected
“Level”
as the auto track
mode, proceed as follows to set the auto
track level.
1 As described in “Basic operation in Menu
mode” (→ p.12), access the “A_TRK
LEVEL?” menu item and press the ENTER
button.
2 Turn the MULTI JOG dial to set the auto
track level in a range of –24 dB to –72 dB (6
dB steps).
3 Press the MENU button or ENTER button
to exit menu mode.
3
If you selected
“Minute”
as the auto track
mode, proceed as follows to specify the time
interval for updating the track number.
1 As described in “Basic operation in Menu
mode” (→ p.12), access the “A_TRK_TIME?”
menu item and press the ENTER button.
The display will indicate “TR_TIME>XXm”.
2 Turn the MULTI JOG dial to select “1m”
(1 minute), “5m” (5 minutes), “10m” (10
minutes), “15m” (15 minutes), or “30m”
(30 minutes) as the time interval.
3 Press the MENU button or ENTER button
to exit menu mode.
In this condition, the track number will be
updated when the input signal meets the specified conditions, or when the specified interval
of time has elapsed since recording began.
Note
You can’t change the TR_TIME setting during recording.
ENGLISH
29
Page 30

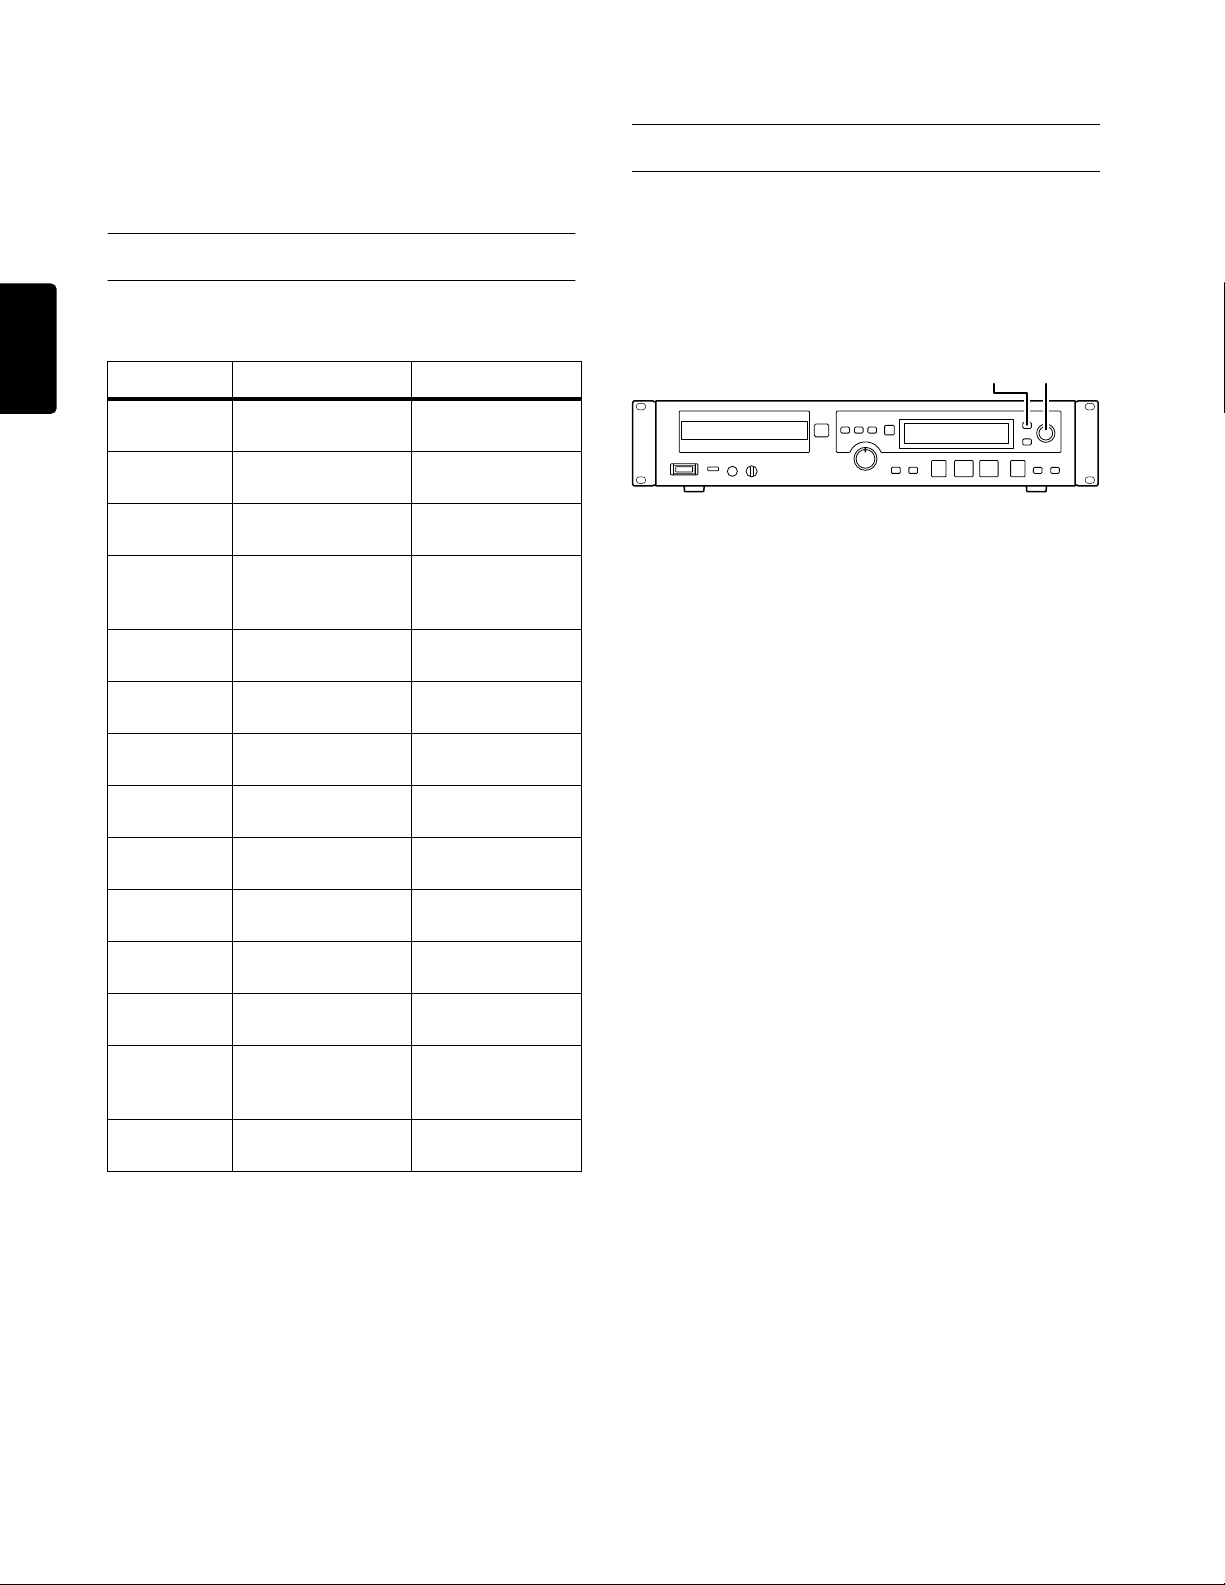
5 – Recording—Manually updating the track number
ENGLISH
Manually updating the track
number
If you want to update the track number manually, proceed as follows.
1
2
1 Take the following steps to enable manual
track number updating.
1 As described in “Basic operation in Menu
mode” (→ p.12), access the “M_TR INCR?”
menu item and press the ENTER button.
The display will indicate “TR_INCR> XXX”
(you can select ON or OFF).
2 Turn the MULTI JOG dial to select ON.
3 Press the MENU button or the ENTER but-
ton to exit menu mode.
Rec mute
This function makes it easy to record a silent interval.
To do so, press the remote control unit REC MUTE
button during recording.
REC MUTE button
The display will indicate
recording will begin. After approximately four seconds, the recorder will enter record-ready mode.
Note
The rec mute function can be controlled only from the
remote control unit.
“Rec Mute”
and muted
2
Press the (record) button at the point
where you want to assign a track number.
The track number will be updated.
Note
This button is disabled while track number 99 is being
recorded.
30
Page 31

6 – CD-R/CD-RW disc operations
Caution
Be careful that the power is not accidentally turned off
while the finalize, un-finalize, refresh, or disc/track erase
operations are being executed. If this occurs, the data on
the disc will be corrupted, and it is also possible that the
disc itself will become unusable.
This section explains various operations that you can
perform on a CD-R/CD-RW disc, such as finalizing a
recorded CD-R/CD-RW disc so that it can be played
on a conventional CD player, or erasing all or part of
the tracks on a CD-RW disc.
4
To execute the operation, press the ENTER
button once again.
Finalization will begin, and the display will indicate the estimated time remaining until completion as “TOC X:XX”.
When finalization is finished, the display will
indicate “Complete”. All operating buttons are
disabled while finalization is being performed.
Un-finalizing
ENGLISH
Finalizing
Finalizing is the operation of writing the TOC (Table
Of Contents: information about the recorded data,
such as the number of songs and the playback start
time of each song) to the CD-R/CD-RW media.
A disc recorded on the CDR632 cannot be played
back on a conventional CD player until the final TOC
has been written to the disc. (The CDR632 itself will
be able to play the disc even before it has been final-
ized.)
Normally, no additional recording can be done on
CD-R/CD-RW media once it has been finalized.
However in the case of a CD-RW, you can
finalize”
performed.
the disc so that additional recording can be
2
1 Insert a recorded CD-R/CD-RW disc into
the disc tray.
2
While stopped, press the FINALIZE/INS button on the front panel or the FINALIZE button on the remote control unit.
The display will indicate “FINALIZE?”.
If you decide to cancel the operation, press the
FINALIZE/INS button (or the FINALIZE button
on the remote control unit) once again.
“un-
3, 41
Un-finalizing is an operation that allows further
recording on a CD-RW disc that has been finalized.
3, 41
2
1 Insert a finalized CD-RW disc into the disc
tray.
2
While stopped, press the ERASE/DEL button
on the front panel (or the ERASE button on
the remote control unit), and use the MULTI
JOG dial (or the SKIP buttons on the remote
control unit) to select
If you decide to cancel the operation, press the
ERASE/DEL button (or the remote control unit
SKIP buttons) once again.
3
Press the ENTER button.
The display will indicate “Sure?”.
If you decide to cancel the operation, press the
STOP button.
4
To execute the operation, press the ENTER
button once again.
Un-finalization will begin, and the display will
indicate the estimated time remaining until completion as “Erase X:XX”.
When un-finalization is finished, the display will
indicate “Complete”.
“UNFINALIZE?”
.
3
Press the ENTER button.
The display will indicate “Sure?”.
If you decide to cancel the operation, press the
STOP button.
31
Page 32

6 – CD-R/CD-RW disc operations—Refreshing
ENGLISH
Refreshing
In some cases, the CDR632 may be unable to recognize a disc, perhaps because finalization was aborted
by a power failure or other reason, or because the disc
has been used by a computer. In such cases, refreshing the disc as described below may enable the
CDR632 to detect it.
3, 41
2
1 Insert the disc into the disc tray.
2
While stopped, press the ERASE/DEL button
on the front panel (or the ERASE button on
the remote control unit), and use the MULTI
JOG dial (or the SKIP buttons on the remote
control unit) to select
If you decide to cancel the operation, press the
ERASE/DEL button (or the ERASE button on the
remote control unit) once again.
3
Press the ENTER button.
The display will indicate “Sure?”.
If you decide to cancel the operation, press the
(stop) button.
4
To execute the operation, press the ENTER
button once again.
Refresh will begin, and the display will indicate
the estimated time remaining until completion as
“Erase X:XX”.
When refresh is finished, the display will indicate
“Complete”.
“REFRESH?”
.
Erasing a disc
This operation erases all tracks that have been
recorded on a CD-RW, allowing the disc to be
recorded from a blank state.
3, 41
2
Caution
The contents of the erased disc will be lost forever. Use
this operation with great caution so that you don’t erase
an important disc by mistake.
1 Insert a recorded CD-RW disc into the
disc tray.
2
While stopped, press the ERASE/DEL button
on the front panel (or the ERASE button on
the remote control unit), and use the MULTI
JOG dial (or the SKIP buttons on the remote
control unit) to select
If you decide to cancel the operation, press the
ERASE/DEL button (or the ERASE button on the
remote control unit) once again.
3
Press the ENTER button.
The display will indicate “Sure?”.
If you decide to cancel the operation, press the
(stop) button.
4
To execute the operation, press the ENTER
button once again.
Disc erasure will begin, and the display will indicate the estimated time remaining until completion as “Erase X:XX”.
When the disc has been erased, the display will
indicate “Complete”.
“ERASE DISC?”
.
32
Page 33

6 – CD-R/CD-RW disc operations—Erasing a track
Erasing a track
This operation erases the specified track and all subsequent tracks from a recorded CD-RW disc.
3–61
2
Caution
The contents of the erased track(s) will be lost forever.
Use this operation with great caution so that you don’t
erase important tracks by mistake.
1 Insert a recorded CD-RW disc into the
disc tray.
When the track erasure is finished, the display
will indicate “Complete”.
ENGLISH
2
While stopped, press the ERASE/DEL button
on the front panel (or the ERASE button on
the remote control unit), and use the MULTI
JOG dial (or the SKIP buttons on the remote
control unit) to select
If you decide to cancel the operation, press the
ERASE/DEL button (or the ERASE button on the
remote control unit) once again.
3
Press the ENTER button.
The display will indicate “Erase XX-XX” (first
track to be erased — last track).
If you decide to cancel the operation, press the
ERASE/DEL button (or the ERASE button on the
remote control unit).
4
Use the MULTI JOG dial (or the SKIP buttons
on the remote control unit) to select the first
track to be erased.
If you decide to cancel the operation, press the
ERASE/DEL button (or the ERASE button on the
remote control unit).
5
Press the ENTER button.
The display will indicate “Sure?”.
If you decide to cancel the operation, press the
STOP button.
“ERASE TRACK?”
.
6
To execute the operation, press the ENTER
button once again.
Track erasure will begin, and the display will
indicate the estimated remaining time until completion as “Erase X:XX”.
33
Page 34

7 – Entering names
ENGLISH
Caution
If you turn off the power without finalizing after entering a
name, the TOC will not be written, and the name you
entered will be discarded. You must execute the finalize
operation to write the TOC.
You can use the
name for a disc or track.
“TEXT EDIT?”
menu item to enter a
Naming a disc
Here’s how to assign a name to a CD-R/CD-RW disc.
2, 31
1 While stopped, access the “TEXT EDIT?”
menu item and press the ENTER button.
The display will indicate “Text> XXX” (you can
choose Disc or a track number 01–99).
To move the cursor
Use the SYNC REC/< button or FADER/> button.
Pressing the SYNC REC/< button moves the cursor to
the left, and pressing the FADER/> button moves the
cursor to the right.
You can also use the remote control unit SYNC REC
or FADER buttons to move the cursor.
To delete characters
Move the cursor to the character you want to delete,
and press the ERASE/DEL button (or the ERASE
button on the remote control unit).
To insert characters
Locate the cursor on where you want to insert a character, and press the FINALIZE/INS button (or the
FINALIZE button on the remote control unit).
To correct characters
Move the cursor to the character you want to correct,
and enter the desired character.
If you’ve edited text and then attempt to remove the
disc without writing the TOC, a message of
will appear. If you want to remove the disc with-
Text!
out writing the TOC, press the (Open/Close) button once again while the
shown (the text you entered will be discarded).
Sure? Text!
message is
Sure?
2
Press the ENTER button, and use the MULTI
JOG dial (or the SKIP buttons on the remote
control unit) to select
3
Press the ENTER button.
The character display area will show the current
disc name, and name edit mode will be active (the
cursor will blink).
4
Enter a name as described below, and press
the MENU button on the front panel (or the
MENU button on the remote control unit) to
finalize your input.
In name edit mode, you can assign a name as follows.
To select the type of characters
Press the DISPLAY button on the front panel or
remote control unit to switch between the following
two types of characters.
• Lowercase alphabet/Symbols (nothing shown in
display)
• Uppercase alphabet/Symbols (“CAPS” lit in dis-
play)
To enter characters
Use the MULTI JOG dial (or the SKIP buttons on the
remote control unit) to select characters, and press the
ENTER button to confirm your choice.
“Text> Disc”
.
34
Page 35

Naming a track
Here’s how to assign a name to a track recorded on a
CD-R/CD-RW disc.
2, 31
1 While stopped, access the “TEXT EDIT?”
menu item and press the ENTER button.
The display will indicate “Text> XXX” (you can
choose Disc or a track number 01–99).
2
Press the ENTER button, and use the MULTI
JOG dial (or the SKIP buttons on the remote
control unit) to select a track number 01–99.
3
Press the ENTER button.
The character display area will show the current
track name, and name edit mode will be active
(the cursor will blink).
7 – Entering names—Naming a track
ENGLISH
Note
If there currently is no name, nothing will be displayed
(the cursor will only blink).
4
Enter a name in the same way as for a disc
name, and press the MENU button on the
front panel (or the MENU button on the
remote control unit) to finalize your input.
If you’ve edited text and then attempt to remove
the disc without writing the TOC, a message of
Sure? Text! will appear. If you want to remove the
disc without writing the TOC, press the
(Open/Close) button once again while the Sure?
Text! message is shown (the text you entered will
be discarded).
35
Page 36

ENGLISH
8 – Messages
Error messages
If one of the following messages should appear, press
the (stop) button and then deal with the cause of
the error. If you are still unable to resolve the problem, please contact service center nearby.
• Can’t Rec!
Cannot record. Either erase the contents of the
disc (for a CD-RW), or use a different recordable
disc.
• Disc Error!
There is a problem with the disc. Use a different
disc.
• Disc Full!
Recording is not possible because there is no
more recordable time or recordable track on the
disc.
• Text Full!
You have reached the maximum number of characters.
• Can’t Edit!
The editing operation cannot be executed due to
operational restrictions.
• Can’t Sel!
The menu or other item cannot be selected
because it is prohibited.
• Can’t INCR!
The track cannot be incremented because
M_TR_INCR is OFF.
• Rec Error!
An error occurred while recording. Please rerecord.
• No DIR!
There is no directory that contains a file.
• Decode Err!
Failed to playback an MP3 file.
Messages during operation
• Sure? Text!
After editing text, you attempted to open the tray
without finalizing. If you wish to proceed (and
discard the text you entered), press the
(Open/Close) button once again.
• Drive Error!
There is a problem with the CD-RW drive.
• D-IN UNLOCK!
No digital unit is connected to the DIGITAL IN
jack (or the power of the connected digital unit is
turned off). Check the connection and power of
your digital unit.
• Not Audio!
The signal being received at the DIGITAL IN jack
is not an audio signal.
• Erase Error!
An error occurred while erasing.
• Not Fs44.1k!
The sampling frequency of the digital input is not
44.1 kHz. Please turn the SRC on.
• PGM Empty!
Nothing has been programmed.
• Blank Disc
An unrecorded disc is inserted.
• Complete
An operation such as finalize or erase has been
completed.
• Now OPC.
Calibration is being performed to match the characteristics of the disc being used so that it can be
recorded optimally.
• Disc Repair
The disc is being repaired.
• PMA Writing (PMA = Program Memory Area)
The recorded content is being written to the disc.
• TOC Reading.
TOC data is being read.
• PGM Full!
You have already programmed 99 songs.
• Format Err!
This format cannot be read on the unit.
36
Page 37

9 – Troubleshooting
• Power does not turn on
Is the power cable firmly plugged in?
• “Disc Error!” appears
Could the disc be soiled? Clean or replace the
disc.
• Can’t playback
Could condensation have occurred? If condensation has occurred, remove the disc and leave the
unit powered-on for several hours.
• No sound
Check the connections to your monitor system
once again. Also check the volume settings of
your amp.
• Can’t record
• Check the connections once again.
• Check the recording level.
• You can’t record on a playback-only CD. Please
use a recordable CD.
ENGLISH
• A setting you changed is not memorized.
The CDR632 saves backup copies of your settings whenever you change mode settings, however, the backup may fail if you turn off the power
immediately. Avoid turning off the power immediately after making any change.
• Noise or static can be heard.
Please re-position the unit away from strong
sources of magnetism such as a television.
37
Page 38

10 –Specifications
ENGLISH
Recordable discs
CD-R, CD-R-DA, CD-RW, CD-RW-DA (High Speed CD-RW is supported)
Quantization bit depth 16-bit linear
Sampling frequency
Frequency response
44.1 kHz
20Hz–20KHz
±0.8 dB (playback)
±1.0 dB (recording)
S/N
95 dB or better (playback)
90 dB or better (recording)
Dynamic range
95 dB or better (playback)
90 dB or better (recording)
Distortion
0.006% or less (playback)
0.008% or less (recording)
Channel separation
90 dB or better (playback: 1 kHz)
80 dB or better (recording: 1 kHz)
Wow and flutter
Analog inputs
below measurable limits (less than 0.001%)
unbalanced input RCA jack
Nominal input level –10 dBV (at full scale: –16 dB)
Minimum input level
Input impedance 22 kΩ ±10% (unbalanced)
Analog outputs
unbalanced output RCA jack
Nominal output level –10 dBV ±2 dB
Maximum output level +6 dBV ±2 dB
Output impedance 600Ω ±10% (unbalanced)
Phones output
stereo phone jack (1/4")
20 mW or greater
32Ω load
Digital output
COAXIAL RCA jack (IEC-60958 Type II)
OPTICAL TOSLINK (IEC-60958 Type II)
Power supply /U1B
/N1B
Current consumption
/U1B
/N1B
Dimensions
120 VAC/60Hz
230 VAC/50Hz
18 W
20W
Width 482.6 mm (19.0")
Height 98.0 mm (3.9")
Depth 307.5 mm (12.1")
Weight
4.9 kg (10.8 lbs)
Dimensions
482.6mm(19.0")
465.6mm(18.3")
435.0mm(17.1")
–
19 dBV or higher (minimum input level that can
be adjusted to nominal level (Full Scale –16 dB))
(at full scale: –16 dB)
16.5mm(0.6")
284.6mm(11.2")
6.4mm(0.3")
38
76.2mm(3.0")
88.0mm(3.5")
Page 39

11 –Limited Warranty
Your Marantz Professional product is warranted
against manufacturer defects in material and workmanship for a period of one year parts and labor.
Marantz will pay for labor and material expenses for
items covered by this limited warranty.
Except as specified below, this warranty covers
defects in material and workmanship. The following
are not covered under warranty:
1. Damage, deterioration, malfunction or failure to
meet performance specifications resulting from:
a) Accidents, acts of nature, misuse, abuse,
neglect or unauthorized product modification.
b) Improper installation, removal or maintenance,
or failure to follow supplied instructions.
c) Repair or attempted repair by a non-Marantz
authorized agent.
d) Any shipment (claims must be presented to
the carrier).
e) Any cause other than a defect of manufactur-
ing.
2. Cleaning, check-ups with no fault found or
changes incurred for installation, removal or reinstallation of the product.
3. Any serialized product on which the serial number
has been defaced, modified or removed.
4. Batteries and battery chargers.
5. Accessories, including but not limited to: cables,
mounting hardware and brackets, cleaning accessories, power cords and adapters, and carry
cases.
Limitation of Implied warranties
All implied warranties, including warranties of merchantability and fitness for a particular purpose, are
limited in duration to the length of this warranty.
Exclusion of Damages (Americas only)
Liability for any defective product is limited to the
product's repair or replacement at manufacturer’s
option. Manufacturer shall not be liable for damage
to other products caused by any defects in Marantz
products, damages based on inconvenience or loss
of use of the product, or any other damages, whether
incidental, consequential, or otherwise.
Some States do not allow limitations on how long an
implied warranty lasts and/or do not allow the exclusion or limitation of incidental or consequential damages, so the above limitations and exclusions may
not apply to you.
How state law relates to the warranty (Americas
only)
This warranty gives you specific legal rights, and you
may have other rights which vary from State to State.
Marantz Professional service number: (Americas
only)
Marantz Professional Factory Service
(866)405-2154 (Toll-free)
Products purchased outside of the United States, its
possessions or territories.
This warranty is enforcable only in the United States
and its possessions or territories.
ENGLISH
Non-transferable warranty
This Warranty may be enforced only by the original
purchaser.
Service Information (Americas only)
1. If your unit needs service in the USA, contact our
service referral at the appropriate telephone number indicated below. We will advise you of the
name and location of one or more authorized service centers from which service may be obtained.
Please do not return the unit directly to us.
2. You must pay any shipping charges if it is necessary to ship the product for service. If the necessary repairs are covered by the warranty, we will
pay return shipping charges to your location anywhere in the United States or its territories.
3. Whenever warranty service is required, you must
present the original dated sales receipt or other
proof of date purchased.
AMERICA
D&M Professional America
http://www.d-mpro.com
EUROPE
D&M Professional Europe
http://www.d-mpro.eu.com
ASIA/OTHERS
Marantz Korea Co.,Ltd.
http://www.marantz.co.kr
DENON Asia Co.,Ltd.
http://www.denon.com.hk
D&M Electronics Singapore Pte. Ltd.
http://www.denonsingapo
re.com
39
Page 40

D&M Holdings Inc.
PROFESSIONAL BUSINESS COMPANY
Printed in China 10/2005 D00884100A ecm-f
 Loading...