

Page 1

Quick Start Guide
Guide de démarrage rapide
English
Français
EsPaÑOl
AV Pre Tuner
AV8802
Guía de inicio rápido
Page 2
Welcome Before You Begin
Thank you for choosing a Marantz Pre
Tuner. This guide provides step-by-step
instructions for setting up your Pre Tuner.
Please do not return this unit to the
store – call for assistance.
If you need help… :
If you need additional help in solving
problems, contact Marantz customer
service in your area.
1-855-ONE-Marantz
1-855-663-6272
Call for Assistance:
Monday – Friday 10:00AM to 10:00PM E.S.T,
Saturday 12:00PM to 8:00PM E.S.T
For frequently asked questions please visit
http://marantz.custhelp.com/app/answers/list
For US and Canada only
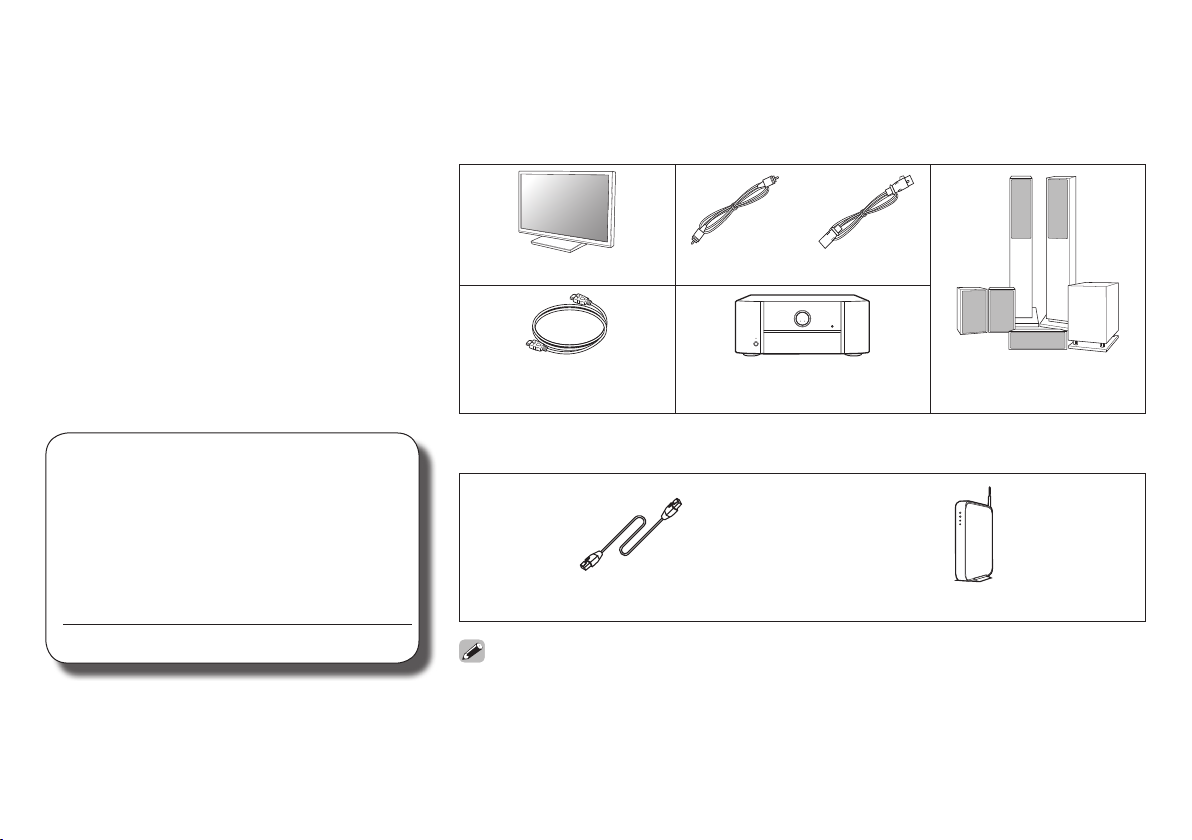
Required for Setup
or
TV RCA cables XLR cables
HDMI cable Power amplifier Speaker systems /
Speaker cables
Optional
or
LAN cable Wi-Fi router
• When connecting this unit to a device that is compatible with the Deep Color, 4K and ARC
functions, use a “High Speed HDMI cable with Ethernet” that displays the HDMI logo.
• These drawings are for illustrative purposes only and may not represent the actual product(s).
1
Page 3
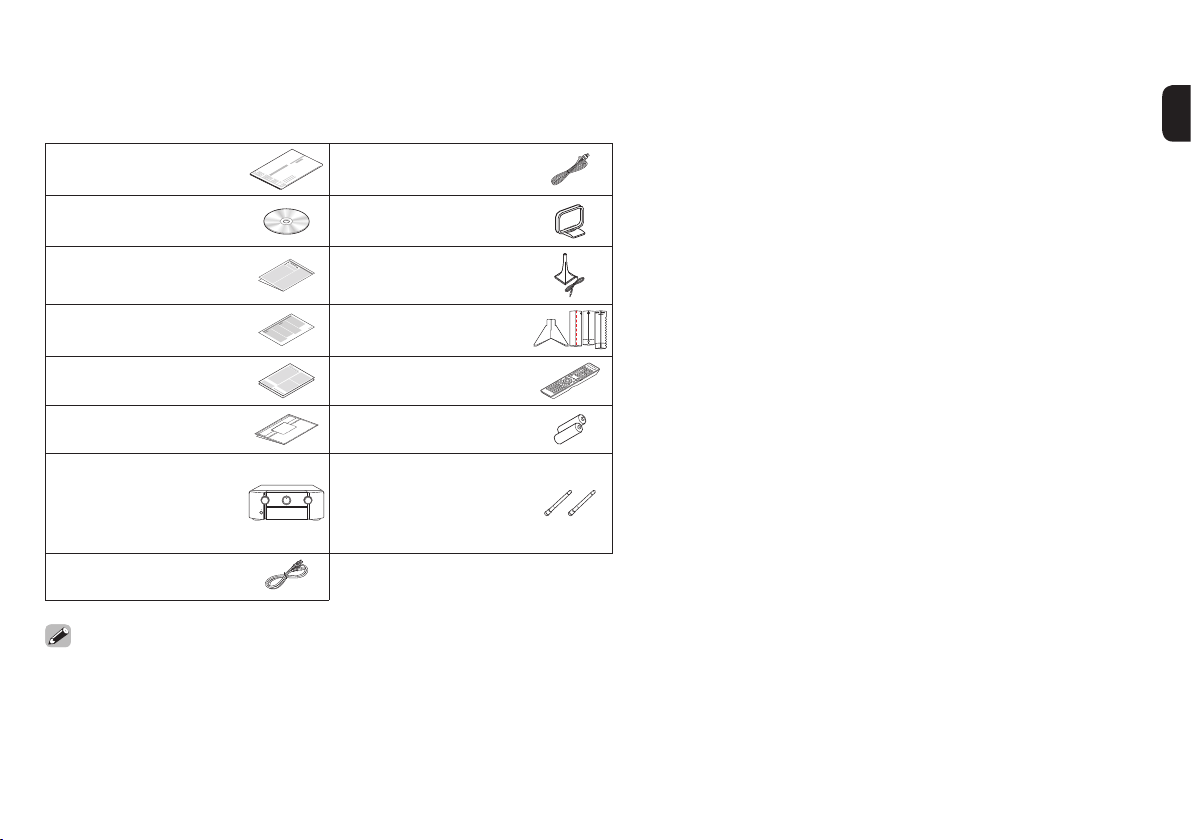
What’s In the Box
Quick Start Guide FM indoor antenna
Owner’s Manual AM loop antenna
Safety Instructions Sound calibration
microphone
Notes on radio Sound calibration
microphone stand
Warranty
(for USA/for CANADA)
Cable labels R03/AAA batteries
Pre Tuner External antennas
Power cord
The supplied Sound calibration microphone stand is convenient for use when
performing Speaker Calibration. Using your own tripod or the supplied Sound
calibration microphone stand enables settings to be automatically configured to
the optimum listening environment, providing exceptionally high performance.
Remote control unit
for Bluetooth/
Wireless
connectivity
2
Page 4
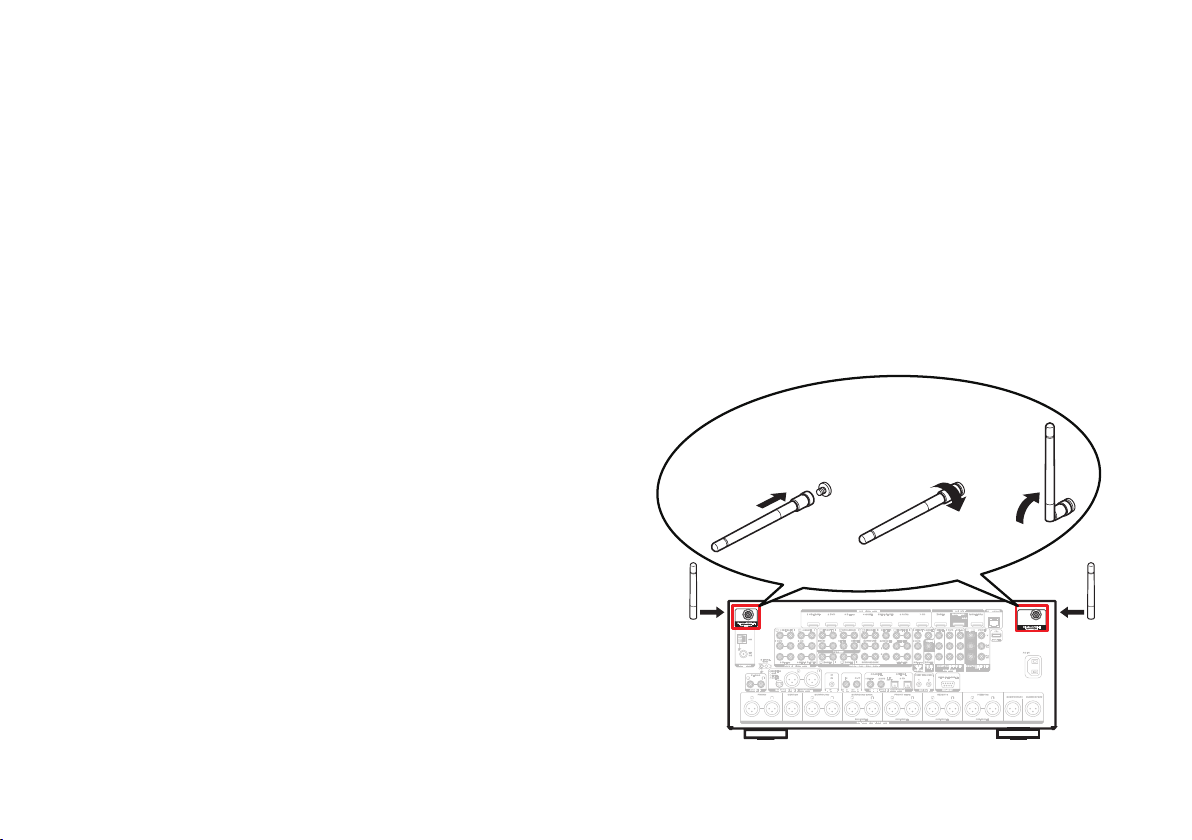
Important: External Antennas
The removable external antennas are required for both
Bluetooth and Wireless network connectivity. Please make
sure to connect the antennas before attempting to use the
Bluetooth or Wi-Fi features of the AV8802.
n Connecting the external antennas for
Bluetooth/Wireless connectivity
For each of the two antennas:
1)
Place the antenna evenly over the antenna terminal
located at the upper left or right corner of the rear panel.
2)
Turn the antenna clockwise until it is fully connected. Do
not over tighten.
3)
Rotate the antenna upwards for the best possible
reception.
qwe
3
Page 5

Setup
There are three steps to the setup
process.
Installing batteries in the remote control unit
1
Connecting the Pre Tuner, Power Amplifier
2
and your TV
Following the On-Screen Setup Assistant
3
Installing batteries in the
1
remote control unit
R03/AAA batteries
4
Page 6

2
Connecting the Pre Tuner, Power Amplifier and your TV
2.1) Place the Pre Tuner and Power
Amplifier near your TV and connect
the power cord.
TV
Pre Tuner
TV
Pre Tuner
Power cord
(supplied)
Connect to household
power outlet
(AC 120 V, 60 Hz)
Power Amplifier
5
Page 7

2.2) Connect to the network.
Wired LAN
When connecting cables (wired connection), connect a LAN
cable between your Pre Tuner and your network router.
Internet
Router
Modem
To WAN side
To LAN port
Wireless LAN
When connecting to wireless LAN (Wi-Fi), follow the
instructions in “Connecting the external antennas for
Bluetooth/Wireless connectivity” and connect the antennas.
Internet Modem
Router with
access point
To WAN side
6
Page 8

2.3) Connect the Pre Tuner to your TV
with an HDMI cable.
HDMI IN
$5&
HDMI cable
2.4) Turn on the TV.
TV remote control unit
HDMI OUT
MONITOR
$5&
2.5) Select the appropriate HDMI input
on your TV.
HDMI
INPUT
or
TV/
VIDEO
Pre Tuner (Rear panel)
TV remote control unit
7
Page 9

2.6) Turn on the Pre Tuner.
2.7) Verify the connection.
•Press X to turn on the Pre Tuner.
•Verify that you can see this screen on your TV.
AV Preamp Setup Assistant
Please select a language...
English
Español
Français
If this screen is not displayed, please go back and
retry the steps again in the recommended sequence.
8
Page 10

3
Following the On-Screen Setup Assistant
The Setup Assistant will walk you through connecting and
configuring your Power Amplifier and components to your
Marantz Pre Tuner. Please use the remote control and
follow the on-screen instructions.
AV Preamp Setup Assistant
Please select a language...
Español
Français
English
9
Page 11

Owner’s Manual
Please reference to the Owner's Manual for more details about the setup and operation of the Pre Tuner and its features.
n Online Version
Enter the following URL into your web browser:
manuals.marantz.com/AV8802/NA/EN/
Online Manual
Contents
Overview
Connections
Playback
Settings
Tips
Appendix
PDF
PDF Download
WEB Manual
AV Pre Tuner
AV8802
c
Copyright 2014 D&M Holdings Inc. All Rights Reserved.
English
AV Pre Tuner
n Printable Version
Access the print version of the owner's manual from the
included CD-ROM or select the “PDF Download” link
from the Online Version.
1
Insert the disc into
your PC.
2
Follow the screen or double click on
the PDF le.
10
Page 12

Printed in Japan 5411 11150 00AM
D&M Holdings Inc.
 Loading...