


R
Model CC3000/CC4000/CC4000 OSE User Guide
5 Disc CD Changer
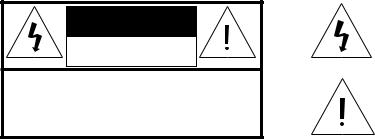
CAUTION |
RISK OF ELECTRIC SHOCK |
DO NOT OPEN |
CAUTION: TO REDUCE THE RISK OF ELECTRIC SHOCK, |
DO NOT REMOVE COVER (OR BACK). |
NO USER-SERVICEABLE PARTS INSIDE. |
REFER SERVICING TO QUALIFIED SERVICE PERSONNEL. |
The lightning flash with arrowhead symbol, within an equilateral triangle, is intended to alert the user to the presence of uninsulated “dangerous voltage” within the product’s enclosure that may be of sufficient magnitude to constitute a risk of electric shock to persons.
The exclamation point within an equilateral triangle is intended to alert the user to the presence of important operating and maintenance (servicing) instructions in the literature accompanying the appliance.
WARNING
TO REDUCE THE RISK OF FIRE OR ELECTRIC SHOCK, DO NOT EXPOSE THIS APPLIANCE TO RAIN OR MOISTURE.
CAUTION:
TO PREVENT ELECTRIC SHOCK, MATCH WIDE BLADE OF PLUG TO WIDE SLOT, FULLY INSERT.
ATTENTION:
POUR ÉVITER LES CHOCS ÉLECTRIQUES, INTRODUIRE LA LAME LA PLUS LARGE DE LA FICHE DANS LA BORNE CORRESPONDANTE DE LA PRISE ET POUSSER JUSQU’AU FOND.
LASER SAFETY
This unit employs a laser, Only a qualified service person should remove the cover or attempt to service this device, due to possible eye injury.
CAUTION:
USE OF CONTROLS OR ADJUSTMENTS OR PERFORMANCE OF PROCEDURE OTHER THAN THOSE SPECIFIED HEREIN MAY RESULT IN HAZARDOUS RADIATION EXPOSURE.

NOTE :
This equipment has been tested and found to comply with the limits for a Class B digital device, pursuant to Part 15 of the FCC Rules. These limits are designed to provide reasonable protection against harmful interference in a residential installation. This equipment generates, uses and can radiate radio frequency energy and, if not installed and used in accordance with the instructions, may cause harmful interference to radio communications. However, there is no guarantee that interference will not occur in a particular installation. If this equipment does cause harmful interference to radio or television reception, which can be determined by turning the equipment off and on, the user is encouraged to try to correct the interference by one or more of the following
measures:
–Reorient or relocate the receiving antenna.
–Increase the separation between the equipment and receiver.
–Connect the equipment into an outlet on a circuit different from that to which the receiver is connected.
–Consult the dealer or an experienced radio/TV technician for help.
NOTE : Changes or modifications may cause this unit to fail to comply with Part 15 of the FCC Rules and may void the user’s authority to operate the equipment.
English . . . . . . . . . . . . . . . . . . . .4
Français . . . . . . . . . . . . . . . . . .19
This Class B digital apparatus meets all requirements of the Canadian InterferenceCausing Equipment Regulations.
Cet appareil numérique de la Classe B respecte toutes les exigences du Règlement sur le matérier brouilleur du Canada.
Français English
English
SAFETY INSTRUCTIONS – Read before operating equipment
This product was designed and manufactured to meet strict quality and safety standards. There are, however, some installation and operation precautions which you should be particularly aware of.
1.Read Instructions - All the safety and operating instructions should be read before the appliance is operated.
2.Retain Instructions - The safety and operating instructions should be retained for future reference.
3.Heed Warnings - All warnings on the appliance and in the operating instructions should be adhered to.
4.Follow Instructions - All operating and use instructions should be followed.
5.Water and Moisture - The appliance should not be used near water - for example, near a bathtub, washbowl, kitchen sink, laundry tub or swimming pool, or in a wet basement.
6.Carts and Stands - The appliance should be used only with a cart or stand that is recommended by the manufacturer.
6A.  An appliance and cart combination should be moved with
care. Quick stops, excessive force, and uneven surfaces may cause the appliance and cart combination to overturn.
7.Wall or Ceiling Mounting - The appliance should be mounted to a wall or ceiling only as recommended by the manufacturer.
8.Ventilation - The appliance should be situated so that its location or position does not interfere with its proper ventilation. For example, the appliance should not be situated on a bed, sofa, rug, or similar surface that may block the ventilation openings; or, placed in a built-in installation, such as a bookcase or cabinet that may impede the flow of air through the ventilation openings.
9.Heat - The appliance should be situated away from heat sources such as radiators, heat registers, stoves, or other appliances (including amplifiers) that produce heat.
10.Power Sources - The appliance should be connected to a power supply only of the type described in the operating instructions or as marked on the appliance.
11.Grounding or Polarization - Precautions should be taken so that the grounding or polarization means of an appliance is not defeated.
Caution: To prevent electric
shock, match the wide blade of this plug to the wide slot and fully insert. Do not use this (polarized) plug with an extension cord, receptacle or other outlet unless the blades can be fully inserted to prevent blade exposure.
12.Power Cord Protection - Power supply cords should be routed so that they are not likely to be walked on or pinched by items placed upon or against them, paying particular attention to cords and plugs, convenience receptacles, and the point where they exit from the appliance.
13.Cleaning - The appliance should be cleaned only as recommended by the manufacturer.
14.Power Lines - An outdoor antenna should be located away from power lines.
15.Outdoor Antenna Grounding - If an outside antenna is connected to the receiver, be sure the antenna system is grounded so as to provide some protection against voltage surges and built up static charges.
Section 810 of the National Electrical Code, ANSI/NFPA No. 70-1984, provides information with respect to proper grounding of the mast and supporting structure, grounding of the lead-in wire to an antenna discharge unit, size of grounding connectors, location of antenna-discharge unit, connection to grounding electrodes, and requirements for the grounding electrode. See figure below.
16.Non-use Periods - The power cord of the appliance should be unplugged from the outlet when left unused for a long period of time.
17.Object and Liquid Entry - Care should be taken so that objects do not fall and liquids are not spilled into the enclosure through openings.
18.Damage Requiring Service - The appliance should be serviced by qualified service personnel when:
A.The power supply cord or the plug has been damaged; or
B.Objects have fallen, or liquid has spilled into the appliance; or
C.The appliance has been exposed to rain; or
D.The appliance does not appear to operate normally or exhibits a marked change in performance; or
E.The appliance has been dropped, or the enclosure damaged.
19.Servicing - The user should not attempt to service the appliance beyond that described in the operating instructions. All other servicing should be referred to qualified service personnel.
4

SAFETY INSTRUCTIONS
Note to the Cable TV system installer
This reminder is provided to call the Cable TV system installer's attention to Article 820-40 of the NEC that provides guidelines for proper grounding and, in particular, specifies that the cable ground shall be connected to the grounding system of the building, as close to the point of cable entry as practical.
English
Example of Antenna Grounding as per NEC - National Electrical Code
Ground Clamp
 Antenna Lead-in Wire
Antenna Discharge Unit
(NEC Section 810-20)
Grounding Conductors
(NEC Section 810-21)
 Ground Clamps
Electric Service Equipment |
|
|
|
Power Service Grounding Electrode System |
|
|
|
||
|
|
|
(NEC Art. 250, Part H) |
|
|
|
|
|
5
English
CONTENTS
Introduction . . . . . . . . . . . . . . . . . . . . . . .6
Installation . . . . . . . . . . . . . . . . . . . . .6 - 7
Functional Overview . . . . . . . . . . . . .7 - 9
Playback . . . . . . . . . . . . . . . . . . . . .11 - 15
Programming . . . . . . . . . . . . . . . . . . . . .15
Edit . . . . . . . . . . . . . . . . . . . . . . . . . .16 - 17
Additional Information . . . . . . . . .17 - 18
Troubleshooting . . . . . . . . . . . . . . . . . . .18
INTRODUCTION |
INSTALLATION |
|
|
|
|
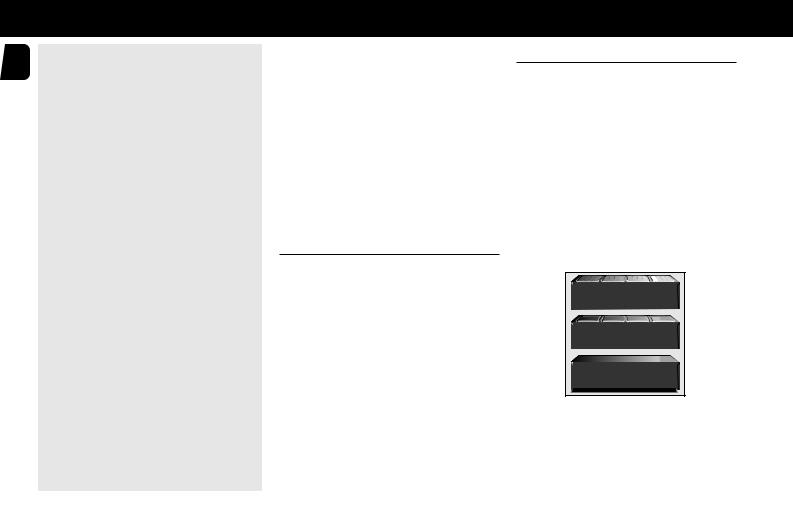
Thank you for selecting the Marantz CC 3000 & CC4000 & CC4000 OSE Compact Disc Changer.
A Compact Disc Changer of the state-of-the-art Marantz the CC 3000, CC4000 & CC4000 OSE combines supreme playback quality with a high degree of user-friendliness by offering the following possibilities:
–able to play CD-RW disc;
–changing CDs during play;
–quick access to a particular CD by means of QUICK PLAY;
–storing 40 tracks from different CDs in any desired order in the changer memory;
–storing the required recording time and playing time in the EDIT mode.
Power Supply Setting
•Check that the type plate on the rear of your changer indicates the correct supply voltage.
•If your mains supply voltage is different, consult your dealer or our Service Organisation.
Siting the Compact Disc Changer
Free standing
•Always position the changer horizontally on a flat, firm surface.
•Allow a free space of at least 3 cm above the changer so as not to interfere with the cooling of the changer.
In an audio rack
• The changer can be sited in any desired position.
Stacked
•Site the changer preferably at the bottom or at the top.
•Never position the changer directly on top of a highpower amplifier, as such an amplifier gives off a substantial amount of heat.
RECEIVER |
CASSETTE DECK |
CD CHANGER |
6
INSTALLATION
English
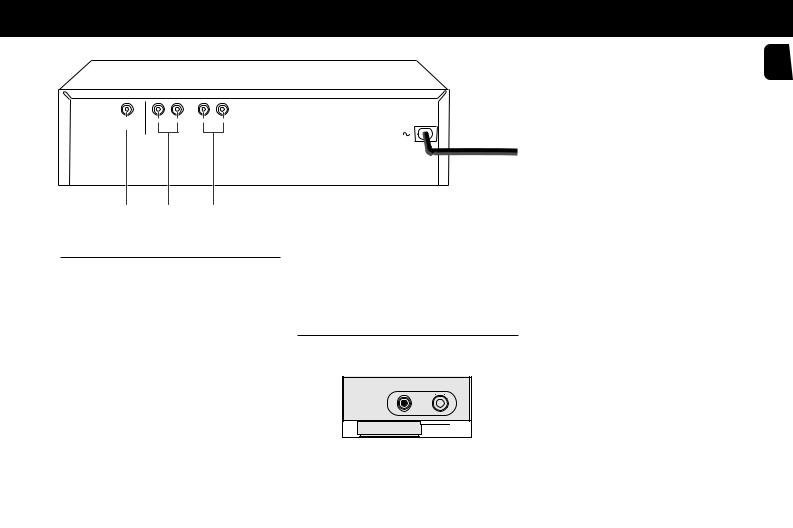
COAXIAL |
R |
L |
IN |
OUT |
DIGITAL |
|
ANALOG |
|
REMOTE |
OUTPUT |
|
OUT |
|
CONTROL |
1 2 3
Connections
1Digital Out
This output supplies digital signal and can therefore only be connected to an input which is suitable for this signal. Use here a lead with one cinch plug on either end.
Never connect this socket to a non-digital input of an amplifier, such as AUX, CD, TAPE, PHONO etc!
2Analog Out
For the connecting cable to the amplifier.
•Insert a red plug into the ‘R’ socket and the other plug into the ‘L’ socket.
•Insert the two other plugs into the corresponding sockets of the CD or AUX input of your amplifier. You can also use the TUNER or TAPE IN connection, but never the PHONO input!
3Remote Control
For connecting up the equipment when you are incorporating the changer in a HiFi system with its own remote control system.
Connecting Headphones (for CC4000 & CC4000OSE only)
•Connect headphones with a 6.3 mm jack plug to the PHONES socket.
•The sound level is adjusted with the LEVEL control.
PHONES/
LEVEL
Note:
–The volume control on the remote control must not be at the minimum level.
7
 Loading...