

Page 1
Switch™ Series
User Manual
Page 2

Safety
It is strongly recommended to consult a doctor before starting any exercise program. If
you have a pacemaker or other implemented device, consult your doctor before using
the heart rate monitor.
The Switch™ GPS watch is a fitness device
designed to record and track certain fitness
activities such as running, biking or swimming.
When using the Switch GPS watch, these
safety rules must be followed to prevent
accidents that can result in injury or death to
yourself or others. The device, its accessories
including the heart rate monitor are not
medical devices and are for recreational use
only. The heart rate reading is for reference
only and the device and its accessories
cannot be used as a substitute for obtaining
measurements that require medical precision.
The Global Positioning System (GPS) is
operated by the U.S. Government, which
is solely responsible for the accuracy and
maintenance of the GPS network. The
accuracy of position fixes can be affected
by the periodic adjustments to GPS satellites
made by the U.S. government and is subject to
change in accordance with the Department of
Defence civil GPS user policy and the Federal
Radio navigation Plan. Accuracy can also
be affected by poor satellite geometry and
obstructions, like buildings and large trees.
Use only Magellan cables and accessories;
the use of non-Magellan cables and
accessories (other than compatible ANT+
wireless accessories) may severely degrade
performance or damage the device, and will
void the warranty.
Internal lithium-ion battery: Never store the
device or the battery in a high temperature
location. Do not disassemble, puncture or
incinerate the battery. Do not attempt to
remove the battery. Please contact Magellan
Technical Center for issues related to the
battery.
Do not use the device outside of the following
temperature range: -4°F to 131°F (-20°C to
55°C).
The information provided in this document
is subject to change without notice.
Improvements and enhancements to the
product may occur without any formal
notification. Check the Magellan website
(active.magellanGPS.com/start) for product
updates and additional information.
MiTAC Digital Corp. 471 El Camino Real Santa Clara, CA 95050 USA
USA & Canada: 800-707-9971
© 2012 MiTAC International Corporation. The Magellan logo and Magellan are registered
trademarks of MiTAC International Corporation and Switch is a trademark of MiTAC International
Corporation. All rights reserved. All other trademarks and registered trademarks are property of
their respective owners.
112-0045-001 A
i
Page 3

Table of Contents
Switch Fundamentals
Switch ...................................................................................................................1
Switch Up .............................................................................................................1
Switch Buttons .....................................................................................................2
Power ....................................................................................................................2
Turning Switch On ....................................................................................2
Turning Switch Off ....................................................................................2
Turning the Backlight On / Off ................................................................2
Battery ..................................................................................................................3
Charging the Battery ................................................................................3
Multisport Mounting ...........................................................................................3
Wrist Mount ...............................................................................................3
Bike Mount ................................................................................................3
GPS ........................................................................................................................4
Checking GPS Status .................................................................................4
Checking GPS Status (Shortcut) ...............................................................4
Tips on Acquiring Initial GPS Signal ........................................................4
Caring for Switch .................................................................................................4
In Case of Problems .............................................................................................4
Resetting Factory Defaults .......................................................................4
Contacting Magellan .................................................................................4
Activity Mode
Activity Screen Flow ............................................................................................5
Button Functions in Activity Mode ....................................................................5
Recording an Activity .........................................................................................6
Page 4

Setting the Activity Profile .......................................................................6
Setting the Activity Profile (Shortcut) .....................................................6
Starting the Activity Recording ...............................................................6
Saving the Activity Recording .................................................................6
Start Reminder .....................................................................................................7
Multisport Activity ..............................................................................................7
Using a Multisport Profile .........................................................................7
Laps .......................................................................................................................7
Activity Profiles
Activity Profile .....................................................................................................8
Selecting the Active Activity Profile ........................................................8
Customizing the Activity Profile ........................................................................8
Selecting the Activity Profile to Customize ............................................8
Displaying or Hiding an Activity Profile .................................................8
Changing the Activity Profile Name ........................................................9
Changing the Activity Type .....................................................................9
Adding a Data Screen ...............................................................................9
Customizing an Data Screen .....................................................................9
Deleting an Data Screen ...........................................................................9
Setting an Activity Pacer ........................................................................10
Setting Display Preferences ....................................................................10
Setting Recording Preferences (Auto Pause) ........................................10
Setting Recording Preferences (Auto Lap)............................................10
Setting Training Alerts ...........................................................................11
Copy Settings to another Activity Profile .............................................11
Multisport Activity ............................................................................................11
Setting the Multisport (MULTI) Activities .............................................11
Page 5

History
Activity History ..................................................................................................12
Activity Totals ....................................................................................................13
Location History ................................................................................................13
Accessing History Menu .........................................................................12
Viewing Activity History ........................................................................12
Viewing Activity Summary .....................................................................12
Viewing Laps ...........................................................................................12
Deleting the Activity ...............................................................................12
Deleting Old Activities ............................................................................13
Deleting All Activities .............................................................................13
Viewing Activity Totals ..........................................................................13
Resetting Activity Totals ........................................................................13
Viewing a Marked Location....................................................................13
Deleting All Marked Locations ...............................................................13
Deleting a Marked Location ...................................................................14
Navigation
Navigation Screen ............................................................................................15
Navigation Screen with Destination ...............................................................15
Accessing the Navigation Screen ..........................................................16
Changing the Map Scale .........................................................................16
Navigation Mode ...............................................................................................16
Starting Navigation ................................................................................16
Stopping Navigation ...............................................................................16
Marking Location ..............................................................................................16
Marking Location using the BACK button ............................................16
Marking Location using Settings ...........................................................16
Page 6

ANT+™ Sensors
Supported sensors .............................................................................................17
Compatibility with Activity types ....................................................................17
Settings...............................................................................................................17
Accessing ANT+ Settings ........................................................................17
Sensors ...............................................................................................................17
Enabling ANT+ Sensors ..........................................................................17
Quick Info Screen
Activity Quick Info Screen ................................................................................19
Accessing the Activity Quick Info Screen .............................................19
Activity Quick Info Screen Details ...................................................................19
Navigation Quick Info Screen ..........................................................................21
Navigation Quick Info Screen Details ..............................................................21
Settings
GPS Settings .......................................................................................................22
Device Settings ..................................................................................................22
Training Zones ...................................................................................................23
User Information ...............................................................................................23
Accessing the Navigation Quick Info Screen ........................................21
Accessing GPS Settings ...........................................................................22
Accessing GPS Settings ...........................................................................22
Accessing Training Zones .......................................................................23
Accessing User Information ...................................................................23
Device Information ............................................................................................23
Accessing Device Information................................................................23
Page 7

Magellan Active Website
Overview ............................................................................................................24
Getting Started with Magellan Active .............................................................24
Activity Files ......................................................................................................25
Uploading Activity Files .........................................................................25
Profile .................................................................................................................25
Activity Page ......................................................................................................27
Exporting Activity Files ..........................................................................27
Sharing an Activity ..................................................................................27
Addendum A - Switch Specifications
Addendum B - Available Data Types
Addendum C - Resting Heart Rate
Page 8
Switch Fundamentals
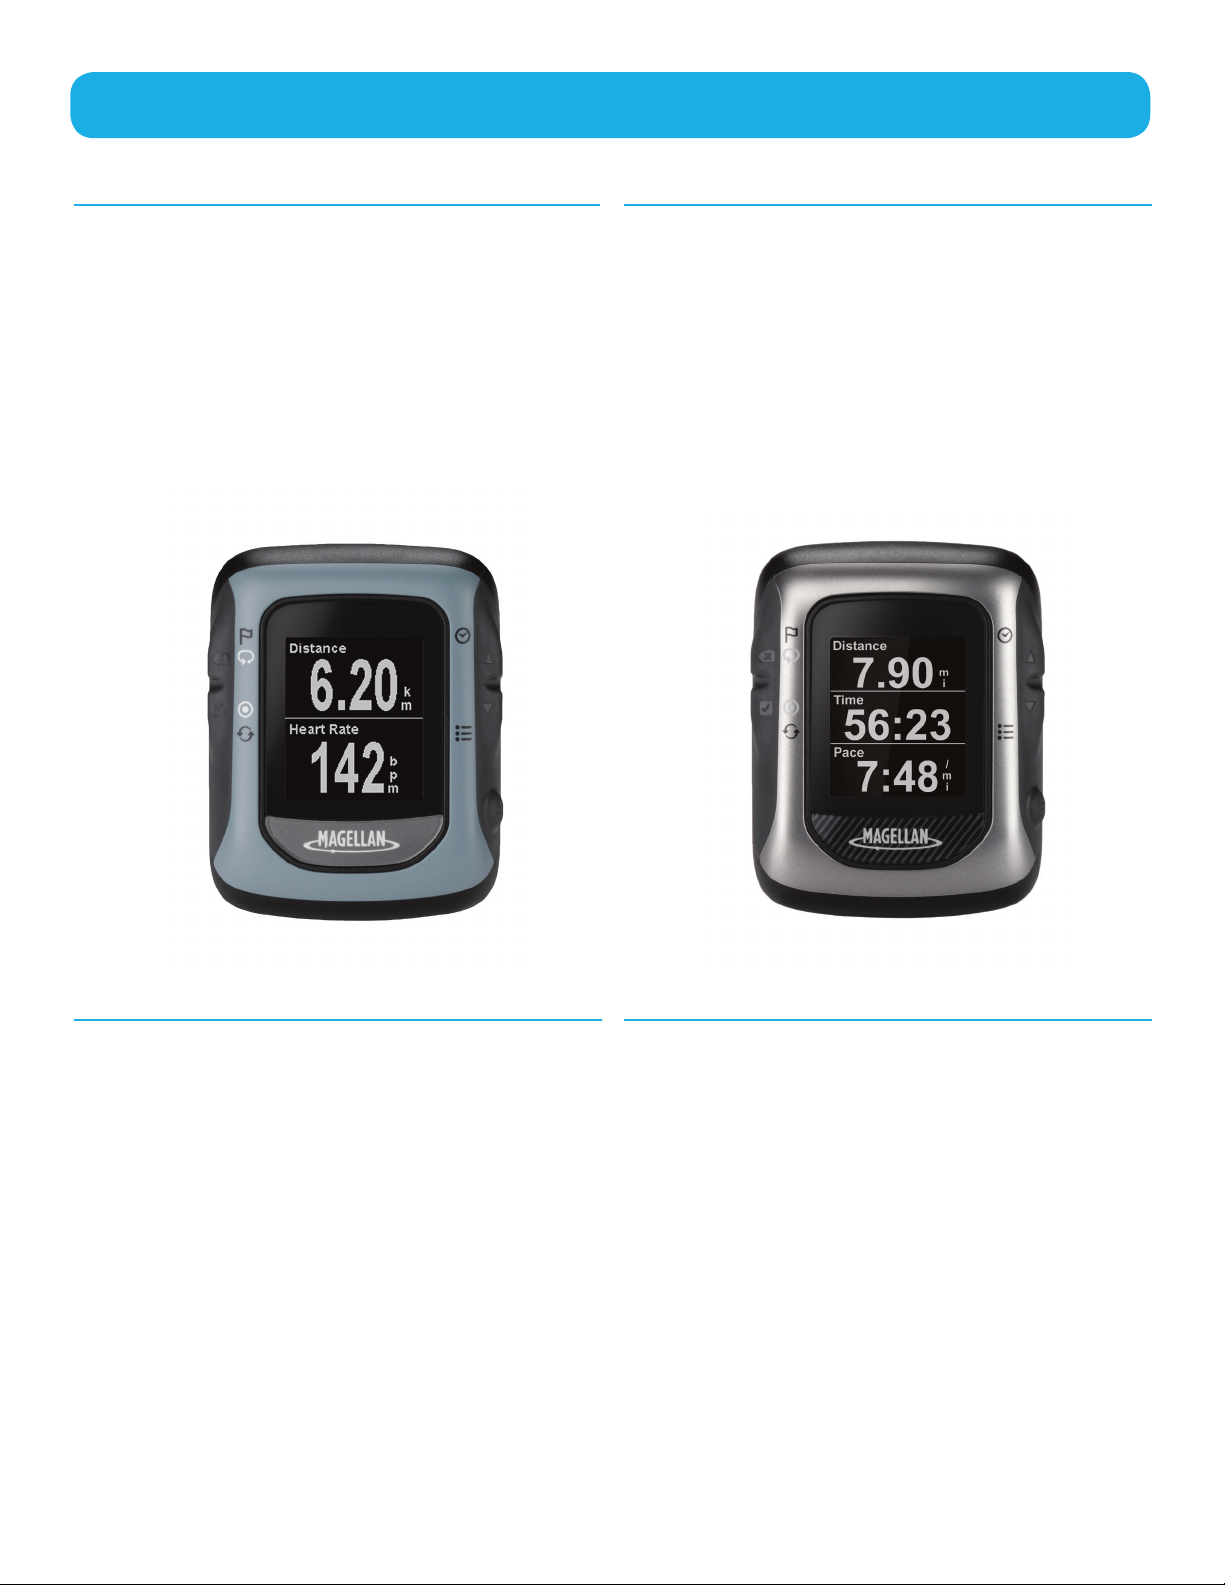
Switch
The Magellan Switch is a crossover GPS
watch for runners looking to track all of their
outdoor activities. You choose the sport and
Switch will guide you to peak performance
with precise GPS satellite data by recording
distance, speed/pace, and elevation. It’s sleek,
yet durable design with 50 meters waterresistance will keep up in any condition.
Switch Up
The Magellan Switch Up contains all the
features of Switch and includes barometric
sensors to improve the accuracy of elevation
measurements, thermometer to monitor
and display outside temperature, as well as
vibrating alerts to notify the user of status
changes.
•Comfortable crossover GPS watch for
multisport activities
•50 meter water-resistance for swimming
and water sports
•1.26” high-resolution display
•Customizable to any sport with 9 activity
profiles
•Comfortable crossover GPS watch for
multisport activities
•50 meter water-resistance for swimming
and water sports
•1.26” high-resolution display
•Customizable to any sport with 9 activity
profiles
•Vibrating Alerts
•Barometric altimeter for precise elevation
data
•Thermometer to monitor and capture
outside temperature
1
Page 9
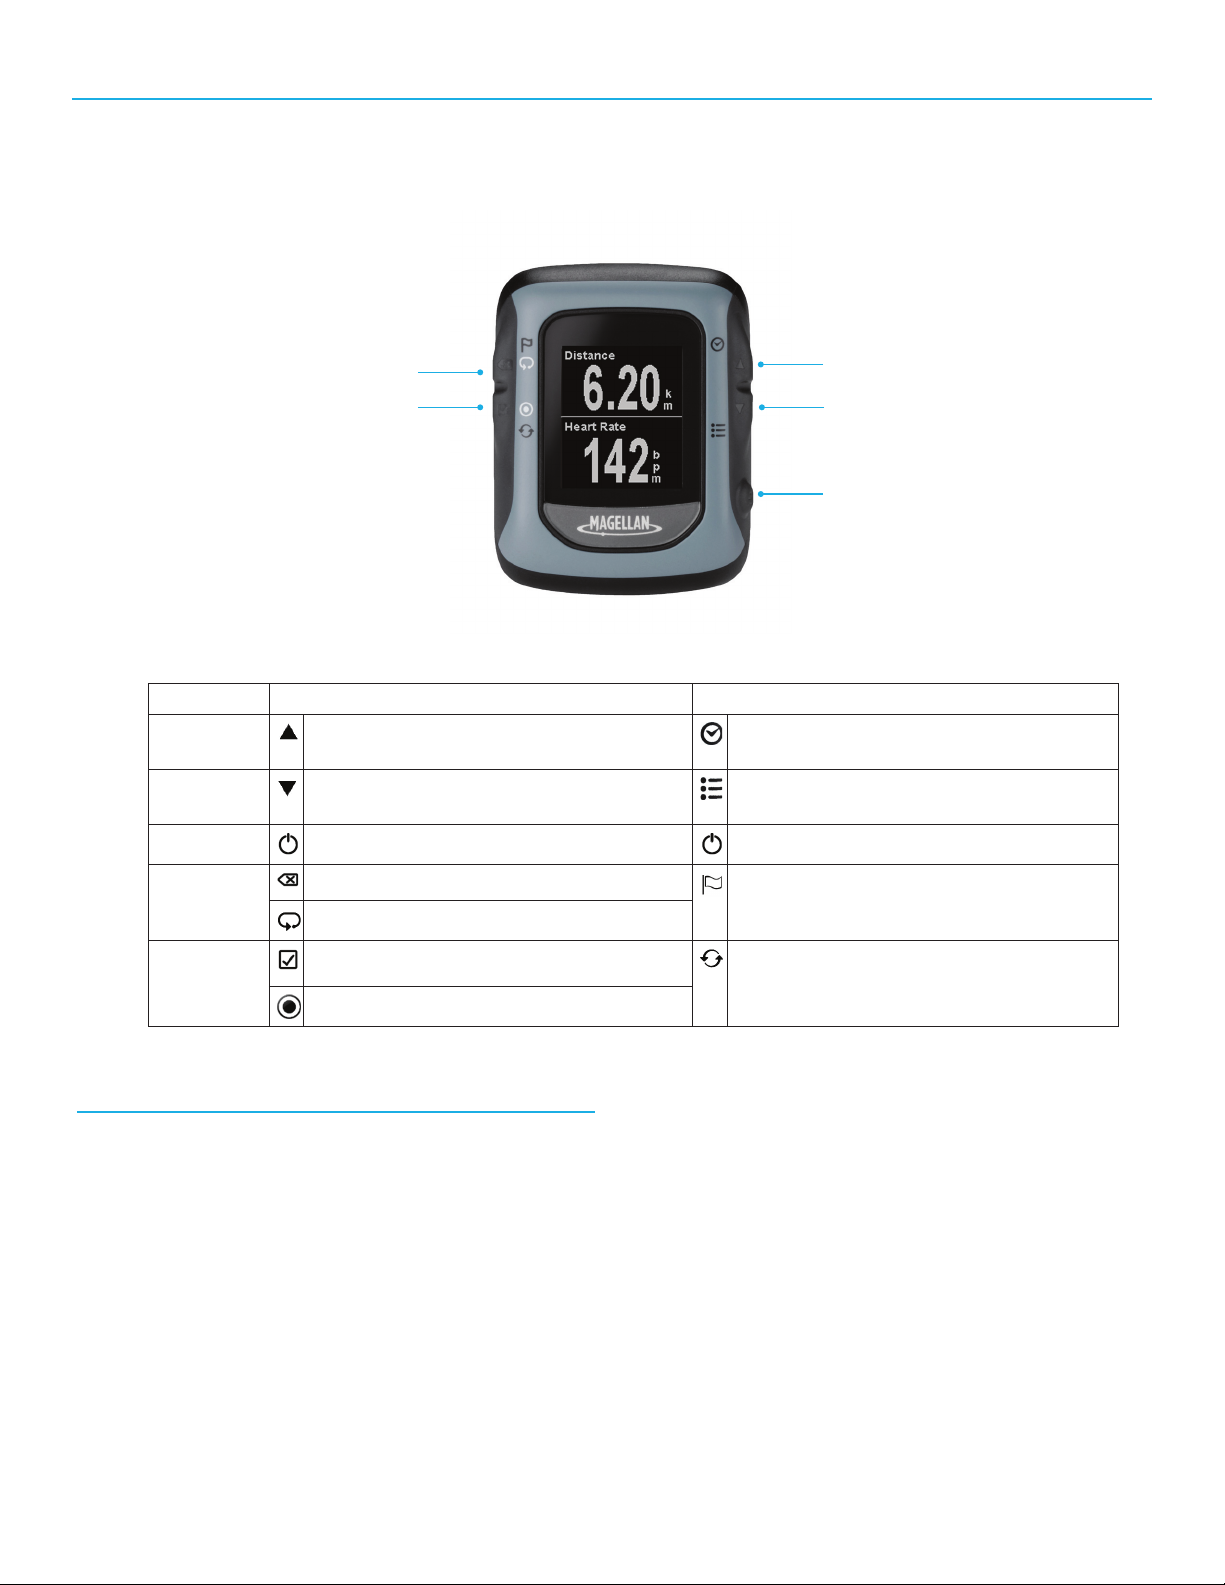
Switch Buttons
Switch has five buttons, all with multiple functions. The chart below describes the different
functions and how they are accessed.
For ease of explanation this manual will refer to the buttons by the names displayed here.
Back
Enter
Button Press Press and Hold
Up
Down
Power Turn backlight on and off. Power on and off.
Back
Page back through data screens and up
on menus.
Page forward through data screens and
down on menus.
Go back or cancel a selection. Save your current location, advance to
Start a new lap (activity mode).
Displays Quick Info screen.
Access Main Menu.
next session (multisport).
Up
Down
Power
Enter
Navigate forward or confirm a selection. Reset your current activity.
Start and stop an activity (activity mode).
Power
Turning Switch On
1. Press and hold POWER button for 2-3
seconds.
2. The first time you power Switch on
follow the on-screen instructions to
configure the settings and enter your
personal information.
Turning Switch Off
1. Press and hold POWER button for 2-3
seconds.
Turning the Backlight On / Off
Note that the backlight causes a severe
drain on the battery and will greatly shorten
the battery life for each charge. Switch will
automatically turn the backlight off at an
interval set in “Device Settings”. (See
Settings
1. Press the POWER button. The backlight
will come on.
2. The backlight will go off automatically
unless the backlight is set to remain on. If
so, press the POWER button to turn the
backlight off.
.)
2
Page 10
Battery
Multisport Mounting
Switch has an internal lithium-ion battery that
is rechargeable using the Switch charging/
data cable. Under normal training activities
with the backlight off, the battery should last
up to 8 hours. An optional Battery Extender
Pack is available as an accessory for Switch
which can give up to 16 hours of battery life.
Use of the backlight can help in making the
display more readable but is a drain on the
internal battery. The factory default for the
backlight is auto-off after 15 seconds but can
be changed in “Settings > Device Settings
> Backlight”. It is recommended that the
backlight not be set to be always on.
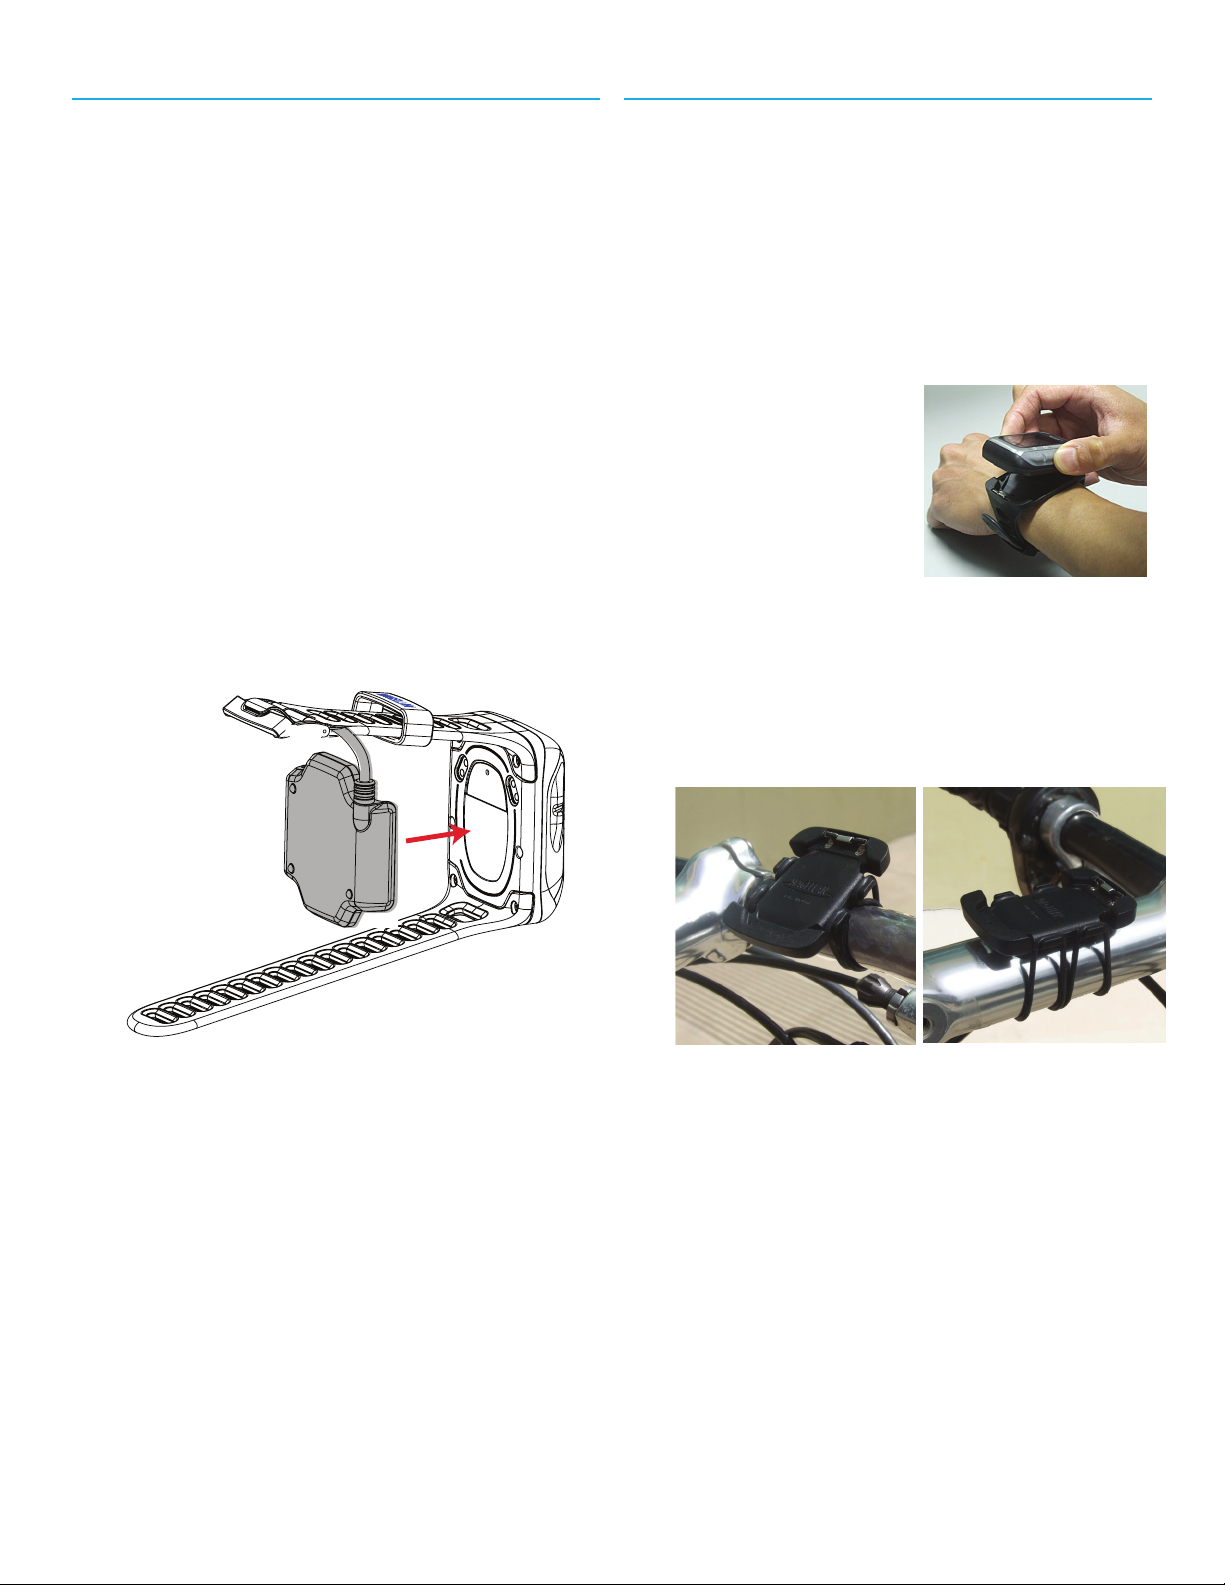
Charging the Battery
1. Place the charging/data cradle on the
back as shown.
Disregard this section if you don’t have the
Mulitisport Mount. The
Multisport Mount is
included with Switch Up and available as an
optional accessory for Switch.
The Multisport Mount provides a quick release
system with integrated wrist and bike mounts
for seamless transitions between sports.
Wrist Mount
1. Attach the wrist
mount around
your wrist.
2. Snap Switch into
the mount by
putting the bottom
of Switch in first
and then pushing
down on the top.
Bike Mount
Note: The above image shows the
battery charging/data cable being
attached to Switch without the Multisport
Mount. If you are using the Multisport
Mount, remove Switch from the mount
before attaching the charging/data cable.
2. Connect the USB connector to a USB port
on a personal computer or AC power
adapter.
1. Attach the bike mount to your handlebars
or stem using the provided rubber rings.
Handlebar Handlebar Stem
2. Snap Switch into the mount by putting
the bottom of Switch in first and then
pushing down on the top.
3. The charging screen is displayed.
4. Charge Switch completely to 100%.
3
Page 11
GPS
Caring for Switch
Before beginning an activity be sure that your
Switch is receiving GPS signals from the GPS
satellite constellation.
After Switch is turned on it begins searching
for signals from GPS satellites. After it acquires
enough information to compute your location,
Switch will inform you that GPS is found and
ready to record your activity.
Checking GPS Status
1. Press and hold the DOWN button.
2. Use the DOWN button to highlight
Settings.
3. Press ENTER.
4. Use the DOWN button to highlight “GPS
Settings”. Press ENTER.
5. The last three lines of “GPS Settings”
provide information on the GPS Status,
the estimated accuracy and the number
of satellites that have been found.
6. To exit, press and hold the DOWN button.
Select “Activity” or “Navigation” mode
from the popup menu and press ENTER.
Checking GPS Status (Shortcut)
1. From the Activity screen, press and hold
the UP button.
2. The Quick Info screen is displayed. The
first item on the fourth line graphically
displays the GPS Status.
Searching for satellites
Satellites found, computing location
Tips on Acquiring Initial GPS Signal
•Clean the Switch display with a dry, nonabrasive cloth.
•Regularly clean the contacts on the back
of Switch with a cotton swab dipped in
alcohol.
In Case of Problems
If you are experiencing problems with your
Switch, visit the Magellan Active web site at
active.magellangps.com/start and check the
Fitness Knowledgebase for information that
may solve your problem.
You can also try resetting the device. This will
fix most problems.
Warning: A factory reset will delete all activity
data and settings.
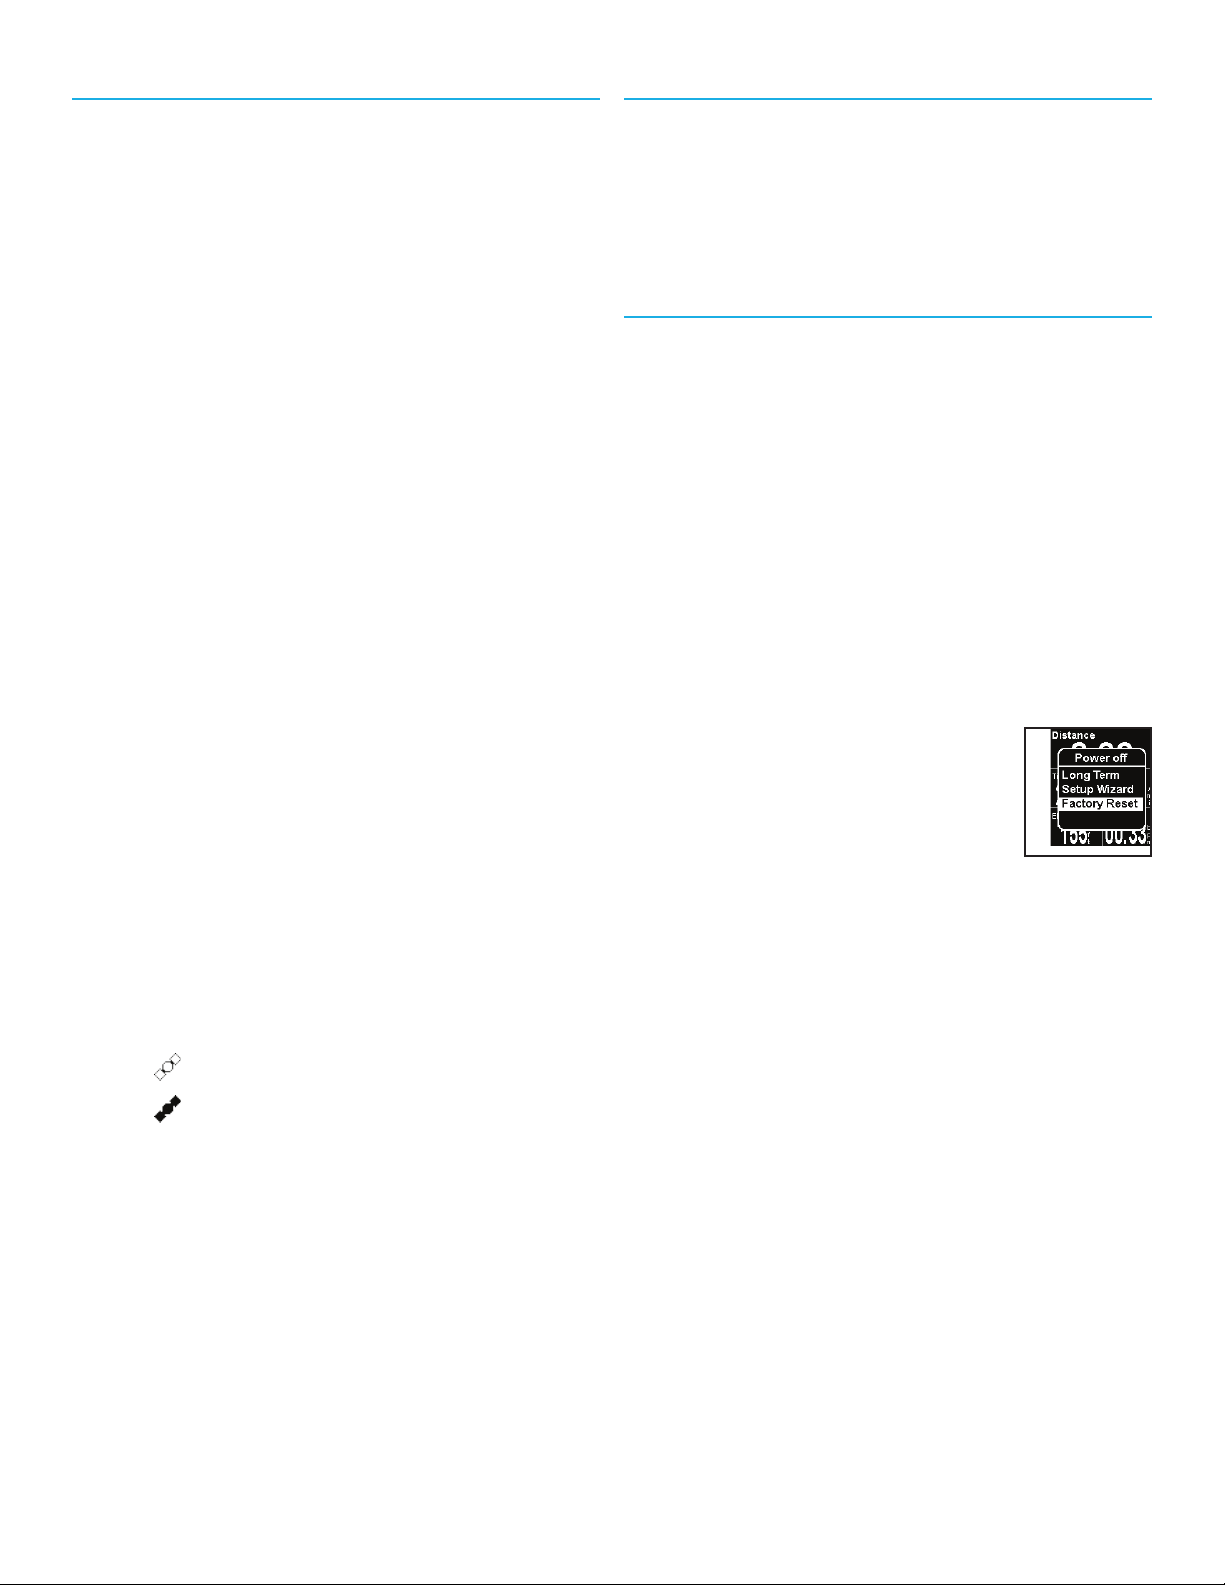
Resetting Factory Defaults
1. Press and hold the ENTER and DOWN
buttons at the same time.
2. After 5 seconds, a menu will
appear.
3. Select “Factory Reset” and
Press ENTER.
Contacting Magellan
If you are still experiencing problems
after checking the Knowledgebase and a
preforming a Factory Reset you can contact
Magellan for Customer Support. Go to
active.magellangps.com/start and click on the
Customer Support link for details on contacting
Magellan Customer Support.
•Go outdoors and get a clear view of the
sky.
•Place Switch on a stationary object with the
face of the watch facing up.
•Avoid blocking the view of the sky with
your body.
•Avoid overhanging trees and tall buildings.
4
Page 12

Activity Mode
No matter what your activity is, the Activity screens provide you with the information you require
to optimize your training workout. The Activity screens can be customized for each Activity Profile
and are at your fingertip during your training session. See the
customizing the screens.
Enter
Activity Profile
UpBack
Down
Power
chapter for details on
Button Functions in Activity Mode
Button Press Press and Hold
Up
Page back through
Activity screens.
Down
Page forward through
data screens.
Power
Back
Turn backlight on and off. Power off.
Start a new lap (activity
mode).
Enter
Start and stop an activity. Reset your current activity.
Display time and status information.
Access Main Menu.
Save your current location, advance to
next session (multisport).
5
Page 13
Recording an Activity
Before the start of an activity, select the
Activity Profile that matches the activity
type and desired settings of the activity you
are performing. Activity Profiles are fully
customizable and include: Activity Types (run,
bike, swim, other), data screens, alerts, and
many more customizable features.
Setting the Activity Profile
2. Use the UP and DOWN buttons to
highlight the Activity Profile and press
ENTER.
Starting the Activity Recording
With the appropriate Activity Profile selected,
start recording an activity. If you are already
recording an activity, you will need to reset the
recording before continuing. (See
Activity Recording
.)
Saving the
1. Press and hold the DOWN button.
2. Use the DOWN button to highlight
“Settings”.
3. Press ENTER.
4. Use the DOWN button to highlight
“Activity Profiles”
5. The first line displays the currently
selected activity. If it needs to be
changed, press ENTER.
6. Use the UP and DOWN buttons to
highlight the activity type and press
ENTER.
Preset Activity Profiles
Icon Name Full Name
MULTI Activity made up of
multiple activities.
ROAD Running - Road
MRTHN Running - Marathon
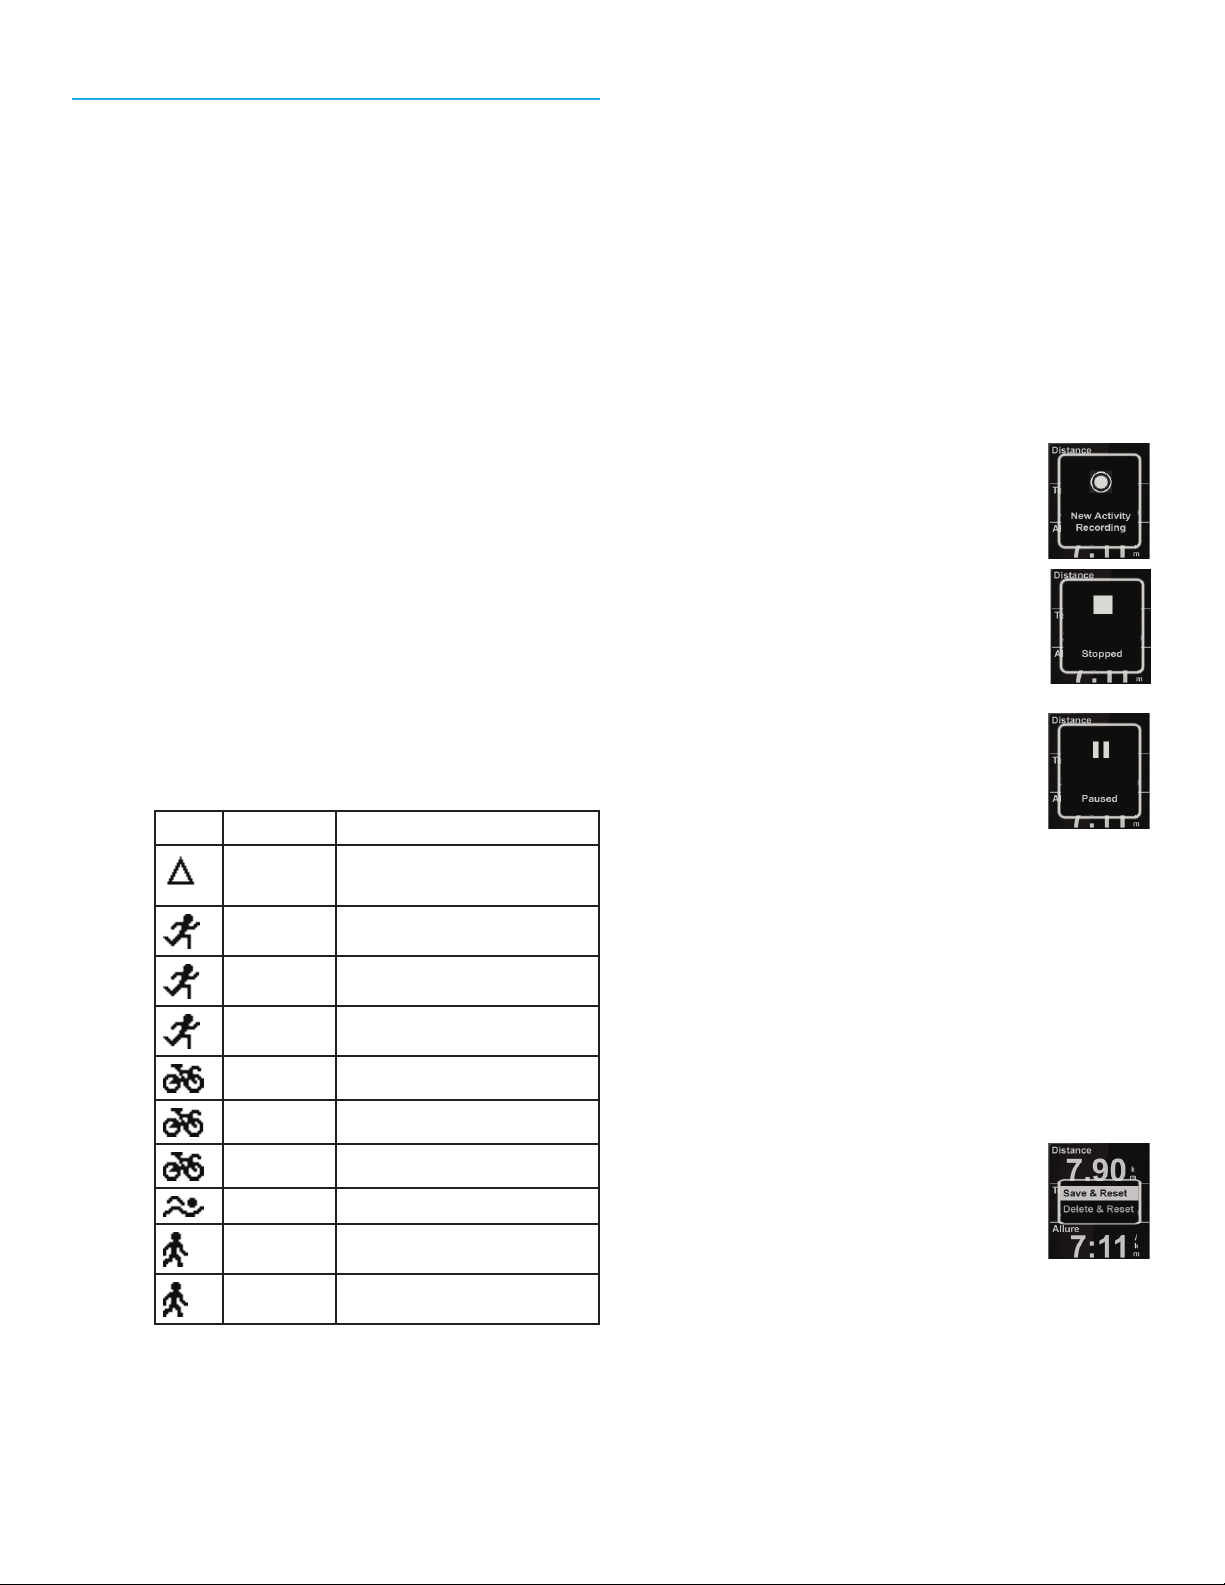
1. While viewing an Activity screen press
ENTER.
2. The New Activity popup is
displayed and Switch will
begin recording the activity.
3. To Stop recording, press
ENTER.
4. Press ENTER again to
resume.
5. The recording can pause
automatically when there is
no change in location (i.e.,
stopped). Auto Pause can be turned on
or off in the Activity Settings.
Note: By default, Auto Pause is active
only for biking activities.
TRAIL Running - Trail
ROAD Bicycling - Road
MNTN Bicycling - Mountain
CRIT Bicycling - Criterium
OPEN Swimming
WALK Walking
HIKE Hiking
Setting the Activity Profile (Shortcut)
1. Press and hold the UP and DOWN
buttons.
Saving the Activity Recording
The activity recording can be saved to the
history which can then be uploaded to various
fitness sites.
1. Press ENTER to stop the
recording.
2. Press and hold ENTER. The
Reset popup is displayed.
Note: If the recording is not stopped or
if there is no active recording, the “Action
Not Permitted” popup is displayed.
3. Select “Save & Reset” to store the activity
to History or select “Delete & Reset” to
erase the recording.
Note: Press the BACK button to cancel.
6
Page 14

Start Reminder
Laps
The Start Reminder is displayed whenever you
are moving and there is no active recording or
if you have stopped recording. This alert is a
reminder in case you forgot to start recording.
Press BACK (Cancel) to close the popup or
ENTER to begin or resume recording. To turn
the Start Reminder on or off go to: Settings >
Device Settings > Recording > Smart Reminder.
Multisport Activity
Multisport (MULTI) is a special activity profile
that combines multiple Activity Profiles into
multisport event. You can record multiple
activities into one recording.
The Activity Profiles can be selected from
the Activity Profiles function. (See
Profiles
Activity.)
for details on setting up the Multisport
Activity
Using a Multisport Profile
All activities begin on Lap 1. The Switch can
automatically step to a new lap based upon
distance or time or a new lap can be started
manually by pressing the BACK button.
Auto: The criteria for when the auto lap is
triggered is part of the activity profile that is
currently being used.
As an example, when using a biking profile the
auto lap could be set for every 15 minutes and
a running profile could be set for every mile.
Manual: A new lap can be manually triggered
by pressing the BACK while a session is active.
You can manual trigger a new lap even while
automatic lap triggering is set. For example if
you are using a running activity with auto lap
set for every mile, you can manually trigger
a new lap with the BACK button and the
automatic trigger will set the next lap at a mile
from that point.
1. Set the activity profile to MULTI. (See
Activity Profiles
2. From the Activity screen press ENTER to
begin the Multisport Activity.
Note: MULTI is a collection of Activity
Profiles. The data screens, alerts, Activity
Pacer, and other settings, are set within
the respective Activity Profiles.
3. Begin your activity as normal. To step to
the next activity or transition, press and
hold the BACK button. A popup will be
displayed with the profile name, time and
distance.
Note: waypoints cannot be marked
while in Multisport.
4. When finished, press ENTER to stop
recording. Press and hold ENTER to save
(or delete) the recording.
.)
7
Page 15

Activity Profiles
The Activity Profile function of Switch provides the means by which you can select the type of
activity you are performing and customize the data screens, display preferences, training alerts and
Activity Pacer for each Activity Profile.
Activity Profile
Selecting the Active Activity Profile
1. Press and hold the DOWN button.
2. Use the DOWN button to highlight
“Settings”.
3. Press ENTER.
4. Use the DOWN button to highlight
“Activity Profiles”.
5. The first line displays the currently
selected activity. If it needs to be
changed, press ENTER.
6. Use the UP and DOWN buttons to
highlight the Activity Profile and press
ENTER.
Preset Activity Profiles
Icon Name Full Name
MULTI Activity made up
of multiple (2 - 5)
activities.
ROAD Running - Road
MRTHN Running - Marathon
Customizing the Activity Profile
Selecting the Activity Profile to
Customize
1. Press and hold the DOWN button.
2. Use the DOWN button to highlight
“Settings”. Press ENTER.
3. Use the DOWN button to highlight
“Activity Profiles”.
4. Use the DOWN button to highlight “All
Profiles”. Press ENTER.
5. Use the DOWN button to highlight the
profile you want to customize. Press
ENTER.
Displaying or Hiding an Activity Profile
1. Follow these steps in “Selection the
Activity Profile to Customize” to hide or
display an Activity Profile from the Activity
Profile pop-up menu. You can access
pop-up menu by holding the UP & DOWN
buttons at the same time).
2. Highlight the “Show” field and press
ENTER.
TRAIL Running - Trail
ROAD Bicycling - Road
MNTN Bicycling - Mountain
CRIT Bicycling - Criterium
OPEN Swimming
WALK Walking
HIKE Hiking
3. Press ENTER to change the state of
showing the profile.
When checked the profile will be
displayed in the list of available Activities
Profiles. When unchecked, the Activity
Profile will be hidden.
8
Page 16

Changing the Activity Profile Name
1. Follow the steps in “Selection the Activity
Profile to Customize” to hide or display
an Activity Profile from the Activity Profile
pop-up menu. You can access popup menu by holding the UP & DOWN
buttons at the same time).
2. Highlight the “Name” field and press
ENTER.
3. Press UP or DOWN to change the
character. Press ENTER to accept the
character and move to the next character
or use BACK to move to the previous
character.
Note: Activity Profile names can only be
five characters in length.
4. Pressing ENTER on the last character
accepts the name change.
Changing the Activity Type
1. Follow the steps in “Selection the Activity
Profile to Customize” to hide or display
an Activity Profile from the Activity Profile
pop-up menu. You can access popup menu by holding the UP & DOWN
buttons at the same time).
2. Highlight the “Type” field and press
ENTER.
3. Highlight the desired type (Run, Bike,
Swim or Other) and press ENTER.
Adding a Data Screen
1. Follow the steps in “Selection the Activity
Profile to Customize” to hide or display
an Activity Profile from the Activity Profile
pop-up menu. You can access popup menu by holding the UP & DOWN
buttons at the same time).
2. Highlight Data Screens and press
ENTER.
3. Highlight “Add Screen” and press
ENTER.
4. Press UP or DOWN buttons to select the
number of data items to be displayed (1 -
6). Press ENTER.
5. Press UP or DOWN buttons to select a
field and press ENTER.
6. Select the Category and then the data
type. Press ENTER.
A complete chart of categories and data
types are presented in Addendum B.
Customizing an Data Screen
1. Follow the steps in “Selection the Activity
Profile to Customize” to hide or display
an Activity Profile from the Activity Profile
pop-up menu. You can access popup menu by holding the UP & DOWN
buttons at the same time).
2. Highlight “Data Screens” and press
ENTER.
3. Highlight Screen # and press ENTER.
4. Highlight “Edit” and press ENTER.
5. Press UP or DOWN buttons to select the
number of data items to be displayed (1 -
6). Press ENTER.
6. Press UP or DOWN buttons to select a
field and press ENTER.
7. Select the Category and then the data
type. Press ENTER.
A complete chart of categories and data
types are presented in Addendum B.
Deleting an Data Screen
1. Follow the steps in “Selection the Activity
Profile to Customize” to hide or display
an Activity Profile from the Activity Profile
pop-up menu. You can access popup menu by holding the UP & DOWN
buttons at the same time).
2. Highlight “Data Screens” and press
ENTER.
3. Highlight Screen # and press ENTER.
Note: The maximum number of data
screens that can be in any Activity Profile
is ten.
4. Highlight “Delete” and press ENTER.
5. Confirm the deletion by pressing ENTER
or CANCEL to exit without deleting the
screen.
9
Page 17

Setting an Activity Pacer
The Activity Pacer helps complete an activity
of a specified goal (distance, time, speed/pace,
or all of the above). Once enabled and the
goals are set, Switch will present data to help
achieve the goal.
1. Follow the steps in “Selecting the Activity
to Customize” and select the Activity
Profile.
2. Highlight “Activity Pacer” and press
ENTER.
3. Enable the Activity Pacer by pressing
ENTER with the “Enable” field
highlighted. (When checked, the Activity
Pacer is enabled, unchecked and it’s
turned off.)
4. Highlight the “Goal” field and press
ENTER.
Press UP or DOWN buttons to highlight
the desired goal and press ENTER.
5. Set the Dist, Time, and/or Pace goals by
highlighting the field and press ENTER.
Press UP and DOWN buttons to set the
digit and press ENTER to step to the next
digit.
Note: Only those fields that apply to the
goal set in step 4 can be accessed.
Setting Recording Preferences (Auto
Pause)
Auto Pause causes Switch to automatically
pause when it detects no movement and to
resume when it begins to move. Common
usage is for biking when it is desired that the
recording be paused while stopped for a traffic
light and resumed when the activity continues.
1. Follow the steps in “Selecting the Activity
to Customize” and select the Activity
Profile.
2. Highlight “Recording Prefs” and press
ENTER.
3. Enable auto pause by pressing ENTER
with the “Auto Pause” field highlighted.
(When checked, Auto Pause is enabled,
unchecked and it’s turned off.)
Setting Recording Preferences (Auto Lap)
Auto Lap causes Switch to automatically finish
the current lap and start a new one. The
automatic lap trigger can be set for a distance,
time or location.
1. Follow the steps in “Selecting the Activity
to Customize” and select the Activity
Profile.
2. Highlight “Recording Prefs” and press
ENTER.
Setting Display Preferences
1. Follow the steps in “Selecting the Activity
to Customize” and select the Activity
Profile.
2. Highlight “Display Prefs” and press
ENTER.
3. To change the default for Speed or Pace,
highlight the Spd/Pace field and press
ENTER. Select “Speed” or “Pace” and
press ENTER.
4. Auto Scroll: When enabled, Auto Scroll
will cause Switch to automatically step
through the data screens.
Enable Auto Scroll by pressing ENTER
with the “Auto Scroll” field highlighted.
(When checked, Auto Scroll is enabled,
unchecked and it’s turned off.)
3. Enable Auto Lap by pressing ENTER with
the “Auto Lap” field highlighted. (When
checked, Auto Lap is enabled, unchecked
and it’s turned off.)
4. If enabled, highlight the “Trigger” field
and press ENTER. Select the desired lap
trigger, distance, time or location.
5. Depending upon which trigger point
is selected, options will be displayed to
define the trigger duration. (For example:
if Distance is selected, a Distance field is
displayed. Highlight the field and press
ENTER and begin entering the desired
distance for each lap.)
10
Page 18

Setting Training Alerts
Training Alerts are tools to alert you when
a predefined training criteria has been met.
Alerts can be set for calories burned, distance
traveled, session time, pace (minimum and/or
maximum) is met, heart rate* (minimum and/
or maximum) is met and cadence** (minimum
and/or maximum) is met.
1. Follow the steps in “Selecting the Activity
to Customize” and select the Activity
Profile.
2. Highlight “Training Alerts” and press
ENTER.
3. Highlight the category for the alert and
press ENTER.
4. Enable the alert by pressing ENTER with
the “Enable” field highlighted. (When
checked, the alert is enabled, unchecked
and it’s turned off.)
1. Follow the steps in “Selecting the Activity
to Customize” and select the activity
MULTI.
2. Set the activities and the order that they
will be performed. Highlight the Activity
Profile and press ENTER. Select from the
options: Insert, Edit, or Remove.
Insert: Select the Activity Profile to be
inserted above the highlighted Activity
Profile.
Edit: Select the Activity Profile that will
replace the highlighted Activity Profile.
Remove: Removes the highlighted
Activity Profile from the MULTI activity.
3. To enable a transition between each
activity, highlight the “Transition”
field and press ENTER. When checked
transitions will be added between the
Activity Profiles.
5. Highlight the additional data field and set
the value that you want the alert to be
presented.
Copy Settings to another Activity Profile
Settings from one profile can be copied to
another profile to shorten the time setting
profiles that are similar to another.
1. Follow the steps in “Selecting the Activity
to Customize” and select the Activity
Profile.
2. Highlight “Copy Settings” and press
ENTER.
3. Highlight the Activity Profile for the
settings to be copied to and press ENTER.
Multisport Activity
Setting the Multisport (MULTI) Activities
A multisport activity can be made up of two to
five individual Activity Profiles.
Note: all settings (data screens, alerts, Activity
Pace, etc.) are inherited from each Activity
Profile.
11
Page 19

History
Whenever an activity recording is completed the user has the option of deleting the activity or
saving it to history. Once an activity recording has been saved it can be viewed or deleted using
the History function.
Accessing History Menu
1. Press and hold the DOWN button.
2. Use the DOWN button to highlight
“History”.
3. Press ENTER.
Activity History
Activity History provides a way to view the
details for a saved activity, the details for each
lap in the activity, or the means to delete the
activity.
Viewing Activity History
1. Press and hold the DOWN button.
2. Use the DOWN button to highlight
“History”. Press ENTER.
3. Highlight “Activity History” and press
ENTER.
4. The top of the menu displays the number
of activities that have been saved. To
view a saved activity, highlight “View
Activities” and press ENTER.
5. A list of activities are displayed, sorted by
date. Highlight the desired activity and
press ENTER.
Activity History Screens - View Activity
The first screen displayed provided
the date and time the activity was
started. It also displays the icon
and name for the type of activity.
Viewing Activity Summary
1. From the View Activity screen, highlight
“View Summary” and press ENTER.
Activity History Screens - Activity Summary
The Activity Summary screen
consists of six data screens that
summarize the activity. Time,
speed, pace, elevation, grade,
temperature (Switch Up only),
heart rate, cadence and power summaries
can be viewed by using the UP and DOWN
buttons.
Viewing Laps
1. From the “View Activity” screen, highlight
“View Laps” and press ENTER.
2. Highlight the lap to be viewed and press
ENTER.
Activity History Screens - Lap Summary
The Lap Summary screen consists of six data
screens that summarize the details of the lap
chosen. Time, speed, pace, elevation, grade,
temperature (Switch Up only), heart rate,
cadence and power summaries can be viewed
by using the UP and DOWN buttons.
Deleting the Activity
1. From the “View Activity” screen, highlight
“Delete Activity” and press ENTER.
2. Confirm the deletion by pressing ENTER
(or BACK to cancel).
12
Page 20

Deleting Old Activities
Resetting Activity Totals
Activities older than one month can be deleted
as a group.
1. Press and hold the DOWN button.
2. Use the DOWN button to highlight
“History”. Press ENTER.
3. Highlight “Activity History” and press
ENTER.
4. Highlight “Delete Old” and press ENTER.
5. Confirm the deletion by pressing ENTER
(or BACK to cancel).
Deleting All Activities
1. Press and hold the DOWN button.
2. Use the DOWN button to highlight
“History”. Press ENTER.
3. Highlight “Activity History” and press
ENTER.
4. Highlight “Delete All” and press ENTER.
5. Confirm the deletion by pressing ENTER
(or BACK to cancel).
1. Press and hold the DOWN button.
2. Use the DOWN button to highlight
“History”. Press ENTER.
3. Highlight “Activity Totals” and press
ENTER.
4. Highlight the activity group to view totals
for and press ENTER.
5. While viewing the Totals screen, press
ENTER.
6. Confirm the reset by pressing ENTER (or
BACK to cancel).
Location History
Details about locations that have been marked
can be viewed under Location History. When
accessed, the date and time the location was
marked, the latitude/longitude of the location,
and the elevation is displayed.
Viewing a Marked Location
1. Press and hold the DOWN button.
Activity Totals
Totals for each activity type (run, bike, swim)
or all activities can be viewed to see the time,
distance and estimated calories burned.
Viewing Activity Totals
1. Press and hold the DOWN button.
2. Use the DOWN button to highlight
“History”. Press ENTER.
3. Highlight “Activity Totals” and press
ENTER.
4. Highlight the activity group
to view totals for and press
ENTER.
2. Use the DOWN button to highlight
“History”. Press ENTER.
3. Highlight “Location History” and press
ENTER.
4. Highlight “View Locations” and press
ENTER.
5. Locations are displayed in the
order that they were marked.
Highlight the desired location
and press ENTER.
Deleting All Marked Locations
1. Press and hold the DOWN button.
2. Use the DOWN button to highlight
“History”. Press ENTER.
3. Highlight “Location History” and press
ENTER.
4. Highlight “Delete All” and press ENTER.
5. Confirm the deletion by pressing ENTER
(or BACK to cancel).
13
Page 21

Deleting a Marked Location
1. Press and hold the DOWN button.
2. Use the DOWN button to highlight
“History”. Press ENTER.
3. Highlight “Location History” and press
ENTER.
4. Highlight “View Locations” and press
ENTER.
5. Locations are displayed in the order that
they were marked. Highlight the location
to be deleted and press ENTER.
6. Press ENTER.
7. Confirm the deletion by pressing ENTER
(or BACK to cancel).
14
Page 22

Navigation
The Navigation function provides a graphical display of your current track and locations you have
saved. The current track, or ‘breadcrumbs’ for the activity, visually displays the path of your activity
and provides awareness to the start of the activity as well as any locations you may have marked.
There is the option of displaying simple navigation instructions back to the start of your activity
or to the last marked location. When navigation is started, a destination line from your current
location to the destination is shown and continually updates as you travel. Additionally, the
distance (“as the crow flies”) to your destination as well as the direction of the destination is
displayed.
Navigation Screen
This is the standard navigation screen when
there is no destination set.
The top of the screen will always point to the
direction you are moving, also referred to as
Track Up. In the bottom left corner is the map
scale which is changed by using the UP or
DOWN buttons. The bottom right is a standard
compass which will display the direction you
are heading while moving.
The center of the display (triangle) is your
current position with the path you have
travelled shown with the dashed line. The
“S” indicates the start of the activity and the
numbered flags indicate locations you have
marked along the way.
Navigation Screen with Destination
When a destination has been selected and the
Switch is navigating, three navigation items
added.
The heavy straight line displays the “as the
crow flies” line from the current location to
the destination. (Destinations can be the
starting point of the activity or the last location
marked.) In the upper right corner is an arrow
pointing towards the destination and the
upper left is the distance.
15
Page 23

Accessing the Navigation Screen
Marking Location
1. Press and hold the DOWN button until the
popup menu is displayed.
2. Use the DOWN button to highlight
“Navigation”.
3. Press ENTER.
Changing the Map Scale
1. While viewing the Navigation screen use
the UP (zoom out) and DOWN (zoom in)
buttons to change the map scale.
Navigation Mode
Starting Navigation
1. Press and hold the DOWN button until the
popup menu is displayed.
2. Highlight “Settings” and press ENTER.
3. Highlight “GPS Settings” and press
ENTER.
4. Highlight “Navigation” and press ENTER.
5. Highlight “Begin Navigation” and press
ENTER.
6. Select the destination. “Activity Start”
(if a current activity is recording) or “Last
Location” (the last location marked).
Stopping Navigation
Whenever the Switch has GPS satellite signal
it can capture your current location. This
location can be “marked” and stored in Switch
until it is turned off.
Marked locations will be denoted on the
Navigation screen by a numbered flag. The
first location marked will be denoted with the
number 1, the next 2 and so on.
There are two ways of marking your location.
Marking Location using the BACK button
1. Press and hold the BACK button.
2. A popup will be displayed indicating
that the location has been saved and the
latitude and longitude of the location.
Marking Location using Settings
1. Press and hold the DOWN button until the
popup menu is displayed.
2. Highlight “Settings” and press ENTER.
3. Highlight “GPS Settings” and press
ENTER.
4. Highlight “Save Location” and press
ENTER.
5. A popup will be displayed indicating
that the location has been saved and the
latitude and longitude of the location.
1. Press and hold the DOWN button until the
popup menu is displayed.
2. Highlight “Settings” and press ENTER.
3. Highlight “GPS Settings” and press
ENTER.
4. Highlight “Navigation” and press ENTER.
5. Highlight “End Navigation” and press
ENTER.
6. You can select “Begin Navigation” or
press and hold the DOWN button to select
viewing the Activity or Navigation screen.
16
Page 24

ANT+™ Sensors
Switch is compatible with ANT+™ sensors to provide additional information about your activity.
Supported sensors
•Heart rate
•Foot pod
•Bike speed/cadence
•Bike speed
•Bike cadence
•Power meter.
Compatibility with Activity types
Sensor Run Bike Swim Other
Heart Rate
Foot Pod
Bike (All)
Power Meter
Options :
•Bike Spd & Cadence - Speed and cadence
can be provided by separate sensors or by
a combined speed and cadence sensor.
Select the option that matches your
configuration.
•Bike Spd Source - Speed can be provided
from a bike speed sensor (combined or
separate) or from a power meter sensor.
Select the option that matches your
configuration.
•Bike Cad Source - Cadence can be
provided from a bike cadence sensor
(combined or separate) or from a power
meter sensor. Select the option that
matches your configuration.
Sensors
Settings
Speed and cadence can be provided from
multiple sensors. Switch needs to know
which sensor configuration is in use to know
where speed and cadence information will be
provided from.
Accessing ANT+ Settings
1. Press and hold the DOWN button.
2. Use the DOWN button to highlight
“Settings” and press ENTER.
3. Use the DOWN button to highlight
“Device Settings” and press ENTER.
4. Use the DOWN button to highlight “ANT+
Settings” and press ENTER.
5. Highlight the option and press ENTER.
By default all sensors are disabled. Before
using an ANT+ sensor Switch needs to have
that sensor type enabled so it can begin
connecting with the sensor.
Enabling ANT+ Sensors
1. Press and hold the DOWN button.
2. Use the DOWN button to highlight
“Settings” and press ENTER.
3. Use the DOWN button to highlight
“Device Settings” and press ENTER.
4. Use the DOWN button to highlight “ANT+
Sensors” and press ENTER.
5. Highlight the sensor type and press
ENTER. (If in ANT+ Settings bike speed
and cadence is set as a combined sensor,
only “Bike Spd/Cad” is displayed. If set as
separate sensors, both “Bike Speed” and
“Bike Cadence” are displayed.}
17
Page 25

6. If the sensor chosen is not compatible
with the active Activity Profile, a warning
will appear. The sensor can still be
enabled, the warning is a reminder that
the sensor is not compatible with the
current activity type selected.
7. Press ENTER to toggle the current state
of the sensor (enabled or disabled).
8. When enabled information on the status
of the sensor is displayed.
Once a sensor has been enabled, Switch
will begin searching for the sensor. After
communication with the sensor has been
established a notification will be displayed
indicating that the sensor has been found and
connected.
Status Definitions :
•Connected - Switch has made a connection
with the sensor.
•Searching - Switch is searching for the
sensor.
•Standby - The sensor is enabled but is not
compatible with the current activity type.
When the activity type is changed to one
that is compatible with the sensor, Switch
will begin searching automatically.
18
Page 26

Quick Info Screen
The Quick Info screen displays some important information that the user will find useful whenever
using Switch. It is displayed in two variations, Activity and Navigation depending upon the mode
Switch is in when accessed.
Activity Quick Info Screen
Accessing the Activity Quick Info Screen
1. While viewing the Activity Screen press
and hold the UP button until the Quick
Info screen is displayed.
2. To exit the Quick Info screen press the
BACK button.
Activity Quick Info Screen Details
Information Icon Details
Time of Day 12:25:20PM Displays the time of day in the format set in
“Device Settings”
Date 12/24 Displays the date in the format set in
“Device Settings” without the year.
Sunrise / Sunset
Battery Life
Internal Memory
External Battery
Satellite Status
7:00AM
7:00PM
100%
20%
Sunrise: Displays the time that the sun will
rise in the format set in “Device Settings”
without seconds.
Sunset: Displays the time that the sun will
set in the format set in “Device Settings”
without seconds.
Displays the remaining battery charge in
Switch both graphically and percentage.
Displays the amount of internal memory
being used.
External Battery is not connected.
External Battery is connected.
GPS disabled. Not searching for satellites.
GPS satellites not found. Not computing
location information.
GPS satellites found. Computing location
information.
19
Page 27

Information Icon Details
Activity Recording Status
Activity Type
Heart Rate Monitor
Foot Pod Sensor
Bike Speed Sensor
Bike Cadence Sensor
Power Meter Sensor
TRAIL
Not recording
Recording
Recording Stopped
Displays the icon and name of the current
activity type selected.
Heart Rate Monitor not connected.
Heart Rate Monitor connected.
Foot Pod Sensor not connected.
Foot Pod Sensor connected.
Bike Speed Sensor not connected.
Bike Speed Sensor connected.
Bike Cadence Sensor not connected.
Bike Cadence Sensor connected.
Power Meter Sensor not connected.
Power Meter Sensor connected.
20
Page 28

Navigation Quick Info Screen
Accessing the Navigation Quick Info
Screen
3. While viewing the Navigation Screen
press and hold the UP button until the
Quick Info screen is displayed.
4. To exit the Quick Info screen press the
BACK button.
Navigation Quick Info Screen Details
Information Icon Details
Time of Day 12:25:20PM Displays the time of day in the format set in
“Device Settings”
Date 12/24 Displays the date in the format set in
“Device Settings” without the year.
Sunrise / Sunset
7:00AM
Sunrise: Displays the time that the sun will
rise in the format set in “Device Settings”
without seconds.
7:00PM
Sunset: Displays the time that the sun will
set in the format set in “Device Settings”
without seconds.
Heading
Displays the current heading in one of eight
cardinal headings (N, NE, E, SE, W, NW, S,
SW)
Satellite Status
GPS disabled. Not searching for satellites.
GPS satellites not found. Not computing
location information.
GPS satellites found. Computing location
information.
GPS Accuracy 5 ft. Accuracy of computed GPS location in the
format set in “Default Units”.
Current Location
34.10360
o
Latitude of current location in the format set
in “Default Units/Coordinates”.
o
117.80296
Longitude of current location in the format
set in “Default Units/Coordinates”.
21
Page 29

Settings
GPS Settings
Accessing GPS Settings
1. Press and hold the DOWN button.
2. Highlight “Settings” and press ENTER.
3. Highlight “GPS Settings” and press
ENTER.
Enabled : Checked, GPS is enabled;
unchecked, GPS is disabled.
Navigation : Begins or ends navigation. Sets
destination, Activity Start or Last Marked.
See chapter
(Not shown when GPS is disabled.)
Save Location : Saves (marks) current
location. See chapter
more details. (Not shown when GPS is
disabled.)
GPS Status : [Informational] Provides current
status of the GPS connection, Searching or
Connected.
Accuracy : [Informational] Displays
estimated accuracy of the computed
location.
Navigation
Navigation
for more details.
for
Device Settings
Accessing GPS Settings
1. Press and hold the DOWN button.
2. Highlight “Settings” and press ENTER.
3. Highlight “Device Settings” and press
ENTER.
Language : Options - Deutsch, English,
Español, Français, Italiano, or Nederlands.
Switch will restart after language selection.
Backlight : Sets the time the backlight will
remain on before automatically turning
off to preserve battery life. Options - 15
seconds, 30 seconds, Remain On.
Date & Time : Displays the current date and
time. Option to set date format and time
format. Option to set time source (Auto
or Manual. In manual, time zone and DST
needs to be selected.)
Default Units : Options to set the default
units of measure for coordinate system,
speed/distance, elevation, height/weight,
temperature (Switch Up), heart rate, and
power.
Satellites : [Informational] Number of
satellites Switch is currently receiving GPS
signals from.
Recording : Enable or disable “Start
Reminders”. Enable or disable “Auto
Power Off”. Select whether the data
source for running or biking will come
from the GPS or an ANT+ sensor. Select
to include or exclude 0s from average
cadence and power.
ANT+ Settings : See chapter on
Sensors
ANT+ Source : See chapter on
Feedback : Set type of feedback used for
alerts and button presses. Switch - sound
on or off. Switch Up - sound, vibration, or
off.
.
ANT+
ANT+ Sensors
.
22
Page 30

Training Zones
Device Information
Accessing Training Zones
1. Press and hold the DOWN button.
2. Highlight “Settings” and press ENTER.
3. Highlight “Training Zones” and press
ENTER.
HR Zones : Provides means to set up and use
Heart Rate Zones for each activity type.
Options : Set the heart rate zone method
(manual, % Max HR, % HR Reserve), set the
resting and maximum heart rate, and view
the heart rate zone chart.
Power Zones : Provides means to set up
and use Power Zones for all activity type.
Options : Set the power zone method
(manual, % FTP), input the Functional
Threshold Power (FTP), and view the
power zone chart.
Accessing Device Information
1. Press and hold the DOWN button.
2. Highlight “Settings” and press ENTER.
3. Highlight “Device Info” and press ENTER.
Model : [Informational] Displays Switch or
Switch Up.
Serial Number : [Informational] Displays the
unique serial number for the device.
Software : [Informational] Displays version
of current software firmware.
Model : [Informational] Displays remaining
battery life (percentage).
Memory : [Informational] Displays the
amount of memory used (percentage).
User Information
Accessing User Information
1. Press and hold the DOWN button.
2. Highlight “Settings” and press ENTER.
3. Highlight “User Info” and press ENTER.
Emergency Details : The first four lines
display the name, phone number,
emergency name and emergency phone
number entered.
Contact Information : Provides means
to enter the name, phone number,
emergency name and emergency phone
that will be displayed in “Emergency
Details”.
Personal Data : Provides a method to enter
date of birth, gender, height, weight and
resting heart beat.
23
Page 31

Magellan Active Website
active.magellangps.com
Overview
We built Magellan Active to help you get the
most out of your Magellan fitness devices.
Magellan Active offers a rich activity upload
and device software update experience, the
ability to view all of the data captured by
our fitness devices, a unified approach to
supporting multisport activities, and much
more. But we understand we can’t be all
things to all people, so we let you take full
control of your data and work proactively with
many of the wonderful third party websites
to ensure compatibility. Using a supporting
software solution such as Magellan Active or a
compatible third-party website or application
will help you get the most out of your
Magellan fitness devices.
Getting Started with Magellan Active
1. Go to active.magellangps.com/start.
2. Click “Getting Started,” within the
Magellan Active section.
3. Follow the set by set online instructions to
get up and running with Magellan Active.
24
Page 32

Activity Files
Uploading Activity Files
Note: Before uploading, capture an activity
with Switch.
1. Log in to your Magellan Active account.
4. Select the activities your want to upload
from the list displayed. Click “Next”.
5. Specify the options you want to apply
to you activities after they have been
successfully uploaded. Also select if
you want you activities to be “Public” or
“Private”.
2. Connect Switch to your personal
computer using the charging/data cable.
3. Click on the Upload button.
If this is the first time uploading files you
will be asked to install the device plugin.
Follow the onscreen instructions.
Profile
6. Click “Upload”.
7. Go to your Profile page by clicking on
your user name at the top or go to the
Activities page by clicking on the Activities
link in the top navigation. .
Profile Page
This is your personal Profile page. The most recent activities, private and public, that you have
uploaded are displayed as well as a listing of what updates have been applied to your profile. Click
on “EDIT PROFILE” to personalize the profile page for you. This page can be shared to display your
public activities. Private activities can only be viewed by you.
Viewing an individual activity is as easy as clicking on the desired activity.
25
Page 33

All of the data for the activity are displayed, including a map with line of your activity. Even the
data for the individual laps can be displayed by clicking on the lap from the listing of laps below
the graph. When the lap is displayed, click on the “Activity/Lap Selector”
different lap or return to the Activity page.
button to view a
26
Page 34

Activities Page
Your Profile page displays your recent activities but you can also view all of your activities from the
Activities Page. Click on the Activities link in the Navigation Bar to view your Activities Page.
Exporting Activity Files
Activities that you have uploaded can be
exported to different formats (.FIT, .kml, gpx, or
.csv).
1. Go to the Activity page.
2. Select the desired activity.
3. Click on “Export” to select the desired
format.
4. Follow the onscreen instructions to save
the file.
Sharing an Activity
1. Go to the Activity page.
2. Select the desired activity.
Note: Only Public activities can be shared.
If the activity is labeled “Private”, you need
to set it to “Public” before sharing.
3. Below the “Export to” button is a listing of
social media pages you can
share your activity to.
4. Follow the onscreen instructions to share
your activity.
27
Page 35

Addendum A - Switch Specifications
Physical & Performance
Unit Dimensions (WxHxD) ............................................................ 4.5 x 5.8 x 1.7 cm
Display Type ........................................................................................ High Resolution, Monochrome
Display Dimensions (WxH) ............................................................. 2.1 x 2.4 cm
Display Resolution ............................................................................ 144 x 168 (pixels)
Weight ................................................................................................. 69 grams (Switch)
71 grams (Switch Up)
Water Resistance .............................................................................. 50 meters
Battery Type ....................................................................................... Rechargeable
Lithium-ion
Battery Life .......................................................................................... 8 hrs.
Memory & Navigation
Activity History (Memory) ............................................................... 60 hrs (1 second recording)
Data Transfer ..................................................................................... USB
Breadcrumb Navigation ................................................................. Yes
Locations ............................................................................................. Yes
Features
GPS - High Sensitivity ....................................................................... Yes
Barometric Altimeter ........................................................................ No (Switch)
Yes (Switch Up)
Temperature ....................................................................................... No (Switch)
Yes (Switch Up)
Audio Alert and Feedback ............................................................. Yes
Vibration Alert and Feedback ....................................................... No (Switch)
Yes (Switch Up)
A-1
Page 36

Alerts (Pace, Heart Rate) .................................................................. Yes
Auto Lap ............................................................................................... Yes
Customizable Activity Screen(s) .................................................... Yes
Auto Scroll Activity Screens ............................................................ Yes
Customizable Activity Profiles ....................................................... Yes (9)
Quick Info Screens ........................................................................... Yes
Auto Pause .......................................................................................... Yes
Multisport Mode ................................................................................ Yes
Activity Pacer ...................................................................................... Yes
Heart Based Calories ........................................................................ Yes
Quick Start (Start Activity without GPS fix ................................. Yes
Accessories
Heart Rate Monitor .......................................................................... Yes (some versions)
Foot Pod Compatible
(displays data from compatible 3rd party ANT+ sensor) ...... Yes
Bike Speed & Cadence Sensor Compatible
(displays data from compatible 3rd party ANT+ sensor) ...... Yes
Power Meter Compatible
(displays data from compatible 3rd party ANT+ sensor) ...... Yes
Software Analysis
Computer compatibility .................................................................. Windows & Mac
Compatible with third-party
(MapMyFitness, Strava, Training Peaks, SportsTracks) ........... Yes
File format ............................................................................................ .FIT
A-2
Page 37

Addendum B - Available Data Types
Category Measurement Description Units
Cadence
Requires a
Foot Pod
Cadence Avg Cadence This is the cumulative average for the laps in the current
Cadence Max Cadence Maximum cadence measured during the current session. Revolutions per
Cadence Lap Avg Cad This is the cumulative average of instantaneous cadence
Cadence The number of revolutions of a bicycle crank per minute. Revolutions per
minute (rpm).
Revolutions per
session.
readings for the current lap.
minute (rpm).
minute (rpm).
Revolutions per
minute (rpm).
Cadence Lap Max Cad This is the maximum cadence reading for the current
lap.
Cadence Prev Avg Cad This is the cumulative average of instantaneous cadence
readings for the previous lap.
Cadence Prev Max Cad This is the maximum cadence reading for the previous
lap.
Calories Calories Cumulative count of how many calories have been
burned during the session.
Calories Lap Calories Number of calories burned in the current lap. Calories (C).
Calories Prev Calories Number of calories burned in the previous lap. Calories (C).
Distance Distance Total distance travelled in the current session. Metric or
Distance Lap Distance Total distance travelled in the current lap. Metric or
Distance Prev Distance Total distance travelled in the previous lap. M Metric or
Elevation Elevation If using Switch, elevation is measured using GPS
calculations, with Switch Up elevation is measured using
the internal barometer.
Elevation Avg Elevation The average elevation for the current session within the
activity.
Elevation Max Elevation The maximum elevation for the recorded session within
the activity.
Elevation Min Elevation The minimum elevation for the recorded session within
the activity.
Elevation Elevation Gain The total elevation gain for the current activity. Metric (m) or
Elevation Elevation Loss The total elevation loss for the current activity. Metric (m) or
Elevation Elevation Net The net elevation change (gain - loss) for the current
activity.
Elevation Lap Avg Elev The average elevation for the current lap. Metric (m) or
Elevation Lap Max Elev The maximum elevation for the current lap. Metric (m) or
Elevation Lap Min Elev The minimum elevation for the current lap. Metric (m) or
Revolutions per
minute (rpm).
Revolutions per
minute (rpm).
Revolutions per
minute (rpm).
Calories (C).
statue.
statue.
statue.
Metric (m) or
statue (ft).
Metric (m) or
statue (ft).
Metric (m) or
statue (ft).
Metric (m) or
statue (ft).
statue (ft).
statue (ft).
Metric (m) or
statue (ft).
statue (ft).
statue (ft).
statue (ft).
B-1
Page 38

Category Measurement Description Units
Elevation Lap Elev Gain The elevation gained in the current lap. Metric (m) or
statue (ft).
Elevation Lap Elev Loss The elevation lost in the current lap. Metric (m) or
statue (ft).
Elevation Lap Elev Net The net elevation (gain - loss) for the current lap. Metric (m) or
statue (ft).
Elevation Prev Avg Elev The average elevation for the previous lap. Metric (m) or
statue (ft).
Elevation Prev Max Elev The maximum elevation for the previous lap. Metric (m) or
statue (ft).
Elevation Prev Min Elev The minimum elevation for the previous lap. Metric (m) or
statue (ft).
Elevation Prev Elev Gain The elevation gained in the previous lap. Metric (m) or
statue (ft).
Elevation Prev Elev Loss The elevation lost in the previous lap. Metric (m) or
statue (ft).
Elevation Prev Elev Net The net elevation (gain - loss) for the previous lap. Metric (m) or
statue (ft).
Grade Grade The amount of incline for the current session. Percentage (%)
Grade Avg Grade The average grade for the current session. Percentage (%)
Grade Avg + Grade The average positive grade for the current session. Percentage (%)
Grade Avg - Grade The average negative grade for the current session. Percentage (%)
Grade Max + Grade The maximum positive grade in the current session. Percentage (%)
Grade Max - Grade The maximum negative grade in the current session. Percentage (%)
Grade Lap Avg Grade The average grade for the current lap. Percentage (%)
Grade Lap Avg + Grd The average positive grade for the current lap. Percentage (%)
Grade Lap Avg - Grd The average negative grade for the current lap. Percentage (%)
Grade Lap Map + Grd The maximum positive grade in the current lap. Percentage (%)
Grade Lap Max - Grd The maximum negative grade in the current lap. Percentage (%)
Grade Prev Avg Grade The average grade for the previous lap. Percentage (%)
Grade Prev Avg + Grd The average positive grade for the previous lap. Percentage (%)
Grade Prev Avg - Grd The average negative grade for the previous lap. Percentage (%)
Grade Prev Max + Grd The maximum positive grade in the previous lap. Percentage (%)
Grade Prev Max - Grd The maximum negative grade in the previous lap. Percentage (%)
Heart Rate
Requires Heart
Rate Monitor
Heart Rate Avg HR The average number of heartbeats per minute for the
Heart Rate Max HR The maximum number of heartbeats per minute for the
Heart Rate Lap Avg HR The average number of heartbeats per minute for the
Heart Rate Lap Max HR The maximum number of heartbeats per minute for the
Heart Rate Prev Avg HR The average number of heartbeats per minute for the
Heart Rate Prev Max HR The maximum number of heartbeats per minute for the
Heart Rate The number of heartbeats per minute.
.
current session.
current session.
current lap.
current lap.
previous lap.
previous lap.
Beats per
minute (bpm)
Beats per
minute (bpm)
Beats per
minute (bpm)
Beats per
minute (bpm)
Beats per
minute (bpm)
Beats per
minute (bpm)
Beats per
minute (bpm)
B-2
Page 39

Category Measurement Description Units
Laps Lap # Number of laps in the current session.
Speed/Pace Speed
Speed/Pace Pace
[1]
[2]
Distance traveled divided by the time to travel that
distance.
Time to travel a distance divided by the distance traveled
in that time.
Metric (kph) or
statue (mph)
Metric (km) or
statue (mi)
Power Power Total rate of energy used in the current session. Watts (w),
%FTP (ftp),
kjhour (kj/h),
Power Zone (z)
Power Avg Power Average rate of energy used in the current session. Same as Power
Power Max Power Maximum rate of energy used in the current session. Same as Power
Power Lap Avg Power Average rate of energy used in the current lap. Same as Power
Power Lap Max Power Maximum rate of energy used in the current lap. Same as Power
Power Prev Avg Power Average rate of energy used in the previous lap. Same as Power
Power Prev Max Power Maximum rate of energy used in the previous lap. Same as Power
Temperature
Switch Up
Temperature The instantaneous temperature of the current session. Metric (°C) or
statue (°F )
only
Temperature Avg Temp The average temperature for the current session. Metric (°C) or
statue (°F )
Temperature Max Temp The maximum temperature for the current session. Metric (°C) or
statue (°F )
Temperature Lap Avg Temp The average temperature for the current lap. Metric (°C) or
statue (°F )
Temperature Lap Max Temp The maximum temperature for the current lap. Metric (°C) or
statue (°F )
Temperature Prev Avg Temp The average temperature for the previous lap. Metric (°C) or
statue (°F )
Temperature Prev Max Temp The maximum temperature for the previous lap. Metric (°C) or
statue (°F )
Time Time The cumulative amount of time for the current session.
Does not include time that the activity was stopped.
Time Paused Time The amount of time that the Switch was paused during
the current session.
Time Elapsed Time The cumulative amount of time for the current session.
Includes time that the activity was stopped.
Time Moving Time The amount of time that the Switch was moving during
the current session.
Time Lap Time The cumulative amount of time for the current lap. Does
not include time that the activity was stopped.
Time Lap Psd Time The amount of time that the Switch was paused during
the current lap.
Time Lap Elpsd Time The cumulative amount of time for the current lap.
Includes time that the activity was stopped.
Time Lap Mov Time The amount of time that the Switch was moving during
the current lap.
Time Prev Lap Time The cumulative amount of time for the previous lap.
Does not include time that the activity was stopped.
Time Prev Psd Time The amount of time that the Switch was paused during
the previous lap.
mm:ss /
hh:mm:ss
mm:ss /
hh:mm:ss
mm:ss /
hh:mm:ss
mm:ss /
hh:mm:ss
mm:ss /
hh:mm:ss
mm:ss /
hh:mm:ss
mm:ss /
hh:mm:ss
mm:ss /
hh:mm:ss
mm:ss /
hh:mm:ss
mm:ss /
hh:mm:ss
B-3
Page 40

Category Measurement Description Units
Time Prev Elsped Time The cumulative amount of time for the previous lap.
Includes time that the activity was stopped.
Time Prev Mov Time The amount of time that the Switch was moving during
the previous lap.
mm:ss /
hh:mm:ss
mm:ss /
hh:mm:ss
Vertical Speed Vertical Speed Vertical speed is the rate of speed based on a vertical
plane from the start of the activity to the current position
of the activity. If there is a gain in elevation, vertical
speed will be a positive number and a negative number
for a loss in elevation.
[1]
Speed has the following options: Speed, Avg Speed, Max Speed, Lap Avg Speed, Lap Max Speed, Prev Avg
Speed, Prev Max Speed.
[2]
Pace has the following options: Speed, Avg Pace, Max Pace, Lap Avg Pace, Lap Max Pace, Prev Avg Pace, Prev
Max Pace.
B-4
Page 41

Addendum C - Resting Heart Rate
Measuring Your Resting Heart Rate
The measurement of resting heart rate or pulse rate (the number of heart beats per minute) should
be taken after a few minutes upon waking while still lying in bed. Give your body some time to
adjust to the change from sleeping before taking your pulse (2-5 minutes). If you are not able to
take a measurement first thing in the morning, make sure you lie down for at least 10 minutes
before taking a measurement. Take a radial or carotid measurement.
Carotid Pulse (neck) - To take your heart rate
at the neck, place your first two fingers on
either side of the neck. Be careful not too press
to hard, then count the number of beats for a
minute.
For an adult, a normal resting heart rate ranges from 60 to 100 beats a minute. For a well-trained
athlete, a normal resting heart rate may be closer to 40 beats a minute. For healthy adults, a lower
heart rate at rest generally implies more efficient heart function and better cardiovascular fitness.
Radial Pulse (wrist) - place your index and
middle fingers together on the opposite wrist,
about 1/2 inch on the inside of the joint, in line
with the index finger. Once you find a pulse,
count the number of beats you feel within a
one minute period.
C-1
 Loading...