

Page 1
User Manual
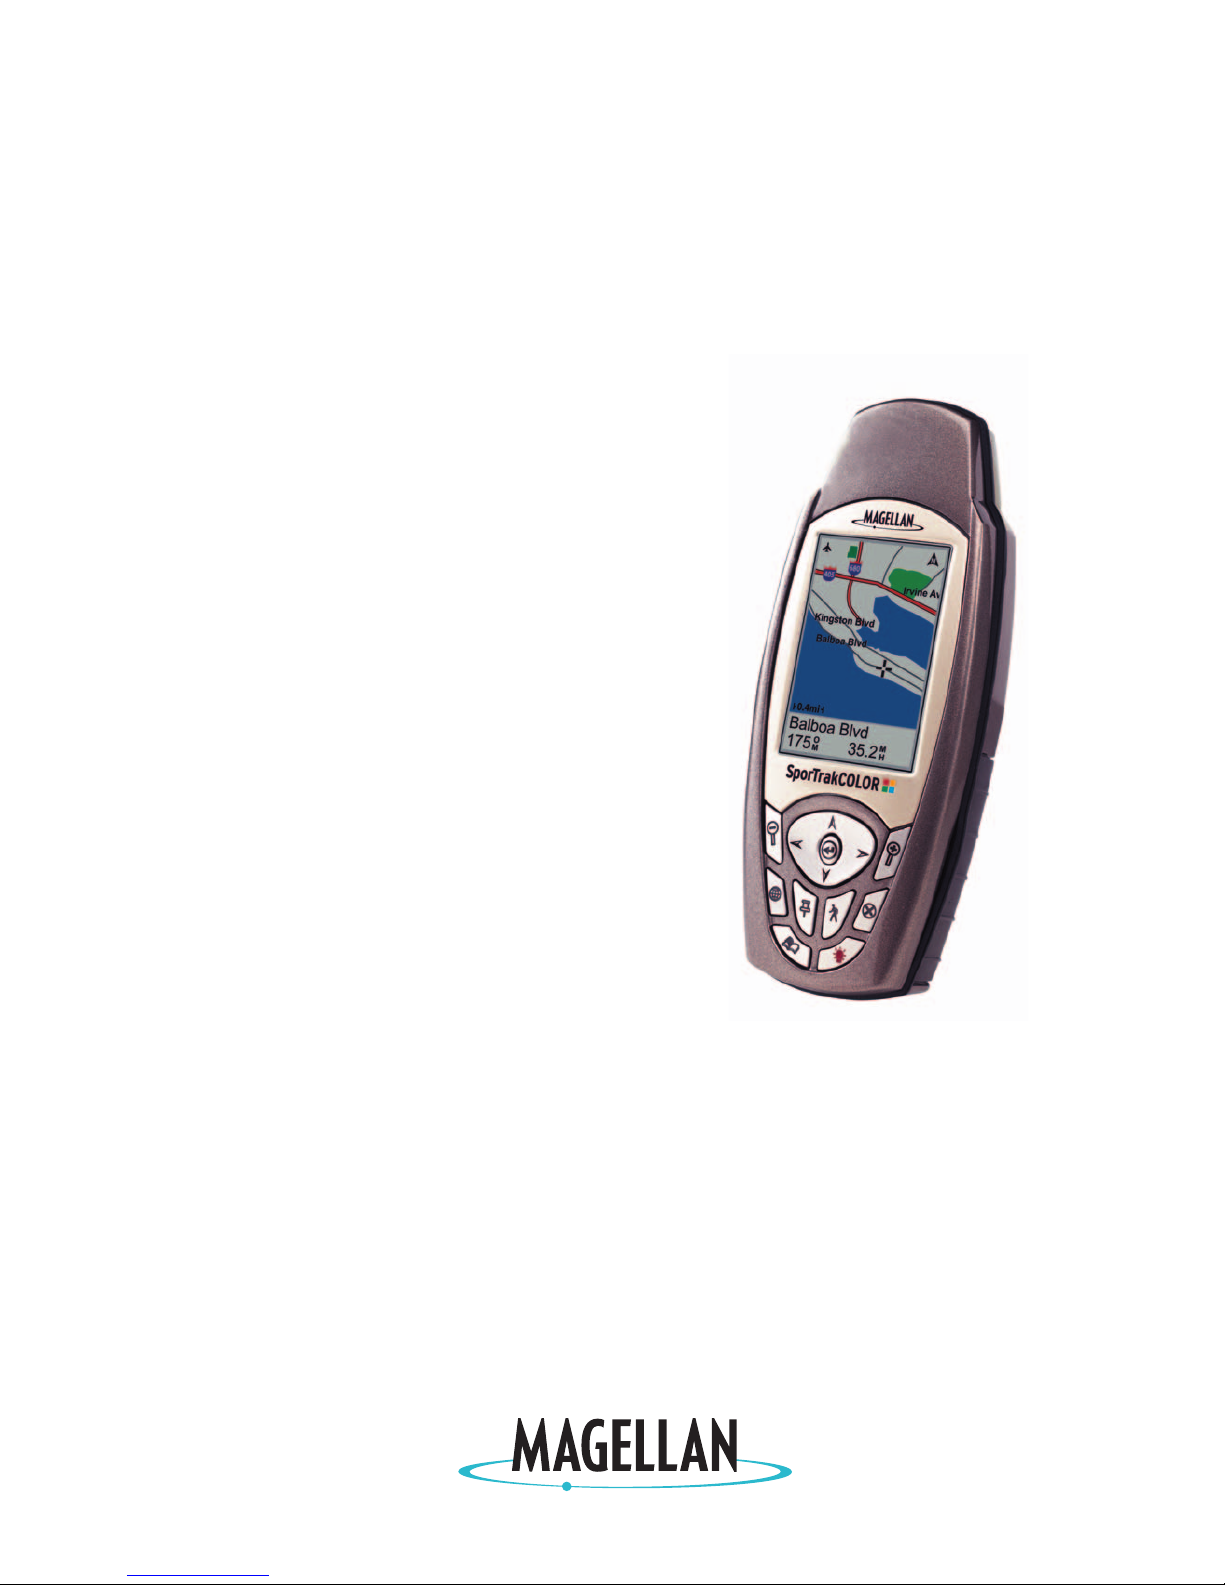
SporTrak Color
GPS Mapping
Receiver
Page 2

WARNINGS
FOR SAFETY REASONS, THE DRIVER SHOULD NOT USE THIS DEVICE IN A
VEHICLE WHILE IN MOTION TO ASSIST THE DRIVER TO NAVIGATE.
Please do not try and change any settings on the SporTrak while driving. Come to a
complete stop or have your passenger make any changes. Taking your eyes off the road
is dangerous and can result in an accident in which you or others could be injured.
USE GOOD JUDGEMENT
This product is an excellent navigation aid, but does not replace the need for careful
orienteering and good judgement. Never rely solely on one device for navigating.
USE CARE
The Global Positioning System (GPS) is operated by the U.S. Government, which is
solely responsible for the accuracy and maintenance of GPS.
The accuracy of position fixes can be affected by the periodic adjustments to GPS
satellites made by the U.S. Government and is subject to change in accordance with the
Department of Defense civil GPS user policy and the Federal Radionavigation Plan.
Accuracy can also be affected by poor satellite geometry.
USE PROPER ACCESSORIES
Use only Magellan cables and antennas; the use of non-Magellan cables and antennas
may severely degrade performance or damage the receiver, and will void the warranty.
LICENSE AGREEMENT
Thales Navigation grants you, the purchaser, the right to use the software supplied in
and with Thales Navigation GPS products (the "SOFTWARE") in the normal operation of
the equipment. You may make copies only for your own personal use and for use within
your organization.
The SOFTWARE is the property of Thales Navigation and/or its suppliers and is
protected by United States copyright laws and international treaty provisions; therefore,
you must treat this SOFTWARE like any other copyright material.
You may not use, copy, modify, reverse engineer or transfer this SOFTWARE except as
expressly provided in this license. All rights not expressly granted are reserved by Thales
Navigation and/or its suppliers.
* * *
No part of this guide may be reproduced or transmitted in any form or by any means,
electronic or mechanical, including photocopying and recording, for any purpose other
than the purchaser's personal use without the prior written permission of Thales
Navigation.
© 2003 by Thales Navigation. All rights reserved.
Magellan® is a registered Trademark of Thales Navigation.
SporTrak™ is a trademark of Thales Navigation.
Page 3

SporTrak Color GPS Mapping Receiver i
Table of Contents
Introduction ....................................................................... 1
About This User Manual......................................................................... 1
Setting Up the SporTrak ..................................................... 2
Installing the Batteries............................................................................. 3
Selecting Language.................................................................................. 4
Initialization for First Time Use .............................................................. 4
Turning the SporTrak On.................................................................... 4
Enter Your Approximate Position (Initialize) .......................................5
Basic Operation .................................................................. 7
SporTrak Color GPS Receiver ................................................................. 7
Turning Power On/Off........................................................................ 8
Turning the Backlight On/Off............................................................. 8
Adjusting the Contrast ........................................................................ 9
Getting a Position Fix.......................................................................... 9
Navigational Screens ............................................................................... 9
Map Screen ....................................................................................... 10
Compass Screen ................................................................................ 10
Large Data Screen.............................................................................. 10
Position Screens................................................................................. 10
Road Screen ...................................................................................... 11
Data Screen ....................................................................................... 11
Speed Screen ..................................................................................... 11
Satellite Status Screen ........................................................................ 11
Accessing the Navigation Screens .......................................................... 11
Saving a Waypoint ................................................................................ 12
Using GOTO Routes............................................................................ 14
Creating a GOTO Route................................................................... 14
Navigating on a GOTO Route .......................................................... 16
Summary .............................................................................................. 17
Page 4

ii SporTrak Color GPS Mapping Receiver
Reference .......................................................................... 17
Power/Backlight/Contrast ..................................................................... 17
Turn the SporTrak On....................................................................... 17
Turn the SporTrak Off....................................................................... 17
Using the Display Backlight .............................................................. 17
Adjusting the Display Contrast.......................................................... 18
Navigational Screens ............................................................................. 18
Selecting NAV Screens ...................................................................... 18
Returning to Last Viewed NAV Screen.............................................. 18
Map Screen ....................................................................................... 18
Setting the Map Detail................................................................... 21
Customizing the Map Display ....................................................... 21
Selecting Map Items....................................................................... 21
Turning On/Off Display Waypoints........................................... 21
Turning On/Off Track Lines ...................................................... 21
Turning On/Off Topographic Lines ........................................... 21
Turning On/Off Displayed POI’s ............................................... 22
Globally Turning Map Items On/Off ......................................... 22
Setting Up Map Data Fields........................................................... 22
Turning Data Fields On/Off ...................................................... 23
Selecting the Data Fields ............................................................ 23
Two Data Fields Description ...................................................... 23
Changing the Data Fields........................................................... 23
Street Information Description................................................... 24
Horizontal Profile Description ................................................... 24
Terrain Projection Description ................................................... 24
Changing the Map Orientation ..................................................... 25
Selecting Primary Usage ................................................................. 26
Selecting Track Mode..................................................................... 26
Auto vs. Auto Detailed............................................................... 26
Using Vertical Profile ..................................................................... 27
Selecting Vertical Profile................................................................. 27
Track History Description .......................................................... 27
Page 5

SporTrak Color GPS Mapping Receiver iii
Highlighted Road Vertical Profile Description............................ 27
Route Vertical Pr ofile Description .............................................. 28
Path Check Description ............................................................. 28
Compass Screen ................................................................................ 29
Customizing the Data Fields .......................................................... 29
Large Data Screen.............................................................................. 30
Customizing the Data Fields .......................................................... 30
Position Screen .................................................................................. 31
Selecting the Position Screen.......................................................... 31
Resetting the Trip Odometer.......................................................... 31
Customizing the Data Fields .......................................................... 31
GPS Status Messages...................................................................... 33
Selecting Coordinate System, Map Datum and Elevation Mode .... 33
Projecting a Waypoint.................................................................... 34
Road Screen ...................................................................................... 35
Customizing the Data Fields .......................................................... 35
Data Screen ....................................................................................... 36
Customizing the Data Fields .......................................................... 36
Speed Screen ..................................................................................... 37
Customizing the Data Fields .......................................................... 37
Satellite Status Screen ........................................................................ 38
Waypoints / Database ........................................................................... 39
Accessing Waypoints in the Database................................................. 39
Selecting Waypoints from the Nearest List ..................................... 39
Selecting Waypoints from the Alphabetical List ............................. 39
Selecting Waypoints Nearest to the Cursor ........................................ 40
Saving Present Position as a Waypoint ............................................... 40
Creating New Waypoint Manually .................................................... 40
Creating New Waypoint with Map Cursor ........................................ 41
Deleting a User Waypoint ................................................................. 41
Editing a User Waypoint ................................................................... 41
Viewing a Map Object on the Map ................................................... 42
Viewing a User Waypoint on the Map............................................... 42
Saving a Map Object as a User Waypoint .......................................... 42
Page 6

iv SporTrak Color GPS Mapping Receiver
Searching for a Street Address ............................................................ 43
Routes................................................................................................... 44
Creating a GOTO Route................................................................... 44
Creating a Backtrack Route ............................................................... 44
Creating a Multileg Route ................................................................. 44
Activating/Deactivating a Route........................................................ 46
Viewing a Route................................................................................ 46
Editing a Route ................................................................................. 46
Inserting a Leg ............................................................................... 47
Deleting a Leg................................................................................ 47
Replacing a Leg.............................................................................. 47
Appending a Leg............................................................................ 47
Appending a Newly Created Waypoint to a Route............................. 48
Reversing a Route.............................................................................. 48
Deleting a Route ............................................................................... 48
Viewing a Route on the Map Screen.................................................. 48
Creating a Route using Track History ................................................ 48
Setup .................................................................................................... 49
Initializing the SporTrak .................................................................... 49
Turning the NAV Screens On/Off..................................................... 49
Selecting the Coordinate System........................................................ 50
Selecting a Map Datum..................................................................... 50
Selecting the Elevation Mode ............................................................ 50
Selecting the Time Format................................................................. 51
Selecting NAV Units ......................................................................... 51
Selecting the North Reference ........................................................... 51
Setting the Backlight Timer ............................................................... 51
Turning the Beeper On/Off............................................................... 52
Selecting NMEA Message.................................................................. 52
Selecting the Baud Rate..................................................................... 52
Seletcting Daylight Savings Time....................................................... 53
Power Off Timer ............................................................................... 53
Changing Languages ......................................................................... 54
Changing the Power Key Settings ...................................................... 54
Page 7

SporTrak Color GPS Mapping Receiver v
Clearing Memory.................................................................................. 55
Clearing Track History ...................................................................... 55
Clearing Wpts/Routes ....................................................................... 55
Clearing All Routes ........................................................................... 55
Resetting SporTrak to Factory Defaults.............................................. 55
Clearing All Memory in the SporTrak ............................................... 55
Sun/M oon Display................................................................................ 56
Accessing the Sun/Moon Screen ........................................................ 56
Changing the Sun/Moon Date .......................................................... 56
Changing the Sun/Moon Position ..................................................... 56
Fish/H unt T imes Display ...................................................................... 57
Accessing the Fish/Hunt Screen......................................................... 57
Changing the Fish/Hunt Date ........................................................... 57
Changing the Fish/Hunt Position...................................................... 57
SporTrak Alarms ................................................................................... 58
Setting the Arrival Alarm................................................................... 58
Setting the Anchor Alarm.................................................................. 58
Setting the XTE Alarm...................................................................... 58
Setting the GPS Fix Alarm ................................................................ 58
Using the Simulator .............................................................................. 59
Turning on the Simulator - Auto Mode ............................................. 59
Turning on the Simulator - User Mode.............................................. 59
Turning the Simulator Off................................................................. 59
About Screen......................................................................................... 60
Help Screen .......................................................................................... 60
Frequently Asked Questions ............................................. 61
Appendix .......................................................................... 64
Troubleshooting .................................................................................... 64
Waypoint Icons..................................................................................... 65
Contacting Magellan............................................................................. 66
Specifications ........................................................................................ 67
Compass ............................................................................................... 68
Page 8

vi SporTrak Color GPS Mapping Receiver
Heading vs. Bearing vs. Course Over Ground ................................... 68
Navigating with the Compass Screen................................................. 70
Calibrating the Compass ................................................................... 70
Using the Barometer and Temperature Screens .................................. 74
Accessories ............................................................................................ 76
MapSend Streets ................................................................................... 77
Using Mapsend..................................................................................... 78
Connecting to External Devices ............................................................ 81
Connecting to External Power Source................................................ 82
WAAS................................................................................................... 83
Glossary ................................................................................................ 84
Page 9

SporTrak Color GPS Mapping Receiver 1
Introduction
Welcome and congratulations on your purchase of the Magellan SporTrak Color
GPS mapping receiver. The SporTrak Color has all the features that a sailor,
fisherman, hiker, hunter, or any person involved with outdoor recreational activities
has come to expect from a Magellan GPS receiver. In addition to these features, the
SporTrak Color offers the ability to display your location on detailed city maps
providing you with a complete navigation tool that will last you for years to come.
Magellan has been a leader in the hand-held GPS market since introducing the
world’s first commercial, hand-held GPS receiver in 1989. Since that time
Magellan has continued to equip the outdoorsman and consumer markets with
navigational receivers, all the way from the first GPS receiver for under $100 to
automotive receivers with turn-by-turn routing capabilities.
Before you begin, make sure that your package includes all of the items listed on the
packing list. Magellan is a registered trademark name for Thales Navigation.
About This User Manual
This User Manual is divided into six chapters; Introduction, Setting Up the
SporTrak, Basic Operation, Reference, Frequently Asked Questions, and Appendix.
Each of these chapters will be explained briefly so you can tell which ones are right
for you. A glossary and index are provided after the Appendix as well.
Setting Up the SporTrak: This chapter will show you how to prepare the
SporTrak Color for use. Instructions will include how to install the
batteries, how to select the languages and how to initialize the SporTrak
Color.
Basic Operation: This chapter provides you with step-by-step instructions for
using the basic functions of the SporTrak Color. This chapter will explain
getting a position fix, viewing the Map screen, saving a waypoint and
using a GOTO. Knowing these four basic steps will enable you to use the
SporTrak Color for most things you will want to do.
Reference: Here you will find step-by-step instructions for all of the features
found in the SporTrak Color. This chapter is set up in a way that you can
quickly and easily find the feature you are looking for.
Frequently Asked Questions: This chapter is aimed at answering some of the
more basic questions that you may have about your SporTrak Color, the
global positioning system (GPS) and using the SporTrak Color to its
fullest. Experienced GPS users will probably not find any new informa-
tion in this chapter but new GPS users may find many of their questions
answered here.
Page 10

2SporTrak Color GPS Mapping Receiver
Appendix: Sections containing information about connecting your SporTrak
Color to external devices, accessories, troubleshooting and specifications
can be found in the Appendix.
Glossary: A glossary is provided explaining some of the terms and abbrevia-
tions found in the SporTrak Color and this manual that may not be
familiar to all users.
It’s time to begin using your SporTrak Color. Don’t be overwhelmed with the size
of the manual as we have tried to give enough information for the beginning user as
well as provide the experienced users with the specifications and features that they
are looking for.
The most important thing to us is to be sure that you are completely satisfied with
your SporTrak Color and the accompanying documentation. If you have any ideas,
suggestions or even a complaint, please pass them along to us through our web site
(www.magellangps.com) or by mail.
Page 11
SporTrak Color GPS Mapping Receiver 3
Setting up the SporTrak
Setting up the SporTrak Color is a simple three-step process: installing the batteries,
selecting the language to be used and initializing the SporTrak.
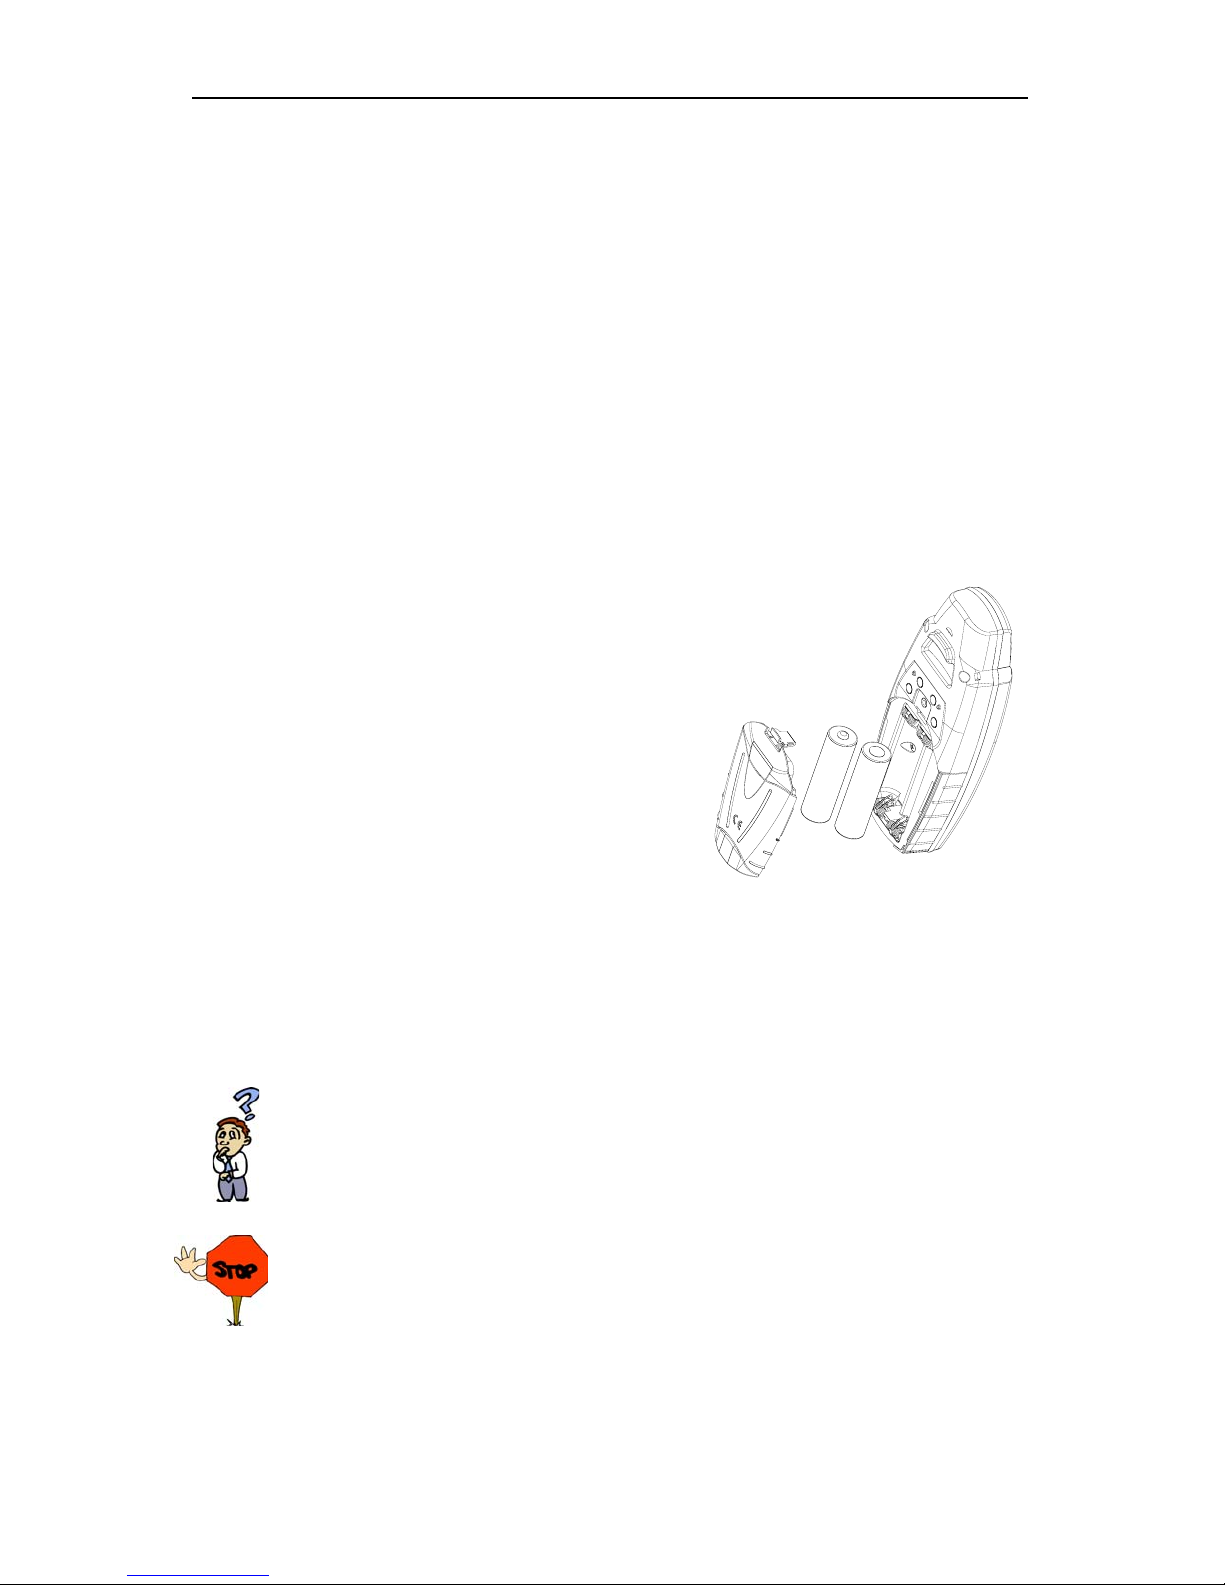
Installing the Batteries
To change the batteries, remove the battery door on the back of the SporTrak
Color. The door can be easily removed by pressing on the lever at the top of the
battery door. This releases the door and allows it to swing away from the receiver.
There is a small lip at the bottom of the battery door, so be sure to open the door as
if it were hinged on the bottom.
Remove the old batteries and install two new AA batteries, observing the correct
polarity. Replace the door by aligning the lip at the bottom of the door to the
groove at the bottom of your receiver. Swing the door back into place
until the lever snaps into the body of the receiver.
Anytime you replace the batteries, you should re-calibrate the
compass. This will insure that your SporTrak Compass is
providing you with the most accurate compass
information.
When battery life is low you will receive a
warning, letting you know that it is just about
time to change the batteries. You can continue to
use your SporTrak Color with the low battery indication but the compass may react
erratically. If you need to use the compass during low battery periods, you should
perform the compass calibration routine when the warning first appears.
See the Appendix of this manual for details on calibrating the compass.
How much time do I have to replace the batteries? Any waypoints or
routes you have created are stored in permanent memory with the
batteries removed. Present position and time data is not stored in perma-
nent memory but will be held in memory for at least 12 hours without
batteries installed.
Always turn the SporTrak off before removing the batteries or turning off
external power. Failure to do so can cause loss or corruption of data.
Page 12
4SporTrak Color GPS Mapping Receiver
Selecting Language
The first time you use your SporTrak (or if memory has been completely erased)
you will be asked to select the language that you want to use. Use the UP/DOWN
arrows on the keypad to highlight the language you desire. With the language
highlighted, press the ENTER button. You can select English, French, German,
Spanish, Italian, Portuguese, Finnish, Dutch or Swedish.
You can change the language at any time by accessing the Languages option of the
Setup Menu. (See Changing Languages in the Reference Section of the User
Manual.)
Initialization for First Time Use
The final step in setting up the SporTrak is to initialize the receiver for first-time
use. This will help your SporTrak begin computing your position in the fastest
manner possible.
The reason for initialization is to speed up the process for computing the first
position fix when the SporTrak has no last position computed in memory (i.e.,
when the SporTrak is brand new or memory has been cleared). This gives the
SporTrak an approximate indication of where it is located so it can use its satellite
almanac (stored in permanent memory) to estimate what satellites are overhead and
which ones it should be looking for.
Follow these instructions to initialize the SporTrak.
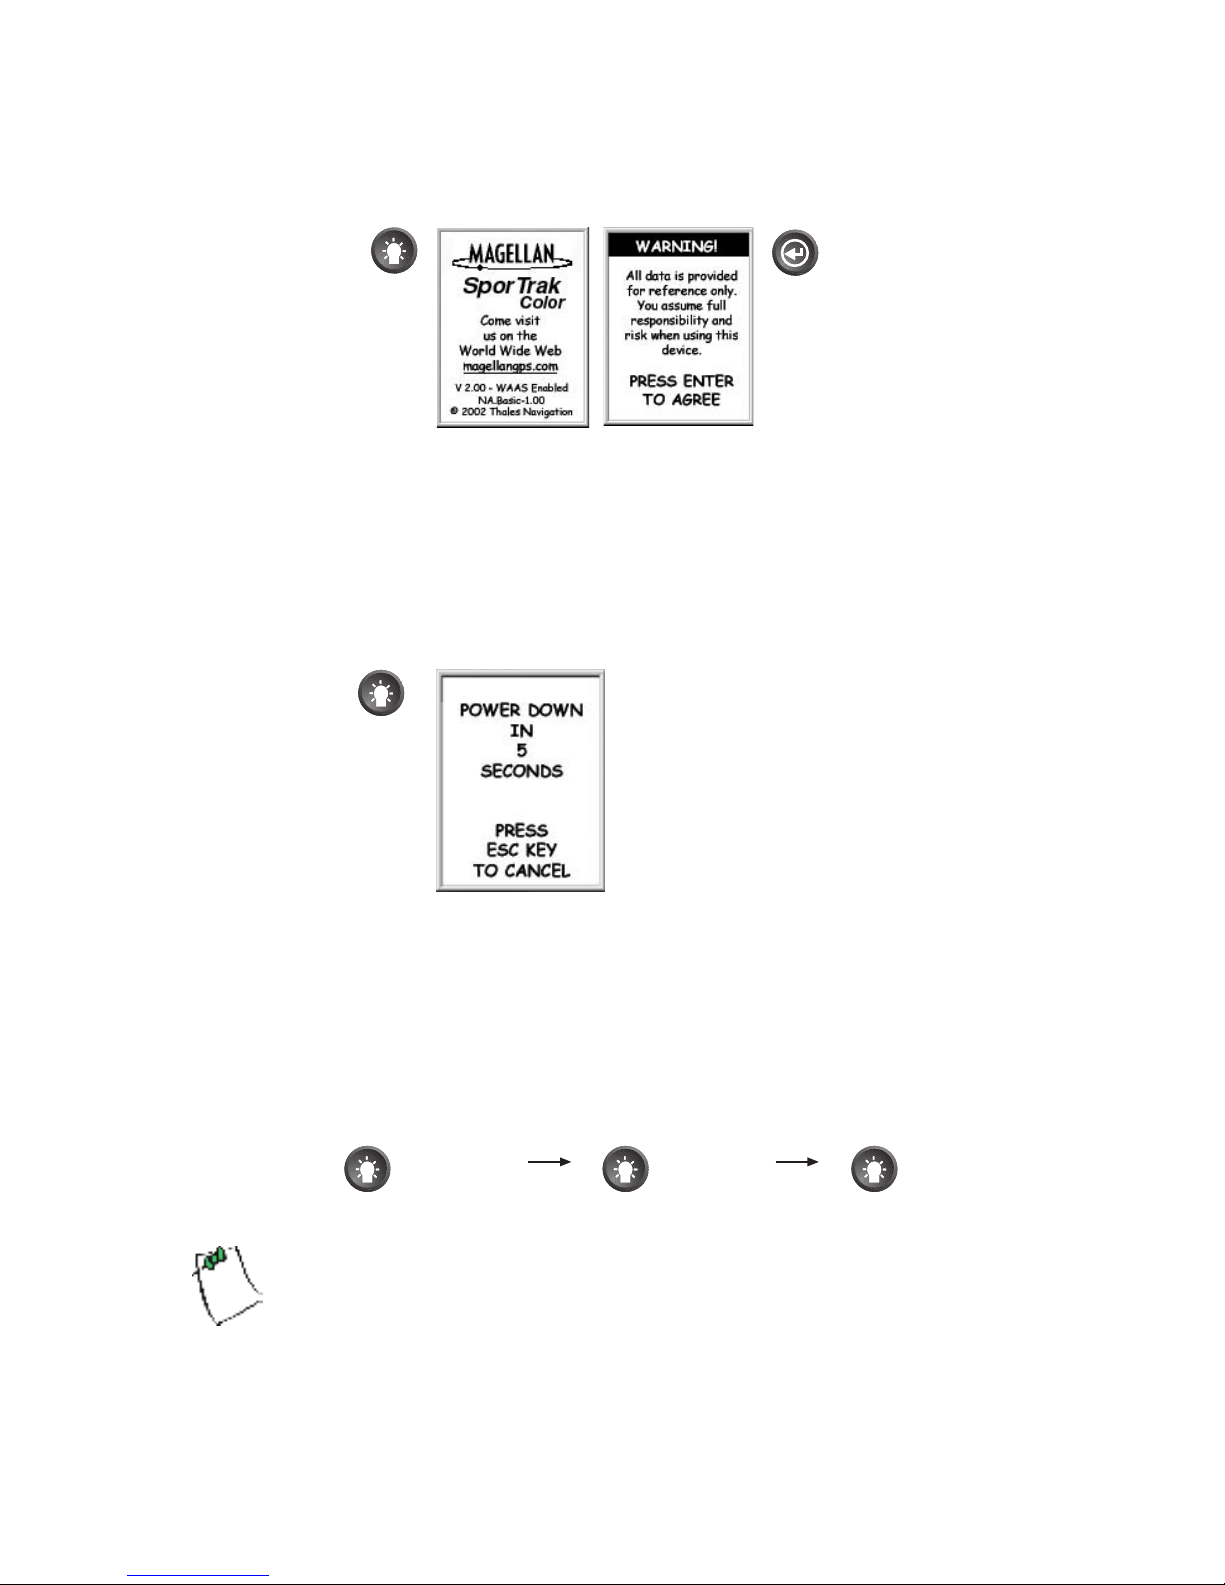
Turning the SporTrak On
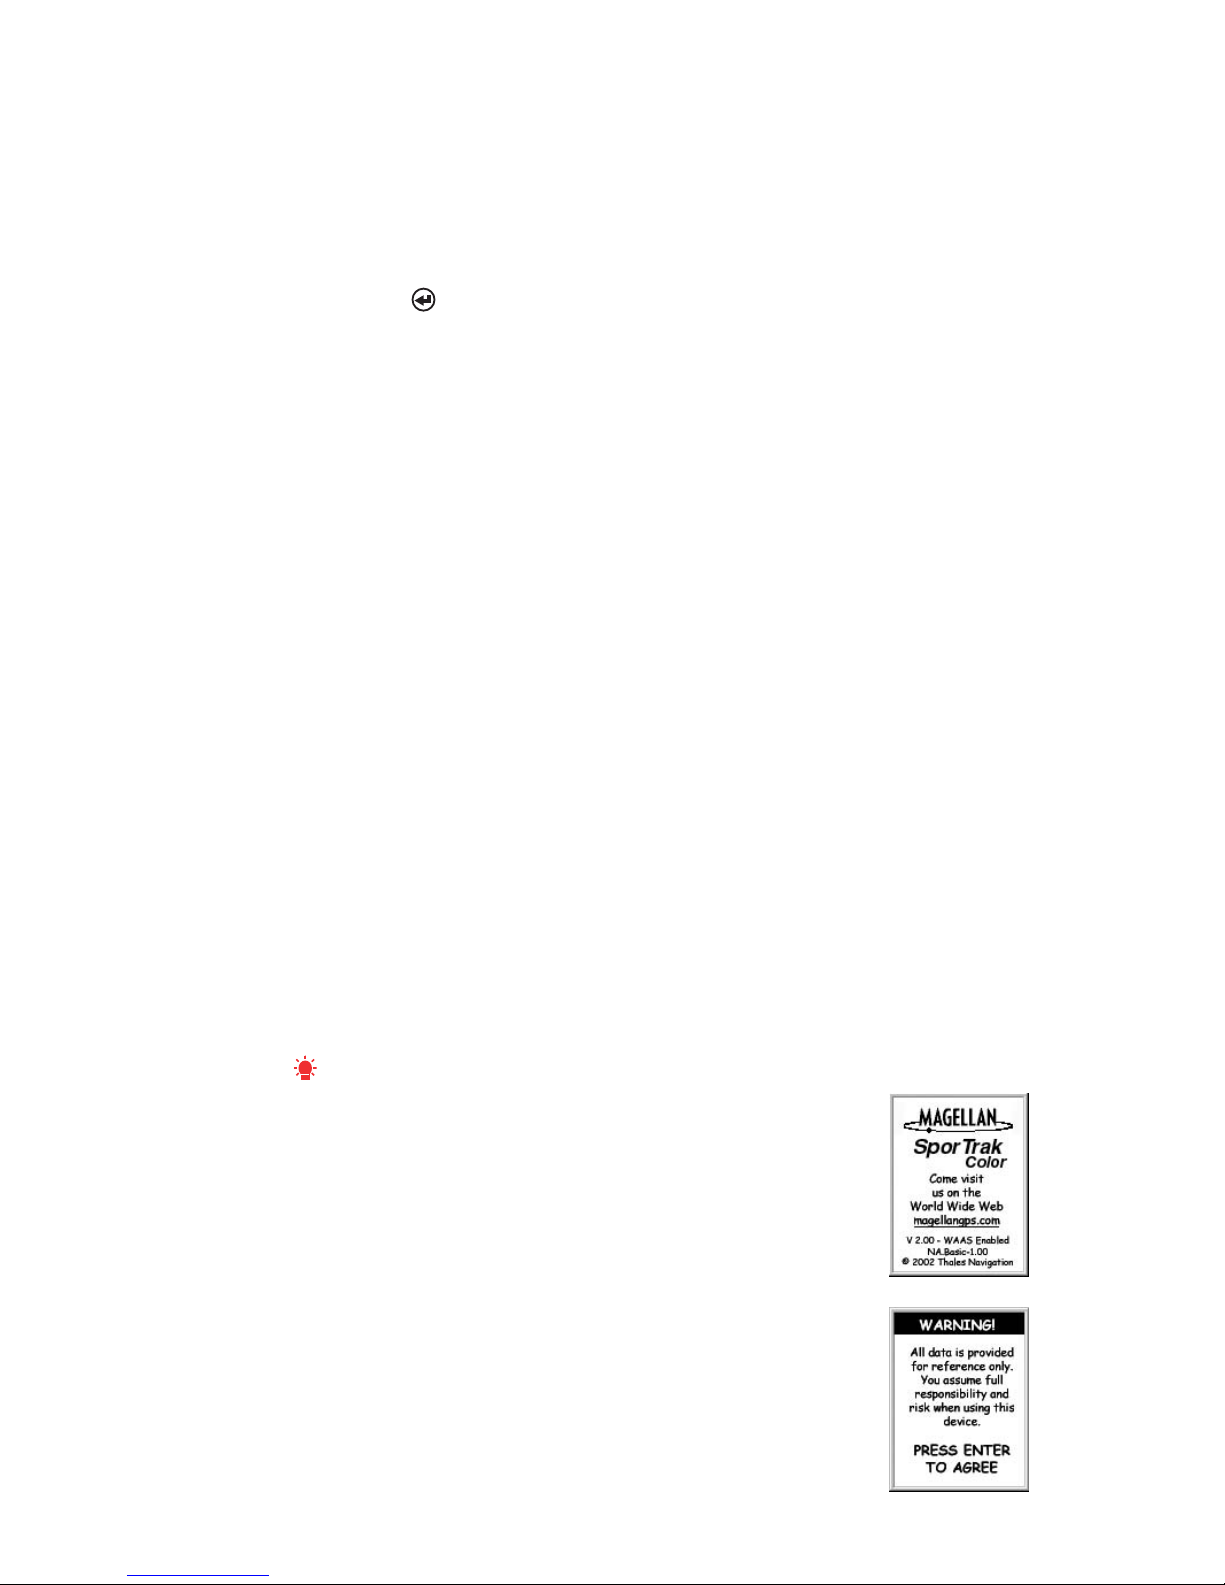
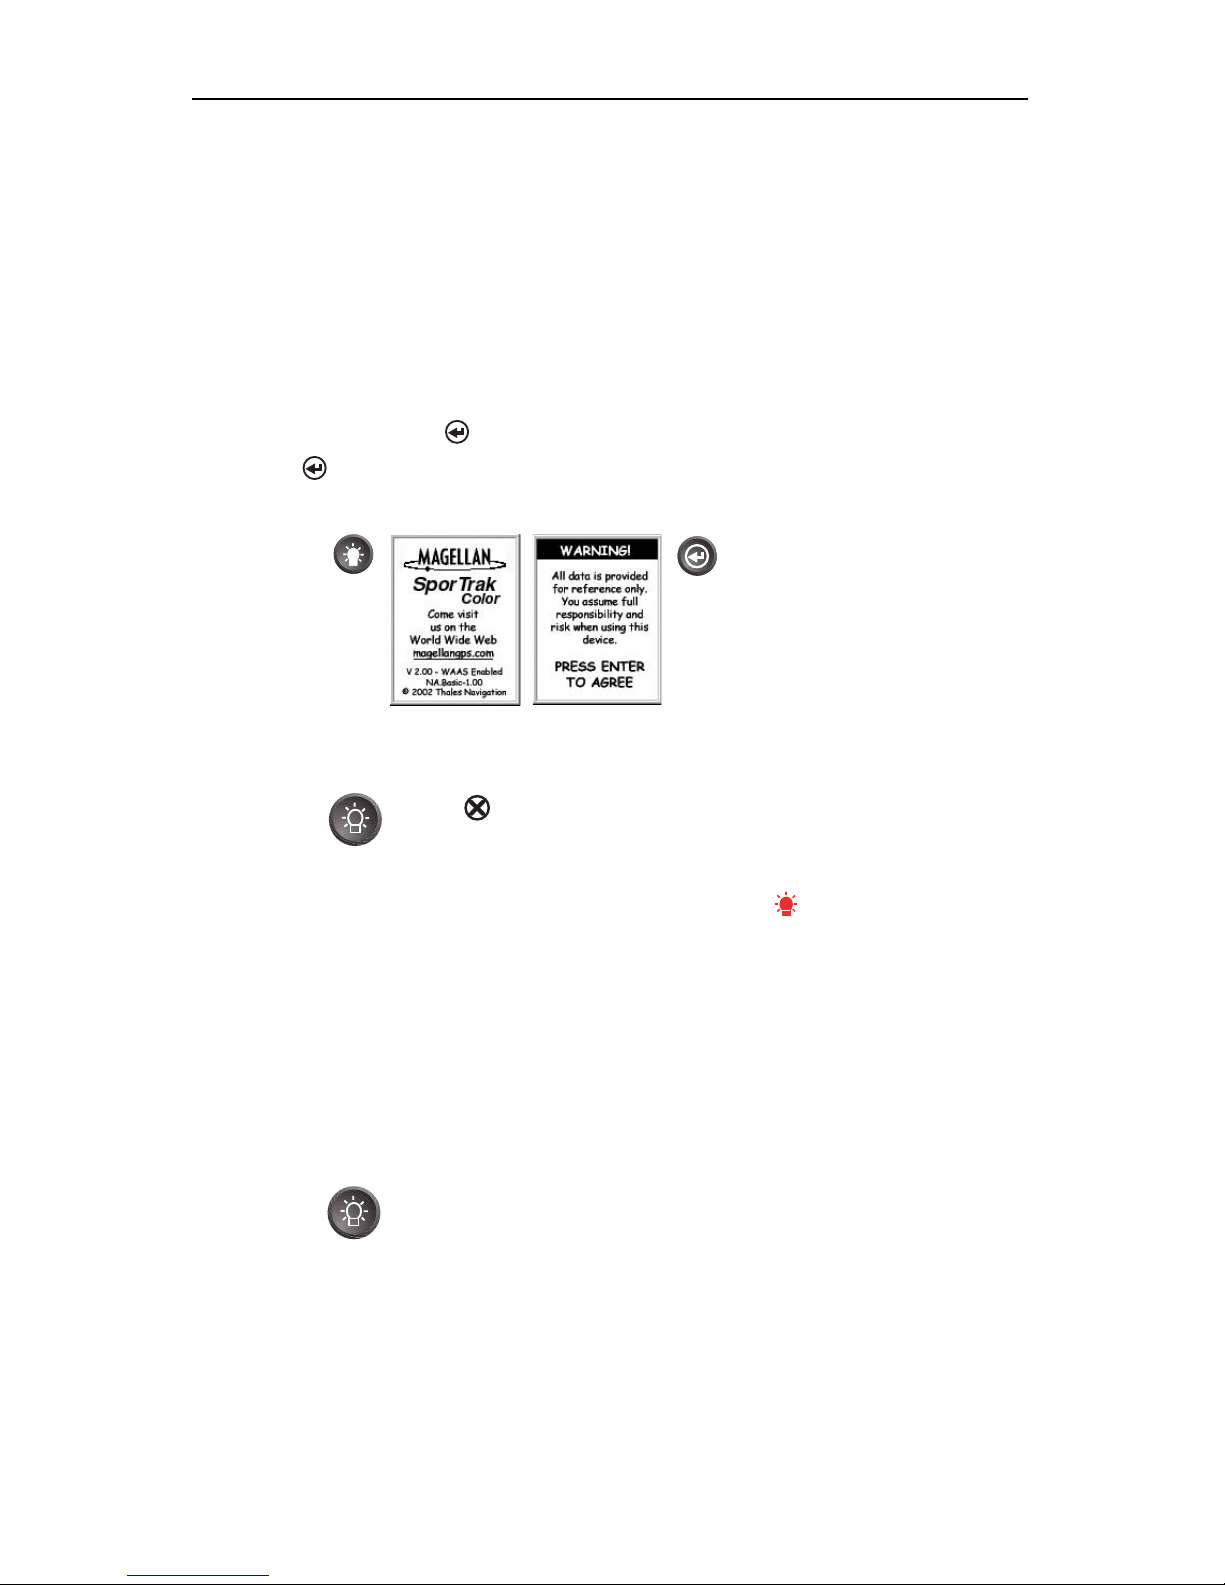
Press [POWER]
The SporTrak turns on and displays the start-up screen
and a warning screen.
Page 13
SporTrak Color GPS Mapping Receiver 5
Press [ENTER]. (You have 10 seconds to press
[ENTER] or the SporTrak will shut off.)
The SporTrak displays a message box indicating that
the receiver needs to be initialized.
Press [ENTER].
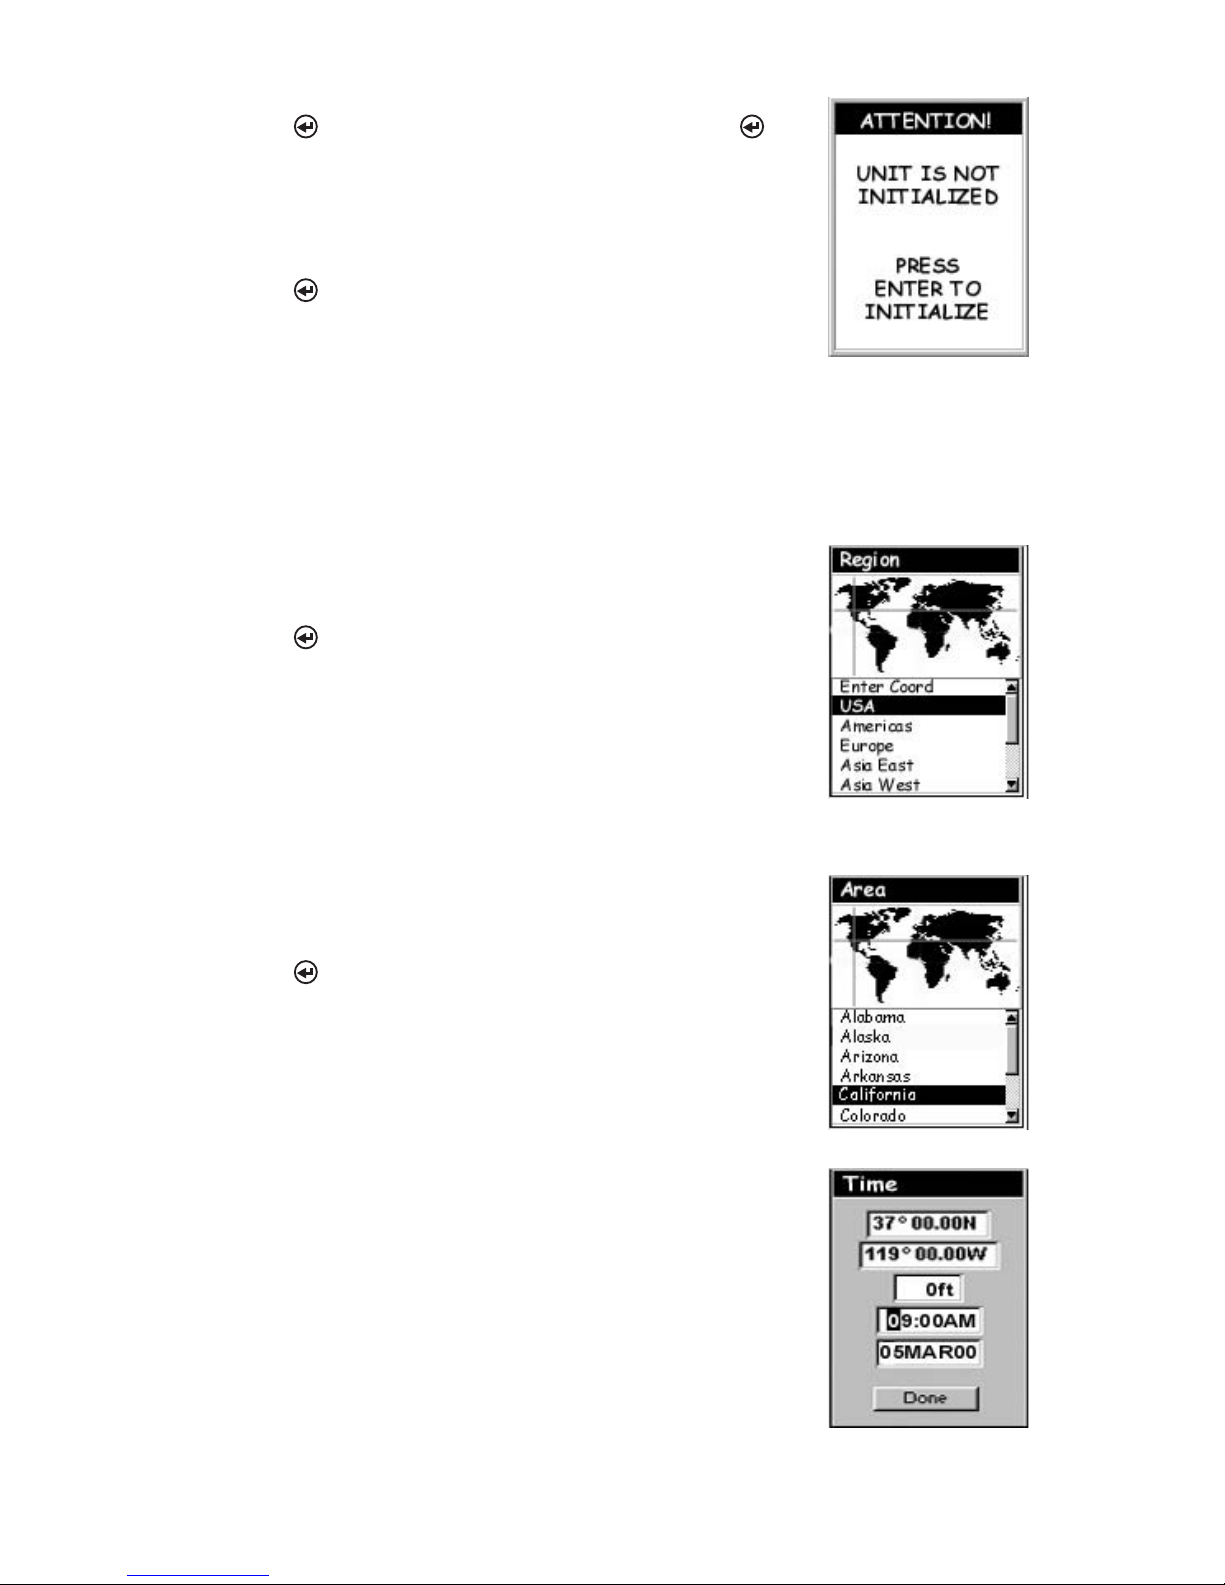
Enter Your Approximate Position (Initialize)
Use the Up/Down arrows on the keypad to highlight
your general region.
Press [ENTER].
Use the Up/Down arrows on the keypad to highlight
your area.
Press [ENTER].
The cursor appears in the time field, waiting for you
to input your local time. Set your local time using
the arrow keys. Be sure that you set the AM/PM
indicator.
Note: After the SporTrak starts to pick up signals
from any satellite, it will automatically update the
time using the satellite’s atomic clock.
Page 14

6SporTrak Color GPS Mapping Receiver
When the time is correct, press [ENTER].
The last piece of information needed is the date.
Using the arrow keys, enter the present date.
Press [ENTER].
Pressing right arrow
results in:
Pressing up arrow
results in:
Editing
moves the cursor block left or right.
To use the arrow keys to edit a field, follow the simple diagram below.
increments the value up or down.
All the information that the SporTrak needs to
speed up the process of computing its first fix has
been entered and the Done button is highlighted.
To complete the initialization process, press
[ENTER].
The Satellite Status screen is displayed and the SporTrak
begins acquiring the data from the satellites. You can
begin using the SporTrak beginning with the Basic
Operation described in the next chapter or you can turn
the SporTrak off. If you turn the SporTrak off, all of the
information you just entered will be saved.
To turn the SporTrak off, press [POWER].
Page 15

SporTrak Color GPS Mapping Receiver 7
Basic Operation
For many of you this will be your first introduction into using a GPS receiver as a
navigational tool. With all of the features and functions provided with the
SporTrak, it may seem a bit intimidating at first. Don’t worry. There are only a few
things you need to know to use the SporTrak. They will be discussed here in detail.
Other features and functions can be found in the Reference Section of the User
Manual.
SporTrak Color GPS Receiver
IN - Zooms in the
display of the
Map screen. (Press
once to zoom one
level, press and hold
to quickly move
through the zoom
levels.)
OUT - Zooms out
the display of the
Map screen. (Press
once to zoom one
level, press and hold
to quickly move
through the zoom
levels.)
ENTER - Confirms
data entries or
menu selections.
MENU -
Accesses menus
for displayed screens.
Also provides access
to waypoint, route
and setup functions.
PWR - Turns the
SporTrak on/off.
Also used to turn
the display backlight
on/off.
ESC - Cancels
the operation of the
last button pressed.
Also scrolls through
the NAV screens in
reverse order.
NAV - Accesses
the various
navigation screens.
GOTO - GOTO is
used to create a
direct route to any
waypoint stored in
memory.
MARK - This key
is used to MARK
(save) your current or
defined position.
Page 16
8SporTrak Color GPS Mapping Receiver
Turning Power on/Off
Turning the SporTrak On
The last navigation screen you were viewing will be displayed. If the last
navigation screen view was the Map screen, the last zoom scale setting will be
used.
Turning the SporTrak Off
Turning the Backlight On/Off
The display backlight can be set to one of three levels (low, high or off).
The backlight causes severe drain on the batteries in the SporTrak. To
prevent accidently turning the backlight on and leaving it on, the
SporTrak will turn the backlight off when there has been no button presses
for 4 minutes. Pressing any button will turn the backlight back on in this
instance. You can change the time delay for the backlight in Setup.
Press and
hold for 2
seconds
Press and
hold for 2
seconds
Press and
hold for 2
seconds
Display
backlight
illuminates
(low)
Display
backlight
illuminates
(high)
Display
backlight
turns off
Pressing the POWER
button again will turn off
the SporTrak immediately.
Pressing ESC will cancel
the power down
sequence.
You have 10
seconds to accept
the warning by
pressing ENTER
or the SporTrak
will shut off.
Page 17
SporTrak Color GPS Mapping Receiver 9
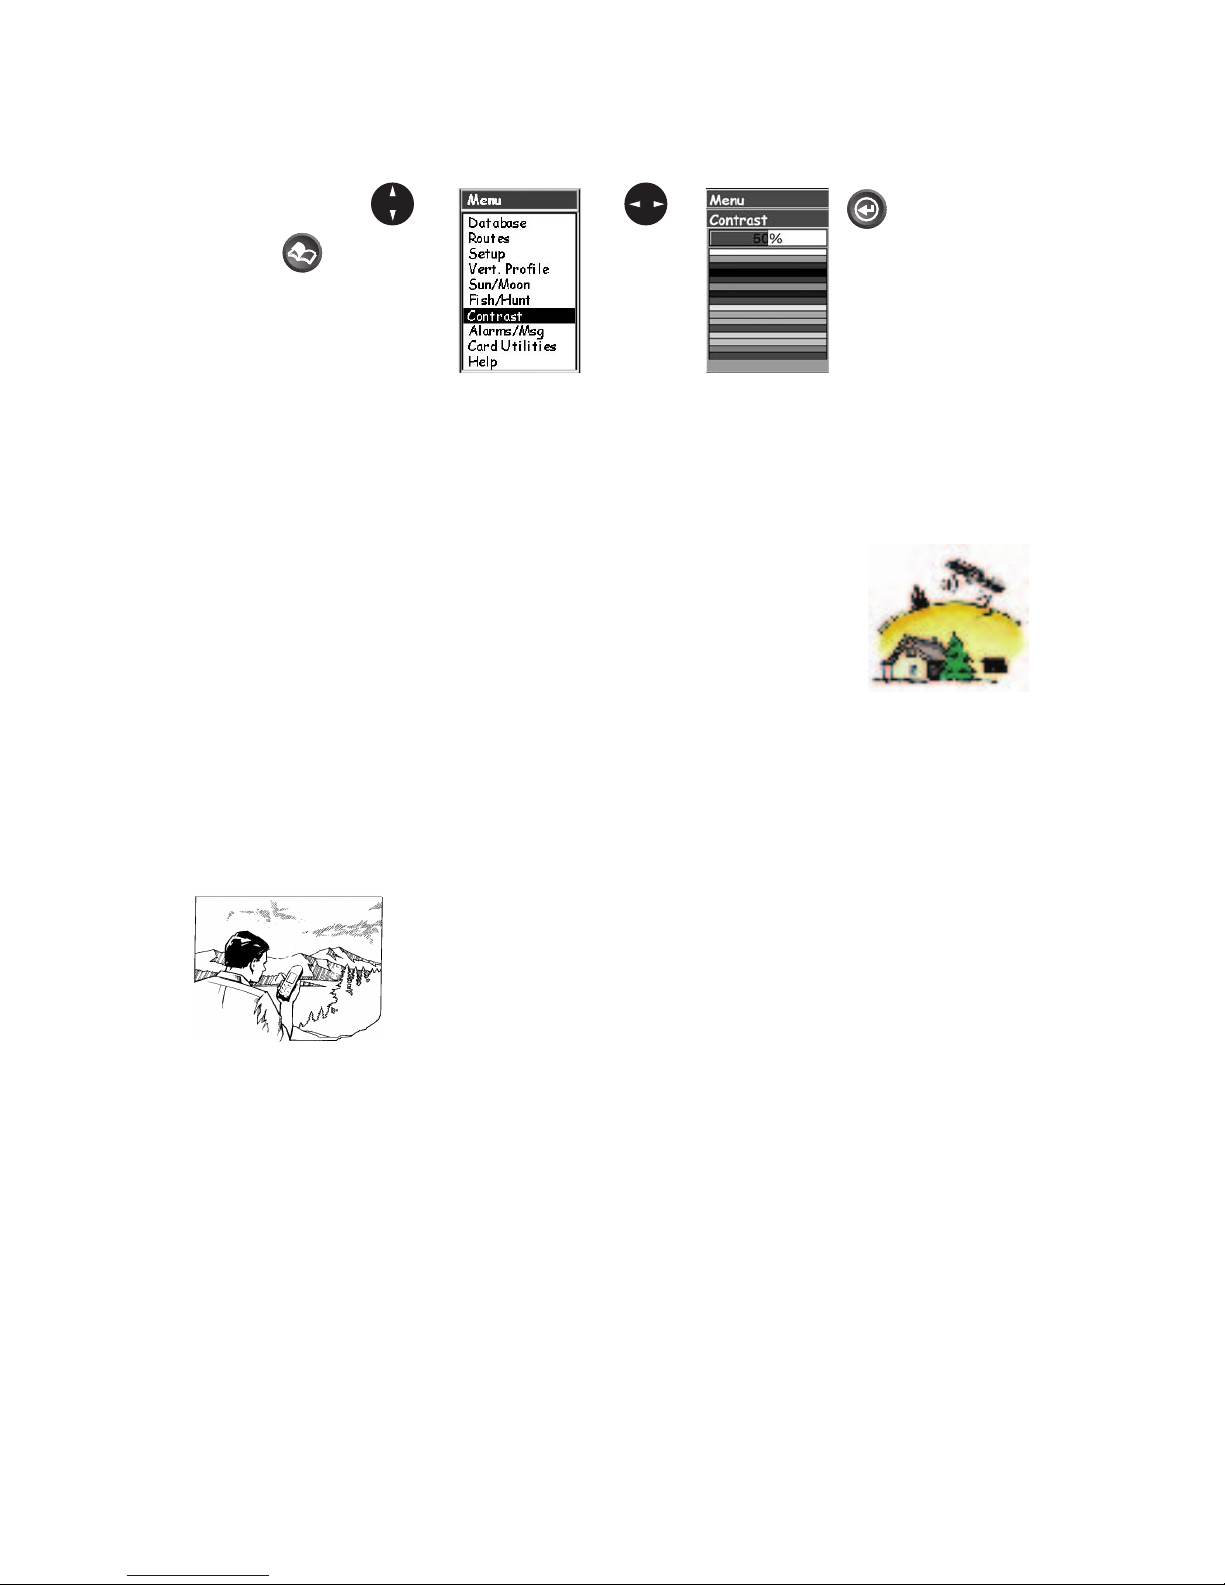
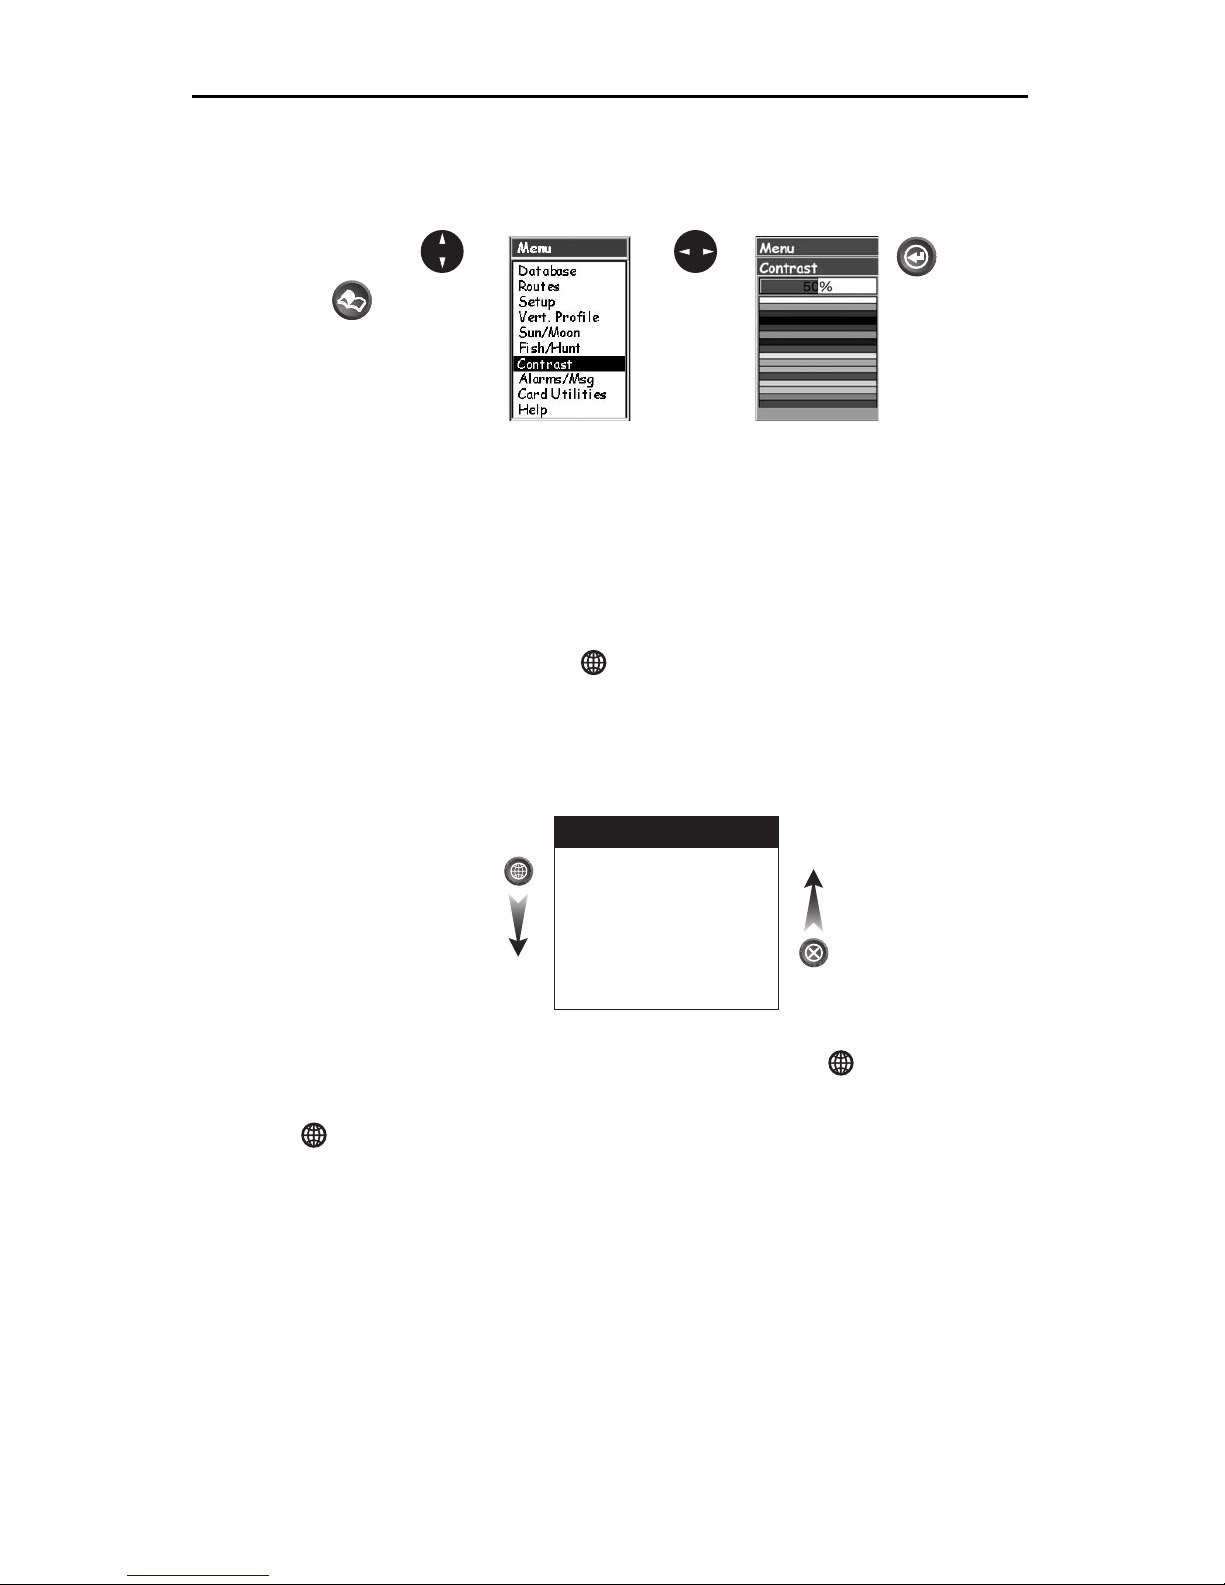
Adjusting the Contrast
Navigational Screens
The SporTrak Color has nine navigation screens: Map screen, Compass screen,
Large Data screen, two Position screens, Road screen, Data Screen, Speed Screen
and Sat Status screen. They will be described briefly here. More detailed information on the different screens can be found in the Reference chapter of the User
Manual.
From any
screen
Use up/down
arrows to
highlight
Contrast
(The menu display may differ slightly
depending upon which screen it was
accessed from.)
Use left/right
arrows to
adjust the
contrast.
Getting a Position Fix
Because the SporTrak attains information it needs from satellites
orbiting the earth, the antenna needs to have a relatively unobstructed view of the sky. This allows the SporTrak to choose from
all satellites currently available.
If the view of the sky is poor due to large cliffs or buildings, heavy
foliage or other obstructions, the satellite signals can be blocked and the receiver
may take longer to compute a position fix.
You can observe the signal strength and the satellites being used on the Satellite
Status screen (described in the next section).
Holding the SporTrak — The receiver is designed to fit
comfortably in your hand. Hold the SporTrak in the palm of
your hand with the antenna pointing towards the sky.
Page 18
10 SporTrak Color GPS Mapping Receiver
Map Screen — The Map screen has two modes, position or cursor.
In the position mode, your present position is indicated by the large
arrow icon in the center of the display. If you are moving, the
arrow will point in the direction that you are heading. At the
bottom of the screen is the scale for the map displayed and two data
fields that can be customized, or turned off, depending upon your
needs.
In the Cursor Mode, you are provided with a cursor that can be
moved on the map. At the bottom of the display is the information
for the position of the cursor relative to your present position. Also
any points of interest that the cursor is over will be shown.
To access the Cursor Mode, press any arrow on the keypad. A
crosshair appears that can be moved with the arrow keys.
To return to the Position Mode, press [ESC]. The cursor will disappear and the
present position icon will appear centered on the map.
Compass Screen — This is a handy screen to have at your fingertips while you are navigating. It is totally customizable to display
the information that is useful to you. The lower portion of the
Compass screen not only displays your heading in a graphical
manner, but also displays the relationship of the sun, moon and
your destination (if navigating on a route) to your heading.
Large Data Screen — The Large Data screen is similar to the
Compass screen but here the compass has been removed to allow
for large display of the navigation data. Ideal for when you have
your SporTrak mounted on the dashboard of a boat using the
optional swivel mounting bracket. Even from a distance the
information can be read with ease.
Position Screens — The Position screens 1 and 2 display your
present position using the coordinate systems that you have selected
in Setup. This screen shows all of the basic position, time and
satellite information. In addition, current navigation information is
shown in the bottom half of the screen.
Page 19
SporTrak Color GPS Mapping Receiver 11
Road Screen — The Road screen presents your route as if you were
travelling on a road. When you need to make a turn, the road will
graphically display the turn and the direction. Waypoint and
destination icons will be displayed relative to your position as they
come into view. Above the road is a compass that displays your
heading and above that are four customizable data fields.
Data Screen — When you need to see a lot of information in one
place then you’ll appreciate the Data screen. The Data screen
provides you with six data fields and an active compass that is the
same as the one used on the road screen. You have the option of
customizing this screen by selecting what data is displayed in the
upper six fields.
Speedometer Screen — The Speedometer screen displays your
speed in a familiar graphical format. There are four additional data
fields at the top of the display that can be customized to display the
data that you need. The bottom of the screen contains a trip
odometer that will record the distance travelled since the last time
the odometer was reset.
Satellite Status Screen — The Sat Status screen provides you with
a graphical display of the satellites in view and which ones are being
used to compute the navigation data. The bar graph shows you the
relative signal strength being received for each satellite. At the
bottom of the display is an indication of the battery life remaining.
When you are using external power, it will be indicated here as well.
Accessing the NAV Screens
From any screen other than a navigation screen, pressing [NAV] returns you to
the last navigation screen viewed. Note that if you are inputting data, pressing
[NAV] will return you to the last navigation screen but your inputs will not be
saved.
Page 20
12 SporTrak Color GPS Mapping Receiver
Saving a Waypoint
A waypoint is a point on a map that you can name and save in the SporTrak. They
are primarily used for creating routes. Whether the route is a simple GOTO or a
more complex multileg route, it needs stored waypoints to use as its starting and
destination point.
Saving a Waypoint with a Receiver-Generated Name
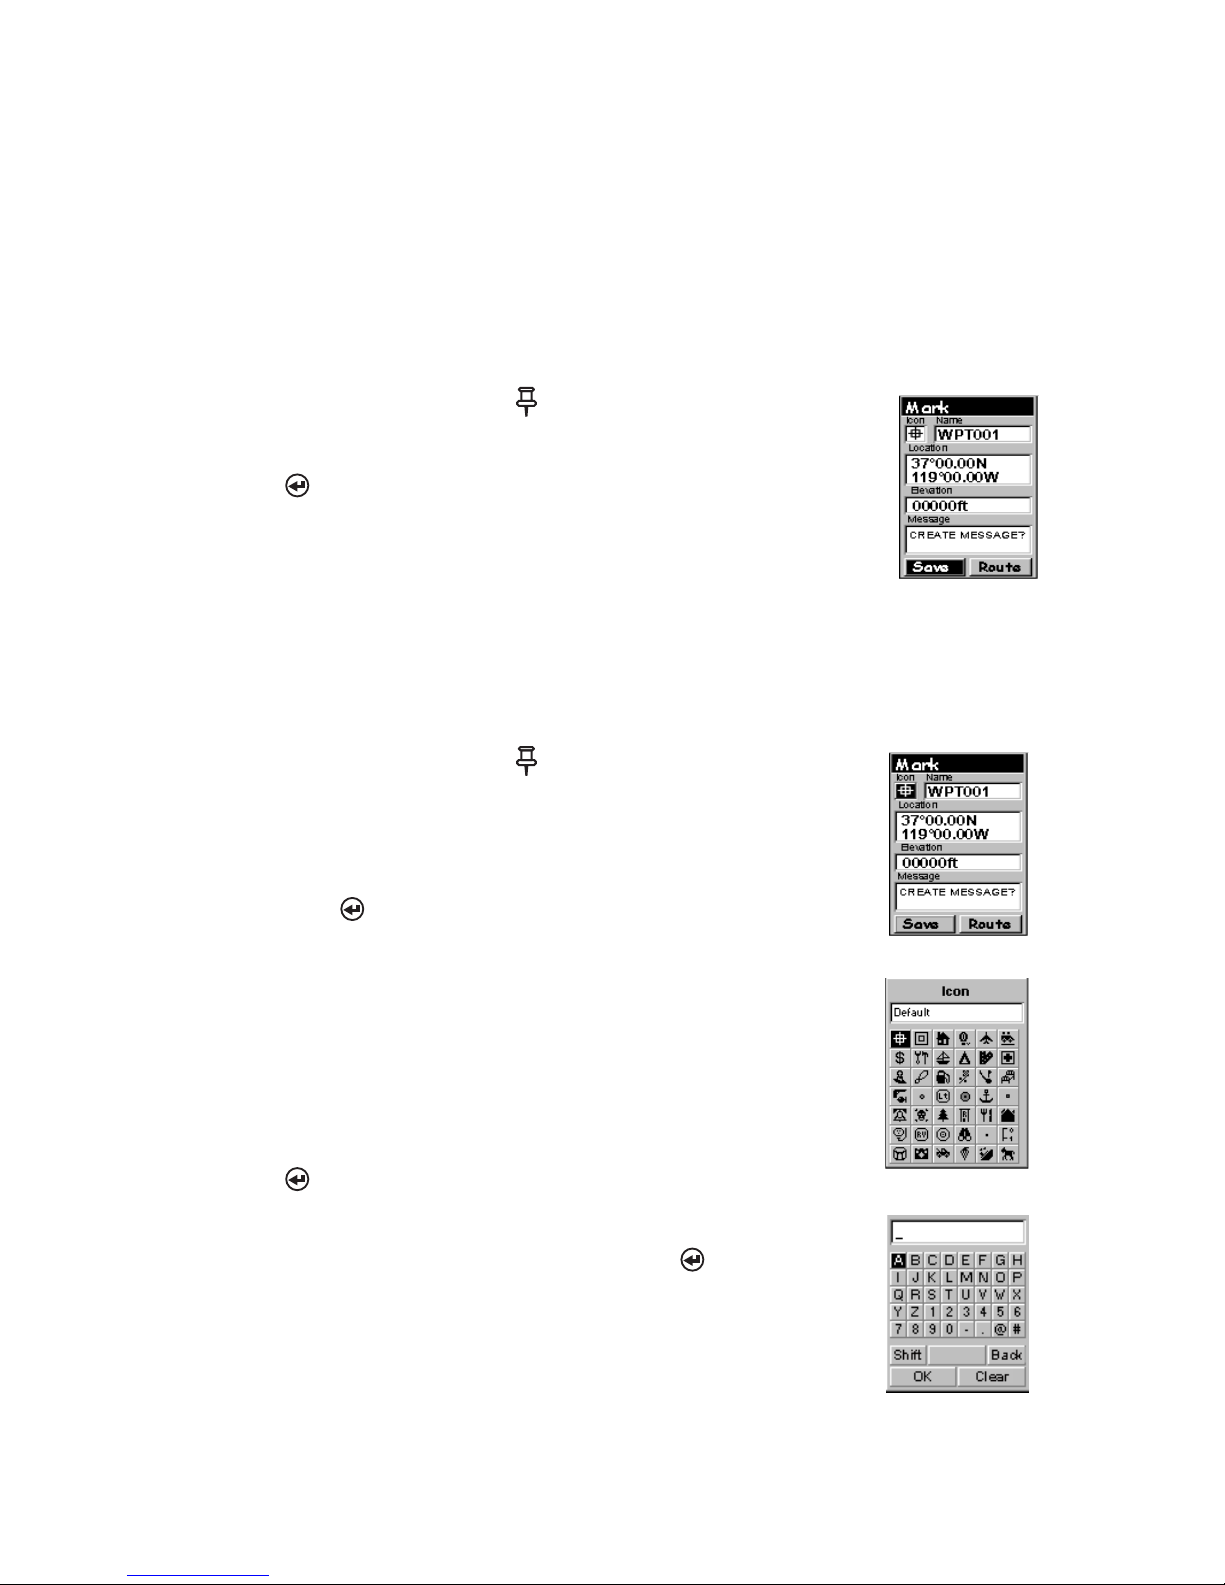
From any screen, press [MARK].
The “Save” button is highlighted and you can press
[ENTER] to save the waypoint using the default name
and icon.
You can later go back and edit any of the waypoint
information through the Database Menu or you can change
the information now following the guidelines below. (See Waypoints in
the Reference chapter of the User Manual.)
Saving a Waypoint with a User-Input Icon and Name
From any screen, press [MARK]. Use the UP/DOWN
arrows and notice that the highlight moves from field to
field and then back to “Save.”
Highlight the Icon field using the UP/DOWN arrows.
Press [ENTER].
The Icon Select window is displayed. Use the arrow
keypad to move from one icon to another with the name
of the icon displayed at the top. As a reference tool, all of
the icons and their names are listed in the Reference
Chapter of the User Manual. When you have highlighted
the icon you want to use, press
[ENTER].
The cursor is now highlighting the Waypoint Name field.
With the Name field highlighted, press [ENTER]. The
input keyboard is displayed. The very top of the keyboard
window shows you what field you are changing, in this
case the Name field.
Page 21
SporTrak Color GPS Mapping Receiver 13
You can now use the arrow keypad to select the character you wish to
enter. With the character highlighted, press [ENTER] and the charac-
ter is appended to the name you are entering and displayed in the field
above the keys. (Note: waypoint names can be up to 8 characters in
length.)
Highlighting “Back” and pressing [ENTER] erases the last character
you entered.
Highlighting “Clear” and pressing [ENTER] clears the entire name.
Highlighting the space bar and pressing [ENTER] adds a space.
Highlighting “Shift” and pressing [ENTER] displays the lower case
letters and some additional punctuation marks.
When you have the name the way you want it, highlight “OK” and press
[ENTER]. You are returned to the Mark screen with the new name
displayed.
Entering a Message
As many as 200 waypoints can have a message assigned to it. This comes
in handy in further identifying the waypoint. If this was a waypoint for a
friend’s house or business, you could add a phone number or any other
information that you find useful.
Is there a limit to the number of waypoints I can store in the SporTrak?
Yes, the SporTrak will store up to 500 user waypoints in memory. If you
should ever get that many and need to input more, you will have to delete
ones that you no longer need to make room.
Page 22
14 SporTrak Color GPS Mapping Receiver
Using Goto Routes
A GOTO route is simply a route with a start point and a single destination point: I
am here and I want to go to there. All that is required to create a GOTO route is
having the destination waypoint saved in memory. This waypoint can be one that
you have saved earlier (which is stored in your User Waypoint List) or any of the
landmarks that come with the SporTrak in its built-in database.
Creating a GOTO Route
Press GOTO. The first thing that has to be done is to select the destination
waypoint. This is done by accessing the waypoint database. The first screen is
used to select the category of the database that the waypoint is in and how it
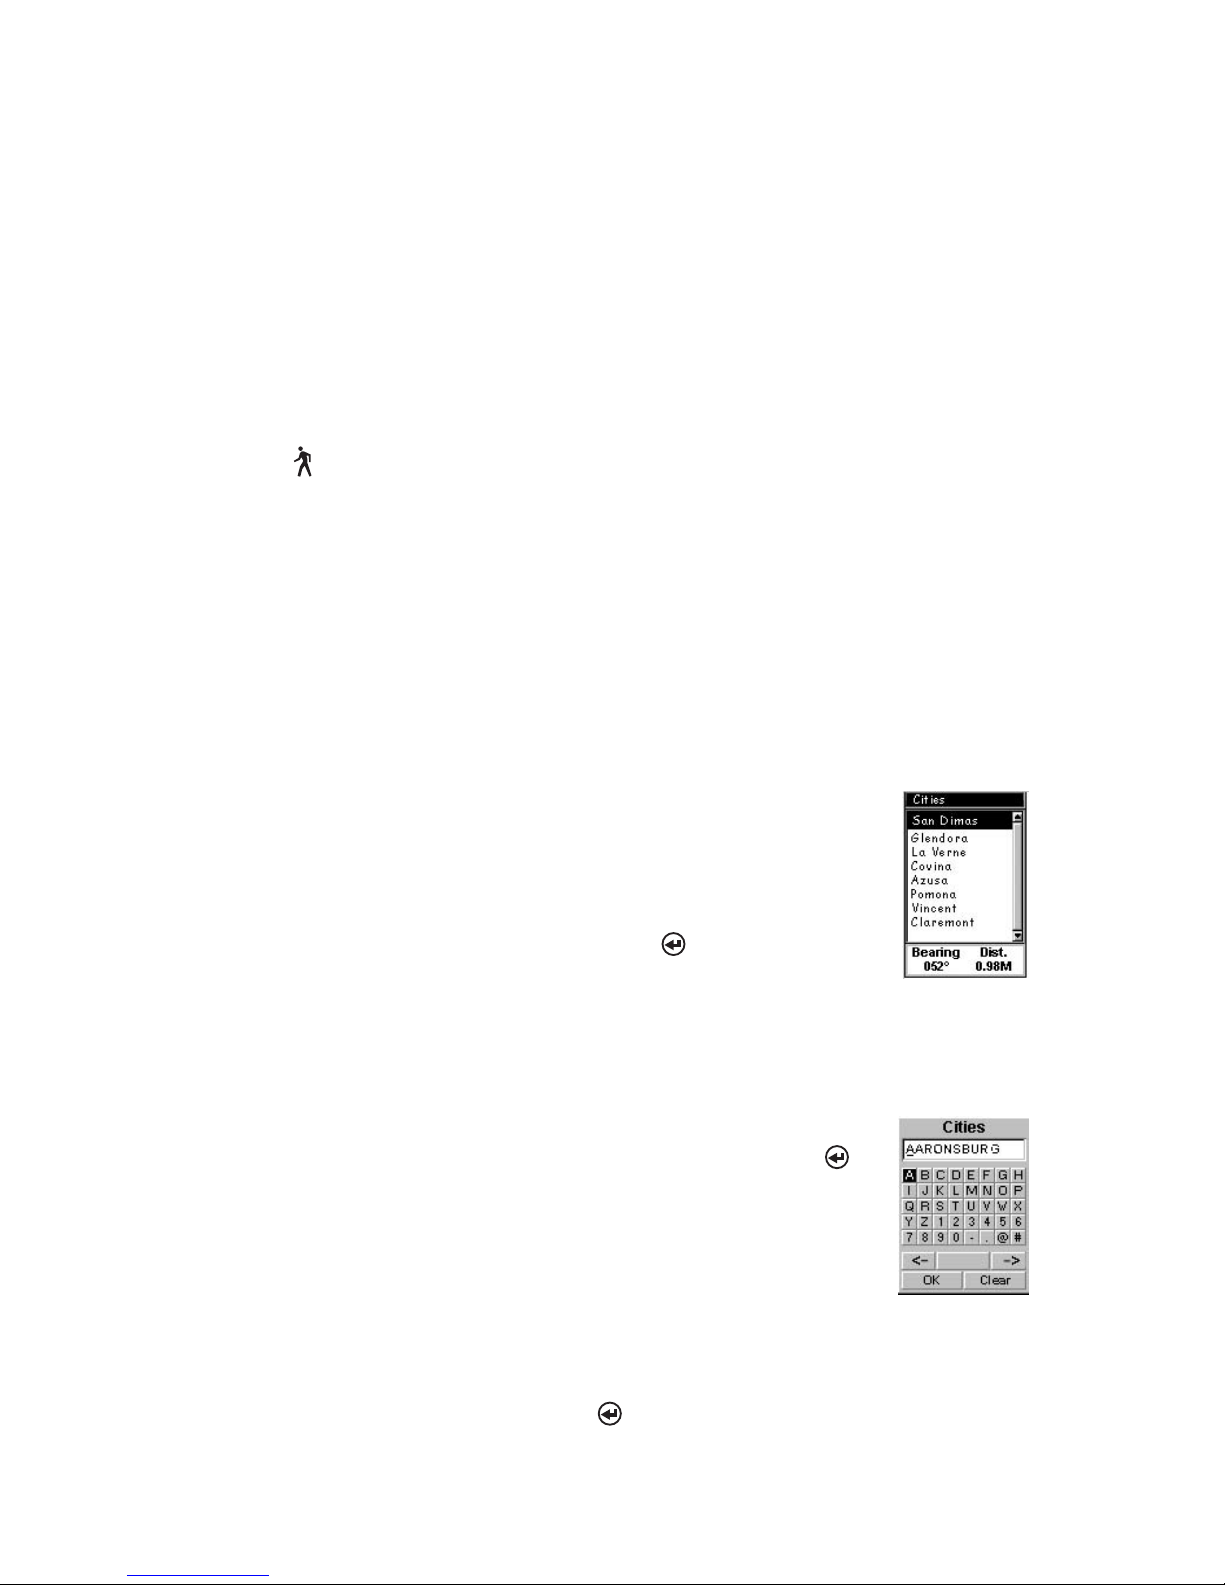
will be found, alphabetically or nearest to your position, a city or the cursor.
Selecting a Destination Waypoint from Database using “Near Position”
Use the UP/DOWN arrows to highlight the category that your destination
waypoint is in. Use the LEFT/RIGHT arrows to select how the waypoints are
displayed, Alphabetical, Near Position, Near City or Near Cursor. In this case,
you will be using “Near Position”.
The example shown here is a sample of a City Waypoint List.
This is a sample of a Nearest City Waypoint list for Magellan.
Your screen will look different.
Use the UP/DOWN arrows to highlight your choice of
waypoint to be your destination and press [ENTER].
The GOTO route is now active and you are returned to the last
viewed navigation screen.
Selecting a Destination Waypoint from the Database using “Alphabetical”
Highlight any category other than User, and press the LEFT/
RIGHT arrows to select a Find By of “Alphabetical”. Press
[ENTER]. (In this example, Cities was selected and this is how
the screen appears.)
Using the arrow keys to navigate the displayed keyboard, begin
typing in the name of the waypoint (destination) you are
looking for.
For example, suppose your destination was to be Los Angeles. Use the keypad
to highlight the letter “L” and press [ENTER]. Notice how the name is
changed to the first city stored in the SporTrak’s memory that begins with the
Page 23

SporTrak Color GPS Mapping Receiver 15
letter “L” and that the cursor has moved to the next letter in the city name.
(You can move the cursor back if you made a mistake by highlighting the “<-”
button on the keyboard and press [ENTER].)
Since we are looking for Los Angeles, we need to highlight the “O” next and
press [ENTER]. Then the “S” and press [ENTER].
To add a space, highlight the “space bar” and press [ENTER]. (Also, you
can use the “->” button to move the cursor to the right if you want to skip the
letter the cursor is indicating.)
You don’t need to spell out the entire word. The attempt here is to get close to
the name so you won’t need to scroll very far during the next step. As a guide,
entering the first five letters should be sufficient. When you are satisfied with
what you have entered, highlight “OK” and press [ENTER].
The list of all the waypoints for the category you selected, in this case cities, is
displayed with the waypoint that was previously selected at the top of the list.
Now just use the Up/Down arrows to highlight the waypoint you are looking
for and press [ENTER].
For this example, you would highlight Los Angeles and press [ENTER].
The Map screen is displayed and the SporTrak will begin computing all of the
necessary information needed to get you to your destination.
Navigating on a GOTO Route
The SporTrak has the ability to provide you with the tools you’ll need to
navigate to your destination. You have the choice of three customizable screens
that display the information that you need in the layout that you desire. Hikers
may find the compass screen perfect for them while boaters may prefer the
Large Data or Map screen. For you, the Map screen may have all the information you’ll ever require.
Press [NAV] until the navigation screen you want is displayed.
If you selected the Map screen, you will see your position icon in the center of
the screen with a line drawn for you on the map, graphically displaying the
GOTO route.
Note that this route is line of sight (LOS) or “as the crow flies.” The SporTrak
does not compute the route using streets and highways providing a turn-byturn routing. You’ll find very quickly that you can easily use the roads and
highways displayed on the Map screen and compare them to the displayed
route and get to your destination simply.
Page 24

16 SporTrak Color GPS Mapping Receiver
GOTO routes are NOT saved in memory when the SporTrak is turned
off. If you are navigating on a GOTO route and you need to turn the
SporTrak off, you will need to restart the GOTO. Routes, however, are
stored in memory. If you need to make a GOTO but expect to turn the
SporTrak off before arriving, you might consider making a 1-leg route
using the route menu.
Summary
This concludes the basic operation of the Magellan SporTrak, but there is so much
more. More detailed information can be found in the Reference Section of the
User Manual.
If this is your first time using a GPS receiver, you should take some time now to get
comfortable with the NAV screens and begin saving some waypoints at different
locations. An ideal way to get used to using the Magellan SporTrak is to go outside
your house and obtain a position fix. (An easy way to see that you are computing a
position fix is to view the Sat Status screen. When you see “3D” in the upper right
corner, you are computing fixes.) Now view the Map screen. Chances are you will
see some familiar streets being displayed.
Now that the SporTrak has told you where you are, save this location into memory
by pressing MARK. Now would be a good time to practice using the keypad to
enter a new name for this waypoint. “Home” would be a good choice. When you
have finished inputting a name and you ’ve highlighted DONE and pressed ENTER,
you will be back at the Map screen. Notice there is now an icon displayed for the
waypoint you just created.
Next, go to the store, a friend’s house or any location away from where you are now.
Repeat the process of “Marking” this position. (Be sure you are computing fixes
before saving the position.) Now you should have two distinct waypoints saved in
your SporTrak.
Using the simple instructions provided here, press GOTO, highlight “User” and
press ENTER. Now use the up/down arrows to highlight the “Home” waypoint
(if you called it that) and press ENTER. The Magellan SporTrak will now begin
computing all of the information you need to return to your home. As you are
travelling, notice the different NAV screens and witness the data changing as you
are moving. (Don’t view the SporTrak screen if you are driving, let the passenger do
that.)
Everything else the SporTrak can do for you is based on the simple exercise you just
performed and when you are comfortable doing this, everything else will be a
simple building block on what you already know.
Page 25
SporTrak Color GPS Mapping Receiver 17
Reference
Power / Backlight / Contrast
Turn the SporTrak On — Applies power to the SporTrak and displays last
NAV screen viewed. During power-up the first screen shows the
software and map database versions currently loaded in the SporTrak.
The second screen gives a warning that must be read. After reading the
warning press [ENTER] to proceed. (If you do not press
[ENTER], the SporTrak will shut off after 10 seconds.)
You have 10
seconds to accept
the warning by
pressing ENTER
or the SporTrak
will shut off.
Turn the SporTrak Off — Shuts down the SporTrak.
During the 5 second countdown, pressing the [POWER] key again
will shut the SporTrak off immediately.
Using the Display Backlight — Illuminates the display for easier viewing
in dark surroundings. Use only as needed as the backlight causes a large
drain on the batteries. An automatic timer will turn the backlight off
when a button has not been pressed for a selected duration. (See “Setup”
to change the settings for the automatic timer).
Press and hold
for 2 seconds.
Press
[CANCEL] to abort before 5
seconds has elapsed.
Page 26
18 SporTrak Color GPS Mapping Receiver
Reference
Adjusting the Display Contrast — Sets the contrast of the display for easy
viewing in most lighting conditions.
From any
screen
Use up/down
arrows to
highlight
Contrast
(The menu display may differ slightly
depending upon which screen it was
accessed from.)
Use left/right
arrows to
adjust the
contrast.
Navigational Screens
Selecting NAV Screens — The [NAV] button pro vides a means of
accessing the navigation screens. (Note: the sequence displayed is when all
eight (counting both P osition Scr eens as one scr een) navigation scr eens ar e
turned on. Screens turned off in Setup will not be displayed.)
Navigation Screen
Sequence
Map Screen
Compass Screen
Large Data Screen
Position Screen
Road Screen
Data Screen
Speed Screen
Satellite Status Screen
Returning to Last Viewed NAV Screen — Pressing the [NAV] button
returns the SporTrak to the last NAV Screen viewed. (Note: if the
[NAV] button is pressed from a screen where data is being input, the
data will not be saved.)
Map Screen
The Map screen is the very heart of the SporTrak. The Map screen has two
modes: Position and Cursor.
In the Position Mode, the map is centered around your present position with an
arrow cursor indicating your position and points in the direction you are
heading. Two customizable data fields are presented at the bottom of the display.
Page 27

SporTrak Color GPS Mapping Receiver 19
Reference
Map Scale
Indicator
Present
Position Icon
Present Position IconPresent Position Icon
Present Position IconPresent Position Icon
Present Position Icon
The Present Position Icon
graphically displays your position
on the map. While you are
moving it will point in the
direction you are heading.
If the SporTrak is not computing
positions, this icon is replaced
with an hourglass icon.
Map Scale IndicatorMap Scale Indicator
Map Scale IndicatorMap Scale Indicator
Map Scale Indicator
Provides the scale for the map.
The number displayed represents
approximately 1/4 of the screen’s
width. Scale can be changed with
the IN and OUT buttons.
Track HistoryTrack History
Track HistoryTrack History
Track History
Dotted line on the map displays
the history of where you have
travelled since the last time you
cleared the Track History (see
Clear Memory in the Reference
Chapter.)
Data FieldsData Fields
Data FieldsData Fields
Data Fields
These fields display navigational
information for viewing on the
Map screen. They are both
customizable with 13 data types
possible.
Both of the data fields can be
turned on or off allowing more
viewable map area.
Both features (customize and
turning the data on/off) can be
accessed from the
[MENU]
button.
Data
Fields
Position Mode
Track History
If you require to see more of the map you can also turn off these data fields.
Information as to how to customize this screen follows this brief description of
the Map screen.
Page 28

20 SporTrak Color GPS Mapping Receiver
Reference
Cursor
Information
Block
Map Scale
Indicator
Cursor
Icon
Cursor IconCursor Icon
Cursor IconCursor Icon
Cursor Icon
The Cursor Icon pinpoints the
location you have selected by
using the arrow keys.
Map Scale IndicatorMap Scale Indicator
Map Scale IndicatorMap Scale Indicator
Map Scale Indicator
Provides the scale for the map.
The number displayed represents
approximately 1/4 of the screen’s
width. Scale can be changed with
the
IN and OUT buttons.
Waypoint NameWaypoint Name
Waypoint NameWaypoint Name
Waypoint Name
Whenever the cursor is over a
map object, the name of the map
object is displayed, otherwise the
word “cursor” appears. The data
shown in the information block is
the heading and distance from
your present position to the
cursor.
Waypoint
Name
Cursor Mode
In the Cursor Mode, you are provided with a cursor that can be moved on the
map. At the bottom of the display is the information for the position of the
cursor relative to your present position. Also any points of interest that the
cursor is over will be shown.
To access the Cursor Mode, press any arrow on the keypad. A crosshair appears
that can be moved with the arrow keys.
To return to the Position Mode, press [ESC]. The cursor will disappear and
the present position icon will appear centered on the map.
Page 29
SporTrak Color GPS Mapping Receiver 21
Reference
Setting the Map Detail — The detail of the map can be set to highest,
high, medium, low or lowest. This changes the zoom level that different
map objects (cities, highways, labels, etc.) are displayed. If you have set
a zoom level and the display is too cluttered, set the map detail to a
lower level; conversely set it to a higher level to view more detail. The
default is Medium.
From
the MAP
Screen
Highlight
Map Setup
Use arrows to
highlight the
“Detail” field
Use arrows to select
the desired Map
Detail level
Customizing the Map Display — The Map screen can be customized for
your individual needs and requirements. You can select what is being
displayed on the map as well as what additional data will be presented at
the bottom of the screen. Customization is broken into two parts; what
items are displayed on the map and what data fields (if any) are
displayed at the bottom of the screen.
Selecting Map I tems
Turning On/Off Display Waypoints — Turns on or off the waypoints
on the Map screen. Default is On.
From
the MAP
Screen
Highlight
Map Setup
Use L/R
arrows to
select
“Display” tab
Use U/D
arrows to
select
“Waypoints”
Turning On/Off Track Lines — As you move, your track history is
normally displayed on the map screen represented by a dashed line. This
function allows you to turn off or on these lines. Default is On.
From
the MAP
Screen
Highlight
Map Setup
Use L/R
arrows to
select
“Display” tab
Use U/D
arrows to
select “Track
Lines”
Turning On/Off Topographic Lines — [Available only if a map has
been uploaded from a Magellan MapSend Topo for the United States
CD-ROM] This function will hide all topo lines and topographic
information. Default is On.
From
the MAP
Screen
Highlight
Map Setup
Use L/R
arrows to
select
“Display” tab
Use U/D
arrows to
select “Topo
Lines”
Page 30
22 SporTrak Color GPS Mapping Receiver
Reference
Turning On/Off Displayed POI’s — [Available only if a map has been
uploaded from a Magellan MapSend Streets and Destinations or
MapSend Topo for the United States CD-ROM] Allows you to select
which, if any, POIs that have been uploaded from a MapSend product
to be displayed. Default is On.
From
the MAP
Screen
Highlight
Map Setup
Use L/R
arrows to
select
“Display” tab
Use U/D
arrows to
select POI
Globally Turn Map Items On/Off — If you have uploaded map data from
a MapSend product, you will notice that the list of POIs can be
extremely lengthy. To aide you in the customization of the display you
can turn everything on or off globally.
To turn off all map items, follow these instructions.
From
the MAP
Screen
Highlight
Map Setup
Use L/R
arrows to
select
“Display” tab
Use U/D
arrows to
select
Clear All
After you have turned off all of the map items, you can go back and just
select the POIs that you want to view. Please note that this function
will also turn off waypoints, track lines and, if applicable, topo lines. Be
sure to turn these back on if you want to see them.
Inversely, to globally turn on all of the map items, follow the above steps
but select “Mark All” instead of “Clear All”.
Setting Up Map Data Fields — The following options are available ONLY
if you are in the Position Mode of the Map screen. If you are in the
cursor mode, press the [ESC] key and the display will snap back to
the Position Mode with the arrow icon displaying your present postion.
(If you are not clear on which mode you are in, the simpliest way to
determine it is to see what cursor is displayed; an arrow indicates
Position and a crosshair indicates Cursor. If you press the [ESC] key
and the display changes to another Nav Screen you were in the Position
Mode and you can press [NAV] to return to the map.
Page 31

SporTrak Color GPS Mapping Receiver 23
Reference
Turning Data Fields On/Off — This option allows you to turn on or
off the two information fields that are displayed on the Map screen.
Turning these off allows for more of the map to be displayed. Default is
SHOW.
From
the MAP
Screen
Highlight
Hide Map Info
or
Show Map Info
When Map Info is hidden and the map is in the cursor mode, the
bearing (BRG) and distance (DIS) to the cursor is shown in the bottom
left corner of the map replacing the scale. (Note: if you have uploaded
topographic information from Magellan’s MapSend Topo for the United
States CD-ROM, the elevation at the cursor’s location is displayed, not
the bearing and distance.) If the cursor happens to be on a map object,
the name of the object is displayed.
Selecting the Data Fields — This function allo ws you to select which
data fields are to be displayed. You can choose from Customize Fields,
Street Information or, if topographic information is loaded, you can
select Horizontal Profile or Terrain Projection. If you select either
Horizontal Profile or Terrain Projection and you do not have
topographic information loaded a warning screen is displayed.
From
the MAP
Screen
Highlight
Select Map Info
Use U/D
arrows to
select desired
information
Two Data Fields Description — This option displays two boxes at the
bottom of the map that can display data that you choose. Displaying
these data fields is the default for the SporTrak.
Changing the Data Fields — Allows you to change the data that is
being displayed to 1 of 13 different data options (bearing, distance,
speed, heading, VMG, CTS, ETA, ETE, XTE, turn, elevation, time,
or date). Note: If you have selected Hide Map Info, this option will
not be available in the menu. Also, you must have the Two Data
Fields displayed on the Map screen to be able to customize them.
Press [ESC] when you are done to leave the customize mode.
Page 32

24 SporTrak Color GPS Mapping Receiver
Reference
Street Information Description — This mode just displays the name of
the street close to your present position.
Horizontal Profile Description — This mode displays at the bottom of the
Map screen a graphical representation of the
horizon at a fixed distance from your present
position. This fixed distance is equal to the map
scale you have selected for the Map screen, so as
you zoom in or out, the horizon displayed will
change. In the Horizon Profile mode, you will
also notice a line projected out from your
present position icon to a shorter perpendicular
line. The intersection of the two lines indicates
the location on the map where the horizon is
being computed. (This function requires that
map data has been uploaded from Magellan MapSend Topo for the
United States and that your present position as well as the projected
horizon falls within the area uploaded.)
You should note that when you select Horizontal Profile, your Map
Orientation will change to “Track Up” so you may need to change that
when you are done viewing the horizontal profile. If you change
Orientation to something other then Track Up while viewing the
Horizontal Profile, the default Two Data Fields is displayed. Changing
the Orientation back to “Track Up” will revert back to the Horizontal
Profile.
Also, you must be zoomed in to a scale of 0.80 miles or closer for the
horizontal profile to be displayed. Zoom scales higher then 0.80 miles
will cause the data displayed to change to the Two Data Fields and will
change back to Horizontal Profile as you zoom in to 0.80 miles and
below.
Terrain Projection Description — This feature allows you to view the
terrain directly ahead of you graphically. It is computed from your
present position and extends in a straight line to the top of your display.
This provides you with instantaneous information on what terrain
elevations are directly in front of you. Your present position and
elevation are indicated at the left side of the display. The maximum
elevation for the terrain ahead of you is displayed above the graph, next
Page 33

SporTrak Color GPS Mapping Receiver 25
Reference
to the map scale indicator. (This function requires that map data has
been uploaded from Magellan MapSend Topo for the United States and
that your present position as well as the projected horizon falls within
the area uploaded.)
Like Horizontal Profile, you must be zoomed in to a scale of 0.80 miles
or closer for the projected terrain to be displayed. Zoom scales higher
then 0.80 miles will cause the data displayed to change to the Two Data
Fields and will change back to Terrain Projection as you zoom in to 0.80
miles and below.
You should note that when you select Terrain Projection your Map
Orientation will change to “Track Up” so you may need to change that
when you are done viewing the projected terrain. If you change
Orientation to something other then Track Up while viewing the
Terrain Projection, the default Two Data Fields is displayed. Changing
the Orientation back to “Track Up” will revert back to the projected
terrain.
Changing the Map Orientation — You can change how the map is
orientated on the screen to either North Up, Course Up or Track Up.
Default is North Up.
From
the MAP
Screen
Highlight
Map Setup
Use arrows to
highlight the
“Orientation” field
Use arrows to select
the desired Map
Orientation
North Up North is at the top of the screen.
Course Up The heading of the active leg of the active route is at
the top of the screen. If no route is active, North Up
orientation is used until a route is activated.
Track Up Your heading (i.e., the direction you are travelling) is at
the top of the screen.
Page 34

26 SporTrak Color GPS Mapping Receiver
Reference
Selecting Primary Usage — The SporTrak can be set to either Land or
Marine U sage. When in Land (default), the map displays land areas in
white and water areas as dark gray. For marine applications it may be
desirable to reverse the display, showing water as white and land as dark
gray. This will make reading some of the data information on the water
easier.
From
the MAP
Screen
Highlight
Map Setup
Use arrows to
highlight the
“Primary Usage”
field
Use arrows to select
Land or Marine
Selecting Track Mode — Allows you to set how often the SporTrak stores
track points. Setting the mode to “OFF” stops the SporTrak from
saving any new track points. In “Auto” or “Auto Detailed” mode, the
SporTrak uses a method for track point storage that maximizes memory.
Using Auto, you will see more points on and near turns and less points
on straight stretches of the map. You also have the option of selecting
fixed intervals for track point storage.terrain.
From
the MAP
Screen
Highlight
Map Setup
Use arrows to
highlight the
“Track Mode” field
Use arrows to
select Mode
Setting the Track Mode to “OFF” will cause severe limitations to the
ability of your SporTrak to create a backtrack route. The same
temporary waypoints used to create the displayed track are used to
compute a backtrack route. Therefore, it is highly recommended that
you use the “Auto” Track Mode whenever possible.
Auto vs. Auto Detailed. You will notice two of the options for the
Track Mode are Auto (default) and Auto Detailed. Basically, both
options behave the same. While your are travelling in a straight line,
only a few track points are taken, but as you turn the SporTrak increases
the rate of track points. This allows for a good representation of your
track with minimal track points stored. Auto Detailed performs exactly
the same as Auto, but has the base rate of track points saved increased.
This allows a more detailed track then Auto to be taken, while at the
same time saving memory over a fixed rate.
Page 35

SporTrak Color GPS Mapping Receiver 27
Reference
Using Vertical Profile — Vertical Profile displays the elevation as a
graphical display for the option you select.
Only Track History is available for this function if MapSend Topo for
the United States map data is not uploaded. (Path Check is shown as an
available function but will not display the vertical profile, however it can
be used to graphically create a route. See the information on Path
Check for more details.) If a topographic map has been uploaded, you
have the additional options of selecting Path Check, Route or
Highlighted Road.
While viewing the vertical profile screen, you can use the left and right
arrows to move the profile accor dingly. The vertical dashed line in the
middle of the profile plot provides the elevation for that point on the profile.
Selecting Vertical Profile — Note, not all options for Vertical Pr ofile are
available at all times. For example, if you have a topographical map
loaded but the cursor or present position is not on a road, the option
“Highlighted road” will not be displayed.
From
Any
Screen
Highlight
Vert. Profile
ENTER ENTER
Select
option
Track History Description — This option
displays the vertical profile of the track that is
stored in the SporTrak. If you have cleared
your track, either with the Clear Track option
or clearing memory, Track History cannot be
accessed.
Highlighted Road Vertical Profile
Description — (Available only with map data
uploaded from Magellan MapSend Topo for
the United States.) If the cursor or your present position is on a road
and you have topographic maps loaded, you can view the vertical profile
for the road you have selected.
Page 36

28 SporTrak Color GPS Mapping Receiver
Reference
Route Vertical Profile Description — (Available only with map data
uploaded from Magellan MapSend Topo for the United States.) If you
have at least one route stored in memory, you can view the vertical
profile for the route. After selecting Vertical Profile, you will be asked to
select the route you want to plot.
Path Check Description — Path check performs two functions. First,
it allows you to create a path on the Map screen graphically and then
view this path’s vertical profile (assuming that you have uploaded a topo
map). You can also save this path as a route, allowing an additional
method of creating a route.
After selecting Path Check from the Vert. Profile menu, you will be
returned to the Map screen where y ou can begin to lay out your path.
Using the arrow keypad, move the cursor to the desired location of the
path’s beginning and press [GOTO]. Now use the arrow keypad to
move to a new location and press [GOTO]. Notice a thick line has
been drawn between the two points. Continue moving the cursor and
pressing [GOTO] until your path is complete. When it is done, press
[ENTER] and the vertical profile for the path is displayed.
When you are done viewing the Vertical Profile of the path you created,
press ESC to return to the map screen. Now you can continue adding
legs to the path.
Tip: You can convert this path into a stored route by simply pressing
the [MENU] key and selecting the Save To Route option.
Page 37

SporTrak Color GPS Mapping Receiver 29
Reference
Customizing the Data Fields — Allows you to change the data that is
being displayed to 1 of 17 data options (bearing, distance, speed,
heading, VMG, CTS, ETA, ETE, XTE, turn, elevation, time, date,
COG, EPE, Avg. Speed, or Max Speed) for any of the two fields.
From the
Compass
Screen
Highlight
Customize
Use arrows to
highlight the title
for the data field to
be changed
Use arrows to
select new
data type
Compass
Data Fields
Destination
Name
Destination NameDestination Name
Destination NameDestination Name
Destination Name
When you are navigating on a
GOTO or multileg route, the name
of the destination is placed here.
For multileg routes, the name
displayed is the name of the
destination for the leg of the route
you are presently navigating on.
Data FieldsData Fields
Data FieldsData Fields
Data Fields
Customizable data fields. The data
displayed can be selected from 13
different options. Customizing is
accessed through the
[MENU]
button. Some of the data displayed
requires you to be moving to be
computed, invalid data is indicated
by dashes.
Compass/Heading MarkerCompass/Heading Marker
Compass/Heading MarkerCompass/Heading Marker
Compass/Heading Marker
Using the compass and the
heading marker, you can view
your heading information in a
familiar manner. Note that you
need to be moving for this data
to be valid.
Destination IconDestination Icon
Destination IconDestination Icon
Destination Icon
When you are travelling on a
route, an icon representing the
destination of the leg or GOTO is
displayed outside the compass.
This provides you with the
direction you need to head to
arrive at the destination. When
you are on course and heading
straight for the destination, the
destination icon will be lined up
with the heading marker.
Heading
Marker
Sun/Moon
Position
Markers
Destination
Icon
Compass Screen
Page 38

30 SporTrak Color GPS Mapping Receiver
Reference
Destination NameDestination Name
Destination NameDestination Name
Destination Name
When you are navigating on a
GOTO or multileg route, the name
of the destination is placed here.
For multileg routes, the name
displayed is the name of the
destination for the leg of the route
you are presently navigating on.
Data FieldsData Fields
Data FieldsData Fields
Data Fields
Customizable data fields. The
data displayed can be selected
from 17 different options.
Customizing is accessed through
the
[MENU] button. Some of
the data displayed requires you to
be moving to be computed,
invalid data is indicated by dashes.
Data Fields
Destination
Name
Large Data Screen
Customizing the Data Fields — Allows you to change the data that is
being displayed to 1 of 17 data options (bearing, distance, speed,
heading, VMG, CTS, ETA, ETE, XTE, turn, elevation, time, date,
COG, EPE, Avg. Speed, or Max Speed) for any of the four fields.
From the
Large Data
Screen
Highlight
Customize
Use arrows to
highlight the title
for the data field to
be changed
Use arrows to
select new
data type
Page 39

SporTrak Color GPS Mapping Receiver 31
Reference
Position Screen
The Position screens 1 and 2 simply display your present position using the
coordinate systems that you have selected in Setup. The Position 1 screen shows
all of the basic position, time and satellite information, all on one screen. In
addition, current navigation information is shown on the bottom half of the
screen.
Selecting the Position Screen — Allows you to toggle between the two
Position screens. This allows the same position to be displayed in
different coordinate systems. This is useful when comparing navigation
data between devices and charts that use different coordinate systems.
The screen viewed can be changed by pressing the Left or Right arrows
while viewing the Position screen.
You can change the coordinate system displayed by following the
instructions in Setup - Selecting the Coordinate System.
Resetting the Trip Odometer — Resets the trip odometer to 0000.00.
From the
Position
Screen
Highlight
Reset Trip
Confirm?
Yes or No
Customizing the Data Fields — Allows you to change the data that is
being displayed to 1 of 17 data options (bearing, distance, speed,
heading, VMG, CTS, ETA, ETE, XTE, turn, elevation, time, date,
COG, EPE, Avg. Speed, or Max Speed) for any of the two fields.
From the
Position
Screen
Highlight
Customize
Use arrows to
highlight the title
for the data field to
be changed
Use arrows to
select new
data type
Page 40

32 SporTrak Color GPS Mapping Receiver
Reference
GPS Status
Present
Position
Coordinates
and Elevation
Present Position CoordinatesPresent Position Coordinates
Present Position CoordinatesPresent Position Coordinates
Present Position Coordinates
and Elevationand Elevation
and Elevationand Elevation
and Elevation
Displays your present position in the
coordinate system chosen in Setup.
Also displays the elevation of the
present position. If the SporTrak is
not computing position fixes, the
last computed position is displayed.
GPS StatusGPS Status
GPS StatusGPS Status
GPS Status
Provides information on the current
status of the GPS receiver portion of
the SporTrak.
Data FieldsData Fields
Data FieldsData Fields
Data Fields
Customizable data fields. The
data displayed can be selected
from 17 different options.
Customizing is accessed through
the
[MENU] button. Some of
the data displayed requires you to
be moving to be computed,
invalid data is indicated by dashes.
Trip OdometerTrip Odometer
Trip OdometerTrip Odometer
Trip Odometer
The odometer performs like the
odometer in your car. It can be
reset through the
[MENU]
button.
Current Time
and Date
Data Fields
Trip
Odometer
Use the Left/Right Arrows to toggle between Position 1 and Position 2
Page 41

SporTrak Color GPS Mapping Receiver 33
Reference
GPS Status Messages — Messages indicating the status of the GPS receiver
section of the SporTrak are displayed on the Position screen.
Message Description
Searching - 1st sat Searching for 1st satellite.
Searching - 2nd sat 1st satellite found; searching for 2nd satellite
Searching - 3rd sat Two satellites are being tracked and searching
for a third.
Searching - 4th sat Three satellites are being tracked and
searching for the fourth.
Collecting Data All satellites needed for position fix are being
tracked and position is being computed.
Averaging SporTrak is computing fixes; speed is near 0.0
so position is being averaged.
EPE xxft Estimated Position Error in feet. SporTrak is
computing fixes while moving.
DGPS Computed fixes are being differentially
corrected.
Since the SporTrak is a 12-channel receiver, once the first satellite is
found, finding the remaining satellites and computing a fix may take
only a few seconds.
Selecting Coordinate System, Map Datum and Elevation Mode —
Allows you to change the coordinate system, map datum and elevation
mode for the primary and secondary Position Screens. These functions
perform identically to the same functions described in the Setup section
of this manual. Simply described, you press [MENU] from either
Position screen, select the option, press [ENTER] and follow the
prompts.
Page 42

34 SporTrak Color GPS Mapping Receiver
Reference
Projecting a Waypoint — This function, found on the menu associated
with the Position Screen, allows you to create a new waypoint that is a
fixed distance and bearing from your present position or from any
waypoint/POI stored in the SporTrak.
An example of waypoint projection would be if you wanted to go to a
location that is 2.0 miles and due north of your current position. You
would access the waypoint projection function and enter 2.0 as the
distance and a bearing of 0°. The Waypoint Projection Screen would
compute the coordinates of the “projected” location and then allows
you to save this waypoint into the SporTrak’s memory. From there you
could simply do a GOTO to the waypoint you just created.
You can also project waypoints from any stored waypoint or POI by
highlighting the “From” field and pressing [ENTER]. This will take
you to the SporTrak’s database, giving you complete access to choose
from any of the waypoints/POIs that you have stored.
From the
Position
Screen
Highlight
Projection
To select a “From” location
other then your present
position, use arrows to
highlight “From” field
Search the database to
locate the waypoint or POI
you want to project a new
waypoint from.
Use arrows to
highlight
“Distance” field
Enter desired
distance to
project
Use arrows to
highlight
“Bearing” field
Enter desired
bearing to
project
Use arrows to
highlight “Save
button
Follow the directions for editing a
waypoint (icon, name, etc.). Highlight
“Save” and press ENTE when done
Page 43

SporTrak Color GPS Mapping Receiver 35
Reference
Customizable
Data Fields
Destination
Name
Scale Indicator
Compass
Road
Destination NameDestination Name
Destination NameDestination Name
Destination Name
When you are navigating on a GOTO
or multileg route, the name of the
destination is placed here. For
multileg routes, the name displayed
is the name of the destination for the
leg of the route you are presently
navigating on.
Data FieldsData Fields
Data FieldsData Fields
Data Fields
Customizable data fields. The data
displayed can be selected from 13
different options. Customizing is
accessed through the MENU button.
Some of the data displayed requires
you to be moving to be computed,
invalid data is indicated by dashes.
Road Screen
The Road Screen provides you with navigation information in a graphical format.
At the top of the display are four customizable data fields. Immediately below
them is a compass that will provide you with your heading. Following the compass
is a graphical representation of your route as if it was a road. This familiar indication of where you are in regards to your planned route will provide you with the
knowledge required for you to keep on track.
CompassCompass
CompassCompass
Compass
Displays your heading in a familiar
compass format.
RoadRoad
RoadRoad
Road
This graphically displays the route
(GOTO or other routes) that is
active. As you move left or right of
your intended track, the road will
move on the display indicating
which way you need to steer to get
back on track. Ideally, the road
would be centered on the display.
Also, you will see upcoming turns in
advance allowing you to make
necessary preparations.
Scale IndicatorScale Indicator
Scale IndicatorScale Indicator
Scale Indicator
Use Zoom In/Out to change the scale.
Customizing the Data Fields — Allows you to change the data that is
being displayed to 1 of 17 data options (bearing, distance, speed,
heading, VMG, CTS, ETA, ETE, XTE, turn, elevation, time, date,
COG, EPE, Avg. Speed, or Max Speed) for any of the four fields.
From the
Road
Screen
Highlight
Customize
Use arrows to
highlight the title
for the data field to
be changed
Use arrows to
select new
data type
Page 44

36 SporTrak Color GPS Mapping Receiver
Reference
Customizable
Data Fields
Destination
Name
Compass
Destination NameDestination Name
Destination NameDestination Name
Destination Name
When you are navigating on a
GOTO or multileg route, the
name of the destination is
placed here. For multileg
routes, the name displayed is
the name of the destination for
the leg of the route you are
presently navigating on.
Data FieldsData Fields
Data FieldsData Fields
Data Fields
Customizable data fields. The data
displayed can be selected from 17
different options. Customizing is
accessed through the MENU button.
Some of the data displayed requires
you to be moving to be computed,
invalid data is indicated by dashes.
CompassCompass
CompassCompass
Compass
Displays your heading in a familiar
compass format.
Customizing the Data Fields — Allows you to change the data that is
being displayed to 1 of 17 data options (bearing, distance, speed,
heading, VMG, CTS, ETA, ETE, XTE, turn, elevation, time, date,
COG, EPE, Avg. Speed, or Max Speed) for any of the six fields.
From the
Data
Screen
MENU
Highlight
Customize
Use arrows to
highlight the title
for the data field to
be changed
Use arrows to
select new
data type
ENTER
ENTERENTER
Data Screen
Page 45

SporTrak Color GPS Mapping Receiver 37
Reference
Customizing the Data Fields — Allows you to change the data that is
being displayed to 1 of 17 data options (bearing, distance, speed,
heading, VMG, CTS, ETA, ETE, XTE, turn, elevation, time, date,
COG, EPE, Avg. Speed, or Max Speed) for any of the four fields. (See
explanation of Data Types in the Map Screen section.)
From the
Speed
Screen
MENU
Highlight
Customize
Use arrows to
highlight the title
for the data field to
be changed
Use arrows to
select new
data type
ENTER ENTER
ENTER
Customizable
Data Fields
Destination
Name
Speedometer
Destination NameDestination Name
Destination NameDestination Name
Destination Name
When you are navigating on a
GOTO or multileg route, the
name of the destination is
placed here. For multileg
routes, the name displayed is
the name of the destination for
the leg of the route you are
presently navigating on.
Data FieldsData Fields
Data FieldsData Fields
Data Fields
The data displayed can be
selected from 17 different
options. Customizing is
accessed through the MENU button.
Some of the data displayed requires
you to be moving to be computed,
invalid data is indicated by dashes.
SpeedometerSpeedometer
SpeedometerSpeedometer
Speedometer
Displays your speed using a familiar
speedometer display. The scale of
the speedometer is not adjustable
but will change dynamically to best
display your speed.
Trip OdometerTrip Odometer
Trip OdometerTrip Odometer
Trip Odometer
It can be reset using the MENU
button.
Speed Screen
Page 46

38 SporTrak Color GPS Mapping Receiver
Reference
Satellite
Position
Satellite
Position Graph
Battery Life
Indicator
Satellite Signal
Strength Chart
Power
Source
Satellite Position GraphSatellite Position Graph
Satellite Position GraphSatellite Position Graph
Satellite Position Graph
The two circles indicate satellite
elevation as seen from your current
position; the outer circle represents
the horizon and the inner circle
represents 45° from the horizon.
The center of the circle is 90° from
the horizon, or directly overhead.
Satellite Signal Strength ChartSatellite Signal Strength Chart
Satellite Signal Strength ChartSatellite Signal Strength Chart
Satellite Signal Strength Chart
Clear bar indicates that the SporTrak
is starting to get information from
the satellite. Satellites that are being
used to compute your position are
shown with solid bars. The height of
the bar indicates the relative signal
strength.
Power SourcePower Source
Power SourcePower Source
Power Source
Indicates the source of power being
used — POWER (Internal Battery) or
POWER EXTERNAL.
Position ModePosition Mode
Position ModePosition Mode
Position Mode
3D - position computed is
3-dimensional (elevation is being
computed).
2D - position computed is
2-dimensional (elevation is not
being computed).
Blank - SporTrak is not computing a
position fix.
Satellite PositionSatellite Position
Satellite PositionSatellite Position
Satellite Position
Where the satellite is located
relative to your position.
Position
Mode
WAAS Satellites
Satellite Status Screen
The Satellite Status screen visually displays the satellites being used and the strength
of the received signal. Additionally, this screen displays the power source you are
connected to and, if internal batteries, how much battery life is remaining. This is a
very handy screen when you wish to view how well your SporTrak is tracking
satellites.
Page 47

SporTrak Color GPS Mapping Receiver 39
Reference
Waypoints / Database
Accessing Waypoints in the Database — All stored waypoints, whether
user-input or preloaded, can be found in the Waypoint Database. You
will need to access waypoints in the database whenever you are editing
waypoints, activating a GOTO route or creating a multileg route.
From
Any
Screen
Highlight
Database
Use up/down
arrows to select
category
Use left/right
arrows to select
“Find By”
Selecting Waypoints from the Nearest List.
If Near Position, Near City or Near Cursor is
selected as the “Find By” option for the database
or if User was selected as the category, you will
be presented with a list of waypoints that you
can choose from. The information at the bottom
of the screen indicates the bearing and distance
to the highlighted waypoint from your present
position.
Selecting Waypoints from the Alphabetical
List. If Alphabetical is selected as the “Find
By” option for the database a slightly different
screen from the Nearest list is displayed. A
keyboard is graphically displayed allowing you
to enter the name of the waypoint or map
object you are looking for. You need not enter
the entire name, just enough letters to narrow
the search down. (A minimum of four characters is recommended.) Selecting “OK” and
pressing enter brings up a listing of the waypoints, starting with the one
you entered at the top.
Note: When selecting the User category, the SporTrak does not use the
keyboard display.
Use up/down
arrows to highlight
waypoint
Page 48

40 SporTrak Color GPS Mapping Receiver
Reference
Selecting Waypoints Nearest to the Cursor. As discussed in the Map
Screen section, the Map Screen has two modes of operation, position
and cursor. If you are in the cursor mode you may want to know what
waypoints are near your cursor rather than the ones nearest to your
present position. You can do this by selecting the “Find By” option of
Near Cursor. You are then presented with a list of waypoints that are
close to the cursor for the category you selected.
After the list is presented, you can use the Up/Down arrows to highlight
a waypoint, and press [ENTER] to view information on it. When
highlighting a waypoint, the bearing and distance from the cursor to the
waypoint is displayed at the bottom of the list.
Note: The “Find By” option Near Cursor is only available when the
Map screen is in the Cursor Mode.
Saving Present Position as a Waypoint — Cr eates and stores your present
position into the memory of the SporTrak. Stored waypoints can be
used in GOTO and route creation. While saving the waypoint, you can
edit the icon, name and add a message or you can just save the waypoint
using the default name supplied by the SporTrak.
(Note: To modify the icon, name or message use the Up/Down arrows
to highlight the field you wish to change and press [ENTER]. You
are then placed into the Edit Mode. Using the method described in
“Getting Started” you can personalize the waypoint, making it easy to
remember what it is.)
Creating New Waypoint Manually — Allows the creation of a new
waypoint with coordinates other than your present position. The
coordinates for the new position need to be entered manually.
From
Any
Screen
Modify
(see Note)
From
Any
Screen
Highlight
Location
Field
Edit Line 1 of
the Location
Field
Edit Line 2 of
the Location
Field
Edit
Elevation
Field
Highlight
“Save”
Button
(Note: To modify the icon, name or message use the Up/Down arrows
to highlight the field you wish to change and press [ENTER]. You
are then placed into the Edit Mode.)
Page 49

SporTrak Color GPS Mapping Receiver 41
Reference
Creating New Waypoint with Map Cursor — Provides a method of
creating a new waypoint with coordinates other than your present
position. The new coordinates are computed automatically based on the
location of the map cursor.
(Note: To modify the icon, name or message use the Up/Down arrows
to highlight the field you wish to change and press [ENTER]. You
are then placed into the Edit Mode.)
Deleting a User Waypoint — Deletes a waypoint that you have created.
Editing a User Waypoint — Allows you to edit a waypoint that you have
already stored in the SporTrak’s memory.
From
Map
Screen
Use arrow
keys to move
cursor to
desired
Modify
(see Note)
From
Any
Screen
Highlight
Database
left/right
arrows select
“Find By”
Highlight
User
Select
Waypoint to
be Deleted
Highlight
Delete
Confirm?
Yes or No
From
Any
Screen
Highlight
Database
left/right
arrows select
“Find By”
Highlight
User
Select
Waypoint to
be Edited
Select Field
to be
Edited
Edit
the
Field
Repeat selecting and
editing fields until all
changes are complete
Highlight
“Save”
button
An alternative method to entering the edit mode is after highlighting
the waypoint you wish to modify press [MENU]. Highlight Edit
WPT and press [ENTER].
Page 50

42 SporTrak Color GPS Mapping Receiver
Reference
Viewing a Map Object on the Map — Displays on the Map the Map
Object you have selected.
Note: This function is for viewing map objects (cities, airports, etc.)
only. See Viewing User Waypoints on the Map for instructions on how
to perform this feature using User waypoints.
Viewing a User Waypoint on the Map — Locates and displays on the
Map the selected User Waypoint.
Note: If the waypoint is used in a route you will get a warning that it is
in a route after selecting it from the list. This is because the screen that
you access the view button can also be used to edit the waypoint and it
may be undesirable to edit a waypoint that is being used in a route.
Also note that any edits you make to the waypoint are not saved when
you use the View button. You need to highlight the Save button and
press [ENTER] to record your changes.
Saving a Map Object as a User Waypoint — Saves a Map Object as a
waypoint to be stored in your User Waypoint List. You would do this
should you want to modify the object or if you wanted to use the object
as a waypoint in the Sun/Moon or Fish/Hunt functions.
Follow the instructions above for Viewing a Map Object on a Map. Press
[MARK]. Edit any field of the waypoint that you want and when
you are done, highlight “Save” and press [ENTER].
From
Any
Screen
Highlight
Database
Select
Waypoint
from the list
Select
Database
Category
From
Any
Screen
Highlight
Database
Select
Waypoint
from the list
Highlight
User
Use U/D arrows
to highlight
“View” button
Page 51

SporTrak Color GPS Mapping Receiver 43
Reference
Searching for a Street Address — This option allows you to search an
uploaded map database for a specific street address. After finding the
address, you can save it as a waypoint (“Mark”) or view it on the Map
Screen.
NOTE: The option is available ONLY if you have uploaded one or more
detailed maps from the Magellan MapSend Streets CD-ROM.
From
Any
Screen
Highlight
Database
Enter street
name
Use arrows
to highlight
street name
Enter
address
number
Use arrows to
highlight an
uploaded map
region
Highlight
Address
Use arrows to
view address
range
Highlight
“Mark” or
“View”
Mark. If you select “Mark” and press [ENTER], the Edit Waypoint
screen is displayed. You can now change any of the attributes for this
waypoint. Highlight “Save” and press [ENTER] to record this
waypoint into the memory of the SporTrak.
View. Selecting “View” and pressing [ENTER] returns you to the
Map Screen in the Cursor Mode with the cursor on the address you
entered. From this point, you can create a waypoint by pressing the
[MARK] button.
Note: The address search has some limitations and is based upon the
map that was uploaded from the MapSend Streets software. While you
are entering the address you will notice that the available range is
displayed on the screen. Addresses entered must fall within that range.
Page 52

44 SporTrak Color GPS Mapping Receiver
Reference
Routes
Creating a GOTO Route — Creates and sets as the active route a 1-leg
route with your present position as the starting point and a destination
waypoint that you choose from the waypoint database.
GOTO routes are not saved in memory. When you turn your SporTrak
off and then back on, the GOTO route is gone. You need to create a
new GOTO route if you intend on completing the route.
Also note that when you are selecting the Waypoint Category you are
being instructed to select the “Find By”. You can select only those
waypoints in your general vicinity (Near Position) or all of the waypoints
in the category in alphabetical order (Alphabetical).
Creating a Backtrack Route — Creates a route using track information
stored in the SporTrak to “retrace” your steps. A good example of using
a backtrack would be if you were out hiking or jogging with your
SporTrak turned on and computing position fixes. After 30 minutes you
From
Any
Screen
Select
Waypoint
Category
Use left/right
arrows to select
“Find By”
If a GOTO route
already exists, you will
be asked to clear it.
Select
Waypoint
from List
From
Any
Screen
Highlight
Routes
Select
“Backtrack”
from Route List
Highlight
Activate Backtrk
choose to return to where you started, following the same route you just
took. All you need do is follow the instructions below and let the
SporTrak take you there.
Creating a Multileg Route — Provides the means to create a multileg
route that can be stored in memory.
Multileg routes are easily the most complicated function in the
Page 53

SporTrak Color GPS Mapping Receiver 45
Reference
SporTrak, but once you can visualize what a multileg route (route) is, it
becomes very easy to understand and create. If you understand that a
GOTO is a 1-leg route with a starting point and a destination point,
then imagine a bunch of GOTO’s strung together where the destination
of one GOTO is the starting point for the next GOTO. That means if
you had three GOTO’s, one from “A” to “B”, another from “B” to “C”
and a third from “C” to “D” you could then put them together to make
one multileg route. In this example you would have a 3-leg route that
went from “A” to “B” to “C” to “D”.
From
Any
Screen
Highlight
Routes
Select an
“Empty”
Route
Step 1:
Select
starting
waypoint
Select
Waypoint
Category
Use L/R arrows
to select
“Find By”
Select
Waypoint
from List
Step 2:
Select leg
destination
waypoint
Select
Waypoint
Category
Use left/right
arrows to
select
“Find By”
Select
Waypoint
from List
Use up/down arrows to move
highlight to next available leg in
the route. Indicated by dashes.
Repeat Step 2 for all additional legs in the route.
Step 3:
Save the
route
Use up/down
arrows to highlight
“Save Route” button
These routes have an advantage over GOTO’s in that A) the starting
point does not have to be your present position, B) they are always in
memory and if activated they remain activated, even when you turn the
SporTrak off and then back on, and C) they can be saved and used over
and over again.
(Note: these routes have been termed “multileg” in an effort to make the
understanding of them a little clearer, however you could create a
1-leg route and save it in the SporTrak’s memory.)
Segment 1
Segment 2
Segment 3
A
B
C
D
Page 54

46 SporTrak Color GPS Mapping Receiver
Reference
Activating/Deactivating a Route — Enables the activating or deactivating
of a stored route. When a route is being used to navigate, it is termed to
be “active”. When you want to use a route to navigate with, follow these
steps to activate it.
Sample Route List
(Bold route indicates “Active” route)
Sample Route Create
(Note: If the route is active, the SporTrak will automatically display
“Deactivate Route” in the menu and inversely if the route is not active,
“Activate Route” will be displayed.)
Viewing a Route — Allows you to view the legs of a route using the same
screen that was used to create the route. Viewing a route can be used if
you just wanted to see the components of the route or as a precursor to
editing the route.
From
Any
Screen
Highlight
Routes
Select
Route
Highlight
Activate
or
Deactivate
From
Any
Screen
Highlight
Routes
Select
Route
Highlight
Map View Route
Editing a Route — Enables you to modify an existing route by inserting a
leg, deleting a leg or replacing a leg. Follow the instructions above for
Viewing a Route and then use the instructions for inserting, deleting,
replacing or appending a leg as appropriate.
When you are done with editing the route, use the Up/Down arrows to
highlight the “Save Route” button and press [ENTER].
Page 55

SporTrak Color GPS Mapping Receiver 47
Reference
Inserting a Leg — Inserts a waypoint in the middle of an existing leg
thereby making two legs where there used to be one.
In the example of a route that goes
from “A” to “B” to “C” to “D”, if
you wanted to insert the waypoint
“E” between “B” and “C” you would
highlight the waypoint “C” and
follow the steps to insert waypoint
“E”. Your route would then be “A”
to “B” to “E” to “C” to “D”.
Deleting a Leg — Deletes a leg from the route.
Select route to be edited.
See Instructions for
Viewing a Route
Highlight
Insert
Select
Database
Highlight destination
waypoint for leg that will
have a leg inserted.
Select
Waypoint
Select route to be edited.
See Instructions for
Viewing a Route
Highlight
Delete
Highlight destination
waypoint for leg that will
be deleted.
Replacing a Leg — Replaces the destination of an existing leg with a
new destination.
Appending a Leg — Adds a leg to the end of a route.
Select route to be edited.
See Instructions for
Viewing a Route
Highlight
Replace
Select
Database
Highlight destination
waypoint for leg that will
be replaced.
Select
Waypoint
Select route to be edited.
See Instructions for
Viewing a Route
Select
Database
Highlight next available
leg. (Indicated by
dashes)
Select
Waypoint
Segment 1
Se
g
m
e
nt 2
Segment 4
Segment 3
A
B
C
D
E
Page 56

48 SporTrak Color GPS Mapping Receiver
Reference
Appending a Newly Created Waypoint to a Route — Allows a newly
created waypoint to be appended to any route in memory.
Reversing a Route — Allows any route in memory to be reversed. In the
example used earlier of “A” to “B” to “C” to “D”, if this route were
reversed it would end up as “D” to “C” to “B” to “A”.
Create a Waypoint by pressing the GOTO button.
Can be present position, user-generated position
or by using Map Cursor to locate position.
Select
Route
Edit/Modify
Waypoint as
desired.
Highlight
“Route”
Button
From
Any
Screen
Highlight
Routes
Select
Route
Highlight
Reverse
Deleting a Route — Enables the deletion of any route in memory. Useful
when you want to add a new route but no “EMPTY” routes are
available.
Viewing a Route on the Map Screen — Provides you with a graphical
representation of the route selected on the Map screen.
From
Any
Screen
Highlight
Routes
Select
Route
Highlight
Delete
From
Any
Screen
Highlight
Routes
Select
Route
Highlight
Map View
Creating a Route Using Track History — This enables you to automati-
cally create a multileg route using your track history. This route will be
saved to your route list with a naming convention of “T01P01 to
T01Pxx” where Pxx indicates the number of points in the route.
From
Any
Screen
Highlight
Routes
Highlight
Save Trk to Rte
Page 57

SporTrak Color GPS Mapping Receiver 49
Reference
Setup
Initializing the SporTrak — Enables you to initialize the SporTrak should
it be needed to speed up satellite acquisition. Two such instances would
be travelling over 500 miles with your SporTrak turned off or complete
loss of memory.
Tu r ning NAV Screens On/Off — Allows you to turn off or on any of the
navigation screens you choose.
(Note: you must go through the entire sequence of nav screens for your
selections to be saved. As an example, if you turn the Sat Status screen
off and press [ESC] before confirming all of the nav screens, your
selection will not be saved and the Sat Status screen will still be on.)
Default: All On
From
Any
Screen
Highlight
Setup
Highlight
Region
Input
Elevation
(optional)
Highlight
Initialize
Highlight
Area
Input
Time
Input
Date
From
Any
Screen
Highlight
Setup
Sat Status
On/Off
Highlight
Nav Screens
Compass
On/Off
Large Data
On/Off
Position
On/Off
Road
On/Off
Page 58

50 SporTrak Color GPS Mapping Receiver
Reference
Selecting the Coordinate System — Allows you to set the coordinate
system that will be used to display the position for the primary or
secondary position screen. Available coordinate systems are: Lat/Lon,
UTM, OSGB, Irish, Swiss, Swedish, Finnish, German, French, USNG,
MGRS, or User Grid.
Default: Primary - Lat/Lon DEG.MIN.MMM
Secondary - UTM
Selecting a Map Datum — Allows you to set the datum used to compute
the coordinates to match the datum used on a map or chart. If you are
using a map or chart with your SporTrak and the datums do not match,
you may find irregularities when comparing the coordinates.
Default: Primary - WGS84 Secondary - WGS84
Selecting the Elevation Mode — Allows you to select the elevation mode
used by the SporTrak. You may choose between 3D (uses satellite
information to compute elevation) or 2D (displays a fixed elevation
based upon the elevation entered).
From
Any
Screen
Highlight
Setup
Highlight
Coord System
The coordinate system you select
may require additional
information.
Select Primary or
Secondary
Select Coordinate
System
From
Any
Screen
Highlight
Setup
Highlight
Map Datum
Select Primary or
Secondary
Select
Datum
Default: 3D
From
Any
Screen
Highlight
Setup
Highlight
Elev Mode
Select
3D or 2D
Page 59

SporTrak Color GPS Mapping Receiver 51
Reference
Selecting the Time Format — Enables you to choose from three different
time formats: Local 24 Hr (military time), Local AM/PM or UTC.
Default: Local AM/PM
Selecting NAV Units — Allows you to select the units of measure that will
be used when displaying navigational data. Options are: Miles/Yd/
MPH, Miles/Ft/MPH, NM/Ft/Knots, or KM/KPH.
Default: Miles/Ft/MPH
Selecting the North Reference — Allows the selection of whether the
SporTrak uses True North, Magnetic North, Military True or Military
Magnetic as its North reference.
Default: Magnetic
Setting the Backlight Timer — Allows you to set the time interval that
will be used to turn off the display backlight when not in use. Times
available are: 30 seconds, 1 Minute, 2 Minutes, 4 Minutes, 10 Minutes
or Timer Off.
Default: 4 Minutes
From
Any
Screen
Highlight
Setup
Highlight
Time Format
Select
Format
If Local time is selected (24 hr. or
AM/PM) you will be prompted to enter
your local time.
From
Any
Screen
Highlight
Setup
Highlight
Nav Units
Select
Nav Units
From
Any
Screen
Highlight
Setup
Highlight
North Reference
Select
North
Reference
From
Any
Screen
Highlight
Setup
Highlight
Light Timer
Select
Timer
Duration
Page 60

52 SporTrak Color GPS Mapping Receiver
Reference
Tu r ning the Beeper On/Off — Allows you to select which actions will
cause the beeper to sound. You can choose from Off, Keys Only
(pressing a key causes a beep), Alarms Only (when an alarm is activated)
or Keys & Alarms.
Default: Keys & Alarms
Selecting NMEA Message — Allows the selection of the NMEA message
that will be output from the SporTrak. Choices are Off, V1.5 APA,
V1.5 XTE or V2.1 GSA. Your choice will be dependent upon what
message the device you are connecting to needs to receive.
Default: Off
Selecting the Baud Rate — Enables you to set the baud rate of the data
being sent out from the SporTrak’s output port. The baud rate sent out
must match the baud rate that the receiving device is set for. You can
choose from 1200 baud, 4800 baud, 9600 baud, 19200 baud, 57600
baud or 115200 baud.
Default: 4800 Baud
From
Any
Screen
Highlight
Setup
Highlight
Beeper
Select
Beeper
Options
From
Any
Screen
Highlight
Setup
Highlight
NMEA
Select
NMEA
Message
From
Any
Screen
Highlight
Setup
Highlight
Baud Rate
Select
Baud
Rate
Page 61

SporTrak Color GPS Mapping Receiver 53
Reference
Selecting Daylight Savings — Allows you to select what region you are in
which will allow the SporTrak to automatically adjust the time displayed
to compensate for daylight savings time. You can select United States
(daylight savings starts on the first Sunday in April and ends on the last
Sunday in October), European Union (daylight savings starts on the last
Sunday in March and ends on the last Sunday in October), or you can
select Customize which allows you to set the month and day that
daylight savings starts and ends in your area.
Default: The appropriate daylight savings time (United States or
European Union only) will automatically be set by the SporTrak
during startup when you use the SporTrak for the first time.
Power Off Timer — Conserving battery life is important to any GPS user
and the power off timer provides another tool in saving battery life.
Selecting “On” will allow you to select the mode and how long the
SporTrak will stay powered on. If the mode you select is “Time”, the
timer field allows you to select time that the SporTrak will remain on
before automatically powering off if no keys are pressed. If the mode
selected is “Position”, the timer field sets how soon the SporTrak will be
powered down when the position hasn’t changed and if no keys have
been pressed.
Default: Off
From
Any
Screen
Highlight
Setup
Highlight
Daylight savings
Select
Region
From
Any
Screen
Highlight
Setup
Highlight
Power Off Timer
Select
On or Off
If On, select Mode and
Timer settings
Page 62

54 SporTrak Color GPS Mapping Receiver
Reference
Changing Languages — You can select from one of nine languages
(English, Fr ench, G erman, Swedish, Spanish, Italian, Dutch, Portuguese
or Finnish) to be used by the SporTrak.
From
Any
Screen
Highlight
Setup
Highlight
Languages
Select
desired
language
TIP: If you change the language setting in the SporTrak just to see what
it looks like and need to get back to the Language Select screen, follow
these instructions. Press [NAV] until the MAP screen is displayed
and press
[MENU]. Select the seventh item in the list and press
[ENTER]. Press the Up Arrow once and press [ENTER]. You
are back at the Language Select screen.
Changing the Power Key Settings — Allows you to choose from “No
protection” (normal) or “On/Off Protected” (alternate). This will
change how the
[POWER] operates in turning the SporTrak on or
off.
No Protection: Turn SporTrak On. Press the
[POWER] button.
Turn SporTrak Off. Press the
[POWER]
button.
On/Off Protected: Turn SporTrak On. Press and hold the
[POWER]
button until the first screen is displayed.
Turn SporTrak Off. Press the
[POWER] button
and then press [ENTER] before the power off
timer is done.
From
any
Screen
MENU
Highlight
Setup
ENTER
ENTER
ENTER
Select “No
protection” or
“On/Off Protected”
ENTER
Highlight
Power key
Default: No protection
Page 63

SporTrak Color GPS Mapping Receiver 55
Reference
Clearing Memory
All of the Clear functions operate in the same way. The instructions shown
apply to all of the Clear options except Clearing All.
From
Any
Screen
Highlight
Setup
Highlight
Clear Memory
Confirm?
Yes/No
Highlight
All
SporTrak
will shut
off
Clearing Track History — This will clear the track history that is dis-
played on the Map screen from memory.
Clearing Wpts/Routes — This will clear all waypoints and routes from
the SporTrak’s memory.
Clearing all Routes — This clears all routes from the S porTrak’s memory.
Resetting SporTrak to Factory Defaults — Allows you to reset all of the
Setup choices to the factory defaults.
Clearing All Memory in the SporTrak — This clears all memory from the
SporTrak. After completing these instructions, the SporTrak will shut
off. The next time it is turned on, it will prompt you that it needs to be
initialized.
From
Any
Screen
Highlight
Setup
Highlight
Clear Memory
Confirm?
Yes/No
Highlight
Menu Choice
Page 64

56 SporTrak Color GPS Mapping Receiver
Reference
Sun / Moon Display
Accessing the Sun/Moon Screen — The Sun/Moon screen displays the
sunrise time, sunset time and lunar phase for any waypoint you have
stored in the User category in the waypoint database. All times displayed are local times to your present position.
From
Any
Screen
Highlight
Sun/Moon
Changing the Sun/Moon Date — Allows you to change the date for the
sun/moon information for the position selected.
From
Any
Screen
Highlight
Sun/Moon
Highlight
At Field
Use left/right
arrows to select
“Find By”
Highlight
Waypoint
Changing the Sun/Moon Position — Allows you to change the position
that you want to view the sun/moon information for. The default is
“Position” which is your present position.
From
Any
Screen
Highlight
Sun/Moon
Highlight
Date Field
Use arrows to
change date
Page 65

SporTrak Color GPS Mapping Receiver 57
Reference
Hunt / Fish Times Display
Accessing the Fish/Hunt Screen — The Fish/Hunt screen displays the
best times for fishing or hunting for the position you choose from your
User waypoints.
From
Any
Screen
Highlight
Fish/Hunt
Changing the Fish/Hunt Date — Allows you to change the date for the
fishing/hunting information for the position selected.
From
Any
Screen
Highlight
Fish/Hunt
Highlight
Date Field
Use arrows to
change date
Changing the Fish/Hunt Position — Allows you to change the position
that you want to view the fishing/hunting times for. The default is
“Position” which is your present position.
From
Any
Screen
Highlight
Fish/Hunt
Highlight
At Field
Use left/right
arrows to select
“Find By”
Highlight
Waypoint
Page 66

58 SporTrak Color GPS Mapping Receiver
Reference
Alarms
All of the Alarm options are set in the same way. The instructions below
apply to all of the Alarm settings. When the beeper is turned on for alarms
(see Setup - Turning the Beeper On/Off) an audible beep will be sounded
for the alarm. A visual alert is displayed for the alarm whether the beeper is
turned on or off.
From
Any
Screen
Highlight
Alarms/Msg
Highlight
Alarm
Field
Select
Alarm
Distance
Setting the Arrival Alarm — The arrival alarm alerts you that you have
arrived at the destination of your GOTO or to the destination of any
leg in a route you are navigating on. This option allows you to set the
distance from the destination that the alarm will begin to sound.
Setting the Anchor Alarm — The anchor alarm will sound when you
have drifted from your anchor point at a distance you set. An example
of its use would be as you set anchor you turn on the anchor alarm to
beep at a given distance. With the SporTrak still operating and computing fixes you can then go fishing or other activities knowing that if you
drift more than the distance you selected, the SporTrak will alert you.
Setting the XTE Alarm — XTE or cross track errors happen when you
are off course for the route you are navigating on. The distance set in
the alarm is the distance left or right of the heading you are supposed to
be travelling on.
Setting the GPS Fix Alarm — This turns on or off the alarm that can
sound whenever the SporTrak has lost its ability to compute position
fixes due to loss of signal from the satellites. This is handy in that it
alerts you that you may need to move to an area that has a clearer view
of the sky.
Page 67

SporTrak Color GPS Mapping Receiver 59
Reference
Using the Simulator
Tu r ning on the Simulator - Auto Mode — This turns the simulator on
and uses a predefined heading and speed rate.
From
Any
Screen
Highlight
Setup
Highlight
Auto
Highlight
Simulate
Confirm
Clearing of
Track
Tu r ning on the Simulator - User Mode — This turns the simulator on
and uses a heading and speed rate that you define.
From
Any
Screen
Highlight
Setup
Highlight
User
Highlight
Simulate
Enter Heading
and Speed
Data
Confirm
Clearing of
Track
Tu r ning the Simulator Off — Turns the simulator off and returns the
SporTrak to normal operation.
From
Any
Screen
Highlight
Setup
Highlight
Off
Highlight
Simulate
Page 68

60 SporTrak Color GPS Mapping Receiver
Reference
About... Screen
The About... screen displays the current status of your SporTrak. Using the
About... screen you can tell what the version of the software is, the version and
memory size of the base map, the number of and total memory size of detailed
maps you may have installed using MapSend Streets, and how much free
memory is available.
From
Any
Screen
Highlight
About
Help Screen
You can view help tips for Nav Screens, Map, Routes, Setup, Database, User
Waypoints and Misc Topics. Each topic has a number of tips available that can
be viewed.
From
Any
Screen
Highlight
Help
Use the “Next” and “Prev” buttons to scroll the
SporTrak Help Files.
Select
Topic
Page 69

SporTrak Color GPS Mapping Receiver 61
Frequently Asked Questions
General
What is the difference between degrees/minutes/seconds (DEG/MIN/SEC) and degrees/
minutes/minutes (DEG/MIN/MMM or DEG/MIN/MM)?
There are different ways in expressing the coordinates computed using Lat/Lon
coordinate system. With DEG/MIN/SEC the final set of numbers (SEC) is
expressed as 0-59 while DEG/MIN/MM expresses the same value as 0-99 and
DEG/MIN/MMM is from 0-999. It would be the same as if you had one
clock that expressed time as hour/minutes/seconds and another clock that
expressed the same time as hours/minutes/decimals. The accuracy for any of
the three is the same. Which you choose is dependent upon your preference
or any chart you are using at the same time. (You should always make sure
that your SporTrak is setup to be the same as any map or chart you may be
using.)
What is 2D vs. 3D?
The difference is primarily how many satellites are used to compute the
position fix and how elevation is computed. In 2D (two-dimensional) only
three satellites are needed for a position fix and elevation is not computed.
Any elevation displayed by the SporTrak during 2D operation is the elevation
you entered. In 3D (three-dimensional), a minimum of four satellites are
needed to compute the position and at the same time, elevation is computed
by the SporTrak.
When the time changes for daylight savings time will the time, in the SporTrak change
automatically?
Yes. It is automatically selected when the receiver is used for the first time or
all of the memory has been cleared. If you need to change the settings for
daylight savings, you can use the Setup menu item and access “Daylight
savings”. There you can select United States, European Union or you can use
the customize option to set the rules for daylight savings in your area.
How long can I expect my SporTrak to run on a fresh set of batteries?
Under normal operating conditions you should get up to 14 hours of use while
the display backlight is turned off. This duration will drop significantly if you
use the display backlight.
Page 70

62 SporTrak Color GPS Mapping Receiver
Frequently Asked Questions
How often do I need to initialize the SporTrak?
Initializing the SporTrak decreases the time it takes to get a position fix during
cold start. What is meant by a cold start is that the SporTrak has no reference
to use as a guide to tell it what satellites should be overhead. Without a
reference to start with, the SporTrak will have to “search the sky” trying to find
any satellite that may be in “view.” This takes time and can increase the time it
takes to get its first position fix. (Can take 10 minutes in severe conditions.)
So where does this reference come from? Under normal operating conditions,
the last position fix computed before the SporTrak was turned off is stored into
memory and will be used as the reference the next time the SporTrak is turned
on. However, if you cleared the memory (see Clearing Memory - All in the
Reference Chapter) this stored reference point is removed from memory and
you probably will want to initialize the receiver again. Also, if you travel with
your SporTrak for more than 500 miles with it turned off, it will still have the
reference point but it may be too inaccurate to be useful and again, you may
want to initialize the SporTrak.
Waypoints/Database
What waypoints come preloaded on my SporTrak’s database?
The Database contains cities, highways, airports, waterways and national parks.
Can I delete preloaded waypoints that I don’t use?
No. Waypoints that are preloaded into the SporTrak will always be available,
even when all of the SporTrak’s memory has been cleared.
Routes
What is a backtrack route?
A backtrack route allows you to “retrace” your steps. As you are moving, the
SporTrak automatically creates and stores hidden waypoints into memory.
These waypoints are the ones that the SporTrak will use to retrace your steps.
When you create a backtrack route, the SporTrak converts these hidden
waypoints into User Waypoints.
How do I know which route is active?
Access the route menu by pressing the [MENU] button and select the
option Routes. The route menu lists all of the routes in memory with the
active route displayed in bold characters.
Page 71

SporTrak Color GPS Mapping Receiver 63
Frequently Asked Questions
Alarms
Why does my SporTrak not make an audible beep when I have an alarm active?
Check your setup settings for the Beeper. If the selection is Off or Keys Only,
the beeper will not sound for alarms.
Output Data
What is NMEA?
NMEA (National Marine Electronics Association) is the standard used for
interfacing marine electronic devices. This standard has also been adapted for
use in a variety of third-party mapping software programs.
What are the NMEA message strings?
The SporTrak supports version 1.5 and 2.1 of the NMEA 0183 standard.
Additional information on NMEA can be found at on the internet at
www.nmea.org, where you can purchase the NMEA Interface Standards.
Another excellent source for NMEA standards is a FAQ sheet that is published
on the internet by Peter Bennett at vancouver-webpages.com/peter/
nmeafaq.txt.
My GPS is not communicating with my computer. What can I do?
Check your baud rate and check the baud rate that your software is using. If
they don’t match, change either the software’s or the SporTrak’s baud rate (See
Setup - Changing the Baud Rate.)
Can I interface my SporTrak with a Macintosh computer?
Magellan does not supply cabling or software for the Macintosh line of
computers. For information on a cable or software that may meet your
requirements, visit GPSy at www.gpsy.com on the internet.
Page 72

64 SporTrak Color GPS Mapping Receiver
Appendix
Troubleshooting
Receiver will not turn on:
1. Check to see if batteries are installed correctly.
2. Replace with two new AA alkaline batteries.
Takes more than 10 minutes to get a position fix:
1. If there are any obstacles nearby or overhead, move to a new location.
2. Make sure that the antenna is pointing up, has a clear view of the sky and
is a reasonable distance away from your body.
3. Check Satellite Status screen to see where the satellites are and if the
receiver is acquiring data.
4. If the receiver still does not get a position fix within 10 minutes, you may
wish to repeat the initialization procedure.
Receiver turns off unexpectedly
This is commonly is caused by excessive static electricity. Turn the receiver
back on and it should operate normally. Move the receiver to a new
location to avoid a similar occurrence.
Battery life seems shorter than it should be:
1. Make sure that you are using two AA alkaline batteries.
2. Shorter life span of the batteries can be due to excessive use of the
backlight. Tu rn the backlight off when not needed.
Position coordinates on your receiver do not match the location on your
map.
1. Make sure that your receiver is set up to use the same datum as your map.
The map datum is generally shown in the map legend. See Setup -
Changing the Map Datum under Reference for instructions on selecting the
map datum in your receiver.
2. Check your LAT/LON format. Make sure that the format selected in
COORDINATE SYSTEM (DEG/MIN/SEC or DEG/MIN.MM) is in
the same format as the map you are using.
Position on map is not exactly on the road.
It could be caused by distance shifts to the map.
Use map data for reference and do not rely completely on it.
Data was not saved or was corrupted.
This can be caused because you removed the batteries or removed external
power with the SporTrak turned on.
Page 73

SporTrak Color GPS Mapping Receiver 65
Appendix
Waypoint Icons
These is a list of the icons and their designator that can be assigned to a waypoint
while marking a position or editing a waypoint.
Default
Box
House
Aerial
Airport
Amusement
ATM
Auto Repair
Boating
Camping
Exit Ramp
First Aid
Fixed Nav Aid
Floating Buoy
Restaurant
Rock
Scuba
RV Service
Shooting
Sight Seeing
Small City
Sounding
Sports Arena
Tourist Info
Truck Service
Winery
Wreck
Zoo
Fuel
Garden
Golf
Hotel
Hunt/Fish
Large City
Lighthouse
Major City
Marina
Medium City
Museum
Obstruction
Park
Resort
Page 74

66 SporTrak Color GPS Mapping Receiver
Appendix
Contacting Magellan
If after using the troubleshooting section, you are still unable to solve your
operation problems, please call Magellan’s Technical Service at (800) 707-9971.
Representatives are available Monday through Friday from 7 AM to
5 PM, PST. Faxes can be sent to Customer Service at (909) 394-7070.
If necessary, you can also return your receiver to Magellan for repair. Before
returning the receiver you must get a Return Materials Authorization (RMA)
from Magellan. To get an RMA, contact a Magellan Technical Service Representative at (800) 707-7845 or you can send an email explaining your reasons to
rma@magellangps.com. After receiving the RMA number, ship the receiver by
Parcel Post or UPS. Include a description of the problem, your name, address, a
copy of your sales receipt and print clearly on the outside of the package the
RMA number assigned. If your return ship address is different, please indicate.
With all correspondence, please state the model of your receiver and if calling,
please have your receiver with you.
Packages should be sent to:
Thales Navigation
Magellan Consumer Products
960 Overland Court
San Dimas, CA 91773
ATTN: <RMA Number>
Additional information regarding software updates to your SporTrak can be
found in the Product Support section of the Magellan web site
(www.magellangps.com).
Customers outside of the United States should contact the
Magellan distributor for your country. A detailed address of each
distributor can be found at www.magellangps.com/.
Magellan® is a registered trademark of Thales Navigation.
Page 75

SporTrak Color GPS Mapping Receiver 67
Appendix
CHARACTERISTICS
Performance
Receiver 12 parallel-channel technology, tracks up to 12 satellites to
compute and update information with quadrifilar antenna
Acquisition Times (under optimal conditions):
Warm approximately 15 seconds
Cold approximately 1 minute
Update Rate 1 second continuous
Accuracy
Position 7 meters, 95% 2D RMS
w/WAAS <3 meters, 95% 2D RMS
Velocity 0.1 knot RMS steady state
Limits:
Speed 951 mph
Altitude 17,500 meters
Physical:
Size 5.6” x 2.2” x 1.2” [h] x [w] x [d]
14.2 cm x 5.6 cm x 3.0 cm
Weight 6.8 ounces (204 grams) with 2 AA batteries installed
Display 2.2” x 1.2” [h] x [w]
5.8 cm x 3.0 cm
1/8VGA (240 x 160 pixels)
Housing Weatherproof construction, wraparound rubber armor
Temp. Range
Operating 14˚F to 140˚F to (-10˚C to 60˚C)
Storage -4˚F to 158˚F (-20˚C to 70˚C)
Power:
Source 2 AA alkaline batteries or 9-18 VDC with power cable
Battery Life Up to 14 hours
Specifications
Page 76

68 SporTrak Color GPS Mapping Receiver
Appendix
Compass
The SporTrak Color includes all the features found in all of the SporTrak mapping series
of GPS receivers along with a 3-axis electronic compass, a barometer and temperature
sensor.
The following text provides you with some information about some of the navigational
terms that are used with the electronic compass.
Heading vs. Bearing vs. Course Over Ground
The SporTrak Color adds Course Over Ground (COG) to the list of data parameters that
you can select for the customizable fields that are displayed on the navigation screens. The
SporTrak Color also uses COG on the compass screen to provide you with additional
information that will assist you in navigating to your desired destination.
Heading, in the SporTrak Color, is not computed from the GPS information as it is in the
other SporTrak Color products, but rather it uses the electronic compass to determine
which way you are facing.
The following is a brief description of how the SporTrak Color interprets heading,
bearing, and COG. If you already understand these terms you can skip over the following
section.
Heading
Heading in the SporTrak Color is the direction that the antenna (located at the top of the
SporTrak Color) is pointing. To get the best representation of your heading, you need to
hold the SporTrak Color with the antenna pointing in the direction you are travelling.
Holding it at an angle, left or right, will accurately display the heading of the receiver, but
it won’t be a true representation of your direction of travel. (As you will see next, COG
provides a true indication of your direction of travel, regardless of which way the SporTrak
Color is pointing.) Heading is displayed all the time.
Course Over Ground (COG)
COG is the direction you are travelling. With the SporTrak Color held directly in front of
you, you would think that heading and COG would be the same, but that is not always
the case. Boaters are quite familiar with heading and COG being different due to tides
and current.
An example of that would be a boat travelling along with a
heading of 0°. At the same time, there are currents in the water
pushing the boat to one side. This would cause the boat to drift
off course in the direction of the current. How much it moves
depends on the speed of the boat and the force of the current.
In this example, the resulting COG or direction of travel is 15°.
COG
15°
Heading
0°
Current
Page 77

SporTrak Color GPS Mapping Receiver 69
Appendix
People hiking or walking would normally see the heading and COG being the same with
the SporTrak Color pointing directly ahead. However, with the receiver held at a slight
angle, left or right, you can see that the heading displayed will differ from the displayed
COG.
The key point to remember is while you are moving, COG is the true indication of your
direction of travel. COG is displayed only while you are mo ving at a computed speed of
0.5 miles or faster.
Bearing
Bearing is simply the direction you need to travel to arrive at
your destination.
Using the same diagram as before, a destination to a fishing
spot has been added. The bearing displayed then indicates
the direction that you would need to travel to arrive at the
fishing spot.
Bearing will be displayed only when you have a GOTO or
other route active.
Putting it All Together
With bearing and COG computed, the SporTrak Color can now provide you with the
precise information you need to arrive at your destination in the shortest time. In the
above example the SporTrak Color would compute that you need to turn 65° to get to
your fishing spot. (Remember, since COG is your true heading, the angle you need to
turn is the difference between COG and bearing, not heading and bearing.)
As soon as you make this turn, the force of the current on your boat would change. This
would also change how much difference there is between your heading and COG. The
SporTrak Color continually updates this information giving you the exact turn information you will need to arrive at your destination.
Always remember:
•Heading is the direction that the SporTrak Color is pointing and is displayed all
the time.
• Course Over Ground (COG) is the direction that you are travelling over the
ground. COG is displayed only while you are moving.
•Bearing is the direction to the destination of a GOTO or leg of a route. Bearing is
displayed only when a GOTO or route is active.
Bearing
310°
COG
15°
Heading
0°
Current
Page 78

70 SporTrak Color GPS Mapping Receiver
Appendix
Navigating with the Compass Screen
When you are using the Compass Screen to steer to a destination, your goal is to align the Destination Pointer and the COG
Pointer together. When both of these pointers are lined up,
regardless of your heading, you are moving in a straight line to
your destination.
Here the Destination Pointer and the COG Pointer nearly line
up exactly and we are moving in a straight line to the destination.
Note: The Destination Pointer points to North and the Destination Icon disappears when you do not have an active route or
GOTO.
Calibrating the Compass
The electronic compass requires that it is recalibrated every time you change the batteries.
Failure to calibrate the compass could result in errors of 20° or more to the displayed
heading. Calibration is very simple and won’t take more than a minute.
It is very important that there are no metallic objects near the SporTrak Color during
this calibration.
1. Remove the SporTrak Color from any cradle it may be in and lay it down face up
on any flat, nonmetal surface. Also you should not be moving (i.e., in a car or
boat in motion) while calibrating the compass. This will affect the calibration
causing errors in the compass output.
2. Turn the SporTrak Color on normally and after any of the navigation screens are
displayed, press the MENU button. Using the Up/Down arrows, highlight
“Setup” and press ENTER.
3. Using the Up/Down arrows, highlight “Compass Calibrate” and press
ENTER.
Using the on-screen “bubble level”, set the SporTrak Color on a level, nonmetallic
surface. (Note: If you cannot level the bubble, the SporTrak Color may have lost
the basic setting information for the compass. This most often occurs after the
SporTrak Color has been dropped or has been struck in a manner that has moved
some of the internal electronics. If this is the case, you will need to perform the
“Extended Calibration”. Information as to how to do this can be found later in
this section.)
4. The SporTrak Color will provide the instructions on rotating the receiver.
Do not rotate the SporTrak Color too quickly. An arrow is provided on the screen
and as long as you keep the arrow pointing in the same direction you will be
rotating the SporTrak Color at the proper speed.
Page 79

SporTrak Color GPS Mapping Receiver 71
Appendix
Note: For most people, the simplest, and most effective method of rotating the SporTrak
Color, is to use one finger and push the receiver around in a clockwise manner.
5. Continue rotating the SporTrak Color until it beeps. (This will be slightly more
than one complete rotation.)
If the calibration is good, the SporTrak Color will display a message that the
calibration is complete and acceptable. However, if the SporTrak Color determines that the calibration may be flawed it will prompt you to perform the
calibration again. This is most likely caused by the SporTrak Color being too close
to metallic objects while you were performing the calibration. You need to move
the SporTrak Color to a new location before performing the calibration again.
EXTENDED CALIBRATION
Sometimes additional calibration is required to the SporTrak Color. A second type of
calibration may be required when something has caused the sensors to be so far off
calibration that the basic calibration routine is not sufficient. This can occur if the
SporTrak Color has been vibrated or dropped. The most common indication that
extended calibration needs to be performed is during the basic calibration routine you
are unable to level the bubble.
To enter extended calibration: (These are the same as the first three steps in performing
the basic calibration.)
1. Remove the SporTrak Color from any cradle it may be in and lay it down face up
on any flat, nonmetal surface. Also you should not be moving (i.e., in a car or
boat in motion) while calibrating the compass. This will affect the calibration
causing errors in the compass output.
2. Turn the SporTrak Color on normally and after any of the navigation screens are
displayed, press the MENU button. Using the Up/Down arrows, highlight
“Setup” and press ENTER.
3. Using the Up/Down arrows, highlight “Compass Calibrate” and press
ENTER.
The screen with the bubble level is displayed. Press ZOOM IN to enter
extended calibration.
4. You are presented with two choices: Factory Defaults or Extended Calibration. It
is recommended that you select the factory defaults. This is the simplest and safest
method in getting your compass calibrated. You should attempt to manually
calibrate only after trying the factory defaults and the compass still does not
function satisfactorily.
Factory Defaults
If you selected the factory defaults, calibration information that has been stored in
memory will be applied to your receiver. You will then return to the basic
calibration function, beginning at the leveling phase (bubble screen).
Page 80

72 SporTrak Color GPS Mapping Receiver
Appendix
Manually Calibrate
If you chose to manually calibrate your SporTrak Color, you must follow the
instructions provided very carefully.
You will be prompted on-screen with the instructions but they are provided here as
a supplement to those instructions.
1. Lay the receiver on a flat, nonmetallic
surface. Insure that there are no large
metallic objects near, especially underneath the surface you are setting the
receiver on.
Press
ENTER and wait for the beep.
2. Turn the SporTrak Color 90° and wait for
the beep.
3. Turn the SporTrak Color another 90° to
180° and wait for the beep.
180
°
0°
90
°
270
°
180
°
0°
90
°
270
°
180
°
0°
90°
270°
4. Turn the SporTrak Color another 90° to
270° and wait for the beep.
180
°
0°
90
°
270
°
5. Hold the SporTrak Color on its side with
the top (antenna) pointing towards you
with the display facing right. Hold it
steady and wait for the beep.
6. Flip the SporTrak Color over with the
antenna still pointing towards you but
with the display facing left. Hold the
receiver steady and wait for the beep.
Page 81

SporTrak Color GPS Mapping Receiver 73
Appendix
7. Stand the SporTrak Color up with the
display facing you and the antenna
pointing up. Hold the receiver steady and
wait for the beep.
8. Turn the SporTrak Color over. Now the
antenna is pointing down and the back of
the SporTrak Color is facing you. Hold the
receiver steady and wait for the beep.
9. Place the SporTrak Color face down with
the antenna pointing towards you. Wait for
the beep.
This will conclude the extended calibration and you will be prompted to perform the basic
calibration again.
Limitations to the Electronic Compass
The electronic compass has some limitations as to how well it works in certain environments. Large metal objects can affect how well it operates. As an example, should you use
your SporTrak Color in an automobile you will find that the compass does a great job of
pointing to your engine but not pointing to north. If you find yourself in a situation
such as this, you should use the Setup option “Compass Orient.” to change the compass
orientation to GPS Course. Then the SporTrak Color will get its heading from the GPS
signals and not the electronic compass.
Other limitations are in the angle that you hold the SporTrak Color. Holding the receiver
flat provides the most accurate readings. While tilting it towards you is acceptable, you
should pay attention to the compass readings as you tilt it. At a certain point, you will
begin to see the compass begin to drift. The SporTrak Color has compensated for tilt, but
the more you tilt it, the more you will notice errors in the compass readings.
The SporTrak Color has a major advantage over many other electronic compasses on the
market today in that it can be tilted and still maintain relatively accurate compass
readings.
Battery consumption increases whenever the compass is operating, therefore impacting
battery life. The compass is operating any time heading is being displayed. So, naturally,
while you are on either of the two compass screens or on the Map Screen (your position
cursor is pointing to your heading), the compass is running. On the other navigation
screens, the compass is off unless you have selected heading for one of the data fields.
However, you could go to Setup and with the “Compass Orient.” option change the
orientation of the compass to “GPS Course” but that would defeat one of the reasons you
choose the SporTrak Color.
Page 82

74 SporTrak Color GPS Mapping Receiver
Appendix
Setting the Compass Orientation
As discussed in the previous section, there may come a time that you wish to turn the
compass off and use the GPS Course to determine your heading. (Remember, GPS
Course will only calculate heading when you are moving at a speed greater then 0.5 miles
per hour.)
1. From any screen press
MENU.
2. Use the arrow pad to highlight “Setup” and press
ENTER.
3. Use the arrow pad to highlight “Compass Orient.” and press
ENTER.
4. Use the arrow pad to select “GPS Course” and press
ENTER. (Selecting
“Magnetic North” turns the compass back on.
5. Press
ESC to exit the Setup Menu and return to the last screen you were
viewing.
Using the Barometer and Temperature Screens
In addition to the electronic compass, your SporTrak Color provides you with a “miniweather station” with temperature and barometer information.
Accessing the Weather Screen
1. From any screen press MENU.
2. Use the arrow pad to highlight “Weather” and press
ENTER.
The Weather Screen is displayed with current temperature and barometer information.
Temperature and barometric information are displayed in a familiar and easy to read
format. The bottom of the display is a graphic of the barometric readings taken over the
last 24 hours. (The SporTrak Color will take barometric readings anytime the compass is
active.)
A brief explanation of the barometer graph is in order at this time. A new bar indicating
your barometric pressure is added to the graph once every 15 minutes. If during the
course of an hour it has taken two readings, it fills in the gap between the readings. If,
however, you have turned the receiver off or do not have enough satellites to compute
altitude (four satellites are needed for altitude computations), and only one reading or less
has been taken in the course of the last hour, there will be gaps in the chart. (See Accessing
Barometer History for more information.)
Calibrating the Temperature and Barometer
This is not a requirement for using the temperature and barometer readings. It simply
makes the readings you have a little more accurate.
Page 83

SporTrak Color GPS Mapping Receiver 75
Appendix
1. From the Weather Screen press MENU.
2. Using the arrow pad, highlight “Calibrate” and press
ENTER.
3. Using the Up/Down arrows to change the value and using the Left/Right arrows to
move the cursor, enter your corrected temperature value. Press
ENTER.
4. Using the Up/Down arrows to change the value and using the Left/Right arrows to
move the cursor, enter your corrected barometric pressure value. Press
ENTER.
5. The “Save” button is highlighted. If you are happy with your changes, press
ENTER.
6. If you are not happy with the changes you have two options. One is to use the
Left/Right arrows to highlight the “Reset” button and press
ENTER or use the
Up/Down arrows to highlight the field you want to redo and press
ENTER.
You will then be placed back into the Edit Mode.
Pressing
ESC will also return you to the Weather Screen without saving any
changes you may have entered.
Accessing Barometer History
You may want to view the barometer history that is displayed in the barometer graph in a
textual format. This screen will also provide you with the low and high barometer
readings for the last 24 hours as well as the reason for the gaps in your chart.
1. From the Weather Screen press MENU.
2. Using the arrow pad, highlight “Baro history info” and press
ENTER.
None of the fields are editable and are presented for informational purposes only. When
you are done, press ESC to return to the Weather Screen.
Limitations on Temperature Readings
Since the temperature sensor for your SporTrak Color is inside the receiver, it is trying to
read the temperature of the receiver and not your ambient temperature. There has been
compensation made to the temperature readings in order to accurately represent the
ambient temperature. Some of those compensations come from the values that you may
have entered if you calibrated the temperature. Even with all of the compensation, the
temperature displayed will still be adversely affected if the receiver is in severe temperature
environments. For example, if you place your SporTrak Color on the dashboard of your
car or anywhere where the sun is repeatedly beating on it, the internal temperature of the
receiver will rise above a point where the temperature compensation values are just not
enough. As with any electronic device, it is not good practice to place it in those types of
extreme temperatures.
Page 84

76 SporTrak Color GPS Mapping Receiver
Appendix
Accessories
Accessories for your receiver are available from your Magellan dealer or you can
order directly from Magellan at (800) 669-4477 (press 3 to place an order).
MapSend Topo for the United States: This CD-ROM allows you to upload
detailed street maps, topographic data as well as POI’s to your SporTrak
receiver. (Available only with United States topographic information.)
MapSend Streets and Destinations: This CD-ROM allows you to upload
detailed street maps as well as extensive sets of POI’s to your SporTrak
receiver (available for United States, Canada, and Europe).
MapSend BlueNav: This CD-ROM allows you to upload charts and harbor
information from waterways around the world (available for North
America and Europe, and soon to be available for Asia/Pacific, and the rest
of the world).
MapSend Worldwide Base Map: This software allows you to upload more
detailed area maps with highways, railways, major cities, and basic
topography.
Carrying Case: The carrying case provides a way of carrying the SporTrak on
your belt while at the same time protecting it from the elements.
Swivel Mounting Bracket: Mounts the receiver on a surface, allowing for
hands-free operation.
Vehicle Mounting Bracket: Full swivel and tilt for easy viewing in any
vehicle.
Bike Mounting Bracket: Mounts the receiver on the handlebars of a bicycle,
motorcycle or off-road vehicle.
PC Cable: Allows you to connect the SporTrak to a PC.
External Power Cable with Cigarette Lighter Adapter: Allows you to
connect the receiver to a cigarette lighter for external power.
Power/Data Cable (Bare Wires): Allows you to connect your receiver to
external power and data.
PC Interface Cable with Cigarette Lighter Adapter: Connects your receiver
to your PC for data transfer and to a cigarette lighter for external power.
Serial to USB Adapter: Adapter that provided connection of the PC Cable or
the PC Cable with Cigarette Lighter Adapter to the USB port of a laptop
or desktop computer.
Page 85

SporTrak Color GPS Mapping Receiver 77
Appendix
The MapSend Streets CD allows you to load detailed street maps into your
SporTrak. The maps supplied on the MapSend Streets CD contain full street
detail of US or European cities.
•Enables you to load street maps
for any region in the United States
or Europe into the SporTrak.
• Allows you to cut any rectangular
map region you choose to load
into the receiver. Maps are not
pre-cut to counties or other
boundaries.
Features
Minimum Requirements
• IBM PC AT-486 or compatible
• 32 MB RAM
•VGA Video Card
• 60 MB Hard Drive Space
• 8x CD-ROM drive
• MS Windows 95/98/NT 4.0 (or
higher)/2000/XP
Recommended Requirements
• IBM PC AT-Pentium/300 or
compatible
• 64 MB RAM
•True Color Video with 800x600
resolution
• 60 MB Hard Drive Space
• 32x CD-ROM drive
• MS Windows 95/98/NT 4.0 (or
higher)
•Creation, management and
upload/download of waypoints
and routes.
• Allows straight line distance
computation on the map.
•Search for map objects (such as
cities, lakes, etc.) by name.
MapSend Streets
Page 86

78 SporTrak Color GPS Mapping Receiver
Appendix
The MapSend series of CD-ROMs allows you to extend the capabilities of your
SporTrak GPS receiver and there isn’t room here to describe all that you can do.
Please refer to the help files in the MapSend for assistance on the features and
functions of the software. This brief introduction is provided only to
demonstrate the most commonly used function; uploading detailed maps.
Preparation: Make sure that you have a SD card installed in your SporTrak.
(Detailed maps are saved to the SD card, not in the SporTrak.) Install
fresh batteries in your SporTrak and using the data cable, connect the
SporTrak to one of the COM ports on your PC.
Run the MapSend application from your PC.
Set Up Map: Using the zoom in and out tools, select the location on the map
for the area that you want to get the detailed map from.
In this example, a detailed map from the Southern California area will be
selected.
Using MapSend
Page 87

SporTrak Color GPS Mapping Receiver 79
Appendix
Select Area: Use the “Draw New Region” tool to select the area on the map
that you want to upload into your SporTrak.
Here is the region
selected for this
example. Notice
that when you move
the cursor inside the
rectangle, the
memory space that
this region will
occupy on your SD
card is displayed.
You can further
modify this region.
To move the region,
place the cursor
inside the region and
with the left mouse button depressed, move the entire region. To change
the size of the region, place the cursor on any of the black dots found in
the corners or along the sides of the region, press the left mouse button
and increase or decrease the size of the defined area.
Cut Region: Select the “Cut Region” tool.
You will be prompted to provide a name
for this region. Use a name that will help
you identify which part of the country this
region is for.
In this example, the name “socal” was used.
After supplying the name, this region is
added to the region list found at the right
of the screen. In the region list, left click
on the box in front of the name of the
region you want to upload. Notice that
the area within the region changes color,
giving you a graphical indication of what
region(s) are to be uploaded.
Page 88

80 SporTrak Color GPS Mapping Receiver
Appendix
Upload Region: Make sure that the SporTrak is turned on and click on the
“Upload Regions” button. You will be given the option of Upload
to GPS Unit, Upload to SD Card Programmer or Store on Hard Drive.
Select Upload to GPS Unit and press “Next”.
MapSend will then poll the COM ports looking for the SporTrak receiver.
When the COM port has been found, it will be indicated on the PC
screen. Press “Next”.
The map region will be uploaded to your SporTrak receiver. Now using
the SporTrak, go to the Map screen and zoom out over the area on the
map where you have uploaded the region. Once you have zoomed out far
enough, you will see the outline of a box. This box represents the region
that you just uploaded. This portion of the map now has detailed street
and points of interest information.
Page 89

SporTrak Color GPS Mapping Receiver 81
Appendix
Available as accessories for your GPS receiver are the following cables: External
Power Cable with Cigarette Lighter Adapter, Power/Data Cable, Data Cable and
PC Cable with Cigarette Lighter Adapter. The instructions given below apply to
all cables, unless otherwise stated.
The cable can be connected to the receiver two different ways:
Connecting directly to the SporTrak.
Using the captive screw that is attached
to the plug, tighten into the back of the
receiver.
If you are connecting to the SporTrak
while it is mounted in the Mounting
Cradle, attach the cable through the
back of the cradle. It is not necessary to
tighten the captive screw to the
SporTrak, although you may do so for
added security.
Connecting to External Devices
Page 90

82 SporTrak Color GPS Mapping Receiver
Appendix
Connecting to an External Power Source
If using the cable that comes with the cigarette lighter adapter, simply connect it
to the cigarette lighter outlet. If you wish to make a permanent mount to a
power supply, cut the cable between the power supply box and the cigarette
lighter adapter. Attach the red (+) and black (-) wires to your external power
source. The input voltage range for external power is 9-16 VDC.
Caution: Do not bypass the power supply box or y ou will damage your unit
and void the warranty.
Power Supply Box
Cut Here
Cigarette Lighter Adapter
Power Plug
Connecting to a Data Source
Data Connection Pinout (PC and Data cables only)
This is the pinout looking into the 9-pin female connector
Pin 2: Data Out
Pin 3: Data In
Pin 5: Ground
Cable Wiring Color Code
Power Red: Power +
Black: GND
Data (Power/Data, PC cable & Data cable only)
Yellow: Data In
Orange: Data Out
Black: GND
9-pin Connector
Page 91

SporTrak Color GPS Mapping Receiver 83
Appendix
WAAS
Your Magellan GPS receiver has been upgraded to include the latest WAAS
(Wide Area Augmentation System) technology. With WAAS your GPS receiver
can compute position locations with an accuracy never before possible in a
commercial receiver.
What is WAAS? WAAS is a means of improving the accuracy of GPS beyond
the standard civilian signal. WAAS was developed by the FAA to provide the
accuracy needed for aircraft to perform approaches for landings. WAAS improves
the accuracy of GPS by calculating the errors in the GPS signal at several
monitoring stations around the country and then transmitting the error corrections to special WAAS satellites. In turn, these satellites broadcast the error
corrections to WAAS-capable GPS receivers around the world.
WAAS is a free service and, with the small exception of two additional satellites
displayed on the Satellite Status screen, it will be transparent to you. There is
nothing you need do, it’s all ready to go.
How accurate will my GPS receiver be with WAAS? The FAA r eports that
expected accuracy can be improved to around 7 meters vertically and horizontally. Our own testing suggests that Magellan GPS receivers will typically
experience accuracy improvements to around 3 meters. You can expect to see this
level of accuracy for 95% of the time that you are receiving WAAS signals.
What are some of the problems with WAAS? The signal coverage with WAAS
is not global like GPS satellites. In some locations, receiving WAAS signals can
be difficult and intermittent. There are two satellites transmitting WAAS for
corrections in the Americas and two more over Africa and India providing similar
coverage for Europe. These satellites are geostationary, i.e., they stay in the same
spot over the Earth equator. The two satellites for the Americas are over the
Pacific and Atlantic Oceans. Chances are then, they will probably be near the
horizon from where you are using your GPS receiver. This increases the chance
that buildings, foliage, terrain and other obstacles could block the WAAS signal.
Also WAAS is a relatively new system and is still in its developmental stage. So
on occasion you may experience service outages. Even during these outages, your
GPS receiver will still be working, computing position fixes and helping you get
to where you want to go using the GPS signals. The only difference is you will
not be getting the precision that WAAS was providing. You can expect to see
these outages diminish as the system matures and stabilizes.
For more information on WAAS, you can visit the FAA website’s section on their
WAAS system: http://gps.faa.gov/programs/WAAS/waas.htm
Page 92

84 SporTrak Color GPS Mapping Receiver
Appendix
Active Leg The segment of a route currently being traveled.
Altitude The current elevation above sea level.
BRG Bearing. The compass direction from your position to a
destination, measured to the nearest degree.
Buoy A navigation aid (usually found in marine charts) that is
floating in water. The position can vary due to the magnitude and direction of the current.
COG Course Over Ground. The direction the receiver is moving.
COG can be reported in true or magnetic north values.
Coordinates A unique numeric or alphanumeric description of the
position.
CTS Course to Steer. The direction you should be traveling in
order to return to the course while proceeding towards the
destination. It is a “compromise” course bearing that
projects from your current position to a point on the
courseline midway between a point perpendicular to your
position and the current leg destination waypoint.
Datum Refers to the theoretical mathematical model of the earth’s
sea level surface. Map makers may use a different model to
chart their maps, so position coordinates will differ from
one datum to another. The datum for the map you are using
can be found in the legend of the map. If you are unsure of
which datum to use, use WGS84.
Default The value or setting automatically chosen by the unit unless
otherwise directed. Can be changed in Setup.
DST Distance. Distance from position to destination.
ETA Estimated Time of Arrival. The estimated time of day the
leg’s destination waypoint will be reached.
ETE Estimated Time Enroute. The estimated time remaining to
reach the next waypoint in a route.
HDG Heading. The direction you are facing, defined as an angle
from North.
Glossary
Page 93

SporTrak Color GPS Mapping Receiver 85
Appendix
Latitude The angular distance north or south of the equator mea-
sured by lines encircling the earth parallel to the equator
from 0˚ to 90˚.
LAT/LON Coordinate system using latitude and longitude coordinates
to define a position on the earth.
Leg (Route) A segment of a route that has a starting (FROM) waypoint
and a destination (TO) waypoint. A route may consist of 1
or more legs. A route that is from waypoint A to waypoint
B to waypoint C to waypoint D has three legs with the first
being from waypoint A to waypoint B.
Longitude The angular distance east or west of the prime SporTrak
(Greenwich SporTrak) as measured by lines perpendicular to
the parallels and converging at the poles from 0˚ to 180˚.
Magnetic North The direction relative to a magnetic compass.
NMEA National Marine Electronics Association. A professional
organization that defines and maintains the standard serial
format used by marine electronic navigation equipment and
computer interfaces.
OSGB A coordinate system describing only Great Britain, similar to
UTMs. Used with GRB36 datum.
Position fix Position coordinates as computed by the SporTrak.
SOG Speed Over Ground. The speed at which the receiver is
moving.
TMP Temperature.
True North The direction to North Pole from an observer’s position.
The north direction on any geographical SporTrak.
UTC Universal Time Coordinated. Formerly referred to as
Greenwich Mean Time (GMT).
UTM Universal Transverse Mercator metric grid system used on
most large and intermediate scale land topographic charts
and maps.
VMG Velocity Made Good. The component of the velocity that is
in the direction of the destination.
Page 94

86 SporTrak Color GPS Mapping Receiver
Appendix
WPT Waypoint. A location saved in the receiver’s memory which
is obtained by entering data, editing data, calculating data or
saving a current position. Used to create routes.
XTE Cross Track Error. The perpendicular distance between the
present position and the courseline. Given as a distance,
right or left, of course when facing the destination.
Page 95

Since the release of the User Manual for the SporTrak Color, there have been enhancements to the SporTrak Color’s software. This addendum will describe those
enhancements as well as provide some additional information that may help you
use your SporTrak Color GPS Receiver.
You can keep your SporTrak Color up to date by checking the Magellan® web site
at www.magellangps.com for future software releases that you can upload into your
SporTrak Color receiver.
Enhancements:
On/Off Protection – This feature is designed to provide a different way to turn the
SporTrak Color on or off to avoid accidental turn on or off if carried in a backpack or your pocket.
Keypad Light Timer – This enhancement was introduced to increase the battery
life of your SporTrak Color. This feature automatically turns the keypad light off
after 1 minute of inactivity.
Map Screen Detailed Information – This provides a simple method of saving a
waypoint or going to an item displayed or just viewing additional information
about any item displayed on the map. You will find that this method is the easiest way to save or go to any map item.
Destination Plotter – You now have the option of displaying lines on the map
screen that graphically display a line from your present position to your destination and/or a line from the departure point to your destination.
Magnetic Heading – Under Map Setup you can now select to set the top of the
display to magnetic heading using the information provided by the SporTrak
Color’s built-in compass.
Map Utilities – You can now select which basemap or detail map you want to use
if you have uploaded optional maps into your SporTrak Color’s memory. You
also have the option of deleting from your SporTrak Color’s memory any optional maps that you have uploaded.
Navaids – The SporTrak Color now contains a comprehensive list of navaids to
support the many mariners who are using the SporTrak Color receiver.
Tides and Currents – The SporTrak Color can now display tide and current information for various ports and stations. Please note that current information can
be displayed only if you have a chart that you have uploaded from one of the optional Magellan MapSend® BlueNav™ software packages.
SporTrak™ Color User Manual Addendum
Page 96

Corrections to the User Manual:
Page 23 – “Changing the Data Fields” — The User Manual incorrectly states that
there are 13 different options to select from for the Map display. There are actually 17 different data field options (bearing, distance, speed, heading, VMG,
CTS, ETA, ETE, XTE, turn, elevation, time, date, COG, EPE, avg. speed, or
max. speed) you can select.
Page 71 – “Calibrating the Compass” — An additional step was omitted from
the instructions. After you rotate the receiver and it beeps as instructed in Step 5,
you need to turn the receiver over (face down) until it beeps again.
Additional Information:
SporTrak Color Support – This will provide SporTrak Color owners living in Europe the information they need to contact Thales Navigation for support of their
Magellan receiver.
Enhancement Instructions
On/Off Protection. This feature was added to assist those who accidentally turn
their receiver on or off while it is being carried in their pocket, backpack or other
container. The following shows the differences between normal on/off and protected on/off.
Turning the SporTrak Color On:
Normal: Press the Power key.
Protected: Press and hold the Power key until the first start-up screen is
displayed.
Turning the SporTrak Color Off:
Normal: Press the Power key. (Pressing the Escape key aborts the power
off.)
Protected: Press the Power key. You have 5 seconds to press the Enter key.
If you do not press the Enter key, the SporTrak Color stays on, returning
to the last screen displayed.
Turning the Power Key Protection On or Off:
1) From any screen, press the Menu key and use the up or down arrows
to highlight “Setup”. Press the Enter key.
2) Use the up or down arrows to highlight “Power key” and press the
Enter key.
3) Use the up or down arrows to highlight your power key choice, either
“No protection” or “On/Off protected”. Press the Enter key.
Page 97

Keypad Light Timer. Normally, when you turn on your SporTrak Color, a light
behind the keypad comes on allowing you to see the keys in dark or low-light environments. If at any time, no keys have been pressed for any 1-minute time frame,
the keypad light will turn off. To turn the keypad light back on, press any key.
(Note that pressing any of the keys with the keypad light off, does not perform the
function, only turns the keypad light back on.)
Disabling the Keypad Light Timer
The Keypad Light Timer is on whenever the display backlight is on. Press and
hold the Power key down, once for each step, to step through the levels of
backlight intensity. When the backlight is off, so is the keypad light.
Map Screen Detailed I nformation. When your cursor or your position icon is
over a map item (road, city, POI, etc.) you can quickly and easily view additional
information about that item. From this display, you can very easily save the position into your user database or you can create a GOTO route to that map item with
the push of a button.
Viewing Detailed Map Information for Your Present Position
1) While viewing the Map screen and your present position icon is displayed, press the Enter key. (If your Present Position icon is not being displayed, press the Escape key to reset the cursor to your present
position. If an hourglass is being displayed instead of your Present
Position icon, the SporTrak Color is not computing position information and you may need to give the antenna a better, unobstructed
view of the sky.)
2) If your present position is over a map item, a list of all the map items
available for your position will be displayed. (If your position is not
over a known map item, nothing will be displayed.)
3) Using the up or down arrows, select the item you
want to view and press the Enter key.
4) A Detail Info screen appears with the coordinates
for your position at the time you pressed the Enter
key. Any notes or messages about this map item
will also be displayed below the coordinate information.
5) You also have the option of saving this map item as
a waypoint in your User Waypoints database.
Page 98

Viewing Detailed Map Information for the Cursor Position
1) Use the arrow keys to move your cursor around the map. When the
cursor is over a displayed map item, press the Enter key.
2) A list of all the map items found at your cursor position is displayed.
Use the up or down arrows to select the item you want to view and
press the Enter key. (If no list is displayed after pressing the Enter key,
your cursor is not over any map items.)
3) A Detail Info screen appears with the coordinates for the cursor position. Any notes or messages about this map item will also be displayed below the coordinate information.
4) You can also save this map item as a waypoint in your User
Waypoints database or create a GOTO route to this map item (de-
scribed below).
Saving or Going to a Map Item from the Detailed Map Information Screen
1) To Save the Map Item in to your User Waypoint database, use the left
or right arrows to highlight the “Save” button at the bottom of the
screen and press the Enter key. The Mark screen is displayed allowing
you to edit the details for this position. When you are done, highlight the “Save” button and press the Enter key. (This method does
not apply to waypoints that are already in your User Waypoint database. User waypoints can be edited or deleted.)
2) To create a GOTO route to the map item chosen, use the left or right
arrows to highlight the “GOTO” button and press the Enter key.
Editing or Deleting a User Waypoint from the Detailed Map Information
Screen
1) If the map item you selected to view is from your User Waypoint database, you are presented with three buttons, “Edit”, “Goto” or “Del”.
Use the arrow keys to highlight the desired option and press the Enter
key.
Edit: Selecting Edit brings up the “Edit WPT” screen allowing you
to change the details for this waypoint. When you are satisfied with
your changes, use the arrow keys to highlight “Save” and press the
Enter key.
Goto: Selecting Goto creates a GOTO route from your present position to the waypoint displayed. You are returned to the Map screen
and are ready to begin navigating towards the waypoint.
Delete: Selecting the “Del” button allows you the option of removing this waypoint permanently from your User Waypoint database. A
confirmation screen is displayed requiring that you confirm this deletion.
Page 99

Exiting the Detailed Map Information Screen
To return to the Map screen, press the Escape key.
Destination Plotter. Originally the Map screen displayed a line (plot) from your departure point to your
destination when you had an active route or GOTO.
The latest enhancement to the SporTrak Color has added
a plot line from your present position to your destination. You can turn either of these plot lines on or off under the Map Setup function.
Departure-DestinationLine
Position-Destination Line
Present
Position
Departure
Point
Destination
Selecting Destination Plot Lines
1) From the Map screen, press the Menu key. Use the up or down arrows to highlight “Map Setup” and press the Enter key.
2) Press the right arrow to access the “Display” tab.
3) Using the up or down arrows, highlight “Pos-Dest Line” or “DepartDest Line”
4) Press the Enter key to toggle the status of your selection. When the
box is checked, the line will be displayed.
Magnetic North for the Map Screen. Using the information from the electronic
compass built in to your SporTrak Color, you can now set the top of the map display to reflect magnetic north. Previously you could only select the top of the display to reflect north, your course or your track.
Selecting Magnetic Heading Up for the Map Screen
1) From the Map screen, press the Menu key. Use the up or down arrows to highlight “Map Setup” and press the Enter key.
2) With the “Orientation” field highlighted, press the Enter key.
3) A drop down list is displayed with the four options for the map
screen orientation. Use the up or down arrows to
highlight “Magnetic HDG Up” and press the Enter key.
Page 100

Map Utilities. You can use this feature to select the basic map or the detailed map
that you want to use. You can also use Map Utilities to delete a map, other than the
basic map, from memory.
What is the difference between a basic map and a detail map? The basic map
(or basemap) is the map that came built in to your SporTrak Color when you
purchased it. It has basic street detail and some Points of Interest, which is
enough information for simple navigating in towns and major roadways. Basic
maps cover a large land area, have limited detailed information and use up a
small amount of memory.
Detail maps are maps you can upload using any of the Magellan software options
through the MapSend or MapSend BlueNav series of software applications.
These maps have an enormous amount of detail down to the street level and a
vast selection of POIs that can be displayed on your Map screen. Detail maps are
limited in size to the amount of free memory in your receiver, have a lot of detailed information and can use up a substantial amount of memory.
Are there other basic maps available? Yes. If you have the Magellan MapSend
WorldWide Basemap CD-ROM, you can select any area on the globe and upload
it to your SporTrak Color receiver.
Selecting a Basemap or a Detail Map
1) From any screen, press the Menu key. Use the up or down arrows to
highlight “Map Utilities” and press the Enter key.
2) With “Change Map” highlighted, press the Enter key.
3) Use the up or down arrows to highlight the field,
“Basemap” or “Detail Map”, that you want to select and press the Enter key.
4) A list of available maps is displayed. (Also, if you
have selected “Detail Map”, you have the option
of turning it off altogether.) Use the up or down
arrows to highlight your choice and press the Enter key. (The Save button displayed at the bottom
of these screens is presently non-operational.)
5) When you have made your selection of the Basemap and Detail map
you want displayed, use the up or down arrows to highlight the
“Save” button and press the Enter key. A pop-up will briefly be displayed indicating that the maps are being loaded and you will then
return to the screen you were viewing when you first accessed the
Map Utilities function.
 Loading...