

Page 1
For complete details on using your
Magellan
®
SmartGPS, please go to
magellanGPS.com/support
and download the user manual
in .pdf format.
Quick Start Guide
MiTAC Digital Corporation 471 El Camino Real, Santa Clara, CA 95050 USA
Get more information at www.magellangps.com. 1
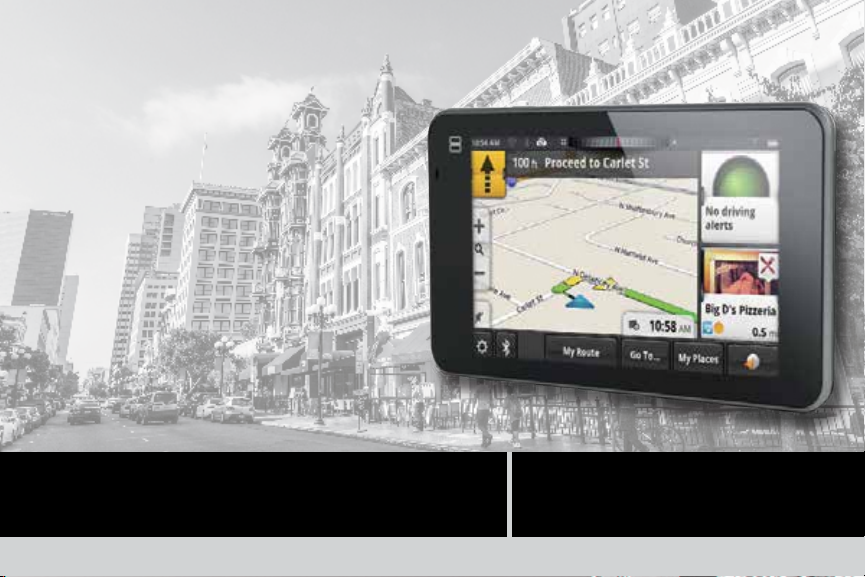
Magellan SmartGPS
Page 2

Safety
This Magellan receiver is a vehicle-navigation aid
designed to assist you in arriving to your selected
destinations.
Please check with your state or local law enforcement
for applicable regulations regarding mounting to
the windshield. Go to www.magellanGPS.com for
alternate mounting solutions.
The driver should enter data or program the Magellan
receiver only when the vehicle is stopped. Only a
vehicle passenger should enter data or program the
receiver while the vehicle is moving.
It is your responsibility to comply with all traffic laws.
Every attempt is made to ensure that the database
is accurate. However, roadways, points of interest
(POIs), and business and service locations may change
over time.
Keep the receiver safe from extreme temperature
conditions. For example, do not leave it exposed to
direct sunlight for an extended period of time. The
Get more information at www.magellangps.com.2
maximum operating temperature is 140°F (60°C).
Take care when mounting the receiver in your vehicle,
whether using the windshield mount or other mount
or accessories, that it does not obstruct the driver’s
view of the road, interfere with the operation of the
vehicle’s safety devices such as air bags, or present a
hazard to occupants of the vehicle should the receiver
be dislodged while driving. You assume the risks
associated with damage to your vehicle or vehicle
occupants as the result of your choices in mounting
the receiver.
The battery is rechargeable and should not be
removed. In the event it should need to be replaced,
please contact Magellan Technical Support.
“Made for iPod” and “Made for iPhone” means that an
electronic accessory has been designed to connect
specifically to iPod or iPhone, respectively, and
has been certified by the developer to meet Apple
performance standards. Apple is not responsible for
the operation of this device or its compliance with
safety and regulatory standards. Please note that the
use of this accessory with iPod or iPhone may affect
wireless performance.
Page 3
Magellan SmartGPS Receiver
Go Beyond Traditional GPS
• All the features you’d expect to find in a
GPS navigational device.
• Go Social: Receive Yelp
reviews and details based on your location.
• Wirelessly save, sync and share between
the Magellan SmartGPS receiver and
smartphones.
• Take the SmartGPS experience beyond the
vehicle using the Android™ or iPhone
app.
• Receive updated gas prices and weather,
saving time and money.
®
and Foursquare®
Get more information at www.magellangps.com. 3
This booklet will give you the information you
need to set up your Magellan SmartGPS receiver.
Detailed information on how to use the various
features can be found at www.magellangps.com/
support.
Connect with us socially on:
• Twitter: twitter.com/MagellanGPS
Facebook: facebook.com/MagellanGPS
•
Pinterest: pinterest.com/MagellanGPS
•
•
YouTube: youtube.com/MagellanVideo
®
Page 4
First Time Use
1. Install the device in your vehicle [pg. 6].
2. Determine your current location [pg. 7]
3. Prepare the receiver for content using the
Magellan Content Manager [pg. 8].
4. Connect to WiFi and download content
[pg. 9].
5. Pair any Bluetooth devices you want to use
with the device [pg. 10].
6. Optional. Connect the device to your
smartphone using the Magellan app
[pg. 11].
Get more information at www.magellangps.com.4
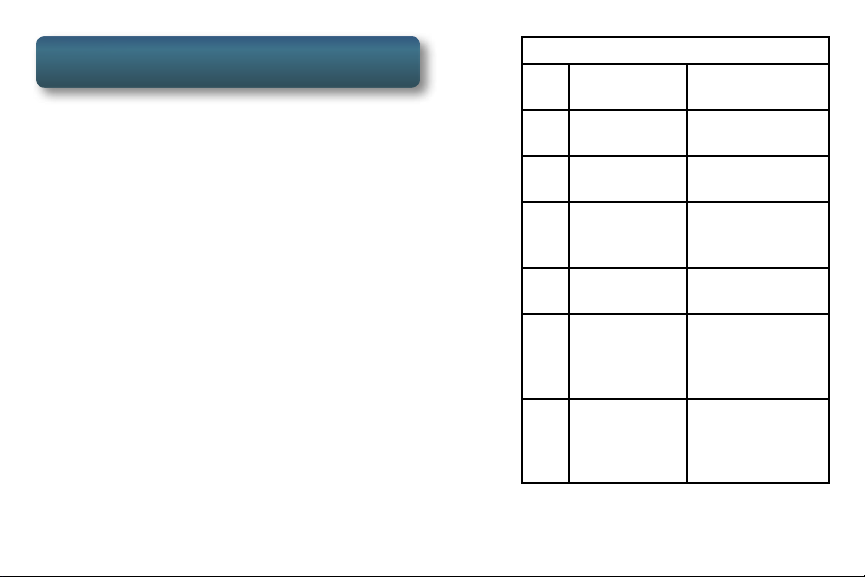
Magellan SmartGPS
Power button Press to turn the
A
Home button Press to return to
B
Microphone Used with
C
microSD Card (Optional) Used
D
Speaker Out Connect external
E
USB
F
Connection
AV In Connect an
G
receiver on or off
the Map screen
Bluetooth
for additional
map storage.
speakers
Connect to
power source
or personal
computer
audio/visual
device (optional
backup camera)
®
Use the Home button [B] to
return quickly to the Map screen.
Page 5
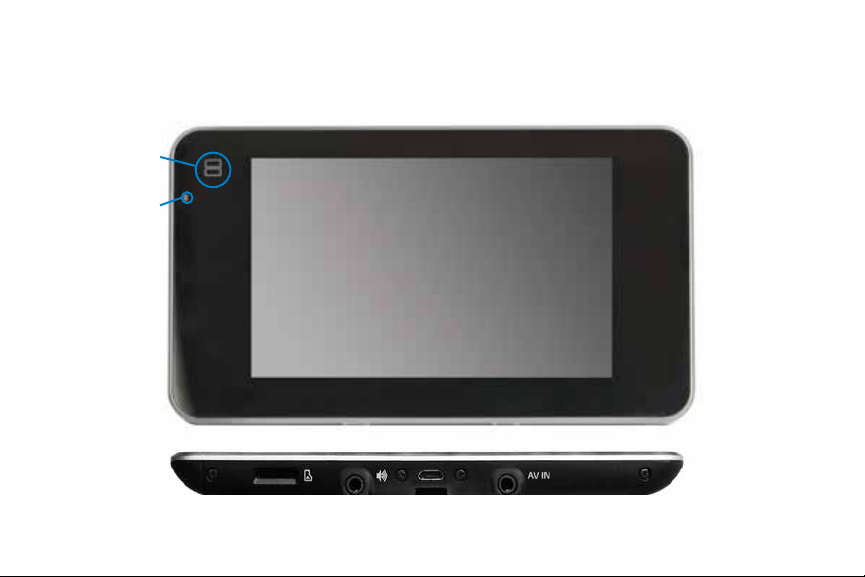
Magellan SmartGPS Receiver
A
B
C
D E F G
Get more information at www.magellangps.com. 5
Page 6

Installation
Choose a Location
• A location with a clear view of the sky.
• Follow Safety guidelines.
Clean the Surface
1. Clean the area on the windshield where
the device will be mounted.
2. Allow the surface to dry.
Attach the Device
Get more information at www.magellangps.com.6
Connect Power
The device battery charges whenever it is
connected to vehicle power.
1. Connect the power cable to a vehicle
power receptacle.
2. Check the light on the vehicle power
connector and make sure it is on.
If the indicator light is not on, you may
need to reseat the connector or turn the
vehicle ignition on.
Power On/Off
ON Press and hold the Power button [A] to
turn the device on. (If the device does not
turn on, allow the battery to charge for a
few minutes.)
OFF Press the Power button again to turn the
device off. The device will begin powering
down for 15 seconds. Tap “Suspend Now”
to power the device down immediately.
Page 7

Current Location
Calculate Current Location
The device needs to calculate your current location
before it can successfully add content.
1. Follow the instructions on page 6 to install
the device.
2. Press and hold the power button.
3. Once the satellites are being tracked, the
device will begin receiving information
that it will calculate into a current location
value.
Not receiving
satellite information
Receiving satellite
information
Get more information at www.magellangps.com. 7
4. When the current location has been
calculated, the displayed map will change
and the blue arrow icon will indicate your
location.
Tips
Various factors influence GPS signal reception and
there are some tips you can follow to improve the
signal reception and time it takes to calculate the
current location.
• Leave any enclosed structure, (garage,
parking structures, etc.).
• Make sure you have a ‘clear view of the
sky’. Buildings and trees can have an
impact on GPS signal reception. The less
obstructions, the easier the signal reception
is.
• Be sure that the device is mounted where
it can have a clear line of sight to the
windshield.
Note: The first time the device calculates its
location can take up to 1 minute, subsequent times
will be 15 seconds on average.
Page 8

Content Manager
Before receiving content (Yelp, Foursquare, etc.)
the receiver needs your current location calculated
[pg. 7] and to be authorized using the Magellan
Content Manager. Follow these simple steps to
register and authorize your receiver.
1. Connect your receiver to your computer
using a micro USB cable.
2. When connected, the receiver will display
the message “Your SmartGPS is connected
to a computer”.
3. Open a browser and go to
Via.magellangps.com.
4. Enter your Magellan account information.
If you do not have an account, use the Sign
Up! button to create one.
5. Registration and authorization will begin
automatically. In a few minutes you will be
notified that the registration is complete.
Get more information at www.magellangps.com.8
Your receiver will appear on the left side of the
Content Manager web page.
• Select “Updates” to install any available
updates.
[Bookmark the Content Manager page and refer
to it often to keep your receiver up-to-date with
the latest software and maps. Additionally you
can manage your addresses, wish list, recent
destinations as well as other tools to help you get
the most from your receiver.]
Page 9

WiFi
Content can be downloaded to the device by:
• Connecting to a WiFi network
• Connecting to a PC and sync via the
Magellan Content Manager
• A Bluetooth connection with a smartphone
running the Magellan app
Setting up a WiFi Connection
1. Connect your receiver to the AC power
adapter or your vehicle power using the
supplied vehicle power cable. (Be sure that
power is being supplied by checking that
the light on the vehicle power adapter is
on.)
2. Turn the receiver on and tap the Settings
icon
3. Tap on “WiFi”. A list of available WiFi
networks is displayed.
.
Get more information at www.magellangps.com. 9
4. Select the desired WiFi network and tap
“Connect”.
5. If requested, enter the password for the
network. The receiver will attempt to log
on to the network and display “Connected”
when successful.
Checking Content Sync Status
1. Turn the receiver on and tap the Settings
icon
.
2. Tap “Content”.
3. “Content Sync Status” displays the progress
of content being synced.
You do not need to wait until the Sync Status is
100% to begin using your Magellan SmartGPS
receiver.
Page 10

Bluetooth
®
You can use your Magellan SmartGPS receiver
as a Bluetooth wireless speakerphone. Pair your
Bluetooth phone with the Magellan SmartGPS
receiver using these instructions.
Pairing Bluetooth
1. Turn the receiver on and tap the Settings
icon
.
2. Select “Bluetooth”.
3. Make sure your phone is on, that Bluetooth
is turned on and near the receiver.
4. In the area “Pair your phone?”, tap OK.
5. Scroll down the list of available Bluetooth
devices and tap “Connect” for the desired
device.
6. Follow the prompts provided on your
phone and on the Magellan SmartGPS
receiver to confirm the pairing.
Get more information at www.magellangps.com.10
Using Bluetooth to Originate a Call
1. Tap the Bluetooth icon
on the Map
Screen.
2. Use the Dial Pad, Redial or access a phone
number from your Address Book to
originate a call.
Using Bluetooth to Answer a Call
1. When a call is received, the Magellan
SmartGPS receiver displays an alert for an
incoming call at the bottom of the screen.
2. Choose “Answer” or “Ignore”.
Page 11

Smartphones
Your Magellan SmartGPS receiver can interface
with Android™ and iPhone® smartphones to
enhance the capabilities of the SmartGPS.
To interface your smartphone with the Magellan
SmartGPS receiver you will need to have the app
installed and running on your smartphone.
Android App
1. Go to play.google.com and search for
“Magellan Link”.
2. Follow the instructions for installing the
app to your smartphone.
®
Apple
iPhone App
1. Open the App Store and search for
“Magellan RoadMate On-The-Go”.
2. Follow the instructions for installing the
app to your iPhone.
Get more information at www.magellangps.com. 11
Interfacing with Smartphone
1. If not done so already, pair your
smartphone to the SmartGPS receiver using
Bluetooth (page 10).
2. [Optional] If you want to sync content to
your SmartGPS receiver using the Bluetooth
on your smartphone, go to Settings >
Bluetooth and check “Sync to MiCloud via
phone”. See advisory below.
3. Start the app on your smartphone. Even
if it’s running in the background, it will
continue to communicate with the
SmartGPS receiver.
Advisory: Syncing to MiCloud via your
smartphone may cause increased data usage.
Please check with your carrier to ensure you have
sufficient data available for use. Data rate charges
vary by carrier and plan, it is your responsibility to
monitor your usage in an effort to not exceed your
data plan allowances.
Page 12

Map Screen
Map screen while navigating on a route.
A B C E F G
D
H
I
J
O R
M N P S T U
Get more information at www.magellangps.com.12
K
L
Page 13

Time of day.
A
WiFi signal strength.
B
Bluetooth status.
C
Content syncing status.
D
Display Slider. Slide to the left to display
E
more squares, to the right to display less
squares.
Traffic signal status.
F
Battery life indicator.
G
Next maneuver instruction, distance to
H
maneuver and street name.
Zoom in/out controls.
I
Volume control.
J
Traffic Alert square.
K
Get more information at www.magellangps.com. 13
POI square. Tap for additional
L
information on the displayed Point of
Interest.
Settings Icon. Tap for access to various
M
device options.
Bluetooth Icon. Tap to access phone
N
pairing or originating a call.
Current Location Icon. Tap to view
O
detailed information on your current
location.
My Route. Tap to access route options
P
(Cancel, Pause, Save, Detour, etc.).
Data field. Tap to access a popup
R
displaying additional data fields.
Search. Search and create a route to a
S
stored POI.
My Places. Tap to access your address
T
book, wish list, and recent destinations.
OneTouch®. Tap to access saved
U
OneTouch destinations and searches.
Page 14

How To...
These are some simple examples of “How To” do
some of the basic functions of the SmartGPS receiver.
A more detailed description of the functions can be
found in the SmartGPS User Manual available for
download at www.magellangps.com/support.
...Go to an Address
Tap
.
Enter the street
name. Tap on
the street name
from the list to
select it.
Enter the
address number.
Tap on the
address in the
list.
Begin entering
the city. As you
type, possible city
names will be
displayed. Tap
on the city in the
list to select it.
Get more information at www.magellangps.com.14
Tap to
begin routing
to the address
displayed.
Page 15

..Go to a Point of Interest (POI)
If the POI you are looking for is not in the list, try
typing in the name in the ‘keywords’ field.
Tap
.
Optional: If you would
like to visually see the
location of the POIs
on the map or change
the order of how the
POIs are sorted, press
.
Scroll through
the category list
to select the POI
category.
Scroll through
the list of POIs
and select
the desired
destination.
Get more information at www.magellangps.com. 15
Tap on the desired destination when displayed.
Tap to
begin routing
to the selected
point of interest.
Page 16

Need Techincal Support?
If you need technical support for your Magellan SmartGPS receiver you should first go to
www.magellangps.com/support for answers to most questions.
If you can’t find a solution there, you can contact Magellan Technical Support directly by e-mail at
support.us@cs.magellangps.com or call 800-707-9971.
MiTAC Digital Corporation 471 El Camino Real, Santa Clara, CA 95050 USA
©2013 MiTAC International Corporation. The Magellan logo and Magellan are registered trademarks of MiTAC International
Corporation, and OneTouch is a trademark of MiTAC International Corporation and are used under license by MiTAC Digital
Corporation. All rights reserved.
© 1984 - 2010 Tele Atlas. All right reserved. This material is proprietary and the subject of copyright protection and other
intellectual property rights owned or licensed to Tele Atlas. Tele Atlas is an authorized distributor of selected Statistics
Canada computer files under Agreement number 6776. The product includes information copied with permission from
Canadian authorities, including © Canada Post Corporation and Geobase®, all right reserved. The data is sourced in part
from Geography Division, Statistics Canada, 2006 Road Network File (RNF), 92-500-XWE/XWF. The incorporation of data
sources from Statistics Canada within this product shall not be construed as constituting an endorsement by Statistics
Canada of such product. The use of this material is subject to the terms of a License Agreement. You will be held liable for
any unauthorized copying or disclosure of this material.
iPhone is a trademark of Apple Inc., registered in the U.S. and other countries.
All other trademarks and registered trademarks are property of their respective owners.
Get more information at www.magellangps.com.16
www.magellanGPS.com
 Loading...