


Simply Connected
User Guide
XMS-1024
Gigabit Ethernet Smart Switch
Use the XMS-1024 to:
Provide Intuitive Network Management and Optimization Capabilities
Expand Your Home or Office 10/100/1000 Ethernet Network
Future Proof Your Network with Gigabit Speeds (10X Performance of Fast Ethernet)
dOptimize and Protect Your Network with Advanced VLAN, QoS and Network Security Features
luxul.com
User Guide
GIGABIT ETHERNET SMART SWITCH MODEL NUMBER: XMS-1024
USER GUIDE
© 2014 Luxul. All Rights Reserved.
No part of this publication may be modified or adapted in any way, for any purposes without permission in writing from Luxul. The material in this manual is subject to change without notice. Luxul reserves the right to make changes to
any product to improve reliability, function, or design. No license is granted, either expressly or by implication or otherwise under any Luxul intellectual property rights. An implied license only exists for equipment, circuits and subsystems contained in this or any Luxul product.
DOCUMENT CONVENTIONS
The following graphical alerts are used in this document to indicate notable situations:
 NOTE: Tips, hints, or special requirements that you should take note of.
CAUTION: Care is required. Disregarding a caution can result in data loss or equipment malfunction.
WARNING!: Indicates a condition or procedure that could result in personal injury or equipment damage.
|
CONTENTS |
1: PRODUCT OVERVIEW |
4 |
1.1 Product Introduction |
4 |
1.2 Product Features |
4 |
1.3 Product Specifications |
5 |
1.4 Package Contents |
7 |
2 |
© Copyright 2014 Luxul. All rights reserved. Trademarks & Registered Trademarks are property of respective holders. |
|
|

User Guide
2: HARDWARE DESCRIPTION |
7 |
2.1 Front Panel |
7 |
2.2 LED Indicators |
8 |
2.3 Rear Panel |
9 |
3. PREPARING FOR INSTALLATION |
9 |
|
3.1 System Requirements |
9 |
|
3.2 Before Connecting to the Network |
9 |
|
4: XMS-1024 INSTALLATION |
10 |
|
4.1 Installing the XMS-1024 in a Rack |
10 |
|
4.2 Desktop Setup |
10 |
|
4.3 Network Connections: |
11 |
|
4.4 Default IP Address |
11 |
|
CHAPTER:5 CONFIGURATION |
12 |
|
5.1 Login |
12 |
|
5.2 Status |
13 |
|
5.3 Port Settings |
14 |
|
5.4 Mirror |
18 |
|
5.5 VLAN |
18 |
|
5.6 Trunk |
22 |
|
5.7 QoS |
23 |
|
5.8 MAC Settings |
24 |
|
5.9 802.1X |
25 |
|
5.10 RSTP |
27 |
|
5.11 IGMP Snooping |
30 |
|
5.12 System |
31 |
|
6: REGULATORY COMPLIANCE |
36 |
|
6.1 Health and Safety Recommendations |
36 |
|
6.2 FCC Statement: |
37 |
|
7: CONTACT LUXUL |
37 |
|
APPENDIX 1: COMMON COMMANDS |
38 |
|
APPENDIX 2: TCP/IP ADDRESS SETTING (WINDOWS XP) |
38 |
|
GLOSSERY |
40 |
|
luxul.com | 14203 Minuteman Dr | Suite 201 | Draper, UT 84020 | p: 801-822-5450 | f: 801-822-5460 |
|
3 |
|
||
|
|
|

User Guide
1: PRODUCT OVERVIEW
1.1 Product Introduction
Congratulations on your purchase of the Luxul XMS-1024 Gigabit Ethernet Smart Switch, featuring network management. The management interface provides a powerful, yet simple method for setting up and optimizing an intelligent home or office network. The XMS-1024 features powerful network optimization capabilities, including extensive support for port management, port security, Quality of Service (QoS), VLAN configuration and port trunking. Other features such as 802.1X authentication, Rapid Spanning Tree Protocol (RSTP), IGMP Snooping, static MAC address table, and port traffic statistics further enable a robust, powerful network environment. The XMS-1024 provides 24 10/100/1000 Mbps RJ-45 ports and 2 shared SFP optical module expansion ports. The SFP ports can be used as uplinks for extending the network between switches or for long range communications and extensions. Optical fiber can be used to efficiently deliver data at distances of up to 49 miles as opposed to the 300 foot limitation of standard twisted pair Ethernet.
1.2 Product Features
Complies with IEEE802.3, IEEE802.3u, IEEE802.3ab and IEEE802.3z Ethernet standards.
24 10/100/1000 Mbps RJ-45 ports, and supports Auto MDI/ MDIX
2 shared SFP optical module expansion ports—automatic switchover between Gigabit electrical interface and Gigabit SFP optical interface
IEEE802.3x full-duplex flow control and half-duplex backpressure flow control
Store-and-forward switching
48Gbps backplane bandwidth, supporting non-blocking line speed transfer
Supports up to 24 groups of port-based VLANs and up to 128 groups of tagged VLANs based on IEEE 802.1Q, with VLAN IDs ranging 1 ~ 4094
IEEE 802.3ad port trunk support provides 8 trunking groups, each of which can contain up to 12 port members
8K MAC address table; Supports up to 128 static MAC address entries
QoS functions: Mapping mode by port, IEEE802.1p, and TOS priorities. Automatic control for the transfer queue based on 4 priorities
Provides control over port access security, including port MAC address filtering, binding and aging
“Plug and Play” Compatibility
Intelligent control of broadcast storms, and provides options for targeting broadcast type and broadcast control
4 |
© Copyright 2014 Luxul. All rights reserved. Trademarks & Registered Trademarks are property of respective holders. |
|
|
User Guide
Port mirroring
802.1X authentication support
Compatible with 802.1D Spanning Tree Protocol (STP) and supports 802.1W Rapid Spanning Tree Protocol (RSTP)
IGMP Snooping
Set the switch IP address using a static IP address or by enabling the DHCP client mode
SNMP management
Support for downloadable pre-optimized configuration options
Simple update, backup and restoration of switch configuration files
Traffic statistics and dynamic display of packet receive/transfer statistics by port
1U steel chassis for standard 19-inch rack installation
1.3 Product Specifications
Standards IEEE 802.3 10Base-T Ethernet
IEEE 802.3u 100Base-TX Fast Ethernet
IEEE 802.3 NWay Auto-negotiation
IEEE 802.3x Flow Control
TCP/IP
PPPoE
DHCP
SNMP
DNS
ICMP
NAT
HTTP
ARP
Features Number of Ports: 24 10/100/1000BASE-T; 2 Combo 10/100/1000BASE-T/SFP
MAC Address Table: 8K
Switch Fabric: 48Gbps
Transmission Method: Store-and-forward
Auto uplink (MDI/MDI-X) detection and configuration
IGMP Snooping
Loopback Detection: Auto disable when loop is detected
Port Mirroring: one-to-one, many-to-one, mirroring for Tx/Rx/Both
VLAN 802.1Q max 4094 VIDs
Port Based VLAN
Supports 1 Management VLAN
luxul.com | 14203 Minuteman Dr | Suite 201 | Draper, UT 84020 | p: 801-822-5450 | f: 801-822-5460 |
5 |
|
|
|
|
User Guide
Quality of |
4 Queues per port |
|
Service (QoS) |
Queue handling: Strict, Weighted Round Robin (WRR) |
|
|
CoS based on DCSP, 802.1P and Port Based Priority Queues |
|
|
Port based bandwidth control |
|
Access |
Maximum profiles: 50 |
|
Control List |
Maximum rules shared by profiles: 240 |
|
|
ACL based on MAC address, IPv4 Address, VLAN ID, 802.1p Priority, DSCP |
|
|
ACL actions: permit, deny |
|
Security |
802.1X Port Based Access Control: Default forwarding |
|
|
Port Security: Supports up to 64 MAC addresses per port |
|
|
Traffic Control: Broadcast/multicast/unicast storm control |
|
|
Static MAC: Supports 256 Static MAC entries |
|
Management |
Web Based GUI |
|
|
System Log: Max 500 log entries |
|
Network Data |
Ethernet: 10Mbps (Half-duplex) |
|
Transfer Rate |
Ethernet: 20Mbps (Full-duplex) |
|
|
Fast Ethernet: 100Mbps (Half-duplex) |
|
|
Fast Ethernet: 200Mbps (Full-duplex) |
|
|
Gigabit Ethernet: 1000Mbps (Half-duplex) |
|
|
Gigabit Ethernet: 2000Mbps (Full-duplex) |
|
Interface |
RJ-45: |
|
Options |
|
10 Base-T: Cat.5 UTP /STP |
|
|
100 Base-TX: Cat.5 UTP /STP |
|
|
1000Base-T: Cat.5, Cat.5e or Cat.6 UTP/STP |
|
Cable Recognition for Straight-through or Crossover Cables |
|
Certifications |
FCC Class A, CE, RoHS |
|
Led |
Per Unit: Power |
|
|
Per Port: Link/Activity |
|
Power |
27.5 Watts Maximum |
|
Consumption |
|
|
Power Supply |
Internal Switched Power, AC100-240V, 50-60Hz input |
|
Operating |
32°F to 104°F |
|
Temperature |
(0°C to 40°C) |
|
Operating |
10% to 90% |
|
Humidity |
(Non-condensing) |
|
Dimensions |
W: 17.3” x D: 8.3” x H: 1.7” (W: 439.5mm x D: 211mm x H: 43.2mm) |
|
Weight Item: 6.5 lbs (2.95Kg)
Packaging: 8 lbs (3.63Kg)
1.4Package Contents
The following items should be included in the box:
6 |
© Copyright 2014 Luxul. All rights reserved. Trademarks & Registered Trademarks are property of respective holders. |
|
|

User Guide
XMS-1024 Gigabit Ethernet Smart Switch
Power Cord
Two L-shaped rack mounting brackets and screws
Four rubber pads
Quick Installation Guide
If any of the listed items are missing or damaged, please contact the reseller from whom you purchased for return/replacement.
2: HARDWARE DESCRIPTION
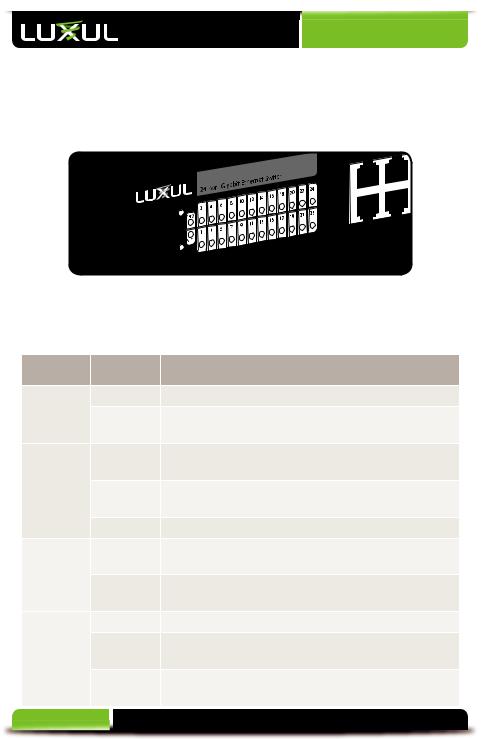
2.1 Front Panel
The front panel of the XMS-1024 switch includes 24 1000Mbps RJ45 and 2 SFP expansion ports on the right side and LED indicators on the left side. Each 1000Mbps port has one Link/Activity LED and one 1000Mbps LED, there are also two SFP LEDs, one Power LED, one System LED and a factory reset button.
XMS-1024 Front Panel View
Factory Reset Button: Used to restore factory default settings.
To reset to factory defaults, press and hold the reset button until the SYS LED turns off, approx. 5 seconds. A factory reset may take approximately a minute to complete. A successful Factory Reset is indicated by the Port LED lights scrolling once from left to right. When the SYS LED turns on the unit is ready.
NOTE: To hard reset the router use the power switch. Turn the router off, wait 5 seconds and turn the unit back on.
CAUTION: Resetting the XMS-1024 to factory defaults will remove all custom settings.
luxul.com | 14203 Minuteman Dr | Suite 201 | Draper, UT 84020 | p: 801-822-5450 | f: 801-822-5460 |
7 |
|
|
|
|
User Guide
2.2 LED Indicators
Each port has one numbered Link/Activity LED and one 1000 Mbps LED. The SFP interface shares the LED indicators with the corresponding Ethernet Port. In addition, there is one System LED and one Power LED, as well as a Reset button to reboot the device or restore factory default settings.
LED Indicators
The green LED indicators show the working status of the switch. The following table describes the LED functionality:
Indicator |
Description |
|
Name |
|
|
Power |
On |
This LED indicates that there is power to the XMS-1024 |
|
Off |
If LED is off, check power connections and on/off |
|
|
switch at the back of the unit. |
Link/Act |
On |
The Link/Activity LED of the port will be on if there is |
|
|
a device connected to the port. |
|
Flashing |
The Link/Activity LED flashes when a port is receiving |
|
|
or transmitting data. |
|
Off |
There is nothing connected to the port. |
1000 Mbps |
On |
The 1000 Mbps LED will come on if a device capable |
|
|
of 1000Mbps is connected to the port. |
|
Off |
If a port has no device connected or it is not a 1000 |
|
|
Mbps capable device, the 1000 Mbps LED will be off. |
SYS |
On |
Indicates that the XMS-1024 is running normally. |
|
Flashing |
Indicates that the XMS-1024 is restoring default |
|
|
settings. |
|
Off |
Indicates that the XMS-1024 is in startup and initializa- |
|
|
tion process or is not on. |
8 |
© Copyright 2014 Luxul. All rights reserved. Trademarks & Registered Trademarks are property of respective holders. |
|
|
|
|

User Guide
At startup, port LEDs will flash for 1 second as a self test.
When an SFP optical interface is in use, the 1000 Mbps LED and the Link/Activity LED of the corresponding Ethernet port are both on to indicate the SFP status.
2.3 Rear Panel
|
0.6A(Max) |
50/60Hz |
100-240V~ |
|
|
|
|
XMS-1024 Rear Panel View
Power Input: Please use the included power cable
3. PREPARING FOR INSTALLATION
3.1 System Requirements
Ethernet Cables to connect the XMS-1024 to Ethernet enabled devices
Computer equipped with a Web browser. Supported Web browser versions include Microsoft IE 6.0 and up, Safari 1.0 and up or Mozilla Firefox 1.0 and up. The Web browser is used to configure the XMS-1024.
Power must be AC 100-240V~ 0.6A(Max) 50/60Hz.
3.2 Before Connecting to the Network
The XMS-1024 can be rack-mounted or used as a desktop switch. Before connecting to the network, please be aware of the following requirements:
Install the XMS-1024 in a stable/safe place to avoid any possible damage
Make sure there is adequate space around the XMS-1024 for adequate ventilation and proper heat dissipation. It is recommended to have at least 4-6 inches around all sides.
Do not place heavy articles on the XMS-1024.
Power outlets should be within 5 feet of the XMS-1024.
Verify the ground connection of the outlet is functioning properly.
luxul.com | 14203 Minuteman Dr | Suite 201 | Draper, UT 84020 | p: 801-822-5450 | f: 801-822-5460 |
9 |
|
|
|
|

User Guide
Check the power cord to confirm a secure connection.
Avoid placement in direct sunlight.
When installing the XMS-1024 on a flat surface, attach the rubber feet to the bottom of the device to avoid scratching the surface.
4: XMS-1024 INSTALLATION
4.1 Installing the XMS-1024 in a Rack
The XMS-1024 can easily be installed in a standard 19” rack. The XMS-1024 includes two mounting ears for installing and stabilizing the switch. For attaching the mounting ears and installing the switch within a rack, please refer to the following illustration:
Rack-Mounting the XMS-1024
Using the included screws, attach the mounting ears to each side of the switch.
Mount the switch in the rack with the LEDs facing outwards. Be sure the switch is level and properly secured within the rack.
4.2 Desktop Setup
For use as a desktop device, position and apply the included rubber feet to the bottom of the XMS-1024.
10 |
© Copyright 2014 Luxul. All rights reserved. Trademarks & Registered Trademarks are property of respective holders. |
|
|
User Guide
Attaching the Rubber Feet to the XMS-1024
4.3 Network Connections:
The XMS-1024 supports 10/100/1000 Mbps Ethernet; 10/100 Mbps half/fullduplex mode and 1000 Mbps full-duplex mode. All RJ-45 ports support Auto MDI/ MDIX and can be used as ordinary ports or as Uplink ports. Any RJ-45 port can be used to connect the XMS-1024 to an Ethernet enabled device (including servers, routers, and other switches) without a crossover cable.
The XMS-1024 offers 2 shared SFP optical module expansion ports. Once the Gigabit SFP optical modules are inserted, these interfaces can support optical fiber cables to extend the Gigabit network up to 49 miles—enabling the network to extend beyond the 300 foot limitation of twisted pair Ethernet.
For the RJ-45 ports, Category-5, super Category-5 or Category-6 unshielded twisted pair (CAT5/CAT5e/CAT6 UTP) should be used. For best results, it is recommended that Category-6 shielded twisted pair be used to ensure stable data transmission at 1000 Mbps.
Optical fiber/cable should be selected based on the wavelength of the SFP optical module to be used.
Make sure only one Uplink channel exists between switches or between the XMS1024 and a router. Otherwise, loops can occur and result in network failure.
4.4 Default IP Address
The XMS-1024 default IP address is 192.168.0.2. This address can be changed. However, for hassle free installation of other plug and play Luxul devices, it is recommended that the default IP value be maintained.
luxul.com | 14203 Minuteman Dr | Suite 201 | Draper, UT 84020 | p: 801-822-5450 | f: 801-822-5460 |
11 |
|
|
|
|
User Guide
CHAPTER:5 CONFIGURATION
This section introduces the configuration of the XMS-1024 Gigabit Ethernet Smart Switch functions via the Web-based management interface.
5.1 Login |
5.7 QoS |
5.2 Status |
5.8 Mac Settings |
5.3 Port Settings |
5.9 802.1X |
5.4 Mirror |
5.10 RSTP |
5.5 VLAN |
5.11 IGMP Snooping |
5.6 Trunk |
5.12 System |
5.1 Login
The XMS-1024 is not equipped with internal DHCP server. However, if your switch is connected to the the XBR-2300 Enterprise Dual-WAN Router, configuration will be automatic. Otherwise, the IP address of the computer for login and configuration will need to be manually configured. The table below lists the default parameters of the XMS-1024.
Parameter: Default Value
Default IP address: 192.168.0.2
Default user name: admin
Default password: admin
Login to the switch with the following steps:
1.Plug an Ethernet cable into any of the ports of the switch
2.Plug the other end into the Ethernet port of your computer
3.Power on the switch
4.Check to see that the IP address of the computer is within this network segment: 192.168.0.xxx (“xxx” ranges 100~254). For example, 192.168.0.100. For IP address settings, refer to Appendix 3.
5.Open the Web browser, and enter 192.168.0.2. The switch login window appears, as shown below.
6.Enter the user name and password (default user name and default password are both set as “admin”), and then click “OK” to login to the switch configuration window.
12 |
© Copyright 2014 Luxul. All rights reserved. Trademarks & Registered Trademarks are property of respective holders. |
|
|
 Loading...