

Linksys Sipura, PAP2 Installation Instructions Manual

Linksys Sipura and PAP2 Analog Telephone
Adapter (ATA) - Installation Instructions
Below you will find installation instructions for the Linksys Sipura-200X or PAP2 broadband phone
adapter.
Setting up your Linksys ATA to work with KONTACT+ phone network is easy! The following
instructions will help you set up your adaptor in a simple Step-by-Step method.
Introduction: How does broadband phone work?
Step 1: Connect ATA to your Broadband connection
Step 2: Verify & Configure your IP address
Step 3: Prepare you device to work with phone network
Step 4: Complete the Setup-Wizard
Step 5: Start using your ATA with KONTACT+ phone network
Introduction: How should the broadband adaptor connect to your
network?
You must have a broadband Internet connection and the Linksys ATA. Since the adaptor works
independently of your computer, there are no requirements at all for your operating systems.
In some case you will not necessarily need a router if your cable modem has 2 Ethernet ports and supports
NAT.
Routers and Broadband service are not sold through KONTACT+ phone network. Routers are generally
available from most retail or online stores.
Please follow the following step-by-step guide below to setup your Linksys ATA to work with
KONTACT+ phone network Broadband Phone Service.
back to top
Step 1: Connect the Linksys ATA to your Broadband connection
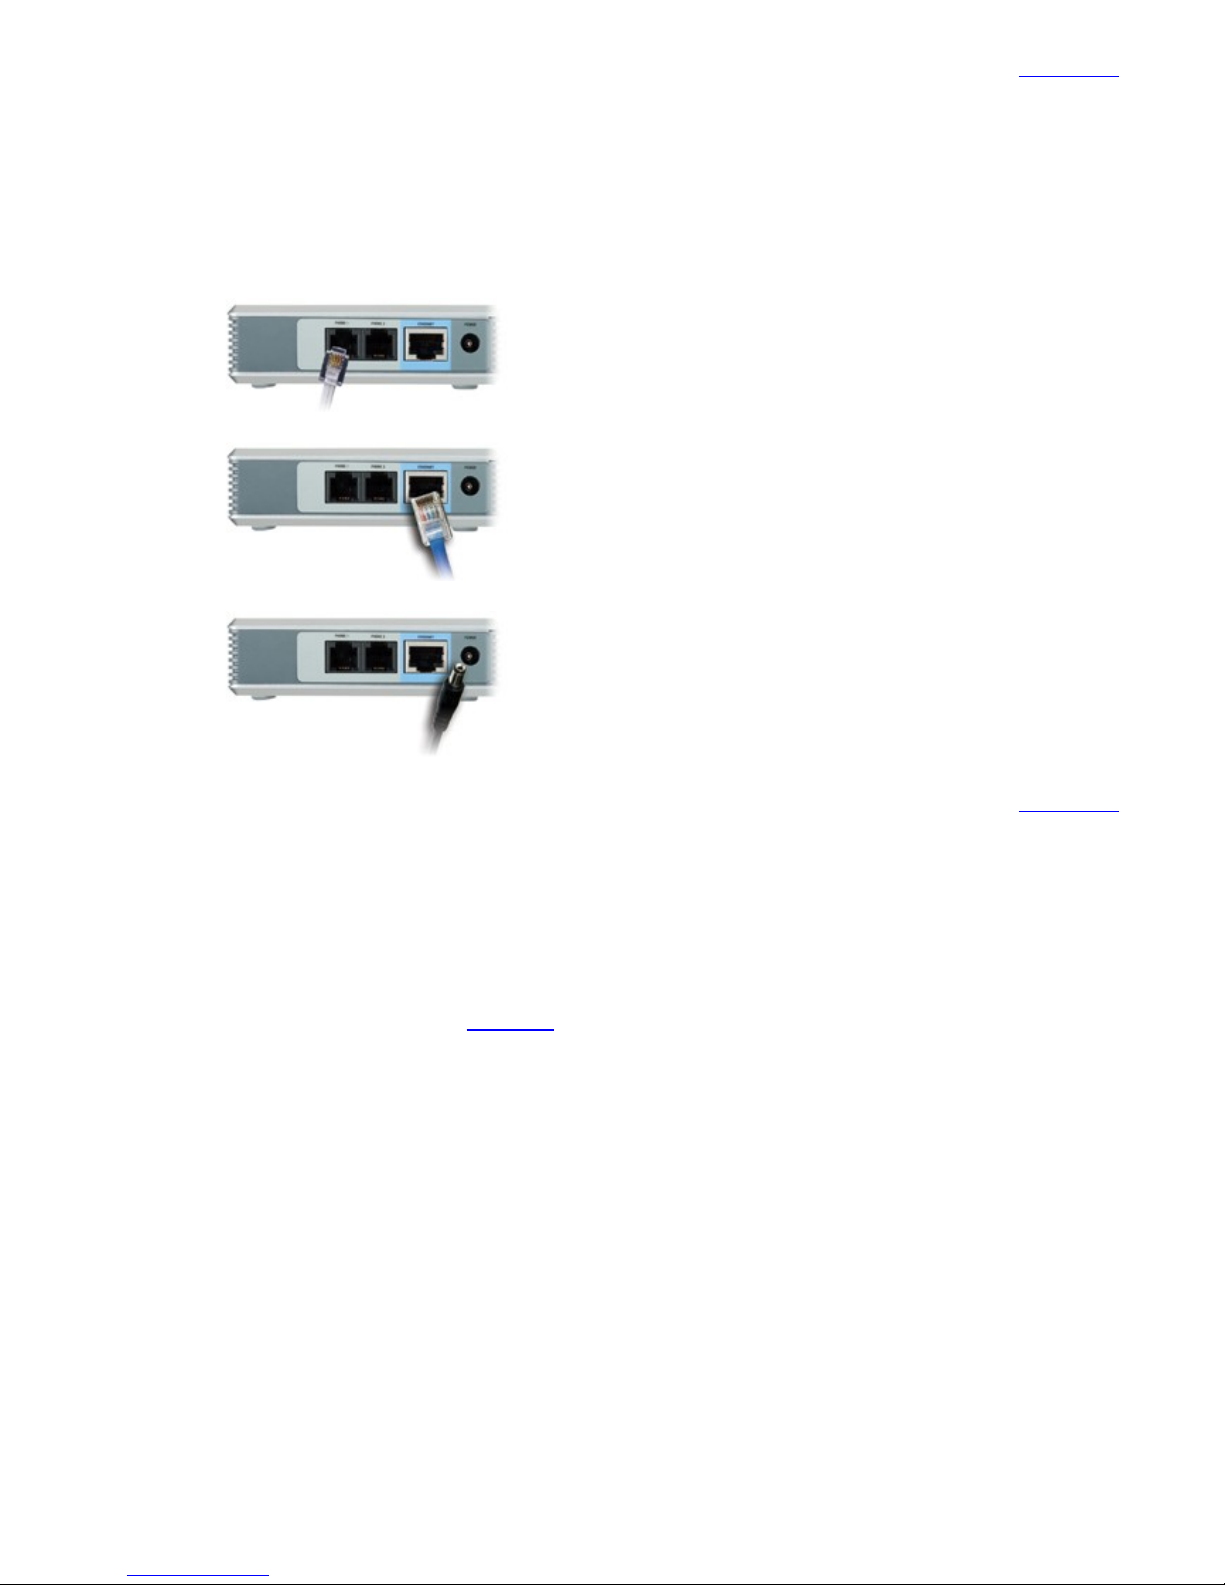
Use this illustration of the back of the ATA to connect it to your network.
1. Phone 1 - plug your analog telephone cord in here to work with your KONTACT+ phone network
account:
2. Ethernet Port - use an Ethernet cable to connect your ATA to your router or Internet connection:
3. Power connection - Connect the power to your ATA:
back to top
Step 2: Verify & Configure your IP address
A. At first we would need to verify that your ATA would acquire an IP automatically if your
network supports DHCP.
If you have purchased your Linksys ATA adaptor from KONTACT+ phone network you should
skip this section and proceed to section B.
If your network utilizes a DHCP Server to assign IP Addresses to network devices, or if you are
connecting the ATA to a home router such as a Linksys or Netgear router, please do the following:
1. Pick up the phone connected to Phone 1 of the ATA and enter "* * * *". You will hear a voice
prompt saying "Linksys configuration menu.".
2. Press the keys 1 0 1 # on your analog phone.
3. Then press 1 # to enable DHCP.
4. Then press 1 to save your configuration settings. Hang up the phone and wait for a couple of
minutes.
B. Next, we would need to verify that your ATA has a valid IP Address, Please be prepared with
pen and paper and proceed with the following:
1. Pick up the phone connected to Phone 1 of the ATA and enter "* * * *". You will hear a voice
prompt saying "Linksys configuration menu".
2. Press the keys 1 1 0 # on your analog phone. The system will now read back the IP address of
your ATA. Please write it down.
 Loading...