

Page 1
INSTALLATION AND OPERATION INSTRUCTIONS
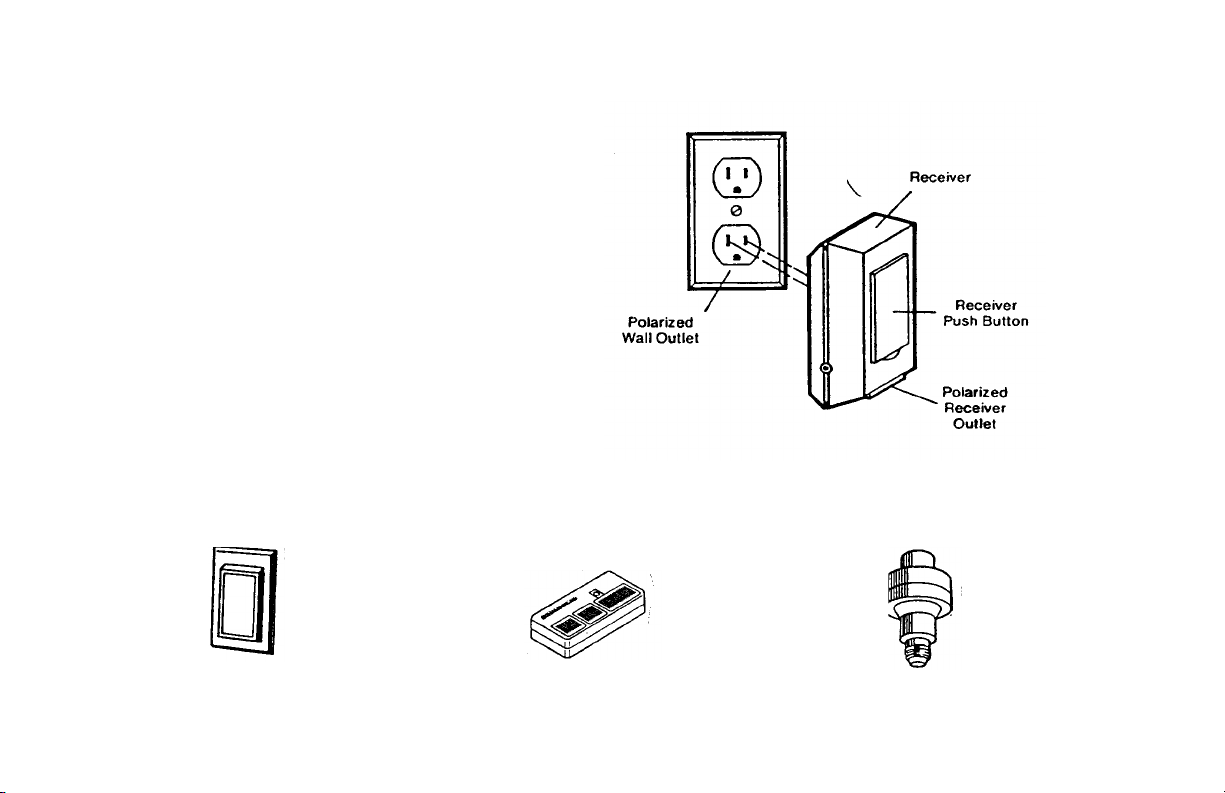
1. Plug the Light Control receiver into a 120 Volt AC polarized outlet.
NOTE: The plug contacts are designed for polarized outlets
only.
2. Plug a light into the polarized receiver outlet.
3. Turn on the light.
4. TO TEST: Press and release the receiver actuator. Light should turn
on.
Press the transmitter push button. Light should turn off.
NOTE 1: Wait at least one second between transmitter push
button operations.
NOTE 2: It two or more light products are installed, receivers
must be located at least 10 feet apart to prevent electronic
Interference.
If light does not operate, check to be sure:
1; Light is turned on.
2. Light and receiver are firmly plugged in.
3. There is power to outlet (check fuse box or circuit breakers).
It transmitter does not operate, check to be sure:
1. Receiver and transmitter(s) have matching code settings.
2. You are pressing the transmitter push button selected to operate the Light Control (with 2 or 3-channel transmitters).
3. Transmitter battery has power. NOTE: Test light on the transmitter should glow when the push button is pressed.
(Battery changing information is included In instructions packed with your transmitter.)
ACCESSORIES
Model 72/72LM
•
Indoor/Outdoor Wire-in Light Control
Controls interior or exterior lights. Wires
into electrical socket like a dimmer switch
114A1073
Model 53/53LM
Multi-Functlon Remote Control
Transmitter
Controls garage door openers and Light
Control Products.
Model 71/71LM
Indoor/Outdoor Light Control
Controls Interior or exterior lights. Screws
into light socket.
Printed in Mexico
 Loading...